3 min
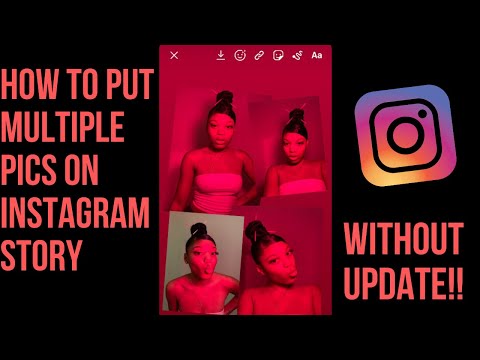
On Instagram, it’s impossible to post an album — multiple photos or videos in one post that you swipe through — with multiple different aspect ratios. In this article, I'll show you how to do it for free and online.
When posting an album, Instagram requires that the images have the same aspect ratio. In this post, I’ll describe how you can post multiple photos or videos with different sizes by first resizing them to square.
On Instagram, it’s impossible to post an album — multiple photos or videos in one post that you swipe through — with multiple different aspect ratios. For example, if you want to post a landscape image and a portrait image at the same time, you need to crop one or the other (or you could crop both to square). Instagram requires that your photos have the same aspect ratio.
When posting multiple photos or videos, all are cropped to squareTo post multiple different photos or videos with different sizes on Instagram, you need to use a tool to resize them first. To avoid cropping out content, add a white background to make each photo or video in to a square. Then, you can post the album without cropping out or changing the size of your image.
Here’s a step-by-step tutorial:
Open the Kapwing Studio and start with a square 1:1 canvas (or 4:5 or 5:4, which are both accepted by Instagram).
One at a time, upload the photos or videos you want to post. Kapwing is free to use and online, so you don’t need to download an app. It supports images, GIFs and videos.
If needed, tap the photo or video and resize the canvas to the right aspect ratio. On mobile, use the "Edit Background" button to find the Resize Canvas button.
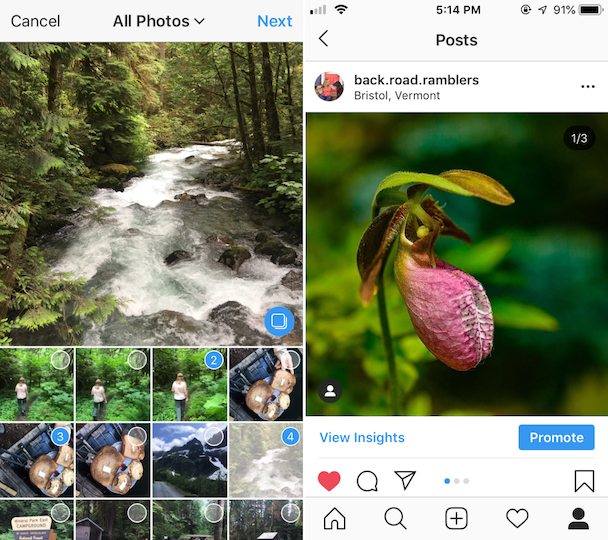
1:1 for an Instagram Post appears under the "Size" dropdown (Kapwing also supports 9:16 sizing for Stories and other formats). Turn off "Canvas Blur" and select white for your background color. You can use Kapwing’s zoom and positioning tools to zoom in, crop, or add a border. Double tap to crop the image or video, and use the Play button to watch a preview of what your post will look like. Click Export once the preview matches what you want your post to look like.
After resizing your posts, you can download them and share them on Instagram as an album. Since each photo/video now has a 1:1 aspect ratio, you can publish them without cropping.
On an iPhone, use the "Downloads" gallery to find the file you just made and save it to your camera roll.
If you're not signed into a Kapwing account, sign in or sign up using your Google or Facebook account. Once you're signed in, each of your exports will be saved in your workspace so that you can download them later.
Repeat these steps for each of the photos and videos that you want to share in your Instagram carousel. After you've downloaded each of the square posts, open the Instagram app and upload them as an album.
For more ideas, tutorials, and features, check back in at the Kapwing Resources page or our YouTube channel! And remember to tag us @KapwingApp whenever you share your content on social media– we love to see what our creators are passionate about!
Related Articles:
• How to Caption Videos Using Instagram Threads
• How to Download Anyone's Instagram Stories
• How to Make Social Justice Slideshows for Instagram
• How to Download Instagram Reels
Instagram is a platform that provides many content options from posts to Stories to IGTV video and Live videos.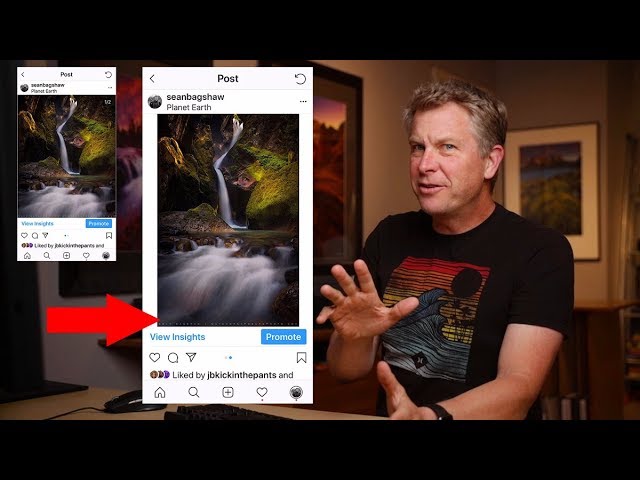 For each type of content, there are different image guidelines that you need to adhere to.
In this post, you will find out everything that you need to know about Instagram image size guidelines. We will discuss the resolutions and aspect ratios required for different types of Instagram content and how you can resize your images without any hassles.
Instagram accepts images between 320px and 1080px, but there are specific guidelines for images added to Stories, posts, and IGTV. If your image is lower than 320px, then Instagram will enlarge it. And if it is higher than the upper limit, it will get resized to 1080px or lower.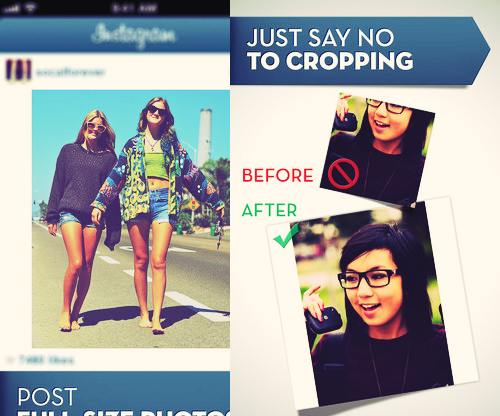 So, you don’t need to worry too much about image size as Instagram automatically takes care of it.
However, you should be aware of image size guidelines for different types of Instagram content. Here are the specific guidelines.
Image PostsTraditionally, Instagram has been known for its square image posts with a 1:1 aspect ratio. And, it was quite a problem for users as they had to crop their pictures to fit the prescribed image size and ratio.
However, Instagram has long evolved from that initial model and now allows you to upload your portrait as well as landscape images. For Instagram posts, you can choose from three different aspect ratios—1:1 (square), 1.91:1 (landscape), and 4:5 (portrait).
Here are more details one each of these options.
1:1 - Square Images
Ideal image size - 1080px by 1080px
These are the traditional square images that are characteristic of Instagram. If you want to use this option, Instagram has an auto-cropping functionality that makes it super-easy.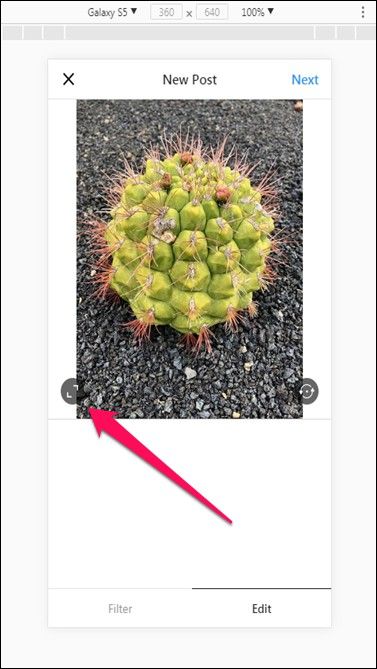
Earlier it was a problem uploading square pictures because most cameras took pictures in landscape or portrait formats, but not square. Nowadays, however, you can take a square picture directly from an iOS device or by using any photo apps that have different size options.
Here’s an example of an Instagram post with a square (1:1) image.
1.91:1 - Landscape
Ideal image size - 1080px by 608px
These are the horizontal photos that you might have seen on some Instagram posts. Adding these types of images is a bit tricky as most landscape images are of 16:9 aspect ratio as opposed to 1.91:1. So, most pictures that you upload will automatically get added with a black border around it.
More often than not, the black border does not look aesthetically pleasing and would make the post inconsistent with other posts on a person or brand’s Instagram feed.
Here’s an example of a horizontal Instagram image post with black borders at the top and bottom, because of an imperfect aspect ratio.
This is another horizontal post from the same Instagram page, but this time they’ve got the image size and aspect ratio right.
4:5 - Portrait
Ideal image size - 1080px by 1350px
These are the posts that have a portrait format images with an aspect ratio of 4:5. These are fairly easy to upload as you can take a portrait image from your mobile’s camera. And, even if you have a portrait image of different aspect ratios, you can always crop it to fit the Instagram post.
Here’s an example of an Instagram post with a vertical, portrait-style image.
The beauty of Instagram is that you can create different types of content like posts, Stories, and IGTV videos. And, all these have the option of uploading images and different image size guidelines for each.
Now that we have discussed the different image sizes allowed for Instagram posts, let’s have a look at the guidelines for Instagram Stories.
The ideal Instagram Stories image size is 1080px by 1920px and the aspect ratio should be 9:16. This is the perfect image size to ensure that there is no black border and the image fits the Story perfectly.
However, Instagram Stories allows you to add any image between 1.91:1 to 9:16. You can simply crop the image to fit the Story or it will automatically add a black border to fill the remaining space.
Ideally, you should upload portrait-style images for your Stories as Stories are basically vertical and are meant to be viewed as such. Even though you are allowed to add landscape images to Stories, it just does not look good. It is always better to use a 9:16 aspect ratio, to the extent possible.
And, if for some reason you can’t upload an image with a 9:16 aspect ratio, at least try to upload a vertical image in any other dimension.
While IGTV is essentially meant for videos, you do need to upload images for the cover photos of those videos. There are specific image size guidelines for adding IGTV cover photos, which are very different from those for posts and Stories.
IGTV cover photos should ideally have a resolution of 420px by 654px and an aspect ratio of 1:1.55. And, you can choose to either upload a new image or a still from your IGTV video, as your cover picture.
After reading about all the different image sizes and Instagram image guidelines, you might be a little worried. There’s no need to worry though because uploading the right-sized images is not as big of a deal as it may look.
No one really has the time to modify their pictures and change the size and aspect ratio every time they upload a picture to Instagram. There are several ways in which you can achieve this without making too much effort.
You can either use a photo editing tool that allows you to edit a picture to make it Instagram-friendly or simply let Instagram do it for you.
Here’s how you can upload images to Instagram while meeting the size guidelines.
Photo Editing ToolsThere are several no-crop photo editors that allow you to make your images Insta-friendly without cropping those.
Square InPic
This is one of the best and highest-rated Instagram-friendly photo editors that you can use to resize your images without cropping. This is especially good at creating square-sized Instagram images without cropping your original picture. And, it also comes with other design features like emojis, filters, etc. that you can use to enhance your images.
Square Pic
This is another great photo editor that can convert any image into a square-sized, Instagram-friendly image. It comes with different background options like blur, black, and white backgrounds to create aesthetically-pleasing, Instagram-friendly images.
No Crop & Square for Instagram
This is another no-crop photo editor that you can use to resize images for Instagram. It is simple to use and comes packed with a variety of useful features to enhance your images. Apart from resizing images, this tool also lets you create photo collages and add filters and other effects to your images. And, it has over 300 background patterns for you to choose from.
Instagram Auto-CroppingIf you don’t care much if your pictures appear with a black border, then you don’t need to resize images before uploading as Instagram will do it for you. Whenever you upload an image that is of an incompatible size, Instagram will automatically crop and resize it to fit its dimensions.
A lot of people don’t bother about editing images and just let Instagram do it for them. However, it might make your Instagram feed look less visually appealing. The trick to avoid that is to follow a consistent pattern for all your image posts.
For example, you can consistently use only portrait-style images with the auto-cropped black borders and make it look like your theme. This way, your Instagram feed will look consistent and you won’t have to put in any extra effort into resizing and editing your images.
A lot of people worry that if they will use a mix of landscape, portrait, and square images then that might make their Instagram feed look inconsistent and haphazard. However, that’s not the case because all your images automatically appear as square images on your feed.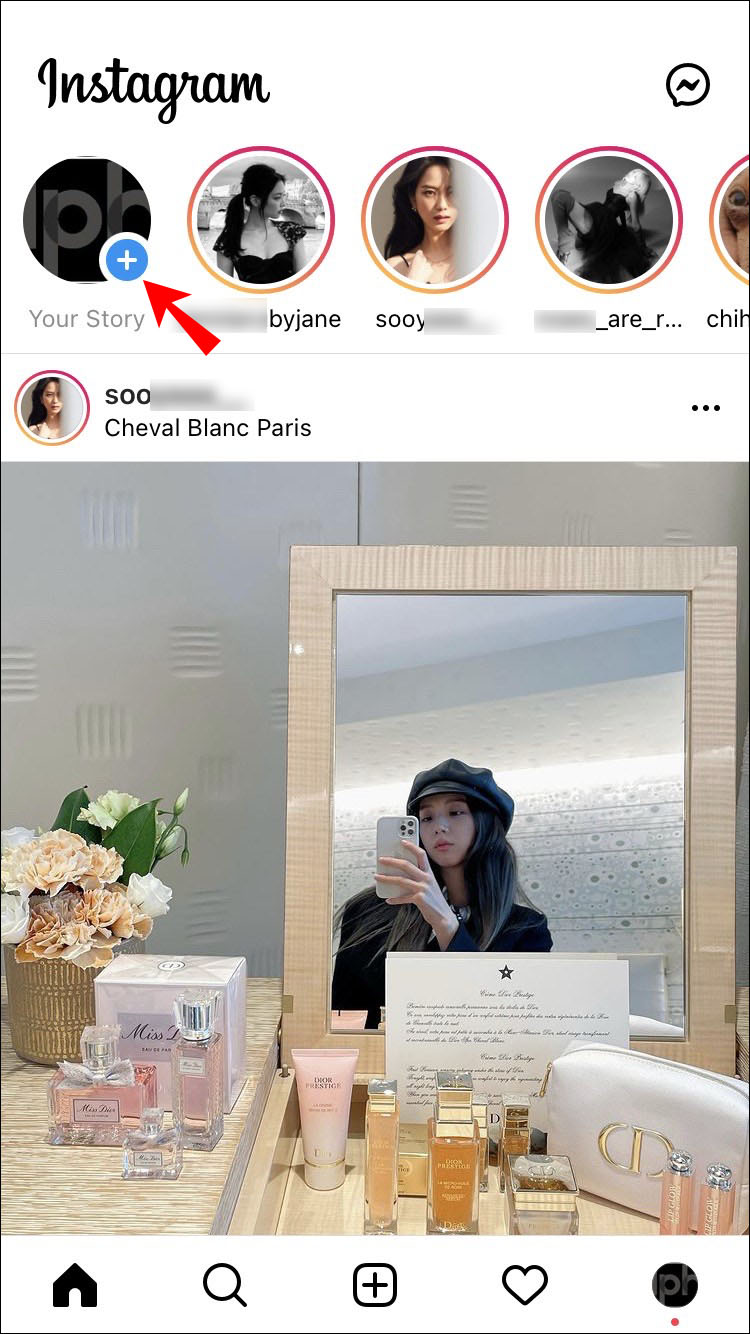
This means that if someone opens a post, they will see the landscape or portrait style images. But, your entire feed as a whole will appear consistent because the preview image will automatically be a square one for all posts.
So, no matter your choice of image, your Instagram grid will appear perfect.
Instagram automatically crops images and fits them in the right dimensions for any type of content. However, you need to be mindful of the image sizes to avoid that and ensure that your images fit perfectly without cropping.
Cropped images often are shown with black borders, which ruins the visual appeal. To avoid that, you should upload your images in the right size to fit your post or story dimensions perfectly.
You can use this guide and create amazing Instagram image content.
Instagram's habit* of cropping photos in the most inappropriate places is frustrating. The user uploads a photo, and Insta boldly compresses and cuts off half of the picture. As a result, heads, legs, parts of the landscape remain behind the scenes, and I only want to delete such a post. Previously, to place a photo without cropping, you had to use additional software, but now there are other ways that we will talk about in our article. nine0003
This social network has several reasons to crop users' photos. She tries to adapt pictures so that they look on vertical phone screens, even if the photo has a strange aspect ratio. And besides, network owners want to save space on servers.
The main reason why a social network crops photos is to equalize the conditions for all users so that photos of any size and quality look attractive, and all pages are the same on the social network on all devices. nine0003
Insta by default crops photos that do not meet its requirements. If the image width is between 320 and 1080 px and the aspect ratio is between 1. 91:1 and 4:5, then the image is published unchanged. If the resolution is lower, Instagram* increases it. If more than 1080 px, then it compresses to 1080 px.
By default, Instagram* scales the photo and takes the center of the frame for publication. If you click on the zoom icon in the lower left corner, then Instagram * will take the entire frame for publication. nine0003 When you click on the zoom icon, the entire photo is in the frame. The frame can be sent to Insta without editing the edges if the aspect ratio is 16:9. Before publishing, you can see how it will look like
Recommended reading: Optimal image sizes for social networks: cheat sheet.
If the photo falls within the proportions Instagram* needs, then Instagram* will not crop part of the image. nine0003
| Format | Approval | |
| Avatar photo | square, 1:1 | optimal 160 x 160 px, minimum 110 x 110 px, maximum 180 x 180 px |
| Post photo | horizontal 1.91:1, vertical 4:5, square 1:1 | horizontal, 1080 x 566 px, vertical, 1080 x 1350 px, square, 1080 x 1080 px |
| Photos for stories and IGTV | vertical 9:16 orientation | 1080 x 1920 px |
Official information from the support of Instagram* informs that the photo will be published in the best possible resolution with a width of up to 1080 pixels. This rule does not depend on whether the device is Android or iOS.
If the photo has a width of 320 to 1080 pixels, then its original size is preserved, but only in cases where the aspect ratio meets parameters from 1.91:1 to 4:5. In this case, the height should be from 566 to 1350 pixels, and the width should be 1080 pixels.
If you want to share a photo with a different extension, Instagram* will crop the photo to the correct size.
If the photo is smaller, then Instagram* will increase the width to 320 pixels. If more than 1080 pixels, then the width will be reduced to 1080 pixels.
There are several ways to add a full photo to Instagram*. To do this, select one of the options:
Let's consider these placement methods in more detail.
Previously, all images of non-standard sizes were published by the social network with a white background behind the frame. This was necessary if the width or height of the photo was not enough. Now you can do without it. Instagram* allows you to post pictures that do not fit the size requirements. When publishing, an automatic transparent background will appear on the image. nine0003 Transparent background adjusts to the frame and is not noticeable
There will be no background if the photo is scaled when publishing. After the frame is selected, it remains to decide on the part of the picture that you want to publish. But there is a nuance - sometimes important parts of the photo disappear, because Insta crops them.
Half of the text at the bottom of the frame and part of the character's head are missing from the photo. But there is no transparent background on the sides. It is worth scaling if the essence of the image is in the center of the frame, and there is nothing important at the edgesRecommended reading: How to make your own stickers in Telegram.
Not so long ago, Instagram* introduced the ability to post vertical long photos. A special button has appeared in the interface that allows you to stretch the image on the sides and add a transparent background there. The photo will be in full size, but with frames.
Instagram* will not allow you to post a panoramic photo in the feed because it is too long horizontally. To upload a frame to the social network completely, without cropping along the edges of half the frame, you need to use special software.
There are 2 simple programs that will help you with this - SwieablePanorama (iOS only) and InSwipe Panorama for Instagram* (works on Android and iOS). In any of the programs, a photo is easily loaded and cut into several identical blocks. They can be uploaded to Insta in the form of a carousel. This is a rather unusual and winning way to publish a panorama without losing the quality and meaning of the image. nine0003 InSwipe allows you to divide a photo into equal pieces up to 10 parts and save it for sharing on Instagram*. When posting to Instagram*, all you have to do is click on “Select Multiple” and highlight the parts you want. The result will appear in the carousel
Recommended reading: How to make an attractive cover for a VK group.
To make the image meet the requirements of the social network, you can use special applications. Finding software that will help you crop a photo or fit it to the right size is not difficult. nine0003
In order for the image to be displayed on the network completely, you can crop it manually, through the program. Almost any graphic editor will help with this, even the simplest Paint will cope with the task of changing the size in pixels or as a percentage.
Here are a couple of programs through which photos are usually cropped:
 A huge number of functions and possibilities for editing. The only difficulty is that you will have to install this rather big software and understand its intricacies. nine0089
 The main thing is to remember the proportions and the maximum possible expansion of the image, depending on its purpose. After all, it can be square, vertical or panoramic. nine0003 The easiest way to check and adjust the aspect ratio is in Paint
You can use any online program, including Canva. Through them you can upload photos, resize and edit. After such processing, Instagram* will not cut the edges.
Blogs usually prepare many photos at once to provide a page with content for weeks and months. To do this, it is convenient to use SMMplanner delayed posting, where posts are posted in advance, and then become visible to subscribers exactly on schedule. nine0003
To understand this feature, we advise you to study Delayed Posting to Instagram* from a computer. Here we talked about how to work with it, how to create and plan Stories, how to publish carousels and much more.
Another way to upload full size photos is to use dedicated apps. Below are the most popular and simple among the programs.
Software for Android and iOS phones. There are both standard functions and other features - change the size, edge, frame characteristics. You can edit a photo for publication, create a collage or story. In addition - the function of zooming pictures. You can pull up a photo from the gallery, clouds, or take a picture right now. nine0003 Several formats in which you can work. There is the most necessary functionality - crop edges, add filters, text and settings. Program with many functions. Most of them are paid, but for the main goal - to publish a photo without cropping the edges - the free functionality is enough.
In addition, the following functions are available:
Run the program and select a picture to share. A light frame will appear in the frame, under which you need to fit the image. After that, the frame can be published - Instagram * will no longer crop it. nine0003
We looked at the main ways you can post a photo to Instagram* without cropping half of the photo. All of them are easy to use, because the main thing is just to keep the proportion and resolution of the frame. And through the program, you can further configure filters, add frames and inscriptions, in general, fully prepare the photo for publication in all its beauty. If you know other ways - tell us about it.
The article has been updated. First published: January 26, 2021
One of the popular content formats on Instagram* is image galleries in posts. Users choose the carousel for a number of reasons. For example, you need to tell a single visual story or publish a series of useful cards. Or you don’t want to bore subscribers with photos from the same location or the same event, but at the same time there is a need to post several equally cool ones. Agree, sometimes it is very difficult to choose? :-) nine0003 An example of a series of cards in an Instagram post*: informative tips from Kinzhal magazine. Link to post
Posting multiple photos on Instagram* may also be needed for Stories. Collages of photos and videos, firstly, remain a visual trend in design, and secondly, they allow you to demonstrate the “before and after” effect, different sides of your product. Thirdly, such compositions allow the brand to stand out, detail the elements of the big picture and show the integrity of the product, which helps to achieve a certain effect from your Stories. Collages of several photos can also be used as a background, for example:
Clothing brand Antipod uses the series to announce the new Introvert collection in the Stories section. Link to StoryLet's look at all the technical possibilities to attach multiple photos to Instagram* and what are the limitations.
Gallery in the feed: from 2 to 10 photos per post .
Stories Collage mode: 2 to 6 photos . nine0003
Using the "Photo" sticker - there are no restrictions on the number of added photos . But, of course, to add too much means to clutter up the already small space of History. In addition, the sticker now allows you to add a video, and also choose the shape of the added photo. In 2022, after the next update, there are also 5 different options for processing pictures for the Story: a square, a square with rounded edges, a circle, an asterisk, a heart.
Selecting the grid in Collage mode and working with the photo sticker on Instagram* is very easyIn addition, in 2021, the Stories section has a new mode - Photo Booth in the Stories section. This is another way to upload multiple photos to Instagram*.
The number of photos in the "Photobooth" mode is exactly 4 . No more, no less. After shooting, they replace each other in a looped mode. Users can change the transition effect between these photos, at the moment there are 6 modes: Flash, Highlight, Filmstrip, B/W Filmstrip, Photo Tape, VHS. nine0003
Since Stories as a format in terms of popularity and functionality has long been ahead of the classic tape, they have more opportunities for publishing a series of photos and they are more interesting. The photo gallery in the feed has not changed much since the release, but the developers have made some improvements, for example:
And who most often needs to publish several photos at once?
Definitely all retail. From cosmetic companies to clothing brands. Showing a product from different angles is priceless.
All areas of online education. A series of visual stories (informative and not so) is a good and visually appealing trend. When the story is accompanied by illustrations, it turns out intelligibly. nine0003
Actually, the niche is not important. It is important to understand what kind of content your audience wants and what opportunities you have to provide it. For example, we have written for you what services you can sell on Instagram*.
Why posting a lot of photos at once on Instagram* is ok? Because you can talk about a corporate holiday, post a few photos from a family trip, vote, post a cool recipe, post a series of tips from an expert… Or continue the story by posting a screenshot of the text, because the post description didn’t fit entirely. nine0003 Instagram collage* Stories for inspiration or opinion gathering, useful post from an expert – using multiple photos in one post is always convenient. Link to post
The main advantage of the format is the ability to fit one cool but visually meaningful story of your brand or yourself into a single post.
Another plus is that the presentation in series format will be concise and concise. A group of photographs or hand-drawn pictures should be carefully thought out, from sequence to content. It's basically a mini-series. And in order for such a format to be appreciated, you will have to try. nine0003
In addition, collages of several published photos on Instagram* suggest a visual combination of elements: contrast or vice versa the overall color scheme does not matter. You need to have taste or a good designer so that users can appreciate your creativity. So the complexity of this format simultaneously affects the quality of content on the social network, requires more investment and effort from brands, and makes us, the layman, a little happier. Visual perfection is an important part of content, which is why we, by the way, have released an article for business on how to write a TOR for an Instagram profile designer*. nine0003
Now to the technical part - how to upload a series of photos to Instagram*.
Let's analyze all the possible ways to publish several photos.
Everything is simple here, regardless of the operating system you use on your smartphone: press the plus sign, select the format - for example, History. In the History, to add several photos, you can either select the “Photobooth” or “Collage” mode and continue working there (I already wrote about the features above). Or post multiple photos on Instagram* using a sticker. nine0003 How to post multiple photos in Stories mode
To post multiple photos on your Instagram feed*, select "Post" from the list, click on the double square icon at the bottom right, and circles will appear next to the photo on the screen - select the desired photos in the correct order . Continue your work, select the necessary filters if necessary, or add more pictures to the future gallery. Done, it remains to sign and publish.
How to add multiple photos to Instagram* If you hold your finger on a slide in the photo gallery for a long time before publishing, you will see a trash icon - you can delete an unwanted object by simply moving the picture to the icon. Please note that in the gallery with only two shots, this will not work.
Neither emulator apps nor developer mode can add multiple photos to Instagram* via a computer. Especially before writing the article, I tried all kinds of ways to download the gallery from a computer, none of them work. Can't upload multiple photos at once, only one is posted:
Bitter reality – the web version of Instagram*, even in emulators and in developer mode, is limited to uploading one photo deferred posting SMMplanner. The service offers various options for regular posting: for example, through the official Instagram API*.To add multiple photos to Instagram*, just click the "Schedule Post" button and select a photo/video to post. To edit photos, you do not need to download additional applications for post-processing, everything is already in the functionality of the service. nine0003 Post-processing photos for Instagram* inside the delayed posting service
And if you want to delay or schedule the release of Stories in advance and be able to edit them directly from your computer (including adding a lot of stickers), then SMMplanner has a built-in Stories editor with multiposting.