Over 100 million photos and videos are uploaded to Instagram every single day — but with all that posting comes a very real challenge: how do you organize your Instagram content?
With so many photos, videos, dates, photo credits, and hashtags to remember, it can be difficult to stay on top of your Instagram content calendar. Especially if you’re a small business with a million other things to do.
Enter: Instagram apps to help make your life easier (and your content organized and searchable)!
Wondering how you can organize Instagram content better? In the following post, we look at 6 Later tools that are perfect for organizing your Instagram content:
Why Use an Instagram Organizer like Later?If you’re a small business on Instagram, keeping track of all the photos and videos, Instagram Stories, hashtags, posting times, and more can be super time-consuming.
That’s because there are so many moving parts! Photos, videos, captions, dates, collaborators… the list goes on!
All of this can make life really stressful — especially if you have a million+ other things to focus on, like growing your business or building relationships with influencers.
That’s why it’s such a good idea to use an Instagram organizer and planning tool like Later. It can help you keep all of your Instagram content in one place and accessible on any device.
Need a few more reasons? Here are 6 Later tools that are perfect for organizing your Instagram content:
Organize Instagram Content #1: Centralize Your Photos and Videos with Later’s Media LibraryKeeping all of your photos, videos, and Instagram content organized can be a major challenge for businesses — especially if you have multiple team members creating and collecting content for your account.
Rather than storing your photos and videos on several different devices (and scrambling to find that perfect post when you need it!), you can use Later’s Media Library to keep all your content stored, labeled, and accessible from a single place — even when you’re on the go.
Think of it as a home for all of your great social content!
Another benefit of Later’s Media Library is that you can upload and store as many photos and videos as you like — there’s no limit whatsoever!
It’s also really simple to get content into your Media Library — you can drag and drop multiple photos and videos from your desktop, or upload directly from Dropbox or Google Drive.
Your Media Library also automatically syncs between the web and the Later mobile app, so you can access your social content from anywhere!
Later’s Media Library also makes it super easy to manage your Instagram content as a team! All the content inside your Media Library is automatically shared with the team members on your Later account, so anyone can upload content!
But what makes Later’s Media Library such a useful organization tool for businesses is that you can label, star, and segment your content so that you can find exactly what you need, right when you need it.
For example, you can create labels for user-generated content (UGC), social campaigns, or even for photos that have a certain color palette.
You can even label by used and unused to avoid posting the same content twice!
According to digital strategist and designer Quinn Tempest, these labels are especially helpful for finding content quickly — especially when you have hundreds or even thousands of items in your Media Library.
“I have over 1,000 images in my Later account and my labeling system keeps me sane and organized while helping me plan out of my grid quickly and painlessly,” she says.
Check out Quinn Tempest’s complete review of Later here!
Ready to get more organized with Instagram? Get started for free now**!**
Organize Instagram Content #2: Get a Complete View of Your Scheduled Content with Later’s CalendarOnce you have all your content and assets, it’s time to put everything together and plan out your social media content calendar!
That’s where Later’s intuitive and easy-to-use content calendar comes into play.
You can schedule your photos and videos to Instagram, Twitter, Facebook, and Pinterest, and view all of your posts on a single content calendar to have a complete view of everything that’s going out.
That part about scheduling to multiple social accounts at once is important.
Some platforms, like Instagram for example, allow you to share the same post to your Facebook profile when you hit publish. But that means you need to be actively posting from the app itself, which definitely isn’t the most efficient solution.
If you’re looking to buy back some time and organize your content in a more holistic way, scheduling your posts to go live across all your social platforms at once is key!
To do this with Later, simply click the “+” sign at the top of your Later calendar to select the social profiles you’re scheduling posts for.
From here, drag and drop the image from your Media Library that you want to schedule and create the caption for Instagram, Facebook, Pinterest, and Twitter.
You can even customize the caption for each platform so you’re never duplicating content!
If that isn’t enough, you can also get a bird’s eye view of all your scheduled content by viewing multiple profiles in a single content calendar!
To do this, just click the “+” sign above each of the accounts you want to view, and then click the “Month” button in the top-right corner of your screen.
Even if you’re not ready to actually schedule your posts yet, you can still plan out your social posts with Later’s Calendar Notes feature.
You can add notes to keep track of all your important dates and deadlines — it’s perfect for campaign timelines, photoshoot dates, holidays, and special events.
You can even mark off new product launches, influencer takeovers, collaborations, and promotions. The possibilities are endless!
Have post ideas ready, but don’t have the content or images yet? You can also use Calendar Notes to save spots on your calendar until you have your photo and everything ready to go.
You can also create placeholders based on the type of content you want to schedule. For example, mark off when you’ll be posting a product close-up or flat lay, a selfie, quote, or a lifestyle shot.
Your calendar notes will show across all social profiles too, so you don’t have to worry about missing an important date!
Organize Instagram Content #3: Plan & Schedule Your Instagram Stories with LaterDid you know that 62% of consumers have become more interested in a brand or product after seeing it on stories?
Instagram Stories help drive traffic and sales, increase brand awareness and engagement, and strengthen your relationship with your followers.
But trying to post to Instagram Stories every day can be challenging — whether you’re struggling with what to post, finding the time to create content on your phone, or just forgetting to post altogether!
If that sounds like something you’ve experienced, we have a huge time-saving solution for you: scheduling your Instagram Stories with Later!
Just like you would with posts, you can upload your stories to the media library, plan your content calendar, and schedule your Instagram Stories to go live at the times you want!
But that’s not all!
With Later, you can storyboard your content, add captions or links, collaborate with your team, and visually plan and schedule Instagram Stories right from your desktop — something you won’t find on any other marketing platform.
Scheduling your Instagram Stories doesn’t just save you time, it also helps you create better stories by planning ahead and optimizing your stories for traffic or sales using analytics, CTAs, and trackable URLs (that you no longer need to keep track of!).
Mr. Porter, a men’s luxury brand with over 1 million Instagram followers, has already seen success from using Later’s Instagram Stories scheduler.
“Since we got access to Later’s Instagram Stories scheduler, we use it all the time,” remarked Sophie Hay, social media at Mr. Porter.
“We love planning out our Instagram Stories content in advance so that we can create a more cohesive look and post more often. It gives us time to focus more on strategy, and less on logistics.”
Watch our step-by-step video tutorial to see just how easy it is to plan and schedule Instagram Stories with Later:
Ready to grow your business using Instagram Stories in 2019? Upgrade now to visually plan and schedule Instagram Stories with Later for just $9/month!
Organize Instagram Content #4: Collect User-Generated Content with Tagged MediaSharing user-generated content is a great way to fill your feed with beautiful content, but it’s also hugely valuable to your audience.
In fact, according to research from Suzy, UGC is 50% more trustworthy than any other type of media!
But how to do you go about finding this super valuable user-generated content?
We recommend using Later’s Tagged Media tool — it lets you quickly find images and videos that you’ve been tagged in on Instagram and save them to your Media Library for future posting.
To access your Tagged Media, simply open your Later account on the web, click the “Collect” tab on the left sidebar, and then select “Tagged Media.”
Here you’ll be able to collect and save all the photos, videos, and carousel posts that your account has been tagged in.
TIP: You can also access your tagged media by from your side library! Just click “Show Filters” and select the “Tagged Media” system filter!
Leveraging UGC on Instagram is a great way to curate a beautiful Instagram feed and an excellent strategy for marketing your business.
But it’s incredibly important to follow the UGC rules of reposting to Instagram! Always remember to give credit to the original poster and when in doubt ask for permission.
Tagged Media is only available on all of Later’s Business plans starting at $19/month!
Organize Instagram Content #5: Source Photos & Videos for Instagram with ContributorsIf your business works with multiple photographers and influencers, keeping track of all the photos and videos you receive (and who sent what) can be super time-consuming.
And if you find yourself juggling multiple media sources, you run the risk of posting the same image twice or scrambling to get images from your contributors and collaborators at the last minute. And that’s one stress you can live without!
Last year, Later created Contributors, a brand new media submissions tool to help streamline your process for collecting photos and videos for Instagram from your photographers, influencers, or other sources!
If you’re managing multiple Instagram profiles, as well as contributors, this tool really is a huge time-saver and a great way to project manage your account!
With our new Contributors feature, all you have to do is invite a photographer or influencer to be a contributor to your account, and they can immediately start submitting content to your Later account for you to review.
And once you’ve received a submission from a contributor, you can easily transfer it to your Media Library and then schedule it to one of your social profiles!
Later’s Contributors tool also creates an easy way for businesses to approve or reject the content they receive from photographers and influencers.
Once a photographer submits a piece of content to you, it will appear in the Pending tab of your Contributors folder.
From there, you can either approve it by adding it to your Media Library, or if you decide that the photo doesn’t match your Instagram aesthetic, you can reject it by selecting it and then clicking the Discard button.
Overall, Later’s Contributors feature offers a simple and effective way to organize and keep track of all your submissions — so you can quickly find the perfect photo or video right when you need it, and easily remember who to give photo credit to.
Watch this video to find out more about Later’s Contributors feature:
Contributors is available now on all Later business plans, starting at $19/month.
Using relevant, targeted hashtags on your social media posts is still one of the best ways to get discovered by new audiences — but as we’ve said before, not just any hashtag will do!
You need to be deliberate with your hashtags and only use relevant ones that focus on the content you are sharing and relate to your brand.
Unfortunately, since they’re often the final step, Instagram hashtags can become something of an afterthought.
If you’re looking to be more consistent with your hashtags, you should consider using Later’s Saved Captions feature, it lets you create multiple hashtag lists based on your frequently used hashtag categories and then easily insert them into your captions with just a single click!
For example, let’s say you run a spa in San Diego, and your Instagram feed is a collection of beautiful California-based travel photography, and images of your spa and treatments you offer.
Instead of trying to remember (or find) relevant hashtags for every post, you can use Saved Captions to keep them all organized, so you can quickly add them when scheduling in the future.
If you want to schedule a photo of a beach in San Diego, since you’ve already saved hashtags for different categories, you can we can insert relevant hashtags for beaches, California, travel, and San Diego with just the click of a button!
After you’ve written your caption, just click on “Saved Captions” and then click on the appropriate hashtag list to instantly add those hashtags to your caption!
When it comes to keeping your Instagram organized, using with an all-in-one social media scheduling tool like Later is a great way to save time while improving your performance, engagement, and growth rate!
Ready to get organized and plan out your Instagram content in advance? Start scheduling with Later, the #1 Instagram marketing platform trusted by over 2 million businesses! Sign up now — it’s free!
Alexandra | Apr 25, 2018
Organizing your Instagram is a lot of fun! And it saves you a LOT of time and stress. But how do you do it without feeling overwhelmed? It’s much easier than you think.
I’m going to summarize all the tips I’ve been giving you in this blog post. I’m going to show you how to organize your Instagram photos and your hashtags. Follow these steps and I promise you’ll see a big difference.
Ready? Let’s go!
First step: get Preview app. Do you have it already? It’s an Instagram planner. It will help you see how your feed looks like before you post anything on Instagram.
You can organize your feed, rearrange your photos, schedule your posts, find hashtags and edit photos… and the list goes on.
You can upload as many posts as you want (photos, videos and slideshows). And you can create any theme you want (with all the filters).
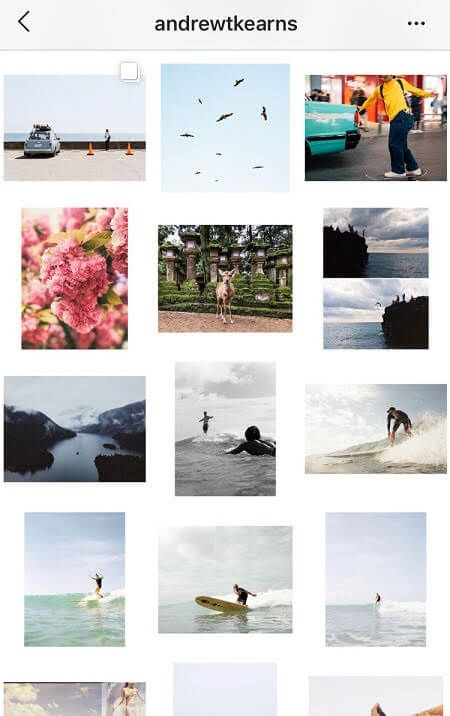
Shoutout to our community for sharing their beautiful feeds with us:
Choosing a layout is probably on of the easiest ways to organize your Instagram.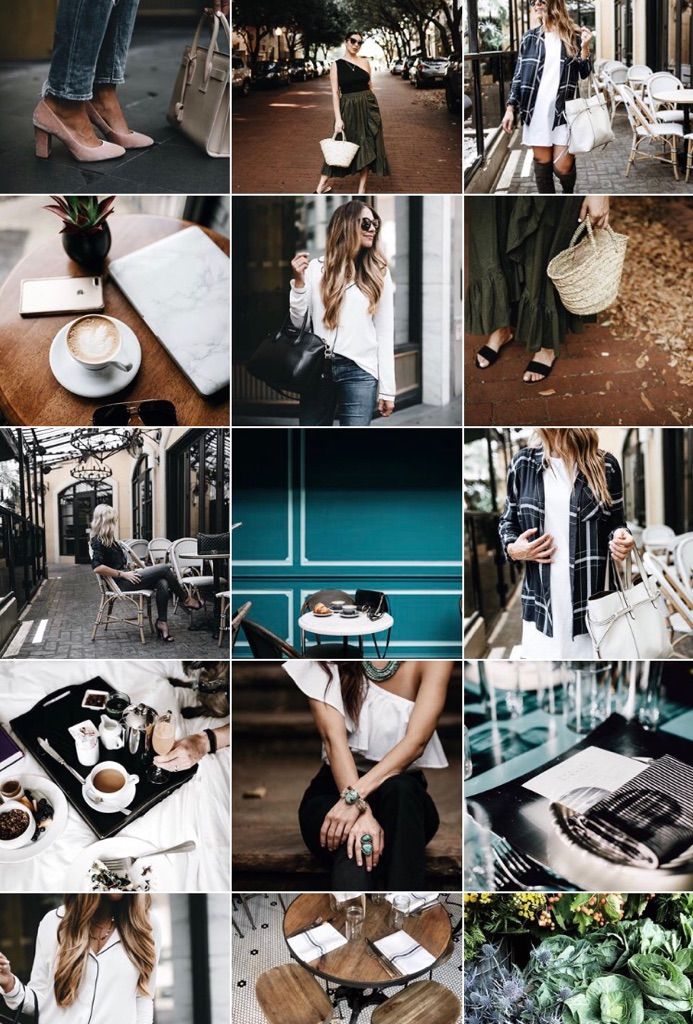 There are 9 different types of Instagram layouts:
Choose one layout and stick to it.
Another way to organize your Instagram feed is by rearranging the order of your posts. You can do that in Preview.
Tricks you can use to organize your feed:
Another good way to organize your Instagram is by sticking to certain colors in your photos. These colors are going to be your color palette. If you feel like your feed looks messy, this trick will save your Insta-life.
Choose 1 – 5 colors that always appear in your feed.
Pay attention to the colors of your subjects, objects, even your outfits (yes, next time pay attention to popular Instagrammers, you’ll see they wear the same colors most of the time). Instagramming is a lifestyle, my friend.
The background of your photos have a massive impact on your feed. Try to always use the same background for your photos (especially if you take a lot of flatlays photos, photos of food). If you can’t keep the same background, it’s okay. Try to keep it as clean, simple and minimalist as possible. This way it won’t clash with the rest of your feed.
A feed looks more organized instantly if you use the same filter all the time. A filter is a visual personality. It will make your whole feed look cohesive.
Another way to organize your Instagram feed is by knowing what you want to post about. I know it seems hard / impossible if you’re taking photos of a lot of different things all the time.
But try to find 1 – 5 things we really love to share. Example: quotes, food flatlays, nature photos, outfit photos, your dog.
Post about these 1 – 5 things all the time. It will create consistency on your Instagram.
You can also find your “hero” photo.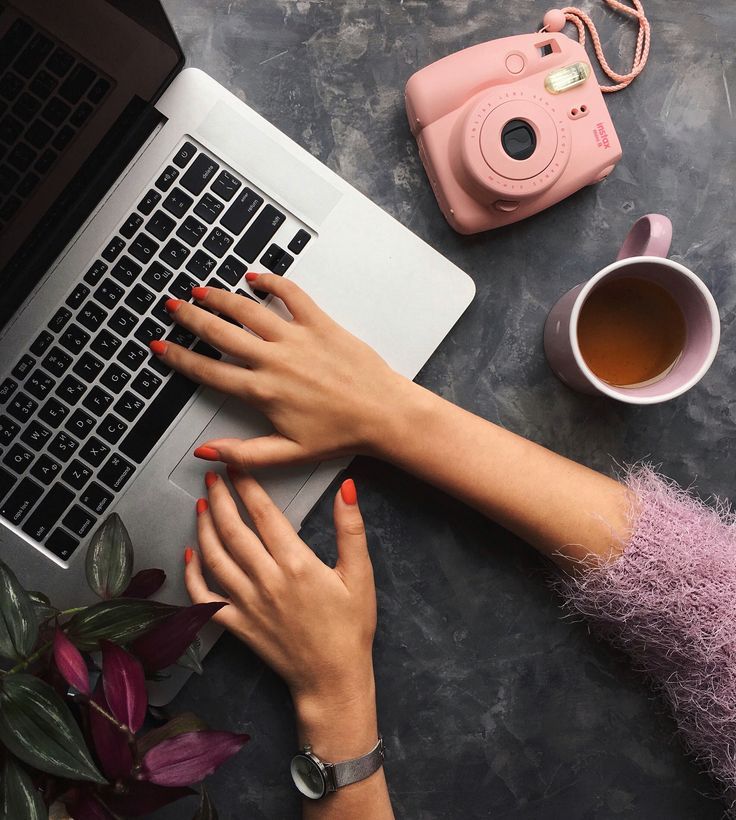 A “hero” photo is a photo you always share from time to time in your feed. For example: cute photos of your dog or very funny quotes. Your hero post should intrigue people and make them want to scroll down more and more. It will tie all your posts together. So choose something that stands out. Think about it as your Instagram signature.
Take half a day or one day (or more if you want to) to prepare a bunch of photos / videos / quotes in advance. This trick will really help you organize your Instagram. You won’t have to stress about “what to post next” – because you’ll already have a lot of content ready to go.
Just upload everything in your Preview app. Post when it’s time to post. #winning
Do you want to post once a day? Once every 2 days? Once every 3 days? There’s no wrong answer.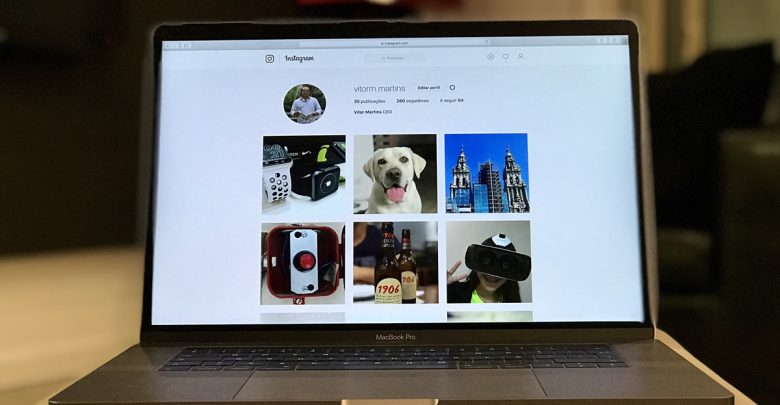 Just pick a schedule and post consistently.
Schedule your posts in Preview app.
And lastly: organize your hashtags. If you want to connect with people, become best friends with the Instagram algorithm and grow your account naturally… hashtags are a must.
You can save your favorite hashtags in Preview. Then just select which hashtag group you’d like to use and it will be automatically added to your caption.
I hope you found this article useful. If you have any questions please leave them in the comments below.
Have fun organizing your Instagram!
Click here to use it
We are sure that many users of the Instagram photo service are unaware of the existence of a tool that allows you to save your favorite publications and organize them into collections (albums) that only the owner of the account can view.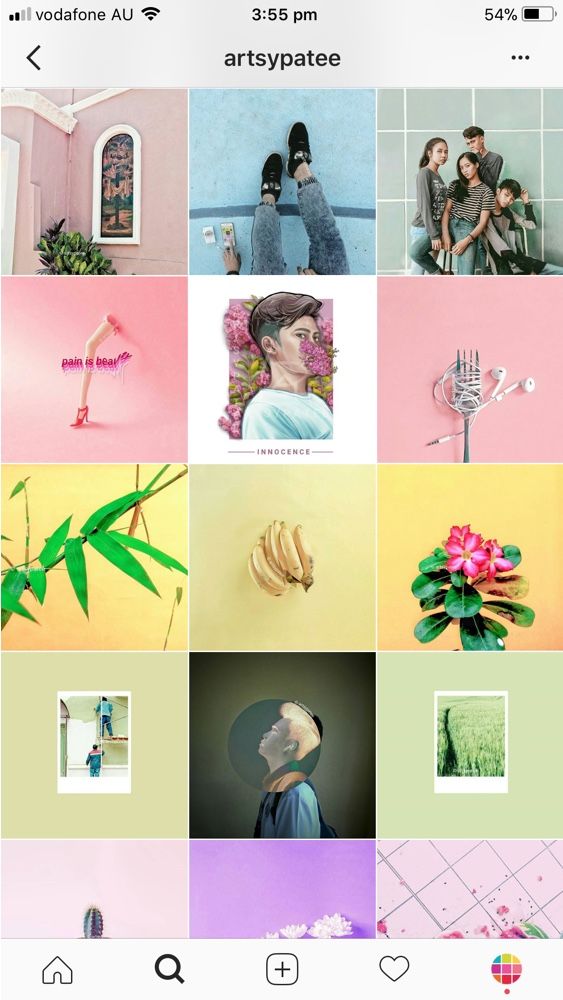 How to do this will be discussed in the instructions below.
| Apple in Telegram and YouTube. Subscribe! |
♥ BY TOPIC: Who has the most followers on Instagram - the 40 most popular accounts.
To save a post (video or photo) to an Instagram album (collection), click on the bookmark icon under the post. In this case, the author of the publication will not know that you have saved it.
The post is not actually stored on your device, you simply bookmark it. If the author of the post decides to delete it from Instagram, the post will also disappear from your saved bookmarks. All saved posts appear in the private section of your profile.
♥ BY TOPIC: Invisibility in Instagram stories, or how to anonymously view other people's Instagram stories.
You can create a new gallery when saving a post, add a post to an existing album, or create a collection of saved posts.
1. Click on the profile icon, and then tap on the icon with three lines in the upper right corner of the screen;
2. Select partition Stored ;
3. Click the "+" button in the upper right corner to create a new collection;
4. Enter the album name and press " Next ";
5. Select publications corresponding to the created album from those added earlier to the general album Saved ;
6. Press " Done ".
♥ RELATED: How to protect your Instagram account from being hacked (it's free).
1 . Select the post you want to include in the new collection;
2 . Press and hold the bookmark icon below a post;
3 . Select an existing collection or create a new one by clicking on " + ".
♥ BY TOPIC: How to repost on Instagram: 3 ways.
1. Click on the profile icon, and then tap on the icon with three lines in the upper right corner of the screen;
2. Select partition Saved ;
3. Click on the collection you want to add the post to;
4. Click on the menu button (three dots) in the upper right corner, and then select " Add to collection ";
5. Select publications corresponding to the created album from those added earlier to the shared album Saved ;
6. Press " Done ".
BY THEME: How to unfollow a person on Instagram so that they don’t find out (so as not to offend).
1 . Open the post you want to delete;
2 . Click on the bookmark icon in the lower right corner;
3 . Click " Remove from collection " to remove the post from the collection.
♥ RELATED: How to add music to Instagram Stories on iPhone.
1. Click on the profile icon, and then tap on the icon with three lines in the upper right corner of the screen;
2. Select partition Stored ;
3. Select the album you wish to delete;
4 . Click on the menu button (three dots) and select " Edit Collection ".
Next, you can either rename the album (enter a new name and click " Done "), or delete it by clicking on the option " Delete collection ", or change the cover.
See also:
Please rate the article
Average rating / 5. Number of ratings:
No ratings yet. Rate first.
There is a difficult way: choose a brush and paint over the entire screen with it for a long time. And there is a way five times easier.
How to Add a picture to your story, select any color for the brush, press and hold your finger - now there is a solid color background.
Photos with a color translucent filter are obtained in almost the same way.
How to Add a picture to the story, choose any color for the brush, but then switch to the marker. Press and hold your finger on the screen - there is a photo with a color filter.
In addition to a solid background, there is another beautiful option - a background with a gradient, like in a story with text.
How to Go to the text story, select a background and write one word. Click next and delete the text - you have an empty gradient on which you can add pictures in the same way as in the previous paragraph.
Are there only 27 standard colors in stories? In fact, there is a whole palette to find any color at all.
How to make Hold your finger on the color ruler and choose something you like.
The main question of all Instagrammers is how to make a story collage. You can download an application with a bunch of templates, or you can do the following.
How to Open a story, add a picture, for example, a colored background. Then go to the photo gallery, select a photo, click the "Share" button, and then "Copy". Return to Instagram - a pop-up window will appear with the copied photo, click on it - it lies on top of the first picture. Repeat to infinity.
Several small videos are added to stories in almost the same way. The sequence of actions in this case is different.
How to Add a picture to the story, for example, a colored background, click on the sticker icon, and then on the round icon with the photo icon. Only in the gallery, select not a photo, but a video.
To record a story in the My Reaction to Anything genre, you need to quickly switch from the main camera to the front camera. That's how the genre works. There is a special button for this, but it is located in such a place that it is easier to break your index finger. Here is an alternative way.
How to Tap the screen twice quickly while recording, the camera will switch. Repeat to infinity.
Owners of older iPhones and Androids can't be happier with the beautiful blurring of the background when taking a selfie with the front camera. But the disadvantage can be compensated in the Instagram camera.
How to Go to the "Focus" tab in the camera and see if the selfie looks better if the background is blurred.
Live Photos on iPhones is an underrated feature. Instead of one photo, she makes a short video, from which they then choose the right moment. And another underestimated feature is boomerangs, because they are simply constantly forgotten about. It's not scary, because boomerangs can be obtained from Live Photos.
How to Add a Live Photo to your story, hold your finger on the screen or hard press it, the photo will turn into a short looped video.
Perhaps your stories are secret and you don't want your followers to send them to anyone. Of course, you can't make it so that random people don't see them at all, because you can always take a screenshot. But at least complicate this operation to the maximum.
How to Go to the camera, click on the gear and turn off the "Allow sharing" option
You may think that comments are a thing of the past decade and have no place in today's social media. There are many ways to remove them from your profile.
How to First, go to Settings - Privacy & Security - Manage Comments and choose who can leave comments under posts. Second, disable comments before publishing a new post. To do this, go to the advanced settings at the very bottom of the publishing screen. Thirdly, turn off replies to stories: on the camera screen, click on the gear and turn off replies.
Thankfully, Instagram doesn't tell all your friends that you've been tagged in a bad party photo. Unfortunately, friends can still see the photos you're tagged in on their profile. This is a solvable problem.
How to Go to settings - "Privacy and security" - "Photos and videos with you" and hide all the photos that you do not like in the last menu. But be careful: this will remove the marks on the photos forever!
Shops, beauty salons and people who subscribe to 2500 people, you do not need, because they do not interact with your content and thereby reduce reach. There are two ways to unsubscribe them from yourself: a difficult one - go to the profile and block it - and simpler.
How to Go to the subscribers screen, click on the three dots next to the nickname and on "Unfriend". Save two taps!
Profile description supports a bunch of weird fonts that don't exist in standard keyboard layouts. What if you always wanted a nice description like "𝖒𝖔𝖘𝖈𝖔𝖜 𝖌𝖔𝖑𝖉𝖊𝖓 𝖌𝖗𝖗𝖗𝖑" but didn't know how to write it. And very simple.
How to make Go to igfonts.io, come up with a cool description in English and choose the best font.
In 2008, we asked friends how to hide your online on VKontakte. In 2019-m this is more relevant on Instagram.
How to do Go to Settings - "Privacy and Security" - "Online Status" and turn it off. But after that you will not see your friends online either.
There are a lot of saved posts to make moodboards. The problem is that not all likes are added to saves. And it's good that there is also a list of likes.
How to do Go to settings - "Account" - "Publications you like".
Instagram has a good photo editor, but there is one drawback: it does not save photos to memory. But the disadvantage is easy to get around.
How to Turn on airplane mode, process the photo, upload it and wait for the message that the post cannot be loaded. During this time, Instagram will save the processed picture to memory.
Maybe Instagram is your life and it would be nice to keep it in a safe place. Or maybe you just decided to leave? Then download the entire Instagram with photos and messages to your laptop memory.
How to do Go to settings - "Privacy and security" - "Download data". It will take several hours to create the archive.
You already know that Stories has a button to align text to the center, left and right.