Device Links
There’s no doubt that when words fail, emojis, gifs, or stickers are great substitutes. As the age-old saying goes: “a picture speaks a thousand words.” In the case of Telegram, one more option was added to the list: Animated stickers. These fun-moving images are far more expressive than their static counterparts. What’s more, you now have the option of making these fun stickers yourself.
In this article, we’ll show you how to make your very own animated stickers on Telegram. The process differs depending on your device, so read on to find out which options work best for you.
If you’re using tools to create animated stickers for Telegram, then you’re best off working from a PC. One way of making animated stickers for Telegram is to use Adobe After Effects. Navigating certain tools from smartphones can be a little fiddly. The tools you will need include any vector graphics editor that supports exporting the vector objects to Adobe After Effects.
You will also need the Bodymovin-TG plugin. This plugin is what will let you export your animations to the required format for Telegraph.
Once you’re equipped with all the right tools, here’s a step-by-step guide on how to create animated stickers for Telegram:
So, you’ve created your sticker.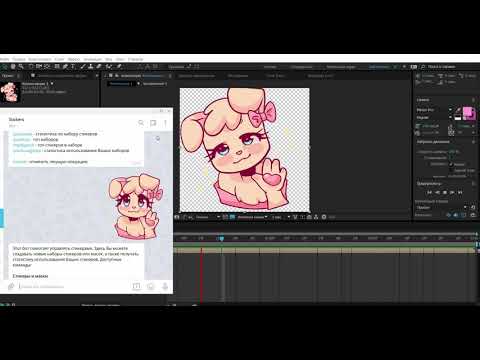 Now it’s time to upload it to Telegram. Here’s how to do so from your PC:
@Stickers.”/newanimated” and type your sticker pack’s name.When the upload is complete, you’ll be given a separate URL so that you can share your creation with other people. Unlike other messaging apps, Telegram doesn’t have its own sticker store. For that reason, you’ll need to share your sticker pack on your own.
In order to do so, you will first need to select your pack’s URL. You will then be presented with two options when it comes to sharing your animated sticker on Telegram.
Navigating certain tools from smartphones can be a little fiddly. But who says you can only make animated stickers using complex tools such as Adobe After Effects? Fortunately, there’s an alternative method if you’d prefer to use your mobile device. Using third-party apps, you can create and share your animated stickers in no time, straight from the comfort of your iPhone.
Perhaps the most popular third-party app for sticker creations is “Sticker Maker for Telegram – Make Telegram Sticker.” As long as you have access to the app store, you will be able to easily download this free feature. Here’s how:
There’s no doubt that using stickers is a fun form of communication. Telegram does a great job at letting its users customize their own stickers when using the app.
The easiest way of making animated stickers for Telegram on your Android is to download a third-party app. Some examples of available apps include: “Sticker Maker for Telegram – Make Telegram Sticker,” “Stickery – Sticker Maker for WhatsApp and Telegram,” and “Stickergram (Stickers for WhatsApp and Telegram).
Here, we’re going to use Stickery as an example. If you wish to create an animated sticker for Telegram using your Android, just follow these steps:
 ”
”If you prefer using Telegram on your iPad, you’ll be pleased to know you can make animated stickers. With the help of a third-party app, you can share stickers in no time with friends and family. One of the most popular apps is “Sticker Maker for Telegram – Make Telegram Sticker.” The best part is that it is free to download on the app store.
To make your animated sticker for Telegram using your iPad, simply follow these steps:
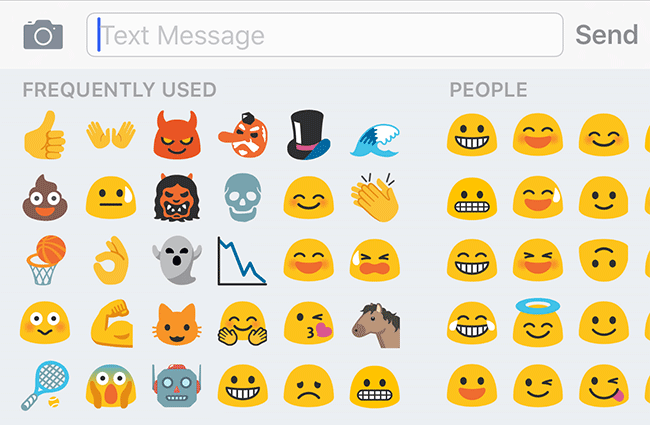
Language tends to adapt over time and the use of stickers is one way that online communication has evolved. Believe it or not, stickers are actually far more popular than both emojis and gifs.
Telegram is unique as it lets you upload your own stickers when messaging your contacts. Whichever method you use, we hope that this article has helped you get a better understanding of how to animate stickers on Telegram.
Have you tried making animated stickers for Telegram? If so, how did you find the process? Let us know in the comments section below.
All users can create, send and share custom artwork using Telegram's open platform for stickers and emoji. Stickers take many forms – from basic images to stunning vector animations.
To start building your own custom sets, click below:
Telegram stickers and emoji can move with smooth 60 FPS animations to bring your characters to life in high resolution.
Animations require Telegram's unique .TGS format – click here for Video Stickers and Emoji made in .WEBM format.
To create vector-animated stickers and emoji you will need the following:
The Lottie-based .TGS format allows for incredibly detailed animations that are less than 30 KB in size – six times smaller than the average photo.
When your files are ready, send the /newanimated command to the @Stickers bot – then send it the .TGS files.
To upload emoji, send /newemojipack to @Stickers. The requirements for .TGS stickers and emoji are exactly the same.
Your set will need an icon. Icons for your sets must be 100x100 pixels, with a looped animation not exceeding 3 seconds.
Stickers and emoji can also be built with .WEBM – an open-source format that is compatible with many graphics editors to create high-detail images. Requires Telegram 8.5 or higher.
To create stickers and emoji from video files, you only need editing software that lets you export your project as a .WEBM video file.
See this Encoding .WEBM with VP9 Guide for details
Once your stickers are ready, send the /newvideo command to the @Stickers bot – then send it the .WEBM files.
To upload emoji, send /newemojipack to @Stickers. Note that video emoji need to be a smaller resolution than stickers.
Your set will need a .WEBM icon. Icons for video sticker sets must be 100x100 pixels, with a looped animation not exceeding 3 seconds.
Turn your favorite drawings and memes into packs of images that are easily to share and access on any device.
To create static stickers and emoji for Telegram, you only need an image editor that lets you export in .PNG or .WEBP format.
Tip: a transparent background, white stroke and black shadow effect will make your sticker stand out.
Once your stickers are ready, start a chat with the @Stickers bot and send the command /newpack. Your sticker set can also have a custom icon – a 100x100 pixel image in .PNG or .WEBP format.
To upload emoji, send /newemojipack to @Stickers. Note that static emoji need to be a smaller resolution than stickers.
For more info about using the @Stickers bot, click here.
As of version 8.9 released in August 2022, Telegram apps support custom emoji.
Emoji use the same technology as stickers, making it very easy to convert your art to both formats. Check out the video and image sections for details on the different size requirements.
To upload them, use the /newemojipack command in @Stickers.
Everyone can create new custom emoji, however, adding and using custom sets is currently an exclusive feature of Telegram Premium users.
Publishing and editing sticker packs is simple and automated, thanks to the @Stickers bot. It can also show you detailed stats for stickers and packs.
Once you open the bot, press the Start button or send /start. The bot will reply, describing its different commands. It will walk you through step by step, but here's a quick guide:
/newpack command to start uploading static stickers. For animated stickers use /newanimated, or /newvideo for video stickers./publish command./skip this step, but it is required for animated or video stickers.
After your pack is finished, you can send
/startagain to see the full list of commands, or use the bot menu to create another pack, edit an existing pack, or see statistics.
Once you've created one or more packs, you can add, edit or replace stickers in your existing sets.
/addsticker if you have more artwork you'd like to add to a set. Choose one of your packs from the list – the upload process is exactly the same as before./editsticker to change the emoji you assigned to a sticker – select the pack and sticker, or simply send the intended sticker from your panel.
/replacesticker if you want to swap out an older sticker for an updated version./ordersticker to change the order of stickers in your pack. Choose the pack and one of the stickers, then choose another sticker to appear before it (to the left) in the panel./delsticker to remove a sticker from the pack – you can always use /addsticker to add it again if you change your mind./seticon to set an icon for your pack or to change the icon. Static sticker packs without a custom icon will use the first sticker as its icon.Edits to your sticker packs may take up to an hour to update for all users.
There are a number of commands that let you see statistics for your stickers – here's what they all do:
/packstats shows how many times your pack was used, installed and removed – both recently and overall.
/stats shows how many times an individual sticker has been sent./top shows the most popular stickers from all your packs./packtop shows your most popular sticker packs and their individual stats./topbypack shows the top stickers from a specific sticker pack./packusagetop shows your most popular packs by recent usage.You can filter the results of
/top,/packtop,/topbypackand/packusagetop. For example/top 20would show your top 20 stickers, and/topbypack -5would show the 5 least popular stickers from a pack.
Developers can build apps to automate importing stickers using Telegram’s API. With these tools, users can instantly bring their favorite stickers to Telegram.
As of version 7.8, Telegram apps support a simple API for importing stickers. Developers can use this to build apps or add tools to apps that let users instantly transfer stickers to Telegram – or create custom stickers from photos or videos.
Click here for more information about developing apps for importing stickers.
Users can find apps that allow them to import stickers or quickly generate their own. They can also easily publish custom stickers with the @Stickers bot using .PNG, .WEBP or .WEBM files for stickers from other apps.
Let's step by step understand all the nuances when developing such a sticker. From software to publishing on Telegram.
101 265 views
So what is this animated sticker?
This is Telegram's own format - .tgs , which is based on lottie technology.
Lottie is an engine from Airbnb that allows you to play animations based on json generated using plugin Bodymovin for Adobe After Effects. The same plugin exists for Telegram stickers and is called similarly - Bodymovin-TG .
Table of Contents
Step 1 - Prepare Tools
Step 2 - Create Sticker
Step 3 - Animate and Export to After Effects
Step 4 - Publish to Telegram
7
Step 1 - Prepare tools
What is needed
How to install Bodymovin-TG
Download the bodymovin-tg.zxp plugin from the developer's site, which is necessary for exporting animation to the .tgs format.
Installation requires ZXPInstaller - an application for installing extensions for Adobe .
Application also available on Mac OS
Open ZXPInstaller and transfer the plugin to the program window.
You can also click and select a file from the explorer pop-up window.
Adjustment Bodymovin-TG
Open Adobe After Effects and go to the settings section - "scripts and expressions".
nine0002 Check the box next to "Allow scripts to write files and access the network."Stage 2 - Create sticker
Creating and setting up a document
Open Adobe Illustrator and select File -> New from the menu bar.
In the pop-up window, set the parameter to 512 by 512 pixels, based on the requirements for the size of the sticker.
Sticker drawing
Drawing vector sticker will require certain skills and knowledge of basic tools, so it is recommended that you familiarize yourself with the basic principles of drawing on the Adobe website.
The image on the sticker must not extend beyond the edges of the canvas.
There is an alternative way (Trace) with which any picture is converted into a vector . It will be very useful for quickly transferring your raster images to vector. nine0003
Image trace
Let's take an image of a sticker from the Internet as an example.
Importing the image into the working environment Adobe Illustrator (transfer to the image program window). And we carry out the indicated actions from the video:
Learn more about Image Tracing on the Adobe website.
The tracing was successful, but the algorithm is not always accurate guesses the shape of the object by element. With the help of built-in tools, these shortcomings can be eliminated.
Save sticker
Select "File" -> "Save As" from the menu bar. Stored file type .ai . In the pop-up window, check the box next to "Create a PDF compatible file."
Step 3 - Animate and export to After Effects
Animation specification
The size of animated sticker must not exceed 64 KB , if the sticker exceeds this mark, the export (Bodymovin-TG) will fail with error . It is possible to fix the error only by reducing the quality of the sticker - deleting vector elements. Make sure there are no 9 in the animation0008 Too many vector objects.
The animation must be cyclic , that is, the first frame of the animation must coincide with the last frame.
These frames have the same "position" value.
Using these functions in Adobe After Effects will result in fatal errors when exporting the sticker:
Masks, Mattes, Layer Effects, Images, Solids, Texts, 3D Layers, Merge Paths, Star Shapes, Gradient Strokes, Repeaters, Time Stretching, Time Remapping, Auto-Oriented Layers
Creating and setting up a composition
Open Adobe After Effects and select Composition -> New Composition from the menu bar.
In the "Composition settings" pop-up window, specify the sticker parameters taking into account the official requirements for animated stickers, such as:
For convenience, you can save presets for 60 and 30 frames, respectively
Import sticker into After Effects
Transferring the sticker file to the Adobe After Effects workspace.
Right click on the sticker and select "create shapes from vector layer".
After creating the vector layer, you can delete layer Sticker.ai , which will not be needed later
Animation in After Effects
For example, let's animate 3 elements in a sticker.
Let's take a closer look at how to animate these elements in After Effects :
1. Change of position
Expand the layer " Curves Sticker " and find the group with the required object, the easiest way to do this is by clicking on the element in the preview window. nine0003
Select the item " Position " and activate it by clicking on the stopwatch icon. After we move the timeline a little forward and move the object with the mouse or manually, changing the numerical value " Position ".
2. Zoom
Similar to ( 1 ) except that now you need to change the scale of , not the position.
3. Contour change
Select item " Outline" and activate it by clicking on the stopwatch icon.
To create such an animation, you need to drag the "blue square", thereby changing the shape of the object and gradually bring it to the desired state.
Export sticker Bodymovin-TG
Select the "Extensions" item and find the plugin there Bodymovin .
We mark the composition and select the save location by clicking on the "ellipsis".
After we press the button Render .
If all goes well, the file .tgs will appear in the location you selected.
Stage 4 - Publication in Telegram
We open Telegram and find the bot @Stickers in the search.
To start working with it, send the command /start .
All stickers in a set must have the same frame rate. Otherwise, you will have to make two different packs - for 30 and 60 frames per second.
nine0034Send the command /newanimated . After we select the name and we get the following instruction:
Thank you! Now please send me the future animated sticker - a TGS file created with the Bodymovin-TG plugin for Adobe After Effects.

We recommend uploading images through the desktop application.
Stickers, bot
The next step is to send an emoticon that matches the animated sticker. We finish creating the set with command /publish, if there are no more stickers to add. In the future, through the bot, it will be possible to additionally add new stickers.
Bot Stickers will prompt you to choose an icon for animated stickers. It needs to be created separately, but the easiest way is to write the command /skip so that the first sticker is shown as an icon.
How to make an animated sticker in Telegram
July 31, 2019 Likbez Technologies
You will need a couple of programs from Adobe and a little imagination. nine0003
Not so long ago, animated stickers appeared in Telegram. These funny moving pictures perfectly convey emotions and are a good alternative to gifs and usual stickers. But if creating a regular sticker pack is quite simple, then you will have to tinker with animated images.

Preparing the tools
You will need Adobe Illustrator vector graphics editor, Adobe After Effects animation editor and minimal skills in working with them.
In addition, the Bodymovin-TG plugin must be connected to Adobe After Effects. It exports animations to the .TGS format supported by Telegram. To do this, close Adobe After Effects if it is open. Download and install the ZXPInstaller application. It is compatible with both Windows and macOS. Download the Bodymovin-TG plugin (the file you need is called bodymovin-tg.zxp ).
Now run ZXPInstaller and click on its window. Select the downloaded plugin and wait while the application installs it. nine0003
Open Adobe After Effects. Then do the following:
- On Windows, open Edit → Preferences → Scripts and Expressions.... Check the "Allow scripts to write files and access the Web" option. Click OK.
- On macOS, open Adobe After Effects → Preferences → Scripts and Expressions….
Check the "Allow scripts to write files and access the Web" option. Click OK.
Click Window → Extensions. If you did everything correctly, then in the list of extensions you will see Bodymovin for Telegram Stickers. nine0003
Everything, the instruments are set. Now it's time to create.
Draw vector graphics
Create a new project in Adobe Illustrator. The canvas size must be exactly 512 × 512 pixels - this is important. The project should not have a background. Objects cannot extend beyond the artboard.
For example, we will draw a face. You can compose it from the shapes in the Illustrator toolbar. Each significant part for animation (arm, leg, eye) must be placed on a separate layer. It is better to immediately sign what is where, so as not to get confused. nine0003
When your graphics are ready, save them in AI format.
Importing graphics into After Effects
Open After Effects and create a composition.
Its dimensions should be exactly 512 × 512 pixels. The number of frames per second is 30 or 60 (for a simple animation like ours, 30 is fine). The duration of the composition should not exceed 3 seconds.
Then click "File" → "Import" → "File" and find your AI graphics. In the "Import as:" drop-down list, select "Composition - keep layer sizes" and click "Import". nine0003
Your graphics are imported with all layers. Select them (they will be in AI format) and drag them to the Create New Composition icon.
The program will ask you for confirmation. Click OK.
Layer order may be a little off. Drag and drop them on the panel at the bottom left, placing them in the desired sequence.
Now we need to create figures for animation from vector layers. To do this, select the layers and right-click, then "New" → "Create Shapes from Vector Layer". So-called curves will turn out. nine0003
After that, the layers in the AI format can be removed so that they do not interfere.
Select them with the Ctrl key pressed and press Delete. Only curves remain.
Done, import completed.
Creating Animation
Adobe After Effects allows you to create very different animations in terms of complexity. But we will not dive into the wilds and, for example, we will try to make our face simply raise an eyebrow.
Select the eyebrow you want to animate and click on it with the left mouse button. Click the > icon next to the curve in the lower left panel and select Transform. nine0003
Using the icons that appear on the panel, you can change the position, scale, rotation angle and degree of transparency of objects in the animation. Since we only need to raise an eyebrow, we'll get by with changing its position.
Click Anchor Point and Position. Then drag the time pointer on the timeline to the third second of the animation (drag all the way).
Click on the diamonds on the left sidebar, to the left of Anchor Point and Position.
This way you will loop your animation: its first frame will be the same as the last one. This is important because otherwise Telegram will not accept your sticker. nine0003
Now place the time pointer approximately in the middle of the scale.
Click on the diamonds again to create an anchor point there as well. And change the position of the eyebrow by raising it. This can be done using the numbers next to the "Position" parameter or by dragging the eyebrow manually with the mouse or arrow keys.
Press the spacebar to start the animation. Everything, the eyebrow moves.
Similarly, you can make other objects move in the animation. Just create anchor points for them by clicking on the diamonds and change their position. nine0003
Export sticker
Click Window → Extensions → Bodymovin for Telegram Stickers. Select the composition you want to export (in our case, the one marked "Eyebrow"). In the Destination Folder parameter, specify the folder where to save your sticker.
And click Render.
If everything is ok, the extension will report that rendering is complete. Click Done. If something is wrong, the extension will prompt you. True, only in English.
The sticker will be saved in the folder you specified under the name data.tgs. nine0003
Adding a sticker to Telegram
Launch the @Stickers bot in Telegram and send it the command /newanimated . The bot will prompt you to choose a name for the new set of animated stickers - enter it and send a message.
Then send the sticker to the bot by dragging the data.tgs file to the Telegram window.
The bot will ask you to send an emoticon with which the sticker is associated - do it. If you have more animated options for this set, please add them. When done, enter command /publish and select your sticker pack from the dropdown list. You can assign an icon to it if you have one (it must be a TGS image with a size of up to 32 kilobytes).