How to make an instagram cardboard cutout
Fun Cardboard Selfie Frames for Instagram & Virtual Events
Skip to contentSelfie frames are great for many occasions! You can use them on your social media profiles to track growth and progress. If you’re planning a fun event or party, selfie frames are a great way to get everyone in on the fun. If you have kids, you can use selfie frames as a fun way to keep a record of your child’s growth. Selfie frames are also great for annual holidays or yearly events like Movember. And if you’re a business owner, cardboard selfie frames are a must!
Read on for more details and ideas on how to have fun with cardboard selfie frames.
“Two students in a selfie frame at Ag Day” by pennstatenews is licensed with CC BY-NC-ND 2.0.
Instagram Selfie Frames
Are you ready to punch up your Instagram page with a unique accessory? Use selfie frames in your next photo shoot! A customized selfie frame can reflect the appearance of a typical Instagram post, but with a more personal, engaging twist. Instagram selfie frames are huge right now and will likely continue to be – they’re not going anywhere anytime soon, so get on board.
Don’t stop there, though! Customized selfie frames are perfect for Facebook and other social platforms, as well.
Selfie Frames For Parties
Going beyond social media, selfie frames can be incorporated in a variety of occasions, both virtual and in-person. Here are just a few popular examples of shindigs to consider creating a personalized selfie frame for:
- Birthday parties
- Sweet 16 bashes
- Bachelor or bachelorette parties
- Bridal showers
- Gender reveals
- Baby showers
- Backyard BBQs
- Super Bowl parties (or your athletic event of choice)
Selfie Frames for Events
On the hunt for a unique photo opportunity that will add a bit of pizzazz to a special occasion? Go all out with selfie frames! Encourage attendees to post pictures with selfie frames online, complete with a pre-designated hashtag.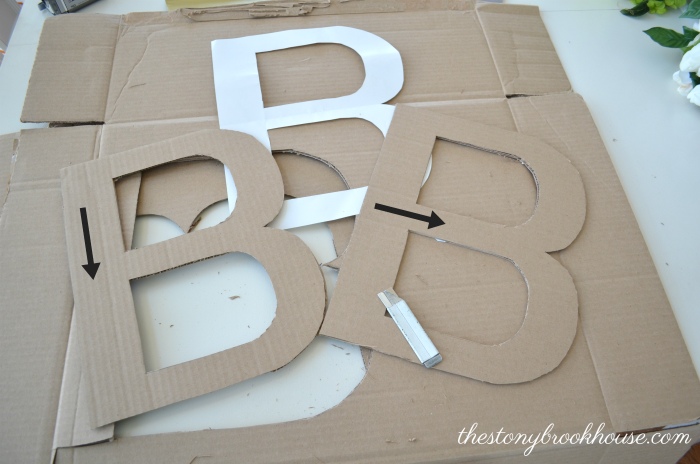 A few popular events just begging for selfie frame inclusion include:
School Selfie Frames for Kids
For a new spin on the classic back to school photo, try a selfie frame. Every year, you can use these accessories for pictures marking the first day of school. Later on, you’ll enjoy comparing several photos to get a sense of your child’s maturation against a similar backdrop.
There’s no need to limit selfie frame usage to the first day of school. They also can mark major academic milestones, such as scoring a spot on the honor roll, winning academic awards or any other special designation.
Get the kids involved by having them create their own selfie frames as a digital art project or Student of the Week presentation. They’ll love the chance to be creative and showcase their personality!
Holiday Selfie Frames
Celebrate the season with a festive selfie frame that incorporates your favorite festive themes, such as a spooky frame for Halloween or a red and green look for Christmas.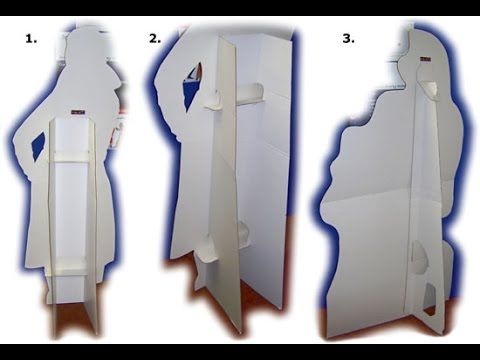
Selfie frames work well for any holiday, be it Thanksgiving, New Year’s, Valentine’s Day, Easter, Hanukkah, Kwanzaa, or virtually anything else. Don’t forget non-traditional holidays such as Talk Like a Pirate Day or National Pet Day!
Selfie Frames for a Cause
Many social media users strive to draw attention to important causes by adding digital frames to their profile pictures. At this point, however, this tactic is so expected and widely used that it can fail to make a significant statement. Physical selfie frames, however, are less expected. Use them to highlight your support for the following causes:
- Black Lives Matter
- Wearing a mask during COVID-19
- Supporting the troops
- Breast cancer awareness
- Supporting health care workers
- Advocating for teachers
- Animal rights campaigns
- Charitable giving
Selfie Frames for Company Branding
While selfie frames are often promoted for private use, they can also prove a valuable addition to corporate efforts.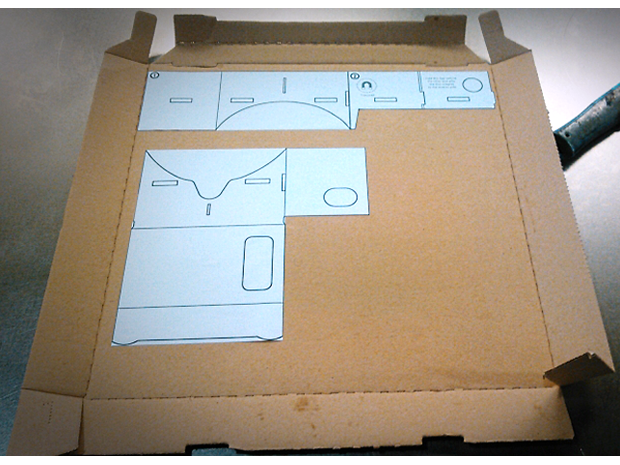 Emblazoned with bold logos, these frames provide numerous branding opportunities. Examples include:
Just for Fun Selfie Frames
Selfie frames aren’t limited to parties or corporate events. They can make the most boring day a bit more entertaining. Here are a few ways to liven up your day if you’re stuck in a rut.
- Staycation – It’s a bummer when you can’t hit up your favorite vacation spots, but staying home can be fun, too! Use a selfie frame to highlight the best aspects of your staycation. Your frame can feature vacation-oriented images, such as palm trees or airplanes. “Aloha” selfie frames are especially compelling.
- Pet selfies – You love your four-legged friend(s) and want to highlight the important role they play in your life, right? Posing your pet (or the two of you together) with a selfie frame is pawsitively adorable.
- DIY projects – Unleash your inner artist by designing and creating a vibrant selfie frame.
 Take a picture using the frame, print it and integrate it into a special collage.
In Conclusion
Cardboard Cutout Standees offers a variety of unique products for work, play and everything in between. With our help, you can design a selfie frame or a life-sized cardboard cutout that meets your specific needs. So what are you waiting for? Get designing!
Recent Posts
- 5 Creative Vision Board Ideas That Are DIY-Friendly
- 6 Inspirational Quote Room Mural Ideas for Wall Decor
- 10 Fun Corporate Holiday Party Ideas Employees Will Love
- 10 Christmas Cardboard Cutout Ideas for Holiday Photos
- Top 10 Anime Character Cardboard Cutouts for Fans
- How To Tailgate at a Football Game: Step-by-Step Playbook
- 5 Ways To Use Cardboard Cutouts for Weddings
- Best Spooky Halloween Backdrops for Photos
- Lifesized Halloween Cardboard Cutout & Stand-Up Party Ideas
- How To Create Movie Cardboard Cutouts & Life Size Theater Standees
Blog Categories
- Business (25)
- Celebrations (18)
- Customer Spotlights (23)
- Everyday Life (30)
- Guides (39)
- Hobbies (8)
- Holidays (12)
- Movies (7)
- Social Media (11)
- Sports (11)
- Uncategorized (1)
Selfie Frames & Cutouts | Custom Printed In 24 Hours
- Home
- Event Selfie Frames
1 / of 4
Don't worry; our professional designers will check your design.
Our artwork team will review your graphic design before printing & production. Kindly note that we do not take responsibility for spelling errors in your design.
Event Selfie Frames
Quantity
Download a larger version of this design for proofing Go back to edit design
Please enter your email address below for a quick quote
Thank you for requesting a quote from us.
If you do not receive a quote within 3 mins, please get in touch.
Sorry something went wrong, you can try later.
- Overview
- Templates
- FAQ's
- Our Process
- Reviews
About Our Event Selfie Frames
FAQ's
FAQs related to Event Selfie Frames
Can selfie frames be used outdoors?
Yes, you can use selfie frames outdoors as they are printed using fade and weather-proof inks.
I don\'t have any artwork.
That's OK. We have loads of free standard templates for you to choose from. Should your budget allow, for an extra $29, we can help you create your custom selfie frame using your image and ideas.
Do you fold the cutouts for shipping?
Generally, we fold all the larger cutouts from around 90cm wide or large size upwards. This is done for several reasons - larger parcels that are very thin and flat are very easy to be bent or damaged in transit; it is also more expensive for shipping as our items ship by cubic weight, not dead weight. Being folded, they are smaller and stronger. This is an industry-standard practice.
Our process is simple!
1. Select your products
Visit our website and choose your display product.
2. Place your order
Place your order online / phone.
No payment is required at time of placing an order.
3. Artwork Design
You have two main options:
1. Upload your Print-Ready file
2. Let us design one for you
4. Processing
Our team member will be in touch with you to discuss the order further.
5. Proofing
Our designers will email you a digital proof for approval prior to production.
6. Production
Once your artwork is approved, your job is pushed into production.
7. Payment
We will email you a tax invoice requesting full payment ahead of the production of your order.
8. Completion
Once the order is dispatched, we will email you a tracking number confirming the dispatch.
Reviews
Manufactured and in Australia
Our in-house production ensures higher quality control
Printing
Printed in Australia
Overview
Event Selfie Frames
Template
Template downloads
600mm W x 900mm H (. PDF) 600mm W x 900mm H (.AI) 800mm W x 1200mm H (.PDF) 800mm W x 1200mm H (.AI)
FAQ's
FAQ's
FAQs related to Event Selfie Frames
Can selfie frames be used outdoors?
Yes, you can use selfie frames outdoors as they are printed using fade and weather-proof inks.
I don\'t have any artwork.
That's OK. We have loads of free standard templates for you to choose from. Should your budget allow, for an extra $29, we can help you create your custom selfie frame using your image and ideas.
Do you fold the cutouts for shipping?
Generally, we fold all the larger cutouts from around 90cm wide or large size upwards. This is done for several reasons - larger parcels that are very thin and flat are very easy to be bent or damaged in transit; it is also more expensive for shipping as our items ship by cubic weight, not dead weight. Being folded, they are smaller and stronger. This is an industry-standard practice.
Our Process
Our process is simple!
1. Select your products
Visit our website and choose your display product.
2. Place your order
Place your order online / over the phone.
No payment is required at time of placing an order.
3. Artwork Design
You have three options to choose from:
1. Upload your Print-Ready file
2. Browse designs and customise
3. Let us design one for you
4. Processing
Our team member will be in touch with you to discuss the order further.
5. Proofing
Our designers will email you a digital proof for approval prior to production.
6. Payment
We will email you a tax invoice requesting full payment ahead of the production of your order.
7. Production
Once your artwork is approved, your job is pushed into production.
8. Completion
Once the order is complete and paid in full, we will email you a tracking number confirming the dispatch.
🎥 5 applications for creating the effect of torn paper (and more) - DISTRICT F
Today's post will focus not only on the effect of torn, crumpled, aged paper, but on the "paper" theme in general: creating stories in the form of paper collages , videos and shots with a torn edge, aged textures for reproducing retro photos, and more. Everything in order - below.
NICHI / ios + android
The application pleases with a large library of textures, cute illustrations, stickers and inscriptions to create unique stories, collages, moodboards and screensavers on your smartphone. nine0003
Includes a variety of paper stickers, ink lettering, newspaper clippings, postage stamps and grungy backgrounds to add authenticity to any shot. (I wrote more about NICHI in this article ).
PREQUEL / ios + android
PREQUEL “layers” effects right on top of your photos and videos (the user has over a hundred free styles).
Thus, two tabs are of particular interest in this context: ALBUM (the effect of aged cracked vintage photos / videos) and, in fact, PAPER (textured torn edges in the photo / video).
A more complete overview of the application is here .
STORYLUXE / ios
STORYLUXE makes it easy to create photo and video stories. The free version has more than two hundred ready-made frames and templates, including those on a “paper” theme (PAPER and COLLAGE tabs): with torn edges, high-quality grainy textures, frames in the form of craft collages. nine0003
PICSART / ios + android
This popular application for creative sampling, photo editing and collage arranging also has a huge (regularly updated, by the way) collection of PNG images.
Among them are dozens of stickers in the form of various sheets and pieces of paper with wrinkled, wrinkled, scorched textures, as well as newspaper and book clippings, torn drawings, photographs and much more.
It's easy to find all this in the built-in PICSART search engine by typing in the phrase "torn paper". nine0010
There are also a couple of interesting textures for converting photos to PICSART under Effects → Paper.
+
INSTAGRAM* / ios + android
*FRIENDS, IMPORTANT: The Meta organization, which owns Facebook and Instagram, has been declared extremist and banned in Russia.
However, you are by no means limited to the applications mentioned above.
I also made a separate video to demonstrate how to make layered stories, photo and video collages with torn paper effect (and more) right in the INSTAGRAM mobile app. nine0003
Passionate about PNG: stocks, download nuances, creating collages
All you need is to download your favorite “paper” textures or stickers to your smartphone from any PNG stock or search engine. In the video below, I focused on the features of choosing PNG images and showed how to visually distinguish them from JPEG images. Usually the process of creating such collages and stories takes no more than 5-10 minutes.
You can also find a detailed manual here: 🎥 How to make "multi-layered" photo and video stories?
You can thank the author now on Boosty
I am on social networks: VK PN
Interesting on the site:
🎥 How to add clouds in the photo without a photoshop?*
🎥 Mobile processing: effect of sprouted letters
Lightroom on the Go: Smoky Pastel Preset Pack
🎥 Live Presence: 4 Animated Story Apps
Lightroom on the Go: 10 Presets to Inspire Creativity
🎥 Selfies on the go: 4 apps to create your best selfies
🎥 Magic realism: apps to create highlights, shimmer, bokeh
🎥 Photoshop on the go: 3 ways to create a chromatic effect on photos and videos
🎥 Color play: how to do selective color correction on a smartphone
🎥 Ideal imperfection: scratches, scuffs and dust on a photo
🎥 6 applications for creating highlights and spots in the style of film burn
🎥 Lightroom basics: installing and configuring presets
10 useful tips for working with a laser engraver on wood and plywood .
 Setting up a laser engraver. nine0001
 Hello everyone, Friends! 3DTool is with you!
CO2 laser cutting machine. 10 helpful tips for beginners on cutting and engraving plywood and wood.
Foreword. For some of the tips, it's important to understand the difference between vector files and raster files. Vector files are mathematical formulas that describe lines, circles, and so on. They are created in programs such as Adobe Illustrator, Inkscape, AutoCAD, and Corel. Raster files are collections of individual pixels, such as digital photos, Adobe Photoshop files, JPG files, etc. You can only laser cut vector files, but engrave both types. Some of the tips listed below require your file to be a vector file. nine0003
Catalog of CNC laser machines
Tip #1. Preparation for laser cutting or engraving.
Before we move on to cutting and engraving tips, let's start with some helpful tips for preparing for them:
Smoke/Slag Resistant: If you are going to engrave anything, be aware that smoke/smudge from engraving can stain the edges of the engraved surface. To avoid this, stick masking tape on the surface. It won't affect the power of the laser much (you can increase the power a little if you think it's necessary), but it will protect the material around the area being engraved from smoke trails. Once engraved, simply peel off the tape. nine0003
Presets: The laser machine you are using probably has the recommended settings for cutting or engraving different materials and different thicknesses. You can download these settings to your computer or the laser cutting machine control board directly and save them as presets. Be sure to name them something meaningful so that they can be easily identified in the future. So the next time you engrave leather or cut 3mm acrylic, you can simply find and use a preset to work with that material. nine0003
Test cutting of a workpiece: Even if you have a preset for material cutting, it is recommended to perform a test cut before starting the main job. There is nothing worse than taking out a sheet of plywood material after a laser cut and discovering that it did not cut all the way to the end. We recommend creating a small circle or square (about 6 or 10 mm wide) and cutting it into the corner of the piece. In this way, you can see if you need to increase or decrease the power before starting the base job. nine0003
Tip #2: The Importance of Layers in Image Editors
Some of the tips below require the ability to engrave/cut only part of a file or design at a time. The easiest way to do this is to put different parts of your design on different layers of the same file. Most graphics programs allow you to create layers and then turn them on and off. While you can of course put everything on one layer, having multiple layers gives you several key benefits: nine0003
1 . Cut order control. Your laser machine will most likely have several options for controlling the order in which cuts occur, but the most convenient way to control the order is in one single way: set different cut lines on separate layers to turn each layer on and off in the desired order.
2 . Multiple layers in one file. Instead of saving each design or part of the design in a separate file, just put them all in one file and break them into separate layers. Then just run the desired layers. nine0003
3 . Create hints and targets. Perhaps you've created a few clues to lay out your design, or a target for placing multiple identical objects. To prevent them from being cut out on the main design, put them on a separate layer and just turn it off.
Tip #3: Laser cutting and wood engraving techniques.
Let's say you've designed a logo or image and want to carve it into solid wood. Wood is a great material for engraving, but you need to understand the difference between engraving on a solid piece of wood and a composite material like plywood or MDF. Unlike manufactured material, natural wood is not homogeneous. The fibers in wood represent different stages of growth (winter and summer) and each will burn differently. Usually the dark fibers are harder and the light parts in between are softer. As you can see from the sample photo above, you see a zebra in the engraving. If a uniform engraving is important to you, your best bet is good plywood, where the top layer is more predictable. nine0003
Another thing to keep in mind is materials with a thin veneer of good wood on top. Engraving often burns through thin veneer, exposing what lies underneath. Make sure the wood underneath the veneer looks good and that you burn all the veneer out so you don't have a mixture of veneer and surface underneath.
Tip #4: Laser cutting overlapping objects.
Often, when you need to cut several parts at the same time, it is tempting to place them next to each other so that adjacent identical lines overlap each other to save a sheet of material. It's a good idea, but it can be messed up very easily. nine0003
For example, you have a bunch of squares for cutting. If you draw two squares (four sides each) and then press them together, there will only be visually one line between them. The problem is that although it looks like one solid line to you, the computer still sees two. The end result is that the lines will be cut off one by one. This will cause that edge to be more likely to be scorched rather than clean. It will also waste time on an unnecessary cut. nine0003
The way to fix this is to remove one of the doubled lines. Draw one of the squares 3 sided, deleting one side line opposite the first square and align them.
Tip #5: The difference between bitmap and vector laser engraving.
The main difference between raster engraving and vector engraving is that for engraving, the laser moves from left to right across the engraving area and then moves down a minimum step, repeating until the image is engraved. With a vector cut, the laser simply moves along the lines. As a result, raster engraving takes much longer than vector engraving. nine0003
So, you have a drawing. For example, the Celtic knot, which is basically just lines. Of course, you can run it as a bitmap engraving. The advantage is that you can set the thickness of the lines to whatever you want, and different lines will have different thicknesses. The downside is that engraving will take much longer.
If the file is vector, there is a quick way to create lines without cutting them. Run your file as a vector cut, but turn off the power and increase the speed. For example, to cut through 3mm plywood, we set the laser power to 100% and the speed to 20%, but to draw a line on it, we reduce the power to 30% and the speed to 9five%. Trying to cut through the material, the laser simply burns a thin line on it. The advantage is that this will be much faster than vector engraving. The downside is that the line will be very thin and you won't be able to change its thickness.
Tip #6: Defocus the laser beam for thicker vector lines.
In the last tip, we looked at how to use a vector image to simply draw lines on material to create line art or designs. But the disadvantage of this method is that the line is very thin. But there is a way to get thicker lines. The laser beam has a very narrow focus point, so if you lower the material a little, the laser will lose focus and scatter. Lay a small piece of wood about 9 inches thick.5mm on the material you are using and focus the laser on that piece. Then run the laser at the vector setting (lower power and higher speed). The result is a much thicker line than if the laser were correctly focused.
There are 2 drawbacks to this method that you need to be aware of when using this working technique. One of them is that the line is a little inaccurate and not as sharp as with a raster engraving. Secondly, at the corners of the lines, the laser pauses a little as it changes direction, so the corners burn a little deeper. The corners look like they have little dots in them. nine0003
Tip #7: Adding a vector stroke to the edge of a font or engraving image
You should usually get good edges on any engraving your laser does (unless you are checking focus). But if you want to sharpen the edges of the engraving a little more, here's a good tip: add a light vector stroke around the edge of the engraved image.
You will need the image as a vector file. Select it and add a thin stroke (stroke) around the edges. When you set up the laser for stroking, turn down the laser power and increase the speed so that it burns but does not cut through the edges. After the laser has done its basic engraving, it will come back and burn a thin line around the very edge. nine0003
This effect is great for all kinds of inscriptions.
Catalog of desktop laser machines - https://3dtool.ru/category/chpu/lazernye-stanki/lazernyy-graver/
Tip #8: Laser cut wood in the target area.
Sometimes you need to accurately hit a target area that is not at the laser's start coordinates. For example, there is a piece of plastic from which you have already cut out several shapes, but there is enough space between the old cutouts to make another, new cutout. How can you neatly insert a new cut into the remaining space? nine0003
First measure the target area and get its approximate dimensions. Make sure there is enough space for what you want to cut out. Then place the workpiece on the honeycomb table of the laser machine and measure the distance from the zero coordinates of the laser to the target area. For example, a rectangle 2.5cm by 5cm, located 6cm below and 2cm to the left of the edge. Then, in your file, use markup to highlight the target area and position from the origin of the material. Place your drawing or cut in the target area. Make sure that this marking will not be used when cutting. If you measured everything correctly, your notch should be right in the target area. nine0003
Tip #9: Laser Engrave Many Objects Simultaneously and Use Templates.
Let's say you have a lot of wooden coasters that you want to engrave your logo on. You can place them one by one at the laser start coordinates and engrave one by one. But wouldn't it be better to arrange several pieces at the same time and have the laser cutter engrave the image on all the blanks at the same time? nine0003
The trick is to create a grid on which you can lay out the blanks and precisely laser engrave them. Create a new vector file the size of your laser target area. Then measure your image to be replicated on blanks. If you can get it's exact shape this is a great option, but if that's not possible then a regular circle or square will do, as long as the edges of the image fit exactly into the area of the square or circle. This will be your target form. Create a template and place your design (engraving or cutout) in this area. Now copy the template and your drawing and paste as many copies as you can fit within the laser's workspace. nine0003
Tip: Leave some space between the templates so that the blanks do not lie tightly together.
Before you run the file, don't forget to move the grid and template to one layer and your image to another layer. Then turn off printing for the layer with your design on it.
Cut a piece of cardboard/plywood to fit the laser area and place it in the laser. Now make sure only the template layer is set for cutting. Engrave the template on cardstock. You will get a grid that matches the one in the file. Now place the items you are going to engrave on the template marked on the cardboard. Remember to refocus the laser on the top of what you are about to engrave. Now you can disable printing of the target layer and enable printing of the layer directly with the design. nine0003
As long as you don't move the cardboard/plywood, you can just keep laying out new pieces on it, click on the engraving, and repeat until you've done all your work.
Catalog of large laser cutting machines: https://3dtool.ru/category/chpu/lazernye-stanki/lazernyy-gravirovalnyy-stanok/
Tip #10: Use a laser dot to simulate a job without cutting.
Some laser machines have the ability to turn on the laser pointer, which projects a red dot indicating where the laser beam will work. This is useful for determining where the laser will cut before working on the material itself. Just turn off the laser power and turn on the red dot. Then run the file and see how the red dot moves, as if we were running a task in idle mode. nine0003
One thing to keep in mind is that this method works well with vector lines where the laser/red dot follows the lines, but not so well with engravings where the laser goes back and forth across the engraving area. If you need to use a red dot to figure out where the engraving ends, you can draw a square or circle around the image you want to engrave, and then simply use the red dot to trace around that square in vector mode.