With over 1 billion active users, Instagram is one of the best social media networks to advertise your business, reach new audiences, and grow brand awareness. So even if you aren’t active on the website yet, it’s never too late to adopt an Instagram strategy in your marketing plan.
If you're ready to start sharing content through this channel, we've got you covered. Here, we're sharing a quick-and-easy guide to posting on Instagram, to ensure you can begin attracting the attention of your audience with Instagram marketing.
Posting to Instagram consistently can help businesses find resonance with their audience and grow better, but doing it right is just as important. Here's how to post to your Instagram account step-by-step.
See that plus sign [+] in the image above? That's your starting point. Click that plus sign and you'll be ready for the next step, below.
Instagram will show you the photos already saved to your phone. Choose one of those to post. Alternatively, you can click on the camera icon to take a photo or video within the Instagram app itself, if you don't already have an image you want to use.
Once you select and crop an image (or carousel of multiple images), click the Next button in the top right corner of the app.
Do you have multiple photos and want to highlight them all? Instagram allows you to do this with its carousel feature.
As you go to tap a photo or video, first tap the icon just above your photos to the right that looks like stacked squares. Once you tap this, you'll see a number on the corner of every image or video you tap. This number notes where the content will show up in the carousel.
You aren't limited to just a square image on Instagram. You can actually share horizontal or vertical images as well. To get more of your image seen, pinch the screen of the photo you've selected on the Library screen (play the video below to see it in action).
However, while Instagram does allow vertical and horizontal options, the images still need to fit into some specific dimensions. So, you might still need to crop a tiny bit of your photo to get it to fit.
Instagram offers a wide variety of filters — scroll to the right to peruse your options, and click on one to preview how it will look on your photo.
By default, the filter will be applied by full strength. However, if you want to scale back the intensity of the filter, double-click the filter tile once it's been applied, and a scale selector will appear, allowing you to downplay the effect.
You can also tap the magic wand at the top of the screen to adjust the photo further.
(Take a look at our Ultimate Guide to Instagram Filters to learn more).
You can also click "Edit" at the bottom right to adjust the image to your specifications.
Here are the editing options that come built into Instagram for you:
 Drag the selector to the left to desaturate the image (all the way to the left if you want a monochrome look), or drag the selector to the right for extremely saturated colors.
 Dragging the selector to the left will darken the shadows in your image while dragging the selector to the right will lighten the shadows in your image.
Featured Resource
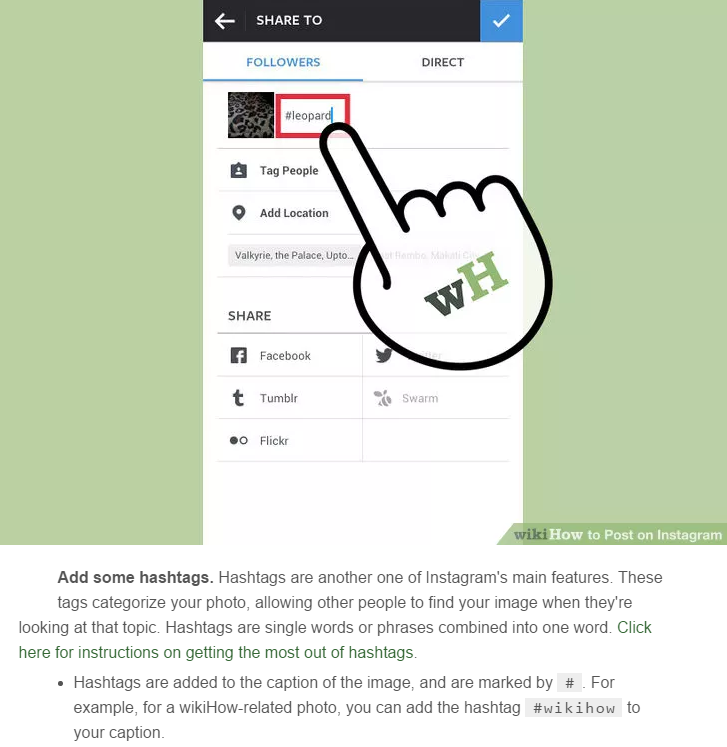
Get creative and write a nice, interesting Instagram caption to go with your photo. Since text can help optimize your post in Instagram's search, writing something can only benefit you.
With Instagram's search feature, users can search by hashtags. So, you should make sure to write relevant hashtags in your caption. If someone does a search of a hashtag you placed in your caption, they might find your post as well as others that included the same one.
Want your friend or their followers to see a photo that you posted of the two of you? Tag them!
On the new post page, you can click "Tag People" to tag other Instagram accounts in your post. Alternatively, you can include their handle (or their username beginning with an @ symbol) in your caption.
If you're on a fun vacation or at a neat event and you don't feel like including that information in your caption, you can mark where you are in another way. On the new post page, tap "Add Location" to put a location on your image (which makes it easier for people to find your post).
When you post an image or video with a location, it will show up between your name and the block of content on the feed.
Emojis are fun and can make your caption more eye-catching. If you know of a few relevant emojis that could fit with your post, stick them in the caption area. For example, if you're posting a vacation photo, you could include a palm tree 🌴 or a plane ✈️ to show you flew somewhere.
Here are the top Instagram emojis you can use:
However, keep in mind that there's a multitude of choices to add flair to your posts, from keeping it real 💯 to the cringe face 😬.
Be sure not to go overboard and post emojis just for the sake of posting them. If you post a bowling emoji along with a photo of a beach, that obviously won't make sense to people.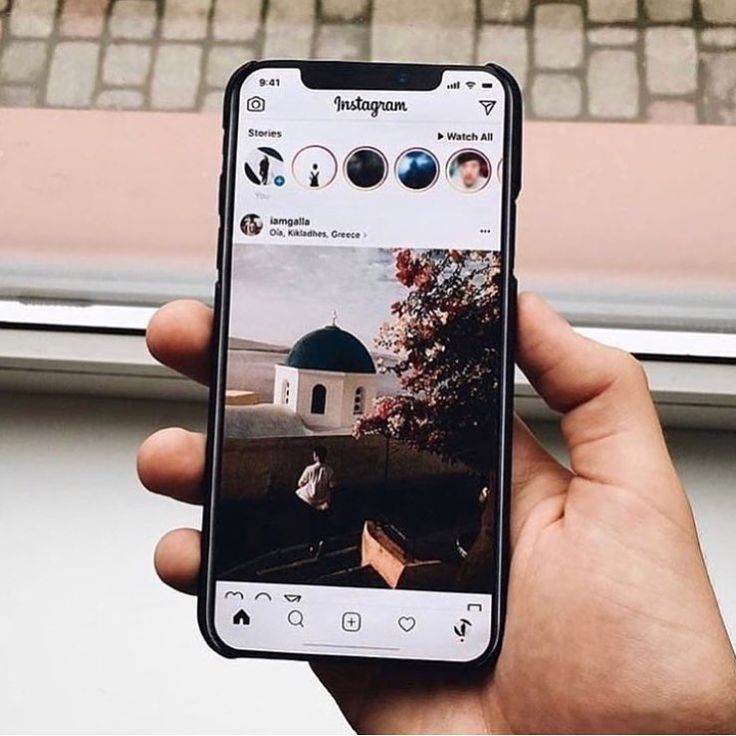 Similarly, if you post 20 emojis that loosely relate to a post, you might just annoy your followers or come off as desperate.
Finally, if you want to share your content on your other, connected social media sites (like Facebook or Twitter), simply toggle the button from the left to the right.
When you're ready to post, click "Share" in the top right.
Instagram Saved DraftsIf you're not ready to post right away, you can also save it to your Instagram Saved Drafts. Simply go back to the filtering and editing step, tap the back arrow in the top left, and select "Save Draft."
Typos happen to everyone! If you just posted something and notice a glaring spelling error, don't panic. Simply tap the three dots that appear on the right across from your name, then tap "Edit."
Make the adjustments you see fit and save them so it reflects on your Instagram. Otherwise, your post is complete and live for everyone to see.
Now that you know how to post to Instagram, you can begin creating content for the platform and connecting with your audience. If you're a business or brand, you'll want a solid strategy for earning engagement and awareness.
Editor's note: This post was originally published in November 2019 and has been updated for comprehensiveness.
Topics: Instagram Marketing
If you haven't posted on Instagram in a while, you may be confused as to where the button to start a post is, as the mobile app has shifted its appearance numerous times in recent years.
If instead you're familiar with the mobile app and wish you could seamlessly post to Instagram from your computer in the same manner as the app, you're now in luck. Instagram recently added a feature to its desktop website that is analogous to the posting method on mobile.
Here's how to post on Instagram from a mobile device or computer.
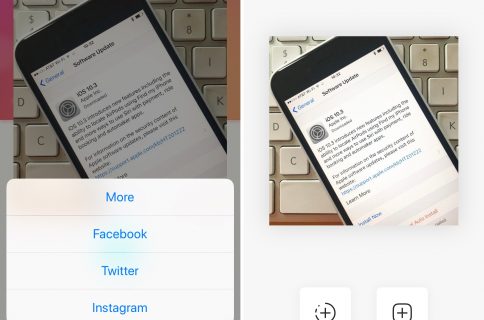
How to post on Instagram from a mobile device1. Open the Instagram mobile app and log in if needed.
2. From your home screen or profile, tap the + (plus) symbol in the upper-right corner, and select Post from the dropdown menu.
3. Select the photo (or video) you wish to post from your device's library or tap the camera icon to take a new image with your smartphone camera. To make a multi-image post – you can use up to 10 pictures in one post – tap the circle with an image of layered squares and then tap the images you'd like to use in order. Tap Next when you've selected your media.
Tap the circle with overlapping squares to add multiple photos or videos. Insider
 4. On the next screen, select a filter if you wish to use one, or tap Edit to make other changes to the image's crop, brightness, saturation, and more. Then tap Done.
Tap a filter or select Edit to customize your post. Insider5. You can now add a text caption and location, tag people, and pair other platforms – like Facebook or Twitter – to syndicate your post there, too.
Add a caption, tags, or other elements on the final page before posting. Insider
 6. Tap Share in the top-right corner to set your post live on Instagram.
How to post on Instagram from a computerYou once had to employ a convoluted process to trick Instagram into thinking you were using a mobile device in order to post from a computer.
Thankfully, Instagram has added a new, built-in feature that makes posting from its desktop website as seamless as posting from its mobile app. Here's how to post from a computer.
1. Go to Instagram's website in a desktop browser and log in if needed.
2. Click the + (plus) symbol at the top of the page to start a post.
Click the plus sign. Insider
 3. Drag image or video files into the pop-up window that appears, or click Select from computer.
Click to select images or drag media into the pop-up. Insider4. Your selected image will appear in the window. Use the magnifying glass in the bottom-left corner to zoom in on the image and crop it, or use the two arrow icon to the left of that to select a specific aspect ratio for the post. If you want to add more images, click the circle with overlapping squares in the bottom-right corner and tap the resulting plus sign to add media. When you're done, click Next.
5. Choose a filter or click the Adjustments tab to adjust levels of brightness, contrast, and other elements. Then click Next.
Choose a filter or make adjustments. Insider; Getty Images
 6. Click the photo to tag accounts, or use the form on the right of image to add a caption, location, or alt text (via the Accessibility dropdown), or turn off commenting (via the Advanced settings dropdown). Then click Share to post to your Instagram feed.
Add a caption, tags, and more from this window. Insider; Getty ImagesSteven John
Freelance Writer
Steven John is a freelance writer living near New York City by way of 12 years in Los Angeles, four in Boston, and the first 18 near DC. When not writing or spending time with his wife and kids, he can occasionally be found climbing mountains. His writing is spread across the web, and his books can be found at www.stevenjohnbooks.com.
Read moreRead less
Do you want to make a post with photos on Instagram, but you have never done it before? Our small but useful guide on this topic may be useful to you.
Posting a new post on Instagram* takes a little time and is not difficult. How to add a post to Instagram* from your phone: first you need to go to your profile through the official application, then follow the steps. nine0003
 If you don't like the result, you can undo the changes, in which case the picture will return to the way it was before editing. You can change all photos in the same way, each in its own way, only part of the frames from the post or not change any photo.
  nine0010
  We talked about this in the article "Large texts on Instagram *: why are they needed and how to design." nine0010
 We looked at how to post on Instagram* from Android. If you have iOS, the intuitive process will be the same, just some functions will be called differently.
There is another way to post from your phone. This is very convenient, for example, when you scroll through your gallery and find a photo that you urgently need to share with other users.
Step by step how to add a post to Instagram* from your phone through the gallery:
 We are looking for those photos or videos that we want to publish for our subscribers. At the bottom of the screen in the center there is a "Share" button. On Android, it often looks like an unfinished triangle with circles at the ends.
 You can also crop unwanted parts of the frame to make it more accentuated in the right place in the photo. Or do nothing, don't edit, just click on the blue arrow to go to the next block. nine0003 You can use any suitable hashtags and geotags of your choice
Our blog has a lot of articles about the benefits of hashtags and how to use them correctly in publications. For example:
And if you just need to quickly find hashtags for publication, you can use our bot "Gennady". You give him a photo or a word for which you need to pick up hashtags, and he gives you a whole cloud of hashtags that can be attached to a post. But we digress. While we were thinking about hashtags, our post has already been published.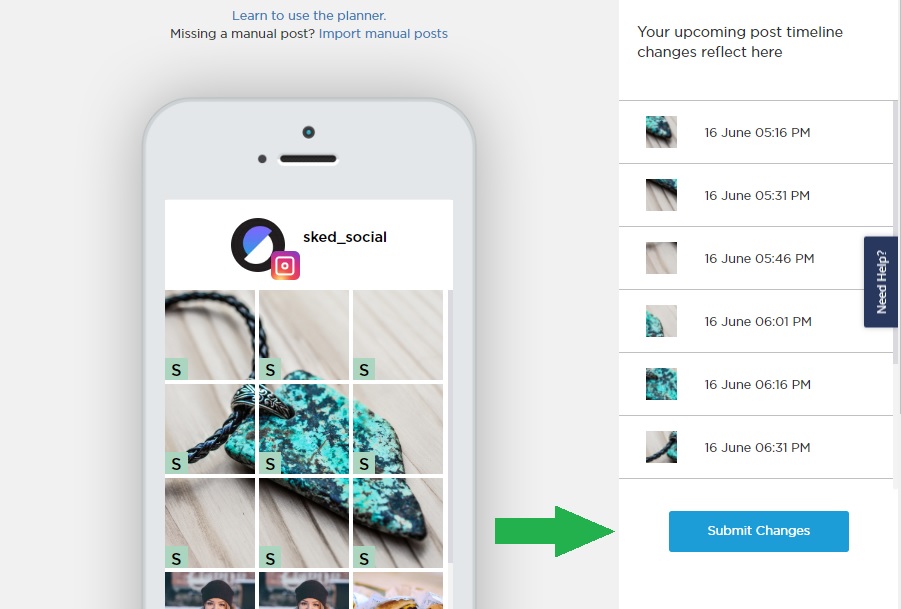
Let's say you tried both options, but the photo still doesn't want to be added. What to do in this case? Determine the cause and try to fix it:
 For the correct operation of the entire device, it is important to update the OS regularly.
 We have figured out how to post to Instagram* from your phone using the Instagram* app or photo gallery. We talked about how to change settings, edit images and their number, add geotags and tag people. We studied why the photo might not be added to the post, and what to do in each of the cases. You can find more information about Instagram*, posts and promotion in our blog.
When you create a photo or video on Instagram, you can choose whether or not to post it to each social network (such as Facebook or Twitter).
To set up the ability to share content on social networks:
Go to your profile and click the icon.
Select Settings.
Tap Account > Share to Other Applications and select a social network to enter login information and link accounts. nine0003
You can also link your Instagram account to your Facebook profile and manage cross-service features in the Account Center.
Learn more about how to opt out of posting on other social networks.
Hipstamatic
Hipstamatic users can post photos directly to Instagram. Just select a photo to post and click the Instagram icon. You can also add a caption to your photo and choose whether to allow Hipstamatic to automatically add the #hipstamatic hashtag and tags indicating what camera and lens the photo was taken with. nine0003
When you link your Instagram and Hipstamatic accounts and click the share button, your photo will automatically appear on Instagram. If tags are enabled for this photo, Hipstamatic will automatically add them to the photo caption. The attribute "Made by Hipstamatic" will appear under the photo caption. Tapping the Hipstamatic icon will open the app (if it's already installed on your device) or the Hipstamatic App Store page (if it's not already installed).
ミクシィ / Mixi (Japan) (iOS)
The item "ミクシィ / Mixi" will not appear in publish settings if the device language is not set to Japanese or the locale for Japan is not used. Regional settings do not change the phone interface language, but determine how dates and numbers are displayed.
Once you have taken and edited a photo (or an image saved on your phone), you can link your Mixi account in the Share section. To do this:
Log in to your account.
Confirm application permissions. nine0003
Click the Mixi icon to enable the publishing feature. The photo will be uploaded to Instagram and Mixi.
If you are not in Japan but have a Mixi account, you can link your Mixi account by setting the locale to Japan. To do this:
Go to your phone settings and then select General > Language and region > Region.
Select Japan from the list.
Select Done > Continue and return to Instagram.
The Mixi service must be available on the Publish screen. nine0003
Weibo (China) / 新浪微博 (iOS)
"新浪微博 / Weibo" will not appear in publish options if the device language is not set to Chinese or the locale for China is not used. Regional settings do not change the phone interface language, but determine how dates and numbers are displayed.