There are a lot of good reasons to delete photos from Facebook, so knowing how to do it as efficiently as possible is a useful skill if you want to make best use of the giant social media platform.
You might simply have uploaded an image in error, or you might simply come to dislike a given picture. And cleaning up your social media persona is important to do before you apply for a new job or to a new school, both of which require putting your best foot forward.
First, log into your Facebook account and find the photo in question, whether it's in an album or just in "Your Photos," and don't click on the picture to open it.
1. Hover over the image to be deleted; a gray box with a pencil icon will appear in the top right corner of the thumbnail image.
2. Click the pencil icon, which will display a popup message "Edit or Remove."
Hover over a picture to reveal the edit icon. Steven John/Business Insider3. At the bottom of the menu that appears, click "Delete This Photo. "
"
4. On the next popup window, click the blue box that reads "Delete."
Click "Delete" to finish the process. Steven John/Business InsiderAnd like that, it's gone from Facebook.
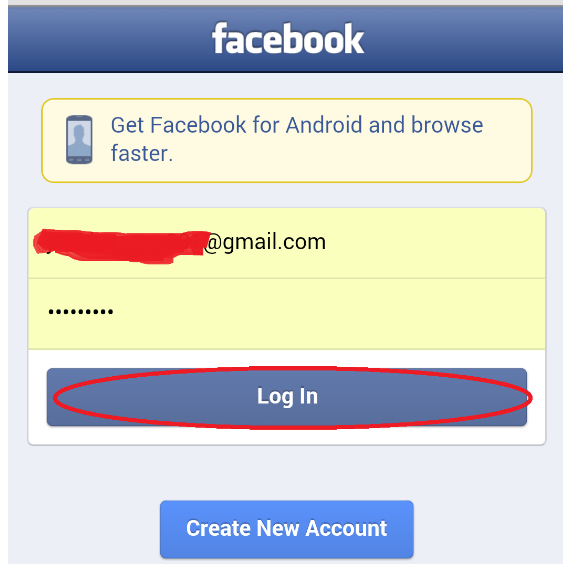
How to delete your Facebook photos from a mobile browserGo to the Facebook website on mobile and make sure you're logged in.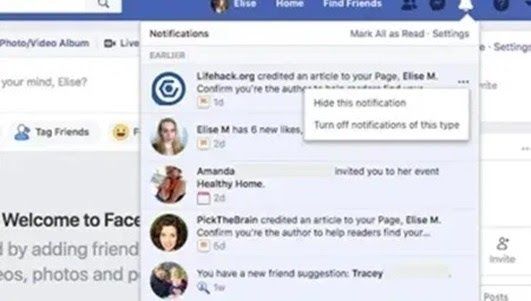
1. Locate the photo to be removed (remembering you can only delete images you uploaded) and tap on the photo to select it.
2. Under the image, tap the words "More Options."
Open the image to find the "More Options" button. Steven John/Business Insider3. Tap "Edit Photo."
4. Tap "Delete."
Tap "Delete." Steven John/Business Insider5. Under "Are you sure you want to delete this photo?" tap "Delete" to do so permanently.
And with that your picture is gone, deleted from Facebook on mobile, desktop, and everywhere else.
How to delete your Facebook photos from the mobile appThe process of deleting a photo from Facebook's mobile app differs slightly from a mobile browser deletion.
1. Open the Facebook app.
2. Go to your photos and tap the photo you'd like to delete.
3. Tap the three-dot menu in the top right corner of the photo's page.
4. Tap "Delete Photo" from the menu that pops up.
Tap "Delete Photo." Facebook; Business Insider5. Confirm your deletion on the next screen.
Tap "Delete" to confirm. Facebook; Business Insider
 Steven John
Freelance Writer
Steven John is a freelance writer living near New York City by way of 12 years in Los Angeles, four in Boston, and the first 18 near DC. When not writing or spending time with his wife and kids, he can occasionally be found climbing mountains. His writing is spread across the web, and his books can be found at www.stevenjohnbooks.com.
Read moreRead less
Facebook is the world’s largest social media website. It houses millions of photographs, videos, and posts on its network. So, it’s not surprising that an individual may consider deleting a few of them. Learning how to delete photos on Facebook is very beneficial to users because they can erase them from their timeline and other people’s feeds.
People may discard their pictures on this website for reasons like applying for a new job and moving on from a relationship. Whatever the purpose is, this article provides information on how to delete photographs on the website in 2021.
There are several reasons a person may want to know how to delete photos from Facebook. All they need is a mobile device with an internet connection. In just a few steps, one can quickly mass-delete their photographs with the app.
Removing a single picture from the website is very straightforward. People can complete the process in just a few steps and in no time.
Here’s how to quickly delete a photo:
Sadly, Facebook doesn’t have a mechanism for wiping out many images at a time. That doesn’t mean it is impossible to mass-delete pics. With a few tricks, a person can remove several photographs easily.
Here’s how to discard an album:
Here’s how to mass-delete photos:
A person can erase any self-made album. However, the ones created by Facebook, like “Videos” and “Cover Photos,” cannot be deleted using this method. One has to remove the pictures in these locations individually.
Learning how to delete pictures on Facebook by using the website is quite similar to operating the mobile web. A person can quickly delete the single snaps that were uploaded on the platform. However, the process of removing photographs on computers isn’t the same as the mobile versions.
Navigating through the web browser on how to delete photos on Facebook is easy. It is simpler than using a mobile device because it saves people from opening several pages to access a single picture.
Here are the best ways a user can do this:
A shorter way to discard single photographs:
 Several controls will appear at the bottom.
Even with the website, people can’t mass-erase their photographs. These photos can either be discarded one at a time or together in an album. Just like on Android and iOS, a new collection will have to be created for this.
How to delete an album:
How to mass-delete photos:

That will immediately wipe out all the pics at once. On the website, only the albums created by a user can be accessed with this method.
This technique is for individuals who do not have the application on their devices. It is not different from using the app, but it’s trickier when deleting pictures with it. Hence, this tutorial will show users how to remove Facebook photos with a mobile web browser.
The mobile web is slower and more disorganized than the mobile app and desktop website. Most times, the widgets on it are tightly packed and smaller than on other platforms. It’s no surprise that a person may have difficulty navigating it.
Here is the best way to delete single photographs with the mobile web:

A user can only remove the photographs and albums that were created and posted individually. The social network doesn’t provide an option to pick multiple pictures and delete them in one go. Moreover, it is more confusing to navigate through the site using the mobile web.
Below are the steps to follow:

A profile picture is one thing a user must always have to enable their friends and family to find them on the app. It serves as the first impression to contacts who search for their account. Now, in a situation where a person feels the image is old, Facebook provides the individual with an alternative to remove the pic immediately.
Here’s how to discard the profile photograph:
The cover image serves as a backdrop for the profile photo. It is a large banner graphic that introduces an individual’s business to other contacts. For multiple reasons, a user may wish to trash it.
The process is similar to that of removing profile images.
The steps are available below.

If a person deactivates an account, all the picture posts will be deleted.
Many people worry about their safety online. Various cyber-attacks may even advance in 2021. Hence, it’s no news that some users may prefer to keep their timeline images hidden. Facebook has a feature that allows people to protect their pictures without hassle.
If people are tagged to a picture they don’t like, they can efficiently use the untag option to exclude themselves from it. Removing tags from an image doesn’t delete photos from Facebook. However, it won’t show in a user’s newsfeed.
Steps on how to hide photographs on the timeline:
 It is located at the bottom of the screen on an iPhone and the top for Android.
A shorter method to hide snapshots from the timeline:
A person may be tired of getting unsolicited tags from friends and colleagues on the website. With time, too many tags can become annoying and offensive. Thus, many people wonder if there’s a way to stop it. Of course, this activity can be controlled.
Here are ways people can untag themselves from photos:

This social network doesn’t have a “Trash” album that stores deleted snaps for privacy. By removing photos from Facebook, the media will be lost on it. Besides, a user may want to operate a new account and not to lose the media on the present one.
Every deleted image can easily be accessed with these steps:
 Then tap “Create File”
Just like photographs, albums have to be deleted individually. There’s no button to remove all of them at once.
Here is a fast way to get rid of them quickly:
There are situations where a person may want to purge its account of all its pics.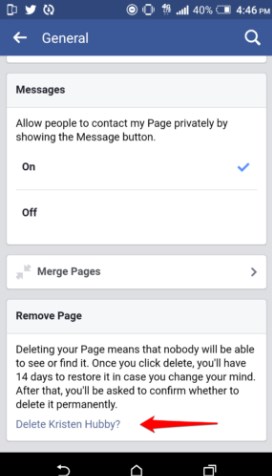 No doubt, this function will remain relevant in 2021. However, the site and other social networks like Twitter don’t provide their users with a single option to delete them all. Here are the best steps to follow on how to remove photos from Facebook.
How to erase every picture on a person’s account:
How to discard every photograph by using albums:
If a user follows these provided steps, knowing how to delete Facebook photos will be straightforward.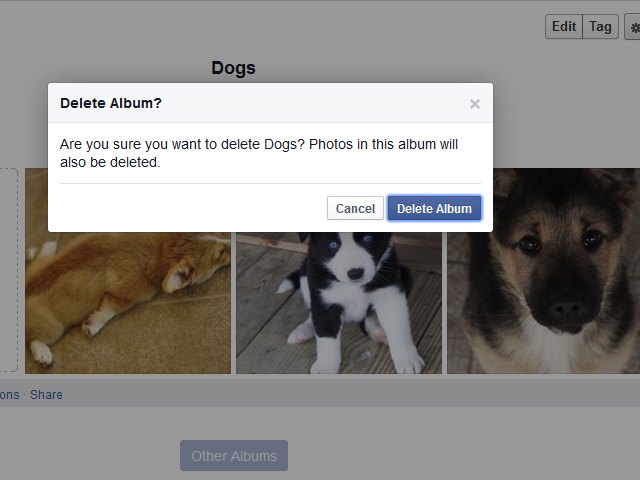 There are several ways to erase these images, depending on the device a person operates. Thankfully, none of these methods is complicated.
As mentioned earlier, an individual can’t erase images and albums created by the site. Now, if people post an undesired photograph, they can easily delete it. Individuals can also decide to report unwanted images to the website rather than discarding them on their own.
How helpful did you find this article? Please let us know in the comments below.
Published: April 07, 2021Updated: April 19, 2021
Matt Robinson
Matt is an experienced technical writer and translator skilled in writing targeted texts for a variety of audiences. He has a diversified background, including social media management of various products. He is a data-driven strategist and a passionate story-teller. He posts about all social innovations and delivers high-quality research and content to our readers.
In some cases, someone has posted photos for your iPhone to Facebook without your permission. And then the photos will also be in the albums. This is puzzling. Here is the way you can delete photos on your Facebook profile. To prevent others from seeing them even if they clicked See photos of me in the Facebook app.
1. Find More than on your Facebook iOS in the right corner. Press the button in the form of three horizontal lines.
2. Select the second option Photo .
3. Select a photo that someone added without notice. Click this photo and enlarge it.
4. Select the third option in the Facebook application. Sometimes we may call it Tag button.
5. When you see your tag, click it to X appear.
6. After that, you can click on X to delete photos in the Facebook app.
Although you can't delete another person's photos on Facebook iOS, you can untag your own photo on Facebook. For now, the best thing to do is talk to that person to delete the photos. With the above method, you can solve the Facebook photo deletion issue. You can keep having fun with anyone else on Facebook.
Most of us know Facebook messenger well. We use it to chat with friends or make new ones. However, as we dig more into Facebook chat, some inevitable problems come to light. Sometimes we want to delete photos on Facebook messenger while chatting for various reasons, it's not that important anyway. In general, we need solutions to solve this problem.
1. Log in to your Facebook messenger, click in the chat where the photos are.
2. Select and hold them, and then click the pop-up window with more options.
3. Click the small box in the right corner of the photos.
4. Click the Delete button. It sits in the bottom right corner of your Facebook messenger and looks like a trash can.
5. The last option will appear in Facebook messenger, asking you if you want to delete. Click icon Delete button. You can delete photos in a Facebook chat.
1. Log in to your Facebook messenger and click More button. A list of options will appear. When you see them, click on the Phone Setup button.
2. Press General and select clear storage.
3. After that, all the photos you sent earlier will be deleted. Select the images you want to delete.
The most useful method is to delete the chat record with this person. That is, you will delete the entire chat recording, which cannot be restored. So be careful if you only want to do this to delete Facebook photos.
This is a feature in Facebook iOS. With this feature, we can share our entire life with others through synchronization. Meanwhile, there is no need to log into the Facebook app to update. While we still need privacy, not all photos are suitable for posting on our Facebook app. Thus, we need to delete Facebook photos synced from iPhone. Moreover, we prefer to stop synchronization.
1. Log in to Facebook, tap the icon More than button in the upper left corner.
2. Click your name at the top and then click Your photos .
3. When you touch the photo, you will find a small pencil in the top right corner. Click them to delete Facebook photos synced from iPhone.
If you want to disable photo sync, you need to make a few more clicks to stop it.
1. Go to the photos, click on them. You will see Synchronization on the top page and click on it.
2. Touch the gear icon in the upper right corner. After that, tap to turn off photo sync.
After all this is done, you can photograph whatever you want without worry. Facebook is a place where many friends with the same interests gather, which everyone is free to express. Although you may have problems deleting photos on Facebook, you can solve them with the instructions mentioned above.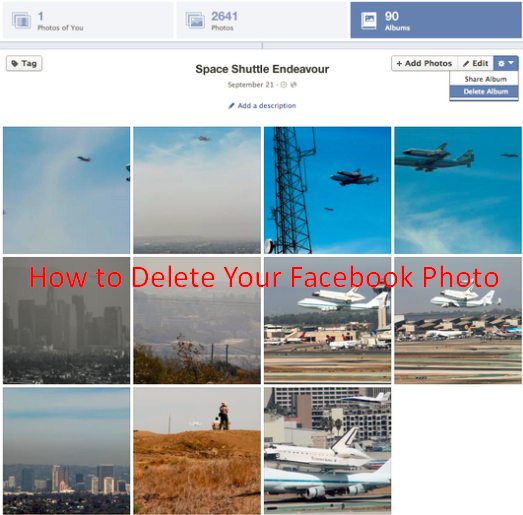 When you need to optimize your Facebook profile, removing Facebook photos is an essential skill. Just try it yourself now.
Win Download Mac Download
Gigabytes of multimedia content - photos and videos - are posted daily on social networks. Alas, quite often users, when uploading such content, forget one golden rule: what appeared on the Internet remains in it forever. Therefore, quite often questions arise about how to delete photos on Facebook.
Contents:
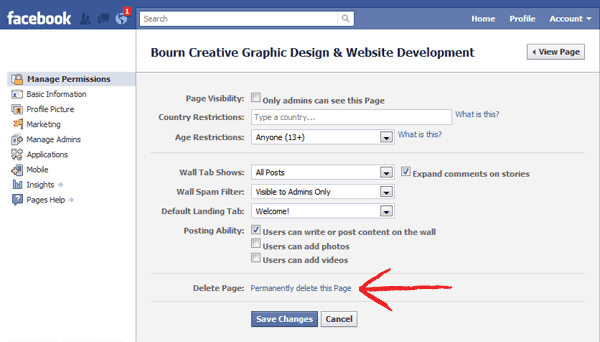
 However, the photos posted in the personal profile are collected in a special section, from where, if desired, the images can be easily deleted.
 How to do it:
Some users complain about this problem: on Facebook, you can change or edit your profile picture, but supposedly you can't delete it. In fact, there is no problem here, and you can delete the photo used as an avatar. To do this, do the following:

To change the main photo, you need to click on the camera image above the profile picture.
You will see a menu with which you can add a new picture, edit an existing one or add a frame. Video avatars are available for mobile applications.
The image used as the cover is removed in the same way as the image used for the avatar. In the albums, find "Covers" and perform the same steps there.
Erroneously or recklessly sent photos can be completely deleted (so that they are erased both for you and the recipient) only within 10 minutes after sending the message. After that, nothing can be changed, no matter how much you want it to be. Therefore, if you find an abnormal situation, do not waste a second.
To delete a photo in the messenger app for mobile devices, do the following:
To delete a photo in the messenger in the desktop version of Facebook, do the following:
Messages sent more than 10 minutes ago can only be deleted from your history. The recipient will retain both messages and other content attached to them, including images. If the recipient has already seen the photo sent to him within ten minutes, there is only one thing left: to contact the person with a personal request to delete this message. And the rest depends on your relationship with this user and on his personal qualities.
Delete a post with photos that you yourself posted somewhere on Facebook is quite real. If we are talking about fresh and relatively fresh publications, then they can be found in the social network feed. If a lot of time has passed since the publication of the publication, then you can find it in the chronicle.
Deletion in progress as follows:
By the way, the marks are very easy to remove. To do this, click on the three dots located in the upper right corner, and then click on the "Unmark" command.
Photo albums are a very popular way to post and store photographic content on Facebook. Albums are easy to organize and, if necessary, find the right photo.
The user can delete both individual photos and the entire album from his album. For this you need: