Chatbots are often touted as a revolution in the way users interact with technology and businesses. They have a fairly simple interface compared with traditional apps, as they only require users to chat, and the chatbots are supposed to understand and do whatever the user demands from them, at least in theory.
Many industries are shifting their customer service to chatbot systems. That’s because of the huge drop in the cost compared to actual humans, and also because of the robustness and constant availability. Chatbots deliver a degree of user support without substantial additional cost.
Today, chatbots are used in many scenarios, ranging from menial tasks such as displaying time and weather data to more complex operations such as rudimentary medical diagnosis and customer communication/support. You can devise a chatbot that will help your customers when they ask certain questions about your product, or you can make a personal assistant chatbot that can handle basic tasks and remind you when it’s time to head to a meeting or the gym.
There are a lot of options when it comes to where you can deploy your chatbot, and one of the most common uses are social media platforms, as most people use them on a regular basis. The same can be said of instant messaging apps, though with some caveats.
Telegram is one of the more popular IM platforms today, as it allows you to store messages on the cloud instead of just your device and it boasts good multi-platform support, as you can have Telegram on Android, iOS, Windows, and just about any other platform that can support the web version. Building a chatbot on Telegram is fairly simple and requires few steps that take very little time to complete. The chatbot can be integrated in Telegram groups and channels, and it also works on its own.
In this tutorial, we will be creating a Python Telegram bot that gives you an avatar image from Adorable Avatars. Our example will involve building a bot using Flask and deploying it on a free Heroku server.
To complete this tutorial, you will need Python 3 installed on your system as well as Python coding skills.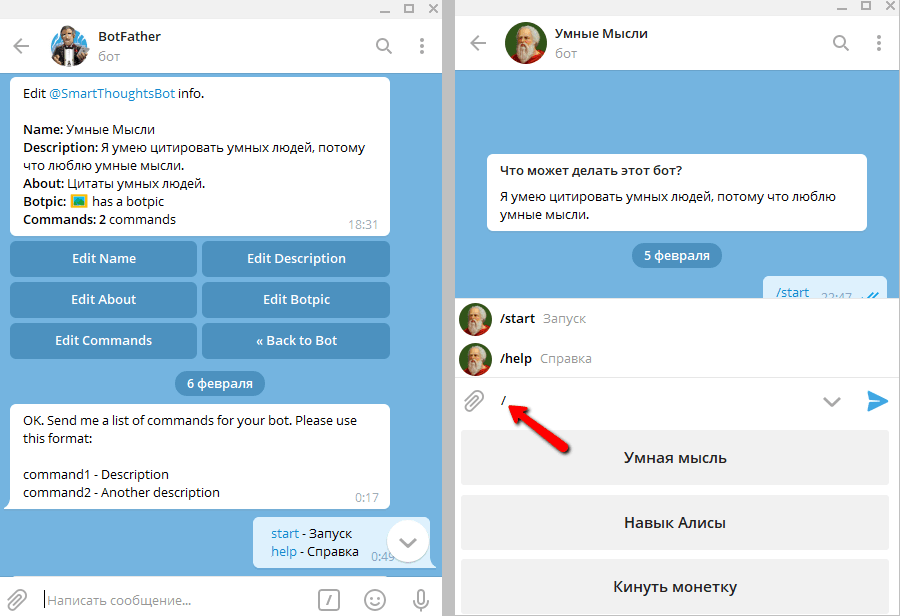 Also, a good understanding of how apps work would be a good addition, but not a must, as we will be going through most of the stuff we present in detail. You also need Git installed on your system.
Of course, the tutorial also requires a Telegram account, which is free. You can sign up here. A Heroku account is required, too, and you can get it for free here.
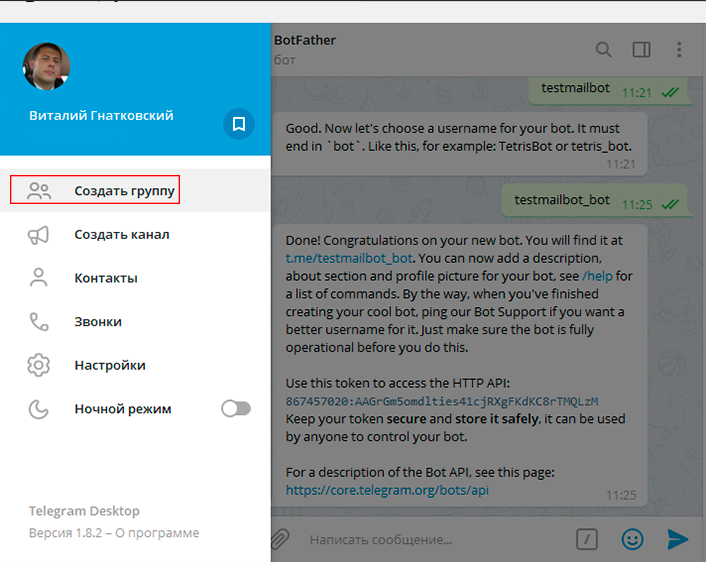
To create a chatbot on Telegram, you need to contact the BotFather, which is essentially a bot used to create other bots.
The command you need is /newbot which leads to the following steps to create your bot:
Your bot should have two attributes: a name and a username. The name will show up for your bot, while the username will be used for mentions and sharing.
After choosing your bot name and username—which must end with “bot”—you will get a message containing your access token, and you’ll obviously need to save your access token and username for later, as you will be needing them.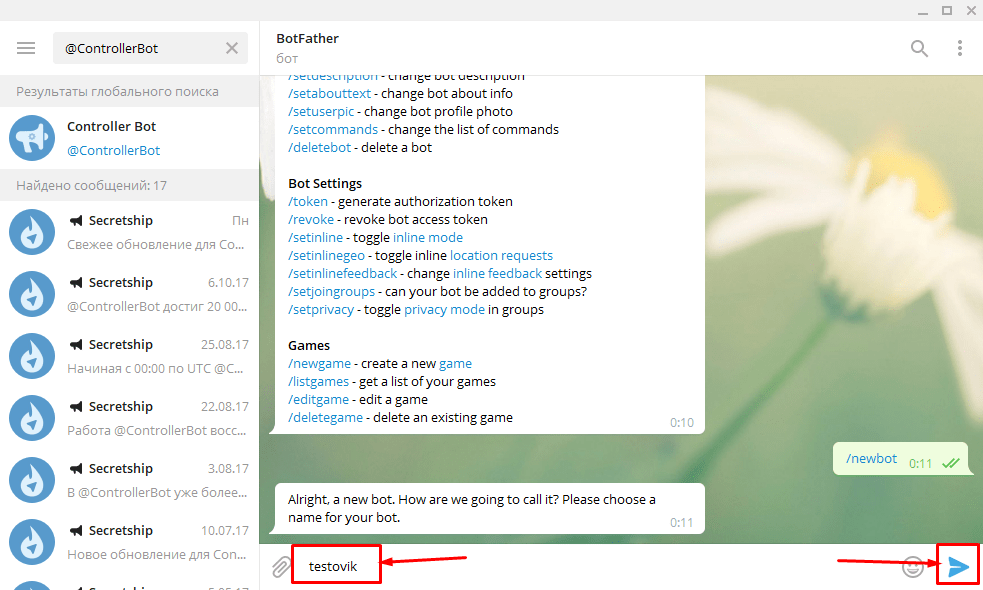
We will be using Ubuntu in this tutorial. For Windows users, most of the commands here will work without any problems, but should you face any issues with the virtual environment setup, please consult this link. As for Mac users, this tutorial should work just fine.
First, let’s create a virtual environment. It helps isolate your project’s requirements from your global Python environment.
$ python -m venv botenv/
Now we will have a botenv/ directory which will contain all the Python libraries we will be using. Go ahead and activate virtualenv using the following command:
$ source botenv/bin/activate
The libraries we need for our bot are:
You can install them in the virtual environment using pip command as follows:
(telebot) $ pip install flask (telebot) $ pip install python-telegram-bot (telebot) $ pip install requests
Now let’s browse our project directory.
. ├── app.py ├── telebot │ ├── credentials.py │ | . │ | you can build your engine here │ | . │ └── __init__.py └── botenv
In the credentials.py file we will need three variables:
bot_token = "here goes your access token from BotFather" bot_user_name = "the username you entered" URL = "the heroku app link that we will create later"
Now let’s go back to our app.py and go through the code step by step:
# import everything from flask import Flask, request import telegram from telebot.credentials import bot_token, bot_user_name,URL
global bot global TOKEN TOKEN = bot_token bot = telegram.Bot(token=TOKEN)
Now we have the bot object which will be used for any action we require the bot to perform.
# start the flask app app = Flask(__name__)
We also need to bind functions to specific routes. In other words, we need to tell Flask what to do when a specific address is called. More detailed info about Flask and routes can be found here.
In our example, the route function responds to a URL which is basically /{token}, and this is the URL Telegram will call to get responses for messages sent to the bot.
@app.route('/{}'.format(TOKEN), methods=['POST']) def respond(): # retrieve the message in JSON and then transform it to Telegram object update = telegram.Update.de_json(request.get_json(force=True), bot) chat_id = update.message.chat.id msg_id = update.message.message_id # Telegram understands UTF-8, so encode text for unicode compatibility text = update.message.text.encode('utf-8').decode() # for debugging purposes only print("got text message :", text) # the first time you chat with the bot AKA the welcoming message if text == "/start": # print the welcoming message bot_welcome = """ Welcome to coolAvatar bot, the bot is using the service from http://avatars.adorable.io/ to generate cool looking avatars based on the name you enter so please enter a name and the bot will reply with an avatar for your name.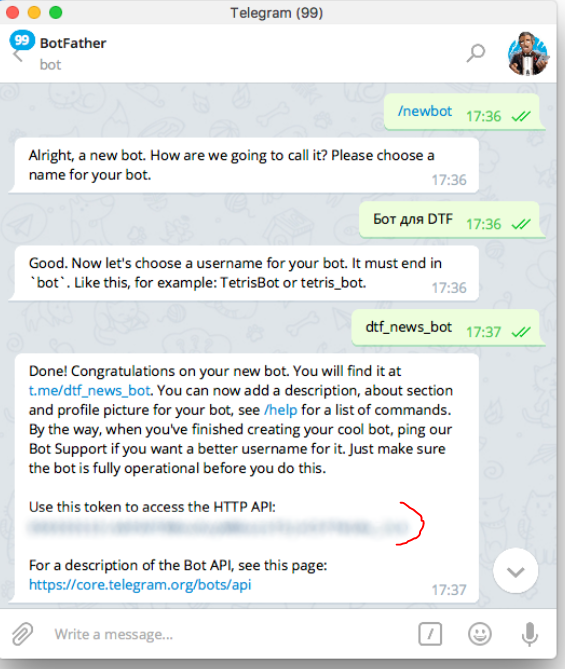 """ # send the welcoming message bot.sendMessage(chat_id=chat_id, text=bot_welcome, reply_to_message_id=msg_id) else: try: # clear the message we got from any non alphabets text = re.sub(r"\W", "_", text) # create the api link for the avatar based on http://avatars.adorable.io/ url = "https://api.adorable.io/avatars/285/{}.png".format(text.strip()) # reply with a photo to the name the user sent, # note that you can send photos by url and telegram will fetch it for you bot.sendPhoto(chat_id=chat_id, photo=url, reply_to_message_id=msg_id) except Exception: # if things went wrong bot.sendMessage(chat_id=chat_id, text="There was a problem in the name you used, please enter different name", reply_to_message_id=msg_id) return 'ok'
 The intuitive way to make this function to work is that we will call it every second, so that it checks whether a new message has arrived, but we won’t be doing that.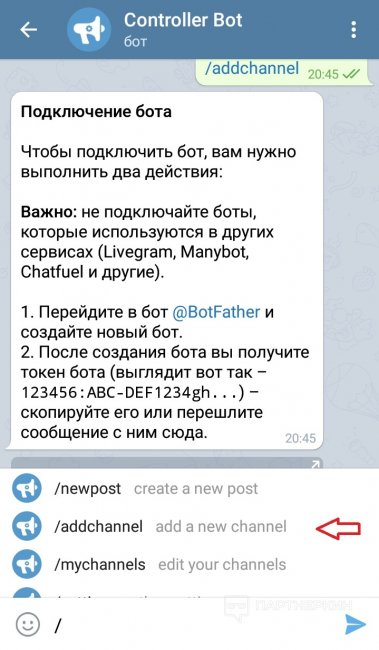 Instead, we will be using Webhook which provides us a way of letting the bot call our server whenever a message is called, so that we don’t need to make our server suffer in a while loop waiting for a message to come.
So, we will make a function that we ourself need to call to activate the Webhook of Telegram, basically telling Telegram to call a specific link when a new message arrives. We will call this function one time only, when we first create the bot. If you change the app link, then you will need to run this function again with the new link you have.
The route here can be anything; you’re the one who will call it:
@app.route('/setwebhook', methods=['GET', 'POST']) def set_webhook(): # we use the bot object to link the bot to our app which live # in the link provided by URL s = bot.setWebhook('{URL}{HOOK}'.format(URL=URL, HOOK=TOKEN)) # something to let us know things work if s: return "webhook setup ok" else: return "webhook setup failed" Now that everything is set, let’s just make a fancy homepage so that we know the engine is up.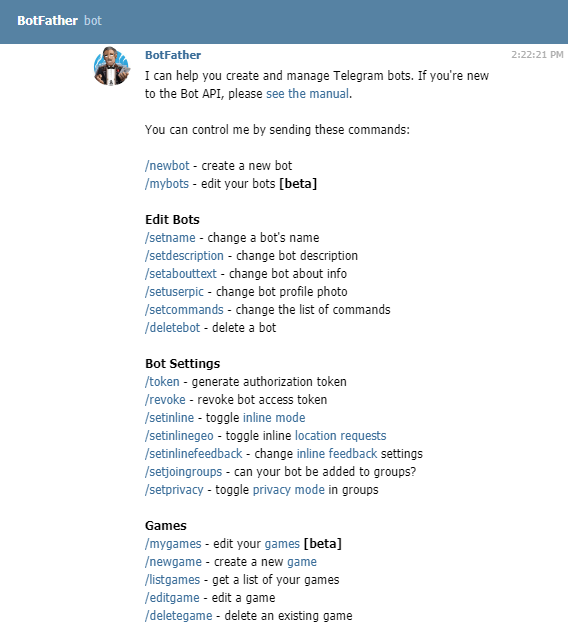
@app.route('/') def index(): return '.' if __name__ == '__main__': # note the threaded arg which allow # your app to have more than one thread app.run(threaded=True) Let’s take a look at the full version of app.py:
import re from flask import Flask, request import telegram from telebot.credentials import bot_token, bot_user_name,URL global bot global TOKEN TOKEN = bot_token bot = telegram.Bot(token=TOKEN) app = Flask(__name__) @app.route('/{}'.format(TOKEN), methods=['POST']) def respond(): # retrieve the message in JSON and then transform it to Telegram object update = telegram.Update.de_json(request.get_json(force=True), bot) chat_id = update.message.chat.id msg_id = update.message.message_id # Telegram understands UTF-8, so encode text for unicode compatibility text = update.message.text.encode('utf-8').decode() # for debugging purposes only print("got text message :", text) # the first time you chat with the bot AKA the welcoming message if text == "/start": # print the welcoming message bot_welcome = """ Welcome to coolAvatar bot, the bot is using the service from http://avatars. adorable.io/ to generate cool looking avatars based on the name you enter so please enter a name and the bot will reply with an avatar for your name. """ # send the welcoming message bot.sendMessage(chat_id=chat_id, text=bot_welcome, reply_to_message_id=msg_id) else: try: # clear the message we got from any non alphabets text = re.sub(r"\W", "_", text) # create the api link for the avatar based on http://avatars.adorable.io/ url = "https://api.adorable.io/avatars/285/{}.png".format(text.strip()) # reply with a photo to the name the user sent, # note that you can send photos by url and telegram will fetch it for you bot.sendPhoto(chat_id=chat_id, photo=url, reply_to_message_id=msg_id) except Exception: # if things went wrong bot.sendMessage(chat_id=chat_id, text="There was a problem in the name you used, please enter different name", reply_to_message_id=msg_id) return 'ok' @app.
 route('/set_webhook', methods=['GET', 'POST']) def set_webhook(): s = bot.setWebhook('{URL}{HOOK}'.format(URL=URL, HOOK=TOKEN)) if s: return "webhook setup ok" else: return "webhook setup failed" @app.route('/') def index(): return '.' if __name__ == '__main__': app.run(threaded=True)
 That’s the last bit of code you will write in our tutorial. Now we can progress to the last step, launching our app on Heroku.
We need a couple of things before we make our app.
Heroku can’t know what libraries your project uses, so we have to tell it using the requirements.txt file—a common problem is that you misspell requirements, so be careful—to generate the requirements file using pip:
pip freeze > requirements.txt
Now you have your requirements file ready to go.
Now you need the Procfile which tells Heroku where our app starts, so create a Procfile file and add the following:
web: gunicorn app:app
A bounce step: You can add a . file to your project so that no-use files don’t get uploaded to the repository.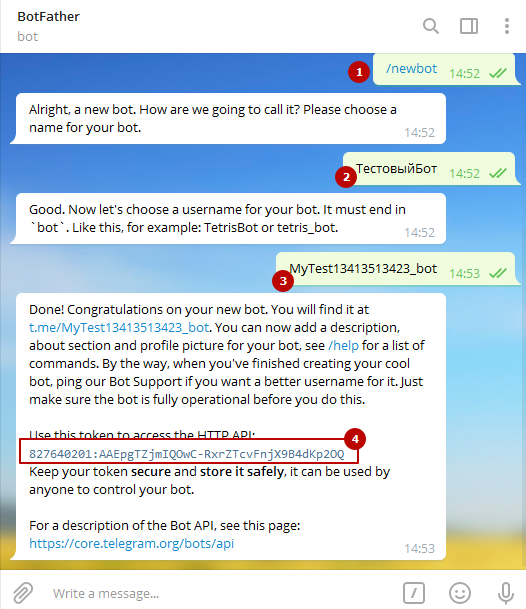 gitignore
From your Heroku dashboard, create a new app. Once you do, it will direct you to the Deploy page. Then, open the Settings tab in a new window and copy the domain of the app which will be something like https://appname.herokuapp.com/ and paste it in the URL variable inside credentials.py.
Now, go back to the Deploy tab and proceed with the steps:
Note: Windows and macOS users can follow the steps described here.
Log in to Heroku:
$ heroku login
Please note that this method sometimes gets stuck in waiting for login, if this happens to you, try to log in using:
$ heroku login -i
Initialize a Git repository in our directory:
$ git init $ heroku git:remote -a {heroku-project-name} Deploy the app:
$ git add . $ git commit -m "first commit" $ git push heroku master
At this point, you will see the building progress in your terminal.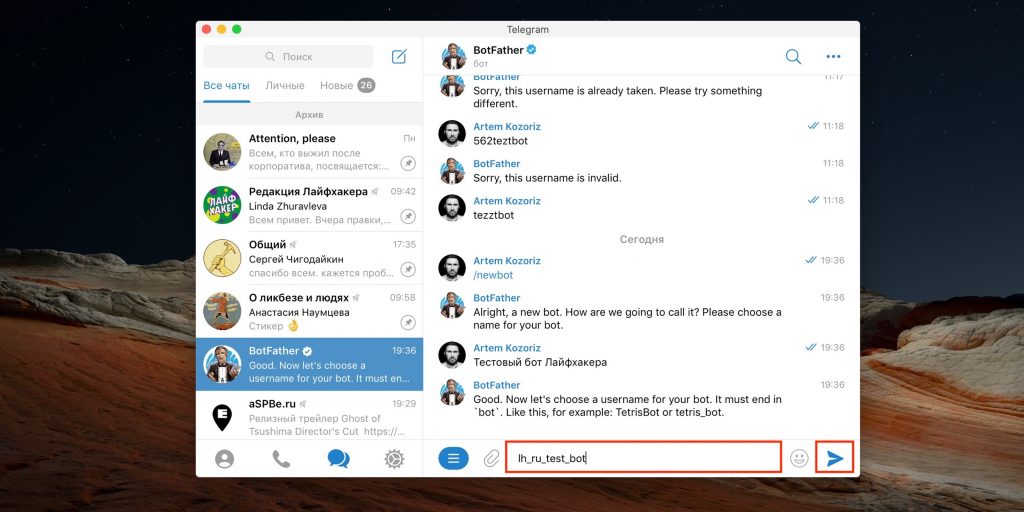 If everything went okay, you will see something like this:
remote: -----> Launching... remote: Released v6 remote: https://project-name.herokuapp.com/ deployed to Heroku remote: remote: Verifying deploy... done.
Now go to the app page (the link of the domain you copied before) and add to the end of the link /setwebhook so that the address will be something like https://appname.herokuapp.com/setwebhook. If you see webhook setup ok, that means you are ready to go!
Now you have your Telegram bot up and running, 24/7, without any need for your intervention. You can add whatever logic you want to the bot, so, for example, you can make your bot more realistic by adding a “typing” status and sending a photo status as follows:
The next code snippet from the respond() function:
if text == "/start": # print the welcoming message bot_welcome = """ Welcome to coolAvatar bot, the bot is using the service from http://avatars.adorable.io/ to generate cool looking avatars based on the name you enter so please enter a name and the bot will reply with an avatar for your name. """ # send the welcoming message bot.sendChatAction(chat_id=chat_id, action="typing") sleep(1.5) bot.sendMessage(chat_id=chat_id, text=bot_welcome, reply_to_message_id=msg_id) else: try: # clear the message we got from any non alphabets text = re.sub(r"\W", "_", text) # create the api link for the avatar based on http://avatars.adorable.io/ url = "https://api.adorable.io/avatars/285/{}.png".format(text.strip()) # reply with a photo to the name the user sent, # note that you can send photos by url and telegram will fetch it for you bot.sendChatAction(chat_id=chat_id, action="upload_photo") sleep(2) bot.sendPhoto(chat_id=chat_id, photo=url, reply_to_message_id=msg_id) except Exception: # if things went wrong bot.
sendMessage(chat_id=chat_id, text="There was a problem in the name you used, please enter different name", reply_to_message_id=msg_id)
As you can see in the snippet, we added a typing action when we are about to send the information about the bot which is in text format, and added an upload photo action when we are about to send a photo to make the bot more realistic. More actions can be found here.
You can also change the bot image and description from the BotFather channel to make it more friendly.
Many more simple examples of telegram bots can be found on the python-telegram-bot page on GitHub.
You can build upon our bot and make it the next super AI bot—all you need to do is to integrate your logic in the respond() function. For example, your logic can be in a separate module and can be called inside of the respond() function like so:
. ├── app.py ├── telebot │ ├── credentials.py │ ├──ai.py │ | . │ | you can build your engine here │ | .│ └── __init__.py └── botenv
And inside of ai.py :
def generate_smart_reply(text): # here we can do all our work return "this is a smart reply from the ai!"
Import it now in the app.py :
import re from time import sleep from flask import Flask, request import telegram From telebot.ai import generate_smart_reply from telebot.credentials import bot_token, bot_user_name,URL
Then just call it inside of the respond() code.
def respond(): # retrieve the message in JSON and then transform it to Telegram object update = telegram.Update.de_json(request.get_json(force=True), bot) chat_id = update.message.chat.id msg_id = update.message.message_id # Telegram understands UTF-8, so encode text for unicode compatibility text = update.message.text.encode('utf-8').decode() # for debugging purposes only print("got text message :", text) # here call your smart reply message reply = generate_smart_reply(text) bot. sendMessage(chat_id=chat_id, text=reply, reply_to_message_id=msg_id)
 Now you can have your bot work the way you want—go ahead and create the next big thing!
I hope you had fun learning how to create a Telegram bot in Python.
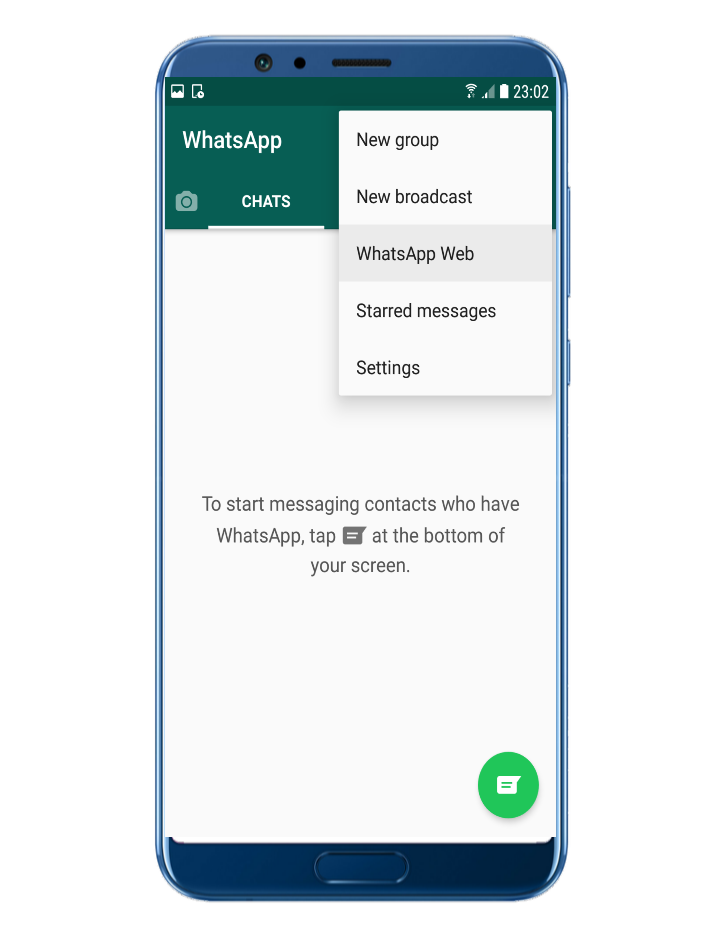
Related: Create a WhatsApp Chatbot, Not an App
A Telegram bot is automated software created to help a user meet their needs with minimal interaction with the system and deliver the best results by understanding what the user says.
Telegram bots have some issues considering using end-to-end encryption, as they use a different encryption technique than the one used in user messages. This makes bots vulnerable an enables attackers access chat messages, so users should be careful.
Flask is a micro web framework written in Python. We used it to build our web server with minimal effort.
Heroku is a cloud Platform-as-a-Service (Paas) with support for several programming languages. In this tutorial, we use it to host our logic and keep it running all the time.
Twitter LinkedIn Facebook Email
APPLIES TO: SDK v4
You can configure your bot to communicate with people using the Telegram messaging app. This article describes how create a Telegram bot and connect it to your bot in the Azure portal.
Tip
For information about which features are supported on each channel, see the channels reference article.
Create a Telegram bot with BotFather before connecting your bot to Telegram.
Start a new conversation with the BotFather.
Send /newbot to create a new Telegram bot.
When asked, enter a name for the bot.
Give the Telegram bot a unique username. Note that the bot name must end with the word "bot" (case-insensitive).
Copy and save the Telegram bot's access token for later steps.
Now that you have an access token, you can configure your bot in the Azure portal to communicate with Telegram.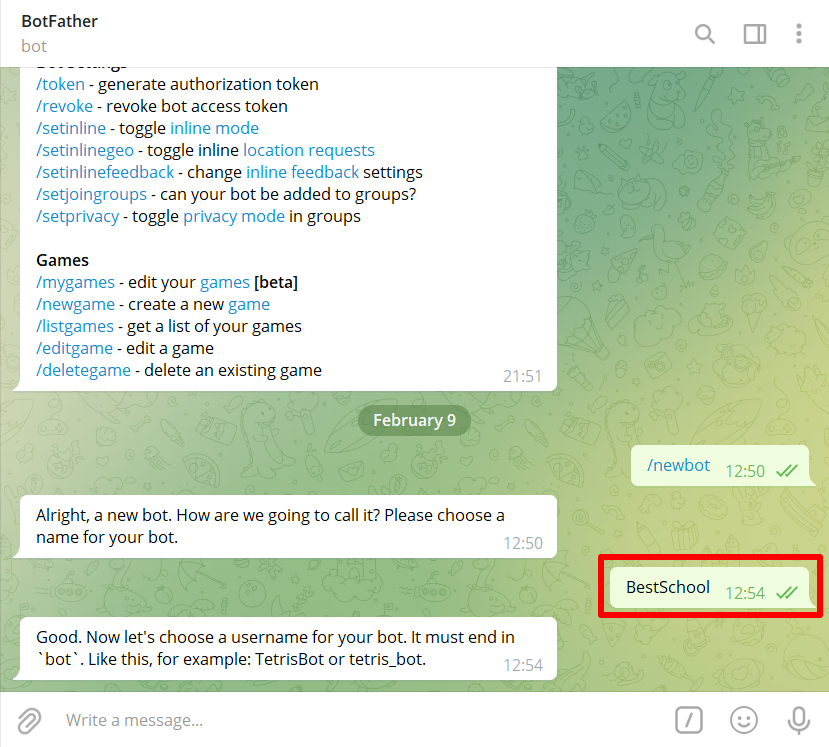
Your bot's now successfully configured to communicate with users in Telegram.
For information about using Telegram-specific actions in messages, see how to Implement channel-specific functionality.
View all page feedback
Chatbot is an automated multifunctional assistant that can show information to subscribers and collect information on demand according to pre-prepared scenarios.
Follow the step-by-step instructions to create your first Telegram messenger chatbot or connect an existing one to the SendPulse service for further customization.
If you already have a bot, skip the first step and go straight to the second.
Open the Telegram messenger, log in to your account or create a new one.
Step 1. Enter @BotFather in the search box and select a bot.
The official Telegram bot will have a blue confirmation sign next to the name in the form of a checkmark.
Step 2. Click Run to activate the BotFather bot.
In response, you will receive a list of commands for managing bots.
Step 3. Select or type and send the command /newbot .
Step 4. Give the bot a name - clients will see this name when communicating with the bot. And the nickname of the bot - you can use it to find the bot in Telegram. The nickname must be unique, not repeat the existing ones in the database, and end with the word "bot".
After you select a suitable name, the bot will be created. You will receive a message with a link to the bot t.me/ , recommendations for setting up an avatar, a description of the bot, and a list of commands for setting up the bot.
You will need a token to connect the bot to SendPulse. Copy the value of the token and go to the last point.
Step 1. Go to the @BotFather bot and enter the command /token .
You will see buttons with created bots.
Step 2. Select the bot you want to connect.
Copy the value of the token.
Go to the Chatbots section of your SendPulse account.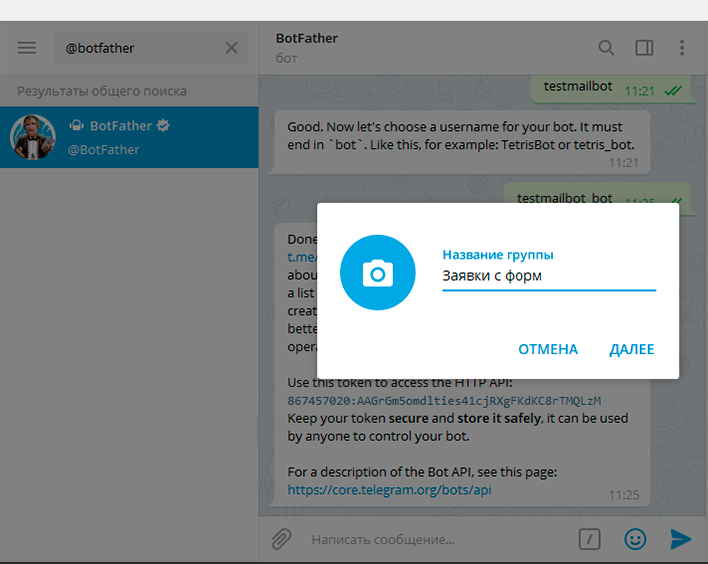 If you did not have connected channels before, click on the "Connect Channels" button.
If you have already connected bots, go to the "Manage Bots" section and click "Add Bot". You can also select "Connect" next to the desired channel.
In the "Telegram" section, enter the access key - the token received in the created bot. Click Connect.
Click the "Subscribe to bot" button. This way you can test every message and thread and send them to yourself before implementation.
You will be redirected to the "Telegram" application, click on the "Start" button and you will subscribe to your bot.
After successfully connecting the chatbot, you will receive a welcome chain, the bot will appear in your list of bots, and you can start creating welcome and trigger chains, mass mailings.
Subscribers are not automatically imported. After connecting, you will be able to collect an audience using the subscription widget or by sharing a link to the t. me/
me/
Connect Telegram chatbot
Updated: 03/06/2023
You can create a bot in Telegram without programming. Follow the instructions and launch your first chatbot for free in 15 minutes.
103 405 views
Let's create a bot that will greet, ask a question with multiple answers and respond to button presses.
Step 1: Create a developer account
1. Register on botmother.com using your email (you will receive a confirmation email) or sign in with Google.
2. Click the "Create a new bot" button (bottom right).
3. Select Empty Bot.
Before you open constructor is a place where you can develop a bot and add features.
On the left is a menu with constructor sections. On the right is a tab with components and screens. In the center is a working area for development. In the lower left corner - feedback widget . If you have any difficulties, write to support.
Bot logic is created using screens - these are bot messages (steps, stages), inside which there can be various functions. The "Start screen" is automatically created - the first message from the bot.
You can add components to each screen - these are the functions and actions of the bot (for example, sending text, pictures, buttons, etc.).
All components are located on the tab on the right.
Step 2: Create greeting
1. In the "Components" tab, click on the "Message" component and drag it to the screen.
2. Write any text. For example, "Hello! This is my first bot.
3. Click the green Save button (lower right).
Step 3. Connect the bot to the messenger
In Telegram, chat bots are created using a special bot @BotFather. Through it, you can manage the bot's data, add a description, an avatar, etc.
Let's create a bot and give it a name:
1. Open the @BotFather bot in Telegram.
2. Write /newbot to him.
3. Think of and write the name of the bot. It will be displayed in contacts and chats. For example, "Hello, bot".
4. Come up with and write a username. It is used to mention the bot and in links. The username must be in Latin and must end with "bot". For example, "botmother_hello_bot".
Now you need to connect the Telegram bot to your developer account:
1. Open @BotFather again.
2. Copy the bot token.
3. Return to the designer, find and open the "Settings" section in the menu on the left.
4. Switch on the Telegram platform.
5. Click the Change button.
6. Paste the previously copied bot token.
7. Save the changes.
The bot is now connected to the constructor, which means it can respond to all users. Let's test?
1. Search Telegram for your bot by username.
2. Press Start (or Start). The bot should send a welcome message.
Excellent! Your bot can send a message.
Step 4: Add more features
Let's complicate the bot. Let him ask a question with multiple answers and send different messages depending on the user's choice.
Example:
Text: How are you?
First button: Good
Second button: Bad
To do this, add two more screens, buttons and an image:
1. Open the constructor.
2. Add two new screens. To do this, click the Add Screen button twice.
3. Save the changes.
You can change the names of the added screens by double clicking:
1. Double click the screen names.
2. Edit the texts. For example, "Screen Good" and "Screen Bad".
Let's add buttons that users can click on:
1. Move the "Buttons" component to the "Start Screen".
2. Write the text. For example, "How are you?".
3. Add two buttons.
4. Write the texts on the buttons. For example, "Screen Good" and "Screen Bad".
Each button must lead to a specific screen, which is specified in the button settings:
1. Press the first button.
2. In the Go To Screen field, select the Good Screen.
3. Press the second button.
4. Select another screen - Bad Screen.
5. Save your changes.
So, on the "Start screen" the user presses the buttons and gets to different screens. You need to fill them with content:
1. Move the Image component to the Good Screen.
2. Upload any image or insert a link to an image.
3. Save the changes.
Now let's fill in the following screen:
1. Move the "Message" component to the "Screen Bad" screen.
2. Write the text. For example, "Cheer up, everything will be fine!". You can add emoji.
3. Save the changes.