With the meteoric rise of mobile operating systems i.e. Android and iOS, Facebook has changed the design of its mobile version and apps. In the process, it enabled Facebook to launch many features, usually reserved for the desktop version, for its mobile versions, including the ability to create a page on mobile.
Facebook does not only allows but also encourages people to create pages using its mobile version or app. It has even launched a separate feature-rich app, called Facebook Pages Manager, for those wanting to manage their pages on mobile. Even Facebook Lite, the lightweight app of the social media site, has a considerable number of functionalities, including the ability to create and manage business pages.
In this lengthy tutorial, we will be discussing how you can create a Facebook page on your mobile version (both on normal mode and classic mode), Facebook mobile app, Facebook Lite and Facebook Pages Manager. If you want to save your time, you can tap or click on any of the links to follow the method of your convenience.
 However, you can skip these options as well.
Now that you have created a Facebook page, you may want to add a new admin to assist you. You may also want to invite your friends to like your new page. Normally, people try to attain the first 100 likes for their page by inviting their friends.
In addition, every page on Facebook is entitled to a dedicated sub-URL or username, provided that it is available; learn how you can create or change the username for your page.
Create a Facebook Page on Facebook app
Create a Facebook Page using Pages Manager
Create a Facebook page on Facebook Lite
Update (15 May 2020): The following method does no longer work. Facebook appears to have disabled creating a page on the classic or mbasic mode.
The classic mode refers to the basic version of Facebook. In the past, this basic version used to be the normal mobile version. It may be accessed to by going to mbasic.facebook.com.
However, the basic version, nowadays, is obsolete. People still use this version if they have slow internet connection or want to save data. Also, the Facebook free version is also effectively the basic version, except that it does not load images and other multimedia and external contents.
If you want to create a Facebook page using the basic version nonetheless, you just have to use mbasic parameter instead of mobile or m.
Contributor
In this article, you will learn how to create the Facebook App ID which opens a lot of opportunities for you.
Following steps to create Facebook APP:
1. Log in to your Facebook account.
2. Go to Facebook for Developers, click on My Apps and press Create App.
3. Set the Display Name of your application.
4. Enter the Contact Email.
5. Navigate to Facebook Login and press the Set up button.
6. Select Web from the displayed platforms.
7. Go to the Settings section and choose Basic.
8. In the appeared menu some of the fields are generated automatically. All you need to do is fill in the rest of them, such as App Domains and Contact Email in particular. Please note these two are obligatory options. Privacy Policy URL and Terms of Service URL are optional, but we recommend you NOT to leave them blank. You will not be able to switch your application to live mode without them being set.
9. Once you've filled all the necessary fields, press the Add Platform button to move to the next step.
10. Select the Website from the list.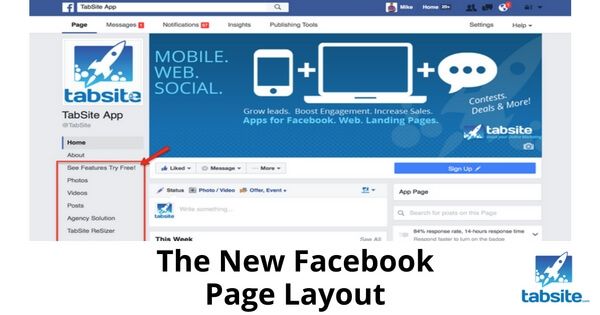
11. Set the website URL address in the Site URL field and press the Save Changes button.
12. Navigate to Facebook Login section and press Settings.
13. Enter you Valid OAuth Redirect URLs. It differs depending on the software you are using it for. Usually, you can get OAuth Redirect URL in the software settings info.
14. Make sure Enforce HTTPS option is enabled due to the Facebook Enforce HTTPS default setting.
15. Press the Save Changes button.
Once you've saved all the changes Switch your Facebook APP to Live Mode.
15. Go to Settings > Basic. Here you can find the App ID and App Secret that you will need for software that uses Facebook APP.
If your APP requires "manage_pages" and "publish_page" permissions read this article to learn how to request them.
However, you shouldn't miss the opportunity to explore other features Facebook offers you: Facebook pixel and Magento 2 Facebook Shop.
Does it help or not? Let us know in the comments below.
Mari is a content writer and customer care manager with more than 5 years of experience. She is a constant source of stunning content ideas who can't get enough of the latest content marketing trends. Mari is an avid learner, a bookworm, and a real wit....
Previous How to Create a New Facebook Page?
Next Magento 2 Blog Comments Configuration
People Also Searched For
Natalia Shpitula
Updated by
Loading. ..
..
Let's start with three facts about Facebook that are important for entrepreneurs: Over the past year, the number of monthly active users has increased by 12 percent: by September 2020, there were 2.74 billion. Every day, 1.82 billion people are active on the platform.
To make platform users aware of your products, create a business page — a company account where you can post news, answer questions from subscribers, and attract new customers. Why can't the same be done with a personal profile? Additional tools are available in a business account to help you manage promotion more efficiently:
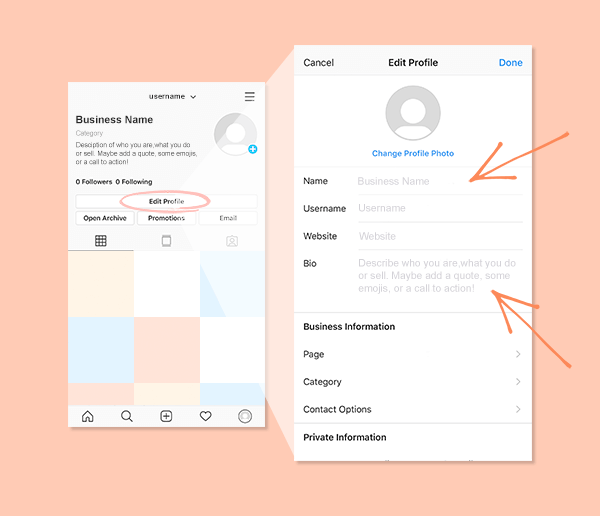
Creating a business profile will not take much time if you prepare all the elements in advance: come up with a name, description and process images.
Follow this link and sign in to your personal account, which will be used to manage your business account. On the left you will see three fields to fill in:

After filling in the data, click "Create" and proceed to filling in and settings.
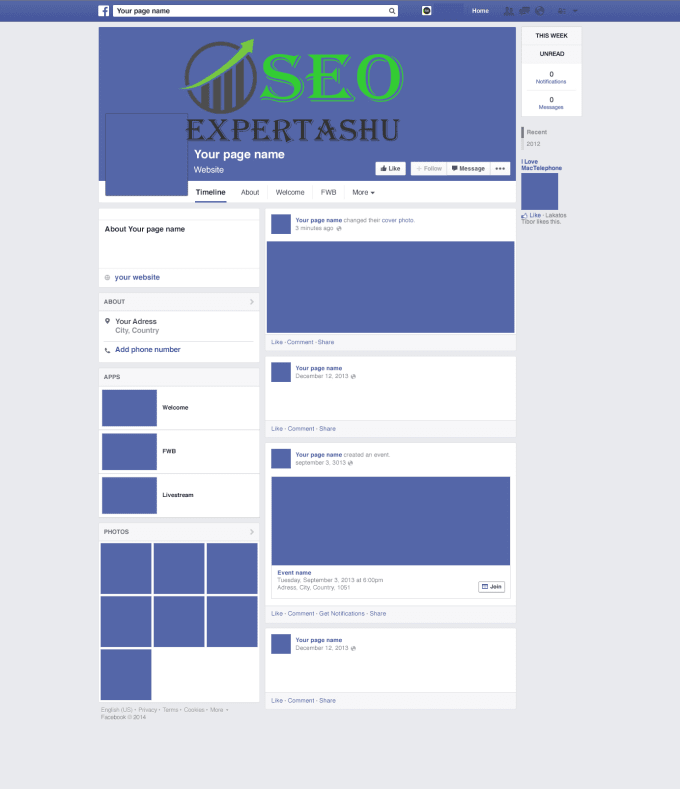
A profile photo (avatar) will help you remember and recognize the company: this image will appear in search results, next to your posts, comments and private messages. An effective avatar reflects a brand’s personality—a logo does the job best.
The minimum image size is 180×180 pixels. You can create a logo adapted for social networks in a few seconds using the Logaster online generator.
Need a logo for your Facebook business account?
Create it for free in a couple of clicks! At any time you can go back and edit the image
The cover complements the impression of the brand. It can display:
The cover can be changed depending on the season, product line updates or special offers. The dimensions of this photo for computers are 820x312 pixels, for mobile devices - 640x360. Also on the cover you can place a video lasting from 20 to 90 seconds with a maximum resolution of 1080 pixels.
In Settings, you can:
 You can find a full description of the roles in the settings.
 This is one of the main elements in any advertisement, from billboards to social media posts. Facebook allows you to place it on the blue button at the top of the page.
Click on the "Edit button" block on the right under the cover, and select from the options: "Place an order with us", "Contact us", "Learn more", "Make a purchase or donation", "Download the application". You can also specify a link to which the call button will lead, for example, a website, landing page or YouTube video.
 Choose a template and organize your tabs
 In Settings, go to Templates & Tabs to access the visual organization of your content.
The social network offers to choose a template for an account depending on the type of activity: a store, a charitable organization, etc.
Tabs help subscribers quickly find the sections they need: photos, videos, reviews, information about the company. You can manage tabs: remove irrelevant ones and reorder, putting the most important ones first.
After completing and setting up your account, see how it will be seen by the audience of the social network. To do this, select the "View as user" option. Make sure your profile and cover images match, your tabs are in the right order, and your call to action grabs attention.
The nuances of a social media marketing strategy are constantly changing depending on the trends and policies of Facebook. We will give basic recommendations, and we advise you to follow the changes in the market.
The more people who find out about your profile and subscribe to it, the more potential customers you get. To do this:
A brand's target audience (TA) is the group (or groups) of people for whom you are creating products. To successfully sell, you must understand what excites these people, how they communicate, where they live, what they do, how old they are. To make a portrait of the target audience:
Your task is not just to advertise the brand, but to create a loyal community around it. Choosing the right content will help you gain people's trust.
 Remember that sales in each post will alienate the audience. Post instructions and checklists, give advice, conduct surveys, share links to articles on your blog, or run contests.
 Facebook posts with images are 2.3 times more engaging than plain text. Use photo and video content to engage potential customers.
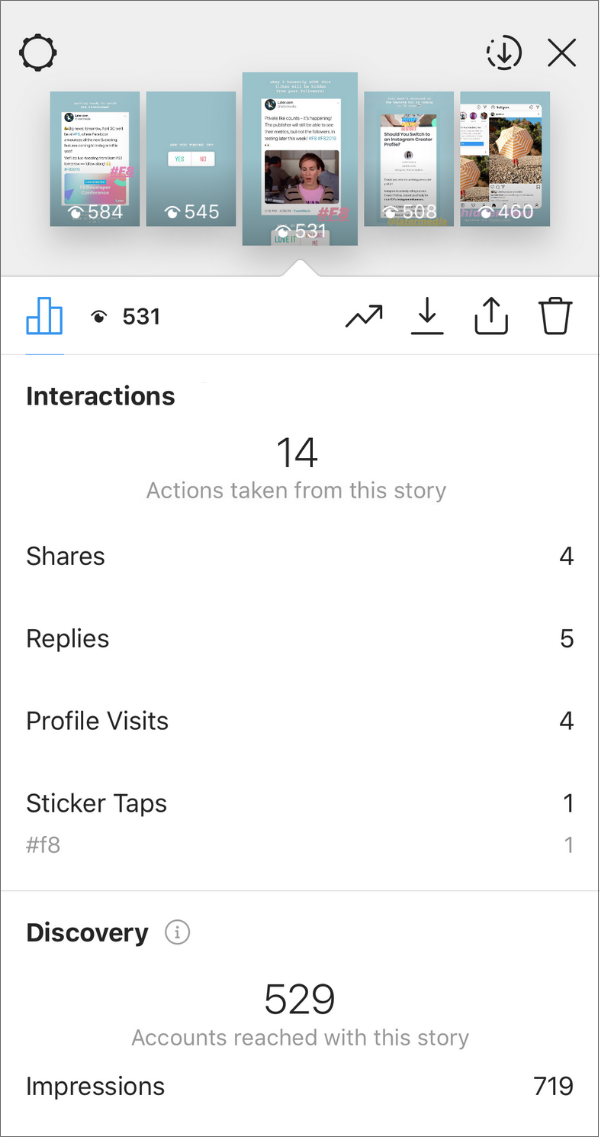
Track your results using the statistics section of your account settings to progress effectively. There you will see activity data for a certain period: reach, likes, traffic sources, etc. If these indicators fall, change the strategy and test different tools.
Facebook helps entrepreneurs reach potential customers from all over the world, reduce the distance between brands and consumers, and better understand their problems and needs. To make your promotion effective, start with analysis, create and fill out an account, test different tools, think carefully about content, and track analytics.
Updated by
Posted inHow To
Integration of your accounts in Webim and Facebook is registered as an application of the Facebook network. This article explains how to create and configure such an application.
Log in to Facebook using the link, enter the login and password of the exact account (account) Facebook on behalf of which the page was created (or will be created) and the integration will be registered. It is recommended to use the account that owns the page. If she has a different role on the desired page, Facebook will not provide access to her for integration.
NB
Integration access is limited to page administrators. Also keep in mind that losing access to this account will render the integration unmanageable. Therefore, it may be useful to create a separate account for these purposes.
If Page of your project has not yet been created, create it now. To do this, you can use our instructions.
Make sure your project has Privacy Policy and preferably End User Agreement/Terms posted on separate web pages. Otherwise, write them now.
Make sure that your project has a logo or other unique image that characterizes it, and that you have intellectual rights to it and the logo bitmap file. Otherwise, take care of the logo now (logo size is 1024 x 1024 pixels).
Make sure that the account Facebook is provided with reliable data that you can confirm in case of verification (name, surname, date of birth, e-mail address, phone number, photo, etc.), and also have a passport or other document ready (for example , driver's license) confirming the identity of this account. Otherwise, supplement or correct these data. Further Facebook may ask you for additional information.
Go to the home page of the Facebook for Developers service using this link. The developer page will open. The same account Facebook is used here as usual, but for those who start working with the service for the first time, it is required to additionally register their account. Click here Get started .
Facebook for Developers home page
This will open the welcome window. Click here Continue :
Facebook for developers welcome window
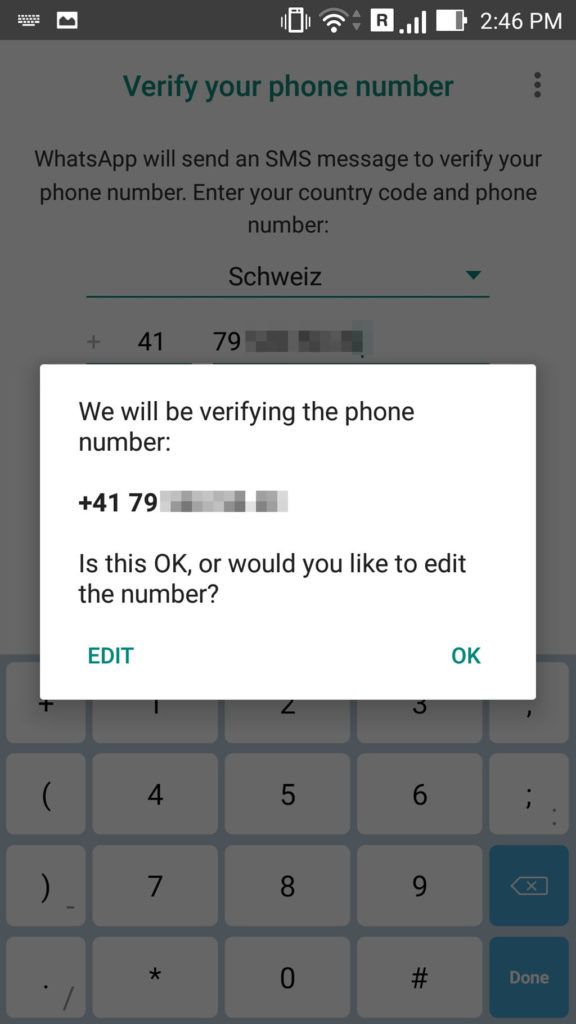
At this stage Facebook performs the first check. If you did not provide your phone number when registering or editing your account, an additional form may appear asking you to provide your phone number and verify it. If the additional form does not appear, proceed to the next step of this instruction.
After the welcome window, a page appears with a button Create app . Click it.
Page with Create Application button
In the application type selection window, select Business .
Selecting the type of Webim
application Then you need to specify Display name of the application (Display name) and App Contact Email . If necessary, please verify that you are not a robot (captcha).
Creating a Webim
ApplicationNext, the product setup page will open, displaying several sections for configuring the product. In the Messenger section, click the Set Up button.
Setting up the Webim 9 application0003
You will be taken to the Messenger settings for the app. Under Access Tokens click Add or remove pages . Select the page where you want to set up the integration (your company page) and click Next and then Done .
Adding page
In section Access tokens the page you added and button 9 will appear0207 Generate Token , clicking on which will open a confirmation window for generating a token. In this window, you will see a warning that, for security reasons, the generated access token will only be shown once.