Home > Transfer WhatsApp > 3 Ways to Send One or Multiple Photos from WhatsApp to Email
Olivia Tucker
Jun 04, 2021 (Updated: May 19, 2022)
3 min read
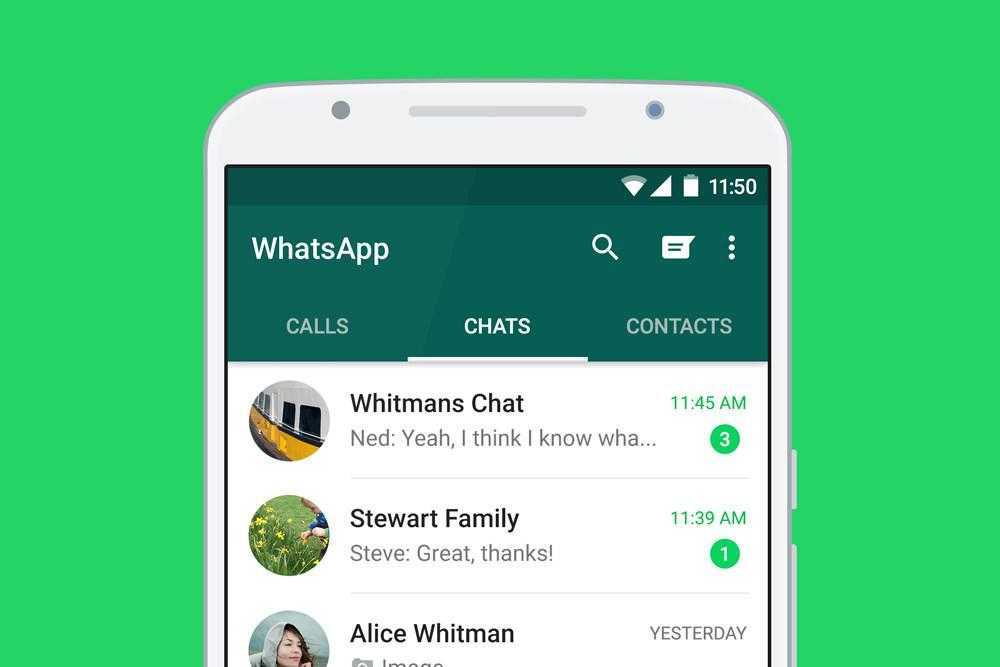
WhatsApp is one of the most prominent instant messaging services out there, making communication between friends, family and pretty much anyone you need to contact incredibly simple. Whether it be sharing messages, files, photos, or videos between one another.
For both Android and iPhone users, you may find yourself wanting to send a photo you received on WhatsApp, to one of your contacts in your emails. It may be something funny to share at work, or perhaps you got sent an important picture for work and need to send it to your boss.
This guide will take you through three methods to send or share photos from WhatsApp to email, depending on whether you want to send bulk photos or send them one by one.
Method 1. Bulk Export WhatsApp Photos and Send to Your Friends via Email
Method 2. Send Photos from WhatsApp to Email One by One
Method 3. Share Multiple Photos from WhatsApp to Email
Before we dive into the methods of sending photos from WhatsApp to Email manually, let's pause and think about how tedious and time-consuming it could be if we were to send them one by one. However, with a little helping tool you can make it much simpler. To find out how to bulk export photos from WhatsApp easily to be able to send them to an email address, then you must try using ChatMover. It is a WhatsApp managing application that can export all WhatsApp photos at once. And it supports all the latest Android and iOS versions, including iOS 15.
The best features for ChatMover:
Secure Download
Follow these steps to export bulk photos or media files from WhatsApp and send them to Email:
Step 1. Plug in your phone and open ChatMover – select the "Backup" option and follow the instructions to back up your WhatsApp first.
Step 2. Once you have successfully backed up your WhatsApp, head to the Export / Restore WhatsApp Backup menu option.
Step 3. Select the backup you just made and press "Export".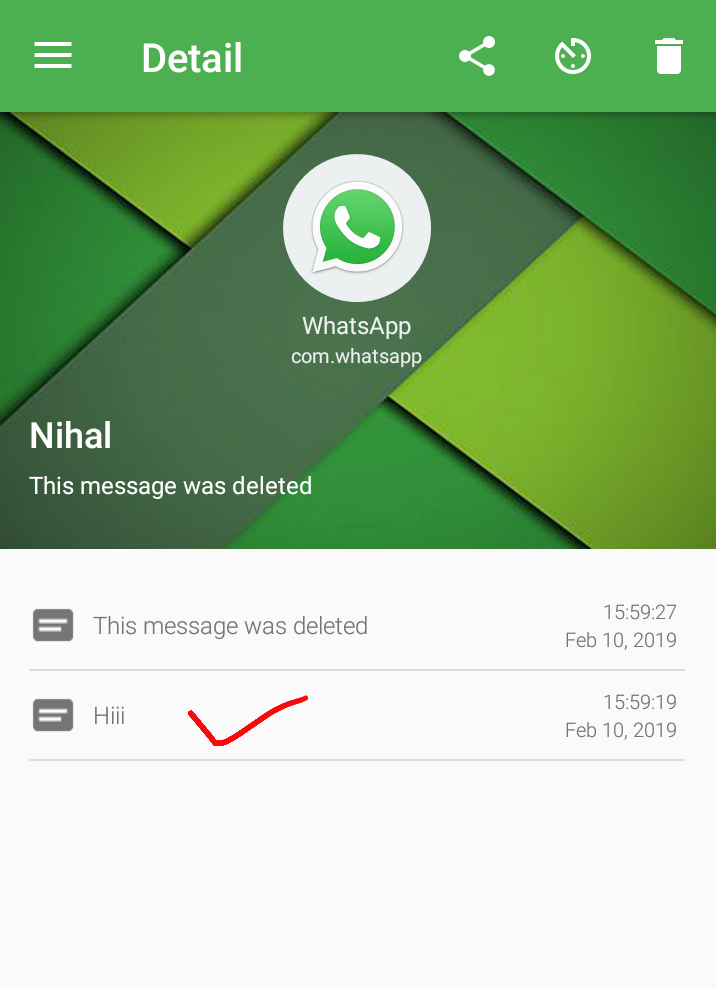
Step 4. Preview and Bulk Export Images – After exporting to your computer, you will be able to see your WhatsApp messages and attachments, including image files.
Step 5. You can then go to check the exported files on your computer and choose the photos you want to send to email.
Sometimes, you may not want to export the whole chat to an email, simply just wanting a single image to be shared. If that's the case, here's what to do:
If you own an Android device like the new Samsung S21 Ultra, the process is super simple. You must ensure that you're signed in to your email accounts on your phone.
Pros
Cons
On the assumption that you've got a few images to send through to someone via email, then sharing may take a while with the above method. At this time, you can try the method below.
For iPhone users, follow these steps:
If you're an Android user, sharing multiple photos from WhatsApp to email is slightly different. Make sure you have the auto-download media option ticked in the WhatsApp settings so that images sent to you will go directly to your camera roll. If not, you can simply tap the download icon and save the image to your gallery.
Once you've got the photo into your camera roll, follow these steps:

Pros
Cons
If you want to be able to share a single image, we've shown you the easiest ways whether you're using an Android or iOS device (iOS 15 included). It is simple, effective and makes sending email attachments incredibly smooth. You can do it all from your mobile phone. But if you want to share multiple or even bulk amounts of photos from WhatsApp to Email, you can freely choose from trying out the little helper ChatMover or applying the third method in this guide.
All the methods will guarantee success when it comes to sending photos and media files from WhatsApp to emails.
Secure Download
Any product-related questions? Contact our support team right now > >
By Mahesh Makvana
Updated
Share Tweet Share Share Share Email
Want to merge or put photos side by side on your Android phone? Here are a couple of apps that enable you to do it.
There are many reasons you might want to put photos side by side. If you want to do this on an Android device, you have several options available to use. There are many image editing apps for Android that let you combine your photos. You can use one of these apps and have your images appear side by side on your phone.
We'll show you two ways to merge photos on Android in the guide below.
The free Adobe Photoshop Express is one of the most popular photo editing apps you can use to combine photos on Android. The app lets you put your photos in many layouts, and you're free to choose any that you like.
To combine your photos on your Android phone with this app:
 Tapping an image once will select it. Then, tap the next icon in the bottom-right corner.
 2 Images
On the last screen, you can share your combined photos directly to your social media accounts as well as email accounts.
Adobe Photoshop Express gets the job done, but it's more than just a photo merging app. You can do plenty more in Adobe Photoshop Express. If you prefer not to use Adobe, there exist great alternatives to Adobe's image editing apps on Android.
Image Combiner—another free app—is dedicated to helping you combine photos on your Android-based devices. With this app, you can select any of your photos on your phone and put them side by side. If you instead want to put a picture on another picture, you'll need to use Android photo blender apps if your Photoshop skills are wanting.
The app takes care of adjusting your images, so you don't need to manually move your photos around to make them look nicer. To use this app to combine photos on your Android device:
 Tap Allow to grant the app storage access. This will take you to your file manager.
 2 Images
If you feel the image quality is not what you expected, open the app, tap the three dots in the top-right, and select Settings. You'll see an option that says Default image quality. Tap this option to choose the quality for your combined photos. Keep in mind the higher the quality you choose for your photos, the larger the size of your photos will be.
If you're looking to combine photos on your Android phone, you don't need to rely on a desktop app as there are apps that let you do this task right on your phone itself. The only caveat is you can't put a picture on another picture using these apps—you can only put them side by side.
Merging photos is just one way you can create new images on Android. There are apps that enable you to animate your pictures, too.
The 11 Best Apps to Animate Photos on Android and iPhone
Read Next
Share Tweet Share Share Share Email
Related Topics
About The Author
Mahesh Makvana (304 Articles Published)
Mahesh is a tech writer and editor at MUO. He's been writing about the tech for the past decade, and he loves to explain technology in simple words. You can find his work on some of the popular tech sites out there, including but not limited to How-To Geek, MakeTechEasier, and Online Tech Tips.
More From Mahesh Makvana
Join our newsletter for tech tips, reviews, free ebooks, and exclusive deals!
Click here to subscribe
COMPUTER
718 2 minutes read
In this tutorial we will teach you how to solve the problem of "black screen" when starting games on the Xbox 360.
You turn on your Xbox 360 and apparently everything works , until you start the game and meet the black screen "forever". The console no longer responds to any commands and the only way to reset it is to unplug it. And now?
Don't panic, we have a solution!
Can you imagine a black screen appearing in the middle of a game? Do not panic!
The problem is strangely caused by hard drive of Xbox 360 . Reports on several international forums point to some kind of "overflow" in the HD cache, which eventually occurs, interfering with name updates (minor updates, that appear when you first launch the game) causing the game to crash – whether on disc or digitally.
Strange as it may seem, the solution is to clear the HD cache. three times in a row . Just go to settings/memory, place the cursor on the hard drive and press the Y button. Then select "clear cache" and then "OK" in the pop-up window that will appear on the screen. Be sure to do the procedure three times - that's the secret!
After cleaning, restart the console. Everything should work great.
Take care of your Xbox 360
Consoles, like all electronics, require some care. Since they are built to last for hours on end, it is important not only for their useful lifespan, but also for the health of the players, rather than staying in long periods of play. This causes the system to overheat, which can cause the hardware to console.
 Keep the console away from heaters and direct sunlight as well.
 It's worth remembering that Microsoft Support has valuable tips on how to get along well or solve common console problems. Whether it's a black screen or overheating, the site has a good guide on dealing with the worst problems.
Do you have questions about procedures? Is your console still not launching games? Was the advice helpful? Leave your comment below! If you are looking for Xbox 360 you can find one at 1299 BRL in our store how to insert two photos in whatsapp profile solve this situation and have one less choice. Although the messenger does not have its own image editor, this is not a problem: just combine images on another platform and then upload them as a profile picture.
Whatever the reason, know that all the steps are very fast and convenient, especially since we will be using Instagram as an editor to merge images. See details below!
In this first step, you can join the two images with the editor of your choice. In this example, we will use Instagram.
–
Download our app for iOS and Android and follow the top technology news in real time from your smartphone.
–