Device Links
One of the most important parts of your Messenger account is the profile picture. It represents your first chance to make an impression with other users who may not have visited your Facebook page. Which is why it’s important to have a quality of the image. Subpar and outdated pictures should be changed since they don’t do you justice, but how can you do this?
In this entry, we’ll give you a step-by-step guide on changing your Messenger profile picture. With this knowledge, you’ll be able to keep your profile fresh and prevent low-quality images from ruining your chances of interacting through the app.
Some users may find it more convenient to change their profile picture directly through the Messenger app, as opposed to using the Facebook app. Here’s how the process works:
Your Messenger profile picture should now be updated!
Luckily (or unluckily depending on your opinion,) Facebook and Messenger share a common profile picture between the two despite being separate apps. If you would rather change your profile picture using the Facebook app instead of the Messenger app, simply follow these steps:
If you find your Android or iPhone screen too small to update your Messenger profile picture, you can use your PC. To do so, you’ll need to employ your browser:


Your profile picture should now be uploaded to Facebook and Messenger.
You may want to consider editing the photo before sharing it to Facebook and Messenger. This option lets you showcase your images in the best light, increasing the chances of more social interactions. Here’s how to edit your profile picture before uploading it to Facebook and Messenger:

There may be various reasons that your profile picture isn’t updating, from memory and cache issues to network connection. They can be hard to diagnose, but trying these following solutions usually do the trick to troubleshoot many issues with profile pictures not updating:
Clearing the cache associated with the Messenger app can sometimes fix the issue of a profile picture not updating. Follow these steps:
This might be a cliché solution, but it goes a long way in solving many problems with your apps. Restarting your phone might do the trick.
Sometimes your network connection, or lack there-of, can prevent your profile picture from updating on Messenger. Checking whether or not you are connected to Wi-fi or cellular data is a good method of troubleshooting this proble.
Unfortunately, you can’t have a different profile pic on your Messenger than the one on Facebook. They both will be identical. The main reason is that Facebook is connected with Messenger, and the apps have a common database.
Nevertheless, other apps let you use a separate profile picture, even though Facebook owns them.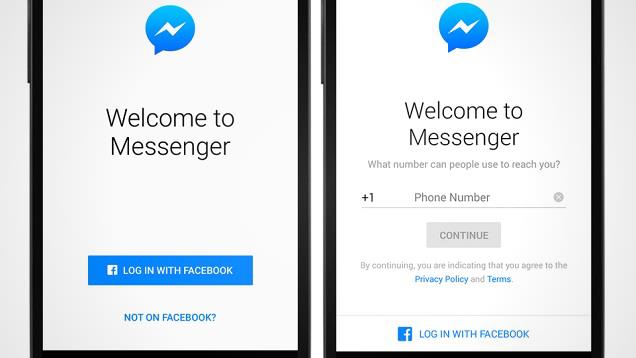 WhatsApp is the most well-known example. The platform has its own database, enabling you to upload a different profile pic.
Like any other app with profile pictures, Messenger doesn’t restrict you to just one image. You can change it whenever you want to improve your profile and allow other people to see your best side. The only problem is that you can’t do it directly from the app – you’ll need to employ your Facebook account. Luckily, the process is a walk in the park.
How often do you change your Messenger profile picture? What version of the app are you using? Tell us in the comments section below.
Your Quick Answer:
To change the profile picture from Facebook Messenger just make sure you are logged in then tap on the profile icon. Upon tapping there you will find the edit icon and you have to tap on that to change the profile picture to a new one on Messenger.
Messenger is available for all devices like Android or iOS and if you have Messenger installed, you can go ahead directly to change the profile picture without opening your Facebook.
You can also add the DP lock feature on your profile picture if you want to protect this from someone else.
Facebook has different apps for checking feeds and messaging, it’s Facebook & Messenger. But, if you want to change the DP you had to go to the Facebook app in order to change it from there.
You have the ways that you can follow in order to change the profile picture directly using your Messenger without the Facebook app or desktop version.
Although, you can try the fixes if you can’t change profile picture on Messenger.
Contents
If you can’t change the profile picture then there might be a few reasons behind this. Let’s explain:
1. The Profile picture might be not proper in size (180px*180px).
2. You are uploading lower-quality images or below the required size.
3. If you’re not logged into your Facebook app along with Messenger or in the browser, the task may not be completed.
Just solve the issues and try following the steps below to change the profile picture through Messenger.
If you are on Messenger on your Android or iOS devices then you will definitely have the edit section of your profile picture where you can easily edit and add a new profile picture.
In case, if you are on your Messenger app, have on tap on your profile picture & this will take you to the profile section where you have to log in with your username and password of your Facebook account then follow the simple process by editing the profile section and change the profile picture by the same process.
You have to follow certain steps to do this:
 For Messenger on Android:
If you are on your Android devices then just follow the simple steps to change the profile picture directly from your Messenger:
🔴 Steps To Follow:
Step 1: First of all, you have to log in with your credentials on your Messenger and open your profile section displaying a circle icon beside your name.
Step 2: Then, on the next tab, you will see the profile section and a pen size icon to edit your profile picture, just tap on that.
Step 3: Next, add the new profile picture that you want to set for your DP and save the settings by positioning the images onto that circle.
If you are on your iOS device then you will find the Messenger app on your home screen, make sure the Messenger app is updated, and then change the profile picture from your iPhone or iPad.
Just follow the simple steps:
🔴 Steps To Follow:
Step 1: Once you open the Messenger app on your iOS device, go to the profile section by tapping on the circle for the profile icon beside your nickname.
Step 2: Now, that will take you to the next tab where you have to tap on the edit icon to change the profile picture for your Messenger.
Step 3: Upon clicking on that, you will instantly be asked to add a new profile picture and then you can set a new profile picture and position it within the circle and set it as the profile picture.
That’s all you have to do to change your profile picture from Messenger on your iPhone or iPad.
If you can’t change the profile picture directly from the Messenger or either your click does not work, maybe the profile picture is still not visible after the change, whatever happens there, might be some reasons behind this.
However, if you can’t see someone’s profile picture, you can confirm if you’re blocked on Messenger.
If you see that the profile picture or DP is not visible after the change or you can’t change the profile picture by getting onto the Edit section then this may be due to the slow internet connection that cannot load that onto the app.
🔯 Fix:
The simple fix to this problem is you can directly connect your mobile to the WiFi network (if available) and your problem might be fixed if this is happening due to the slow internet connection or wait for a while to get it updated on the Facebook server.
In order to change the profile picture directly from Messenger by tapping on the name on your Messenger app, this will take you to the profile section from the existing app or through the web. In case you are not logged in there, you will be required to log in to see the pages.
🔯 Fix:
To fix such a problem you have to log in with your credentials on your Facebook app or directly on your default browser that is set on your devices and then the problem will be solved once you retry the same process.
You can change your Facebook profile picture & control whom you want to show on Facebook and this also affects your Messenger.
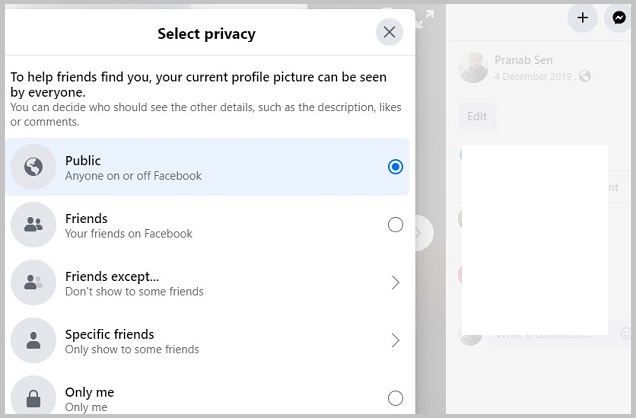
On Facebook, you can change your profile picture settings either to friends or you can set the ‘Only Me’ option if you want to hide this from everyone. You can see the same profile picture only to specific friends and also can hide from certain friends.
The best part is if you want to hide your profile picture and you are setting the privacy from your Facebook app then the same will take effect on the Messenger app as well.
To control your profile picture in case of the previous ones, you can delete that from your account or you can set the privacy to ‘Only Me’ for the profile picture.
Note: If you see the profile picture is missing from the profile name on your Messenger then this could be an issue with your internet connection as you can set the privacy to ‘Only Me‘ at most of the privacy where you can see while others cannot.
The Bottom Lines:
This article explained that if you want to change the profile picture you have to tap on this and by editing that directly on Messenger, you can change it to a new one. You can control your profile picture from your Messenger to show or hide from friends.
Also Read:
Your Facebook cover photo is the first thing people will notice when they see your page. When you're looking to create the best first impression, everything matters: size, content, text, mobile readability, etc.
In this guide, we'll look at Facebook photo and video size rules, templates, and examples. Let's talk about what to do and not to do, and much more, which will help you create the most effective and impressive cover photo and video.
In order for everyone to be on the same wavelength and understand what will be discussed, it is necessary to go through the basic terminology that will be used in this article. You won't find a lot of technical information, but there are some terms you still need to know. So:
So:
A pixel (px) is a constituent element of a digital image, as well as the smallest unit of information. For example, an image might be 640px wide by 512px high, which is easy to see when you zoom in.
PNG (portable network graphics or “portable network graphics format”) is one of the most commonly used formats in which image compression is lossless.
Facebook cover photo is a large high resolution image. But with such a huge number of rules and sizes (covers, avatars, links to photo publications, etc.), it's hard not to get confused. Here are some specifications:
For desktop users, your cover photo is displayed at 820px wide by 312px high. For those using the mobile version, the photo will be limited to 640px wide and 360px high. If the photo does not fit within the designated frames, it will be automatically resized to fit.
Luckily for Facebook users, all photos are scaled to fit the cover space. Depending on the original dimensions of the image, it will be stretched or cropped. Automatic correction does not distort the image. However, the image may become slightly blurry if it is small and has a low resolution.
The cover photo is the largest image on your page. It can make a good impression of you when you first visit the page, but it can also destroy it. If the selected image does not meet the requirements, then you may experience some difficulties. For example, an image can be "pixelated" as discussed earlier. Also, part of the text may be “cut off” during correction, or the entire layout may look awkward.
As shown in the picture below, both the mobile and desktop versions cut off significant portions of the original image. Therefore, it is best to position the main part of the image and text closer to the center. Then you will avoid the risk of losing important information.
Some users are annoyed by the inability to upload different images for mobile and desktop versions. To avoid this problem, you need to choose an image that will fit both formats. The generally accepted size is 820 x 360 px. In the images below, you can see how Facebook automatically resizes the same image that was already created with this fact in mind.
”
There are more reasons to make your pages mobile friendly. For example, 71% of website visitors are mobile users. Thus, it is very useful to make your content available to all users.
All these rules and sizing requirements make the process of creating a Facebook cover photo very intimidating. To make your task easier, we have collected practical recommendations and the most important tips. There's plenty of room for creativity - all you need to do is make sure that your cover image follows three basic principles:
Text - A short slogan can play an important role in attracting attention. Small text serves as an additional way to interact with users and allows you to effectively promote your brand message.
Emotions - if you get an emotional response from visitors, they are more likely to remember the content they viewed. For example, creating a connection between a brand and feelings of friendliness, inspiration, warmth, and happiness has a positive effect on users' purchasing decisions.
Relevance – Your cover photo should be relevant to your audience as well as your brand message. Find a balance between making the cover useful for searchers and reinforcing your company's interests.
Once you've mastered these basic principles, you can move on to the rest of the helpful tips. Let's explore practical tips on how to create relevant and visually memorable Facebook covers:
 There are no critical consequences for non-compliance, but you don't want to put your Facebook page at risk of being taken down. You can always refer to the official requirements when choosing a photo:
  Although this rule has technically disappeared, the general impression of its usefulness has remained unchanged. If your cover photo will contain text, try to keep it concise.
 The post will be highlighted at the very top of your wall for 7 days and will contribute to improving conversions.
 As long as you feel free to put any image on your Facebook cover, some decisions can have a detrimental effect on your page's performance. Here are some common mistakes and reasons why you should avoid them:
 And you also need original and recognizable pages, not templates that imitate each other.
 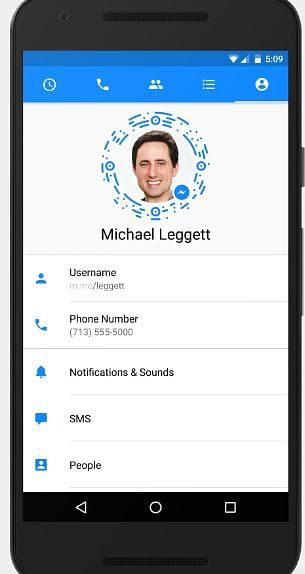 People are browsing a huge amount of content these days, so it's important to grab their attention with something they haven't seen yet. A carefully crafted, unique cover will most effectively communicate who you are.
 Many brands are already following the above guidelines. Here are some examples of great Facebook covers you can use.
The first is a graphic design tool that uses its cover image to encourage users to create posts with their hashtag. It combines mutually beneficial colors, elegant design and a clear brand logo. Active buttons with text attract the attention of visitors, but do not put pressure on them with an excess of information.
Next is a TV network that is promoting one of their most popular shows right now. This poster adds relevance to the page and can be used in other social media posts. networks to complement the entire marketing campaign. The colors are very bright and prominent, and there is no detail around the edges, which helps users concentrate better.
Finally, here is an example of how to arrange an image so that it displays correctly on all devices. The cover is right-aligned, which emphasizes the avatar on the left and balances the overall picture. The company specializes in retro style accessories, and the photo suits the concept and atmosphere of the brand.
Suppose you have an image that you want to crop according to Facebook's requirements. Here's what you need to do.
Step 1. Open the free online editor pixlr.com .
Step 2. Load the image into the workspace.
Step 3. Change the "Borders" box to "Output Size" and set the width and height to 820 and 360 respectively (this is the optimal image size for both desktop and mobile versions). Drag the cropping tool according to how you want to crop the image and hit enter.
Step 4. Go to "File" - "Save As..." and change the format to PNG. Save the image to your computer.
Step 5. Go to your Facebook page. Click "Add Cover" or "Change Cover" in the top left corner and select "Upload Photo".
Step 6. Click on the desired image and save the new cover. Ready!
Instead of a cover photo, Facebook business pages now have the ability to upload a video cover. The main purpose of this feature is to increase the number of interactions with users. The video format opens up a lot of possibilities for what a brand can share: provide useful information, showcase your product/services, show you behind the scenes, etc.
The Facebook cover video needs to be at least 820 x 312 px, but the recommended dimensions are 820 x 462 px. The resolution can be up to 1080p and the file size must be no larger than 1.75 GB in .mp4 or .mov format. Video length must be between 20 and 90 seconds.
Keep in mind that all videos play in a loop, which means that the video will play continuously until the user leaves the page. Thus, you need to make sure that it starts and ends with a smooth loop, that is, the moment of merging the end of the video with its beginning passes naturally.
The video should not contain anything annoying or too bright, so as not to cause discomfort during repeated viewing. This can create the exact opposite effect of what you would like your cover to achieve. Instead, try to create balanced and engaging content without being too intrusive. Just like with images, brands can present and promote their products, add clickable buttons, add some text, and share their messages with the audience.
Since the ability to add a cover video is a recent addition to Facebook, there aren't too many examples. Nevertheless, we have collected some of the most interesting ones that demonstrate the possibilities of this format.
This monthly magazine uses a cover format to draw attention to its upcoming issue. The video zooms in smoothly enough so that the text remains legible and all the colors used are pronounced. At first glance, it doesn't look like a magazine cover at all, which encourages readers to take the extra time to look closely and figure out what it is.
The following example is an online training platform. The motivational component fits perfectly with the main message of the brand. You can also easily post the video to any other social network. networks. The animation is very simple and at the same time creative, it contains enough elements to keep users interested and make them take a closer look.
The most minimalistic example is a scalloped pattern and a clothing brand. This calm movement is exactly what we meant when we said "don't be too intrusive." It captures the essence of the brand and conveys the feeling that the customer will experience in the process of using their product.
When registering on Instagram*, the user is prompted to establish a connection with Facebook*. This combination of accounts provides many opportunities and makes the pages more secure. But sometimes this link interferes or you need to replace the linked page with a new one. In the article, we have analyzed all the possible ways to split pages on Instagram* and Facebook*.
People tend to separate social networks for several reasons:

Remember that a page link is required to run a business account on Instagram*.
If you are moving to VK and need to study chat bots and mailing lists in detail, come to the 14-day practical course "Mailing lists, chat bots and VKontakte auto funnels" from SMM.school. There you will learn how to automate work using Senler, launch mailings, warm up and sell on VKontakte. This is the most up-to-date guide to automatic tools for promoting a business in VK at the moment.
And if you need to maintain one or more advertising accounts in different social networks, use the SMMplanner scheduling posting service — it will speed up your work and help make it more efficient.
There are three ways to unlink an Instagram* page from Facebook* in 2021 - through a mobile application of one or another social network, as well as through a computer. We will analyze each instruction step by step.
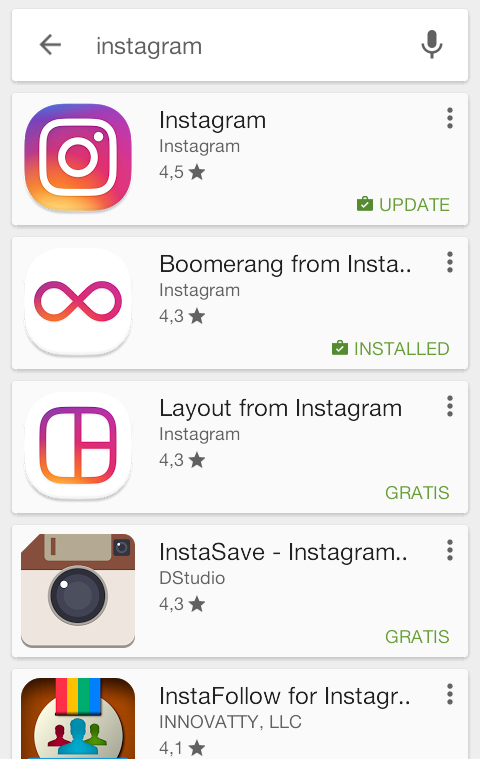
The algorithm of actions for Android and iOS devices is practically the same. The differences are only in the appearance of the application interface and buttons. Before you start unbinding, we advise you to check the applications for updates and, if possible, update to the latest version.
Read also: How and where to transfer the audience after blocking Meta*.
Via the Instagram application* it is easy to disconnect your account from Facebook*. But please note that if the pages have a common phone number for registration or one email for both accounts, then the system will periodically offer to re-sync profiles.
Step-by-step algorithm of actions:
See also: Export from Instagram**: content, statistics, information.
Through the Facebook page*, it will not be difficult to untie Instagram* either. First you need to open the application and find the "Menu" button, it is located in the lower right corner.
In the list that opens, find the item "Settings and privacy" and go to it.
There are many tabs in the menu, you need to scroll to the very bottomThe first item will be “Settings”, open it. At the bottom we see the “Account Center”. We click on it.
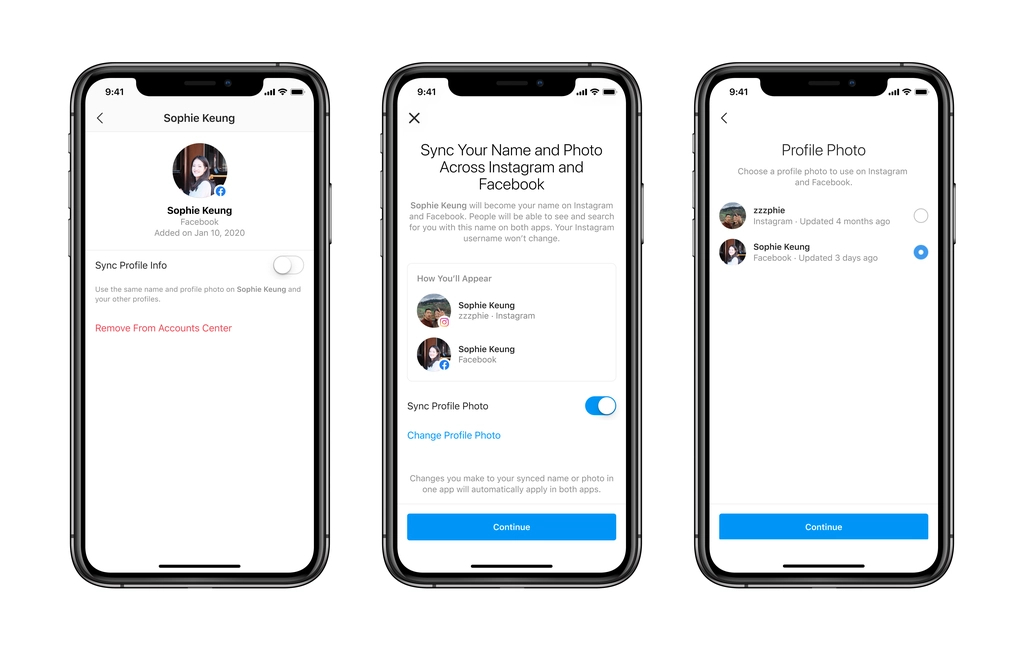
Operation in the Account Center is the same for both social networksFurther unbinding is no different from what we did in the Instagram mobile application*. A window will open describing the consequences of the action. Lists everything that will change in the account in case of unbinding. If everything suits, click on "Remove from the account center". Ready.
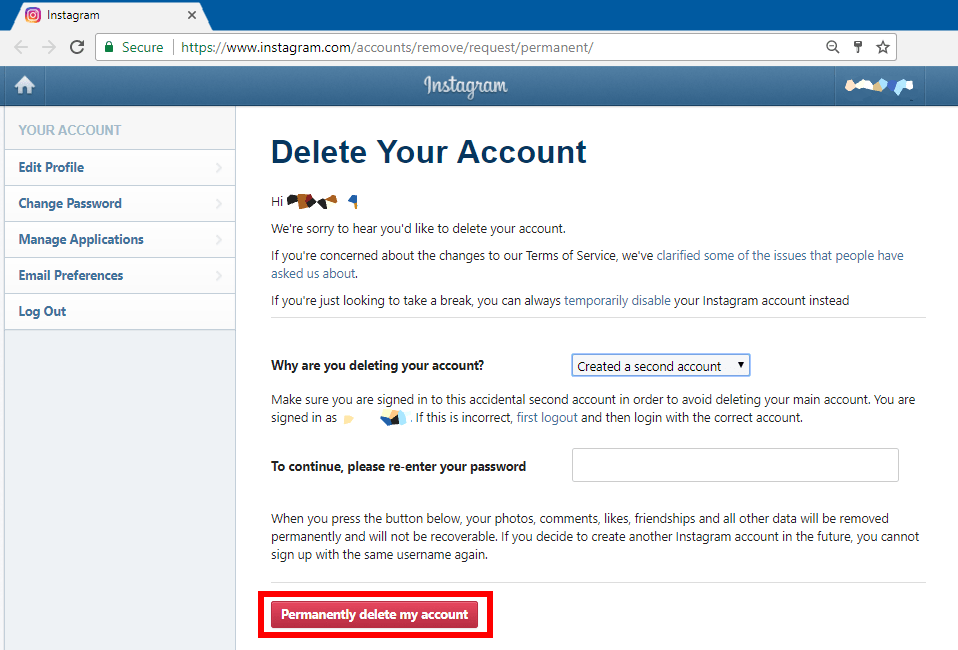
You cannot delete a profile in the Account Center using the Facebook version for a computer*. Such a function simply does not exist.![]() But you can disable their synchronization and communication.
But you can disable their synchronization and communication.
Let's take a step-by-step look at how to unlink an Instagram* profile from Facebook* via a computer:
After this action, the profiles will be independent and not connected in any way.
Read also: How to secure your Instagram account**.
The procedure for unlinking pages through a computer is the same as when deleting a profile through the Instagram mobile application*.
Open the profile page, click on "Settings"In the settings, look for the "Account Center" item we need. It is located at the bottom left.
We need the “Account Center”, do not click on “Temporarily disable my account” Click on the three dots next to the account you want to disable In this field, you can delete the profile or synchronize accounts so that they always have the same name and photo It remains to click on "Remove from Account Center".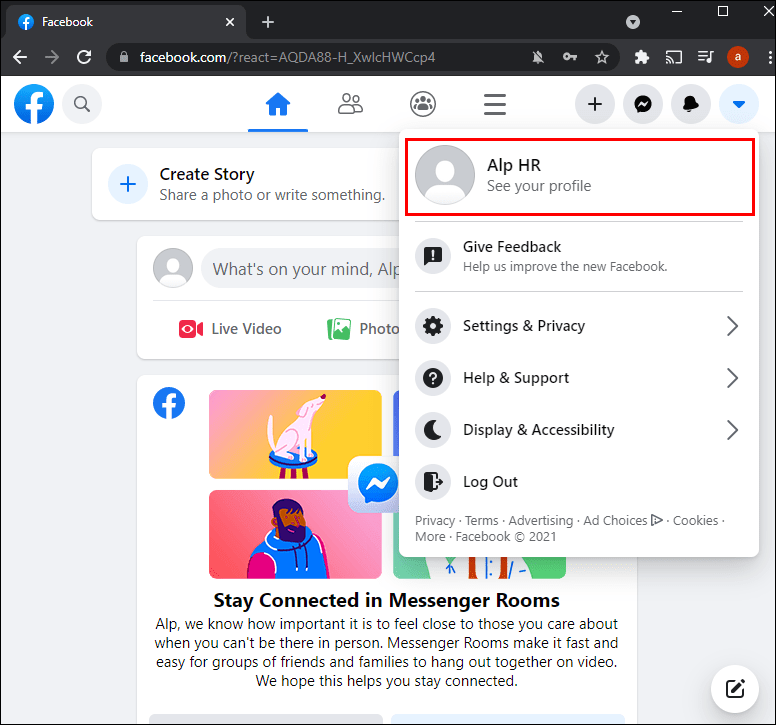 The system will ask you to confirm the action, warn you about the consequences of your choice.
Check which account is being removed from the link. The word "delete" means only removal from the Account Center. The page will be just as active, just not linked to the current one.
If everything is done correctly, then this profile will no longer be in the Account Center.If there were more than 2 profiles in the Center, the remaining ones will be displayed in it. If there were only 2, then the active field "Add accounts" will appear.
All actions are performed in the same way as in the previous cases. After confirmation, the connection will be terminated. But at the same time, it will not be possible to use cross-posting and launch advertising on Instagram*, it is possible only through the Facebook page*, the Instagram account* will not be in the ad settings. This means that potential customers will not see your Instagram* in an ad. By the way, in our blog we already wrote how to effectively run an advertising campaign on Facebook* in the article “7 Tips for Effective Facebook Advertising*”. If you need to effectively reach a large audience and attract more user attention, I advise you to read.
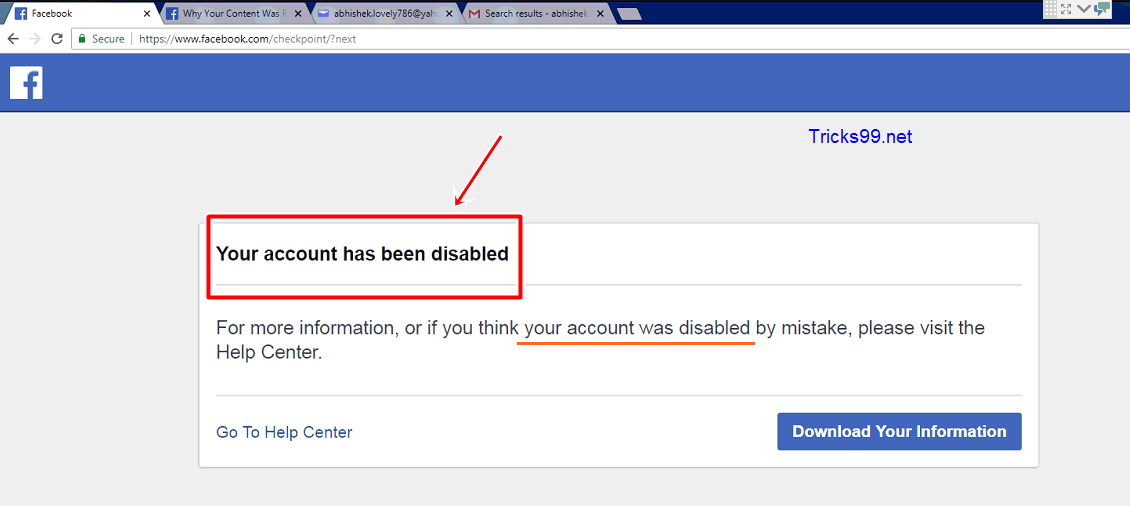
To unlink an Instagram* profile from a Facebook* page, you must first regain access to it. There is no other way to disconnect social networks.
How to restore access to a Facebook page*:
After that, it remains to wait until the account is unblocked and it will be possible to untie it from the page on Instagram *.
A few more ways to regain access to a Facebook page* that was lost for various reasons:
 But only if 2 weeks have not yet passed.
 Yes, you can. At any time, you can go to the page on Instagram* or Facebook* and re-link the desired profile to it in another social network. Moreover, you can bind not only the profile that was before, but also any other.
Read also: How to freeze an account on Instagram**: hide a profile for a while while saving data.
One page on Instagram* can only be linked to one page on Facebook*. When you try to add a new page, the previous one will fall out of the link, it needs to be unlinked. You can break the link using any of the methods listed above. When the page is unlinked, you can link a new one.
If the link field is not active or the old page is not unlinked, then you need to wait a bit and re-enter the application (on the profile page).