Ooh! I so love the Instagram story highlights on your account.
It’s like a directory about where I can find certain content that you’ve added.
But, I think your Instagram story highlights aren’t organized the way they should be.
Well, changing the order of your Instagram story highlights isn’t tough if you know what you should do.
So, head on out and continue reading to discover how exactly to reorder Instagram story highlights.
How to Reorder Your Instagram Story Highlights
Instagram currently doesn’t allow users to directly reorder their story highlights. But, what you can do instead is to edit a certain highlight by adding a random new story to it. The IG story highlight will then move to the beginning of the row. Just don’t forget to remove the random story you added.
Wait, what? You said you don’t quite understand it?
Well, keep on reading to find out more about reordering Instagram story highlights in a jiffy.
Reordering Instagram Story Highlights: All You Need to Know
Instagram story highlights, as everyone knows, serve as an organizer of the stories you have shared so far on IG.
Think of it as a directory of stories, allowing your followers to have a better understanding of what your account is about.
Thus, if you want to juggle up what IG highlight you want to appear first on the list, then here are the steps you should follow.
Take note though that we’re using Instagram’s mobile app to do the reordering.
Step 1: After logging in to your account, head to the menu bar at the bottom and tap on your profile image.
You can find your profile image on the lower right of your mobile phone screen. You’ll then see the profile page.
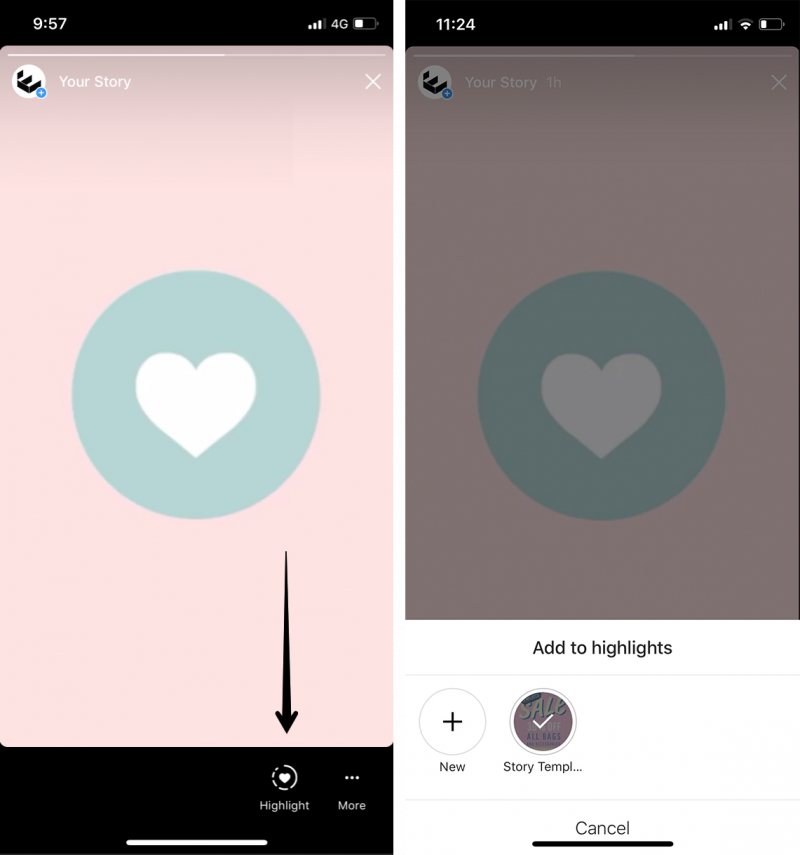
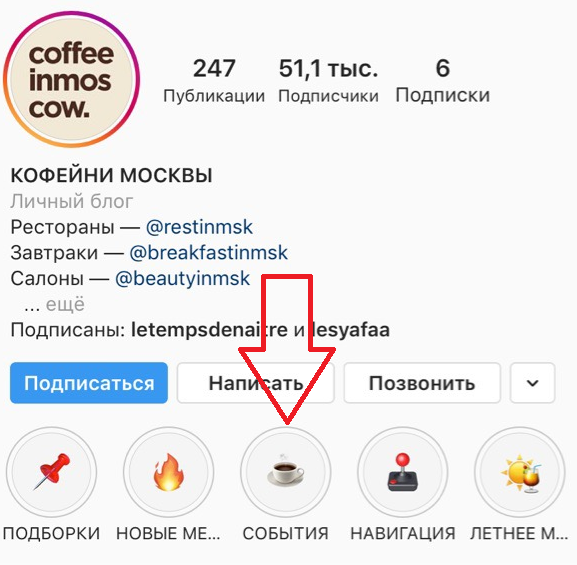
Step 2: Once you’re on your profile page, press on the Instagram story highlight that you want to be first on the list.
Step 3: After tapping on that story highlight, the video or photo you added will automatically play or flash on the screen.
Now, head to the lower right of the screen again and tap the More button which appears as a 3-dot icon.
Step 4: In the pop-out window that appears, press the Edit Highlight option. You’ll then be redirected to the story highlight’s gallery.
You can also access the Edit Highlight option by long-pressing the highlight to make the pop-out window appear.
Step 5: Now, you’ll see two sections in the highlights gallery: Selected and Stories. Since you want to add a new story, tap the Stories option.
From there, you choose a random story that you’ll add to that particular highlight.
You’ll know that the story’s selected if you see a blue checkmark on the lower right of the story’s thumbnail.
After selecting a story, head to the upper right of the page and press Done.
Now, you’ll see that the IG story highlight you selected earlier has been moved at the beginning of that list.
Step 6: If there are other story highlights that you want to reorder, repeat Steps 2 to 6 until all the highlights are in the order you want them to be.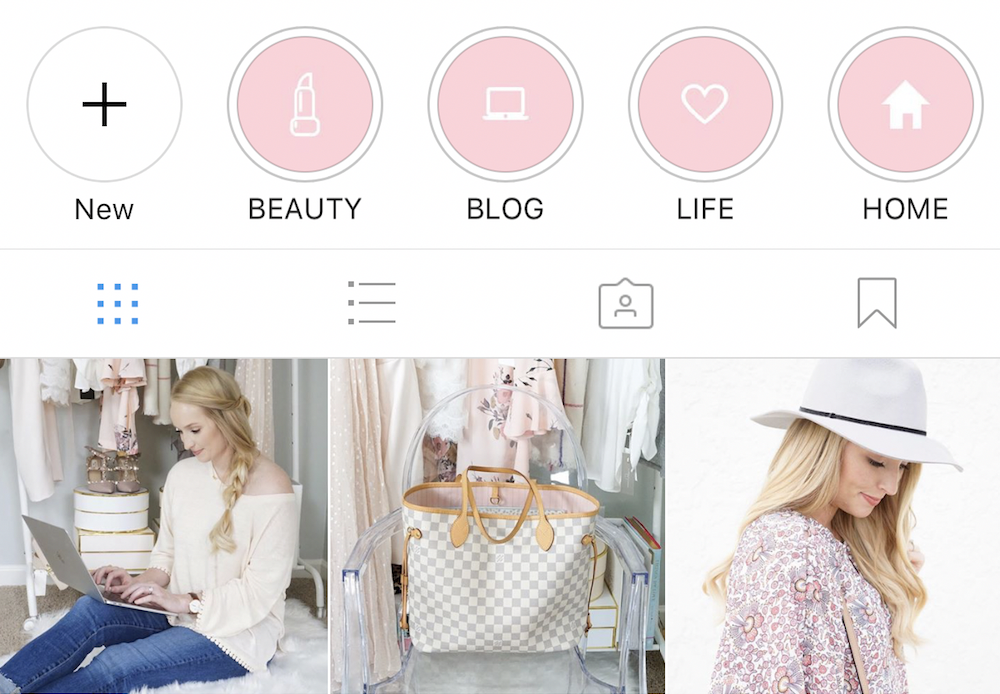
Step 7: Now, head back to the highlight you recently reordered by pressing it.
Browse through the stories in that highlight until you reach the most recent one you added.
Once you’re on the last IG story, press the 3-dot icon (which is the More button) again on the lower right of the screen until you see the pop-out window appear.
Step 8: In the pop-out window, select the Remove from Highlight option.
Then, to complete the move, choose the Remove video option in the next pop-out window that appears.
And, just like that, you’ve removed the random highlight you added.
Repeat these steps until all the story highlights are in the order you want them to appear.
So, what’re you all waiting for? Go get your phones and try this method out.
Frequently Asked Questions about How to Reorder Your Instagram Story Highlights
Can you reorder your Instagram story highlights if you’re accessing Instagram on a desktop?
Reordering your Instagram story highlights is only available in the mobile app. Hence, you cannot reorder your Instagram story highlights through a computer.
How can I reorder more than 1 Instagram story highlight?
If you have more than 1 story highlight you want to reorder, use the same process of adding random stories. But, you need to start adding random stories with the highlight that you want to appear last, working your way to the one you want to be the first. Then, remove the random highlights after.
Is it possible to reorder the stories within the highlights in the way you want them to appear?
Whether you’re using the mobile app or desktop in accessing Instagram, you cannot change the order of the stories within a highlight. The stories appear in chronological order, meaning, the most recent one you uploaded appears first.
Marcel
Hey guys! It’s me, Marcel, aka Maschi. I earn a full-time income online and on MaschiTuts I gladly share with you guys how I stay on top of the game! I run several highly profitable blogs & websites and love to speak about these project whenever I get a chance to do so.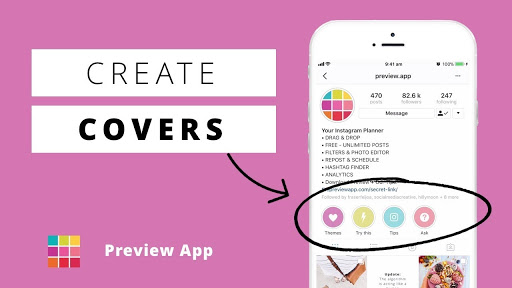 I do this full-time and wholeheartedly. In fact, the moment I stopped working an 8-to-5 job and finally got into online business as a digital entrepreneur, is problably one of the best decisions I ever took in my life. And I would like to make sure that YOU can get on this path as well! Don’t let anyone tell you that this can’t be done. Sky’s the limit, really…as long as you BELIEVE in it! And it all starts right here..at Maschituts!
Last updated: Oct 9, 2022 • 5 min read
Search 1000s of TikTok & IG influencers at Hypetrace
Instagram Stories changed the way we use this social media platform.
If you want to capture a quick moment and share it with others, you just upload a Story and that’s it!
Nevertheless, since Stories are meant to disappear after just 24 hours, you might have problems if you want to share them for longer times.
Fortunately, there’s a feature that solved this matter: Instagram Story Highlights.
Just upload a Story, and it will stay on your profile until you decide to delete it.
But what if you want to reorder your Instagram Highlights? Is it possible? Continue reading this article to get precise information about:
Table Of Contents
Instagram Highlights are a collection of chosen stories that remain on your profile until you decide to remove them.
They can be photos, videos, and pretty much whatever you want to upload.
Highlights are posted in chronological order, meaning that if you create a story and then add it to highlights, it will appear next to the last one on the list.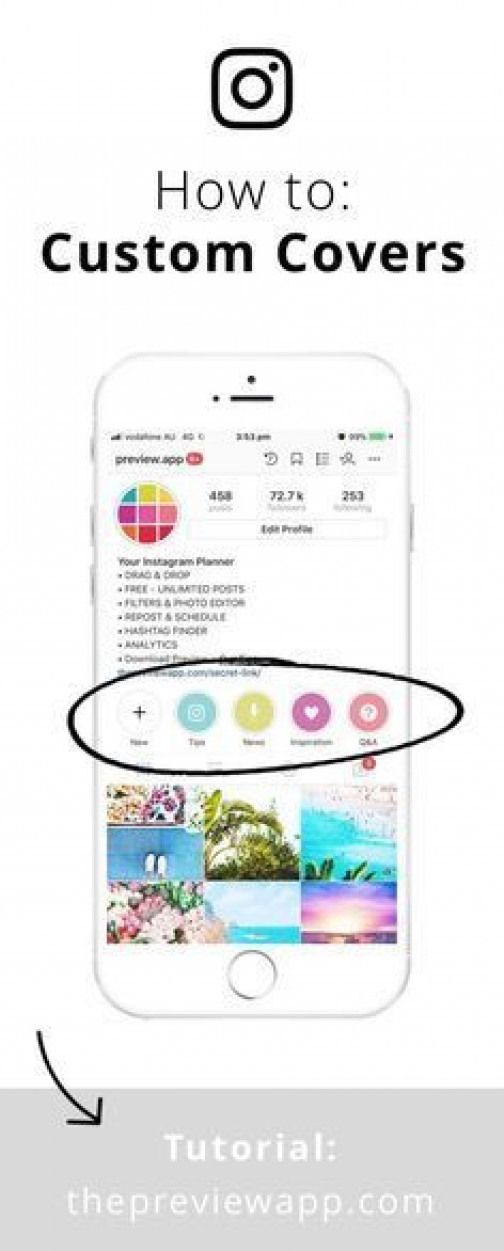
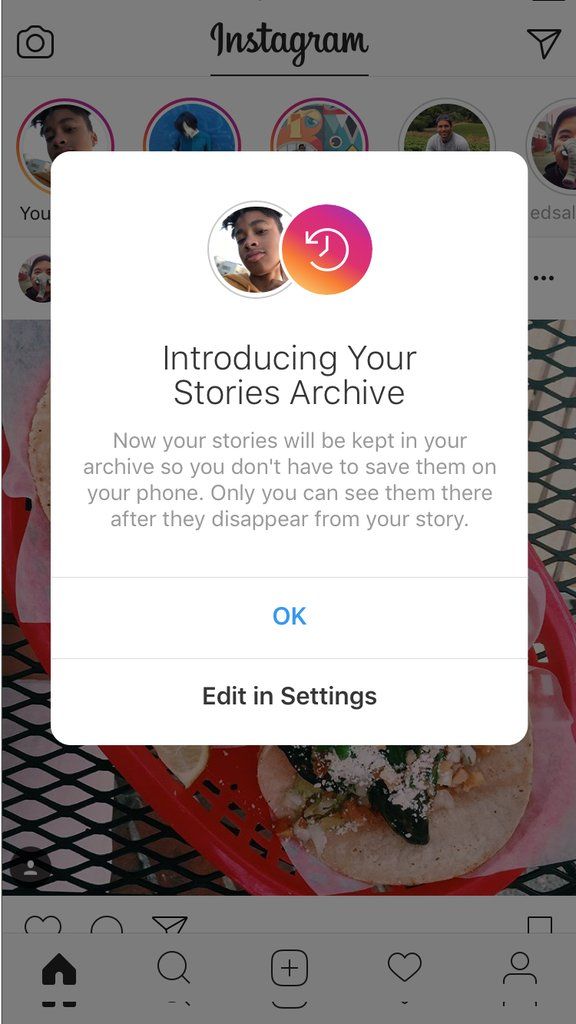
Highlights were introduced along with the Story Archive, which allows you to Repost an Instagram Story if you search for it on the archive.
You can get more related information about Highlights and new story features on the app here: Instagram Introducing Stories Highlights.
No, there’s not. It’s not like you can drag a highlight with your finger and put it whenever you want.
If you want to move to the beginning an uploaded Highlight, you won’t find an option to do so.
But do not despair - there’s a little trick that you can use to rearrange Instagram Highlights at your will, and we are going to show you how to employ it.
If you need to reorder Instagram Highlights for one reason or another, you can indeed do so, but it will not work as you imagine.
Don’t worry, it isn’t rocket science either! Just follow the steps we are about to show you here, and you will be good to go.
Read Also: Are you trying to add stickers to an Instagram story, but the button is not working at all?
If you are looking for an answer to this question, then search no more - read our “ Add Your Stickers Not Working on Instagram” blog post to learn more.
Firstly, open your Instagram profile as you normally do.
Keep in mind that you can only edit a highlight from the mobile app, so avoid using the browser version of Instagram.
As we mentioned before, it’s not like you can simply reorder a Story Highlight with some feature. Consequently, you need to use this little harmless “hack.”
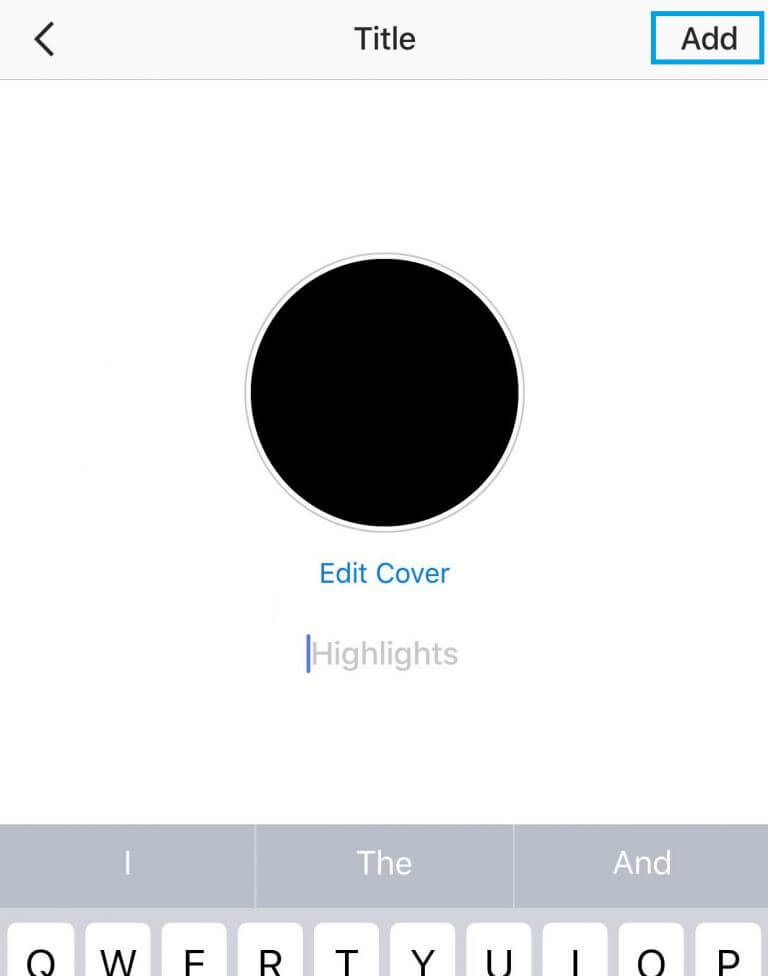
Upload a new story to your profile. You can upload photos, videos, Multiple Photos on Your IG Story, and more. It can be whatever you want!
Once the Story is uploaded, you need to select the option that says “Highlight. ” You have two options here: either use this story as a new cover for a Highlight, or select other Highlights that you have already posted.
For practical purposes, you need to press on the highlight you want to move to the beginning.
Imagine that this Highlight is in 4th position. Tap on it, and the Story you just posted will be added.
Since you have just uploaded a recent story to this Highlight, it will automatically move to the first place! Nevertheless, the picture you uploaded might not be related to the overall content of the Highlight you want to show first.
Thus, keep your finger pressed on the Highlight, and then choose “Edit Highlight.”
After tapping on “Edit Highlights,” select the story you just uploaded, and remove it.
This will reorder your Highlight List, and the desired story will move to the beginning.
You can do this process as many times as you want.
It works either if you want to move a Highlight on the 7th position to the beginning, or if you want to entirely reorder your list.
It would be amazing for Instagram to implement a feature to rearrange your Highlights, right? If they ever do, GrowFollowing will be here, giving you the latest information you need!
Yes, you can. Just scroll through your Highlight list and remove them all. Nothing will happen - you can upload them from the very beginning if you please as well.
About the author
Karen
Karen is a senior technical writer and copywriter here at GrowFollowing. Her area of expertize are social media apps and new media.
Instagram Stories, aka “stories”, “moments”, “stories” or “stories” appeared in 2016, and since then have gained such popularity that Instagram is constantly updating and improving this format.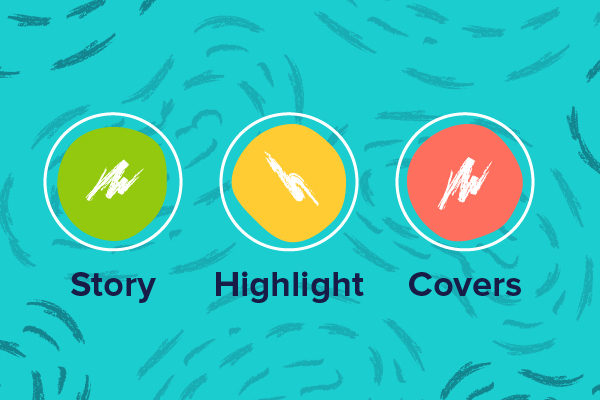 Instagram Stories appeared thanks to the growing popularity of Snapchat, in which users could send short videos and photos.
Now more than 400 million Instagram users view Stories per day, and this figure continues to grow.
Any content on Instagram can be seen by all users - profile posts and “stories” - this is a very promising media format, moreover, stories are integrated with Facebook, and users can view them from the feed of this social network.
Stories can only be viewed for 24 hours, after which they disappear from the feed and are stored in an archive accessible only to the user. The time of one video clip is no more than 15 seconds.
“Stories” are actively used for advertising, personal brand and business promotion. They help the brand to remind about itself, attract a new audience, talk about promotions and new products. Stories is like your own TV channel.
Instagram Stories appear at the top of the app, to view stories, just click on the profile photo. Stories are rewound with a single tap on the phone screen: on the right - fast forward, on the left - back. Stories are paused by long pressing the screen - this is usually used to read long texts.
To switch stories, swipe from right to left or vice versa.
You can create stories through Instagram or third-party applications, upload photos and videos from your computer after editing them. We will tell you about all the ways to create and upload stories.
To add previously captured videos and photos to stories, you need to switch to the Stories shooting mode, click on the leftmost button to go to the gallery, and select the necessary files. Thus, you can shoot stories not only with the camera from the application, but also with any available phone camera that you use.
Instagram allows you to capture and edit your Stories directly from the app. To create a Story, click the camera icon in the top left corner of the app, or open the camera by swiping right.
Instagram camera has several modes and features. Let's get to know each of them.
As soon as you switch to creating stories, the normal camera mode turns on. One short press on the central round button creates a photo, a long press - a video that lasts 15 seconds. If you hold the button and move it up, the camera will move closer to the object.
Below the photo and video button is a menu with other camera modes.
Boomerang
Boomerang is an analogue of live photos, that is, short looped videos made up of a series of photos. Frames taken one after another are played from beginning to end and in reverse order. Boomerangs are not as popular now as they were when they appeared, but users still love to make short videos and come up with new ideas.
View this post on Instagram
Posted by Starbucks Coffee ☕ (@starbucks)
Superzoom
Superzoom allows you to shoot dramatic 3-second video music using a special camera close to the subject. Instagram gives you the opportunity to choose several shooting options, from romantic to tragic. It remains only to choose the right one.
Reverse Capture
Reverse Capture creates videos with reverse playback, so you can diversify your content with an interesting idea.
View this post on Instagram
Posted by ReverX (@reverx.app)
Shooting one video will last 15 seconds.
Text
Text - a mode that allows you to insert text information into stories. There are several font options: modern, neon, typewriter, bold. Fonts are switched by touching the font name at the top of the screen. You can change the background color by touching the button with the current color on the bottom left.
Live
Live allows you to broadcast stories in real time, communicate with subscribers and get instant feedback. The live broadcast cannot last more than one hour, and users see the comments and likes coming at this time on the screen with the broadcast. Starting a live broadcast is very easy. It is enough to select the desired mode, and the “On Air” button will appear. Subscribers who are currently online (they can be seen live) will receive a notification when the broadcast begins.
During the live broadcast, you can write a comment and pin it on the screen. You can turn off the ability to comment for everyone by clicking on the menu item and selecting “Turn off comments”. Live broadcast allows you to broadcast together with another user.
To end the broadcast, you must click “End” and confirm the action. By clicking the "Save" button, you will download the live broadcast without likes and comments. This function is made so that the video material is not lost. The live broadcast can be seen on Instagram in the recording for another 24 hours, like regular stories.
Remember: if you don't save the live broadcast, it will be deleted after 24 hours and you won't be able to restore it.
Instagram masks
Another feature of stories is adding masks. Masks are virtual face filters that make Stories even more colorful and funny.
Masks are available in almost all shooting modes. Just click on the smiley to the right of the record button and select the appropriate one. Masks can change along with the rotation of the camera, the surrounding space or the user's facial expressions.
You can publish your posts from your Instagram profile to Stories to attract more attention to them. To do this, you need to click on the airplane icon under the post and select “Add to story”.
You can repost the story itself from another person's profile if your account is tagged in it. When this happens, you will receive a notification in private messages about the mention in the story, there is also an active link “Add this to the story”. After clicking on the link, a window with editing stories will open.
Once you've shot your story, it's time to edit it. Editing is available for both photos and videos.
How to add filters to Instagram?
To view and apply filters, swipe left and select your favorite.
How to add hashtags to Instagram Stories?
A hashtag is a special label that combines user content into one group. On Instagram, hashtags are used not only as a means of navigation and search, but also for promotion. We can say that hashtags are the keywords of your post, story and Instagram profile.
There are several ways to add hashtags to stories.
The first way: click on the sticker icon at the top of the screen and select “#Hashtag”. In this case, you need to enter the hashtag without the pound sign #, Instagram will offer several popular or frequently used hashtags.
Second way: enter the hashtag using the Text tool. In this case, you must enter along with the hashtag #, and Instagram will also offer to select popular or frequently used hashtags.
Some users use tricks to insert more hashtags into stories. They use two methods at once, write more hashtags in text, hide hashtags in a poorly viewed area of the screen (at the very bottom or top of the story), fill the text with a hashtag with a background color so that they are not visible to users and do not annoy when viewing.
These hashtags are also included in Instagram searches.
On Onlypult.com, when publishing stories, you can insert up to 9hashtags, while they are not visible in the story itself, but participate in the Instagram search.
How to geotag Instagram?
Instagram geotags are also used to promote and search for publications. Geotags or geotags are data about a specific position that are affixed to a frame as metadata.
Inserting a geotag into an Instagram story is very easy. Just click on the sticker icon and select . Choose from the proposed list or start typing the name of the location.
How to tag a person in an Instagram story?
To mark another Instagram profile in your story, you need to select the “Text” tool and enter the user's nickname, starting with the @ symbol. In this way, you can enter up to 10 profiles in one History. If you click on the sticker and select “Mention” from the menu that appears, you can add one profile without using the @ symbol.
In both cases, Instagram will prompt you to select a profile corresponding to the characters you enter, it remains to choose the one you need.
The user will be notified that they have been mentioned. He will not be able to remove the mark, but it will be possible to share this Story in his account.
After affixing such a mark, subscribers will be able to go to the specified profile by clicking on it in the story.
How to insert a link in an Instagram story?
This feature is only available to business accounts with more than 10,000 subscribers. A few days after reaching the required threshold, a link button appears at the top of the screen in the interface for adding stories.
With this tool, discounts and promotions are announced, Instagram users are directed to the site or a separate page of the site, links are added to blog articles, online and offline events, and so on. By clicking on the button, enter the desired link and create a story. When viewing your Story, users only need to swipe up to follow the link.
If after reaching 10,000 followers the link button still does not appear, try restarting your phone or updating the app, you can also contact Instagram support.
How to draw on Instagram stories?
Instagram Stories has a drawing tool. To use it, you need to click on the pencil icon at the top of the screen.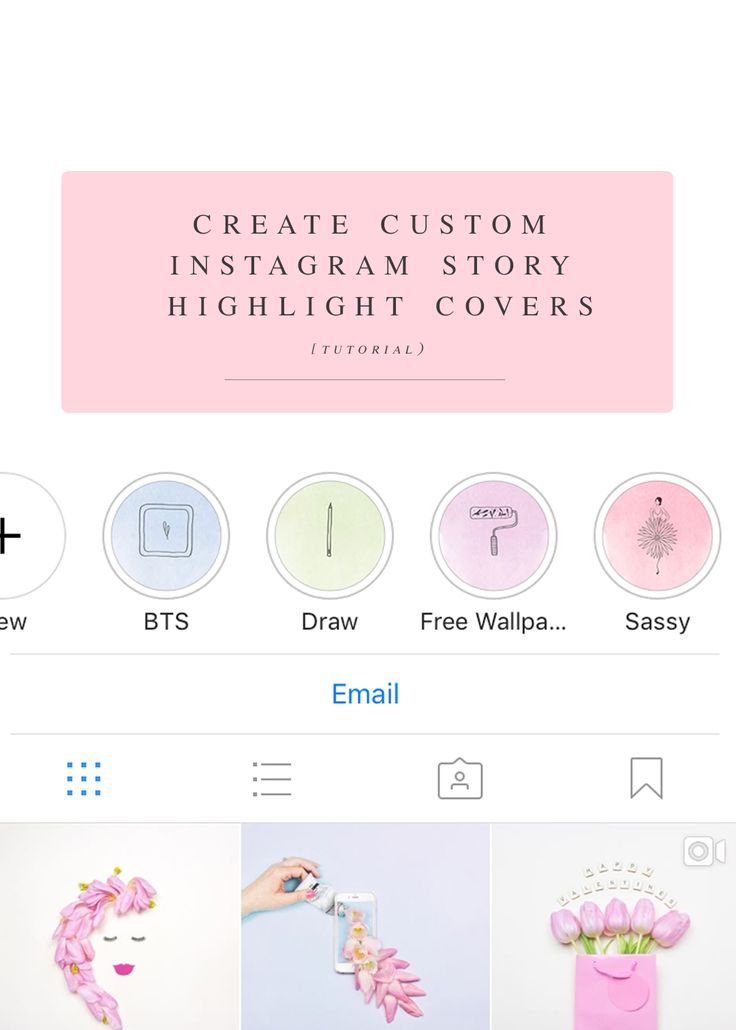
Several modes or brushes are available for drawing. They differ in overlay style and line thickness.
Use the drawing tool to fill a photo with a solid color. Just select the desired color at the bottom of the screen and pinch the photo anywhere.
To fill with a translucent solid tone, choose a brush with a thick nib or a “marker”.
There is another secret to this tool. You can choose not only the standard colors indicated in the palette. If you press and hold the colors of the palette, a panel with a choice of an arbitrary color will appear. Without lifting your finger from the screen, move to the desired color to select.
How to add a selfie to Instagram stories?
You can add a selfie to the finished photo or video. To do this, click on the camera sticker. If you click on the finished selfie, the design will change: blurry edges or a white frame.
Questions.
A form is attached to the story in which you can enter your question. Subscribers will be able to ask you any questions.
To insert a form, select the “Questions” widget while editing stories. You can choose the color and size of the published form.
Enter your appeal in the form. For example, “I will answer your questions. Ask!”.
Responses can be viewed by clicking in the lower left corner in the story. You can share responses with subscribers, to do this, open the desired response and click "Share response". You can choose the color of the form, add a comment and publish to stories.
Polls
The "Polls" widget allows you to conduct a small survey among subscribers, where only two answers are available. The standard form is “Yes” and “No”, but you can enter your own question and short answers. After the survey is published, you will see the responses as a percentage.
In the story statistics, you can see which user clicked on which answer, and the total number of viewed stories.
Voting
Voting in stories is done using a scale. By selecting the appropriate widget, you can assign the color of the scale and emoji for the answer. Ask a question, and to answer it, subscribers will move the slider, expressing the degree of their reaction to the question.
Statistics will show exactly how users voted, as well as the average answer on the scale.
Quiz
This widget is also called “Test” because you enter the correct answer, and users, having chosen an option, immediately see whether it is correct or not. To insert a widget, click on the sticker icons and select "Quiz" in the story. In the form that appears, you can enter your question and several answers.
There can only be four answers. Enter the answers in order and press “Next” on the phone keypad for new options to appear next.
The color is changed using the setting at the top of the screen.
Do not forget to indicate the correct answer. To do this, click on the letter of one of the options, it will be highlighted in green.
To see user responses, go to your story statistics or swipe up. You will see the number of correct and incorrect answers, as well as the total number of viewed stories.
Adding music to Stories has been available since 2018, but not in all countries. Therefore, if it is not possible to add music directly through Instagram, you need to use third-party applications. But we will tell you about all the ways.
How to add music through the Instagram app?
If you can add music through the Instagram app, click on the sticker icon and select “Music” from the menu. The application has a search by mood, genre and popularity. After selecting a song, you can rewind to the desired moment, and the track will be played from a given point while the story continues.
You can add a track before selecting a video. Open the camera, swipe the menu under the record button to the right and select "Music". Find the song and the right moment, and record a video while the song is playing.
How to add music to Instagram?
If there is no choice of music in the Instagram application, it is possible to add it to the story through third-party video editors.
You can download the video editor from the App Store or Google Play, here are some of them:
Storybeat - allows you to add not only music, but also small effects on photos and videos, you can record your voice or slow down the video.
InShot - can remove unwanted frames, suppress noise, add text and stickers. Music is added only from the device library.
PicMusic - photo and video editor, you can add music, voice, text.
When a story is ready and edited, it can be published. To do this, just click the “Your story” button in the lower left corner, and the story will be published on your profile and will be available to everyone. You can limit your viewers by clicking the "Best Friends" button when posting. Then only those whom you add to your friends list will see the Story.
Stories can be sent to selected contacts if you click on the "Publish" button and select the desired profiles.
Within 24 hours, while the published History is available, it can be deleted, edited and adjusted. To do this, click on the three dots in the lower right corner and select the desired menu item.
To customize your story, select "Story Settings". By moving the sliders and checking the checkboxes, you can customize the display of stories for yourself. Here you can hide Stories from certain accounts, allow or block comments on stories, and create a list of best friends.
You can post multiple stories at the same time. To do this, select the story camera and click on the gallery icon. The latest photos and videos taken by the device will be shown. Click the pages icon at the top right and select all the photos and videos you want in the order in which they should be posted. Each story can be edited before publication.
To publish stories from a computer, you need to use third-party services. For example, the Onlypult.com deferred posting service, with which you can select the date and time of publication.
Go to the service website, click "Stories", edit the publication card and set the time. Ready!
Already published stories can be deleted. To do this, you need to open the Stories and at the moment the unnecessary file is displayed, click “More” in the lower right corner. When the additional menu of stories comes out, click “Delete” and confirm the deletion.
To delete the entire history, you must delete each file in it.
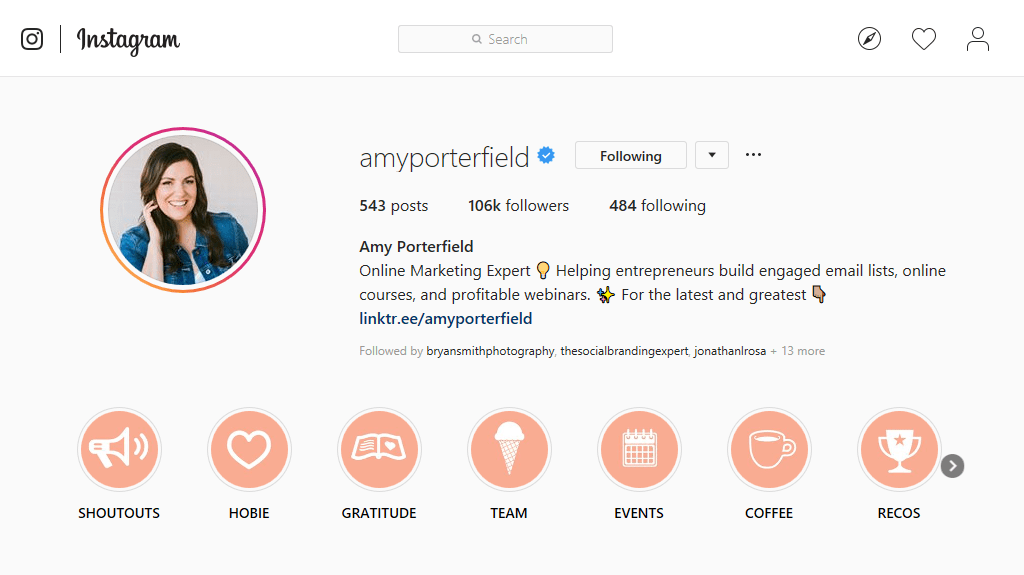
Stories Highlights or Actual Stories - albums or sections with archived Stories that users can save in their profile. Thus, all saved stories can be sorted or the main ones can be selected - as it is more convenient for anyone.
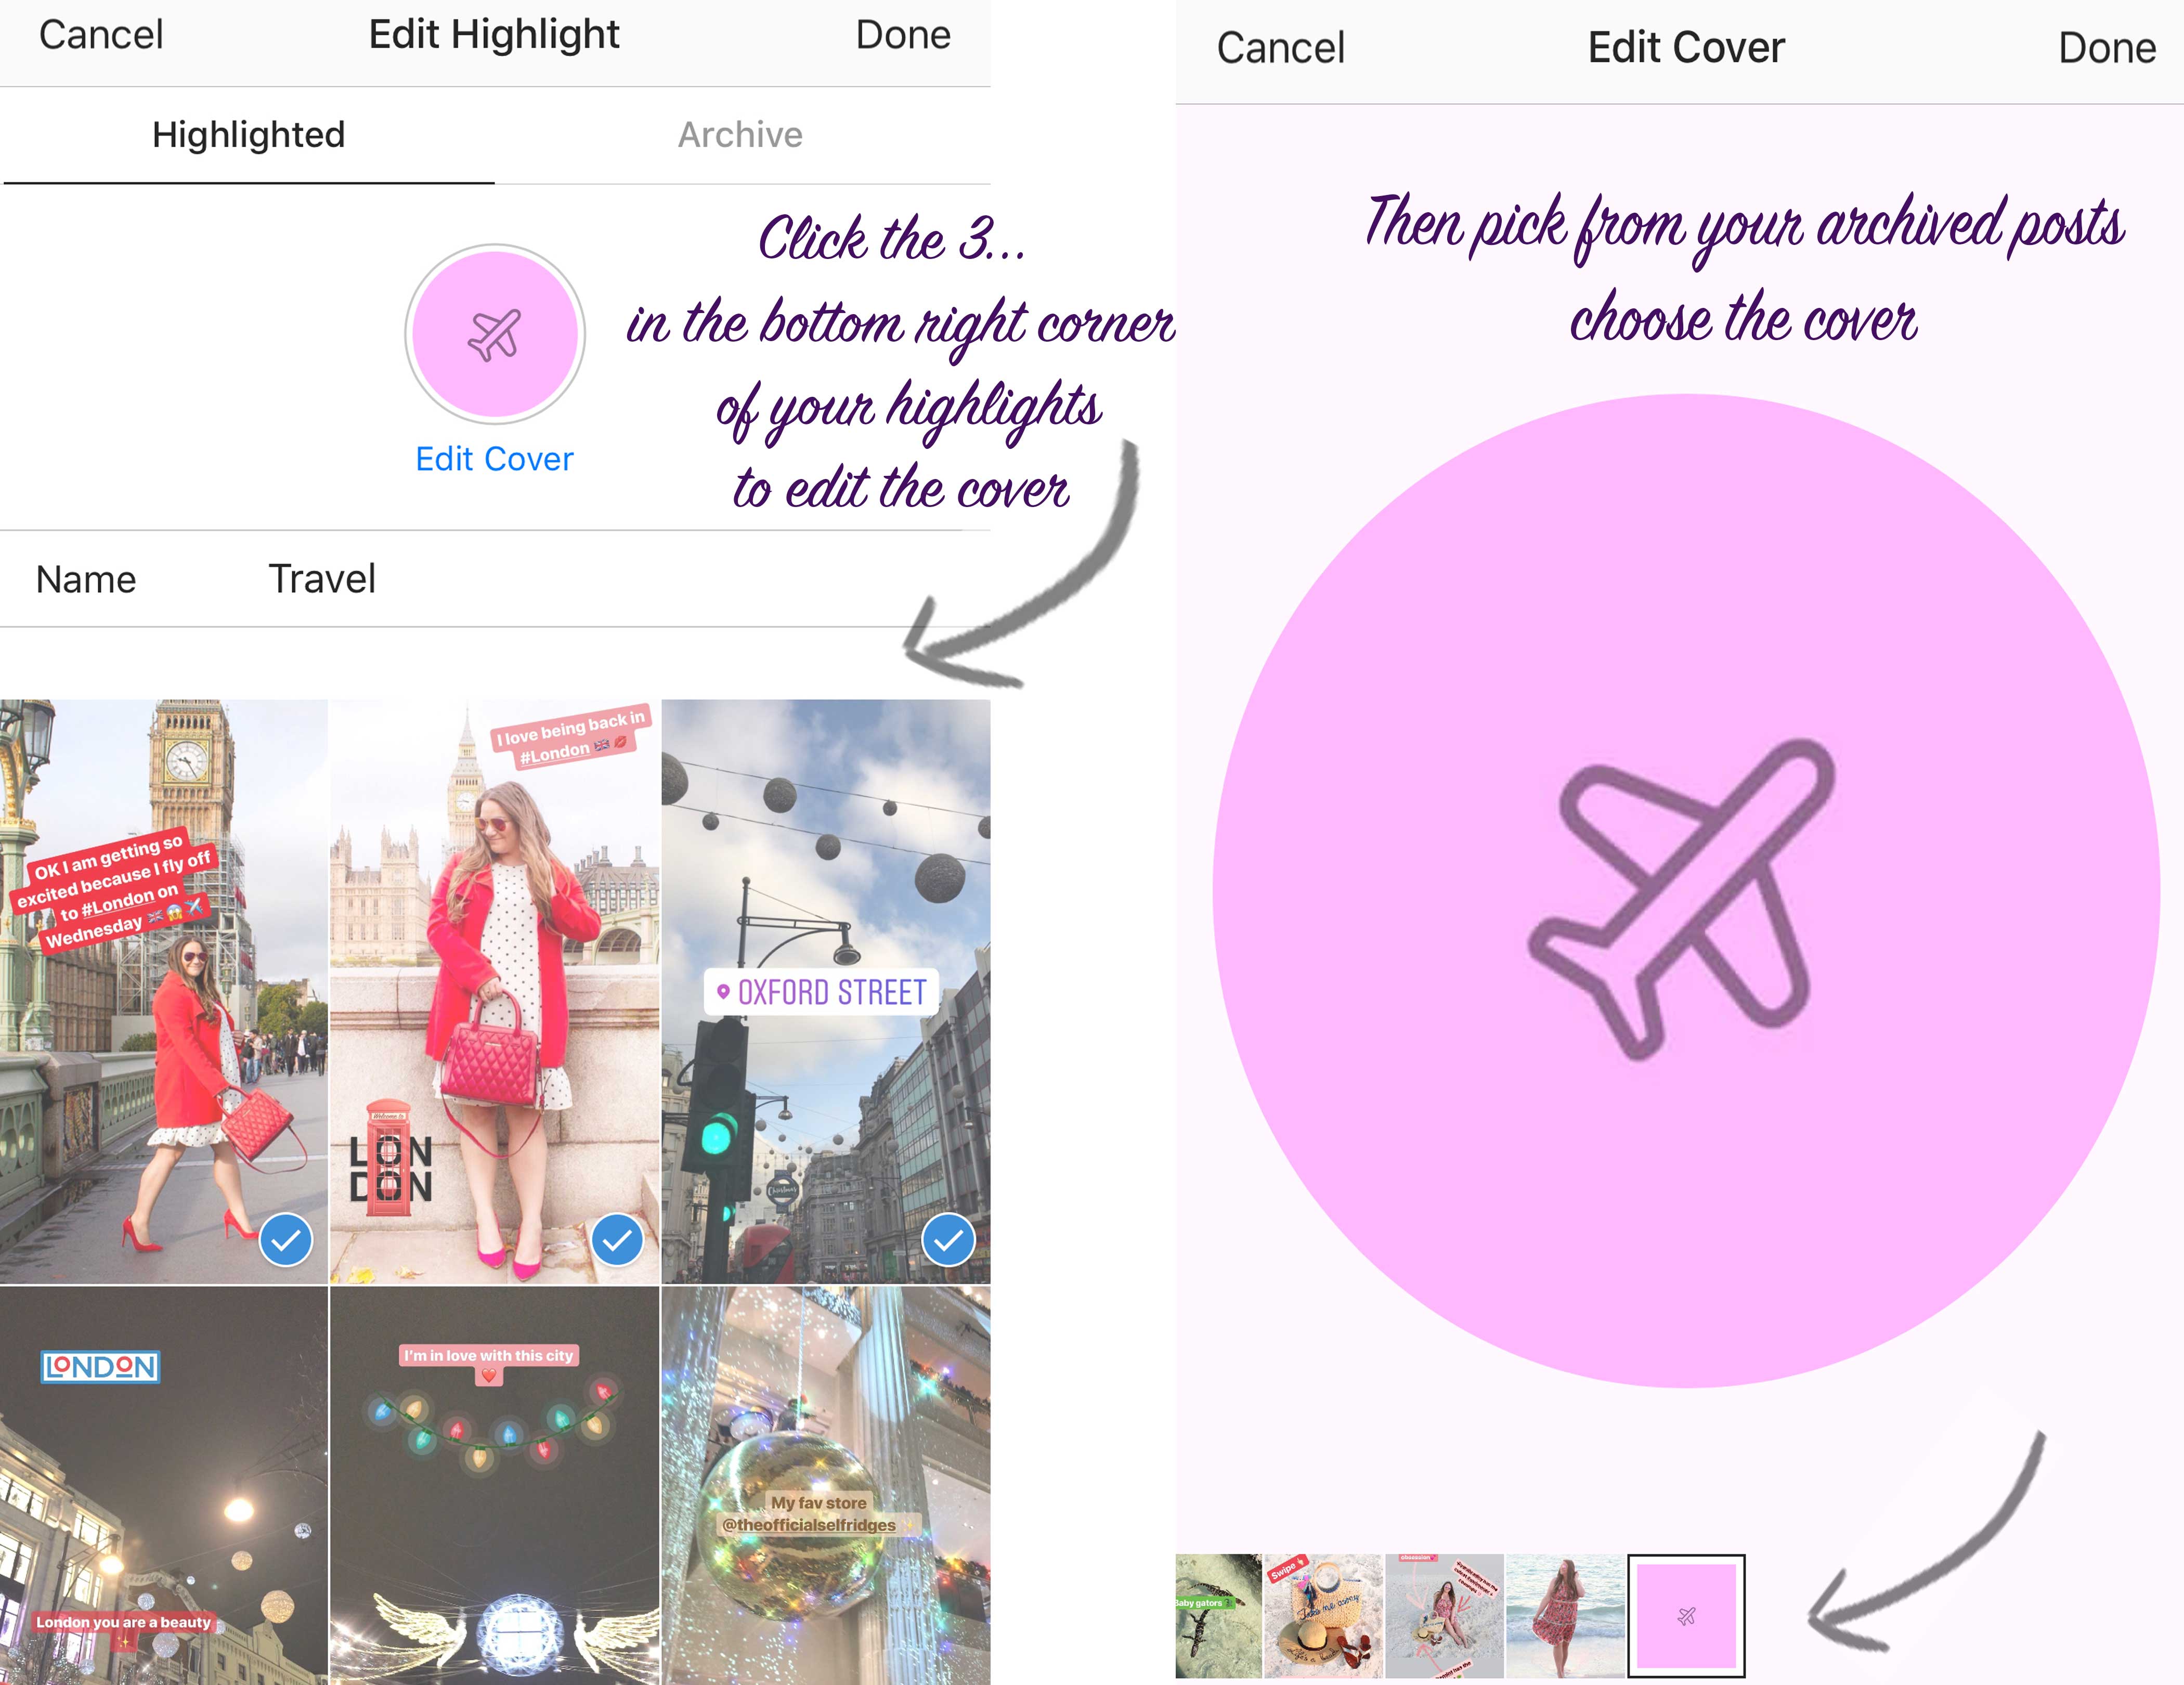
Actual stories you create yourself. They will appear on your profile above your photos. You can add to Topical those stories that have already been published. To do this, in the profile, click on the plus sign “+”, select the desired stories and click “Next”. Give a name to the new collection of "Actual", select the cover (initially it will be one of the stories) and click "Done".
Here you can save promotions, portfolios, products, case studies, workshops and much more. This will make it easier to navigate through your account and allow you to highlight the information you need.
When creating Actual Stories, it is important to remember:
For the latest, you can create and upload your own icons. This will emphasize individuality.
There are several ways to create a story icon.
The easiest option is to use a pre-made Story and select it as the cover.
Click on the “+” in the Instagram profile, select the necessary stories and click “Next”. After that, give a name to the new album and click "Edit Cover". In this step, you can choose any story for the cover, zoom in or out, or select a specific part of the photo.
Click "Done" and your new album will appear on your profile.
Another way to create an icon is to make it in third-party applications and services. For example, in Canva or Photoshop. It is better to create regular square images, where the icon will be located in the center. The optimal image resolution is 1080x1080 pixels.
The finished picture can be uploaded as a story and selected as a cover according to an already known option. Or, when editing a cover in Actual, click on the gallery icon and select from phone files.
To insert a cover into an already created album, you need to open it through your Instagram profile. In the lower right corner, click on the three dots with the words “More”, and then “Edit current”.
Click “Edit Cover” and select the desired icon.
Stories statistics can be viewed by connecting a business account.
To view statistics, go to your Instagram profile, click on the menu icon in the upper right corner and select "Statistics". You will have access to account statistics and publications.
The “Stories” section displays statistics of stories posted in the last 24 hours. But you can find out the statistics of publications made in the last 14 days. To do this, click "All" in the "Stories" section.
In the filter above statistics, you can switch data and view statistics on impressions, reach, clicks, scrolls, responses, and so on.
Impressions - the total number of views of stories.
Reach is the number of people who viewed your stories. Impressions for the same account do not count here.
Scroll forward and backward - how many times users have moved to your next post or returned to the previous one. So you can understand whether the audience was interested or not, they were intrigued by the continuation of the viewing, they understood what you wanted to tell in the story.
Next story - transitions to the stories of other accounts. The data shows how many people moved from your story to the next without being interested in the content.
Exits - shows how many times users clicked the cross to exit your Story.
Replies - how many people have responded to your stories.
Reposts - how many other accounts reposted your story.
Clicks on the link - how many people followed the link published in the story.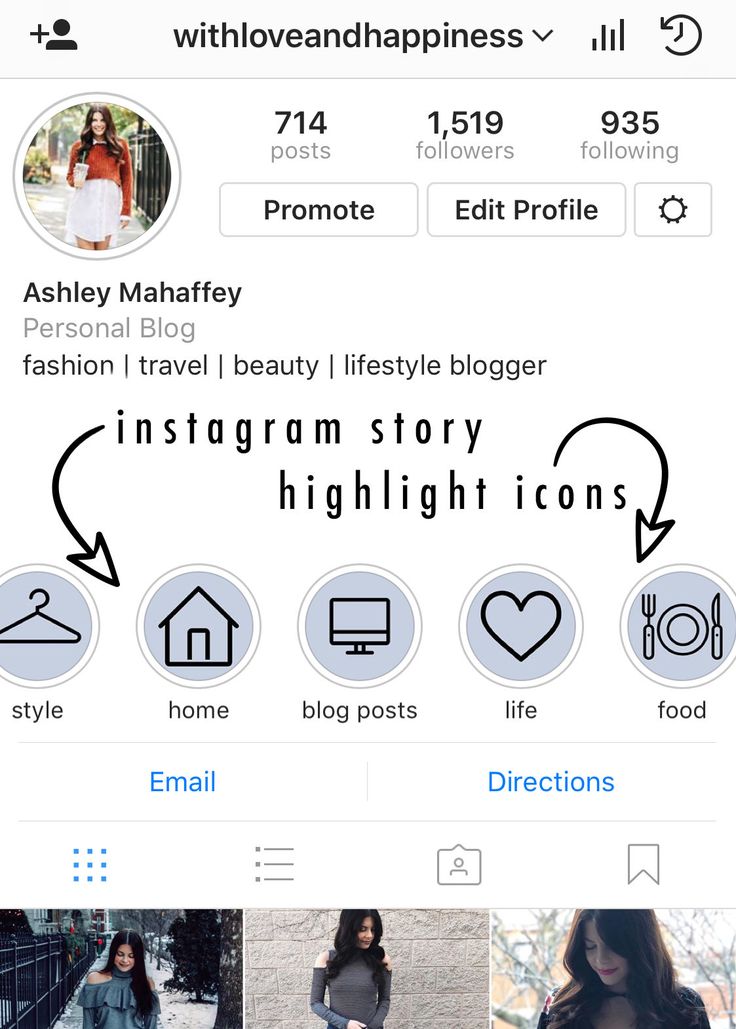
Stories statistics provide detailed metrics and help you determine how engaged your viewers are when viewing Stories.
Instagram stories can be created on third-party resources and use not only the standard tools that Instagram offers.
Here are a few services where you can create stories from ready-made templates, upload your photos or use ready-made backgrounds and fonts:
Easil is a platform with a number of ready-made templates that you can change. Templates already have the correct dimensions for stories, but in the paid version it is possible to change them.
Another popular platform for creating marketing materials, including Instagram Stories, is Canva. All templates you create will be stored on the platform and you can download them at any time.
Is the list of viewed Stories displayed in order?
Instagram uses different ranking methods, and users sort differently. Moreover, it can change every few months. Therefore, for some users, lists can be shown by viewing time, for others by the frequency of interaction with the profile, and so on.
How is the list of unviewed Stories formed?
Usually shows actual stories made in the last 4 hours. Then they are mixed with the earlier ones. But Instagram pays more attention to real people, so the stories of ordinary accounts are shown first, and then commercial or impersonal ones.
Viewing History will count as a profile visit?
No. According to Instagram, visits are the number of clicks on a username to go to a profile.
To learn more about Instagram and other social networks, subscribe to our newsletter.
Master these tricks and create professional posts oes hows
GOOKS INSTAGRAM
Haki for publishing photos and video 9000 9000 Haki for stories
Hacks for profile description
Hacks for hashtag ov
Hacks for private messages in Direct
 Remove posts and/or stories from certain accounts you follow from display
 Disable posts from annoying users without risking offending them by unfollowing them.
Bring frequently used filters forward for faster publishing.

Looking for inspiration? Why not take another look at what has already inspired you.
How to:
Don't let anyone with access to your phone know how obsessed you are with fake friends.
How to:
Permanently remove certain searches (accounts, hashtags, places, etc.) so they don't appear in searches.
Never miss the posts of your favorite people and brands!
If you change your mind, the option to turn off notifications is in the same place.
On Instagram, you can add up to 5 accounts under the same email address.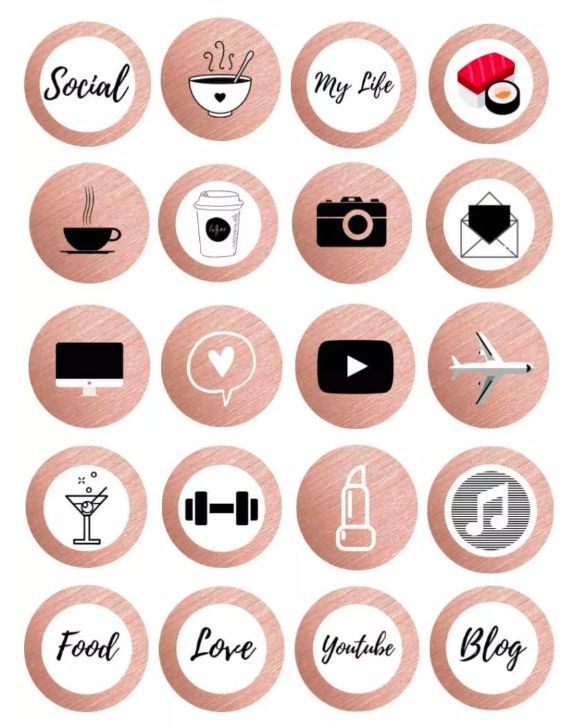 And you don't have to sign in and out of the app to switch between them.
To switch between accounts you have added:
Pinterest is not listed as one of the app options where you can post an Instagram post, but there are workarounds for both the Instagram mobile app and desktop.

If you need to hide an offensive comment or erase a typo, deleting comments is easy.

Dealing with a troll? Comment controls allow you to filter and block comments containing certain keywords.
When you enable filtering, it applies to both new and existing comments in your posts. When you disable comment filtering, hidden comments on your posts will be restored.
Note . You can change this setting even after publishing. Navigate to the post by clicking the three dots icon above it and select Enable commenting . You can also disable comments on a previously posted post by following the same steps.
Do your followers ask a lot of the same questions? For example: “When will the item be back in stock?” Or “What days do you not work?”
For iOS users, there is a feature that will help you quickly and conveniently answer these questions.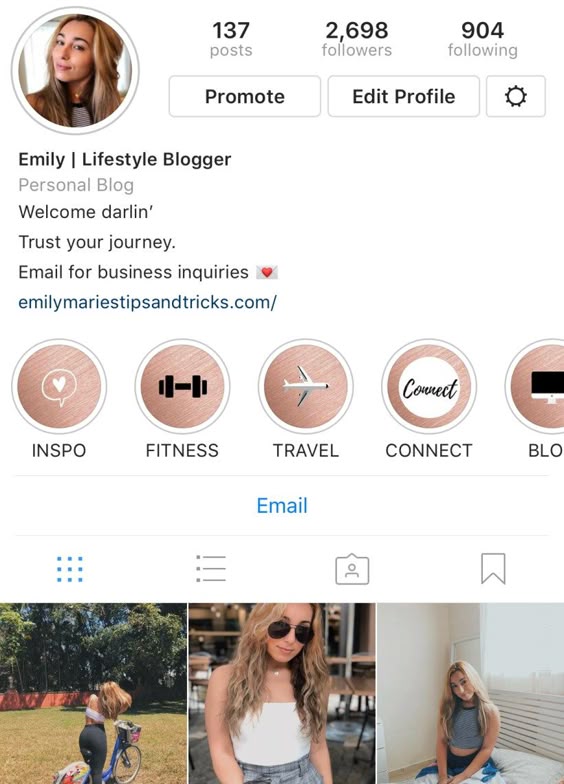
The perfect way to draw inspiration. You can also use this feature to keep an eye on competitors.
This is possible thanks to the archiving function.

Don't want to be stuck on Instagram for too long? Set a reminder to know when the allotted time is up.
If you prefer long National Geographic captions, this hack will make your text more readable.
Note . Typing will start a new line, but will not create a gap in the text that you want to separate one paragraph from another. Create a caption in the notes app and copy it to Instagram. To break lines further, you can use punctuation, such as a bullet or period, to leave room for a blank line.
How to do it right - watch the video in the original article on the Hootsuite blog.
Get creative and enjoy Instagram's grid format.
Image from reynoldkitchens Instagram account
For those who want a photo that looks like the real thing, but not quite #nofilter.
These are Instagram Stories that will never disappear!
If the sound is bad and/or unimpressive, you can also remove it so it doesn't distract your audience.
This can also be done in stories. To mute the sound, after recording a video, tap the volume control icon at the top of the screen.
You've taken the perfect shot and edited it to perfection, but the perfect caption never comes to mind. Save the post as a draft with all your edits and come back to it later.

note . To remove a post from saved drafts, select Manage to go to drafts, then press Edit . Select the posts you want to delete and click Unpublish at the bottom of the screen, then click again to confirm the action.
26. Blur the background of the portrait
This feature is only available on select Android devices, iPhone SE, 6S, 6S+, 7, 7+, 8, 8+, and X.
Companies can use this feature to partner with other companies or influencers, for announcements, joint projects, etc. You can invite your subscribers to join the Q&A session you host.
 If it's a temperature sticker, you can choose between Celsius and Fahrenheit.
 You can only share posts from public accounts.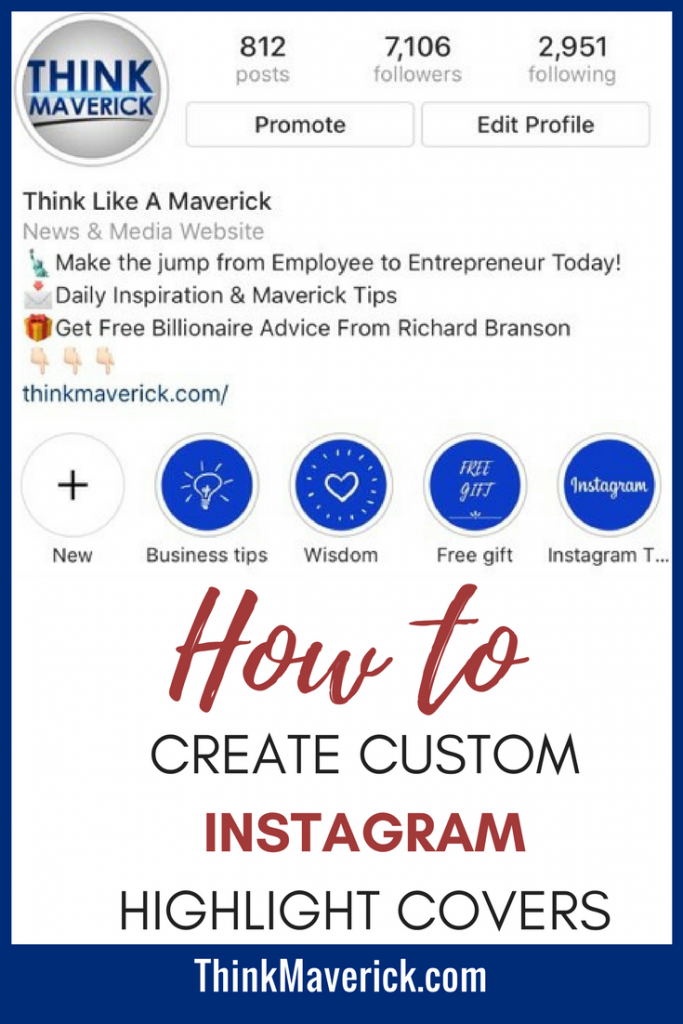 If you don't want your content to appear on other people's Stories, you can check it in your settings.
You can choose from thousands of songs!

Whether you want new music to get you in the holiday spirit or new tunes to help you get through your final weeks of school, your friends have the perfect tracks.
 They can click on a sticker in your story and then write a question or send you a song.
If you want to publish it on another channel later.
You can also save individual posts from your history by downloading them by clicking the down arrow icon in the lower left corner of the screen. If you've published a post, go to the photo or video you want to save, tap the three dots icon in the bottom right corner, and select Save photo .
If your story ー is fire and you want everyone to see it ー even those who haven't been on Instagram in the 24 hours it's showing ー post it on your profile.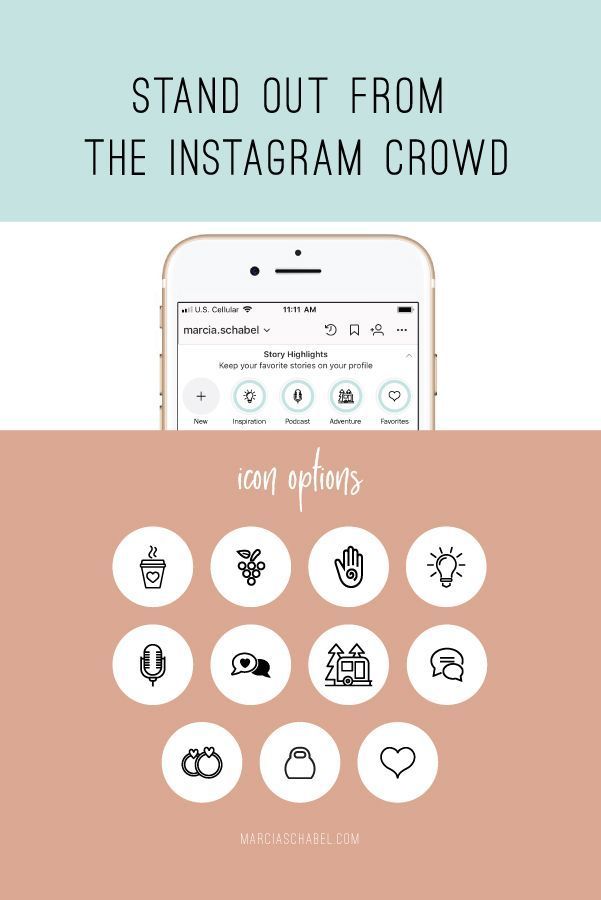
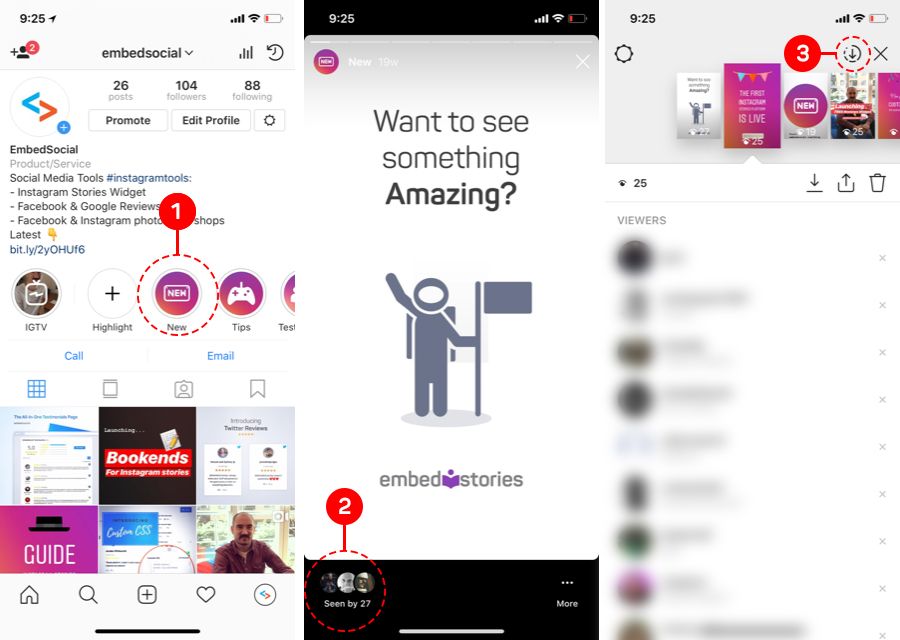
Want to know how your stories are doing? Take a look at this little-known feature to find out who has viewed posts.
Method 1
Method 2
You can also select the people your story will be hidden from when you view the list of people who have seen your story.
Hiding your story from a person is different from blocking and does not prevent them from seeing your profile and posts.
Make a "best friend list" to share private moments with a small group of your choice.
You can safely update the list and remove people from it.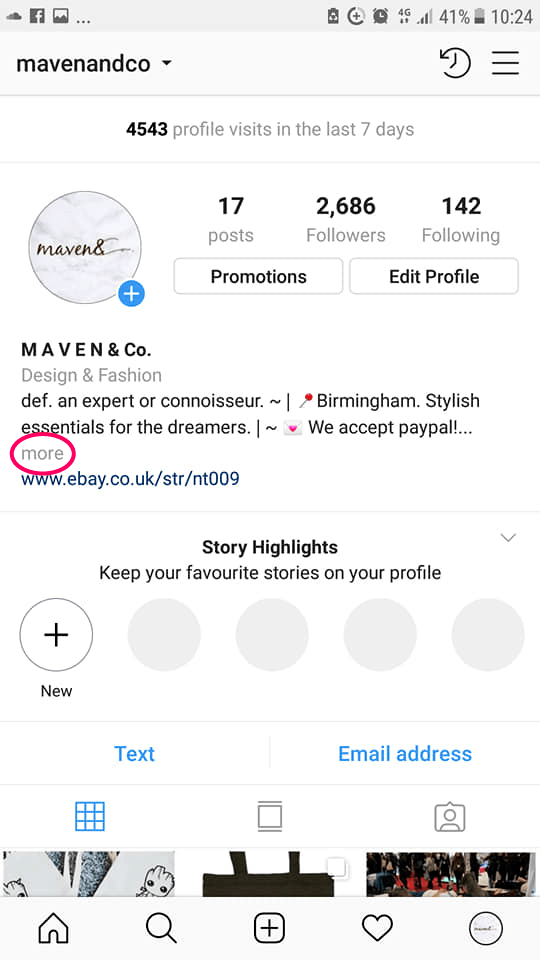 They will not know that you have added or removed them.
People on your list will know they're on it, but won't be able to see who else is on it. If someone has added you to their list, you will see a green badge when viewing their stories and a green ring around their profile photo.
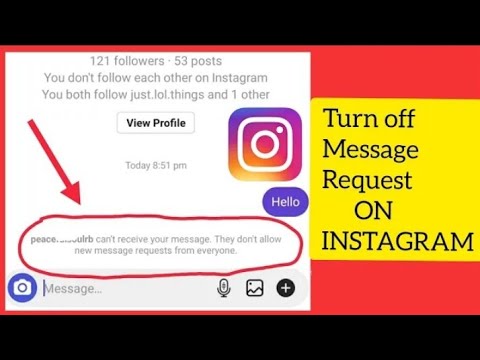
Whatever the reason, we are all subscribed to at least one account, the content of which we may not like, but for some reason it is impossible to unfollow the account. What is the solution? Switch his stories to silent mode.
A picture is worth a thousand words, but sometimes you only want to say a few words.
Now you can share a large-format photo of a group of colleagues without cutting Gary out of accounting.
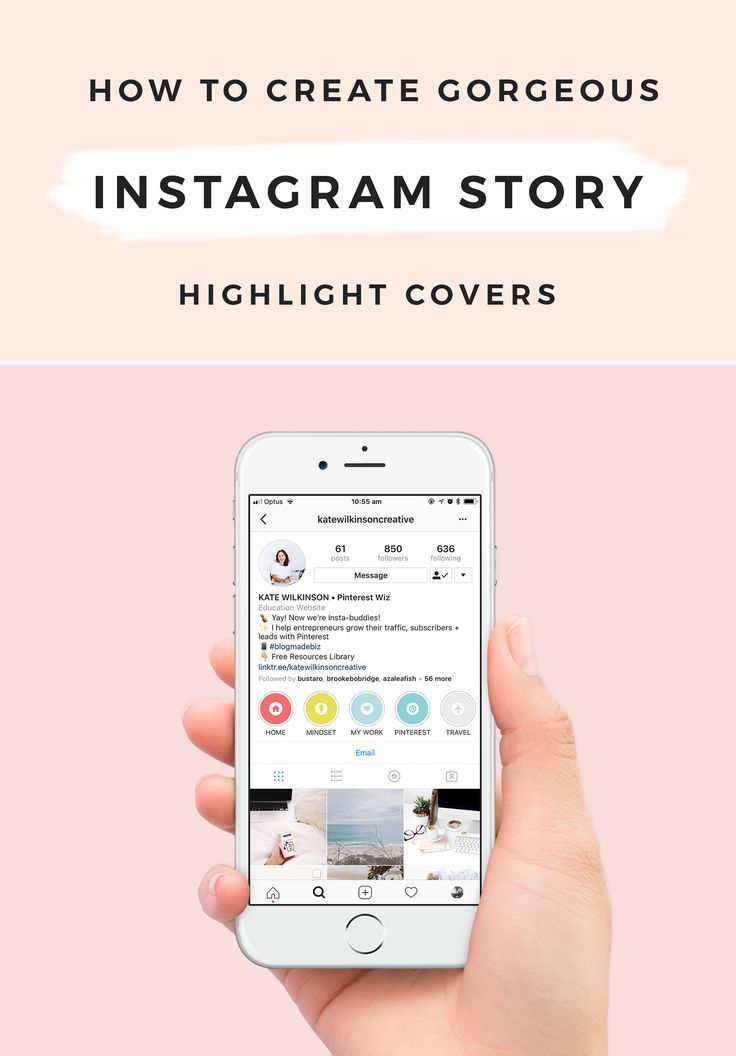
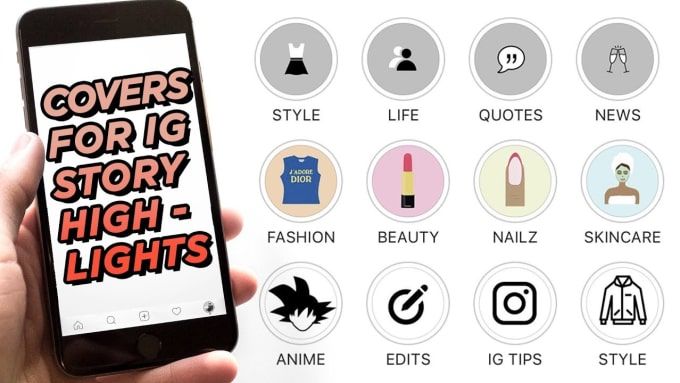
Businesses can keep their best stories forever with Instagram Stories Highlights.
Eternal stories remain on your profile until you delete them.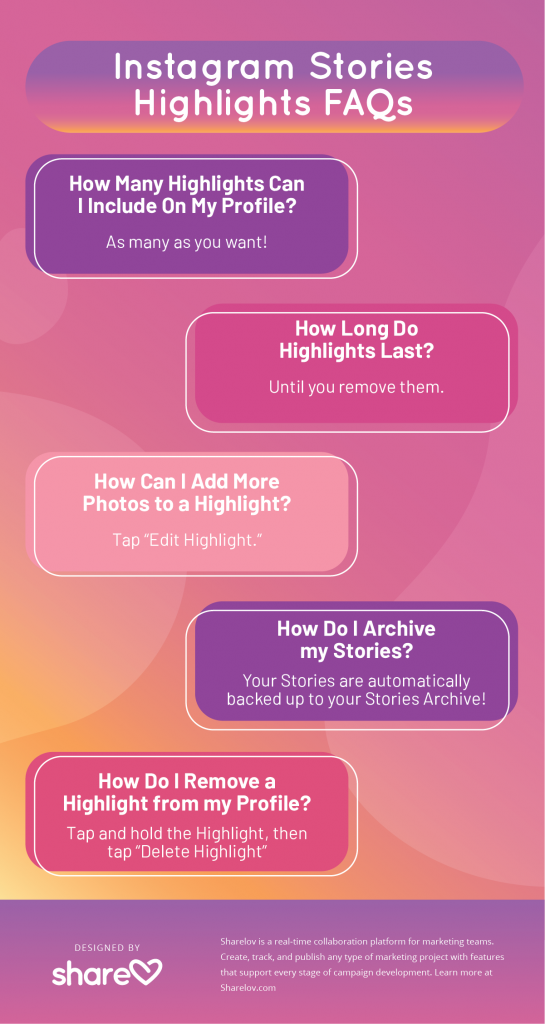 You can post as many pinned stories as you want. Check out how to create timeless story cover icons for free so that your icons really stand out from the crowd.
You can do this for a single post, or you can set up the app so that all your Instagram stories are automatically published on our Facebook page.

Another feature available to business accounts.
After the live broadcast ends, click Share at the bottom of the screen and the video will be added to your story.
Note . The recording will be available within 24 hours. During playback, all comments and likes from the original broadcast will be displayed. Companies will also be able to know exactly how many people watched the video ー both live and recorded in stories.
Want to encourage your audience to watch the rest of your account's stories? We have a simple trick for this.
If you just created an IGTV account, let your followers find your new content ー share it in stories.
Now your followers can go to the video on IGTV by scrolling through the story on Instagram.
In your profile description, you can link to a hashtag page or other account.
Note . When you mention someone else's profile in the description, their owner receives a notification and can remove the link. The account will remain in your description, but without an active link.
Has your company been tagged in an image you don't want to be associated with? There are ways to remove it from your profile.
Pro tip: If you don't want tagged photos to appear on your profile, go to the three-line menu, section Privacy > Tags and toggle the toggle switch Add automatically to inactive.
If you want to break up a block of description text about yourself, this hack is for you. Line breaks are a great way to add information and enhance the visual experience.
Note . It does not matter if the profile was edited from a mobile device or from a PC, when viewed from a desktop computer, the information will be displayed without paragraphs.
Profile Description ー A great place to link and drive traffic to your website or other social network.
How to:
Pro tip: include UTM parameters in your URL to track the amount of traffic coming from your profile link.
You can search for a person in the profile description by field Name . If you mention keywords related to your business in your name, you will appear more often in the search results of people who are looking for companies in your industry.
Tired of left alignment? There is a way to align the profile description to the center or even to the right.
Note: you only have 150 characters to describe your profile and each space counts as a character.
On some Instagram profiles you will see symbols such as hearts, stars and pencils. You can do that too!
If you represent a business and still don't have an Instagram business profile, you're missing out on useful features and insights. Switch now.
Because with the right hashtag, your content will be found more often and it will allow you to expand your audience.

Great way to get inspired to create content!
If you often use the same hashtags for every post, save them in a note to save time.
Don't pollute signatures. Hide hashtags so the reader can focus on what's important.
You can include up to 10 hashtags in a single story, which will greatly increase the number of people who see it. To keep your story from looking cluttered, there are two easy ways to hide hashtags and maintain a neat appearance.
 Disable activity status
 If you don't want your followers to know when you last logged into the app, you can disable your activity status in Instagram Direct Messenger.
You can send a disappearing photo, video, or boomerang to another account or group of friends using Instagram Direct Messaging.
If you select multiple recipients without creating a group, the same message will be sent to each user.
You can send your live video or the video you are watching to a user or group.