Instagram has been one of the leading social apps over the past decade. It’s now widely used by more people than ever, from all parts of the World. Because of this, more and more users are deciding that privacy is a top priority. Luckily, Instagram makes it very easy to make your profile private in order to fend of prying eyes that may have no business looking at your content.
However, this has created an influx of users that have gone private. In fact, it’s now just as common to find a private profile as it is to find a public profile. Ultimately, if you want access to someone’s private account, you’ll need to send them a follow request. In doing so, you’ll then have to wait until the user accepts your request, or flat-out denies it. Often times, users will see your follow request, then leave it in review; basically leaving you hanging there for as long as they, at their own discretion.
Note: At no extra cost to you, we may earn a commission for purchases using our links. Learn more.
Initially, it may be difficult to wait for their decision. Therefore, you may want to see the status of who you’ve requested to follow; so you can see who’s ignored your Instagram follow request. However, before jumping to conclusions, it’s important to know that there’s a chance that the user hasn’t even viewed your follow request, yet.
Regardless, a little bit of patience goes a long way. You’ll want to give them a bit of time before you assume they’re ignoring your follow request. Let’s be honest, many popular Instagram accounts either get bombarded with followers or even take an “Instagram Break” – it’s best not to assume they’re full-on ignoring you! Give them a chance to see your request before taking any offense to it.
Luckily, there’s a few easy methods to viewing the status of who you requested to follow on Instagram.
The first method involves using your iOS or Android device. However, some of the most recent versions of Instagram’s mobile app may not contain the “Access Data”. Because of this, don’t get frustrated; simply use the web browser method, instead.
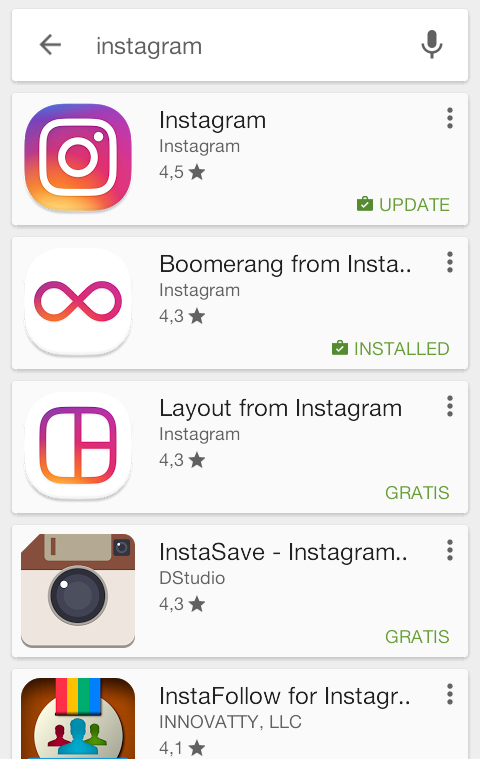
1. Open the Instagram app on your smartphone or tablet.
2. Click on your profile and then click the “Menu” icon. It’s the three little lines stacked on top of each other in the top-right corner.
3. Next, select the “Settings” menu.
4. Tap “Security” and then scroll down until it says “Access Data“.
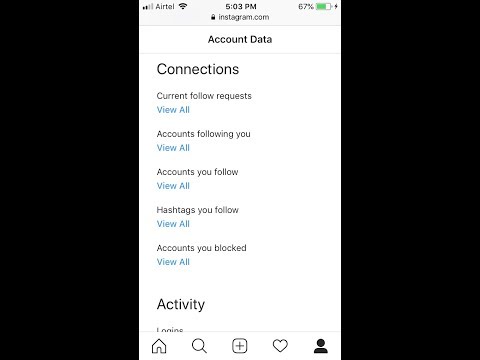
5. You will then see “Connections“. Proceed by selecting “View all current follow requests“.
Using your web browser to view your pending follow requests is the most reliable method, by far. It seems Instagram likes to change-around their mobile app quite a bit, but the web-version of Instagram has remained the same for the past few years. Below, we’ll give you the steps to manually check, but an even easier method is to just head straight on over to the following URL: https://www.instagram.com/accounts/access_tool/current_follow_requests
1. Head on over to Instagram.com through your favorite web browser.
2. Click on your own profile and select “Settings” by clicking your profile’s icon and selecting the third option from the dropdown menu.
3. On the left side column, you’ll see “Privacy and Security” as the 7th option from the top. Click it.
4. There will be an assortment of settings to scroll through. The 7th menu is titled “Account Data“. Proceed by clicking “View Account Data”.
5. In the top-right column underneath “Connections” you should see “Current Follow Requests“. Click “View All“.
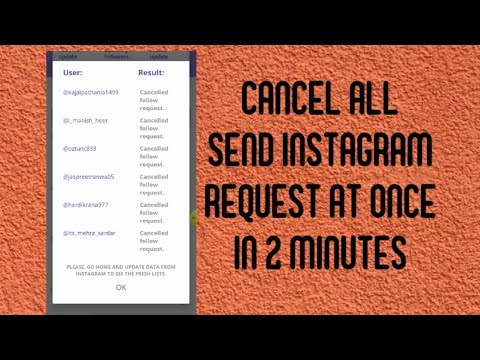
6. From here, there will be a simple text list of each account that you have requested to follow. There’s not even a link to each account or a way to cancel each one. There’s simply the name of each account, in plain text, with no other links.
When you’re trying to get more followers on Instagram, many users will simply request to follow each and every account that they can. If you don’t want to go through the procedures we outlined above, there are other effective methods to re-trace your steps.
When you post a video or photo on Instagram, one of the most popular methods to gain more followers is to simply request to follow any account that’s given you a “like”. Browse through your posts and click on the number of likes for each upload. There will then display a list of all the accounts who liked it.
They will be sorted from people you already follow to people you don’t follow. Any account that you have not yet requested to follow, or have done so but they denied you, will appear with a blue “Follow” button next to their name. Then, you can quickly determine which of the “likes” are from people you’re currently following or have not yet requested to follow.
Often times, finding a popular “third-party” profile and viewing their followers is a quick way to access a list of “new” accounts that you have not yet requested to follow. Whether it’s a mutual friend’s account or simply one that’s similar to your target audience, this method is commonly used to acquire new followers. If this is something you often do, you can go back in a few days to see a list of accounts who’ve either accepted or denied your requests, just by viewing the followers of the third-party account.
If you’ve tried this method to find follow requests that you’ve sent in the past, there’s a chance you’ll go back in a few days and you won’t see them. If this is the case, there’s a good chance that they’ve either accepted your follow request by default, or they’ve manually accepted it. Rather than having a blue “Follow” button next to their name, there will be a white “Following” icon.
In the event that you’ve encounter an account you know you’ve already requested to follow, but there’s still a blue “Follow” next to their name, chances are they’ve denied you. A cancelled follow shouldn’t be taken personally, however. Worst comes to worse, you can attempt to DM them or request to follow them, yet again. Keep in mind, however, this may ruffle some users feathers. Simply put, don’t be too annoying and constantly re-request; you’ll likely do more harm than good and it won’t help your case.
If you’ve been requesting to follow a large amount of accounts or even just a few, you may find the desire to cancel your request. Often times, leaving a pending follow request can be a bit disheartening. Why don’t they want you to follow them? Is it something personal? How do I know they’ve seen it? Feeling embarrassed? If these are questions that immediately come to mind, cancelling might be a good option.
First, head on over to your Instagram account’s current follow requests using your web browser. As we described earlier, here is a list of accounts you’ve requested to follow in the past. Unfortunately, there’s no button next to each entry, so you’ll need to copy and paste each account name to find their profile. Once their profile loads, click the “Requested” button; the large white button on top of their profile, directly above where it says “This Account is Private”. Clicking it will immediately cancel the follow request. As a result, the button will go from “Requested” to a blue background button that says “Follow”.
It would be great if there was a way to automatically cancel every sent follow request you’ve made on Instagram. However, there’s not a way to do this. Unfortunately, the only way to do this is to manually go one by one through your current follow requests and painstakingly individually cancel each one.
As of now, there’s not even an application or third-party software that’s capable of cancelling all sent follow request simultaneously. Ultimately, Instagram prevents this data from being scraped and/or collected.
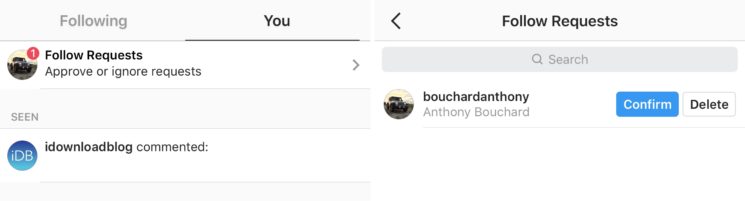
When your account receives a new follower request, it’s very easy to mistakenly delete their follow request. Being that the “Confirm” button is right next to the “Delete” button, it’s very easy to accidently hit the wrong one. Because of this, some users may want to know if there’s an easy way to view deleted follow requests.
Unfortunately, Instagram doesn’t offer any way to see which requests you’ve deleted; accident or not. Simply put, once the request is deleted, it’s gone forever! The only plausible way to find a deleted follow request is through memory. If there’s a chance you remember the accounts you previously deleted, you’re still able to simply search their username to pull up their account. Yes, this relies on memory, but it’s the only realistic way to have another chance of them requesting to follow you once again.
The best and only method is to search their username and request to follow them. Then, they’ll see your request and likely hit “follow” on your account since they’re probably already familiar with who you are. In the event that you don’t want to follow them first, simply drop them a direct message and explain the situation. There’s a somewhat good chance they won’t even notice your DM, but it’s worth a shot!
If you’re waiting to gain following access to someone’s account and you’ve already requested to follow them, you may notice the button on their profile go back to “Follow”. If this is the case, it likely means that they’ve denied your request. This doesn’t mean they’ve blocked you, rather, they’ve canceled your follow request for one reason or another. Ultimately, you’ll need to re-request to follow them. Sure, they’ll see it again and may deny you a second or third time, but it doesn’t mean they’ve blocked you. After all, if they blocked your account from their own, you wouldn’t even be able to see their account at all (unless you’re logged out).
Was this helpful? Please consider sharing:
Note: At no extra cost to you, we may earn a commission for purchases using our links. Learn more.
How to check your sent follow request on Instagram guide, Social media tips, Online follows advice
23 June 2022
Instagram is one of the most popular social media apps in the recent decade. It’s used by almost all the sections of people. Though it is largely popular among young generation, mostly GenZs and people between the age group of 15 to 35.
On Instgram, in contrast to Facebook, We make followers instead of Friends. However you can’t follow everyone on Instagram.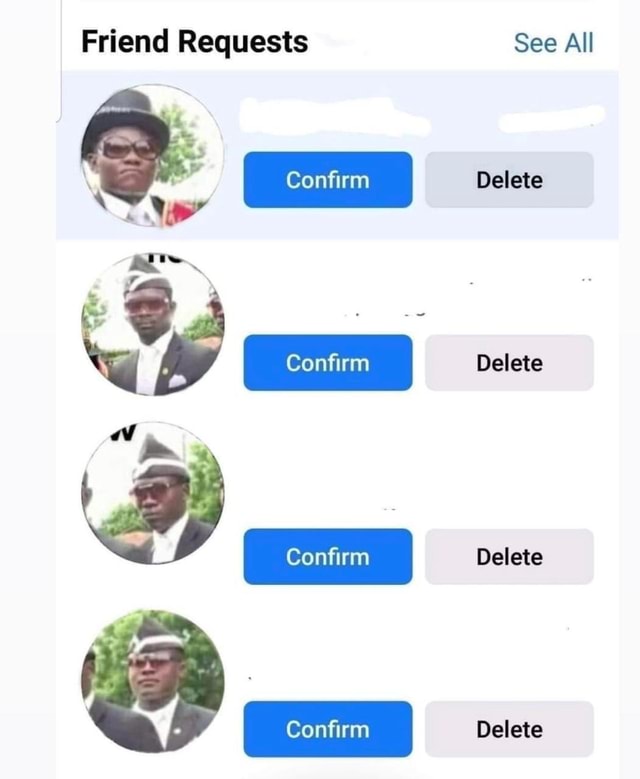 There are two types of accounts – Private account and a Public one. And people. And people send Follow requests to the private accounts. One can just follow the public accounts without requesting them.
However on a daily basis, we request to follow a lot of people on Instagram. Some are people we personally know and some of them may be have a mutual friend with you. Quite other times, we may find interesting people in the comment section of different posts or on the stories of known people.
However when we request them to follow, it is on the discretion of the user to accept your request or not. This leads you hanging there for as long as they want. You would want to see their request status or just want to know whom you have requested to follow. You may also think that they have either ignored your request or haven’t even seen it till now. However there are a few easy ways to find out the people whom you have requested to follow or view the status.
In this article, we will provide you with both mobile and desktop method to view the status of the people whom you have requested to follow,
Want to Get 10k instagram followers ? then we recommend you to visit – IGInstant Website.
 Proceed and select Account Data.
This may sound ridiculous. But you would have noticed that when you post on Instagram. And when you click on likes, you will have sorted lists of followers and following and in the following section, there will be accounts you requested to follow. So in this you definitely won’t see all the account that you requested but can some of the accounts who liked your photo.
The bottom line here is that don’t be obsessed with people who have denied or ignored your follow request. Some people do follow for follow to gain more followers, its good idea to gain followers, but its time consuming instead you can buy instagram followers to grow followers fast.
Don’t take this personally. If you really want to follow them, then DM. However in the process don’t be an annoying and toxic person by re-requesting them, Some people just want to have close circle on social media and it has nothing to do with you.
With this I sign off!
Comments on this guide to How to check your sent follow request on Instagram article are welcome.
Ultimate tips for increasing followers on instagram
Why should architects buy instagram followers and likes
Should architecture firms buy Instagram followers
Use Instagram to gain mileage in home decor business
Residential Architecture Articles
City
Camping building designs
PSLab Studio & Multi-functional Workspace, Stuttgart
Design: DELORDINAIRE
photo courtesy of architects
PSLab Studio & Workspace Stuttgart Building
Civic building designs
Comments / photos for the How to check your sent follow request on Instagram advice page welcome
Instagram* notifies you of new followers and friend requests, but does not send unsubscribe messages. Let's say you subscribed to a person, he subscribed to you - you will be aware, because the social network sent notifications. But when a person unsubscribes from you, you will continue to be in his subscribers. There will be no notifications from Instagram*.
In the article we will analyze all the possible methods that will help you:
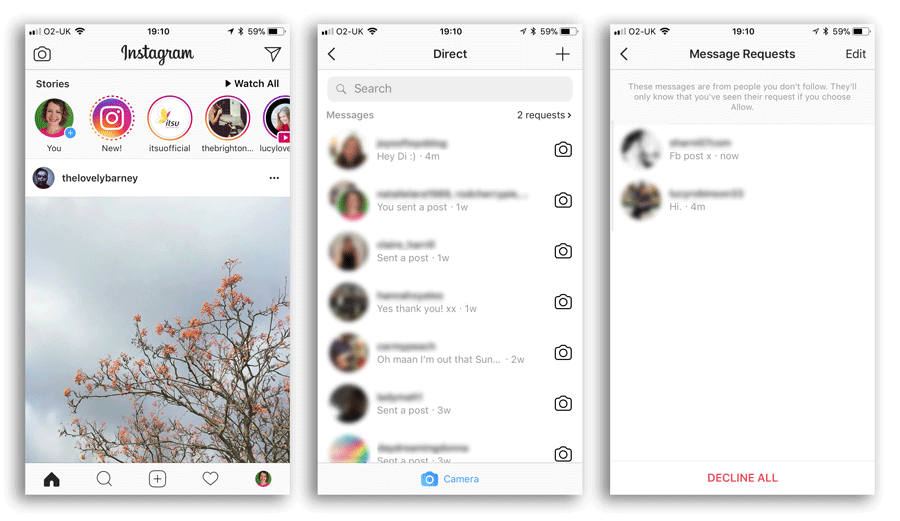
In the Instagram* mobile app, follow requests go to a tab with like, comment, and tag notifications.
How to find follow requests on Instagram*:
To understand which followers are mutual and which are not, look at the contacts in the "Followers" list. If there is a “Subscribe” button to the right of the profile picture, it means that the account is following your updates, but you are not following it.
If your account is not private, then anyone can subscribe to it and see your content in their feed. You can:
How to delete a follow request on Instagram*:
How to hide stories from the subscriber who sent the request:
 This is how a closed page for a new follower looks like
 How to close a page on Instagram* from new followers:
Unlike the open profile, where you receive notifications for new requests, a separate folder is created for them in the closed profile.
Two buttons are available to you: “Confirm” and “Delete”By the way, you won’t be able to see a closed account without an approved subscription - we talked about this in the article “How to view a closed profile on Instagram* without subscribing”.
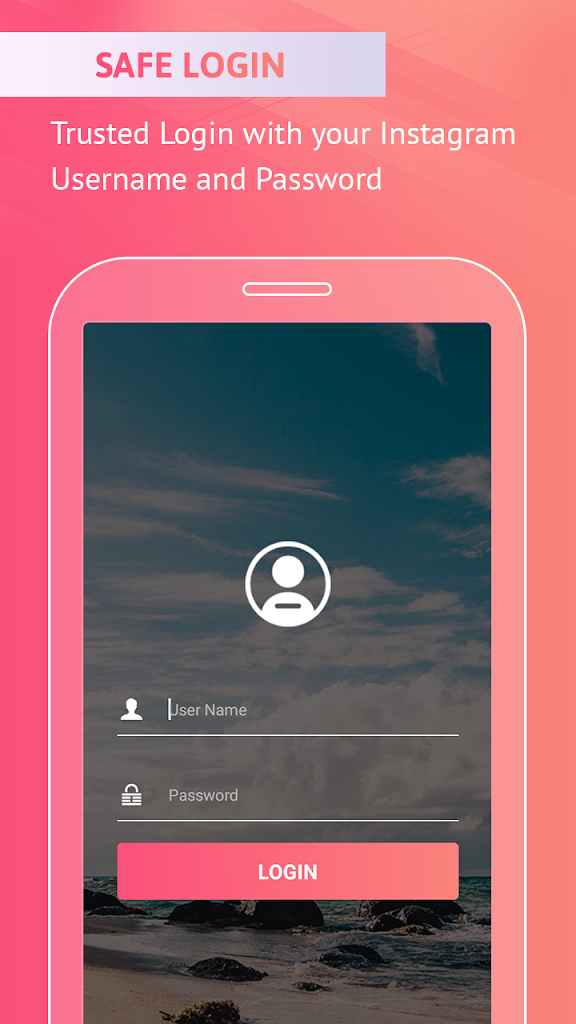
Important : there are a lot of mobile applications that more clearly show mutual and non-reciprocal followers in the profile. I can’t recommend it: most of the reviews on Google Play and the App Store are negative. People write that such applications are not only full of ads and a lot of paid features, but they can also steal your Instagram logins and passwords*.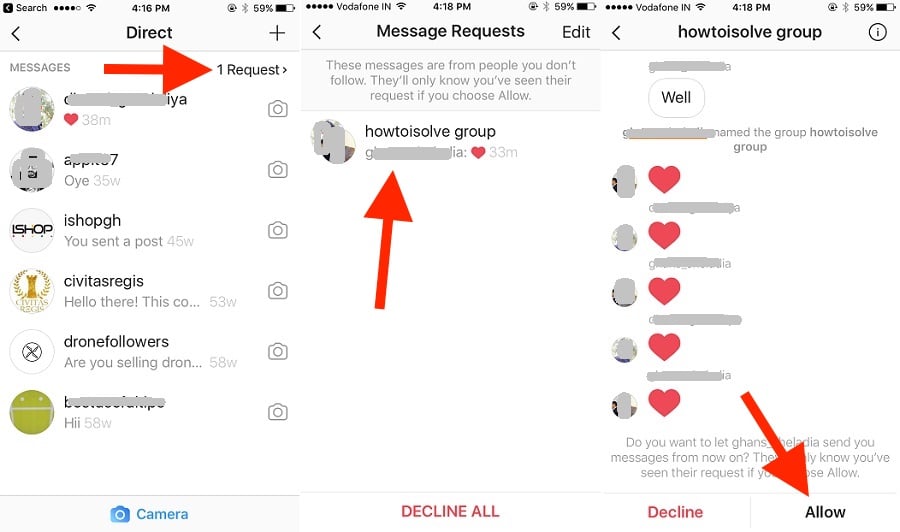
You can only find out to whom you sent a request on Instagram*, only indirectly. To do this:
True, in this way it will not be possible to look at requests that were sent to closed accounts and find out their total number. To do this, you need to open the web version of Instagram * and go to "Settings".
The settings section will open when you click on the avatarAfter that, select the "Privacy and security" section, and after it - "View account details".
How to view account data on Instagram* Here you can see the number of requests sent to subscribe to closed accounts.
If you want to cancel the subscription request or view the account, copy its name and paste it into the search.
Titles are not clickable – you will have to search for accounts yourselfInstagram* does not have a query statistics function, but you can see the total number of followers for a certain time. To do this, you will need to translate the page to a business profile, for more details, see the article “Business Profile Guide”.
How to view subscription statistics:
You can learn more about subscribers using the DataFan service. In it, you can connect your profile on Instagram* and get not only data on audience growth, but also the dynamics of outgoing subscriptions.
To find out the number of outgoing requests on Instagram*, go to DataFan and click "Connect public / RK".
How to connect an account to DataFanConnect Instagram*. Please note that you can only sign in with a business account linked to a Facebook page*.
How to connect Instagram* to DataFanLogin via Facebook*.
Pages on Facebook* and Instagram* must be linkedAfter - specify your account on Instagram* and click "Finish".
You can also immediately connect an advertising account to collect all possible statisticsFor the first time, the service will collect data for several minutes. Then you won't have to wait to enter - DataFan will automatically collect all statistics on subscribers.
An example of collected analytics from an Instagram account* Such a dashboard will show not only data on how many people have unsubscribed and subscribed, but in general all information about the state of the account: what coverage it has, how the audience reacts to content in posts and stories, how much good profile engagement. Tables can be saved as an image, PDF file or table for further work or transfer to the client.
In the first case, the order of steps is:
There can be many situations that are the reason for updating the list of feeds where the page is signed. Among the most common reasons for accessing this functionality:
The list of standard features of the Instagram application in the area of follower management includes several main sections:
In addition, there are systemic limitations in the social network itself. The fact is that depending on the duration and activity of the account, there are restrictions on the number of subscriptions (approximately 7500 people). If exceeded, a system error will appear. This imposes a requirement to periodically review the data and correct them.
If you have a private account, then anyone who wants to see your photos and videos will have to send you a subscription request.
If you have a private account, then anyone who wants to see your photos and videos will have to send you a subscription request.
Content
 1 In the phone through the application in the new and old versions
 If you accidentally declined a subscription request, ask the user to resend it.
Unsubscribe all sent follow request from Instagram app for iPhone
Instagram can be used both in the web interface and in the app. To cancel five or six requests, you won't get bored following the steps on the mobile app, but if you have a long list of follow-up requests, choosing a PC to cancel them would be a wise choice. Let's start with the tutorial to undo all the following requests on an Instagram account.
Canceling subsequent requests using the Instagram app takes less than a minute. Here's how to do it.
Instagram profile on iPhone app on Instagram
Click on Greater than in the top right corner of the screen and open settings ,
Instagram profile settings in the Instagram app for iPhone
Click Security , Search and open Data access under Data and history ,
Data access in the Instagram app for iPhone
Search for links and click View all under Current Next Requests ,
View all sent follow query on iPhone app for Instagram

Unsubscribe all sent follow request from Instagram app for iPhone
As I said, it is recommended to use the web interface if you have a few more cancellation requests, that's all.
Thank you for visiting! Check out more up-to-date tips and tricks for all your social apps. Request in the comments section for more help from us!
Everything is simple here. You can do this right in the app. To do this, go to the notification page by clicking on the heart in the menu. Above other notifications, there will be a link “Subscription Requests”. Clicking on it will take you to a list of all requests. Here you can approve the request, or ignore it.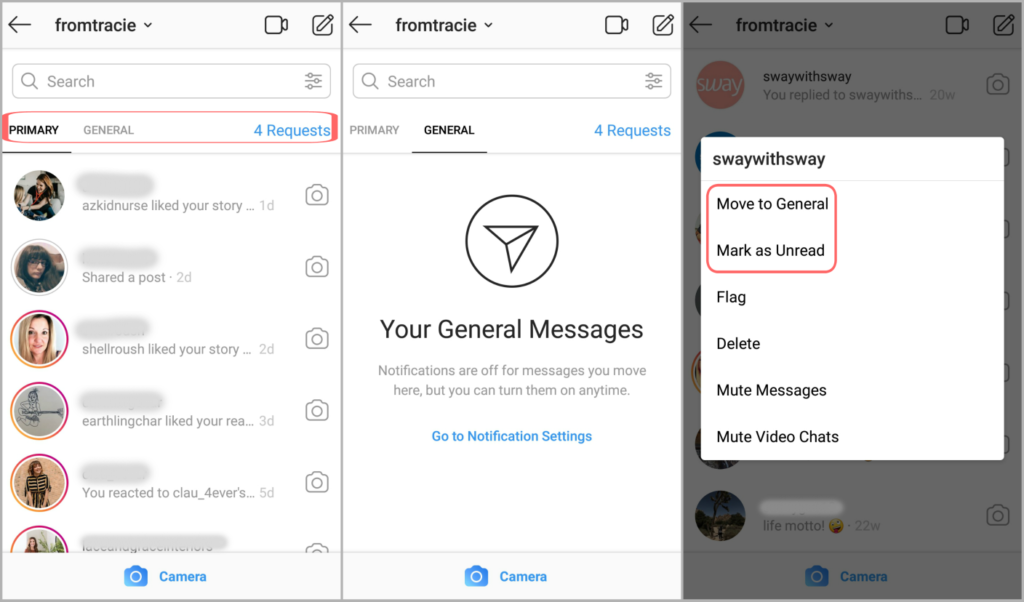
When you submit a request for a closed account, you do not always receive instant approval of the request. To do this, you need to wait until the account owner appears online. And even in this case, he can ignore the request, which will remain “hanging”. By such “hanging” requests, you can understand who rejected your request.
To see a list of your requests, you need to use the web version of Instagram. Unfortunately, the application does not yet have such an option.
Go to the account settings section by clicking on the gear icon. In the window that appears, select "Privacy and Security".
On the page that opens, find the "Account details" section and click the "View account details" link.
In the Contacts section, under Current Subscription Requests, click show all.
You will see a list of all your unaccepted or pending requests.
If you have a lot of requests and you don't want to analyze them by sorting out spam, then you can simply delete everything at once - the Reject all button in the center of the window at the bottom.
You submitted a request to subscribe to a private profile, and now you want to check whether it was approved or not. Even the status of the owner of the page you are interested in is "online" does not guarantee that you will not be ignored. You can check "hanging" only through the browser version of the application. In the Settings section (gear icon), select the Privacy and security item. In the menu that appears, click on Account Details, and then on View Account Details.
In the window that opens, go to the Contacts section and select the Current subscription requests item. By selecting Show all, you will see a list of outgoing requests: ignored or rejected.
Find out who is subscribed to:
If one of the friends is not displayed on Facebook or there are inactive pages in the list, they are deleted through the follower management.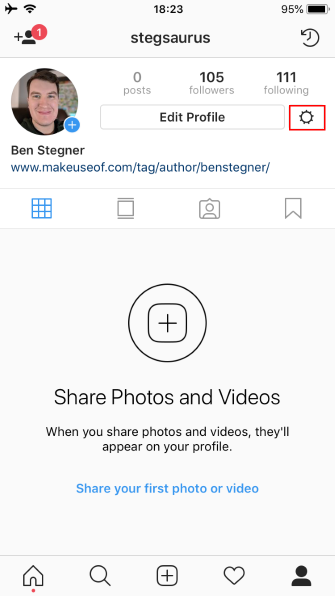
How to clear the list of friends:
Warn the system that when deleting from mutual subscriptions, notifications, photos and publications of this person become unavailable. By selecting "Unsubscribe" - notifications from their Chronicles are blocked: notifications about new posts will not come.
Another option to hide from the list of subscribers is to use blocking:
If more than five complaints are sent against a user, his account will be temporarily blocked. This may be due to spamming, obscene behavior, or other violations of the Community Guidelines.
On Facebook, you can only delete each subscriber individually: there is no mass blocking or clearing the list of friends.
If the data was entered correctly, the system will request a confirmation code that will be sent to your phone number.
To connect, go to the "Deals" section, and then go to the settings of the funnel to which you want to add Instagram. Click on "Set Up Funnel" - "Add Source" - select "Instagram".
To set up integration, click: — Add; - Install; - Enter a verified phone number and password from your Instagram account;
If the data was entered correctly, the system will request a confirmation code that will be sent to your phone number.
After entering the verification code, Instagram will appear in the list of sources for unparsed.
Important! To connect correctly, your Instagram account must be verified by phone number, you can check this by logging in to your Instagram account by phone number, two-factor authentication must be disabled, and all notification settings must be enabled.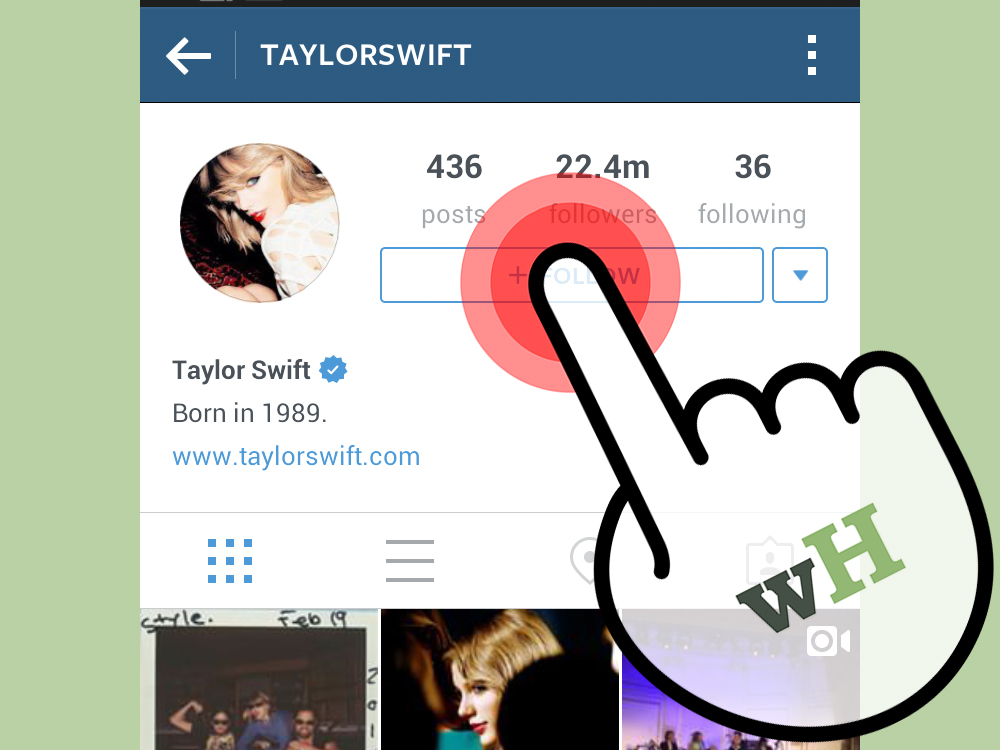 Once you've connected Instagram, the first messages from your clients go to Unparsed. Make sure that it is active otherwise the stage will not be displayed in the funnel.
When a user submits a request, the bell notification icon turns red and displays the number of offers. It also makes it easier to view incoming friend requests from other people. To do this, simply click on the "Bell". After that, a section will open that displays incoming requests and the time at which they were sent.
Incoming friend requests on VKontakte - requests from other profiles. In this case, the owner of the page must independently accept the offers of friendship or refuse them. Unlike outgoing requests, incoming requests can accumulate in large numbers. A striking confirmation are the pages of media personalities.

Old version.
To determine through the official VK application who sent the offer of friendship, you must click on the "Bell". It's at the bottom next to the Messages icon. In addition to this method, you can check applications in the following way:
Incoming requests are recommended to be cleaned periodically. Often, VK users delete their pages, but their friendship offers are still displayed in the Inbox section. Therefore, in order not to miss requests from other people, it is necessary to cancel unnecessary requests.
This method is similar to viewing outgoing requests. To find out who has been added as a friend, you need to:
The list displays users who are subscribed to the profile.
On the main page of the account, these profiles will appear in the "Followers" section.
If desired, it can be hidden from other users in the privacy settings. If the subscriber disappeared from the list, then he canceled the friend offer. Deleted profiles will remain in this section.
When a user submits a request, the bell notification icon turns red and displays the number of offers. It also makes it easier to view incoming friend requests from other people. To do this, simply click on the "Bell". After that, a section will open that displays incoming requests and the time at which they were sent.
In the mobile version of VK, you can check incoming requests in the following way:
Outgoing and incoming friend requests - functionality that allows page owners to find out who they have sent a friend request to and who is following them. The presented methods will help control applications and clear the page from uninteresting users.
We also remind you that if you were not able to get into the current intake, you can apply next month or watch video lessons from the online school section.
1. Only members of the Samson Buyers Club registered on the website and in the application, as well as subscribed to the Instagram accounts @mysamson.ru ru and @club.samson, can become students of the Samson Culinary School.
2. All students of the Samson Culinary School study free of charge.
3. You can study at the Samson Culinary School only once.
4. The collection of applications for training at the Samson Culinary School takes place once a month. The start date for collecting applications is announced on the Instagram accounts @mysamson. ru ru and @club.samson.
5. The collection of applications lasts 14 days, after which the organizers consider applications within 2 days. A response with a positive or negative decision is sent to the direct of the Instagram accounts specified in the application.
6. The organizer does not guarantee confirmation of all applications, as the number of students in one stream is limited.
7. Applications are confirmed or denied at the discretion of the organizer. The speed of sending the application does not matter.
8. One person can submit applications after each announcement until one of the applications is confirmed.
9. Applications sent earlier are not transferred to the next stream.
10. Before submitting an application, the subscriber must be absolutely sure that he will be able to attend all four classes of the course as scheduled and without delay.
If you haven't done it yet, I strongly recommend that you do it right now. It will take less than a minute, but you will have exactly the functions that I will describe below. You can find out how to switch in this article.
Since this article is not only devoted to the functionality of Instagram Direct, but also to other features that can increase the efficiency of work through correspondence with clients.
Therefore, one of the productive tips that is worth implementing is to start taking customers to instant messengers such as WhatsApp and Telegram.
Important! The client must receive some benefit in order to give you his phone. For example, you can offer him to send detailed photos and documents to WhatsApp, because Direct does not support a specific format of materials.
It turns out that everyone wins. You get a phone number that you can use in the future for repeat sales, targeted advertising, and more. And the client receives the necessary documents, photos and other materials that he needs to make a decision.
sources uvidet-komu-otpravil-zayavku
http://ru-ru.