Accidentally sending a follow request to the wrong person on Instagram can be a potentially embarrassing mistake. As these mistakes rack up over time, you could eventually find yourself with dozens of unapproved follow requests. The good news is that the popular photo and video-sharing social networking service allows you to cancel pending follow requests as long as you meet one obvious condition: The person you’ve sent the request to has not accepted or declined it yet.
Unfortunately, it’s not possible (at least not yet!) to remove pending Instagram requests using the Instagram mobile app, but even if you rarely use Instagram in your web browser, you won’t have any problem finding and cancelling pending follow requests thanks to our step-by-step guide.
Step 1: Open Instagram In Your Web Browser
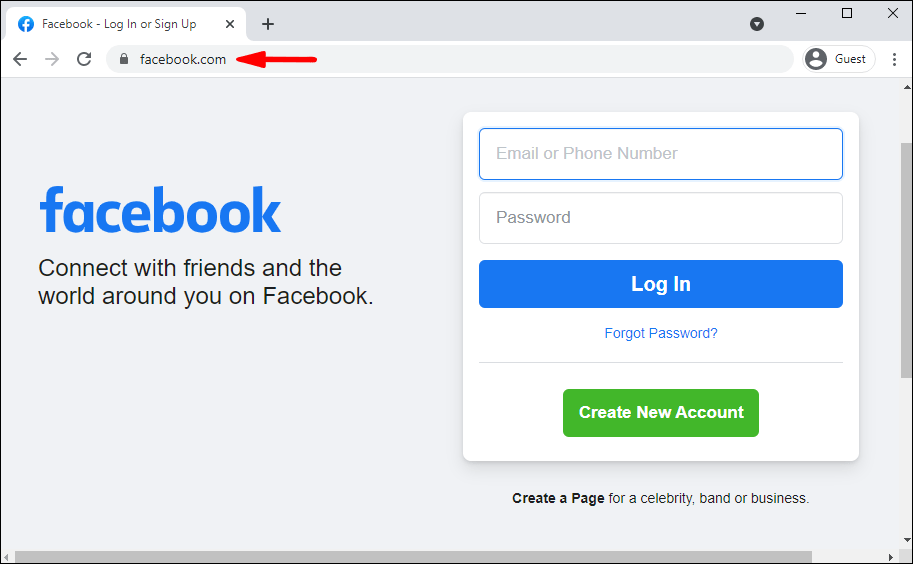
The first thing you need to do, is access Instagram’s web interface. You can do this by going to Instagram.com in any web browser either on your computer or mobile device, however doing this on your computer will be much faster and more convenient.
Step 2: Log In To Your Instagram Account
It shouldn’t take more than a few seconds for Instagram to load and greet you with a login screen. Enter your username, phone number, or email address, along with your password to login. Alternatively, you can use your Facebook account to login. If you can’t remember your Instagram password (which happens quite often), just click on “Forgot password?” to reset it.
Step 3: Open The Settings Menu
Now that you’re in your account, you need to go to the settings menu. To open the settings menu, you need to go to your profile page by clicking on your Instagram account name or picture. Then, click the settings gear icon next to the “Edit Profile” button.
Step 4: Open Privacy & Security Settings
With the Settings menu open, you need to select the fifth option from the top, called “Privacy and Security“, to bring up the privacy and security settings page.
Step 5: View Account Data
Look near the bottom of the privacy and security settings page for a section called “Account Data“. Click the “View Account Data” link.
Step 6: Display Your Pending Instagram Requests
To display your pending Instagram requests, all you need to do is click “View All” under “Current follow requests“. If you don’t have any pending follow requests, you will see the following message:
Pro Tip: You can also visit the “Current follow requests” page directly by entering the following URL in your web browser after you’ve logged into your Instagram account: https://www.instagram.com/accounts/access_tool/current_follow_requests
Now that you can see all the accounts you’ve requested to follow, it’s time to cancel them.
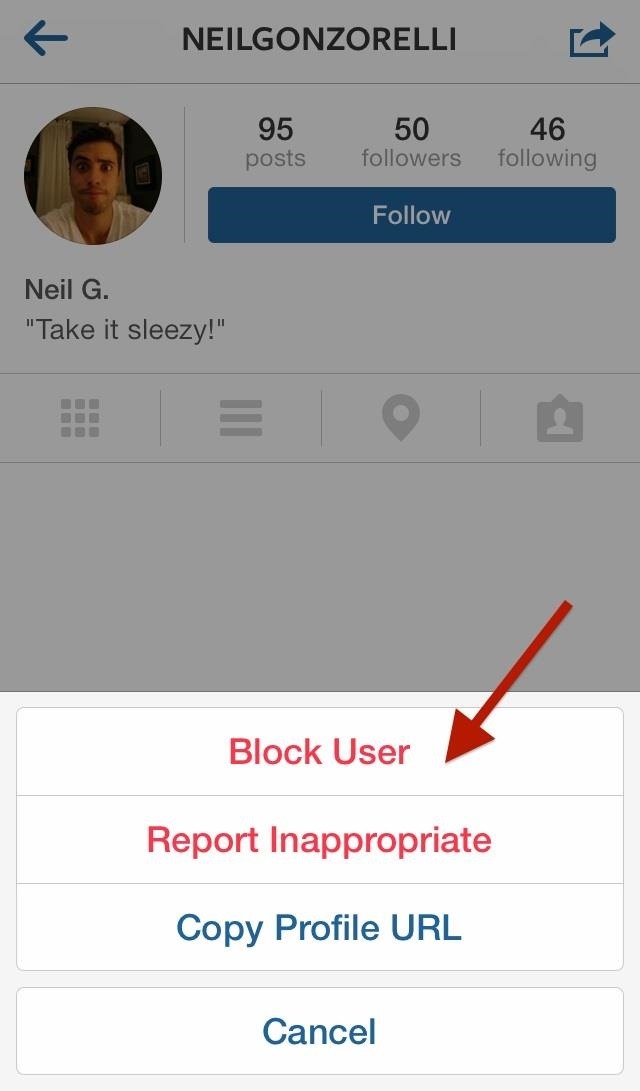
For some reason, Instagram doesn’t let its users remove pending follow requests from the same page where it lists them (although that would be a very useful feature). To cancel a sent request, you need to visit the profile page of the account you’ve sent the request to.
Simply copy/paste the account names in your Instagram search and unfollow them. This process might take some time, depending on how many follow requests you’ve sent out.
Read Now: How To Permanently Delete Your Instagram Account
As you can see, finding and cancelling Instagram follow requests isn’t complicated – you just need to know where to look. If you found this guide useful, let us know in the comments below. Also, make sure to follow us on Instagram!
We live in a world where the popularity of the brand depends on visual search. How well the brand portrays visually matters the most. When it comes to visuals, Instagram is the name that pops up in our heads. You will be surprised to know that 35 billion pictures are uploaded on Instagram. That’s huge! Now, it goes without saying that billions of people are using Instagram every day. Some like to socialize while others rely on this platform to attract the attention of the target audience.
However, Instagram has a few restrictions to protect the privacy of its users.
For example, it allows people to switch their Instagram account to private so that no one can view their profiles except for users these people add to their friend lists.
Let’s say you have sent follow requests to a lot of people on Instagram. Once these people accept your request, you will get access to their profiles and watch their feed.
Now, what if you decide to cancel all sent follow requests on Instagram?
You may have sent the follow request to the private account users and now you’d like to delete those.
How can you do that?
Let’s find out.
Can You Call All Sent Follow Requests on Instagram at Once?
How to Cancel All Sent Follow Requests on Instagram
Method 1: Cancel Follow Request on Instagram App
Method 2: Cancel Sent Request on Instagram Website
When you start using Instagram, you don’t really know who to follow. You send follow requests to hundreds of people at once. If you have been using Instagram for quite a while, you must know that the platform allowed people to send multiple follow requests at once. However, Instagram has changed a lot since then.
It has enhanced the security features and is now focusing more on the user’s privacy than other things. Now, it is not possible to send more than 10 requests at once or unsend these requests. So, you are going to have to be very careful when it comes to sending requests or unfollowing people.
Instagram might suspend your account or limit your usage, for example, you may no longer be able to send any more follow requests for the next few days or until the restriction is lifted. If you follow the manual way of removing people from Instagram, you can only remove up to 10 people at a time. Instagram does not let you unfollow a large number of users at once.
So, as far as these limitations are concerned, you can unfollow or cancel the follow request of 10 people at once. You need to wait a few hours or a day to start canceling the next set of requests.
Now, the question is how do you know who you had sent a follow request to? Or, is there any way to track down the people who have not accepted your follow request till now?
Well, if you knew who has not accepted your request, you could easily cancel it.
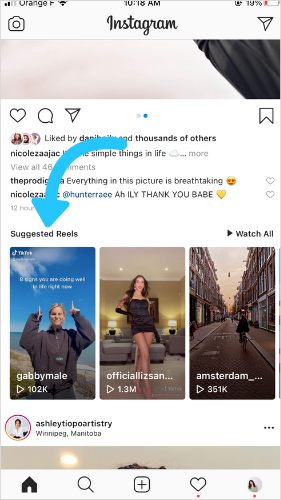
You might have sent the requests in bulk earlier, so it must be hard to locate each user you have sent a request to. Here’s what you can do to find a list of the Instagram accounts you have sent a follow request to.
 Click on this to get a list of the users you have sent a follow request.
That’s the easiest way to unsend your Instagram follow request. The problem, however, is that this method does not work for users who have sent a request to hundreds of people. It happens. You create an Instagram account and send a friend request to strangers only to realize later that it was a mistake.
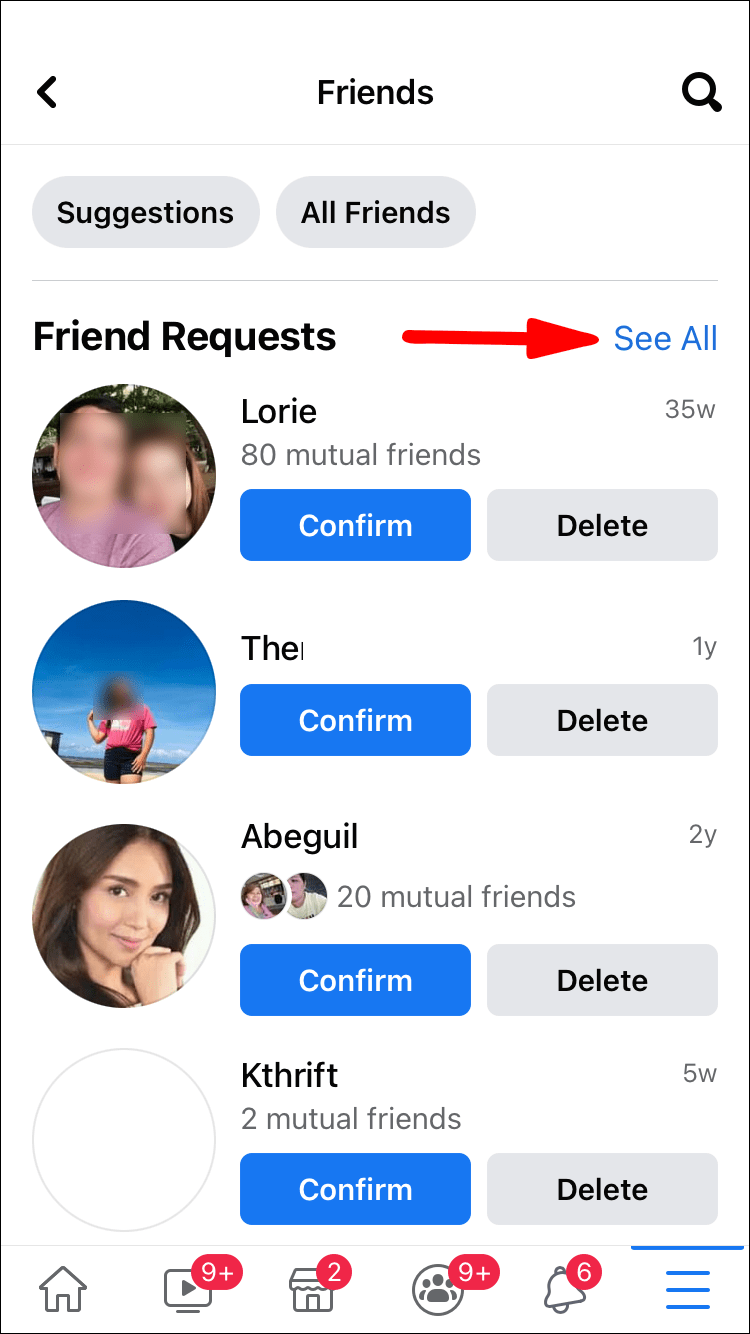
You don’t have to log into Instagram on your browser. It can be done on the mobile app as well. Here are the steps for unsending the pending follow requests on your Instagram mobile app.
If you see these requests, Instagram only shows you the requests of the top 10 users. Select View More to get a full list. Unfortunately, it does not have an option that could allow you to cancel the pending requests directly.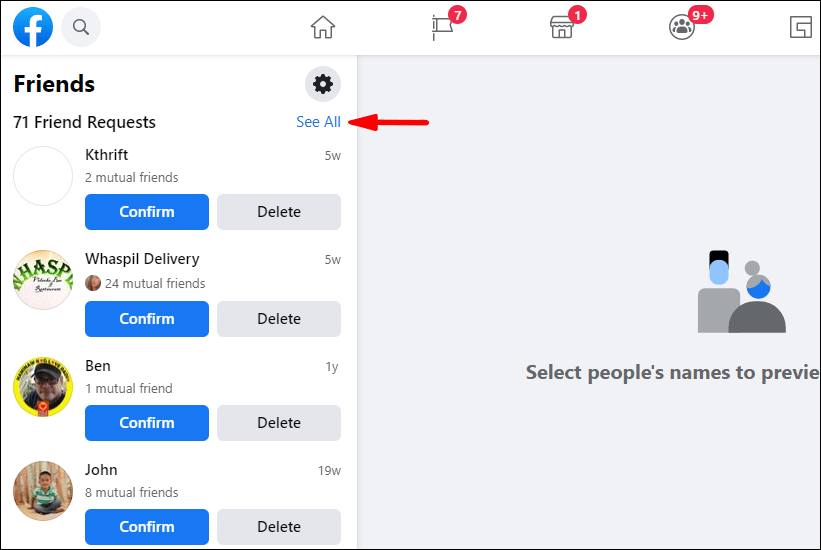
So, you can copy each username from this section, type it in the Instagram search bar, locate the profile of the user, and tap the “requested” option. It will be back to follow option. The process may seem time-consuming, but considering that Instagram doesn’t let you cancel more than 10 requests at a time. So, you need to do it only 10 times at once.
Also Read:
Instagram can be used in both the web interface and the app. To cancel five or six requests, you won't get bored following the steps on the mobile app, but if you have a long list of follow-up requests, choosing a PC to cancel them would be a wise choice. Let's start with the tutorial to undo all the following requests on an Instagram account.
Canceling subsequent requests using the Instagram app takes less than a minute. Here's how to do it.
Instagram profile in iPhone app on Instagram
Instagram profile settings in the Instagram app for iPhone
Data access in the Instagram app for iPhone Search
View all sent follow request on iPhone app for Instagram
Unsubscribe all sent follow requests from the Instagram app for iPhone
As I said, it's recommended to use the web interface if you have a few more cancellation requests, that's all.
Programs for Windows, mobile applications, games - EVERYTHING is FREE, in our closed telegram channel - Subscribe :)
Thank you for visiting! Check out more up-to-date tips and tricks for all your social apps. Request in the comments section for more help from us!
Programs for Windows, mobile applications, games - everything is free, in our closed telegram channel - subscribe :)
90,000 how to cancel the request on Instagram ▷ ➡️ Creative Stop ▷ ➡️4297
6
How to unsubscribe on Instagram
Driven by curiosity about the content of Instagram , a few days ago you decided to follow this famous photographic social network. However, if you found this guide, I understand that it has problemino with your account: in this case, you do not know how to unsubscribe on Instagram and I would like to know if I am ready to help you resolve the situation. But what questions?! Of course yes!
If you give me five minutes of your free time, I can explain what you need to do to cancel requests sent to users who have a private Instagram profile. In fact, on Instagram, the need to send the user a request to follow him only occurs if he has set his profile as private (I have already discussed this in another guide).
Courage: Sit back, take all the time you need to read the following paragraphs and, more importantly, put into practice the "advice" I give you. You see, canceling requests sent to Instagram will be as easy as drinking a glass of water; I promise!
wishes cancel an Instagram request Why did you realize that you sent an email to the wrong person? I guarantee that you can do this with a really simple procedure: just specify the user you sent the next request to, click the appropriate button to cancel the request, and that's it.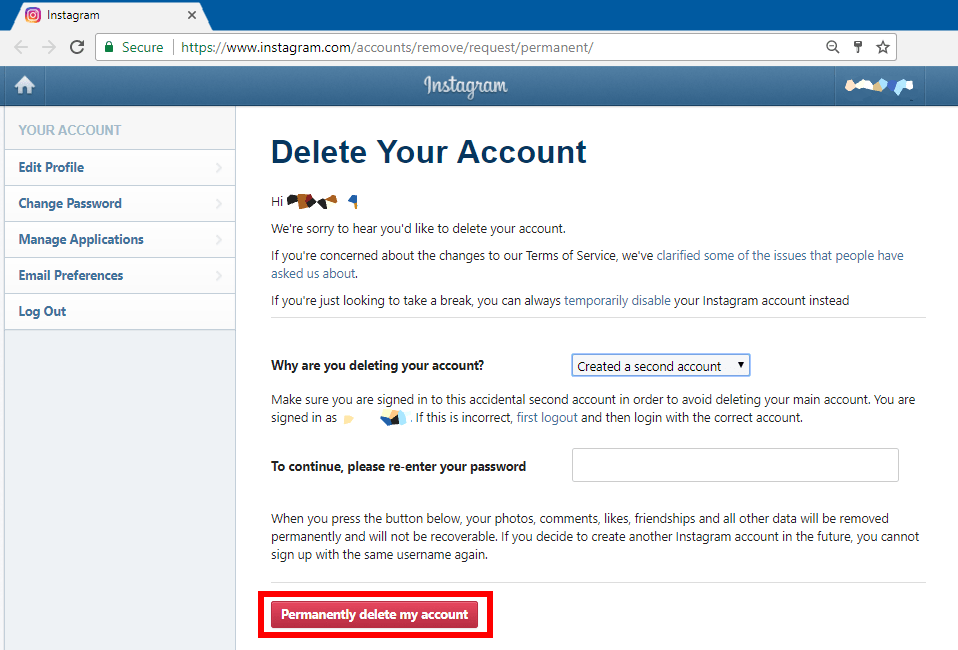
In the following paragraphs, I will explain in detail how to operate not only on Android and iPhone, but also on PC, using the web version of Instagram (which can be accessed from the browser) as the official application for Windows 10. Happy reading!
Cancel the request to Instagram from your device Android , first launch the official photo social network app by clicking its icon located on the home screen and sign in to your account (if you have not activated automatic access).
After logging in, press the button Magnifier located in the lower left corner and in the search field place on top, enter username to whom you sent the request you want to cancel, and click on them nominative or your Profile photo .
Now, to cancel the request, all you have to do is click the button Request made located next to the corresponding user's profile photo and that's it.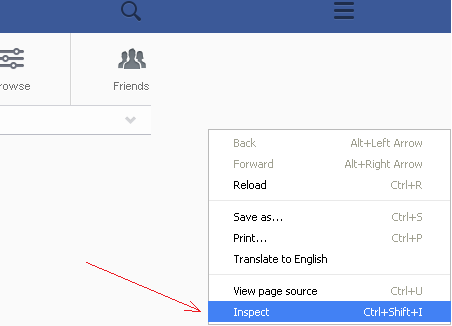 If everything went well, the blue button will reappear. follow .
To cancel the Instagram request from iPhone , you have to follow almost the same steps that I showed in the previous Android chapter. Then launch the official Instagram app by tapping its icon located on your phone's home screen and sign in to your account (if you haven't enabled automatic sign-in).
Then press the button Magnifier located at the bottom of the screen and, in the search bar located at the top, enter username to whom you sent the request you want to cancel, and click on their profile photo or your nominative . To cancel a submitted request, press the button Request made , which will give way to the blue button follow , Easier than that?
You don't currently have an Android device or iPhone manually and would like to know if it's possible to cancel an Instagram request using Development of from the social network? Know that it is possible and very easy.
To continue, connect to the Instagram login page, sign in to your account (if you haven't already) and in the search bar located at the top of the page, enter username to whom you sent the request you want to cancel. Then click on your profile photo or your nominative and to cancel the sent request, click on the button Request made : as if by "magic" the button will reappear follow up confirm that the operation was successful.
PC upgraded to Windows 10 ? Know that you can cancel a request sent to Instagram using the official social media app in the Microsoft Store.
After downloading the Instagram app for Windows 10, launch it and sign in to your account. Then click on revision Login type username es password into the appropriate text fields and press the button login . If you signed up for Instagram with Facebook, you can log in by simply clicking the Login with Facebook button.
Once you are logged into your account, click on the icon Loupe located at the bottom (left) and in the search field located at the top of the window, enter username to whom you sent the request you want to cancel . Then click on your Profile photo o su nominative to go to your profile and to cancel the sent request, click the button Request made by . Et-voila! The request will be canceled immediately and the button will reappear. follow .
The user you sent the request to on Instagram accepted it, and since you didn't intend to follow them, now you want to know if there is a way to fix the situation? Of course there is: just unfollow user .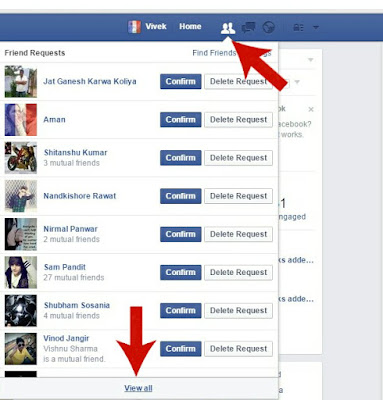
Unfollow an Instagram user on Android , launch the official social network application, click on the icon small person located in the lower right corner, click on the item continued located in the upper right corner, click the button Follow now is in the correspondence of a user who wants to terminate the subscription and confirm the operation by pressing button Don't subscribe again in the menu that appears. If everything worked out, instead of the button Follow now , you will see the button follow .
Unfollow Instagram user on iPhone , first launch the official social network application, click on the symbol small person located in the lower right corner, click on the element continued located in the upper right corner, click the button Follow now is next to the user who no longer wants to continue and confirm the operation by pressing the button Do not subscribe again in the menu that appears.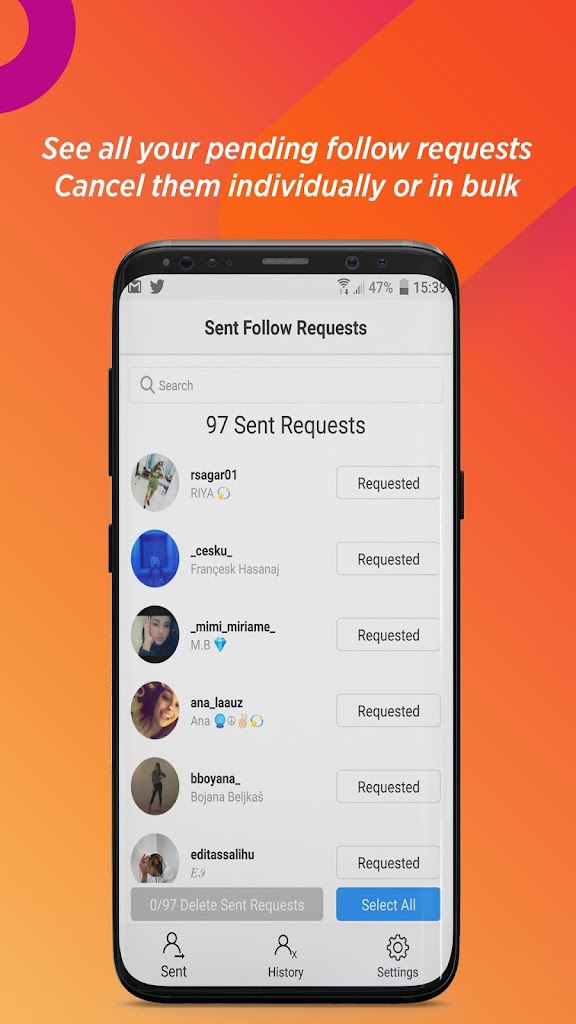 If everything worked out, instead of the button Follow now you will see the button follow .
Do you want to stop following a user on Instagram, acting according to version Development from the social network? Then connect to the Instagram login page and sign in to your account (if necessary). Then click on small person is located in the upper right corner, click on the script profiles are followed is located on the right, click the button Follow now is placed under the username of the person you want to unfollow, and that's it. If you followed the above steps correctly, you will see the blue button follow instead of the button Follow now .
Unfollow Instagram user by personal computer , launch the Instagram app for Windows 10, log into your account (if necessary), click on the little person located in the lower right corner, and then in the revision continuation of that you will find at the top of the window.