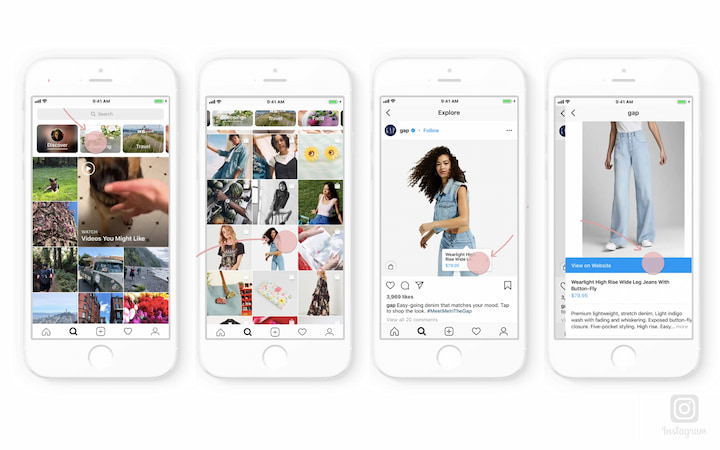
Instagram Shopping helps people turn inspiration into action and learn more about products when they discover them. When you set up a shop on Instagram, you can help people browse and learn more about your products, such as the name of the product and the price of the item, without leaving the app.
Mangata & Gallo is a high-end jewelry store that sells diamond engagement rings. Most of the brand’s sales come from its website. Mariana, the owner and lead designer, manages Mangata & Gallo’s Instagram business account and consistently posts photos of the brand’s offerings.
She wants to attract new customers on Instagram and set up a shop on Instagram.
Shops enables you to create an immersive, full-screen shopping experience on Instagram. Customers can access your shop directly from your profile, posts or story. When people visit your shop, they can explore your products and take steps to purchase them. If you have an eligible business in the US, you can set up Checkout on Instagram so that people can make purchases directly in your shop without leaving the Instagram app.
To use Facebook commerce tools for your business, your Facebook account and Page or your Instagram business account must meet the following requirements.
Your Facebook account and Page must comply with Facebook’s Terms of Service, Commercial Terms and Community Standards, and your Instagram professional account must comply with Instagram’s Terms of Use and Community Guidelines.
In addition, lack of compliance with Facebook policies, including the Merchant Agreement, Commerce Policies, Ads Policies and Pages, Groups, and Events Policies, may result in loss of access to Facebook commerce surfaces or commerce features and may lead to your account being disabled.
Your Facebook Page or Instagram professional account must contain product listings that are available for direct purchase from your website or Checkout on Facebook or Instagram.
If you are directing buyers from Facebook commerce tools to a website in any supported market, you must provide Facebook with the single non-shortened domain through which you sell. Your Facebook Page or Instagram professional account must represent the store or website associated with the domain provided. To confirm you own your domain, Facebook may require you to complete its domain verification process.
Your Facebook Page or Instagram professional account must be located in a supported market to use Facebook commerce tools. Supported markets for commerce tools on Facebook are listed here. Supported markets for Instagram Shopping are listed here.
Checkout on Facebook and Instagram is currently only supported in the United States. Facebook will update its supported markets lists if and when new locations are added.
Your Facebook Page or Instagram professional account must be located in a supported market to use Facebook commerce tools. Supported markets for commerce tools on Facebook are listed here. Supported markets for Instagram Shopping are listed here.
Checkout on Facebook and Instagram is currently only supported in the United States.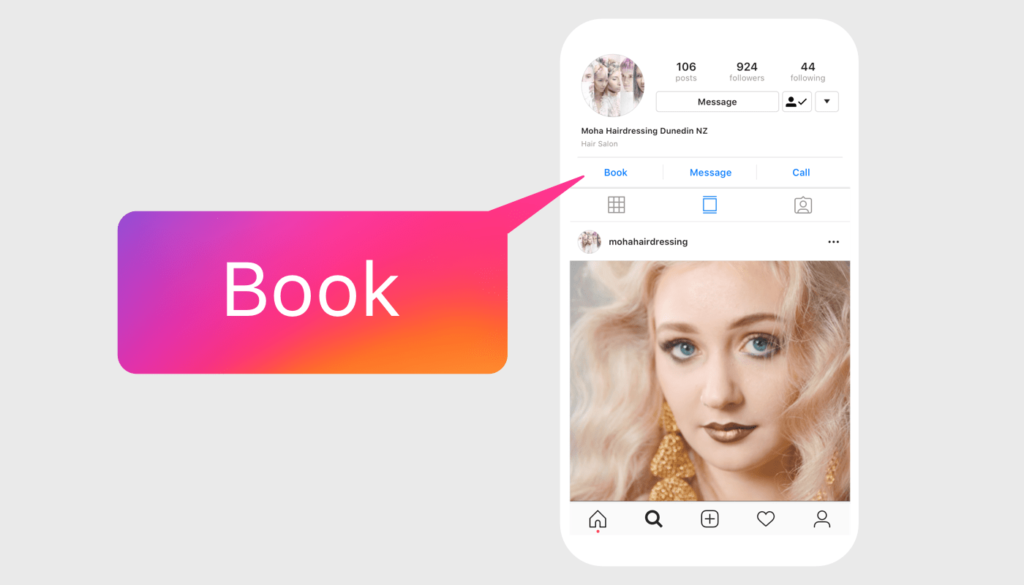 Facebook will update its supported markets lists if and when new locations are added.
Your Facebook account and Page or Instagram professional account must have demonstrated trustworthiness, including through an authentic, established presence. This may also include maintaining a sufficient follower base.’
Your Facebook account and Page or Instagram professional account must have demonstrated trustworthiness, including through an authentic, established presence. This may also include maintaining a sufficient follower base.’
Product information listed through Facebook commerce tools must not contain misleading pricing and availability information. Your refund and return policies must be clearly displayed and easily accessible from your website or on Facebook or Instagram.
Product information listed through Facebook commerce tools must not contain misleading pricing and availability information. Your refund and return policies must be clearly displayed and easily accessible from your website or on Facebook or Instagram.
Once you confirm your eligibility, follow these steps to convert your account to an Instagram business or creator account and start using Instagram Shopping.
Play Icon
Once you have a business or creator account, you can add relevant business information like your store hours, business address, phone number and a link to your website.
To switch your profile to a business account:
 When you connect a Facebook Page to your Instagram account, you’ll get access to commerce tools that help you expand the reach of your business on Facebook and Instagram.
  When you connect a Facebook Page to your Instagram account, you’ll get access to commerce tools that help you expand the reach of your business on Facebook and Instagram.
Mariana meets all of the eligibility requirements, so she’s ready to start the onboarding process for Mangata & Gallo’s shop in Commerce Manager.
Note: A Business Manager account will automatically be created for you when you set up your shop. You’ll use this account to set up your shop in Commerce Manager.
Business Manager enables you to manage your ad accounts, Pages and the people who might be working on them.
Note: A Business Manager account will automatically be created for you when you set up your shop. You’ll use this account to set up your shop in Commerce Manager.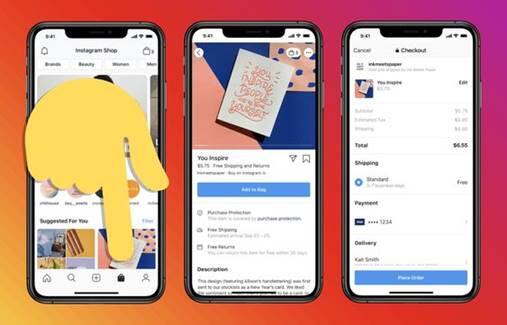
Business Manager enables you to manage your ad accounts, Pages and the people who might be working on them.
Mariana has set up her new shop in Commerce Manager. To start using Instagram Shopping, Mariana needs to submit her account for review and turn on shopping features. Here’s how:
Once you connect a product catalog to your shop and have products in the catalog, follow these steps to submit your account for review. Account reviews typically take a few days but can take longer.
Some businesses may be notified that they need to provide additional information to prove ownership of their website domain. If you receive this notification, follow the steps to complete the domain verification process to submit your account for review.
Once your account is approved, you can turn on Shopping features. Note: If you don't see Shopping under your settings, your account is probably still under review or it hasn't been approved for Instagram Shopping.
Some businesses may be notified that they need to provide additional information to prove ownership of their website domain. If you receive this notification, follow the steps to complete the domain verification process to submit your account for review.
When you upload images to your catalog, present your products as they're shown on your website. Ensure products are clearly visible against clean backgrounds. Showcase a single product with minimal clutter.
Mariana tries a few different shots of Mangata & Gallo’s rings and chooses one that best highlights the ring’s features.
Use the same visual treatment across all of your product images. Consider adding a logo on a product, a colored background or simple props to create a visual identity.
Mariana takes photos of all of Mangata & Gallo’s rings against the same white background.
Add videos to your catalog if it’s helpful for customers to see your product in motion. Try experimenting with a single product, like a flowy dress, with lifestyle imagery, detail shots and different angles. Or film a tutorial, like a makeup demonstration, to show your product in use.
Mariana includes videos of Mangata & Gallo’s rings to show a 360-degree view.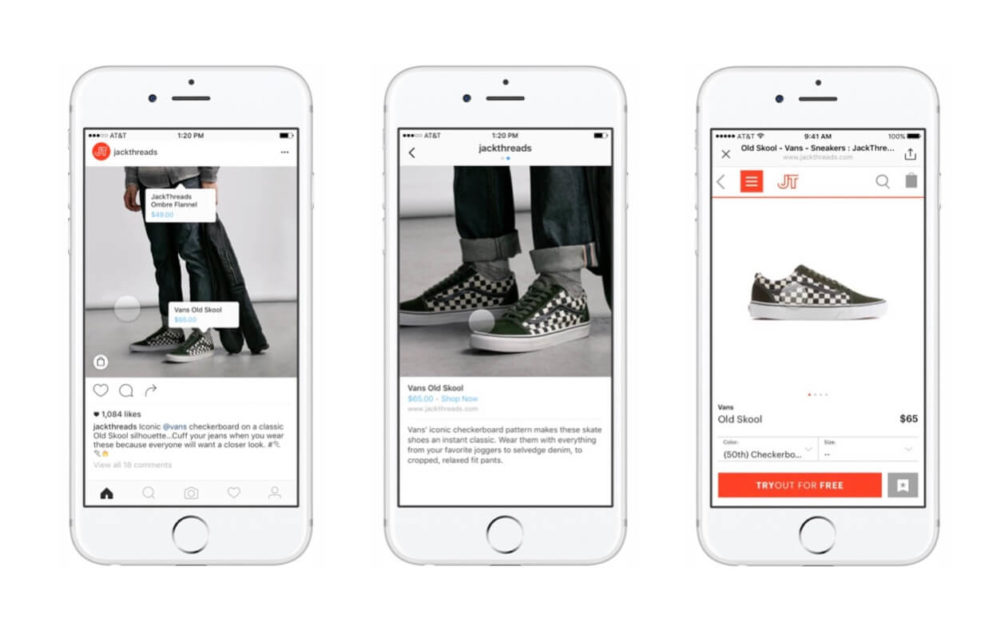
Add multiple images to give people a clearer idea of what your product looks like. Consider showing different product angles, color variants and model sizes or skin tones. Display all your product options so your customers can choose from a selection of different colors, sizes and materials.
Mariana includes photos of her customers wearing Mangata & Gallo’s rings.
Something Went Wrong
We're having trouble playing this video.To watch the video, please upgrade your web browser.
Learn more
Now that Mariana has set up her shop, she can highlight her products in photo and video posts. She can use product tags to highlight items in her feed and story. People can view information about her products, such as the name and price of the item, without leaving Instagram.

PREVIOUS
NEXT
Was this page helpful?

More courses
Page Contents
Nowadays, especially in these days of quarantine and self-isolation, most people prefer to buy whatever they need from online shopping stores. In this way, Instagram has become one of the most popular social media platforms all over the globe which is also offering some amazing features for those who want to sell products and services online. By the way, one of the best features available is the “Shop Now” button which lets people purchase whatever they need directly from Instagram bio.
But what is the shop now button and how can you add it to your Instagram profile? This is what we are going to teach you in this article. Don’t worry if you don’t have a business account, we have included solutions for everyone. Stay tuned!
To add a “Shop Now” button to your Instagram account, you need to have a business account on Instagram and also turn your account into a shoppable one.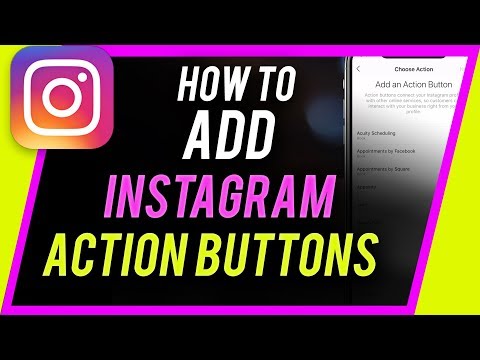 Unfortunately, as we have mentioned before, turning your account into a shoppable one is not a simple thing to do. For this, you must meet so many strict requirements. To illustrate, you must connect your Instagram account to a Facebook catalog, be located in some special spots of the world, etc that have been mentioned here.
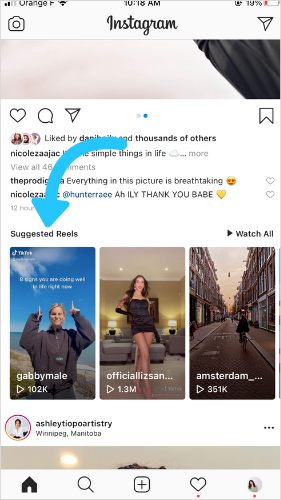
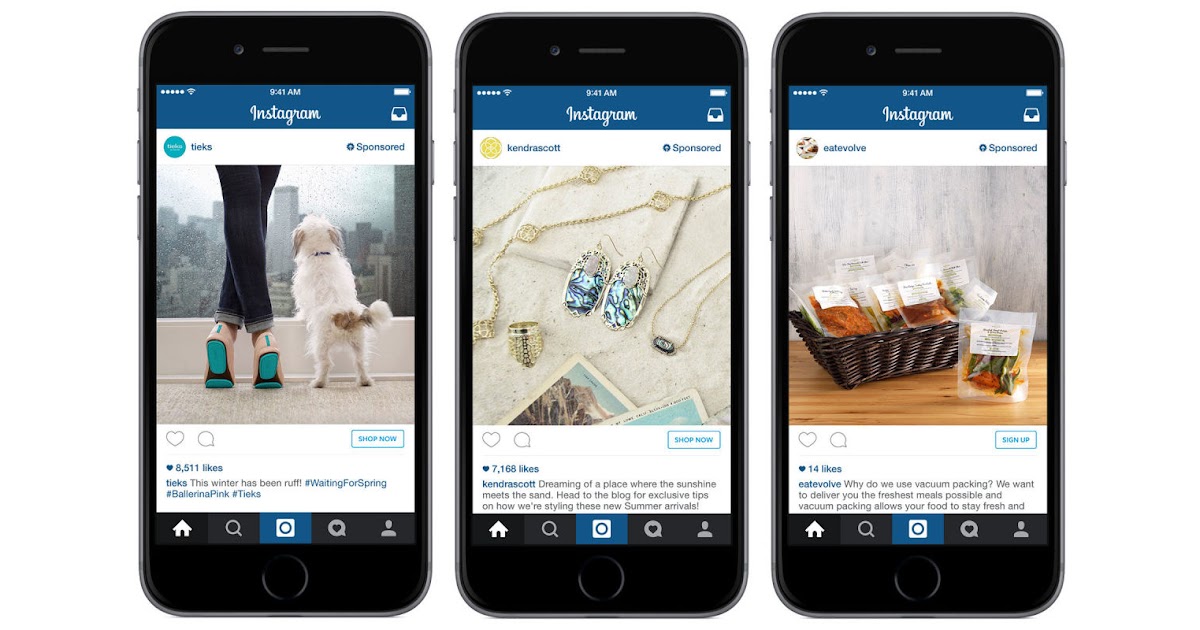
However, in case you meet all the Instagram requirements, you can purchase a shoppable account and start selling products from there. Actually, having a shoppable account on Instagram, a bag icon appears on your page as you can see in the picture below:
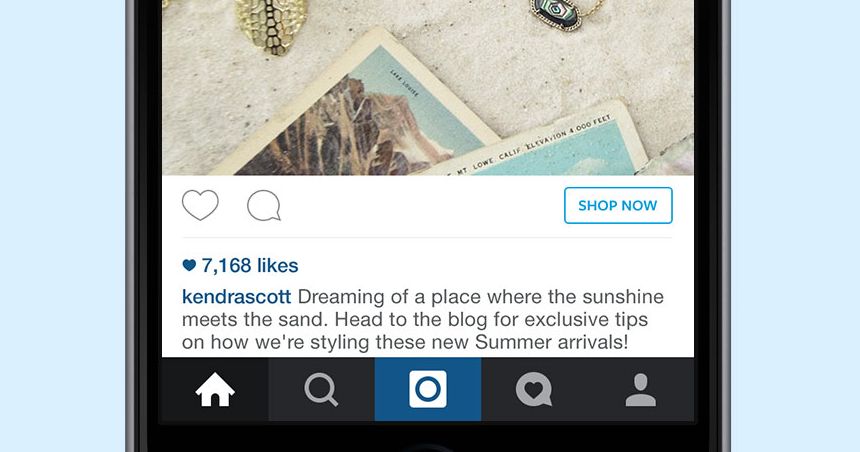
shop now buttonBut what is this tab? In fact, on this tab, you can see all the posts that have shopping tags or in other words, are shoppable. In addition, here, you can see the names of the products, prices and also sales.
shop now buttonThen, by tapping on each of them, you can either tap to visit the product on the website or scroll down to see the description and also view similar products.
shop now buttonAs you see, it is a really amazing feature and lets you leverage your Instagram to sell products more professionally. However, it is hard to turn an Instagram account into a shoppable account. So, what to do instead? Well, keep on reading.
Luckily, there is a free way to turn your Instagram account into a shoppable one and also add the “Shop Now” button to your bio. Additionally, using the following way, you don’t even need to have a business account on Instagram. So, this solution is literally for every user on Instagram. But what is it?
Well, our solution is to use AiSchedul. AiSchedul is a complete package of professional tools that will make you become an intellectual Instagram user. Using this tool, you can sell on Instagram without a business, and use all the Instagram features that are available only for business accounts.
To illustrate, with AiSchedul, you have the ability to:
And leverage your Instagram bio to sell more efficiently. But how can it help you to get the shop now button? One of the best tools of AiSchedul is the link in the bio tool.
Actually, using this tool, you can add multiple links to your Instagram bio, add clickable links to your posts and stories, link to social media websites using widgets, and also share links using buttons that also include the shop now button. But how? Let’s see!
To add a shop now button to your Instagram account using AiSchedul follow these simple steps:
First, create an account for free.
Then, add your Instagram account(s) by clicking on the “Add Instagram Account” button. Note that you can add as many accounts as you want.
Now, click on the “Manage Account” button below the Instagram account you want to add a shop now button for.
AiSchedul dashboardAfter that, on your dashboard, click on the “Bio Link” tab.
Next, click on “Add any other links in the form of a button”.
Finally, enter your shop address, and right “Shop Now” or any other things you want in the second box and hit the “OK” button.
That’s it. Now, people can go to your online shop from the bio and purchase whatever they need.
Remember that using this amazing feature, you can add any clickable buttons you want.
Also, using this amazing tool you can add some clickable tags to your Instagram posts. These tags can include the names, prices, and also shop URLs which makes it easy for people to buy and purchase their desired products.
So, go ahead and sign up for free right now.
To sum it up, Instagram has so many amazing features that will make you a professional seller on Instagram. However, most of these features are available for professional accounts and ordinary ones cannot use them. However, there are tools like AiSchedul that help you have all these features for free and sell more on Instagram.
By Milena Anderson Reading 4 min. Views 14
Short answer
How do I add a booking link on Instagram?
To add a booking link on Instagram, you need to create a link that will take your followers to your booking page. Once you create a link, you can add it to your Instagram bio.
Can you order on Instagram?
Yes, you can order on Instagram. You can write to the company directly or use the "Book Now" button on their profile.
Why can't I add a Book button on Instagram?
Instagram does not allow users to add external links, including links to books, in their posts. This is likely because the company wants users to stay on its platform and not navigate to other websites.
What is the best booking app for Instagram?
There is no single answer to this question, as different applications will work better for different people.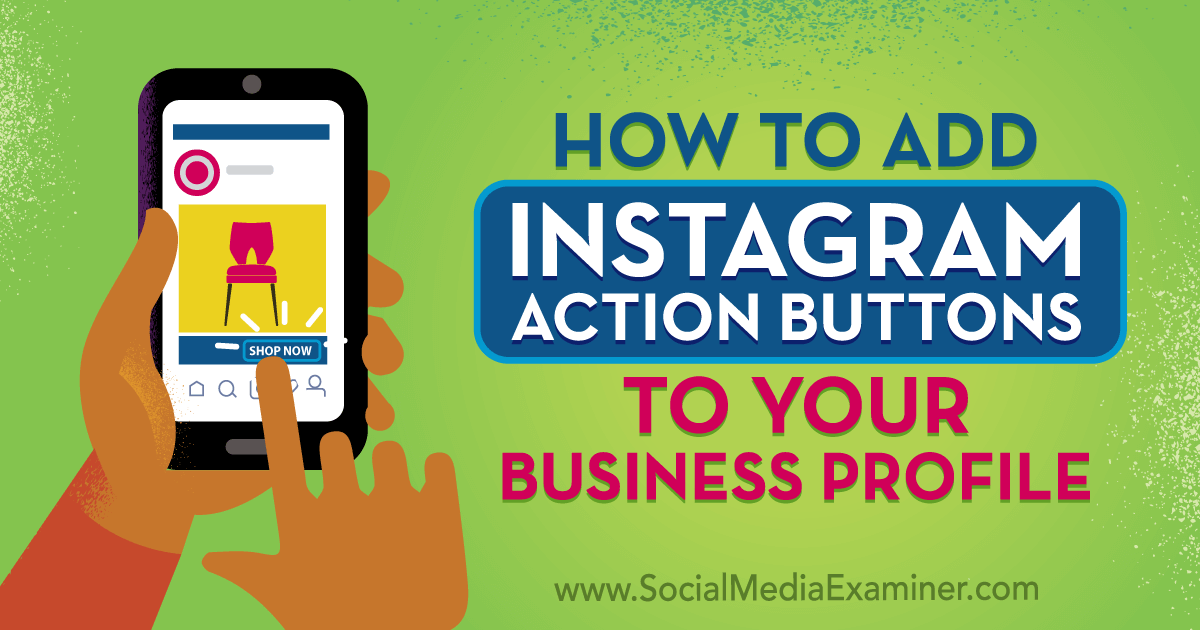 However, some popular booking apps that are often used for Instagram include Airbnb, Booking.com, and Expedia.
How to create a booking application?
There are several different ways to create a booking application. One way is to use a ready made booking platform like Appointlet or Calendly. Another way is to use a development platform like Ruby on Rails or Django. Finally, you can also use a specially designed solution.
How do I create an online booking?
There are several ways to create an online booking. One way is to use a booking widget, which is a tool that allows customers to make appointments or make reservations on your website. There are also many online booking platforms that allow you to manage appointments and bookings.
How do I add a Buy Now button to Instagram?
There is currently no way to add a "Buy Now" button to Instagram.
What does DM mean for a booking?
DM stands for Direct Message. When someone says they'll contact you about a booking, they're saying they'll send you a private message via whatever messaging platform they use (Twitter, Facebook, etc.) to discuss booking details..
How to add a NOW button on Instagram?
To add a NOW button to Instagram, you need to create a custom URL for your profile. To do this, go to your profile and click on the three dots in the upper right corner. Then select Copy Profile URL.
Then open a new browser tab and paste the URL into the address bar. Add "?ref=INSTAGRAM" to the end of the URL. For example, my profile URL would look like this: “https://www.instagram.
What is the Book button on Instagram?
The Instagram Book Now button is a feature that allows businesses to make appointments directly through the app.
How do I link my Square account to Instagram?
To link your Square account to Instagram, open the Instagram app and tap the Profile tab. Then click on the three lines at the top left of the screen and select "Settings". Scroll down and tap Linked Accounts, then select Square from the list of available options.
How to share a square link for booking?
To share a square booking link, you need to first create a square account and then create a booking. Once you create a booking, you can create a unique link that you can share with others.
How do I schedule an event on Instagram?
To schedule an event on Instagram, you first need to create a business profile. Once you have created your business profile, you can create an event. To create an event, go to your business profile and click on the Events tab. Then click the "+" button and enter all the information about your event. Once you have entered all the information, click the "Publish" button.
Does Instagram have its own scheduler?
Yes, Instagram has its own scheduler. You can use it to schedule posts for the future.
Can I schedule posts on Instagram?
Yes, you can schedule posts on Instagram. There are several different ways to do this. You can use a scheduling tool like Hootsuite or Buffer, or an app like Schedugram.
Over the past few years, Instagram has grown from a simple (albeit popular) photo-sharing app to one of the most popular social media marketing sites on the market.
Part of its meteoric rise can only be explained by its commitment to the platform's constant evolution—new features are being offered at an almost breakneck pace. Every month for the past three years, Instagram has announced new features. However, with this amount of information, social media professionals and agencies can easily miss some of them. In this article, we'll take a look at the top five Instagram features you may be forgetting to use.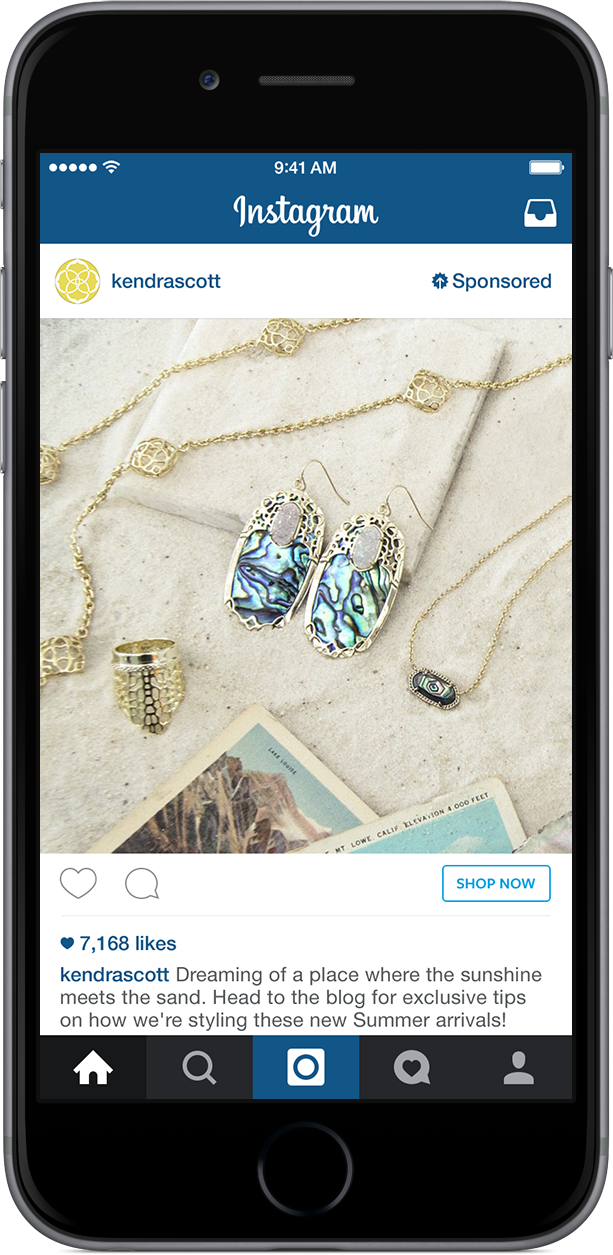
Instagram stories are the main part of the platform. If you're just posting a few times a week, you may not have delved into the intricacies of the features stories offer. Interactive stickers in Instagram Stories are nothing new, but some businesses still don't know how to use them or what they can do.
We've compiled a compilation of their main features:
The more interactive your stories are, the better. Users become more engaged. You can even generate very valuable and direct feedback, send it to pages like your branded hashtag with lots of user-generated content, or find out more about what they want to know about you.
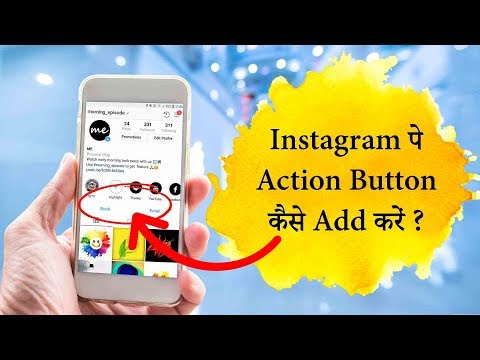
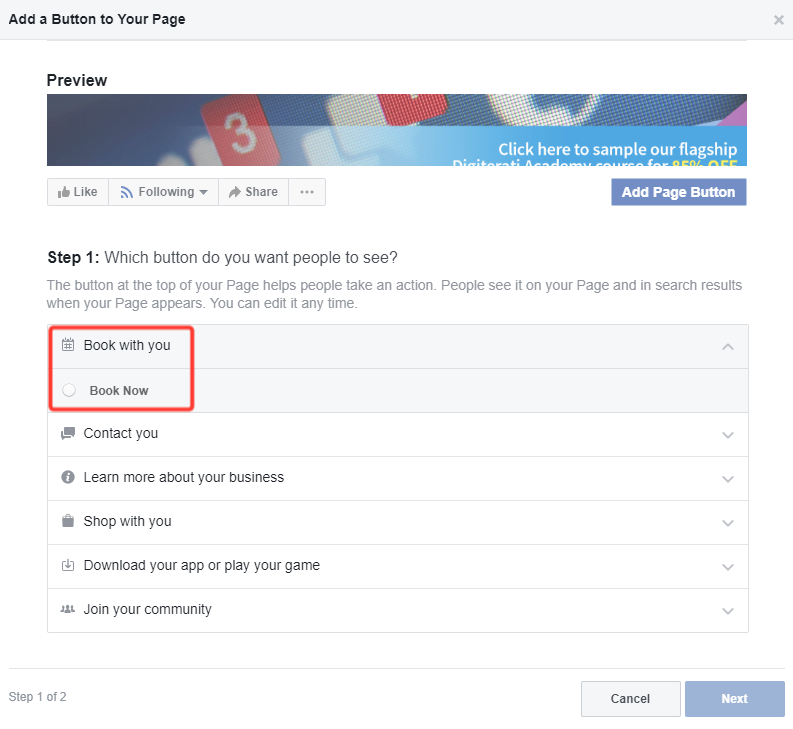
Have you noticed that there are new interactive buttons on Instagram business profiles such as "Book an appointment" or "Order a meal"? Action buttons are essentially calls to action that appear next to the Contact Us or Buy Now buttons on your Instagram mobile profile. If you've ever wondered "what new Instagram features can help me" then you should take a look at this as well.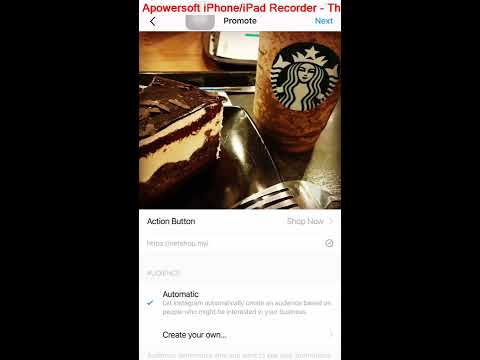
Action buttons allow you to control certain off-platform actions on the platform using third-party tools such as scheduling software or spreadsheet management software. Luckily, they're easy to set up, although you'll need subscriptions with these third-party tools. To get started, click "Edit" your profile. Then find "Action Buttons". Then decide which button you want to add.
Selecting "Order Meal", "Gift Cards", "Book Now" or "Reserve" will sync with the third party tool you are using. Once integrated, this button will now appear on your account for users to interact with it.
Alt text is used to tell Google and people using assistive technologies such as screen readers what is happening with the image. On a visual platform like Instagram, it ultimately makes a huge difference whether visually impaired users can participate in the platform. You can add alt text to all your posts in your Instagram feed. To do this, simply go to "Advanced Settings" on the page you see before posting.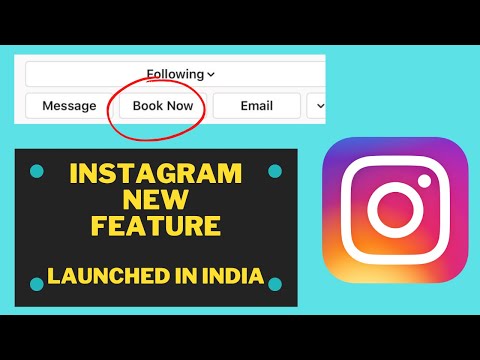 You can then click "Write alt text" in the "Accessibility" section at the bottom of the page.
If you're uploading the same post to multiple platforms or scheduling posts in advance, this can be a huge time saver.
If you knew there were moderation features but were wondering “how exactly to use Instagram's moderation features”, we have good news: it's easier than you think.
Instagram has some outstanding features to help you control who comments on your content and who can see it. A solid option is to look at account limits. This will allow you to automatically hide everything a user posts in your content from everyone except you and them. They won't know they've been restricted because they'll be able to see the comment, but no one else will. This is a great asset for both personal and business accounts. And if you're wondering what a person can see when you restrict them on Instagram, the answer is "everything.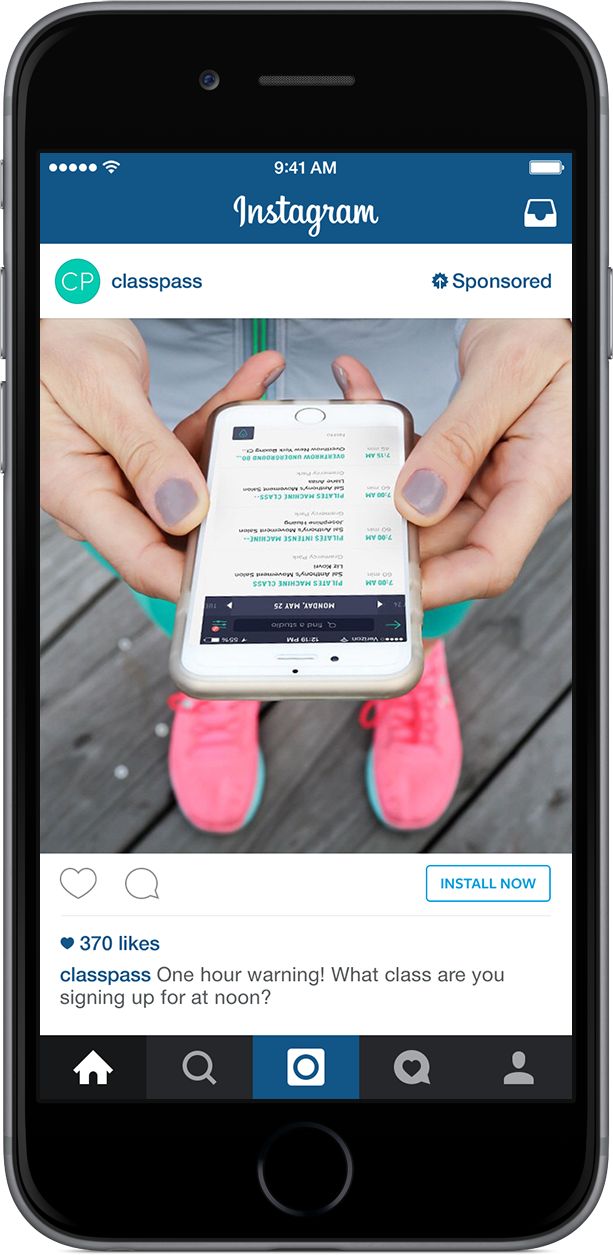 " It's just that people don't see their comments.
To restrict someone, go to settings and then to privacy. Scroll down to find "restricted accounts". Find the username you want to restrict and select it. Note that if there is someone you don't want to access your account or comment at all, period, you can block them completely.
In addition to restrictions, you can also set up comment moderation features to make your job as an agency owner or social media manager easier. Go to "Comments" in the privacy section.
Here you can allow comments from certain groups of people, block certain users and hide offensive content. To do this, you can use Instagram's automatic algorithms or set up manual filters for certain words. If something breaks the algorithm, the comments will be hidden.
Sponsored content is not uncommon on Instagram, with brands partnering with other brands or influencers to promote their product. That's great, but if you're doing this, you need to tag it with a branded content tag.