Add Products to a Facebook Page Shop | Help Center
Do you want to log in or join Facebook?
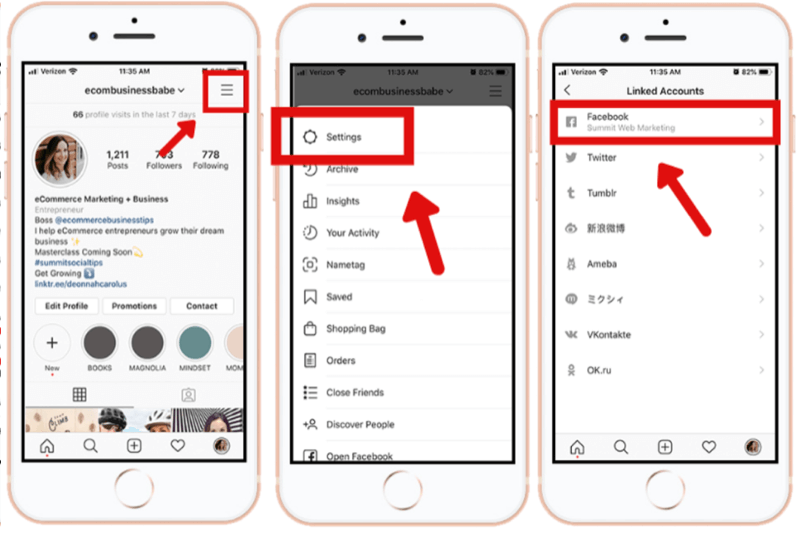
Add products to a Facebook Page shop
This content is only relevant to businesses that already use Facebook Page Shops and haven't yet been transitioned to Facebook Shops.
If you don't have a Facebook Page shop but want to sell products from your Page, you should create a shop instead.
After you’ve created a Page shop, add some products for customers to browse. Remember that you can only sell physical goods that comply with our commerce policies. You can add and manage the products in your shop in two ways:
Learn more about these options below.
Add products using Commerce Manager
With this option, add and manage products in a catalog using Commerce Manager, Facebook’s inventory platform. We recommend Commerce Manager if you want to bulk upload many products or use your inventory across different ads and commerce channels on Facebook and Instagram.
If you already added at least 1 product to the Shop tab on your Page, we automatically created a catalog for you. To add more products to your catalog:
Return to Commerce Manager when you want to manage your products. Keep in mind that:
Add products in the Shop tab on your Page
With this option, add products one by one in the Shop tab of your business Page. We recommend this option if you don’t have many products to manage and they don’t change often.
Note: If selecting this button takes you to Commerce Manager, it means you can’t add products directly to your Shop tab. You’ll need to use Commerce Manager instead. Learn more about adding products to a catalog.
 We recommend using a short title without symbols like ! * $ ?. Follow our product title guidelines.
If your product complies with our policies, it usually appears in your Page shop within 24 hours. Some products may take longer to review.
Related Articles
Get help for other devices:
Ads Help - Desktop
How to set up a Shop on Facebook and Instagram | Help Center
Do you want to log in or join Facebook?
How to set up a Shop on Facebook and Instagram
With Shops, you can display and sell products on Facebook and Instagram. People who visit your shop can browse your products, make purchases, and get to know your brand. You’ll create your shop in Commerce Manager, a platform you use to manage your inventory and sales on Facebook and Instagram.
You can choose one of 3 checkout methods for people to purchase your products: On your business website, with checkout on Facebook and Instagram (US only), or through messaging.
Before you begin
 Your Business Manager must own the Instagram business account that it’s connected to.
 How to set up a shop on Facebook and Instagram
To set up your shop:
 Click Next.
You’ve now created your shop. Next, you’ll want to:
Note: If you set up a shop with checkout, Shop Pay by Shopify will be automatically turned on. If you don’t want your customers to use Shop Pay, you can turn it off at any time.
Learn more
Related Articles
Get help for other devices:
Ads Help - Desktop
What is a Facebook Catalog? online stores, offers with flights, booking hotels and tours, offers with rental and sale of real estate, cars, etc.
Facebook catalogs are created in the service for working with the Commerce Manager assortment, available at business.facebook.com/commerce . nine0005
Thanks to the catalog, the company will be able to:
Add products to Facebook, specify and manage information about them. In the catalog, you need to specify the name of the product, add its image, description, cost, various options, etc. Products and data about them can be uploaded individually or in bulk.
Create groups for ads and collections in stores. Groups and collections are a set of items from the catalog. nine0005
Share with colleagues and partners to collaborate on the catalog.
Specify country and language data. This will allow users to display correct information about products regardless of their language and country.
Facebook recommends adding all line items to one feed rather than creating multiple feeds. The presence of all items in one catalog allows:
it is easier to manage information about products, since they are all in one place;
Create audiences based on pixel events associated with catalog positions. Since all products will be in the same directory, events for them will not be separated;
Sell all available items in Facebook Shops (according to the rules, only one directory can be connected to a store created using Facebook Shops). nine0005
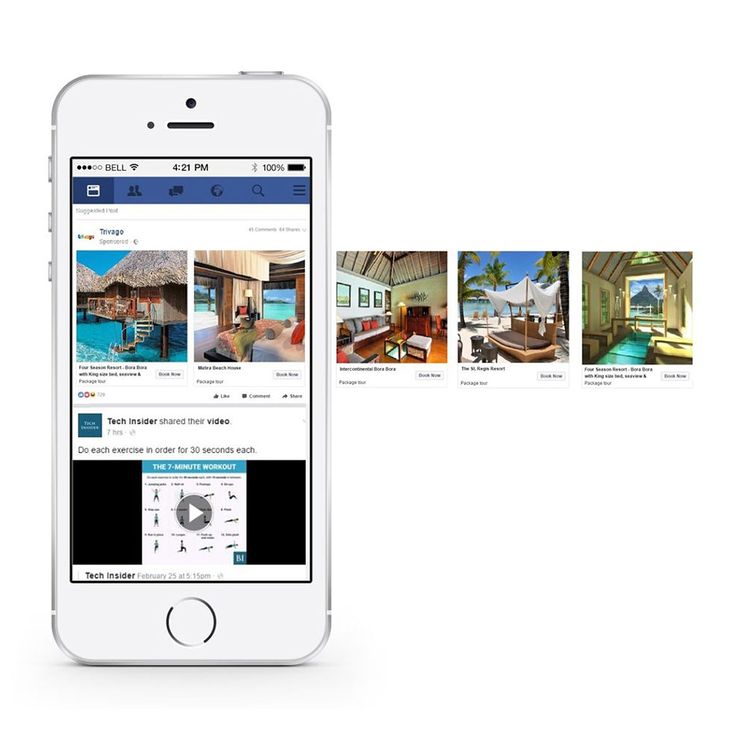
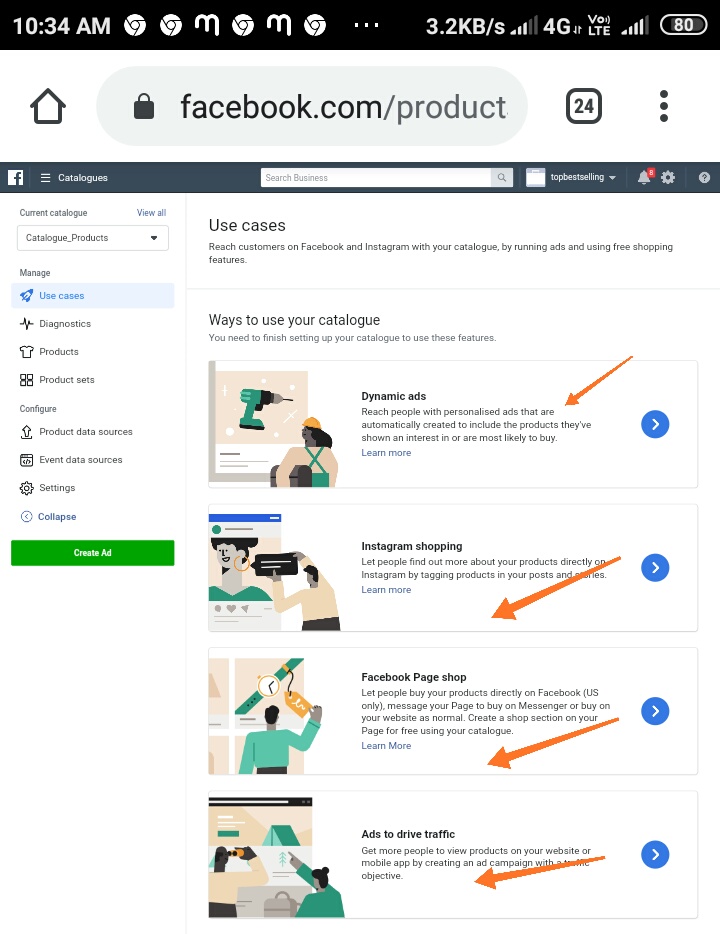
Products from the catalog can be advertised on Facebook and Instagram. Facebook Ads types available for catalog line items:
Dynamic advertising. Shows users items from the catalog that they were interested in on the advertiser's website or on the Internet.
Advertising with a selection. The ad includes several items from the catalog below the main image or video. By clicking on a product, the user can learn more about it or see similar products. nine0005
Carousel advertisement. Items from the catalog are dynamically loaded into carousel cards.
Advertising with shopping tags. Products from the catalog are marked with special tags in the ad. By clicking on the label, the user goes to the product page with information about it and can place an order.
Affiliate advertising. Brands that sell products through merchants can run direct sales campaigns. The merchant must give the brand access to the relevant catalog segment, which the brand can use to set up dynamic ads. nine0005
Before setting up the catalog, create a company business page and a Business Manager account to link the catalog to the business page. Next, open Commerce Manager.
Click "Add catalog" and select from the proposed list the subject to which the positions in the catalog belong, for example, e-commerce.
Next, specify how you want to add products to the catalog - upload the information yourself or use a partner platform, such as Shopify or Big Commerce. nine0005
For self-download, click "Download product information". You can add products one at a time manually, add products in bulk using a feed, or use the Facebook pixel to import and update line items from your site.
If using a partner platform, click "Partner platform connection", select the desired platform, go to the site and complete the setup. This option only works for e-commerce.
Next, select the Business Manager account that the catalog is linked to to access more options for using the catalog than with a personal account. It will also be possible to give access to work with the catalog to other employees and partners. Only a user who has been assigned the administrator role can select a Business Manager account. nine0005
After that, enter the name of the directory and click "Create". The catalog is ready. Now it needs to be filled. To do this, go to it, click on the "Add Products" button and select the desired option.
You can upload one product by manually adding a description.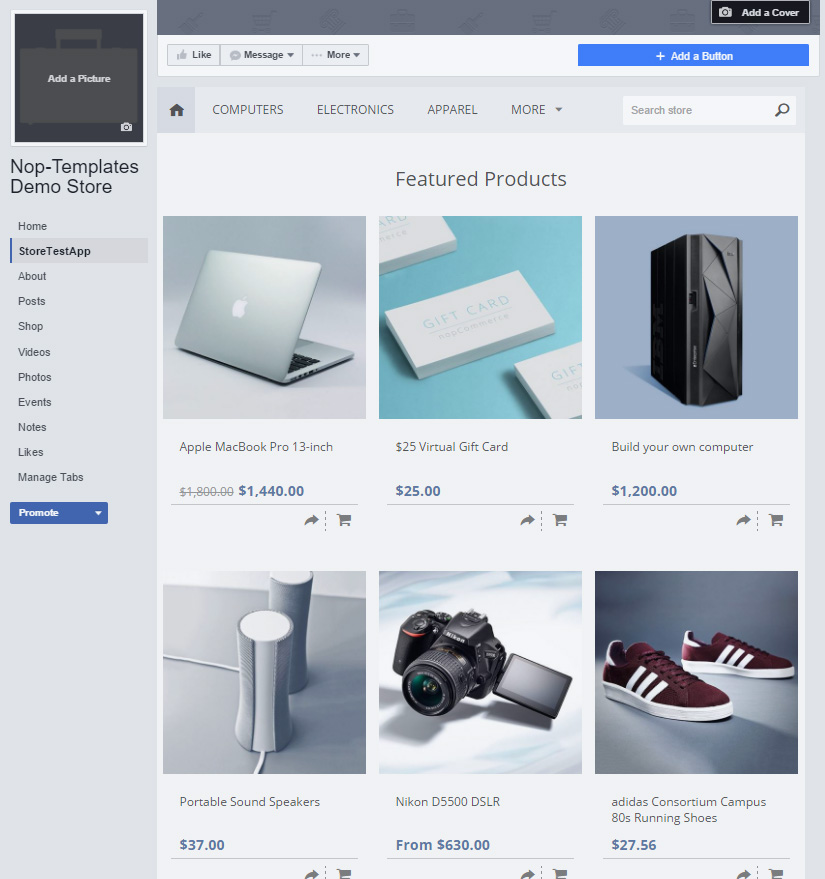 To download several products, the system will prompt you to select one of the methods.
Manual upload of products one by one
Multiple upload options
Once the catalog is full, it can be used to set up ads and display products on the storefront on Facebook and Instagram. nine0005
5773
6 min.
In May of this year, Facebook took the first steps to launch Facebook Shops, a tool that should support businesses during a pandemic.
What are the advantages of this innovation?
We have prepared a detailed checklist for you to help you set up your own store based on Facebook Commerce Manager.
To start setting up, you need to have:
The catalog is the foundation of your future Facebook shop. Therefore, it is very important to create it correctly and group the products.
To create a new Facebook catalog:
You can upload product information via a data feed or Facebook pixel.
If you use a supported e-commerce platform, you can connect an account to automatically import products. (Shopify, Magento, BigCommerce, OpenCard, WooCommerce)

Available options include:
After all the preparatory steps are completed, you can proceed directly to the creation of the Facebook Store. To do this, use the Commerce Manager tool in the "Stores" tab: www.facebook.com/commerce_manager
Commerce Manager is a platform for creating a store and managing sales on Facebook and Instagram, with which you choose where and how customers will do purchases:
As Facebook stores expand, more features will be added:
 nine0016
 So how do you set up a store with Commerce Manager?
In the business tools in the Ads manager, select the “Catalog Manager” tab: www.facebook.com/commerce_manager
In the “Catalog Manager”, select the “Stores” tab and proceed directly to creating a Facebook Store.
At this stage, you can choose how you want your customers to make purchases. Available options include:
At this stage, you need to connect the store to your Business Manager.
Select the page where your store will be published.
Catalog selection.
For the most efficient use, it is recommended to choose the directory that has the most impressions.
The created store will be available in the Commerce Manager under the Stores tab. Here you can view the published Facebook Store or make changes to it. nine0005
Now that all the basic settings are done, we can move on to the visual design of the store. To edit the design, you need to go to the Commerce Manager in the “Stores” section. Next, click on the "Change" button.
After completing the above steps, we get into edit mode, where we can change the design and content of the Facebook Store.
In the “Layout” tab, you can add new blocks with different formats and product groups. Currently available:
You can also edit title and description text. By default, the name of the directory will be automatically pulled into the section header.
In the “Style” section, you can change the size and position of headings, the design of store buttons, the color of links, etc.
To save all the entered data, click the "Publish changes" button in the lower right corner of the screen.
To give access to your store to other users, you need:
By granting administrator access, you give full control of your trading account. Including the ability to assign new roles, manage all settings, and so on.
In “Standard Access” you can grant access to individual resources. For example, to statistics, promotion management, etc. nine0005
You can study store analytics in the “Statistics” section. In the “Overview” tab, you can view summary data on key metrics.
In the “Performance” tab, metrics are available for the following parameters:
In “Behavior” you can track the number of content views, clicks to the site from the product card, adding to the wish list.
In "Traffic" - number of sessions, bounce rate, number of new visitors. nine0005
In "Events" - additions to the cart, orders on the site, income, etc.