Alexandra | May 9, 2021
Let’s create your own unique, custom Instagram location!
As you know, you can now tag a location when you schedule your Instagram posts with Preview.
A lot of you asked:
“Can I create my own custom location tag for Instagram?”
Yes you can!
I’m going to show you how to do it.
The location can be anything:
Follow these 4 steps.
Click here to use it
You need to set up your location tag on Facebook.
Facebook and Instagram are linked. As you may know, Instagram is owned by Facebook.
So you need to go through Facebook first to create your new location.
Type a location name exactly as you want it to appear on Instagram. Pay attention to spaces, capital letters and punctuations.
Tap “Search“.
Chances are your new “location” does not exist. Or maybe some people have already registered a location with a similar name as you – which is fine.
If you’re not fine with that, here’s a quick tip.
Quick tip:
If someone has already taken the name of your location and you want to have a unique name, you can get very creative.
For example, if “Coffee” is taken, you can try “Coffee Official”, “The Official Coffee”, “This is Your Coffee”, “Where You Feel Alive”, “The London Coffee Shop”, etc…
Use your location name for marketing purposes.
If it’s something different, people will look at it and be intrigued! Take your time to brainstorm.
Once you’re happy with the location name:
Next time you post on Instagram or schedule a post in Preview, use your new location.
Did this trick work for you?
More tips:
Click here to use it
In this blog post, we’ll teach you how to create your own special, custom location on Instagram. So you can “be” anywhere you say you are.
(Or so you can get people to tag your new restaurant, office, apartment, event — you get the picture whatever!)
But first, I’ve got a question for you. What’s wrong with the picture below?
View this post on Instagram
“My mama always told me that miracles happen every day. Some people don’t think so, but they do.”
A post shared by Danielle Hertel (@danielle.hertel) on
Did you spot it?
Is it?
a) she’s on a green screen.
b) is that mars?
c) The location tag says “The Wisdom of Forrest Gump” – and that’s not a real place!!!
(drumroll please)
(suspense building)
(…) (…) (…)
It’s “c” – you silly gooses!
But here’s a better question…how did she do that?!?!
And that’s what this article will teach you. How to create your very own funny, practical, or nonsensical custom location on Instagram. But first, some backstory. (Skip ahead to go right to the step-by-step-instructions).
In the age of social media, our society has a growing curiosity concerning the whereabouts of our friends, our families, even our exes, estranged aunts and childhood bullies…. We wonder what they’re doing out there.
What are they up to? Where are they eating? What’s that restaurant they posted from while on a date?
Of course, you’ve seen those you follow on Instagram tag their location, or your friends on Facebook “check-in” to a restaurant, coffee shop or some other attraction.
And, if you’re anything like me, you’ve probably clicked on one or two (or 35) of those location tags to check them out, wondering what those paces offer and why they’re popular with our friends.
With every location tag we follow to a venue’s social media, directory or web page, that business suddenly has our engagement — which is an opportunity for them to gain new customers.
If you’re a business owner, this last bit should have gotten your attention, at the very least!
To the Instagram Marketer
Click here to see what’s inside.
Did you know you can create your own custom location for your business? And that your location can be tagged, shared and followed by users who are interested in your content?
You don’t need to be a business owner to create a custom location. Locations can be a great way to have fun with your Instagram feed or give your followers some additional insight.
For instance, an Instagram family might want to create a custom location for their house and title it, “The Bungalow.” Or a group of friends could create a custom location called, “The Hangout.” The opportunities are endless.
However, if you are a business owner, creating a custom location is almost essential in gaining more exposure. Here are the exact instructions for creating your own special location on Instagram:
How to Create a Custom Location Tag on Instagram [Step-by-Step Instructions]
In order to get a custom location on Instagram, you’ll need to head over to… Facebook? Yes, you heard correctly. Since Facebook bought out Instagram in 2012 (for $1 Billion), the two social media titans operate on the same system.
This means you often need one to access certain functions on the other. Creating a location is a prime example. You will be setting it up on Facebook so that you can use your new location on Instagram.
Let’s get started!
Step 1: Check-In
On the Facebook homepage, you should see a “Check In” button located underneath the status bar.
Click on this, and you should see a list of popular locations near you. If you are not seeing any locations, make sure to…
Step 2: Enable Location Services
You need to have your location services turned on in order to create a custom location. You can do this by going into your Settings > Privacy > Location Services and allowing your Facebook app to know your location.
(If location tracking isn’t something you want, you can turn this off as soon as you’re done setting up the custom location.)
Step 3: Name Your Location
Once your GPS permissions are turned on, go ahead and type in the name of your custom location (in most cases you will want this to be the name of your business).
Make sure to use capital letters and proper grammar — this is what people will see when they tag your business!
Step 4: Add Your New Location
Ignore any other locations that auto-populate while you’re typing in your custom location. Instead, find the “Add Location” option, located towards the bottom of the Check-In screen.
For the sake of this tutorial, let’s say I own a flower shop called Beautiful Blossoming Buds.
As you can see, there are no other businesses or locations with that name.
Note: If you find your location name is taken, get creative with your new name. Use keywords that allow your audience to know what your business entails. The more specific, the better!
You’ve come to the right place.
Step 5: Choose a Category
After clicking on the “Add” button, you’ll be taken to a prompt to pick a category for your location.
It’s important to choose an accurate category so people can find your business when searching in your niche.
For my example, I chose the Floristry category for my business, Beautiful Blossoming Buds.
Step 6: Pick a Physical Location
After choosing a category, the next step is to determine your exact location. This process works best if you are physically at the location of your business. (I’ll go over this in more detail below.)
Step 7: Claim Your Location
After creating your location, find it on Facebook by typing it into the search bar at the top of the Facebook homepage. When you find it, you should be brought to a page where you can click, “claim this location.”
Do that and you’re done! Creating a custom location is a super-simple process with a lot of payoffs.
Now when you want to post a photo on Instagram, your new location should now be available to tag and share.
Troubleshooting
Test Out Another Category: Facebook really wants you to be specific with the category your business falls under. Play around with a few different categories and see if that does the trick.
Be in the Exact Location – or really, really close. Custom locations tend to work better when you’re creating one in the exact spot of your business. If entering in an address from elsewhere didn’t work, try creating the location while you are physically there.
Benefits of a Location Tag For Your Business
So why should you bother creating a custom location in the first place? Does it really affect your business that much?
The short answer is Yes.
Above all else, a custom location creates exposure for your business, literally putting it on the map for social media users. More exposure means more customers and more customers leads to more profit …that part’s kind of a no-brainer.
Source
How a Custom Location Tag Creates Exposure for Your Business
For starters, potential clients and customers will have an easier time stumbling across your business.
Locations work in a similar way to hashtags. When a user searches a particular word or phrase, any hashtags containing that word or phrase populate.
It’s the same process with locations.
Let’s say I’m sitting in my apartment in Los Angeles, and I want a cup of coffee. Maybe I want to try out a different coffee shop I haven’t been to, or I’m new to the area and looking for local businesses. I’m going to use Instagram to find a business that sells coffee.
(In fact, there has been a dramatic increase in the number of people who use Instagram as a means to search for places to eat and drink, using it Iike Yelp!)
As you can see below, a simple search of the keyword automatically generates a list of all locations near me that make and sell coffee.
When you create your custom location, your business will appear in search results and increase the chances that someone might stumble across it and try it out.
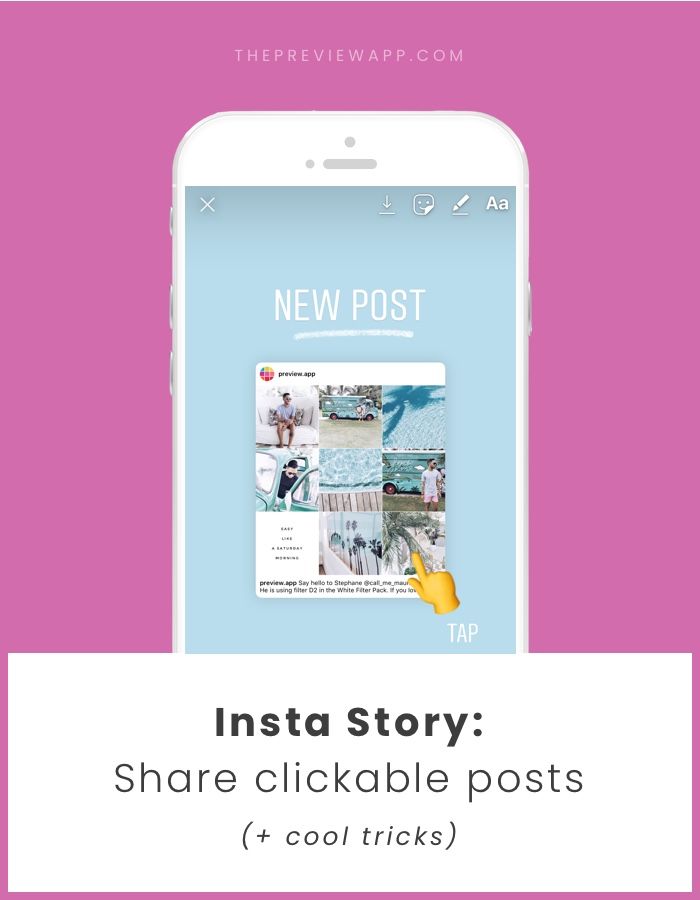
Insta Stories
Instagram Stories is another way you can use a custom location to increase your reach.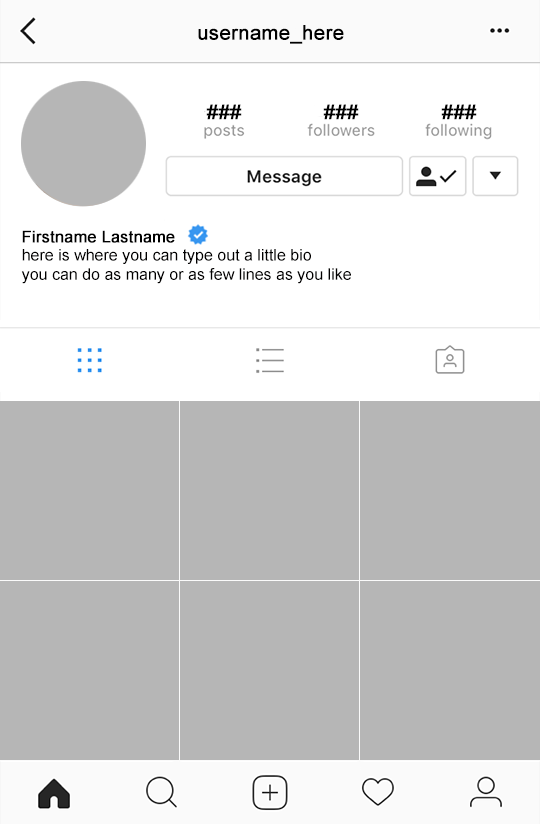
The Stories feature continues to grow in popularity, and it’s easy to see why. Through this platform, users can easily upload photos or boomerangs, tag friends, use hashtags, countdowns and share their location.
Allowing your business to be tagged by you or, more ideally, by your happy customers, is an easy way to spread the word about your products and/or services.
Higher Engagement for your Page?
And if all that exposure wasn’t reason enough, what if I told you that posts with a tagged location have higher engagement than those without?
In 2016, Instagram released a statement about their new algorithm, quoting that “the order of photos and videos in your feed will be based on the likelihood you’ll be interested in the content.”
What does this mean?
Well, let’s pretend you are in the coffee business, and caffeine-hungry Instagrams users are searching for coffee shops or coffee-related products like we do. The likelihood you will appear in the feed of someone who enjoys coffee increases when you have a custom location turned on.
This is because Instagram can identify your business through your location and category. It can pick up on keywords in your custom location and place your popular content in the feed of applicable users.
What Does This Mean For Your Business?
All this, again, means more exposure for your business without you having to lift a finger (well, after those couple of strenuous finger-lifts involved in that 5-minute Facebook step).
A custom location can be set up in no time, but it will have long-reaching effects on your customers finding you and how, in turn, your business will go forward.
It only takes one location tag to lead to an inquiry, leading to a new customer, who makes a new location tag, and your reach will grow on.
If you’re a brand trying to grow your business, and you haven’t created a custom location for it yet… what are you waiting for? It’s a great way to gain more exposure and spread the word about your products with minimal effort on your part.
How many times have you checked out an interesting new location because you saw it tagged on social media?
At the moment, this is one of the most active social networks, surpassing the Meta a few years ago and everything is at hand. Instagram is a social network where celebrities address , but also people who share moments of their daily lives with an image and a bit of text.
We can access from your website and app , the second is a convenient way to quickly enter and upload content, all from a fairly friendly interface. The first one is the one used a priori if you don't have an app installed, many people prefer to download content without having to download any software.
In this tutorial you will learn how to create an Instagram location , all in case you go to the site and want it to be attached to an image or video. The places we share will be very helpful for this popular network looking to expand features throughout 2022.
Article subject:
What to do if the news on Instagram is not updated
Index
Subscribe to our Youtube channel
When geolocating photo , the location will act quickly and intelligently so as not to insert the city manually. This will go from cumbersome to quite handy, ideal if you usually visit countries from time to time.
You can specify a location without having to be there specifically, this is useful to trick certain people into visiting a certain point. Instagram, like other apps, will let you tag a site, yes, the only thing you can't do is change the day or time .
If you want to tag images the right thing is that you can create places on Instagram to keep things organized, not the other way around. You'll be done with this in a few steps, so try to remember how to do this when you want to create as many places as you want.
When creating location , the best thing you can think of is where you are, for more accuracy you have the option to use Google maps and your phone's GPS. When we travel, sometimes the address of the exact place is unknown, at least if it is a point isolated from the city.
Setting the location is something that anyone using the phone and the website can do, although it works better in the former than in the latter. By entering a location, anyone who follows you will see it below the image. , indicating where you were.
Create an Instagram location , Do the following:
 , tablet or PC
As if we put the real location of the site image , a person has the opportunity to add a false one, you can play a little with this, show your imagination. If you decide to host a non-original site, you will make the person wonder if it is true or not.
When tagging a name, you have the option to add a person's name, a specific country, a place you've been to, including a page or image of a specific site. While setting up , try to take something that attracts attention, such as a photograph.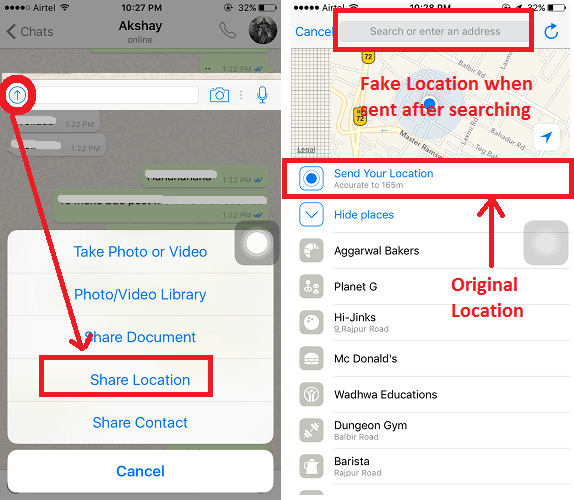
To create a fake Instagram location , follow the same steps as above:
The seats will be editable by the account that uploaded them. , so if you want to obfuscate, you will do it whenever you want. Instagram is a social network that will allow you to edit at any time, including a photo that you can delete and fix with another one from your phone's gallery.
It's likely that you will fail when you try to attach a location, but there is an easy fix for this error, to enable "Location" on your mobile device.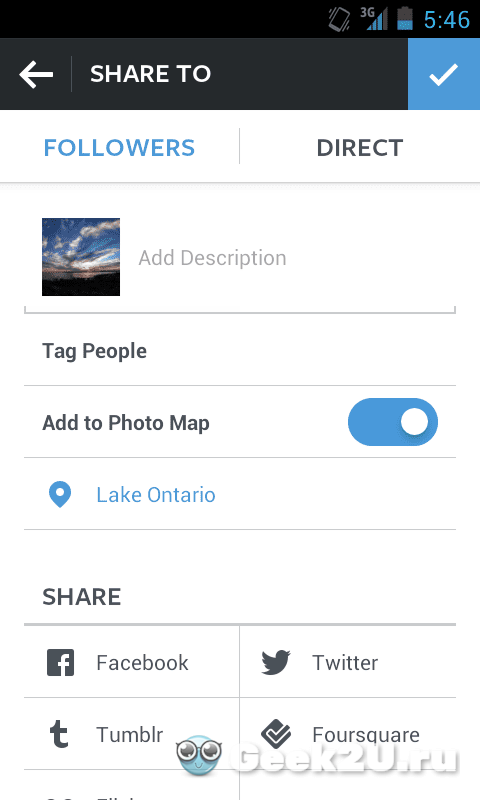 If you have it disabled by default, it may not allow you to share your location in real time, which saves us from manual settings on Instagram.
After activation, try again from the first step. , the second will allow you to create a fake location, which in this case is set by the account. Locations, as before, are editable, and you can do it in a few simple steps from your phone, tablet or computer.
To enable location on your device, follow these steps:

Real-time location will find the city of and even the point where you are, so it is appropriate to activate it if you take a photo and upload it to Instagram. A location is nothing more than a place that you will call whatever you want, although the truth is that it is better to always use the real name for more authenticity.
Share!
Geolocation should be understood as a point that indicates the location of a particular object. A car in a traffic jam, a place of an appointed rest, a place where your lost cat was last seen, and much more can act as such a point. Geolocation can be used to bind a certain place to it - a store, cafe, beauty salon, fitness club, and so on, and then use this place in profile description or in posts. Thanks to this, customers will be able to quickly find the location of your points of sale.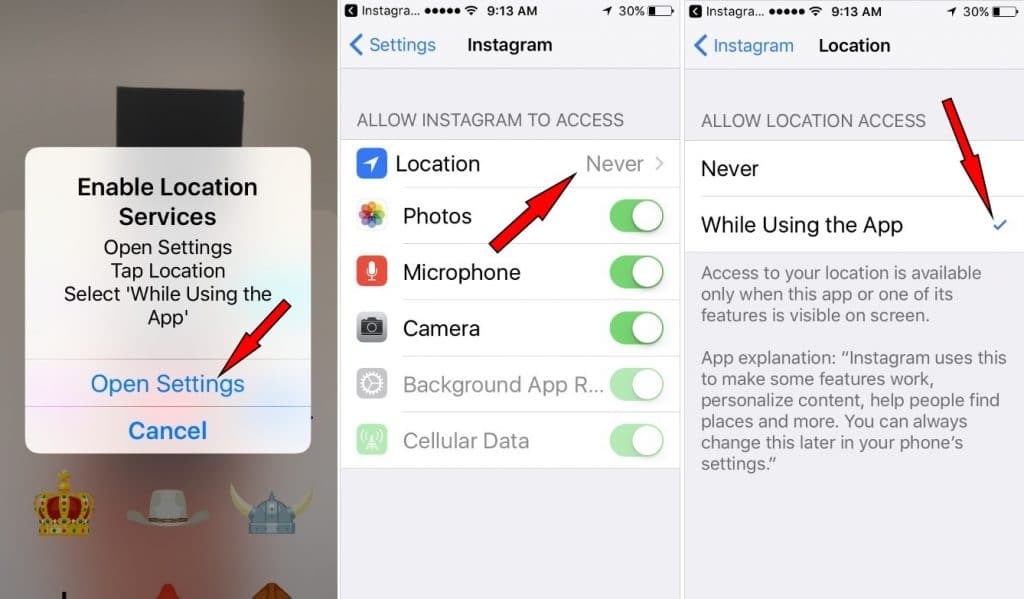
In this article, we will look at how to create a geolocation on Instagram, add a location and specify a geotag when publishing a post.
Program for promotion on Instagram - SocialKit:
Registration >>>
From the user's point of view, setting a geolocation in a post is an opportunity, no matter how trite it may be, to mark your location. Place of work, restaurant, popular resort and much more.
You can also use geolocation to promote your business. In addition to using a geotag in your profile, you can post using the most popular ones in your city. In addition, you can to collect the target audience for geolocations located in close proximity to your points of sale using the program SocialKit , and then for the collected audience launch a mass subscription .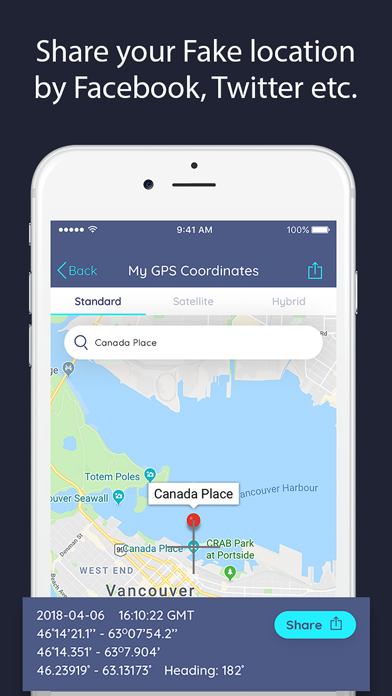
Each user has the ability to create their own point and attach it to the post. For example, you visited a beautiful place and marked it with geodata. This place can be seen by any Instagram user. In addition to the fact that a person will be able to see the name of the place / address, he will be able to open a map where, with the help of a guide, a route to this place will be built. This option is useful not only for commercial enterprises, but also for those who travel a lot and blog on Instagram.
Who must use this Instagram feature?
It has been said before that geolocation is of particular importance for those who are promoting their company. Thus, you will not only advertise your business, but you will also be able to find it in the "Where are you" column. The recognition of the institution due to geolocation will increase significantly, and people who are or live nearby will definitely find out about this place.
The process of creating a new geolocation is quite simple, but it is not done on Instagram itself.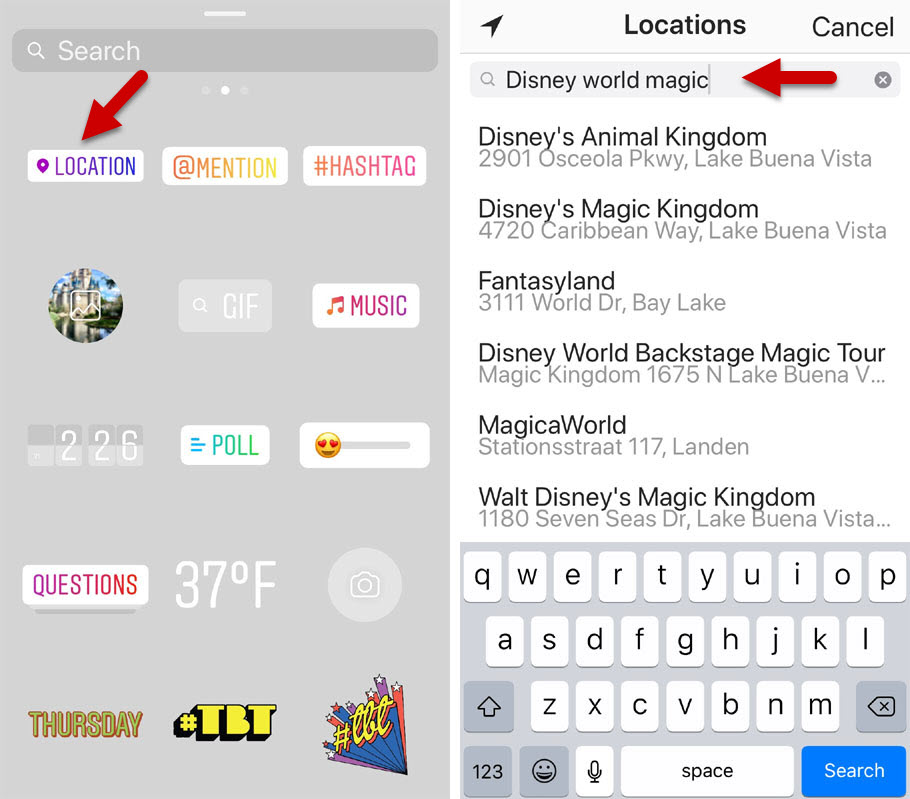 Since Instagram is owned by Facebook, adding space happens when you create a Facebook business page for the subsequent transition to an Instagram business profile.
If it was previously created by someone else, then you can safely use this geodata. To create a geolocation, it is best to use the phone, but there are applications that are adapted for PC.
After you have downloaded the application, you need to register a new profile or log in if you have already registered.
Next, create a business page for the company.
Enter the exact address in the information section.
This completes all the steps. The point on the map has been created, the place has been added. Now you can attach the created place in two social networks to any of your publications.
If your phone cannot detect your geopoint, then the reason is either in the smartphone settings or in the geosensor.