Facebook is a great tool for sharing your images online with friends and family. Many of us do this on a regular basis, but photographers will often find their images heavily compressed. You’ve probably uploaded a photo that looked fine on your computer, but once on Facebook it looked soft and not as good!
This guide will give you all the top tips for uploading images to Facebook and retaining as much quality as possible. I will cover optimum sizes, file types and other tips for getting the most out of your image.
Want to improve your social media presence? Try The Photographer’s Guide to Social Media Marketing
To assist fast webpage loading times for its users, Facebook compresses all images uploaded to it. As this is done automatically, your images are subjected to a default compression, which more than likely does not suit them.
Facebook supports photos that are either 720px, 960px, or 2048px on their longest edge. Any other sizes will have their dimensions reduced automatically, and this inevitably results in visually poorer images. Reducing the dimensions of an image decreases its sharpness, especially if it is a drastic resize.
We’ve got a free PDF for you!: The Photographer’s Guide to Facebook
Facebook will always compress your images, there’s no getting around that. However, there are some tricks to reducing the amount of compression that occurs.
The most important factor is the dimensions of your image. Make sure you upload your photo at exactly 2048px on its longest edge. Facebook won’t change the dimensions of your image, so there is a lot less file compression required and your photo remains sharp. If you aren’t comfortable uploading such a large file, then ensure that you upload a 960px longest edge photo instead.
Once you’ve resized the image, look to see if it appears sharp enough. Make sure you are viewing the image at 100% size in your editing software. If it looks soft having been resized, sharpen it a little.
Then, use Adobe Photoshop’s “Save for Web” function. Ensure that the image is selected to compress to a JPEG file at 70% quality, whilst also converting it to an sRGB colour profile. More detail about using this function can be found in our article “Preparing a Photo for Web Use“.
Yes it does, and I was surprised at the degree to which it improves image quality. Here is a comparison of a photograph uploaded at two different set of settings.
I’ve cropped in on the puffin that is part of a larger photo so that you can see the details. The sample on the left was uploaded at an obscure size of 1096px longest edge using a colour profile of Adobe RGB (1998). You can see that the colours are lost slightly, especially around the eye. The image loses sharpness drastically, too.
The image on the right, however, was uploaded at 2048px longest side with an sRGB colour profile. I also used the save for web function, as mentioned above, saving at 70% JPEG quality.
As you can see, the image looks a lot better for it. The colours are stronger, and reflect those of the original file. You can see red details around the eye and beak more clearly. The clarity and sharpness of the image is also still there.
What Facebook won’t tell you, is that you can upload a PNG file at any size you wish and achieve a similar effect. Don’t forget to convert it to sRGB as well, but you aren’t restricted on your dimensions this way.
To do this, just save your photo as a PNG file using your editing software. You can also use the “Save for Web” function in Photoshop for this by selecting PNG-24 from the drop down list.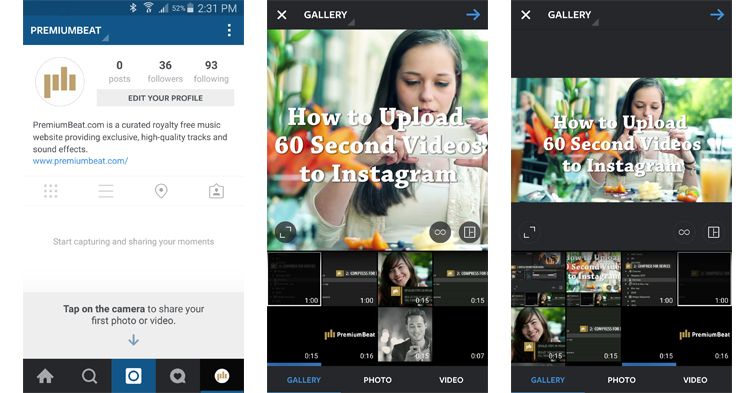
If you want to export PNG files straight from Lightroom, we have written a tutorial that shows you how to enable that function.
Some photographers argue that PNG produces even better results than JPEG. So, try it out! Facebook doesn’t mention this, strangely enough, but it is another great way to get your images looking good online.
Further Reading: “How to Use Facebook to Promote Your Photography“
One thing that you need to keep in mind is that viewers haven’t seen your original, high-resolution file. You, on the other hand, have.
This means that you are of course going to be comparing how your image looks to how the very large, full resolution original looks on your computer. Consequently, things appear to be worse than they actually are (most of the time).
Ensure that you are giving yourself some tolerance for the fact that you’re uploading a compressed image in the first place. Think about how you look at other photographers’ images online – they are most likely feeling just like you about online compression.
In reality, though, you view their images thinking they look great. They may argue otherwise, but on social media websites it’s all about how the viewer perceives the image in the first place.
So as you can see, images don’t have to look horribly compressed as soon as you upload them to Facebook. Just follow the steps above, and you’ll be wishing you knew this earlier!
Here is a summary of what I’ve covered, in 4 quick and easy steps.
Or, try using PNG files, as mentioned above!
Remember, if you’re uploading images online you may want to protect them. We’ve written instructions for how to find websites that are using your photos without permission – make sure to read this! It can throw up some very interesting results.
Don’t forget to download our free PDF: The Photographer’s Guide to Facebook.
By Alvin Wanjala
Updated
By changing one setting, you can start uploading videos and photos in HD when using the Facebook app on Android or iPhone.
When uploading photos or videos to Facebook using the mobile app, it defaults to standard quality. Frankly, most people would probably prefer to upload standard quality photos and videos, particularly if they're using their mobile data to do so.
If you're a pixel peeper and would rather upload the best quality possible, you can do that by changing a setting in the app.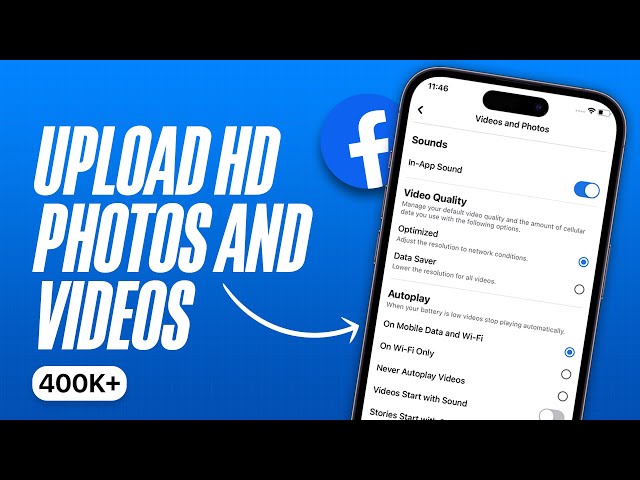 The process is slightly different depending on whether you're an Android or iOS user.
Here's how to upload HD videos and photos on Facebook.
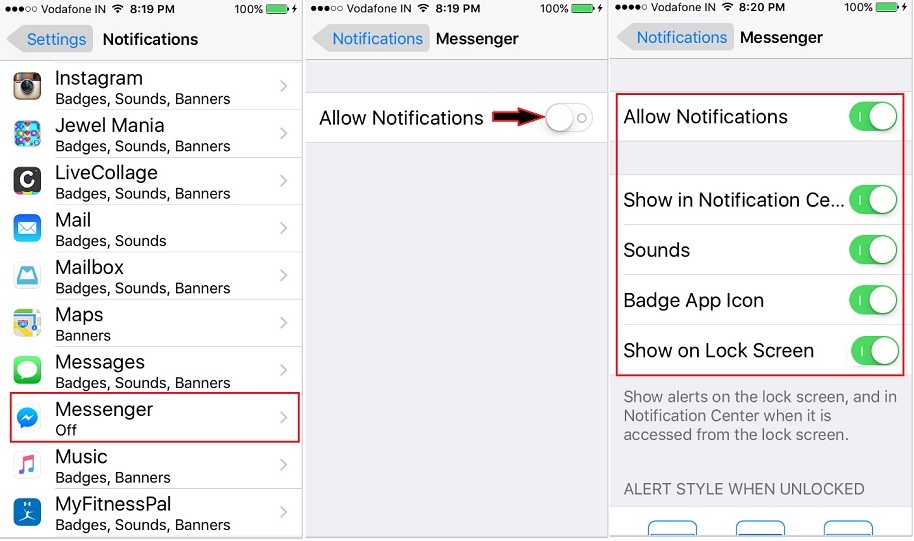
If you have an iOS device, there's a specific setting inside the Facebook app that you should enable to start uploading HD videos and photos on Facebook. Follow the steps below.
3 Images
With this setting, Facebook will adjust videos based on your network conditions. If you have a fast and stable internet connection, Facebook will upload your videos and photos in the highest quality available.
If you're a long-time Facebook user you can recall that this is unlike older setting options that allowed you to tell the app to strictly upload videos and photos in HD. Nonetheless, it's better than nothing.
On Android, the process is slightly different because the menu icon is located in the top right-hand corner—rather than at the bottom.
Here's how to upload a high-quality video to Facebook on Android, along with photos.
3 Images
If you do prefer to upload HD video, we'd definitely recommend doing it over WiFi given the time and expense that can be involved with uploading a large file using your data.
Once you've saved the settings, every video you post on Facebook via the mobile app will upload in the highest quality as long as your network is capable of doing so.
If you want to save videos you've seen online, check out this guide on how to save or download any video from the internet, including on Facebook.
If you use Facebook on your computer, there's no tutorial for uploading high quality videos. This is because Facebook will automatically upload videos in HD if you use it on these devices. Of course, you need to ensure that the video or photo you want to upload is of a high enough quality.
For starters, here's how to post a video on Facebook.
Uploading HD videos to Facebook, as well as other forms of visual content, helps you get the most out of the social media platform. For instance, uploading videos is a great way to grow a presence on the platform and engage your audience.
Besides that, it's also more pleasing to the eye of other users. If you're serious about getting good with Facebook, you might also want to consider learning how to go live on the platform, how to send high quality videos on Facebook Messenger, and more.
September 15, 2015 Technologies
If you use Facebook*, you are most likely uploading images to your photo albums or timeline. But when viewing the tape not from a smartphone, but on a larger screen, the quality of the images can greatly disappoint you. The fact is that Facebook* uses quite brutal compression when uploading images. But there are several ways to fix this.
Facebook* is huge! Users upload about 350 million images to it every day. This is a lot. Therefore, uploaded images are compressed to reduce their size. As a result, the picture quality may noticeably suffer. And after your image has passed through the entire Internet, has been downloaded, then repeatedly uploaded to different services, it can become absolutely terrible.
Even the text becomes much less attractive: noise and blurring appear, the font becomes angular. What can we say about photographs, the quality of which plays a decisive role in shaping the impression of the viewer. nine0003
Naturally, the situation only gets worse when the whole cycle " Download - edit - upload to Facebook *" is repeated many times. And this happens all the time on the Internet:
As a result, after repeated compression, the picture will look disgusting.
Of course, Facebook* isn't the only site that compresses images. Instagram*, Twitter, Tumblr, and pretty much every other site you usually upload photos to uses some level of compression. However, Facebook* compression is especially ruthless! In addition, an image compressed to the level of Facebook* and then processed, for example, with Instagram* filters, becomes larger. The next time you upload to Facebook*, the compression process will repeat and add artifacts. nine0003
When you upload a photo for the first time, it may still look good. But once a few people move it from one site to another, it quickly becomes trash. The more time passes, the worse it will look.
Unfortunately, you can't turn off compression in Facebook*. But you can minimize the negative impact by using Facebook*'s own tools, preparing before uploading a photo, or by bypassing Facebook's servers*. nine0003
To reduce the impact of compression, follow these tips:
 According to Facebook* guidelines, 2048px is the ideal width for high resolution images. Your images will still be compressed. But if they are initially loaded at a higher resolution, the effects of compression will not be as noticeable. This advice is more suitable for photographs. nine0018
If you're willing to spend a little more time uploading photos to Facebook*, there's one more thing you can do.
Not every image you share is your own. Sometimes you just want to share something funny or useful. If you're going to share an image found on the internet, do yourself and others a favor and share the best one you can. Here are some ways to do it:
 If you see a Share button next to an image, use it to avoid recompressing the image.
 One way or another, when dealing with Facebook*, you will encounter image compression. However, if you do choose to share a picture, there's usually a way to find a better version of it.
Not all technically available tools are worth using. For example, shooting vertical videos is bad manners. To avoid having to share ugly, compressed images on Facebook*, there are a few photo habits you need to break:
 nine0018
 These simple tips can help you make the Internet a little more beautiful. nine0003
*Activities of Meta Platforms Inc. and its social networks Facebook and Instagram are prohibited in the territory of the Russian Federation.
A lot of social network users face this situation. They post a high-quality photo in their account or page, wanting to please their friends, but on the screen, the photo posted on Facebook looks much worse than the original. Alas, Facebook automatically degrades the quality of posted video or photo content without informing the user about it.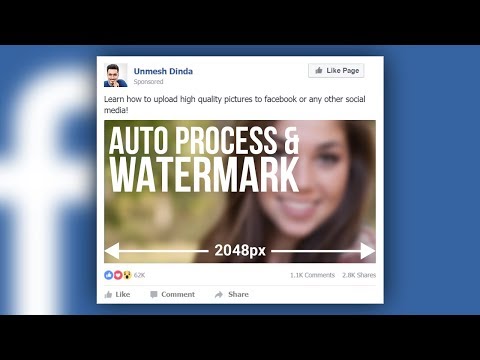 This is called optimization. How to deal with it? nine0003
Content:
. videos and photos. Visual content dominates the modern Internet space. And the platforms on which this content is hosted strive to optimize it in every possible way in order to save space on their servers and ensure fast loading of photos and videos on any device. The mobile segment of the Internet is expanding every day. And social networks tend to follow the trend, that is, everything should be loaded as quickly as possible even with communication problems. nine0003
Of course, a simple user will not change the algorithm of the social network. However, there are tricks with which you still manage to publish high-quality photos and videos on Facebook. Let's start with the fact that a lot depends on the device from which the content is posted.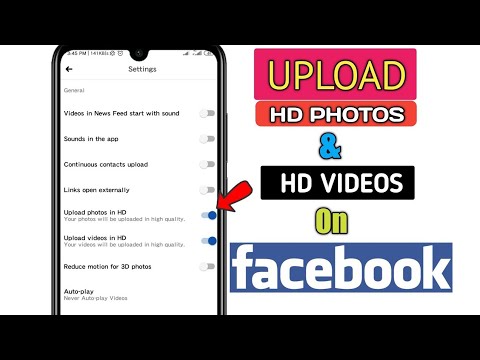
During the latest Facebook updates, a lot of good innovations have appeared, and the media component of the social network is no exception. If a user has uploaded a photo or video in HD quality for publication or for an album, then this content will be saved in the system in the same quality. nine0003
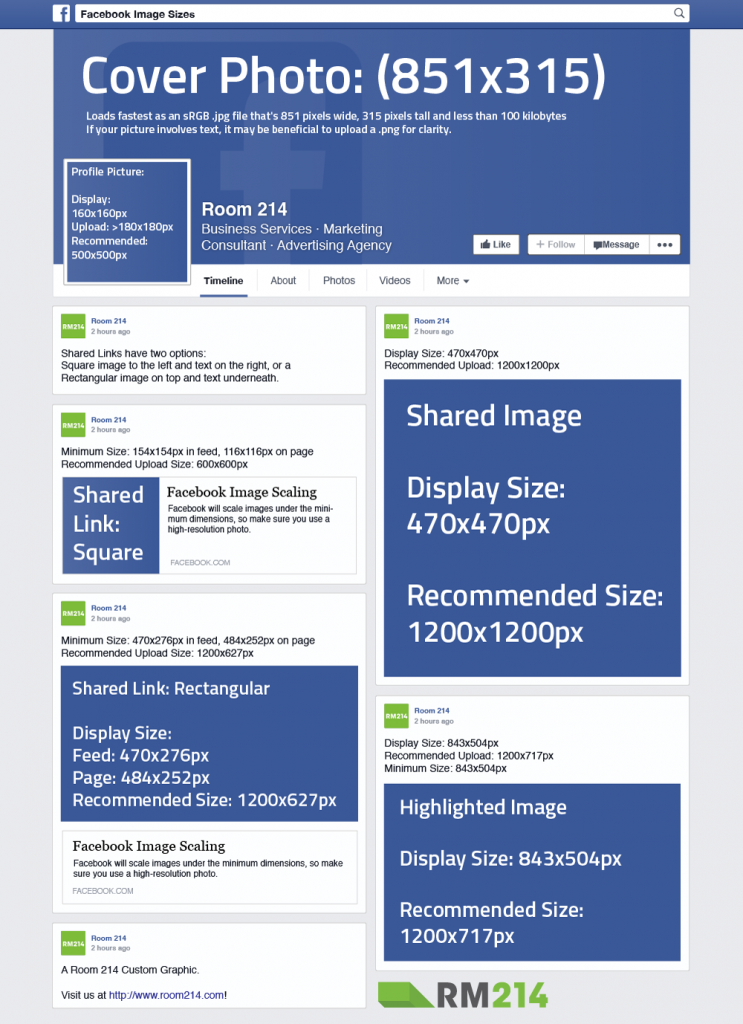
The optimal resolution for page covers is 1920x1080. Then the system will compress the image to the desired size without any noticeable loss of quality. In this case, it is necessary to take into account that 95 pixels will be cropped from each side, therefore, in the picture, important details should be placed closer to the central part.
According to Facebook, the best avatars and covers come out if you use a photo with a .PNG extension for them.
Important! When reading recommendations on the web regarding the size of pictures for the avatar and cover, keep in mind that the photo parameters are often indicated there after displaying on the screen. The required source image data is often different. nine0003
There is one setting that needs to be changed in the Facebook mobile app to ensure that only good quality visual content is saved in the future. This is done like this:
 nine0018
Problems with video content are among the most common on Facebook. Videos may or may not open, or "freeze" during playback. The video can be uploaded in high quality, but the output will be with a fuzzy picture. In the vast majority of cases, the reasons are as follows: poor characteristics of the original file, problems with the device, problems with the speed of the Internet connection.
As for the source file, Facebook recommends the following parameters:
In other sources, you can read about Facebook's support for about 30 video formats. But for the best quality indicators, it is still desirable to adhere to the above parameters.
When running video ads, you need to set up detailed targeting by audience device type. In particular, high-quality videos are appropriate only for areas with a good level of Internet signal. nine0003
The quality of photos and videos displayed on Facebook may also be degraded due to individual settings in the user's account. To check and change these settings, do the following: