How to unhide a photo on instagram
How to Unhide Posts on Instagram
Instagram is a photo-sharing application where you can capture photos, edit them, and share them with your friends and family. Sometimes, we take a picture and upload it to Instagram without giving it much thought, only later to realize that we need to hide them. One way to do that is to delete the post, but the downside is that we’ll lose all the likes and comments.
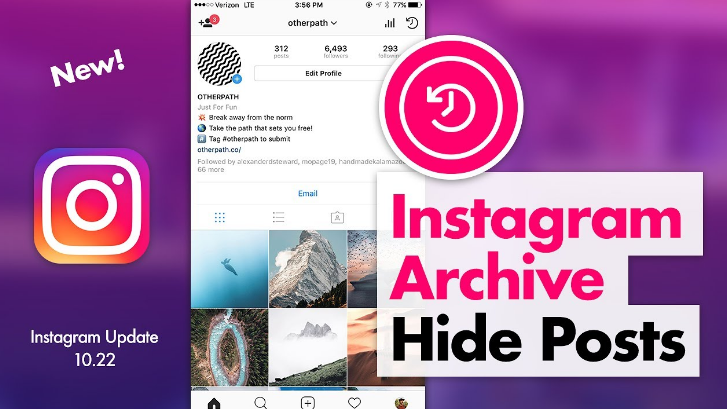
This article will talk about how the Instagram archives feature works and how you can hide and unhide your posts on Instagram without deleting and losing all the likes and comments.
Hiding Your Instagram Posts in Archives
Hiding your posts in Instagram Archives will let you restore the posts in the future. You won’t have to permanently delete the posts only because you don’t want stalkers to see some sensitive photos.
To archive your posts on Instagram, follow these steps:
- Open the Instagram app.
- Go to your Profile by clicking your profile picture (bottom right corner).
- Scroll down to the post you want to hide, and click on it.
- Click on three dots (upper right corner of the post).
- Find Archive, and click on it (your post will be hidden from your profile and saved in the archive).
You can easily hide your Instagram posts for some time if you don’t want to delete them permanently. This way, the posts will not be deleted, they will only be hidden, and you can unhide them too, in the future.
Unhide Your Instagram Posts from Archives
Once you hide your posts in Instagram Archive, you can unhide the same post with the same amount of likes and comments. When a post or photo is in Archives, it’s only hidden from the public; it is not deleted.
Unhiding hidden posts from Archives is as easy as hiding them. You just have to follow these set of instructions, and you’re good to go:
- Open the Instagram app and log in if you have not already.
- Click on your profile picture (bottom right corner).
- After that, click on three parallel lines (top right corner).
- Right below Settings, Click on Archive.
- Likely, you’ll first see the Stories archive. Click on Stories Archive and select Posts archive.
- You’ll see all the posts you’ve hidden in the archive. Click on the post you want to unhide.
- Click on three dots (upper right corner of the post), and select Show on Profile.
You’ll notice that the post is no more in the Stories archive, which means that the post is now unhidden and showing on your Instagram profile.
Save Your Stories With Instagram Archive
The Instagram Archive feature came out in 2017. Apart from hiding and unhiding posts on Instagram, you can also save your Instagram Stories in archives. As you all know, Instagram stories are deleted after 24 hours of uploading them.
However, there is a way you can save and restore your Instagram stories even after 24 hours have passed. This is made possible by the Archive feature by Instagram. You can enable this feature in Settings and all your future posts will be archived. So, you can restore your stories even after Instagram deletes them after 24 hours.
To enable archive for stories, follow these steps:
- Open the Instagram app.
- Click on your profile picture (bottom right corner).
- Click on three parallel lines (upper right corner), and choose Settings.
- Go to Privacy, scroll down, and click on Story.

- Scroll down and enable Save story to archive.
After you enable this feature, all your future stories will be saved in archives.
Moreover, you can hide as many posts as you want as there is no limit. Also, you can unhide as many posts as you want without any restrictions. You can also hide your Instagram posts in the archive without deleting them permanently.
Conclusion
Before 2017 it wasn’t possible to hide or unhide your Instagram posts, but they made it possible through a feature called Archive. You can now easily hide and unhide your Instagram posts, stories, and live streams using this feature.
Once you archive a Live Broadcast, it is deleted from the archive after 30 days. Though, it only applies to Live Broadcasts; Posts and Stories are stored permanently unless you delete them.
We’ve explained how you can hide your Instagram posts without deleting them and unhide the posts from the archive. We’ve also explained how to save stories in the archive even after being deleted from Instagram after 24 hours.
how to unhide pictures on instagram?
Answer
- If you want to unhide pictures on Instagram, you can do so by following a few simple steps.
- First, open the Instagram app and tap on the “Profile” icon in the bottom-right corner of the screen.
- Then, tap on the “Photos of You” tab.
- Next, tap on the three dots in the top-right corner of the photo that you want to unhide, and then select “Unhide.
How To Hide/Unhide Instagram Photos | Instagram Photos Hide/Unhide Kaise Kare | Hindi
How To Hide/Unhide Tagged Photos/Videos On Instagram
How do I unhide photos?
To unhide photos on your iPhone, open the Photos app and tap Albums. Then tap the Hidden album. Tap the Select button in the top right corner of the screen and select the photos you want to unhide. Tap the Unhide button in the bottom right corner of the screen.
How do you unhide pictures and videos on Instagram?
To unhide pictures and videos on Instagram, first open the app and go to your profile. Tap the three lines in the top left corner, and then select “Settings.” Scroll down and tap “Account.” Under “Privacy,” tap “Photos and Videos of You.” Toggle the switch next to “Hidden” to the off position.
How do you unhide someone’s post on Instagram?
If you want to unhide someone’s post on Instagram, you can do so by following these steps:
Open Instagram and go to the profile of the person whose post you want to unhide.
Tap on the three lines in the top left corner of the post.
Tap on “Unhide.
How do you unarchive photos on Instagram?
To unarchive photos on Instagram, first open the app and sign in. Then tap on the profile icon in the bottom right corner of the screen. Next, tap on the three lines in the top left corner of the screen and select “Photos.” Finally, select the photo you want to unarchive and tap on the three dots in the top right corner of the screen and select “Unarchive.
How do you see hidden content on Instagram?
To see hidden content on Instagram, you need to enable the “Show Activity Status” setting. This setting is off by default, so you’ll need to turn it on in order to see when other users are online and active.
Where are the archived photos on Instagram?
The archived photos on Instagram are located in the user’s profile. To view them, go to your profile and tap “Photos and Videos.” The archived photos will be at the bottom of the screen.
Can I unarchive a post on Instagram?
Yes, you can unarchive a post on Instagram. To do so, open the post and tap the three dots in the top right corner. Then select “Unarchive.
Why is my archive not showing on Instagram?
There could be a few reasons why your archive isn’t showing on Instagram. One possibility is that you have a private account and your archive is hidden from other users. Another possibility is that you’ve deleted posts from your archive, which means they won’t show up on your profile. If you want to view your archived posts, you can always use the Instagram app or website to view them.
To unhide tagged photos on Instagram 2022, first open the app and sign in. Then tap on the profile icon in the bottom right corner of the screen. Next, tap on the three lines in the top left corner of the screen and select “Settings.” Scroll down and tap on “Posts You’ve Been Tagged In.” Tap on the photo you want to unhide and then toggle off “Show On Profile.
How do you unhide tagged photos on Instagram 2022?
How do you unhide tags?
To unhide a tag, first go to the Tags page. Next to the tag you want to unhide, click the More Options (•••) button and then select Unhide.
How do you see hidden tagged photos on Instagram Reddit?
To see hidden tagged photos on Instagram, you can use a third-party app like InstaSpy. This app allows you to see all of the posts that have been hidden from your feed, including those that have been hidden by other users.
How do you find hidden pictures on the Internet?
There are a few different ways to find hidden pictures on the Internet. One way is to use a search engine and type in “hidden pictures.” This will bring up websites that have hidden picture puzzles that you can solve. Another way is to use a website that specializes in finding hidden pictures. These websites usually have a search bar where you can type in the name of the picture or the artist who created it.
Where do hidden Photos go on iPhone?
Photos that are hidden on an iPhone go into the “hidden” album in the Photos app. To access this album, open the Photos app and tap on the Albums tab at the bottom of the screen. Then, scroll down and tap on the Hidden album.
How to add a photo to Instagram from your phone
There are 3 main ways to add a photo to Instagram* from your phone: upload via the Instagram* mobile app, from your phone gallery, or via third-party apps. We will analyze separately how to publish a photo in a post and a story.
How to publish a post in the feed
Method 1: through the Instagram app*
Download the Instagram app* from the AppStore or Google Play. After registering or logging into your account, you will see the [+] icon in the upper right corner, click on it, and then in the menu that appears, click on the "Publish" button. nine0003 Interface for adding a new post to the feed
Next, you will open the interface for adding a post, you need to go through several steps:
- select media files;
- file editing: filters, light and color correction;
- adding text, geotagging, etc.;
- publication.
Let's take a closer look at how to post photos on Instagram* from your phone.
Select media files. After pressing the "Publish" button, you will be taken to the gallery on your phone. Select the photos or videos you want to post. At this stage, you can also change the resolution or select multiple files for one post. nine0003 Basic buttons for setting up a future publication
Editing files. After selecting all the settings, click the "Next" button in the upper right corner and go to the editing interface - here you can apply filters, adjust contrast, add sharpness, level the horizon, and so on.
Add text and labels. Once you've finished editing your media, click the Next button again and the last settings will open: select other social networks for publication, add text, geotag, user tags. Read more in our article “Instagram tags*: how and why to use”. nine0003 Final settings for posting to the feed
Big text cannot be posted on Instagram*, the limit is 2200 characters. But if you really need it, we have an article with recommendations for the design of such publications.
Publication . When you're done with the settings, click "Share" in the upper right corner and the post will appear in your account feed and in the news feed of your followers. Hooray!
The process of loading a post and its display in the news feedMethod 2: through the phone gallery
This is a quick way when you just need to post one file with a caption, because this way you can not customize the display format, add multiple files to one post, edit media files, add geotags and tag other users.
How to post photos on Instagram* from your phone using the gallery:
- open the gallery on your phone;
- click on the desired photo;
- select "Share" from the menu; nine0018
- click on the Instagram icon*;
- click on the "Publish" button;
- write the text for the post and click "OK" in the upper right corner;
- then click "Share" in the same place.
That's it - the publication has been uploaded to your profile!
Step-by-step process of publishing a photo in the feed through the phone galleryIf you do not know what, why, why to publish and how to design, I recommend our free course "7 Steps of Content Marketing". In the course, we tell you what content marketing is, how to create, design and promote content on the Internet. All this will help you understand how content works, why publish posts and how to make them beautiful and interesting. nine0003
Method 3: Through other apps
You can upload photos to Instagram* from photo and video editing apps, feed maker, and so on. Almost all of these applications have the ability to automatically add media files to Instagram*.
For example, the Canva photo and video editor app has a Share button in the top right corner. In the additional menu, the Instagram icon appears *, when clicked, it transfers to the social network application with the option to select a placement: Stories or feed. After clicking on the "Feed" button, the standard Instagram interface * opens to add a post to the feed. nine0003 Algorithm for publishing a post in the feed from the Canva application
How to post a Story
You can upload a photo to Instagram stories* from your phone both directly from the Instagram application* and through third-party applications.
There are 3 ways to post a Story via the Instagram app*:
- click on the blue [+] icon on your avatar in your feed or profile;
- click on the [+] button in the upper right corner and select the "History" item;
- in the news feed, swipe from left to right across the screen.
After clicking, the interface for creating Stories will open. By default, the camera opens, and you can immediately take a picture or video for stories. If you want to add files from your phone's gallery, tap the button in the bottom left corner of the screen or swipe up from the bottom of the screen.
Stories interface when first opened with camera enabledThe story editing interface also has many useful features:
- Text. Different fonts, colors, ways of writing, animation. To add, click once on the screen or on the “Aa” icon at the top right of the screen, the interface for adding text will appear with additional settings at the top of the screen.
- Drawing. Brushes for painting on photo or video. Click on the ellipsis in the upper right corner and on the "Draw" button. The color and brush settings will also appear at the top of the screen.
 nine0018
 - Interactive Instagram stickers*. Questions, tests, polls, mentions, geolocation, music, hashtags and so on. To select stickers, click on the sticker icon in the upper right corner or swipe up from the bottom of the screen. Read more about them in our article with an overview of new stickers.
- Masks. Filters and AR masks to decorate stories. There are masks both from Instagram* itself and from users. To get as many creative masks as possible, subscribe to major bloggers who create such masks. For example, bloggers ya.molli or georska. nine0018
Once you're done with your stories, select the publish option at the bottom of the screen:
- Your Story. Stories are immediately published on your profile, and all users can see it.
- Close friends. Stories will only be seen by users that you have added to your Close Friends list.
- Right arrow.
 An additional menu will open, which has the function of sending stories in a private message. nine0018
Stories, like posts, can be posted from other applications, only when choosing a placement, you need to click "Stories".
Check out the Instagram Stories* section of our blog for inspiration on how to use Stories on both your personal blog and brand account.
If you feel uncomfortable publishing posts and stories from your phone, use services for publishing from your computer, such as SMMplanner. With it, you can design and post posts and stories from your computer and specify the time at which they will be automatically published. nine0003 Scheduling a new post on Instagram* from a computer via SMMplanner
What is the convenience of delayed posting and how to post on Instagram* from SMMplanner, read in our article "Delayed posting services on Instagram*: why they are needed and how they work".
Briefly about the main
Universal algorithm of actions for posting photos on Instagram* from the phone:
- download the Instagram application*, register or enter your profile;
- click on [+] in the upper right corner and select "Publication" or "History"; nine0018
- edit media file, add interactive elements or labels;
- click the "Publish" button.
Done! Your first story or post is already in the feed.
How to show tagged photos on Instagram?
Content:
If you don't know where you tagged or hid photos on Instagram, you can undo this action, as I explain here.
How to show tagged photos on Instagram? nine0007
To show tagged Instagram photos, you need to go to the Tags section under Privacy.
To show tagged photos on Instagram:
- Open the Instagram app and go to your profile by clicking on your profile picture or home username.

- Find the tagged photo and check if there are images there (then you can use the above method and display them directly from your Instagram profile)
- Click on the hamburger icon in the top right corner.
- Go to setting
- Open Privacy
- Find tags. You should see pending photos with tags (with their number), open them.
- Click on any photo you want to show.
- Click on the three-dot icon in the upper right corner of the selected photo.
- You should see Publish Options.
- Click on Show on my profile
You can see tagged photos on your profile in the tagged section if you go back to your profile.
How to hide tagged photos on Instagram?
If you don't feel comfortable showing tagged photos in your Instagram feed, remove your name or hide it from your profile. Both options are available.
Method #1: Hide tagged photos directly from your profile
If you're looking for photos you've been tagged in, you can go to your Instagram profile page. Click the icon below your bio. If someone tagged a photo to you, you can see it there. nine0003
You can click on the picture; There are two options available: remove me from the message and hide me from my profile. Click on the button to enable "Hide from my profile". It will also disappear from your profile for your followers.
- Open the Instagram app and go to your feed by clicking on your profile picture.
- Find the tagged section and open it to see tagged photos on Instagram.
- Click on the photo you want to hide. nine0018
- Click on the three-dot icon to see multiple options.
- Select Hide from My Profile right here
However, if you have already removed the tag, the photos will not be in the tagged photos section unless someone tags you again.
To do this, repeat the previous instruction. At the end, select "Remove me" from the message. This way, the post will no longer appear on your Instagram feed. nine0003
You can also remove your name from posts in the Tags section of Instagram under Settings > Privacy.
If you go back to the Instagram feed and tap the tagged section, you won't see the photos anymore. You can find hidden tagged photos in Settings > Privacy > Tags.
If you're wondering how to tag people while you're uploading an image, you can see the bottom section below the photo. You can click on this and write the name of the user you are going to tag. nine0003
Even if you have posted a picture, you can continue to publish. In the upper left corner of the image, click on the icon and select edit. While editing is open, you can click on the tag icon and write the names of the users you want to tag.
You can revert a hidden photo tagged by you in Instagram back to your profile, unless you have removed the tag from your images. Have you ever been tagged in those Instagram photos that are spammy or unprofessional but don't want them on your profile? For example, a picture of your drunken face at a friend's wedding or spam from an unknown business account. I'm here to tell you that you can take your mind off these unwanted photos. Phew! Right? Don't worry, I'll help you get through this. Just follow the instructions and you'll be fine. Just like Facebook, you can quickly get rid of unwanted tagged photos or images that don't even apply to you! nine0003 1- Go to your Instagram profile Your tagged photos are stored here. If you have a photo that you no longer want to be tagged in, keep reading this article and I'll show you how to remove them from your profile. Instagram allows you to remove yourself from tagged photos. Note: If you just want to hide this photo from your profile (and not untag it), click Hide from My Profile. nine0003 And you're done! Nothing to worry about. Summary Article title — How to hide and show tagged photos on Instagram? Description If you use Instagram regularly, you certainly know how to use its features like feed, stories, tagged photos. Instagram has an option that allows people to tag you in an image that, once approved, will appear on your Instagram feed. If you removed the tag, someone has to tag you in the picture again. nine0003
 If you want to see photos tagged:
How to untag a photo on Instagram?
 The only thing you need to do is follow these steps:
