Alexandra | Dec 15, 2017
Do you want to put your favorite Insta Stories under your Instagram bio?
This new feature is called an Insta Story “Highlight”. You can pick whatever photos and videos you want to share in one Highlight.
Facts:
Now that you know the basics, let’s move on to the tutorial.
This is how to manage your Insta Story “Highlight”:
Click on a link to go to any section.
The first thing you have to do is enable to Insta Story archive feature.
Now all your Insta Stories will be automatically added in your archive folder on Instagram.
Now, just post your Insta Stories as usual.
Instagram will start archiving them for you.
Now you are reading to share your first Insta Story Highlight.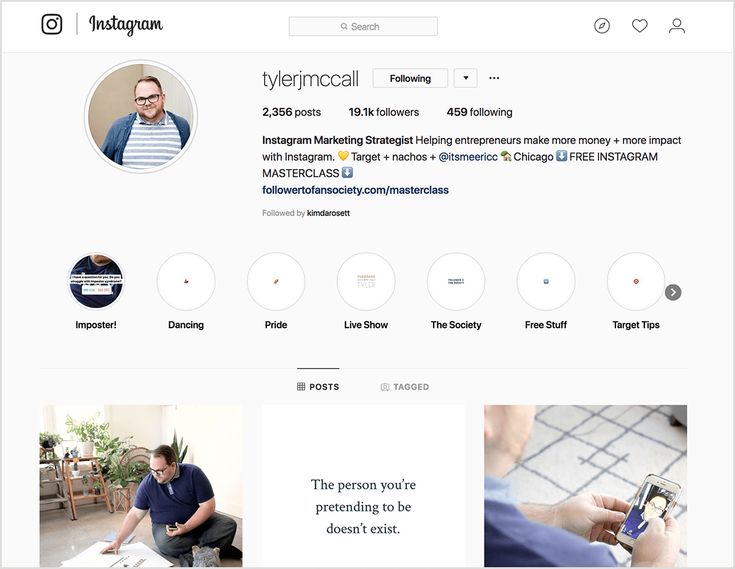
On your Instagram page:
Note: You can also edit the cover of your Highlights. This is what people will see in the circle when they see your Instagram page.
What if you want to delete your whole Insta Story Highlight? Remove it from your Instagram page?
Now imagine you want to remove a specific photo or video from a Highlight:
That’s it!
Have fun creating your Insta Story Highlights!
Leave a comment below if you have any questions.
Click here to use it
An Instagram feature which is proving very popular is Instagram Stories. But not many people know how it works or how to take advantage of it.
The irony of social media is that the more people you follow, the less likely you are to see everything. Updates normally only stay on your screen for seconds as the next batch loads, making you wonder how “social” the whole thing really is. Instead, it becomes a mad race to keep up on everything in your feed. That’s why something like Instagram Stories is a nice feature.
Instagram Stories allows you to highlight a particular image and message to your followers. It stays on your Instagram profile for 24 hours, is linked to your profile avatar, and is then archived. If you want people to see the stories after that, you can permanently pin them to the top of your Instagram profile in categories.
Today, I will cover how Instagram Stories work, how to create them, and how to pin them to your profile.
You can only create Instagram stories on your phone. The web version of Instagram is only for viewing images. So, make sure you have the Instagram app installed and then log in to the app. Now click Your Story at the top, where your avatar is.
The Stories section opens. At the bottom are the various types of stories you can create. Let’s take a look at each one.
TYPEThis is your most basic one, where you can make a text-only update. I have done a few of these, but since Instagram is an image-based service, you should try to focus on photos and videos instead if you can.
MUSICWhen you’re making a story, you can add music to it to give it that extra-special oomph. After all, when you’re doing a story about your first sit-up, you need to have “Eye of the Tiger” blaring in the background. Am I right?
LIVEThis is for people with nerves of steel as you go “live” on your Instagram channel. Your followers are notified that you’re currently live, wetting yourself live on air so they can all come and watch you make a fool of yourself.
You need to have a decent script prepared before you do this if you want to avoid all the “eh’s” and “ah’s.” There are no do-overs with live broadcasts.
NORMALThis is where you can take a normal image or video—no special effects.
BOOMERANGThis is virtually the same as a GIF image. Several pictures will be taken to make an animated picture by pressing the record button. To get the most out of it, make a small body movement such as sticking your tongue out, moving your glasses up and down, moving your head about, etc.
SUPERZOOM
View this post on Instagram
A post shared by Mark O’Neill (@markoneill_author) on
This is quite a funny one. You first need to choose a style of music that should be played. Then, tap on the area you want the camera to zoom in on really fast.
The Focus feature makes sure that the people in a picture stand out. When taking a picture in a well-lit area, the people are shown more prominently, while the background gets a gentle and subtle blurring.
REWINDSimple. This one merely takes the video you made and plays it backward. Oh, the hilarity.
HANDS-FREEUsually, you must keep your finger on the record button to prevent the recording from ending. But if this is a big hassle, you can use hands-free mode. With this, you can tap once to start recording and tap again to end it. This is particularly useful if you require both hands in the video to demonstrate something.
How to Pretty Up Your StoriesOnce your image or video is made, it’s time to customize it and make it look nice.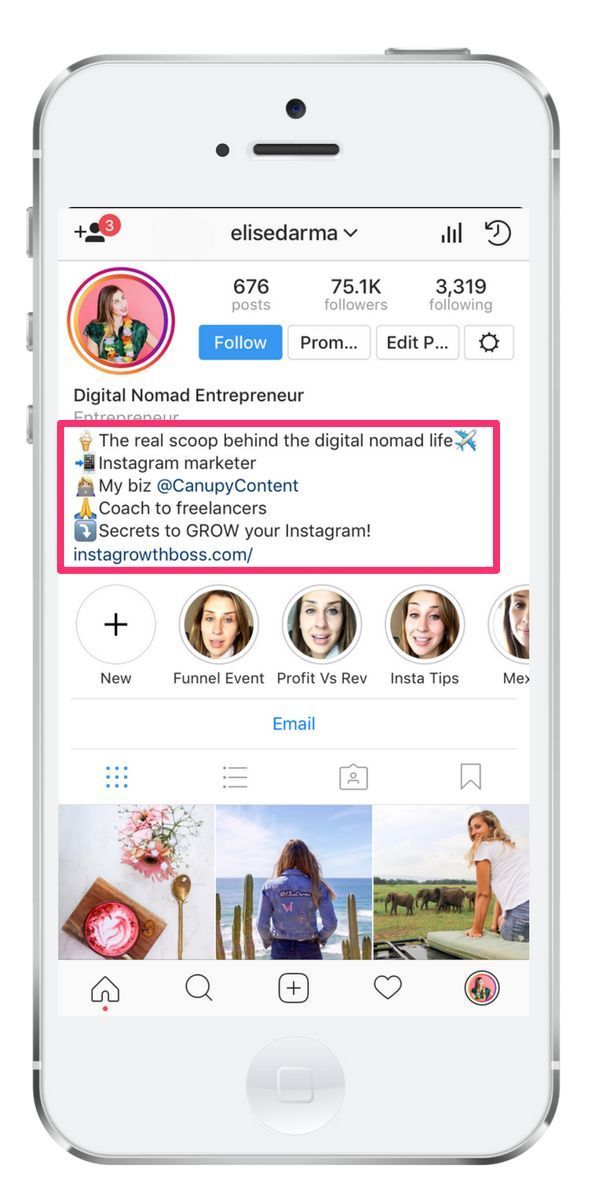 Tap on the story you’ve just made, and you’ll see editing options at the top.
Sometimes you may want to add a message. A slider lets you increase or decrease the text’s size, and multiple colors are available.
Add LayersGive yourself bunny ears or have butterflies hovering over your head. Businesses may be put off by the childish nature of some of these, but showing your fun side is never a bad thing.
Add Writing & DrawingsUse a pen or paintbrush to write or draw something. Here I’ve gone all celebrity and signed my photo.
Add Other ElementsThis option gives you numerous widgets for your stories, such as adding the time, your location, tagging another Instagram user, a hashtag, and more.
How to Post Your Instagram StoriesOnce your story is ready to go, click Your Story for it to be posted.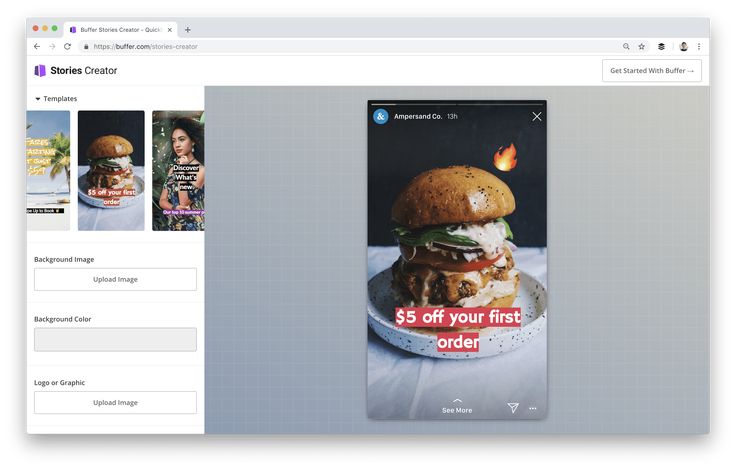 Alternatively, you can click the Send To button to send it privately to another Instagram user or Close Friends to send it to a group of private Instagram friends.
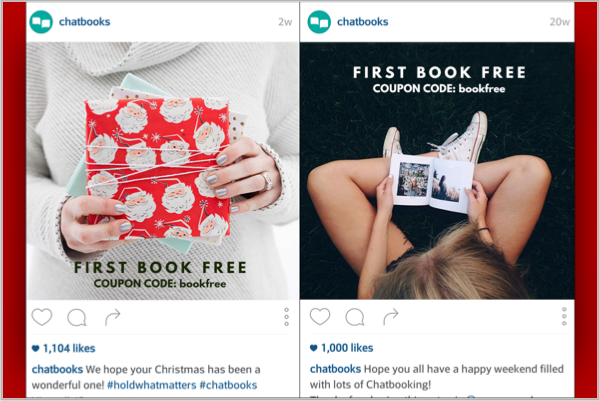
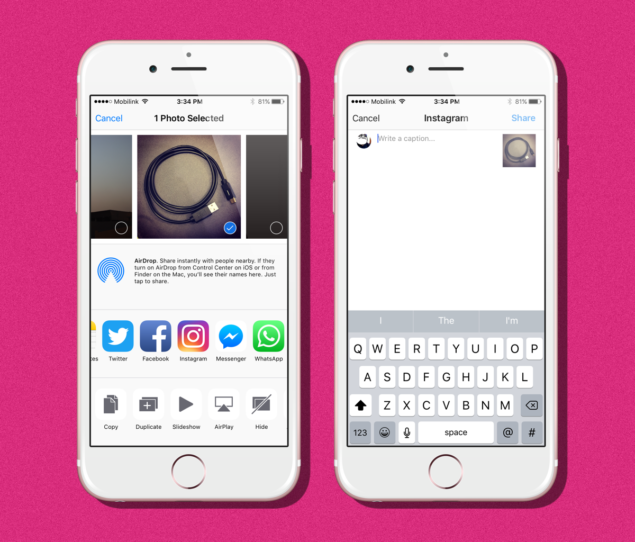
Another way to post a story is to take an already existing Instagram update and click the paper airplane icon. You’ll then see an option to add it to your story.
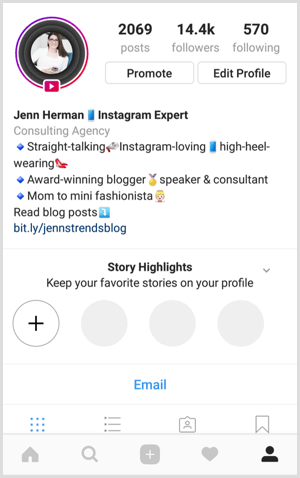
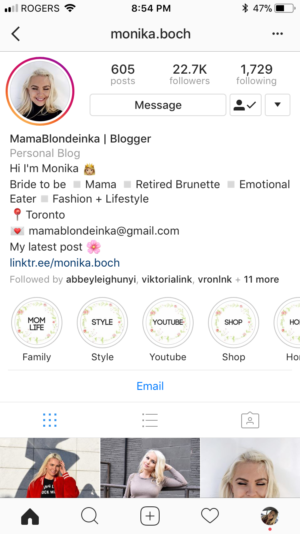
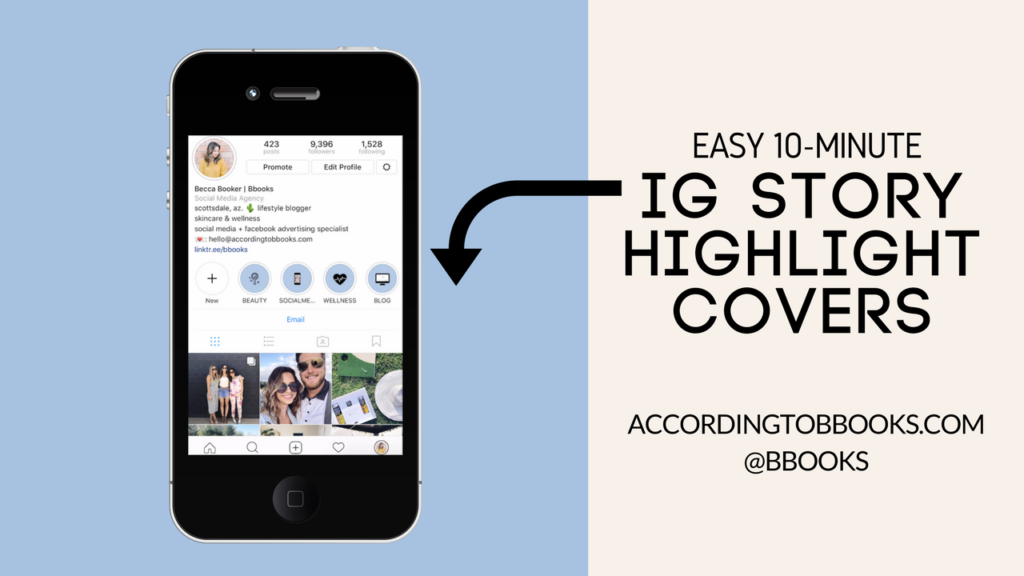
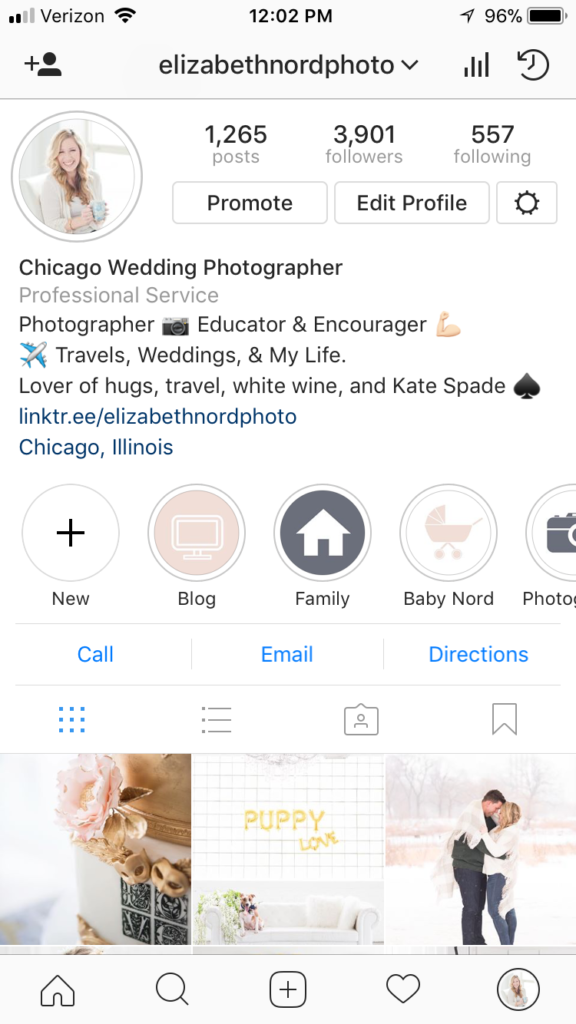
How to Pin Your Stories to Instagram HighlightsInstagram Highlights is a group of circular logos at the top of your Instagram profile page. Here you can create story categories and add stories to them for easier viewing in the future.
First, click New if you want to make a new category. If you already have a category created, click on it and choose edit highlight in the options. Whichever option you choose, you’ll then see your archived stories. Tap the one you want to add to a Highlight.
You will be asked to name the Highlight if it is a new category. As you can see, it automatically takes the first photo of the Highlight as its cover icon.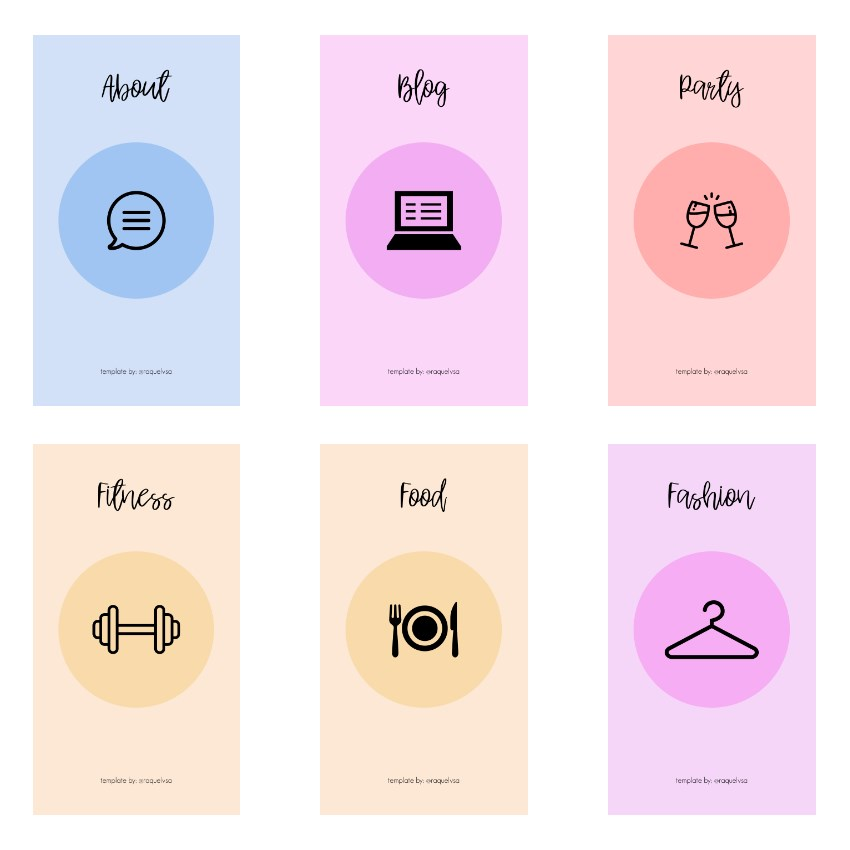 But you can make your own cover icons and upload them. Or look online for pre-made ones, such as these.
You will now see your new Highlight. Click on it to see your stories.
Instagram Stories is outstanding if you have a business account and, therefore, things to promote. But even if you only have a personal account, Stories are fun if you want to share a few great images you don’t want to be buried. Surprisingly not many people know how Stories work, but now you can take advantage of them and bring more attention to your feed and images.
Related Items:instagram, Mobile, Photography, Social Media
This simple and clear instruction will teach you how to publish Stories on Instagram* in different ways: for example, scheduled stories through SMMplanner or directly from Instagram*.
In this article, I will tell you how to post stories from your phone, tablet or computer: in general, from where you are most comfortable right now. It only takes a few minutes to learn how to make Stories on Instagram*! nine0003
Open the Instagram app* and go to your news feed. Then click on the camera icon in the upper left corner.
To create a story, click on the camera iconThe mode for creating and editing stories will open. You can shoot a new story right now (using the camera) or make it from an existing photo or video.
First, let's consider the first option: shooting directly. By default, the camera field will open, and along the left edge, formatting options. Can choose:
 There is a tool "ask me a question" with a field for entering the answer.
 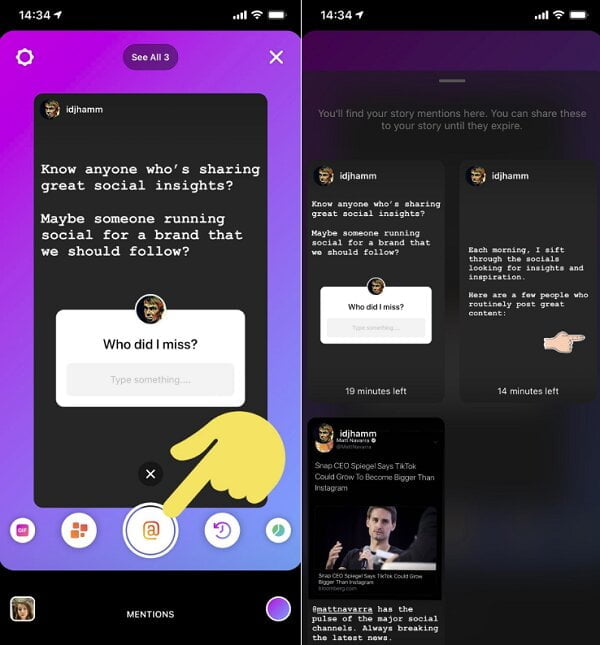 The meaning of such a story is to gradually increase the center of the frame to the melody and the selected effect. Looks funny. Various effects are available - epic, drama, sadness, fire, hearts and others.
 By the way, if stories are used for business purposes, then you should draw up a content plan. And how to compose it for stories, we have analyzed in the article "How to compose a content plan for Stories on Instagram *".
There are also a number of additional settings: for example, you can choose whether you need a flash (click on the lightning icon), you can switch to the front camera (camera icon with arrows in the lower right corner) or put a funny mask on the image (icon with a smiling face) . nine0003
Once you figured out how to make a beautiful Instagram story* with these settings and mode, click on the round center button on the screen. A normal click will take a photo, and if you need to record a video, press and hold the same button.
Now let's figure out how to post the photo or video you took earlier. To do this, click on the gallery (to the left of the lightning icon), and select the desired file.
Pressing the gallery button opens existing pictures, you can select 1 or moreClicking on the "Gallery" button will open other options for places where there can be photos on the phone. You can search for photos in other albums that you have on your phone. For example, if you want to make a story from photos uploaded to the “download” folder, then you just need to select it.
Once you've made your story, choose whether you want to send it to your feed, save it to your phone, or send it to a friend. There is also a function to send stories only to a limited circle of friends.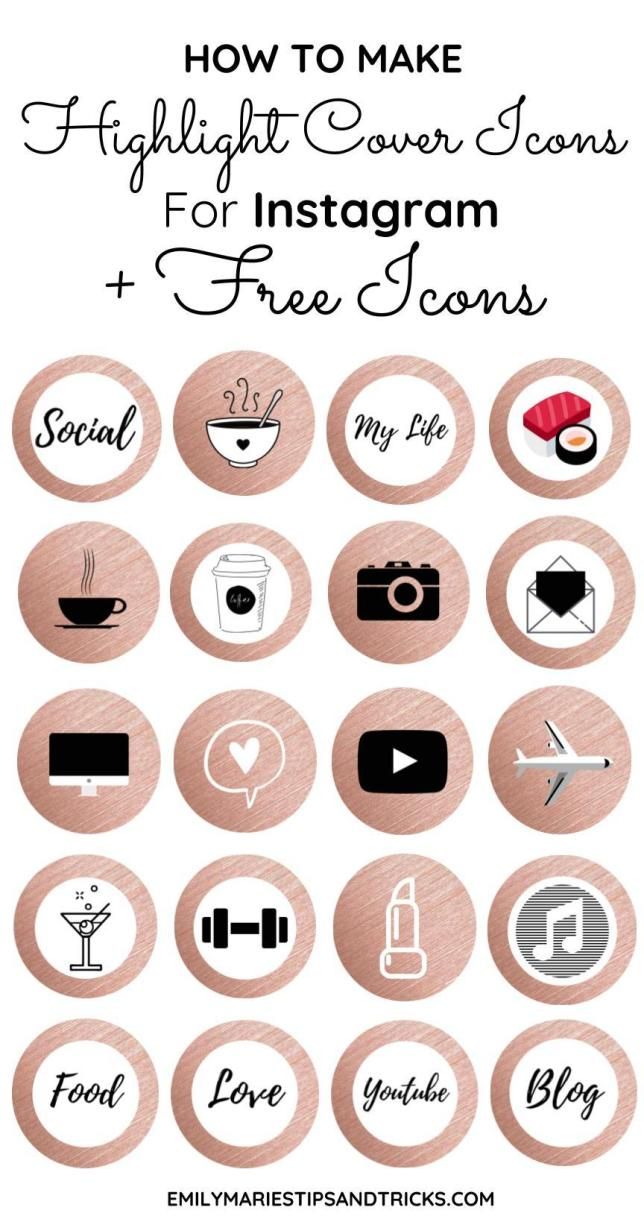 You need to choose people for this circle in advance. nine0003
By the way, to develop your business it is useful to look at what your competitors are doing. In order not to show them your interest, you can do it anonymously. How to do this - we consider in the article "How to anonymously view Stories on Instagram *".
You can also add additional elements to stories: pictures, stickers, widgets, gifs or captions. You can edit photos, add effects and filters.
You can select the appropriate effects and filters for each modeTo add a gif, widget or sticker to your story, click on the smiley sticker icon. Here you can add geodata, a hashtag, mention one of your friends (by nickname), make a poll or vote, add time or weather, and attach funny stickers or gifs.
Add a sticker, gif, or widget to your story, choose who sees your storyYou can move gifs, stickers, or widgets within an image, and zoom in or out. nine0003 You can add as many additional elements as you want
In addition, you can also draw by hand in stories.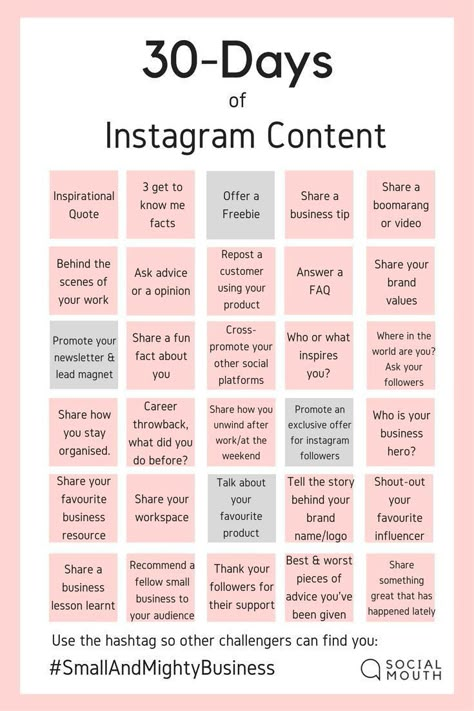 To switch to drawing mode, click on the pen icon in the upper right corner of the screen. You can choose the color and drawing style.
It is possible to add text to your stories - to do this, click on the Aa icon in the upper right corner of the screen. So you can type text and change the font, as well as the color of the text and the color of the background under the text. Text size can be scaled. nine0003 Add your captions to stories by changing their style and color. If something went wrong, you can delete the text and write it again
To always stay in trend, you should see our article “Visual Stories Trends 2021 on Instagram*”. And now let's figure out how to make a new story on an Instagram profile * from a computer.
Sometimes you need to post a story, but the phone is not at hand or the file is stored on the computer. Or maybe you need to schedule stories for the future so that the publication comes out on schedule. In both cases, the delayed posting service SMMplanner will help you, it is he who allows you to post stories from your computer. nine0003 In SMMplanner you can schedule Stories on Instagram*
In order to post Stories, go to SMMplanner and log in through any convenient social network or email, depending on what was used during registration. Then click on the "Schedule a post" button, and after that - if the data did not pull up automatically - select the desired account and project.
Choose an account, background, and stickers that match the meaning of the publicationWhen publishing stories through SMMplanner, a lot of background design options appear:
Clicking on the creation via Canva will open a mini-editor inside the SMMplanner page. All the tools available on the Canva website are available. You can add templates, individual elements, add and edit text. There are free and paid templates, some of the elements are paid. But no money will be withdrawn for anything if the client does not choose to pay for such content. nine0003
You can easily assemble story content from free templates, elements, and backgrounds. To distinguish them from paid ones, you need to look at the lower right corner of each picture or element. Paid ones will have a small crown symbol.
You can change the size, font, color, text direction of all texts, even if they are taken from a template. Unnecessary blocks are also easy to remove. When the work on the stories is finished, you just need to click on the "Insert in Story Builder" button and continue editing there. nine0003 SMMplanner has built-in Canva and Crello editors, you can quickly create stories
You can create your own GIFs for stories. How to do this is discussed in detail in the article “How to make your own GIF for stories on Instagram *”.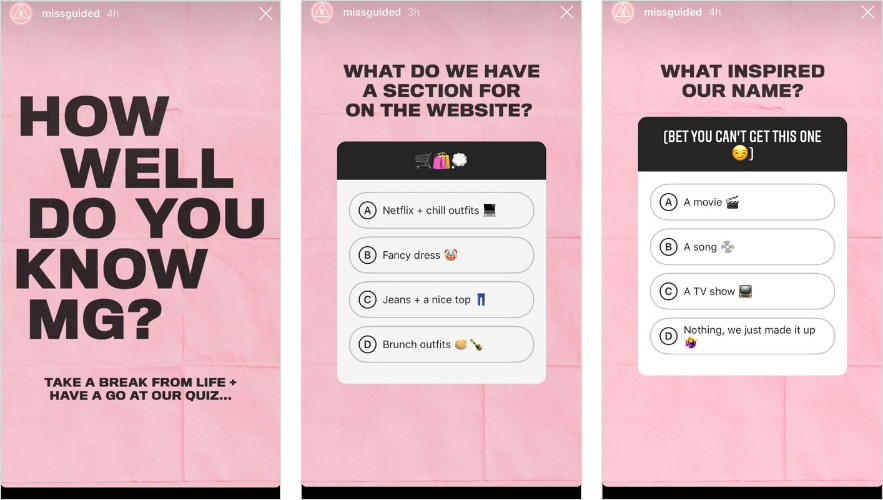 It's a fairly simple process, they can be added to Instagram* and then used in all stories.
You can fill the entire background of the emoji, and write a question or the desired text in the center. If necessary, in the settings, you can create a duplicate story and publish it again as many times as you like. If you don’t know what story to make on Instagram* — try different ones, release edited duplicates. nine0003
When adding a picture, you can select it in full size with blurring of the borders at the top and bottom. There is another way to place an image - filling. Then part of the frame will be cropped, but the photo will be over the entire area of the story. There will be no white fields in both versions.
If it's hard to decide on a background, we advise you to read the article "How to choose backgrounds and templates for Instagram Stories *". There we figure out how to choose the right pictures for each type of business.
You just need to choose between formats to make it look beautiful Through SMMplanner, you can add any stickers, polls, tests to your stories, ask the audience questions and insert a countdown.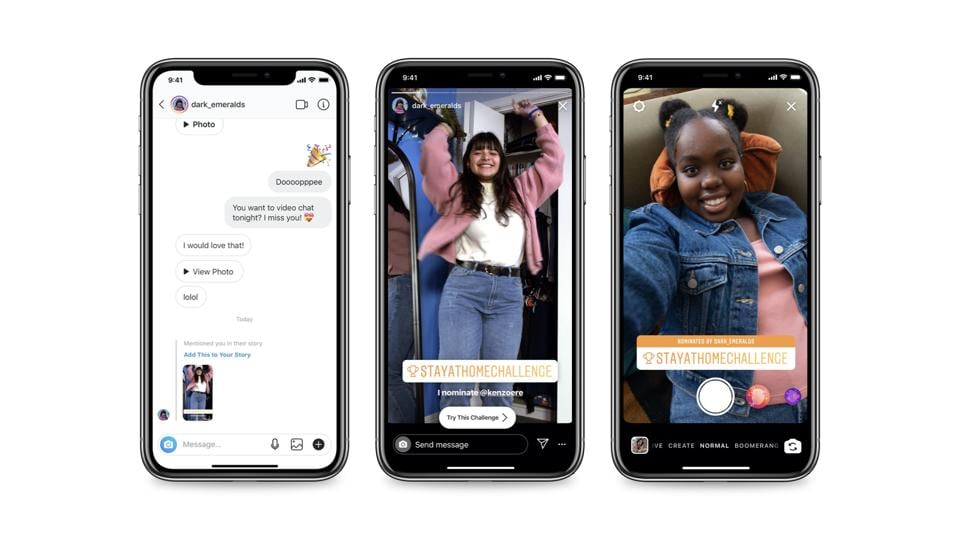
To select the desired sticker, you just need to click on it. It will immediately appear on the preview screen on the left. It can be moved, resized, edited, entered the desired words.
If something goes wrong, you can always remove the sticker and start overWhen you're done, you just need to click on "Schedule". That's it, you can schedule posts on Instagram*-Stories! nine0003
A separate Instagram* Stories constructor is now available.
In this article I will tell you how to make an Instagram story and show you how to post a story from your phone or computer. Let's see all the features of the story editor - I'm sure you didn't know about some of them.
The easiest way is to post a story on Instagram through a mobile application. You will need the official Instagram app, download it from the Play Market or the App Store. We install, log in or register, draw up a profile if necessary.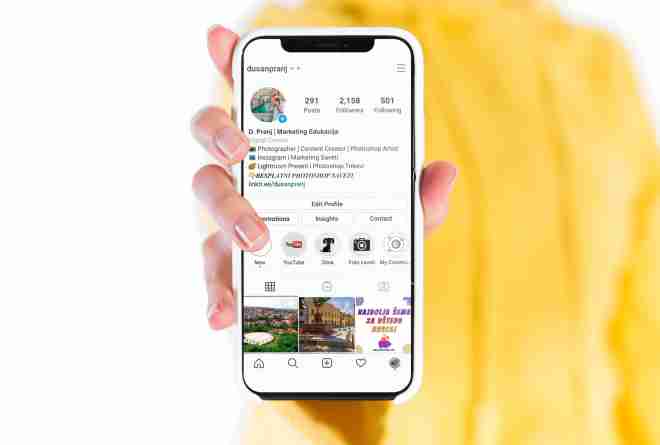
Article on the topic: "Instagram design: how to make your profile attractive to the audience."
There are three ways to exit the Instagram story creation window. The first is to click on the plus icon in the bottom bar of the app. The second is to go to the main page (the section with the house icon) and click on the circle with your avatar.
Buttons that will take you to the story editorThe third way is to drag the main page to the right.
If you drag the screen to the right, the story creation window will also openIn all three ways, you go to a window from which you can create not only a story, but also a post, and also start a live broadcast:0003 From one editor, you can create a post, story, or start a live broadcast.
You can post a ready-made photo or video to stories, or take them directly from this window. To select ready-made materials, click on the square gallery icon in the lower left corner.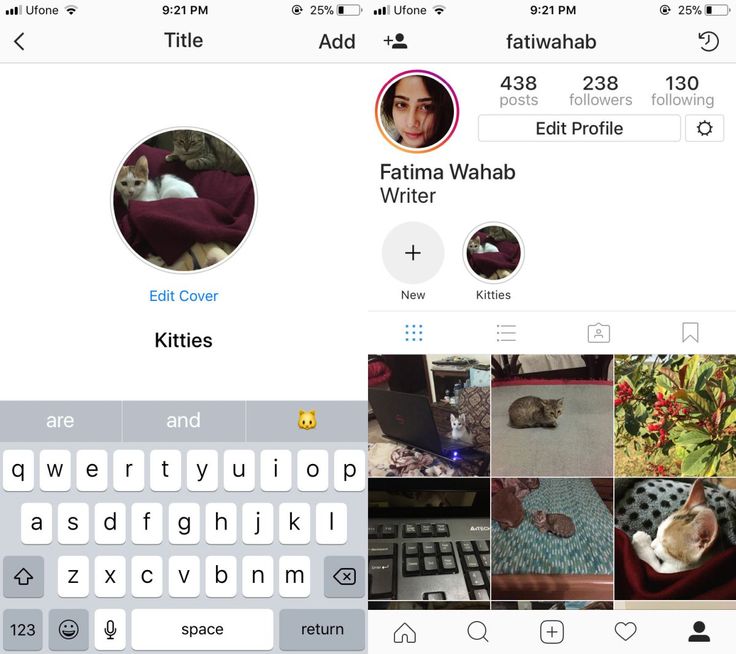
You can select one file or several at once, to do this, click the "Select Multiple" button, it looks like two squares superimposed on each other. nine0003 This is what the "Select Multiple" button looks like.
If you want to remove material, use the round button at the bottom center. To take a photo, click on it. To shoot a video, press and hold for as long as you need. A colored bar will run along the edge of the button: one full circle of it is equal to one full story duration. This will help you fit the video at the right time.
Press the button to take a video. Short press to take a photoBuild auto sales funnels and answer user questions using a chat bot on Facebook, VK and Telegram. nine0003
Instagram has more and more features for decorating stories: effects, shooting modes, elements that can be used to decorate a story.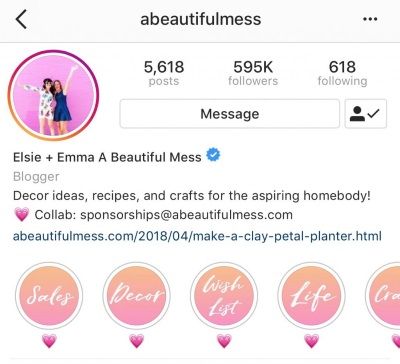 I'll tell you about all these functions in order.
Shooting Effects - a row of circles at the bottom near the shoot button. To the right of it are pre-installed effects, to the left - added by you. How to add an effect, I'll tell you further.
Effects create a background, add snow or hearts to videos and photos, and also change the color of the frame or the face in the frameEach of the circles will add a visual or sound effect to the photo or video you take through the app. Many of them are interactive: for example, masks that are applied to the user's face and change along with facial expressions.
Interactive masks react to your facial expressions and change with itLife hacks on effects:
 You can also add a filter from someone else's story, just click on its name. The added filters will be displayed to the left of the capture button.
 Shooting modes - icons on the left. They can be used to create another fun video effect, such as a boomerang video loop or zoom video.
Shooting mode options. This is not the whole list - expand it by clicking on the arrow belowHere is a list of available modes:
Some modes have additional settings. For example, in a collage, you can select several grid options, and in a photo booth, an imitation of different photographic film. nine0003
When you have taken a story or selected it from the gallery, the final editing is in progress. You can add an effect, text, stickers and gifs to stories, draw something and add a link.
I'll show you how to edit stories on Instagram using different functions.
Color filter. It can be changed by moving your finger left or right. Just scroll to the right filter.
To apply a color filter, swipe left or right on the screen until you find the one you want Effects is a button with a smiley face and two stars . Here they are similar to shooting effects - here, too, there are masks, filters with snowflakes, with color changes, and so on.
Please note that if you have already used the effect when shooting, you cannot add an additional effect to the video or photo while editing so that they do not conflict. You just won't have an add effect button.
In the example on the right, I used the hoarfrost effect when shooting, so there is no additional effect buttonReference - button with chain link. On a personal account, you can only add a link to a video from your IGTV. You can add external links on the account of the author or business, but on condition that the audience is more than 10,000 subscribers.
Button for adding a linkDownload - button with an arrow . With its help, you can download the story that you have turned out to your phone.
If you need to save what you got to your phone, click on the arrow Sticker or Gif Curved Rectangle Icon . Through this button you can add a so-called sticker, also known as a sticker. With the help of a sticker, you can beautifully design a hashtag, mark a geolocation or another account, make a test, vote or poll. The element can be made larger or smaller and rotated, filled with your own text. If you want to delete an added item, drag it to the bottom of the screen, where the trash can icon will appear.
Here you can also find gifs, they are pulled from the Giphy service. Press the magnifying glass button labeled GIF, select a GIF from the list, or search by keyword.
Select GIFs from the list or search for the ones you need by keywordsYou can also take a photo and attach it as a sticker, to do this, press the button with the camera. Take a photo and just like with a sticker or GIF, adjust the size, tilt and place.
A sticker with a camera icon is needed to add another photo to a photo Marker.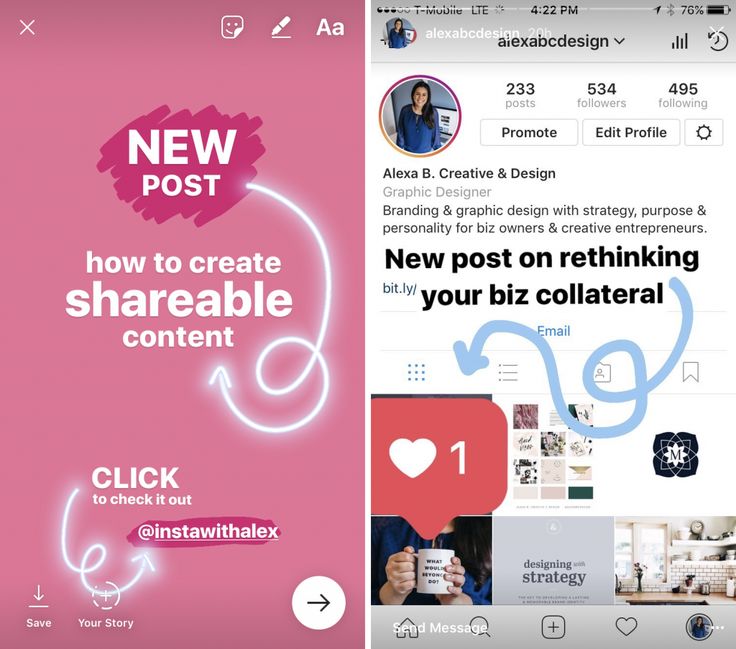 Using a marker, you can draw something on the story. There are several types of lines and an eraser, you can choose the thickness and color of the marker.
Text. Write the desired text and edit. There are three options here. Left aligns text to the edge or center. The middle one is responsible for changing the font or its color. Right - adds effects to the font.
Write, arrange, move the textLife hack. To quickly add text, click anywhere in the editor. The Add Text window will open. nine0003
Please note that when you move elements on the story, the editor shows guides at the edges. It’s better not to step behind them, otherwise the element may be partially hidden - for example, in the upper left corner it will be covered by your avatar.
Guides are shown when moving an element to the edge of the screen Sound. If you shot a video with sound, there will be an additional button to turn it off.
That's all the settings. Now you can start publishing. nine0003
Important! Read our article about the features and interesting features of Instagram stories - we talked about invisible stickers, time-saving templates, delayed posting and other useful things.
Send chains of trigger messages of welcome, abandoned cart, reactivation, combining email, SMS and web push within one chain.
The settings for publishing stories are under the gear in the upper left corner. Here you can choose:
There are three options for posting: post for everyone, post for a friends list, send a private message.
I will show two options - through the auto-posting service and directly through the Instagram website.
Some social media auto-posting services support posting stories to Instagram. Try:
However, in most services, the function of publishing stories is only to upload a photo or video. From the above list, only Parasite and SMMplanner support more or less advanced design: add text or gif, see how the story will look after publication. nine0003
Please note! In order not to screw up with the size of the picture, save yourself our cheat sheet on picture sizes for social networks.
If you want to post your Instagram story without the frills, post directly through your browser. To do this, you need to go into the simulation of viewing from a mobile device, this is called the adaptive design mode, and it definitely exists in Chrome, Opera, Firefox. I'll show you how to do it in Firefox.
We go to the Instagram website and log in to the desired profile. Then we press the key combination Ctrl_Shift + I, it will open the developer panel. In this panel, you need to find the devices icon - it is at the top of the panel, it shows a phone and a tablet.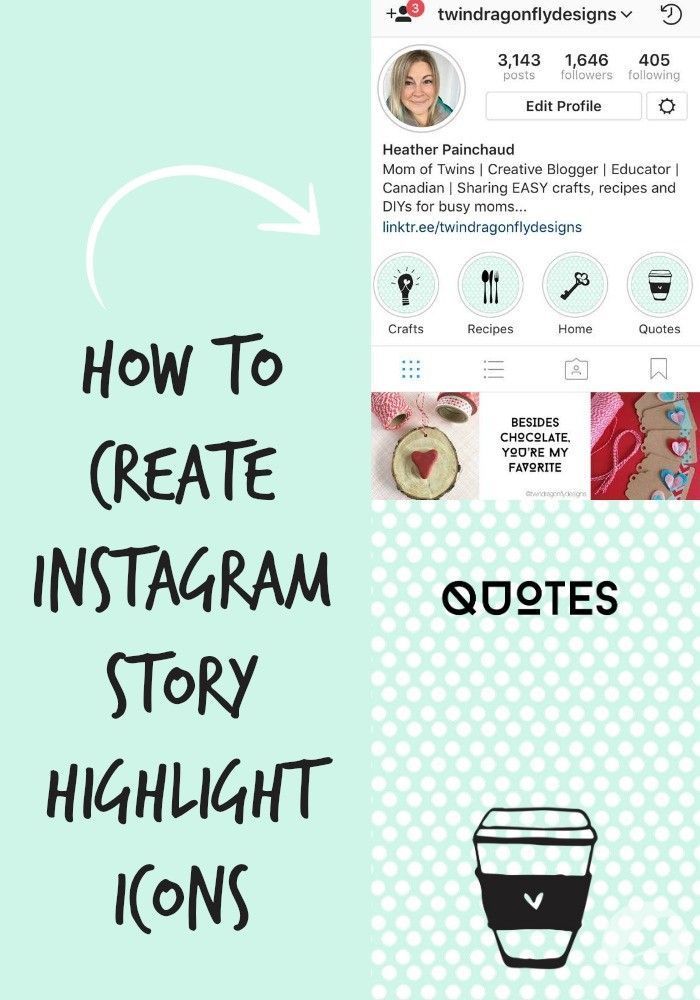 nine0003 Turn on the mode with the button with the image of the phone and tablet in the developer panel
The site will look like you opened it on mobile, and the mode settings panel will appear on top. Here you need to select some kind of mobile device so that the buttons for creating posts appear, as in a mobile application.
Select any mobile device from the suggested listI'll choose the first option, Galaxy. Now the site finally looks like a mobile application - there is a panel at the bottom, and my avatar appeared at the top, which you can click on to create a story. nine0003 Now the site looks like you are in a mobile application
Click on your avatar at the top. The site will immediately prompt you to select a file from your computer, the file you selected will open in the story editor. Please note that the editing functionality here is severely curtailed: in my case, only four gifs were available in the stickers, and the elements added to the photo could not even be moved.