Table of Contents
“Who takes your photos?” is the first question people ask me when they see my Instagram profile. Most of them are shocked to hear that I take my own travel photos when I’m traveling solo. I have to be honest, it took me some time and practice to figure out how to do this. In this guide, I’ll be sharing my best tips and tricks on how to take good Instagram photos of yourself.
If you don’t already use a tripod, this is a game-changer! Even if you don’t own a camera, you can use a tripod for your phone.
Here’s why using a tripod to take your own travel photos is essential: a) There aren’t always people around to take photos of you b) Even if you give your camera to strangers, they don’t always capture the photo you want c) You can take your time setting up the exact angle you’re looking for d) If you set up the camera to take several photos of yourself, the pictures usually look more natural.
How to take nice pictures using a tripod:a) Choose the right angleThe beauty of having a tripod is that you can take your time finding the perfect angle for your photo.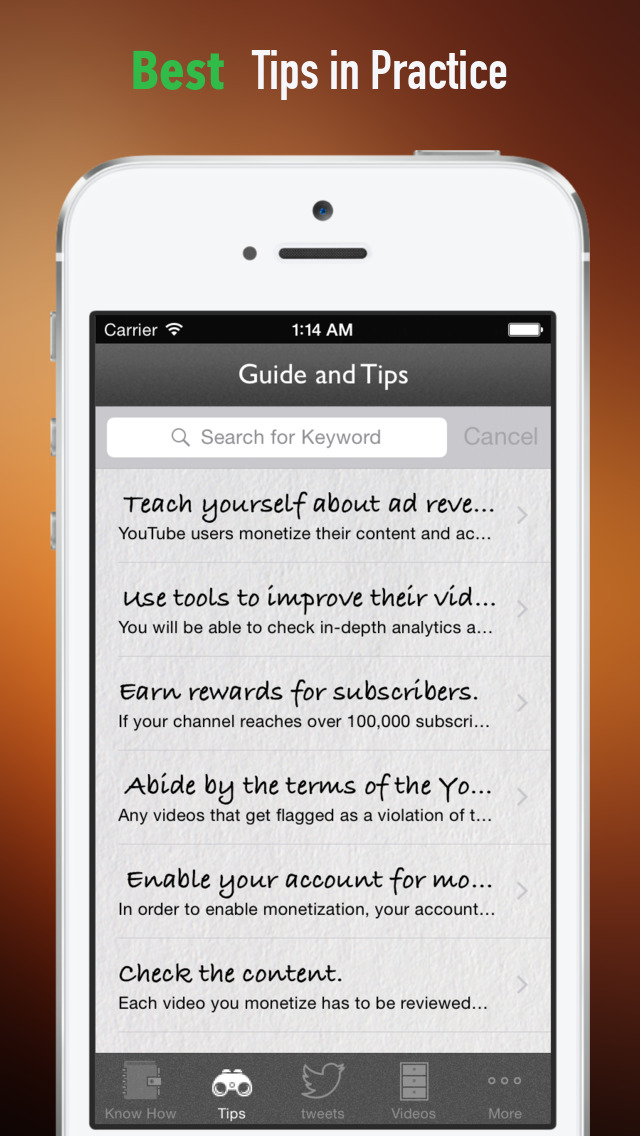 This is, in fact, the most important step to make sure you get amazing pictures of yourself.
I normally show up early to overcrowded places and experiment with different angles. It will take some practice and experience to get it right from the first time. If you’re just starting out, I recommend trying at least 3-4 different angles until you find your favorite.
When you’re setting up your camera, try to visualize exactly where you will be standing in the picture. Sometimes I use props to see where I should stand exactly before jumping in front of the camera.
b) Don’t pose for the pictureLet’s face it, most of us have no idea how to pose for a picture. A lot of people feel awkward posing and don’t know what to do with themselves with a camera pointing at them. Also, pictures usually look much more natural if you can capture a candid moment.
So, what do you do if you’re not supposed to pose? It’s pretty simple actually… act like the camera is not there. Walk, move around and interact with your surroundings.
A lot of bloggers use a remote to capture their photos with a tripod. My preference, however, is to shoot with the interval timer setting. Set up your camera or phone to take a picture every 2-3 seconds (you can normally customize the seconds on every camera). Why? Because as I mentioned above, we want the photo to look natural as if someone captured it while you were walking around.
This setting is different for each device, but you can easily find a guide on how to set it up online. If you’re using your phone, there are lots of free apps you can download. Here’s a list of self-timer apps for iPhone. If you’re using your camera, you can look up this setting online by searching for example “Fujifilm XT-10 interval timer mode”.
d) Find a good tripodThere are a lot of great affordable, lightweight and compact tripods that you can carry in your backpack. You have lots of cheaper options (around $20) that are lighter, but obviously not as heavy-duty as the more expensive ones.
I highly advise you to invest in a good tripod. It’s a one-time purchase that can last you several years. The tripod I use and absolutely love is this: Manfrotto Compact Light Tripod ($60). I can’t recommend it enough!
Tripods below $25:Turn on your JavaScript to view content
Premium Tripods:Turn on your JavaScript to view content
Tripod safety tips: Some overcrowded cities are not always the safest to set up your tripod. Be cautious with this and if you’re traveling solo, ask another traveler to watch your things when you’re taking photos.
If you don’t want to carry around a tripod, you can ask a stranger to take your picture. But, read these tips first!
a) Don’t just give your camera to a stranger and expect them to capture the right angle. Tell them exactly how you want your picture taken. Example: Mention that you want the landmark behind you to show on your right or left.
b) Tell them not to zoom in. I say this because I’ve had so many incidents where people have zoomed in only on my face when I’m trying to capture the beautiful scenery behind me.
c) Mention to them that you won’t be looking straight at the camera. Some travelers hold the camera and wait for you to look straight at them and smile. It’s good to point out that you will be moving around and not posing.
d) Tell them to take several shots and keep shooting when you’re walking around. I usually tell people to start shooting from the moment I give them the camera till I come back to take it. You can delete unwanted pictures later.
A good angle highly depends on the type of picture you’re trying to take. Fashion shots are very different than landscape travel photos.
It’s great to know a very basic photography rule called the rule of thirds. This is a composition rule to know where and how to place the subject of your photo. Here’s an in-depth guide to the rule of thirds that explains it perfectly.
How to take a good selfie? Keep these tricks in mind: a) Hold the camera slightly above your face and not at the same level b) Hold the camera as far away as possible c) Make sure the lighting is good and flattering. Facing the sun is normally better than having it behind you.
Related Article: How I Get Paid to Travel the World
Don’t underestimate the power of doing your research to take good pictures. This is especially true for travel photos.
Instagram is a great place to find some inspiration. You can search for cute Instagram pictures both by using location tags and hashtags. Not only does this help you find some hidden spots, but it can also help with finding the best time to shoot. Some locations look amazing during sunrise or sunset.
I organize the photos I like by saving them on Instagram under different hidden folders by city names. That way whenever I’m visiting a new city, I open that folder (example: “Paris”) and find all the cute spots I want to visit.
Related Article: Solo Female Travel Tips
When I say early, I mean you need to be the first one there. I’ve shown up to some very touristy spots 15 minutes before they were even open. There’s nothing worse than having huge tourist groups in the backdrop of your photo.
If you hate waking up early, you can also try your luck right before closing time. Some very overcrowded places are better to visit during the weekdays instead of weekends.
Do you want your photos to look natural? Don’t look at the camera. You’re now wondering… where do I look?! It depends on the scenario, but the best thing to do is to interact with your surroundings.
If there’s a landmark around you, you can look at that. If there are animals or people around you, interact with them. If all else fails, you can play with your hair/dress or use a prop.
Last but not least, don’t forget to smile! I have countless photos where my smiles look a bit fake. As funny as this may sound, to overcome this I sometimes try to laugh out loud so my photos look as candid as possible.
Related Article: How I Afford to Travel Every Month & How You Can Too!
View this post on Instagram
A post shared by Travel Influencer & Blogger (@thejetsetterdiaries) on
This is the biggest issue I had to overcome when I started blogging. There’s nothing more awkward than setting up a tripod in the middle of a busy street and jumping in front of it when everyone is staring at you.
How do you overcome this? With time and practice! The first time you try this, it’s completely normal to be shy. The more you practice, the more it will seem natural. I’m happy to say that after traveling solo for so long, I feel completely at ease in front of the camera now. When people start staring and wondering what I’m doing, I give them a big smile and say hello instead of feeling shy.
Smartphones have become so advanced these days, that a lot of people prefer to take photos with their phones. However, if you want to take your photography to the next level, you need a good camera.
List of great cameras:I’ve been using the Fujifilm X-T10 as my travel camera since I started blogging and I can’t recommend it enough! It’s compact, lightweight with amazing features and interchangeable lenses. Another plus is that it looks like an old vintage camera.
With all the awesome camera functions that the Fujifilm X-Series has, it’s relatively affordable compared to other similar brands.
Click below to find some great deals on the Fujifilm X-Series cameras:
Turn on your JavaScript to view content
The GoPro is tiny, but has some amazing features, especially for adventure travel. It can take some wide-angle shots and videos like no other compact camera. It’s also waterproof and shockproof, which makes it so versatile.
I use my GoPro mainly for action shots or underwater photos. You can, however, also use it to take pictures of yourself with the selfie stick or tripod.
Click below for great deals on GoPro bundles:
Turn on your JavaScript to view content
Nothing looks prettier than aerial shots of beautiful travel destinations. There is a huge range of drones out there with different prices, but it’s best to invest in a good one to get the quality and functionality that you need. The cheaper ones are cheaper for a reason and don’t have all the features you can find in a good drone.
The best brand out there, especially for travel drones, is DJI. They have a very good compact and lightweight ones that you can pack easily in your carry-on. Prices range from $400 to over $1,000 and I recommend buying the extra accessories (like extra batteries) to ensure enough flight time during your photoshoots.
Click here for the best DJI drones for travel photos:
Turn on your JavaScript to view content
View this post on Instagram
A post shared by Travel Influencer & Blogger (@thejetsetterdiaries) on
Every camera is different. If you’ve invested in a good camera, it probably has some amazing features you’re not even aware of. Study all the settings on your camera by watching some tutorials online. Look up your exact camera model and learn from the experts.
You can also visit brand websites depending on your camera model and read tutorials and blogs.
Editing can do wonders for your photos. If you learn how to edit properly, you can make even the most regular photo look magical.![]()
I’m personally against changing pictures too much and I never add things (like clouds or birds for example) that weren’t originally there. My objective is to show what I place is really like with minor tweaks to make my photos pop.
I use Adobe Lightroom to edit my photos, which is basically a simplified version of Adobe Photoshop. Lightroom is perfect to edit Instagram pics and you don’t need any other tools. Photoshop is used by a lot of designers with much more advanced tools that you rarely need to edit pictures.
The best way to learn how to edit photos is: 1) Watch tutorials online 2) Ask for advice and tips from content creators 3) Practice, practice, practice to see what works for you.
Every person has a different style and feel, so the goal is to find what fits your personal taste. This will not happen overnight and the best thing to do is experiment until you develop your own style.
Here are some great Adobe Lightroom tutorials: Beginner Lightroom Tutorials by Adobe, 35 Incredibly Useful Adobe Lightroom Tutorials, Lightroom Tutorial for Beginners – Overview of EVERYTHING in 15 mins, Lightroom CC For Beginners – Full FREE Training Course 38 mins.
If you want a jumpstart, you can purchase something called “Lightroom Presets”. These are similar to “filters” that you find on Instagram. They are created by photographers or influencers with their own editing styles. You can purchase them online from your favorite bloggers and upload them to your Lightroom.
Even if you use presets, you still have to weak the individual photos to make sure they look natural. You can’t expect to simply apply presets to several types of photos and instantly get beautiful results. Every picture has different lighting and colors, so make sure to adjust them to fit your style.
Adobe Lightroom also has a mobile version that is perfect to edit your photos on the go. It’s important to mention that the mobile version does not have all the functions of the desktop version, but if you create your own presets, you can easily use them on your phone.
Download the Adobe Lightroom Mobile version here: Apple Android
Another simpler photo editing app for beginners is Snapseed. This is how I initially started to edit a few years ago before I learned how to use Lightroom.
Download Snapseed here: Apple Android
Editing mistakes to avoid:a) As I mentioned above, don’t make drastic changes to photos. Adding objects that were not there or playing too much with colors will make your picture look staged. That’s the last thing you want! Editing is supposed to enhance photos and not portray an untrue image of whatever you are showing in your picture.
b) Don’t oversaturate the colors. The saturation feature makes the colors in your photo pop. It’s good to add some saturation, especially in outdoor shots, but don’t overdo it to an extent that the colors look unnatural. The best example: if you have a photo of a beautiful beach, you can up the saturation to make the water look a bit bluer. A lot of people oversaturate this and the beach just doesn’t look real anymore.
c) Overcropping is another common mistake. Sometimes cropping out too much of the “negative space” (example: the sky, the ground) can make your photo look claustrophobic. Follow the basic “rule of thirds” that I mentioned before to crop your photos with the correct composition.
d) This is going to sound strange, but don’t use the common filters on Instagram or editing apps. More often than not, these filters drastically change the HDR (high dynamic range) of the photos. This means that the highlights and shadows in the photo will not look natural.
e) There are 2 modes to shoot photos: JPEG and RAW. Smartphones shoot all photos in JPEG mode and cameras have both JPEG and RAW available. Make sure you adjust your camera setting to shoot in RAW to get better and higher quality photos after editing. Here’s a brief explanation of the difference: 10 Reasons Why You Should Be Shooting RAW
Questions?
If you have any questions, add me on Instagram: @thejetsetterdiaries and drop me a message.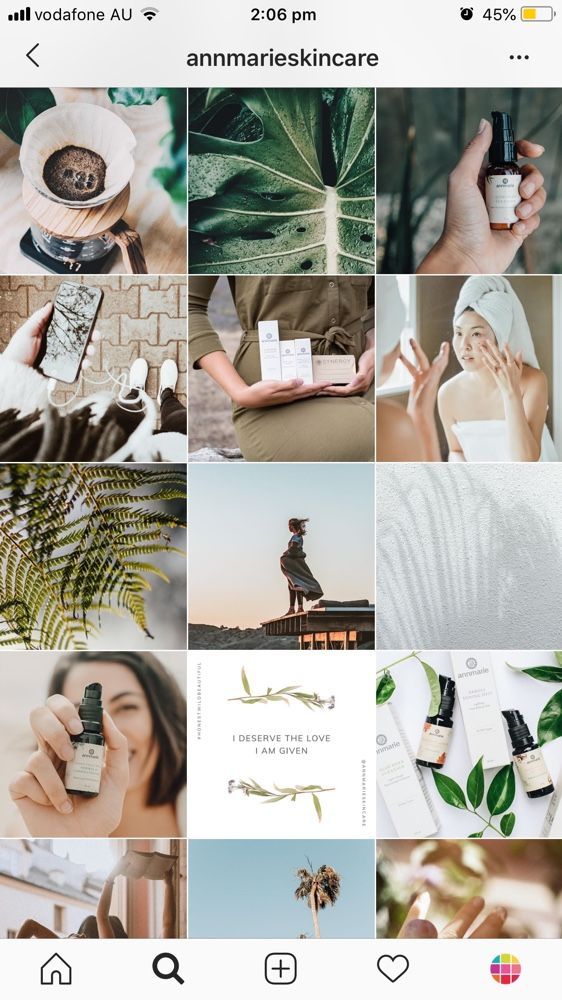 I’ll be happy to answer as many questions as possible.
View this post on Instagram
A post shared by Travel Influencer & Blogger (@thejetsetterdiaries) on
1. Use the Proper Device
2. Find Your Lighting
3. Practice Natural Poses
Test All of Your Angles
5. Grab a Tripod
6. Perfect Your Composition
7. Put Finishing Edits on Your Photos
8. Play with the Settings on Your Camera
9. Start Scheduling Your Selfies to Instagram
Raise your hand if you’ve ever tried to take an Instagram-worthy pic of yourself, only to wind up shooting, deleting, reshooting, deleting, reshooting… you get my drift here. 🙋♀️
🙋♀️
After a while, you just want to give up and post a pic of your puppy instead.
(Note: There’s nothing wrong with that. Instagram could use more puppies! 🐶)
But here’s the thing: your Instagram feed could use more photos of you, too!
Why? It’s simple. People connect with your face. Posting pictures of yourself helps your audience see that you’re real and connect on a deeper level.
So how to take pictures of yourself for Instagram?
That’s what we’re covering in detail today, so buckle up!
Our Tailwind selfie party 🎉Plus, we wouldn’t be Tailwind if we didn’t go the extra mile for you and demonstrate our own before and after photos of these selfie-snapping tips!
That’s right – to help you learn how to take good pictures of yourself, our brave team willingly took questionable selfies to be posted on the internet…
Forever. #CustomerService
So what are you waiting for? Let’s have a selfie party! 🤳
 Use the Proper Device
First things first – High-quality photos in social media reflect the brand’s quality and identity, even if it is your personal brand. But, to achieve it, you need to find a device that allows you to showcase all the ideas you have envisioned.
A high-quality image will capture your audience’s attention, communicate your message better, and show professionalism; some even believe it relates directly to increased engagement.
The good news is that nowadays, there are many available DSLR cameras and smartphones that make this task a bit simpler. So now, in the moment of truth, which of these two is better?
We asked our social media strategist friends Marek and David and this is what they had to say:
Image size is another factor to consider because a low-quality camera might not provide the proper sizes to adhere to Instagram’s guidelines for photos and reels. To better understand Instagram image size, check out our article.
Arguably the most important factor of a good selfie – LIGHTING. 💡
💡
If you’re puzzling over how to take pictures of yourself, the answer is definitely NOT doing it in dim rooms or super-bright artificial lighting.
Our world-class Community Manager Melissa bravely volunteered to demonstrate the difference for you.
First, she snapped a pic under the fluorescent lighting in her workspace.
This harsh lighting tends to wash out your skin tones and throw shadows into sharp focus.
Takeaway: Bright light does not equal good light. 💡
However, when Melissa moved over to a large window and snapped her selfie, it made all the difference!
The natural light from the window illuminated Melissa’s features without washing them out! Her skin glows and her lips have color again! 👏
Now it’s your turn! Here’s how to find your best light:
How to Take Pictures of Yourself in Great Lighting:

Let’s be real: it feels really awkward to pose for photos in a way that doesn’t look, well… posed.
If you’re anything like me when a camera is pointing your way you hit a variation of the same stance without even thinking about it!
(Mine is hand on the hip turned slightly to the side. Pageant style. 👑)
There’s nothing wrong with a go-to pose, but it can quickly get repetitive in your feed. To amp up your Instagram profile and keep things fun, fresh, and interesting, you need to find natural-feeling poses that showcase you in the best way possible!
I know, I know. Easier said than done. That’s why our Chief of Staff Ellana offered to demonstrate!
In the before photo, Ellana strikes a basic pose for her portrait.
It’s definitely not a bad picture but doesn’t showcase Ellana’s fun, can-do personality.
In fact, by creating this enclosed shape with her arms, she’s unconsciously submitting a closed-off and uncertain look to the viewer.
In the after shot, Ellana relaxes back into her seat, leans on the armrest, and cocks her head slightly towards the camera. She’s adjusted to catch the lighting, and the uncertain posture is gone.
Now she’s just effortlessly cool!
Here’s how to take your own aesthetic selfies:
Do you know your best angles? If the answer is no, you’re not alone. According to many group photos, I still haven’t found mine! 😂
The good news is, they’re pretty easy to find with some dedicated practice! Ever heard someone stop a picture snap right to switch to their “good side”?
That means they know their best angle, or the most flattering angle to position their face or the camera in.
Our Pinterest Product Specialist Alisa volunteered to demonstrate a before-and-after of camera angles.
In her before selfie, Alisa has the camera angled down towards her face.
At the same time, she’s angling her face toward the camera 3/4ths of the way.
This changes the way the light hits her face in the shot, and accentuates away from one of her most gorgeous features: her eyes! 👀
Boom! In her after selfie, Alisa is serving us a major smolder with two slight angle changes. She’s positioned the camera level with her eyes and tilted her chin at a slight angle.
Completely different look, right? Now you can see her eyes and the planes of her face are highlighted in all the right ways.
Here’s how to test all of your angles for perfect Instagram pictures:
You will absolutely have a million photos to look at, but you’ll quickly get a feel for where the camera needs to be and where your face and body should be angled to get the most flattering looks!
Unless you have the cash to burn on a live-in photographer, chances are you’ll be taking photos by yourself most of the time.
Knowing how to take pictures of yourself alone will change your selfie game.
One of the best ways to do it? Grabbing a tripod! You can find extremely affordable phones and camera tripods on Amazon.
Many of them are even equipped with a handy Bluetooth remote that allows you to snap an Instagram picture without touching your phone!
Our ace Customer Success Associate Sarah was more than happy to demonstrate for us!
Here’s Sarah’s before selfie.
It’s super cute!
Buuut you can see Sarah’s “selfie arm” that makes a self-portrait look a little less polished than we’d like.
Plus, when you hold your camera yourself, you can’t catch all the details of your great outfit. Boo! 👎
It’s also tough to capture full lifestyle shots that tell a story this way.
In Sarah’s “after” selfie, she’s able to back up and strike a flattering pose using a simple stand and her iPhone’s self-timer.
Adorable, right?
Here’s how to take good pictures of yourself alone with a tripod:

Composition is a key part of a good photo, whether you’re taking product photos with your iPhone or a selfie!
Our Customer Success star Doricia was on hand to show you the difference composition makes. Let’s take a look! 👀
In her “Before” photo, Doricia serves us a major look from a couch.
This photo is great, but the balance and composition are a little off.
If you imagined a grid over this photo, dividing it into 9 squares, you’d notice that it’s off-balance.
There’s more white space at the top of the photo, and the subject skews to the left.
In her after selfie, the composition of this shot is way more balanced. Doricia is centered in the photo, and it’s balanced on either side.
Here’s how to perfect your photo composition:

While we’d love to nab the perfect selfie on our first try, most photos could benefit from a few finishing touches in an editing app.
From lighting tweaks to blemish removal and softening, you can make your self-portrait shine with just a few taps!
Our Inbound Marketer Jordan demonstrates the subtle effects of a few edits using a selfie, and Adobe Lightroom.
Jordan’s “before” selfie is great!
However, it’s just a smidge too dark, which can make detail hard to see.
Plus, she’s taking her picture against a greenery wall, which looks a tad faded.
A punch of extra vibrance will make that colorful backdrop stand out!
A few lighting and color tweaks and voila!
Jordan’s face is illuminated with a gentle nudge of exposure, and the shadows on her face now aren’t as harsh.
You can also tweak selective colors in most editing apps.
That made it a breeze to increase the saturation and luminance of the green backdrop!
To put the final touches on your selfies, download an Instagram photo editor (we discuss the pros of our five top favorites!) and experiment with edits until your selfie is just right.
Before you go through the process of uploading your selfie to an app and making tweaks, poke around and see if your camera settings can’t manage some of those edits already!
For example, the settings in my iPhone 11 Pro often remove the step of editing my Instagram photos!
Here’s my own example selfie!
In this shot, I used the Portrait setting on the iPhone. This softens the background of your photo and makes the photo subject clearer!
The lighting is pretty good as is, right? #ThatNaturalLightTho
However, I often add the Studio Light setting to get a little extra brightness and crisp focus to my photos.
I’ve added that Studio Lighting to my after photo. Overall, my face, eyes, and hair are a pinch brighter and stand out more!
And the best part, I didn’t even have to open this selfie in one of my apps for editing.
How to Take Good Instagram Pictures of Yourself with Your Camera Settings:
Whew! That was a lot of tips and tricks for taking good photos of yourself for Instagram! And guess what? There’s more where that came from!
Sign up for our FREE Smartphone Photography webinar to go even-more in-depth on:
Did we mention it’s absolutely free? Don’t hesitate- view our webinar right now! 🍿🎥
Now that you’ve learned how to take good photos of yourself for Instagram… it’s time to get those beauties onto your feed! You can easily and quickly schedule all of your beautiful posts with Tailwind’s publishing tool.
Just upload your photos into your drafts and arrange them with our visual Instagram planning tool – the 9- Grid Preview.
Our Smart Schedule tool will analyze your best times for engagement and create calendar slots for each. Tada! 🗓✨
And if you prefer to set it and forget it, just enable Auto Posting for Instagram Business accounts! Tailwind for Instagram will do the heavy lifting for you and post your amazing selfies on your behalf at the best times. ⏱
Can’t wait to try it out? Sign up for the forever free plan of Tailwind for Instagram – no credit card required! 💳
March 11, 2013 Photo Android
A few simple tips to improve your photography.
— 1 —
Try to photograph in good light, ideally it should be natural. Experiment with light, try to focus the camera on different parts of the frame: bright and dark.
— 2 —
Take several shots in a row, in which case you can choose the best one. nine0003
— 3 —
Use horizontal format unless circumstances require otherwise. People often forget to turn their smartphone around and shoot in portrait mode, which makes photos look like cropped stripes. For the most forgetful, there is even a special Horizon Camera program that aligns the horizon.
appbox fallback https://apps.apple.com/app/id778576249
Download
Price: Free
— 4 —
Take photos with the volume key. The physical button is more convenient, it is easier to press it at the right moment. And thanks to the physical feedback, you will immediately understand that you have taken a picture. nine0003
— 5 —
Always look at the subject or scene with the naked eye before shooting, before looking through the screen. It helps to choose the angle.
- 6 -
Subscribe to famous photographers. Let them inspire you and be a good example. So, look at the work of brahmino, thiswildidea, mikekus or natgeo.
- 7 -
Shoot a lot and diligently - only in this way you can wake up the photographer in you. But don't fill your personal Instagram* with all the frames in a row. Choose the best. nine0003
— 1 —
Crop your shots, cut out unnecessary details that ruin your photos.
— 2 —
Stylize photos with built-in filters, but choose wisely.
— 3 —
Make sure that the maximum frame resolution is set in the camera settings. Sometimes users forget this detail and shoot with a camera set to medium or low quality.
— 4 —
Enjoy additional apps and services that enhance Instagram*. For example, create original collages in Layout or edit finished shots in the Snapseed editor. nine0003
Download
Price: Free
Download
Price: Free
— 5 —
Use the grid in your camera's settings to compose using the rule of thirds.
— 6 —
Don't forget the optional accessories. For example, an overhead lens or a tripod will bring your photos closer to professional ones. A waterproof case will allow you to take spectacular pictures underwater.
— 1 —
Avoid clichés: cats, food, generic selfies… Too clichéd for you, isn't it? But if you decide to take a self-portrait, then use scientific tricks.
— 2 —
But try to take less pictures of yourself. Instead, try to shoot other people, unusual situations, interesting objects and places more often.
— 3 —
Always look for new stories. Try to fill the pictures with artistic value, creativity, humor, in the end. nine0003
— 4 —
Capture not only the picture, but also the feelings, try to convey the mood.
— 5 —
Experiment with angles.
— 6 —
Pay attention to small details, look around. For example, watch out for silhouettes, highlights, and shadows.
*Activities of Meta Platforms Inc. and its social networks Facebook and Instagram are prohibited in the territory of the Russian Federation.
You must have heard that Instagram* is a social network for visuals, and photos are of paramount importance here. Not without exceptions, but that's how it is. What to do if you want to conquer Instagram *, but you have never been a photographer? How to take cool photos on Instagram*? Don't be upset, believe in yourself and read this article! nine0003
If you have long been attracted by the art of photography, but are afraid of the number of complex words, technical nuances and long processing, your time has come - Instagram* will solve problems and wake up dormant creative potential. After all, everyone can take cool photos on Instagram* and upload normal, high-quality content to their profile!
You don't have to buy a big expensive camera to take cool photos for your Instagram account*. You can get by with a smartphone with a good camera. nine0003
By default, there are two types of photos on Instagram*: square and rectangular. This means you don't have to worry about cropping, weight, or photo size. The social network will think about it for you. Catch cool shots and upload to your account by publishing a post or story.
Read our blog about the nuances of uploading photos to Instagram* without cropping.
If you make it a rule that your profile will only have Instagram photos*, that is, square ones, you can do it in the following ways:
set the frame format to 1:1 in the phone's camera settings crop the photo to a square format when publishing a post Pictures will have to be uploaded from the camera to a computer, deal with processing programs (Photoshop or analogues), learn a lot of complex words, like “exposure” or “trimming”. It's easier with Instagram. nine0003
 The application itself has a shooting function. You can edit brightness, contrast, saturation and other parameters in the application by moving your finger along the scale. Here, on Instagram*, there are many filters that are superimposed on the photo with a touch, even a child can handle it.
When standard photo editing tools are no longer enough, check out our articles for more applications:
- photo and video editing for Instagram*;
- top 25 services for working on Instagram*. nine0110
Tip: If you don't want to share a photo taken and edited with Instagram*, save it to your smartphone.
After applying the filters, click "Download" When deciding how to take good photos on Instagram * on your phone, follow a few simple rules.
Light from a chandelier and lamp makes a photo yellow and distorts colors, so if you are new to photography, shoot only in daylight - it is the most advantageous. Daylight doesn't mean sunny day, it's just daylight hours. In this light, the photo turns out “as if alive”: with natural colors and shadows. nine0003
You don't have to go outside to take a photo on Instagram* in daylight, you can also take pictures at home. If it's dark at home, get closer to the window, shoot on the windowsill, or set up a photo zone next to the window.
The social network is not an online store, and photos of items on an etched white background that look great in a store window on Instagram * usually do not arouse much interest. Here they love photos with details and textures that are interesting to consider. In this case, you can use a white background, but if it is a sheet or a blanket, the frame will become more interesting. In addition to them, you can use a special photophone. Backgrounds come in different textures and colors: under the tree, under the concrete, under the brick - choose any. nine0003
The photophone itself, of course, is not very interesting. To make it interesting, you need to put something on it. It can be postcards, books, magazines, cookies, flowers, travel magnets - all that junk that gathers dust on the shelves and it's a pity to throw it away.
But if you are thinking about creating an online store, read “How to take a professional photo for Instagram *”, “Hand-Made. How to make a selling photo of a product” on our blog.
It may be obvious and funny, but it is the smudged lens that often prevents you from taking normal photos on Instagram*. One day I decided that my phone was broken: all the photos turned out to be cloudy. A few hours separated me from buying a new phone, when I realized that I just needed to wipe the lens.
Wipe the lens. Always clean the lens.
There may be more than one subject in the frame. The most clear should be the main one. To "catch the focus" it is enough to poke your finger into the desired object on the phone screen. nine0003
Back when everything was shot with film cameras, every shot was worth its weight in gold. Now, in the digital age, we can click the shutter until our phone runs out of space. Then remove the excess and click again. This is good, because it is not always possible to "see the frames" the first time.
Tip: Take multiple shots at once. Swap items in places, add new ones, remove unnecessary ones. Then choose the best option and publish a post or story. nine0003
In theory, everything is simple and clear, but in practice, accounts are full of trash pictures. Why? Because after the lecture it is necessary to work out seminars to consolidate the material. And if “just a photo” in stories is still somehow appropriate, then beautiful photos should always be taken for posts on Instagram *.
Taste can be trained like a muscle. Perhaps now you don’t know what a “beautiful photograph” is, how to build a frame, how to lay out small things on a photo background. But there are many who know and post cool photos on Instagram* - find them! Subscribe to accounts that you like, whose style is close to you. Let their photos constantly flash in your feed. nine0003
You can't use other people's photos. But you can take your photos "based on". At first, this will help you to “fill your hand” and feel the insta-style in photography. Do not worry that you are repeating, because you are unlikely to get exactly the same photo.
Over time, you yourself will learn to invent and see shots, and the need for repetition will disappear by itself. Repetition is only needed at the very beginning while you are learning. I myself went through this, learning to photograph from other people's photographs. nine0003 Friend / foe
Among the pictures you look at, there are likely to be those that you can hypothetically repeat for your profile. Surely you also have beautiful bedding, or a cool mug, or you can also lay out dry leaves in a book, or it’s interesting to gut a bouquet. If you like the frame and you understand that it is not difficult to recreate it, take a print screen and save the idea for creating a photo in the Instagram format*.
Change your angle.
The simplest thing you can do. What is the point? You are asked to take a picture of a person. You take your smartphone, stand in front of it and press the button. Do not do like this.
Squat or stand up so that your faces are at the same level to prevent the person in the photo from turning out to be short-legged. For the next shot, climb somewhere higher and take a picture from above. Squat down and take a picture from below. Come closer and again from below. Take a photo from the side. Go behind the tree and take a couple more shots through the leaves. This is called changing perspective. nine0003 lissa.zn and _lsvln_ just put a smartphone in an unusual place for shooting, and the result was not “just a photo”
When you look at cool pictures on social networks, not necessarily people, think for a second where was the photographer at the time of the shoot. And how would the frame turn out if the photo was taken in a standard way, from a height of human growth.
The technique is also suitable for subject shooting. You can take a beautiful photo of a mug on a table on Instagram* from a dozen angles: from the side, placing the smartphone on the table, just from the side, from the side of the handle, from the top in the center, slightly tilting the smartphone from above, and so on. nine0003
Reflection.
Also an easy trick. Look for reflections: in shop windows, in puddles, in mirrors, in sunglasses, and even in broken glass, if you're not superstitious.
irenaponaroshku and kristikut experiment while relaxing on the beach and taking Instagram photos* for posts and storiesGet deeper.
Cool trees, flowers, grass, children's climbing frames? Don't stand in the background, go inside if possible.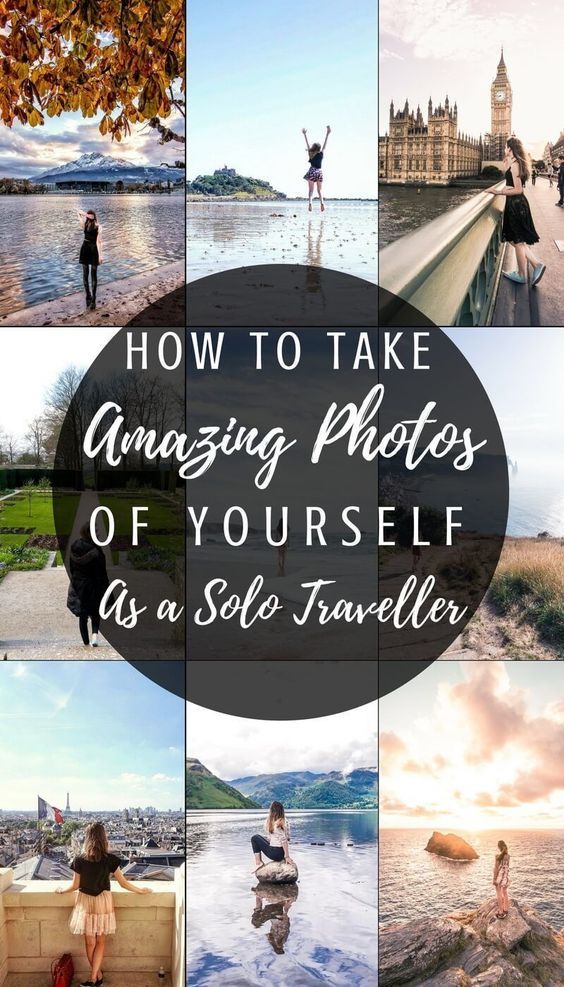 nine0003 akmaral_bekmaganbetova and analim_oni were not afraid to go deeper into the thickets
Seasonal photos.
There is something beautiful in every season. If you get stuck with ideas, remember what is now, what will not be later, and take a picture with it. In winter, it is snow, snowmen, a fairytale forest, garlands in the city and cool shop windows, snow fun. In the fall ... yes, you yourself will continue this list better than me!
In spring nature wakes up and photographer.victoria28 takes a photo with everything that woke up, filling the feed with spring contentFocus on one subject .
Often, seeing something cool, we take and take a photo thoughtlessly. Tip: Your shots will look more professional if only a small part of the beauty is in focus, and the rest goes into the background.
An example from my dacha. Pay attention to the grid - the main object is better placed along the lines or at the intersection points of the lines. The eye is so pleasing
 A part of myself.
The picture will attract more attention if you shoot not just an interesting street or forest, but insert a part of yourself into the frame. Let it be your legs, or a hand with a hat or ice cream, it doesn't matter.
There is a story behind such shots...Film life .
When you blog and look for footage, walk the streets of the city and take a closer look at your surroundings. We all often hurry somewhere, and do not notice many interesting things. You can also ask to take a picture of you "in the crowd." Here you are going somewhere, or sitting on a bench thinking, and people, bicycles, cars are hurrying around. Just make sure the focus is on you. nine0003 Tip: if it's difficult, imagine that you are a reportage photographer, and your task as a newspaper editor is to capture the life of the city :-)
Natural frames .
Arches, a large mesh fence, an art object, even an inflatable swimming ring can become a kind of photo frame.
Repeating objects, symmetry .
A row of identical cars, a long fence, even identical white sneakers lined up - all this attracts attention with its repetitions. The same with symmetry: the eye automatically begins to look for inconsistencies in ideality, and you have earned attention to your photo.
monika0305 sees symmetry in architecture, red_apple_photo in nature. When there is no symmetry around, create it yourself like ya.shedowUse shadow .
Difficult but interesting technique. An ugly shadow will spoil even a beautiful shot. Do you want chic? Train your eyesight and repeat like a pro.
little_studio and irenaponaroshku and their shadow games Funny shots .