Home »
Misc »
How to take photos of food for instagram
How to take photos of food for instagram
Food Photography: 7 Tips for Instagram
*This post contains affiliate links. Thank you in advance for supporting Click it Up a Notch.
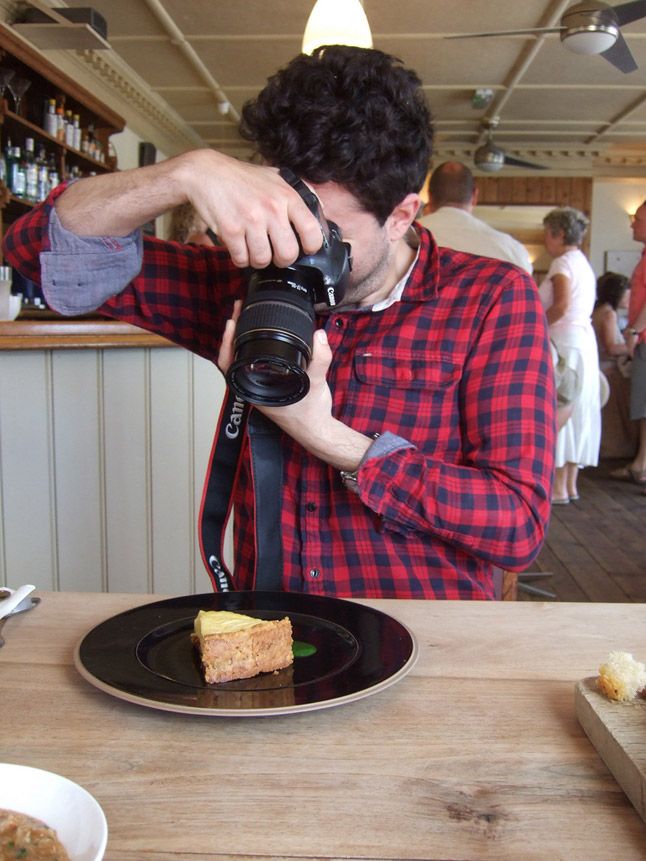
A quick glance through my Instagram feed & it’s not hard to decipher what I’m all about. Food, kiddos, cute shoes & food. When I first started snapping pics of food on my feed, they really weren’t anything special. It wasn’t until I started applying the same principles to iPhoneography that I used in shooting food with my DSLR, that people really started to take notice of what I was snapping. By working to create an inspirational foodie feed, I’ve been able to grow, make connections & push myself further & further with creativity. Every day I get to create a tiny image of beautiful food that people can come back to view again & again. I’m going to share some of the secrets & tricks I’ve learned along the way to help you create beautiful food Instagram feed! All images shown here were taken with my iPhone 5.![]()
Read more food photography tips – Eat Pretty Things.
1. Look for natural light
Too often, when we’re snapping food with our phones, we forget one of the most important factors in getting a great image – light! Turn off those harsh, overhead, indoor lights. This will help keep your shots from looking flat or having unappetizing color casts. Try & find your best source of natural light in your house. I typically snap all my food shots on the floor of my eat in kitchen area where I have 4 windows & curtains to help adjust my light. I set up my shot just outside of the bright light that spills in. I want the light to be in my shot but not so harsh it gets blown out.
I don’t take many food pics when I’m at a restaurant, mainly because it can be disruptive to other people & I’m too busy wrangling 4 children anyway. If you happen to be at a restaurant & feel comfortable, try & find a good window seat. Sitting next to a big, bright window will help keep your image well lit but too often restaurants also have yellowish overhead lights above each table.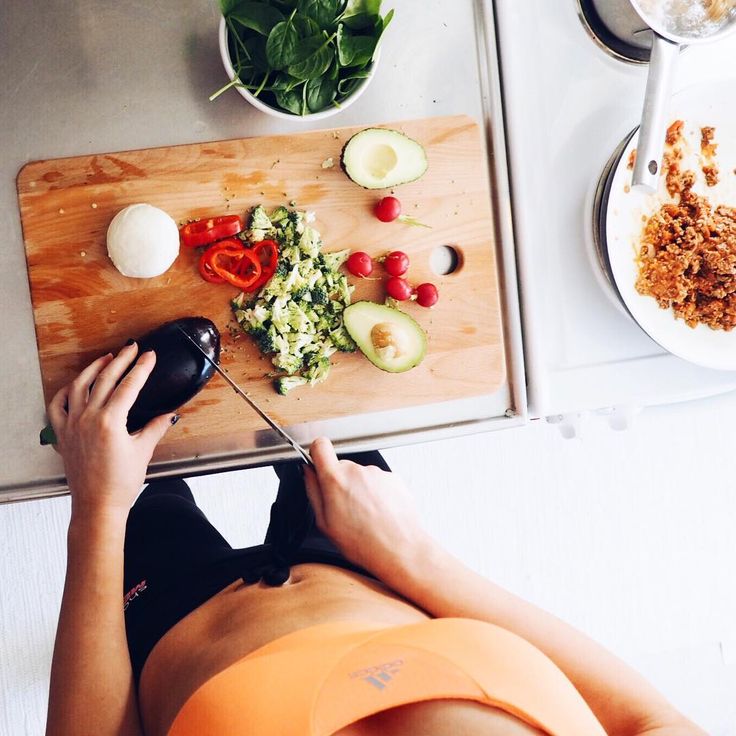 In this shot, we were the only people at the ice cream shop so I used one hand to cover the light bulb that was hanging directly over our table & the other hand to snap the shot. You can still see a slightly yellow color cast next to my coffee, but I only took one shot & my hand was able to cover most of the bulb.
2. Use a reflector
If you’d use a reflector in dlsr photography, why not in iPhoneography! You don’t even need to buy a real reflector if you’re not sure you’ll use it. I use an inexpensive piece of foam board I got from a craft store! After finding the best spot of natural light to set up my shot, I get out my reflectors.
By moving my reflector board around I can bounce the window light into the shadows in my frame. Sometimes I’ll even use two reflectors if my props start to create unwanted shadows. I also keep an inexpensive, sheer curtain panel handy to help diffuse the outdoor light.
3. Take time to compose a shot
It might surprise you but I do actually take the time to set up each of my food shots.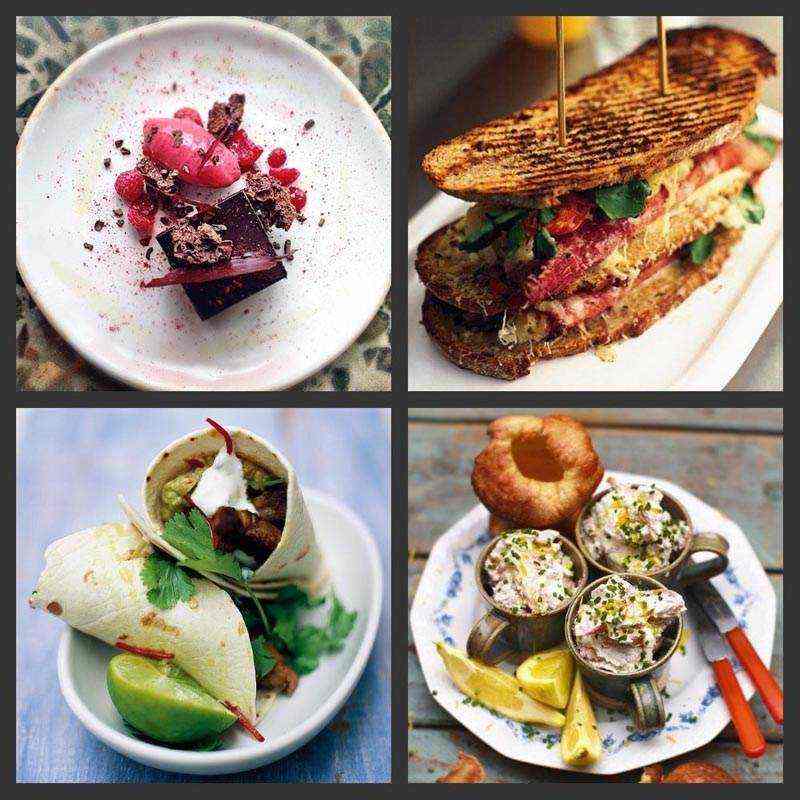 Sometimes it’s as simple as using a single item thoughtfully, like my son’s half eaten cookie.
Other times it’s a full blown food styling session complete with props, linens & fancy plates.
Either way, it’s important to take the time to compose each shot instead of just snapping your morning cereal straight on, in your bowl. Use ideas like the rule of thirds or leading lines to serve as inspiration.
4. Tell a story
This is my favorite thing about food styling. I love telling stories with my food shots. Sometimes it’s setting the scene for my 4 year old’s birthday breakfast. Every meal in our house is crazy & chaotic – we have 4 kids! I wanted to convey both the celebration & the messiness of our meals – every meal with little kids, really. Also, the birthday boy has a serious dino obsession so no image of his morning was going to happen without a dinosaur or two.
This story is about showing how we eat on a road trip. When we travel it’s easier to hit the rest stops for snacks & running off steam. I love that my youngest son is sitting on the table – the only way he could compete with getting any food next to my older kids. Also, even though most of our food has to be packaged on the road, we still make an attempt to eat as healthy as possible.
Even just giving a sneak peak into how we cook when we’re camping tells a story. Fresh fish on the charcoal fire pit, sweet potatoes wrapped in foil, green grass & of course, my Birkies. Story telling is a great way to connect with your audience as well as pull them into each photo so they want to know more!
5. Do something unusual
This is where you get to step outside of showing your bacon & eggs every morning for breakfast. Do something creative & unusual that you might not think of initially. Using a condiment? Write out a message in mustard.
For the 4th of July I hadn’t made any festive desserts or red, white & blue anything that day but knowing I wanted to post something I just lined up some fresh cherries into a 4!
Another time this worked great for me was when I didn’t have any ingredients to make frosting for my daughter’s birthday cake so instead I just cut up some fresh fruit & it created this beautiful image on the cake.
6. Don’t be afraid of shadows
I started the post talking about natural light & trying to get the best light possible, but I don’t want to encourage you to shy away from the shadows either! You may be surprised to see how using shadows & the right apps to edit your pictures, you can create a contrasted image quite easily.
When working with split lighting, decide where you’d like your phone to ‘meter’ off of. Yes, your phone can actually meter off light in the image! By tapping any section of the image on your screen you’ll see the image adjust to whatever light you touched. Want to add more light to your image? Tap the darkest shadows on your screen. Want to get more shadow? Tap the brightest light. Don’t just stop there though. You can adjust your light levels by tapping any section of the image on the screen. If I’m shooting something where I want contrast lighting I will usually take 2 images. One bright & one much darker. Then I edit the best one in an app. It’s very easy to add light back into an image but it’s much harder to bring something back from being blown out or over exposed.
7. Use the right apps
The thing I love about Instagram is that your food doesn’t have to look the same way it does when you’re shooting with a DSLR. It naturally won’t be as sharp & your white balance won’t be perfect but there are some apps that have great filters that can help you come close. The biggest concern when choosing the right filter is you don’t want to pick one that’s tinted that will make your food look pink, blue or purple. I also like to use multiple apps to get just the right look. I know, it’s fussy, but once you get used to the filters you love, it’s easy!
I typically use Snapseed first. Once I’m in there I can adjust my brightness, contrast & temperature. I also can rotate my image or correct the horizon. Once I’m done there, I’ll open Afterlight & choose a couple of my favorite filters to layer.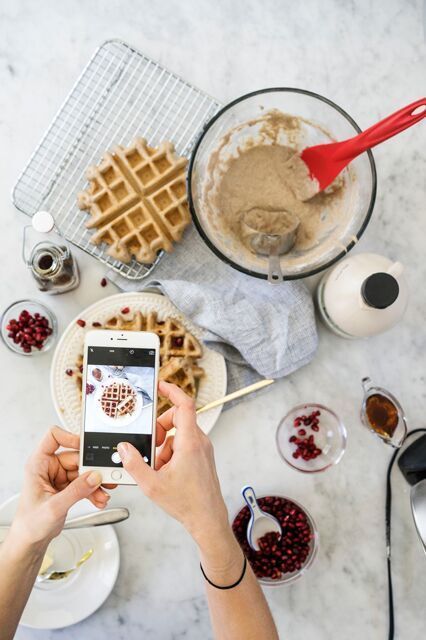 I really like the ‘relic’ & ‘russ’ filters.
Do you love snapping food with your phone? Leave a comment with your best tip below.
Trisha Hughes - Contributor
I’m a midwestern girl who’s traveled the globe. My house is always messy but my sense of humor makes up for it. I started my blog, Eat Your Beets, as an excuse to get my husband to give up gluten. It didn’t work. Once I realized I was pretty good at food photography I decided to help other’s turn that same passion into reality by writing my ebook, Eat Pretty Things.
How to take the best photos for Instagram
There's no denying the huge appetite (pun intended) for food posts on Instagram, with chefs, bloggers, producers and home cooks all snapping, sharing and liking on the image-led platform. A staggering 500 million people worldwide use Instagram, and of these, 300 million open the app every single day, including us - follow at @bbcgoodfood. We asked some of the most successful Instagrammers for their secrets to capturing that perfect food photo.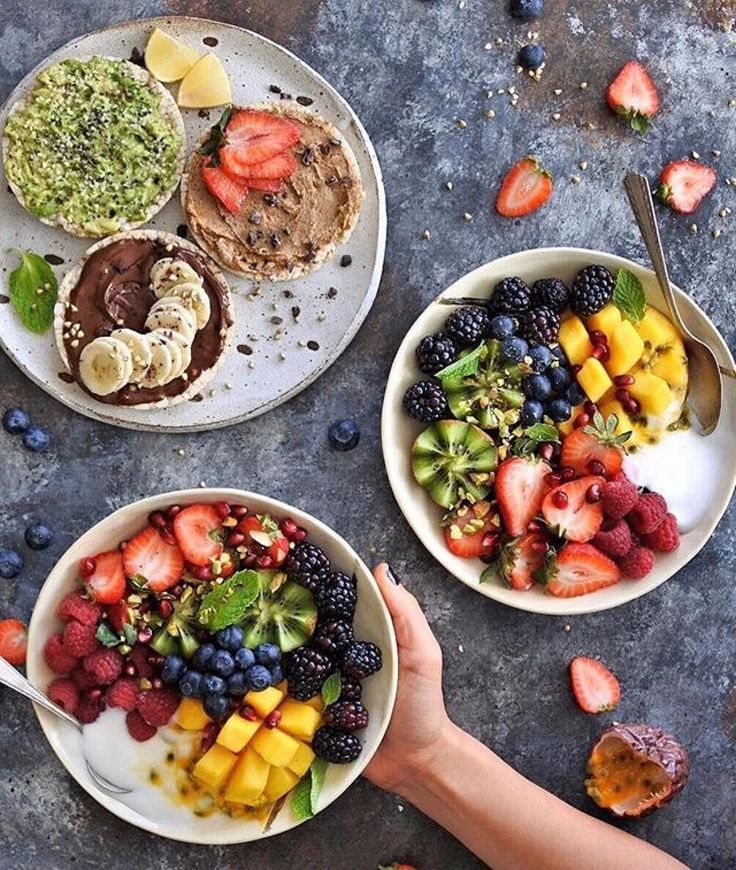 ..
..
Clerkenwell Boy, restaurant & travel Instagrammer
Soft, natural light is best. Ask for a table by the window if possible and always try to shoot your photos during the day time. Decide on the style and composition of your photo: (i) top down, (ii) 45 degree angle or (iii) super close up. Play around with negative space (the area in between and around objects) and use symmetry or the rule of thirds to structure and balance your images. When styling your table, add elements that evoke the mood of the cuisine such as flowers, cutlery, herbs, spices or fresh ingredients. When sharing, geotag the location so that others can find it via Google maps, and tag the restaurant or bar so others can easily connect and follow your recommendations. Tell a story through your posts by finding your personal niche and style – you could provide a description of your favourite dish on the menu, share a recipe, or describe a personal story or memory.
Follow Clerkenwell Boy on Instagram at @clerkenwellboyec1.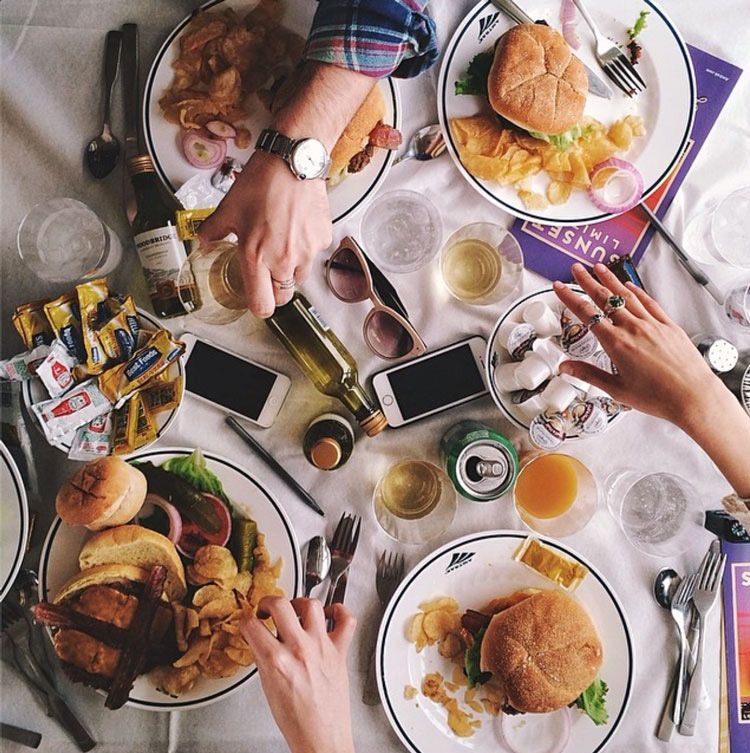
Symmetry Breakfast, food Instagrammer
Think of yourself before your audience. Eat and cook what you think is delicious, not what you think will get likes. As long as you aim for substance over style in the content you post, you will develop your unique signature later (I promise)! Be passionate about researching ingredients, cooking techniques and tools, but don't break the bank. An expensive piece of kit might sound like a good investment, but so is a good knife or pan. Start small and grow over time - becoming an expert at what you do takes patience but there is always something new to learn. Be inspired but don't copy. There are lots of great accounts for home cooking, restaurants, healthy eating and so on, but establishing a point of difference takes some market research. Finally, use the Instagram editing tools to correct, not enhance, the photo. A phone camera doesn't 'see' the world like the human eye, but there is no way that avocado was that green!
Follow Symmetry Breakfast on Instagram at @symmetrybreakfast.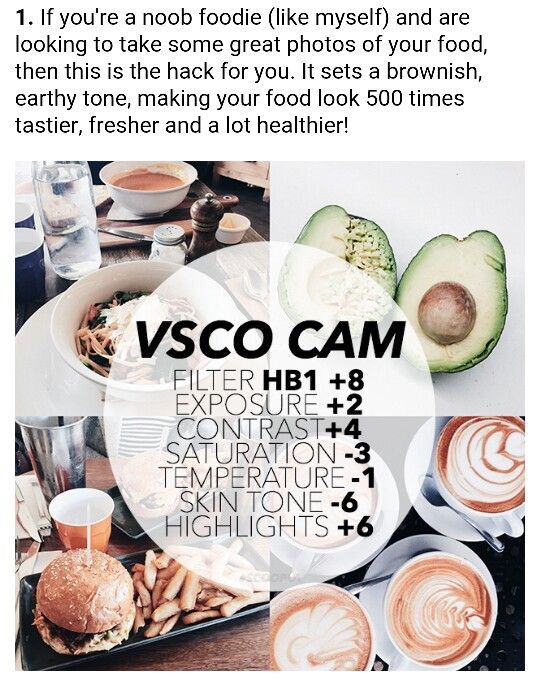
Lily Vanilli, baker & cake designer
Bear in mind how your Instagram feed looks as a whole, because this is what people first see when deciding whether to follow you - if the images don’t flow nicely together it can look a bit of a mess. To achieve this, shoot against a consistent backdrop or colour as much as possible. Whether you're going rustic kitchen table or clean, fresh and white, stick with it and create a style for your account. Steer clear of filters as a rule, and also be wary of warm tones or yellow lighting. Use an editing app like Snapseed to crop, brighten and up the saturation on your images, and go for a consistent finish across your posts. I also use natural lighting pretty much without exception, which means thinking carefully about timing in the winter months!
Follow Lily on Instagram at @lily_vanilli_cake.
Marina O'Loughlin, BBC Good Food contributing editor
Don't spam people. When on trips abroad, I have to restrain myself from uploading every beautiful dish I eat, or sight I see. Fewer and carefully edited is better than dozens a day. Take as many snaps as your patience (and your friends' patience) will allow, then choose the best - don't snap straight from Instagram. Don't overuse hashtags - this looks a bit screechy. If you’re eating out, go at lunchtime - the natural daylight is much better, especially now when the most fashionable restaurants are, well, fashionably dimly-lit. Use zoom - it's a really useful tool for getting rid of pesky shadows. (Also, beware of pesky shadows.) I like Instagram's edit feature better than the filters. Filters tend to give everything a homogenous feel, whereas judicious use of edit - crop, brighten, contrast and saturation are my favourites - make pictures more 'your own'. Finally, restaurant dishes tend to look better photographed from above, but there's really no need - as I witnessed at Morito recently - for the snapper to stand on the chair.
Follow Marina on Instagram at @marinagpoloughlin.
Edd Kimber, baker & food writer
Edit lightly.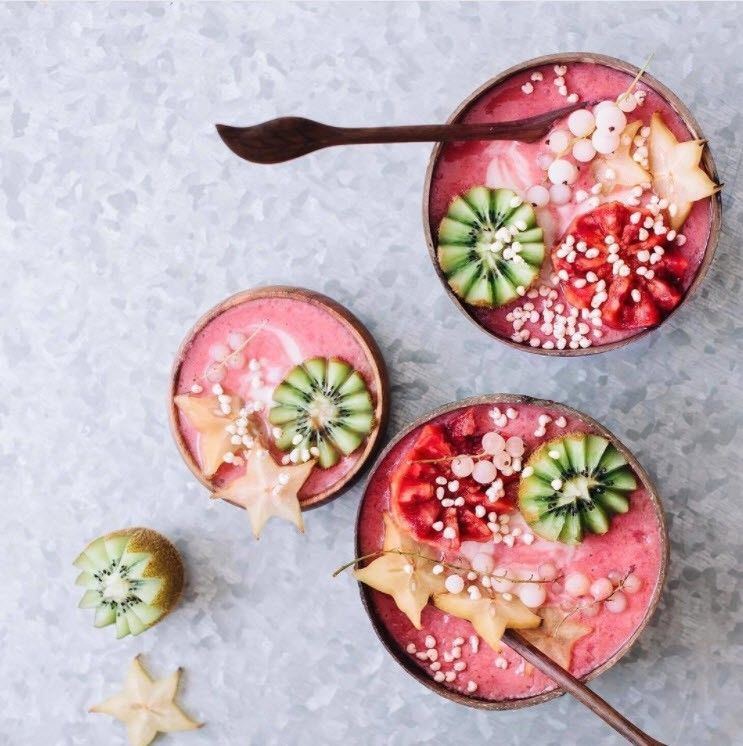 Instagram’s built-in filters can reduce the quality of the photo rather than enhancing it, so I edit with an app called VSCO which gives you great control. Always avoid flash - on a phone it always creates an ugly artificial look that makes the food look unappealing. Overhead shots can be easier to take and look great on Instagram. Most importantly, don't take it too seriously. I see people taking lighting and all manner of kit into restaurants, which seems silly to me. Instagram is meant to be fun - if you spend too much time thinking about it your feed will end up forced and generic.
Follow Edd on Instagram at @theboywhobakes.
Gizzi Erskine, chef & food writer
Good photography comes down to a good eye. Many people think they're good at shooting food but few are and I think it's simply in how you see the world. I don't think it's something you can learn per se... Instagram is a way for people to see the world through your eyes so make the set-ups as honest as they can be.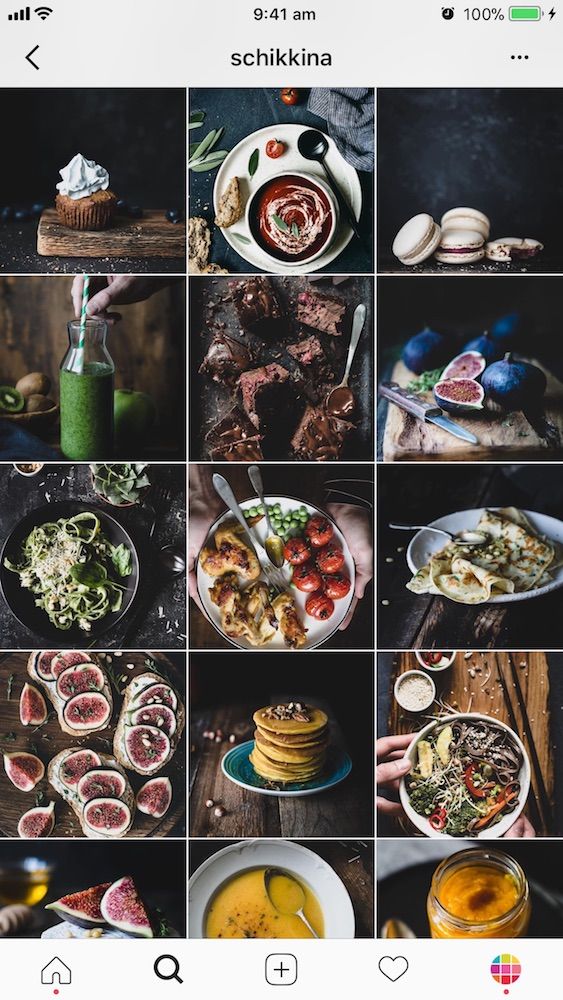 When you watch the ‘uber-bloggers’ and ‘instagrammers’ they shoot in a second as they know what they're after - it's got to come naturally to you. My tip to make things look great is to always shoot in day light. And choose a filter that makes the food ping and not the plate or back ground. I like Nashville. I think it's as simple as that.
Follow Gizzi on Instagram at @gizzierskine.
Cassie Best, BBC Good Food food editor
Keep it real. Food looks most delicious when it's messy, drippy and oozy, so don't try to make it look too perfect. A tip that I’ve picked up on photo shoots is not to overfill the plate. Give the food space to breathe and it'll look all the more beautiful for it. Keep crockery and cutlery simple - intricate designs can dominate the image and make the food look fussy. Good lighting is everything! If you’re shooting outside, take the snap with the sun behind you, it'll highlight the food and help pick up all the beautiful details. Yellow tones can make the image look dated and bleak, so to counter this, I usually drop the warmth and increase the saturation in the self-edit options. My final tip is to clean your camera lens before you start snapping. Most phones are buried in bags or pockets all day and accumulate a layer of dirt. A quick buff on a clean cloth can make all the difference to the clarity of the image.
Follow Cassie on Instagram at @cassiecooks.
Sam Stern, chef & food writer
Think about presentation when you are plating. That might mean holding off on the full portion size or keeping certain ingredients of the dish separate instead of mixing it all in, so they can stand out and pop in the final image. For example, pasta dishes can look messy if you just pile it on the plate. Setting aside ingredients such as capers, tomatoes and basil for the top allows them to stand out and really pop, so keep some final garnishes such as chopped fresh herbs on hand. I don't use the Instagram filters 99% of the time. Use an app like Snapseed or Afterlight to customise your image - these give more of a professional look. Finally, experiment with different angles. Above is always nice but coming in from the side can give more of an impactful image – get creative!
Follow Sam on Instagram at @sam_stern.
Ed Smith, chef & food writer
Great photos can be taken with minimal fuss. First of all, if you're dining with friends or in a restaurant, never let taking a photo overtake the purpose of your meal – it’s all about enjoying the taste of the food and the company of others. I'm not a fan of moving plates around, standing up or generally causing a scene in the hope of gaining a few extra 'likes'. Have a think about which angle will look best before whipping the phone out. In terms of editing, I don't think pre-set filters ever look particularly good, but I do use Instagram's manual edit filters. I try to be relatively consistent and tweak the same settings each time - generally 'brightness', 'lux', and occasionally add a little 'structure', more 'shadows' and 'sharpness'. All the time my thought process is to try and ensure the food still looks as natural as possible. Ultimately, just enjoy taking pictures of food and occasionally posting your favourite ones. And remember, don't let the act of taking the photo become more of an event than the meal or moment.
Follow Ed on Instagram at @rocketandsquash.
Alpana Deshmukh, food & travel Instagrammer
Get familiar with your phone’s functionality - turn on the gridlines; tap the screen to focus before shooting; consider using the AE/AF lock to fix the exposure and focus. Look for visually interesting backgrounds to add another dimension to your shot – in bars, cafes and restaurants, I’ll keep an eye out for graphic tiled floors, colourful wallpapers, textured walls and table tops. You don’t have to always shoot where you are served; I have been known to (discreetly) pick up my glass or dish and wander over to a different space in the venue to capture more light or a photogenic background. Judge your environment; you don’t want to cause a commotion taking pictures and distracting other diners!
Follow Alpana on Instagram at @alpana.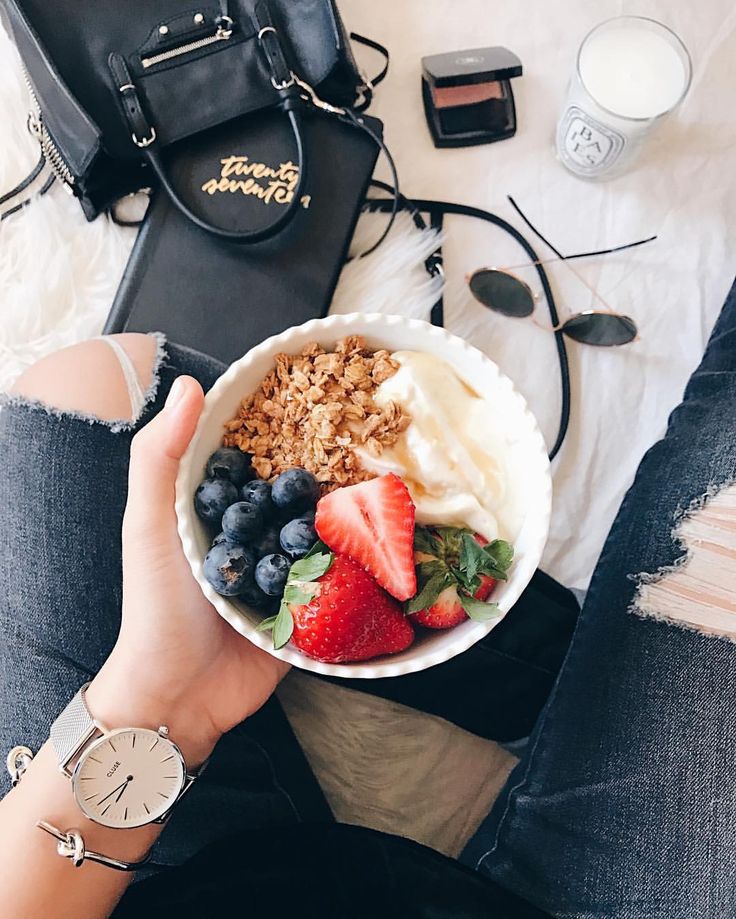 deshmukh.
Niomi Smart, lifestyle vlogger
Shoot from the side. Overhead shots of food look great, but it's also lovely to get some of the background scenery into the shot to add context, especially when you're out and about or abroad. If you find yourself somewhere picturesque, take the shot at a slight side angle so that you can appreciate the beautiful surroundings but also have a clear view of the delicious food.
Follow Niomi on Instagram at @niomismart.
Rosie Birkett, BBC Good Food contributing editor
Think about the composition. Try making use of asymmetry and negative space - don't be afraid to leave some space on one side as this can add interest. It's important to make sure the shot is well lit so that the ingredients can really stand out. Use natural light and find a spot by the window if possible.
Follow Rosie on Instagram at @rosiefoodie.
Inspired to get snapping? Read our top tips on how to photograph food, or find out what it's like to work as a professional food photographer or food stylist.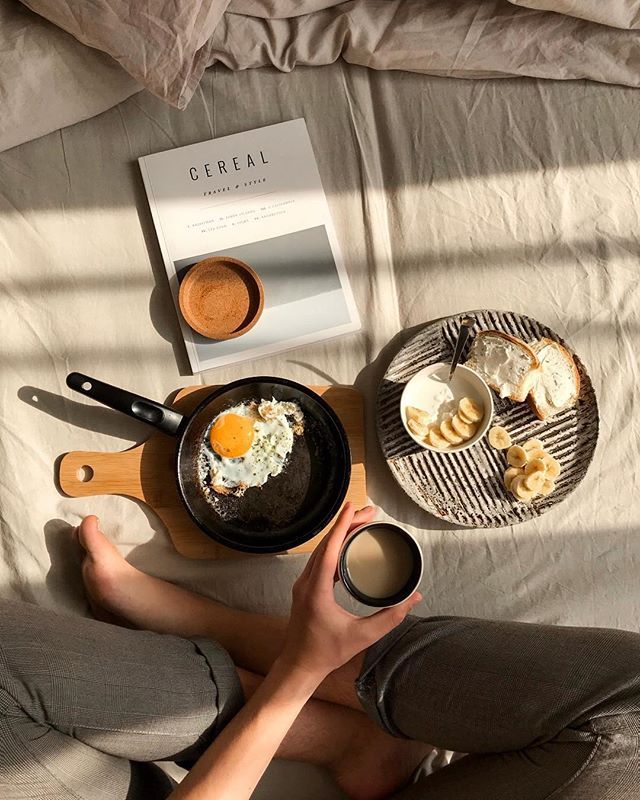
What are your tips for taking the perfect photo for Instagram? Let us know in the comments below...
How to photograph food on a smartphone: 10 secrets of mouth-watering pictures | Articles | Photo, video, optics, Phones
Photo: pixy.org
No one is interested in a photo of just food on a plate. If you want to collect likes, shoot like professional food photographers. It is about their tricks and tricks that you will now learn.
1. Almost everything depends on lighting
The main mistake of a beginner is to underestimate the role of lighting. For food shots, natural daylight is the best option. Therefore, it is better to photograph dishes at the window, in the morning or midday hours, as lighting may not be enough in the evening.
- If it's cloudy outside, just move the dish to the window and take a picture. This is the perfect light.
- If it is sunny outside and the light is too bright, close the blinds or curtains to soften the light.
- If shooting outdoors, shoot in the shade.
There are various techniques you can use to make food photography more expressive. For example, try shooting drinks against the sun. The so-called backlight will create a deep shadow in front of the object, but highlight the color of the cocktail.
Properly placed lighting will help emphasize the color of the drink. Photo: flickr.com
But light sources behind the back should be avoided: with your shadow you will close the dish, the background will turn out dark, and the foreground will be overexposed. The image will look flat, the dish will look unappetizing. By changing the position, you will shoot this composition much more profitably.
2. Choose the right angle
Remember: first determine the angle, then work with the composition. Successful placement of subjects in the frame depends on how you shoot - from above, at an angle or from the side. Think about how best to present the main dish, given its shape, size and other features.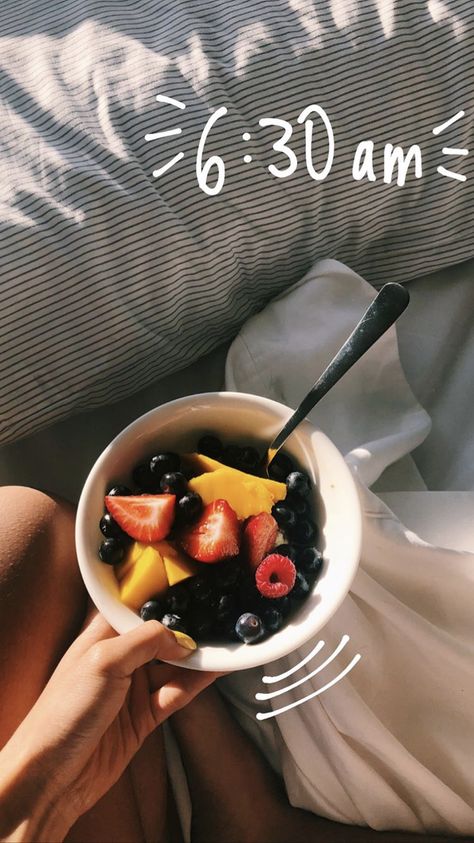 After that, arrange the rest of the elements. Here are the three basic views:
- Side. This angle is appropriate when you need to show the height of a dish or toppings: burgers, desserts, pancake towers, layered cocktails, cakes.
- Top. Ideal for dishes such as pizza, scrambled eggs, salad, smoothie bowl.
- Angled. An option for when you need to reflect the volume or want to capture the height of the dish, but also show it from above - for example, this is how tall pastries with berry decor are removed.
Immediately consider where you will post the photo. If you plan to upload it to your Instagram feed and stories, take two shots (vertical and square) or just keep in mind that you will need to crop or reduce the picture. This non-obvious nuance can affect the optimal angle.
3. The rules of composition are relevant for food photos as well.
Before taking a picture, conditionally divide the frame into 9 equal parts using two vertical and two horizontal lines.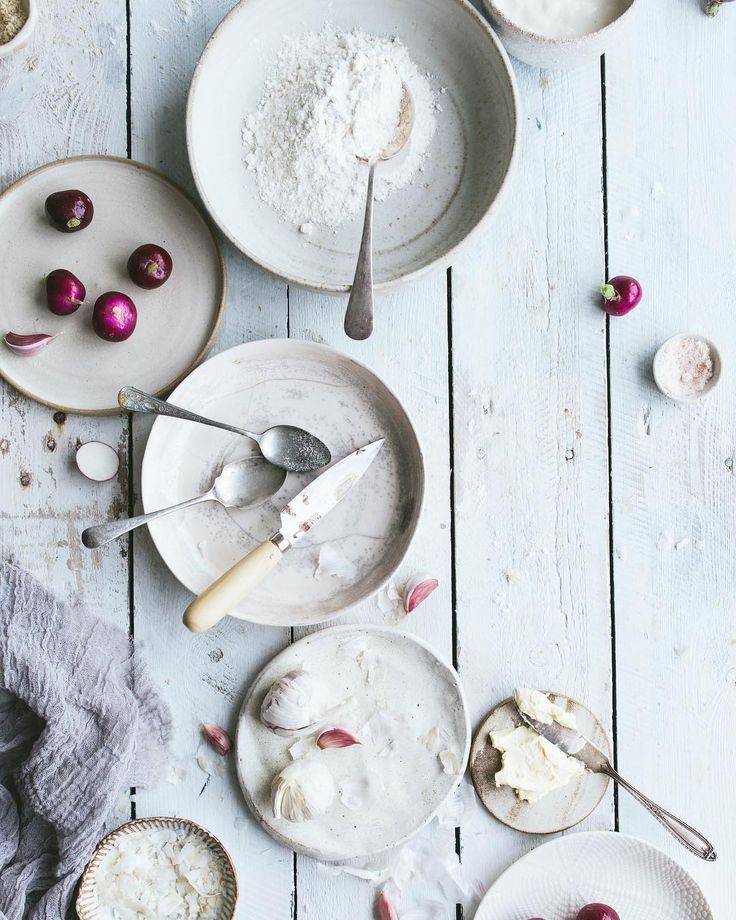 If it’s hard to do this mentally, turn on the display of the corresponding grid in the camera settings. The object must be placed in the frame so that it is along the lines or at the intersection - these are the so-called visual points.
There is also a rule of diagonals, according to which the main objects in the photo should be placed, you guessed it, diagonally. A simple technique helps to streamline everything by adding dynamics. You can implement this in different ways: arrange the cutlery at an angle or arrange the plates in a row diagonally.
Diagonal placement will give you an original shot without much manipulation. Photo: pixy.org
Symmetry is another elementary but powerful technique when framing a shot. Creating a symmetrical composition is useful when shooting the same foods, dishes or drinks.
4. The background can ruin everything and vice versa
The right background will make the food photo more coherent.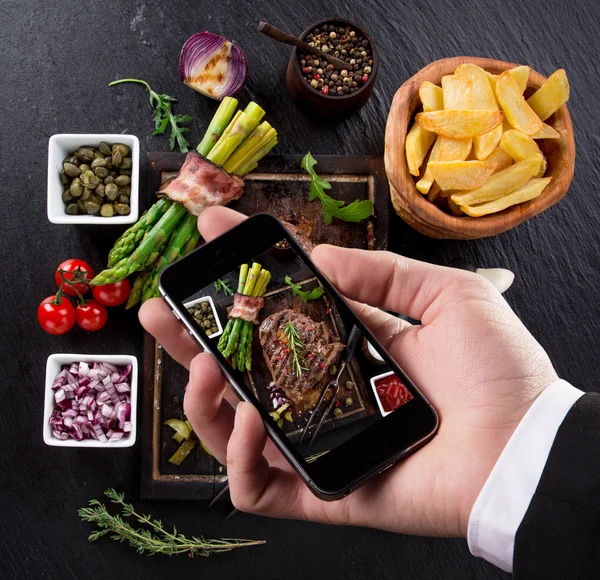 If you are shooting a complex dish, use the most concise background, for example, a plain one. When photographing some simple food, you can beat everything with an interesting tablecloth or napkin.
When shooting food at home, it is quite possible to do without special backgrounds. There are simple and public, but no less beautiful analogues: trays, countertops, tablecloths. A wooden board is generally a win-win and versatile option. No one bothers you even to arrange food on the floor if a suitable porcelain tile or laminate is laid on it. Experiment and find the key to success.
5. Learn to use color and contrast
Are you sure that the contrast in the photo is the key to success, as all photographers say? We will prove you otherwise. Try photographing a green salad. Avocado, cucumber, white cabbage, green pepper and basil, cilantro, broccoli - they all differ in shades, but together they will merge into one green frame. In a motley social media feed, he will definitely stand out.
Ingredients in different shades of green contrast well with the cutting board. In the social media feed, such a frame will not go unnoticed. Photo: flickr.com
But contrast is good too. Red and green, yellow and purple, black and white - there are a lot of options. For example, a salad of red tomatoes with green basil leaves will look just perfect if you take a picture in the right composition and with well-exposed lighting.
Cook it yourself - decorate the dish with something bright to make it look inexpressive. Even non-photogenic oatmeal will be transformed by putting a few berries on top or a drop of blueberry jam.
6. Additional ingredients will dilute the picture
Fresh berries and fruits, honey and nuts, herbs and spices, flax or pumpkin seeds, various sauces and even just sliced bread - all this decorates and complements the simplest dishes. In some cases, a close-up will be more beneficial, allowing you to see the texture or color. In others, the far one is better - with a lot of details that distract the eye and create a pleasant impression of what you see.
Also, don't be afraid to spill or spill anything. Cleanliness in the frame is good, but there are exceptions. Sometimes scattered flour, spices or even crumbs will look very appropriate. The main thing is not to overdo it so that the picture does not turn out sloppy. Here the rule applies: less is better than more.
7. Use a tripod whenever possible
Of course, you're unlikely to photograph a dessert ordered from a cafe with a tripod. If you shoot at home or you are faced with the task of making the highest quality frame on order, then this is another story. With a tripod, the phone will be in a fixed position. Thanks to this, you will be able to get sharp shots even in poor lighting conditions. By preventing camera shake, a tripod makes it possible to set slower shutter speeds.
With a tripod, you can shoot at slower shutter speeds and in low light. Photo: flickr.com
A tripod is also indispensable when you need to take a series of photos of different dishes or drinks from a certain angle. Set the height and angle of inclination, and change the subject itself.
8. Focus creates interesting effects
To make your food photos not only beautiful, but also artistically expressive, try experimenting with focus. For example, highlight the subject in the foreground or focus on the background. This technique is appropriate when the frame contains not only the main dish, but also objects that complement the exposure and create the right mood.
For best results, switch your smartphone's camera to manual zoom mode. By touching your finger on the touch screen to the desired areas of the image, you can place accents. In automatic mode, the camera will choose for itself which area in the frame should be the sharpest, and this may not correspond to your idea.
9. Essential props
Expressive food photography is hard to imagine without props.![]() It can be all kinds of dishes, cutlery, napkins, cutting boards, glasses, gravy boats, trays, and so on.
It can be all kinds of dishes, cutlery, napkins, cutting boards, glasses, gravy boats, trays, and so on.
The main thing is that the props match the style of shooting. When photographing freshly baked bread, using transparent glassware is not a good idea. But some canvas towel or linen fabric is perfect for this. Remember that the props should not draw attention away from the main object - your dish.
Freshly baked bread would not look so appetizing without a cutting board and knife as props. Photo: piqsels.com
10. Processing will make the picture even more appetizing
No matter how good your smartphone is, no matter how hard you try when shooting, post-processing will make the frame even more aesthetic, and the dish on it will be as appetizing as possible. To begin with, it does not hurt to crop unnecessary fields, lighten or darken the photo a little, remove extra crumbs or spots. There are popular mobile apps for all this: Lightroom Mobile, Photoshop Express, and Snapseed. The functions of this software abound for high-quality correction.
Bonus tips for everyone
Universal tip: make it a rule to wipe the lens before shooting, as even subtle fingerprints can spoil the photo, and you will not fix it in any way.
Practice continuous shooting. This function helps to catch good moments for a photo, when, for example, coffee from a Turk is poured into a cup or spices are sprinkled on a salad. Photo: pixabay.com
Also try to shoot the same dish from several angles, adding and removing different details. Play with lighting and choose the best shots. Often, random shots look much better than staged ones. In other words, do not be afraid to experiment - it is always useful! And don't be afraid to borrow other people's ideas: look at the top food photos on Instagram or Pinterest, analyze, highlight your favorite moments and repeat various shooting techniques. In addition, you can enroll in some food photography course, from which you will learn the basics of this type of photography and draw original solutions.![]()
Instagram: how to photograph food correctly?
10/25/2018
Whatever it is, we will always photograph food. Someone for the Instagram feed, someone for work, and someone just for memory, so that you never forget the most delicious pasta in Piazza Navona in Rome (and how appetizing it looked then). That's why I've put together in this article some tips on how to best photograph some of the best and most delicious memories.
Let's start with what I strongly advise before taking any shot, wipe the phone camera, and it is advisable to do this with a cotton cloth (for example, a T-shirt or a napkin), so that for sure without streaks and “fingers”. This is the golden rule, which for some reason not everyone is still aware of, however, such a simple action will save you from a large number of further manipulations in the processing process.
But, if you still missed this moment, and now you are very sad, because the croissants are bitten, and the heart pattern on the cappuccino is irreparably broken, don't be discouraged! With your trouble, the "contrast" tool in any application will help you, whether it's VSCO Cam, Snapseed or good old Instagram.
What are the nuances you need to consider if you want the picture to turn out delicious?
Lighting. An obvious thing, but still. It is better (although not necessary) to shoot in daylight, that is, you need to settle down somewhere near the window. In other cases, there is a possibility that you are tormented with color from artificial light, with extra shadows, and in general, everything will most likely not turn out as cool as your imagination drew.
Background , on which everything is located. Let it be better to be monophonic, and ideally, just light, for example, marble, a board or a white tablecloth. If your tablecloth has a psychedelic pattern of roses and butterflies, then yes - this is a bad option.
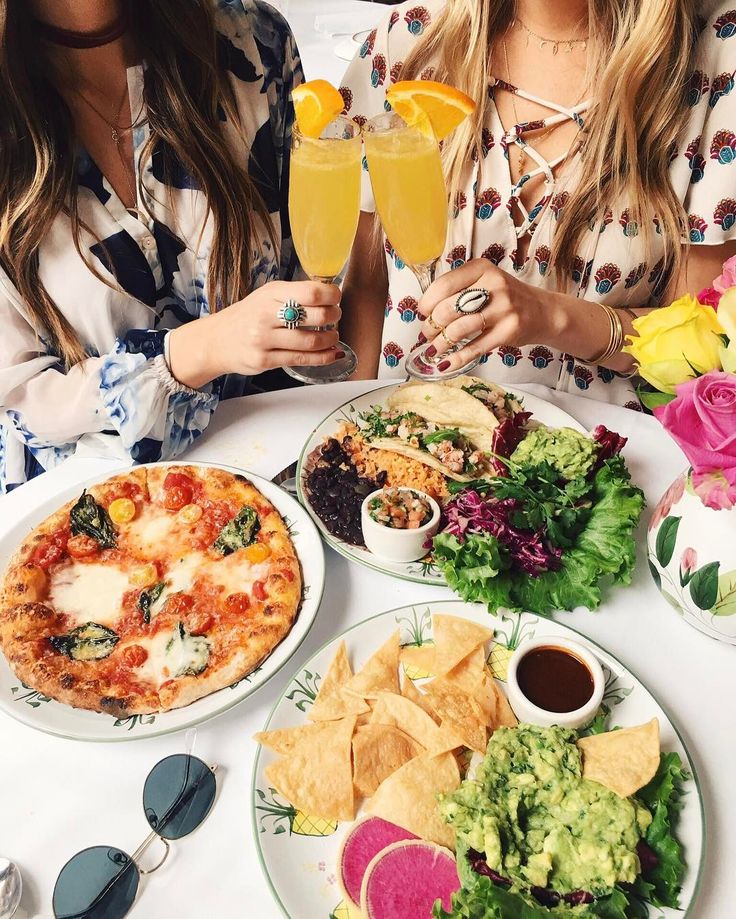
What you photograph. This is, of course, an amateur, but I assure you that hodgepodge or beef stroganoff will lose in this unequal battle not only to desserts, but also to steak and pasta with seafood. Glasses of water, glasses of wine, fruits, cheese, olives and French fries always look advantageous in the frame. The list is incomplete, as you can imagine.
Colour. To make the picture pleasant and harmonious, I advise you not to "dazzle", but to leave two, maximum three shades in the frame, which are combined with each other, and dance already from this. Let's say white-beige or white-green-yellow. It looks natural, natural and pleasant.
Angle. Tall objects in the frame are always distorted, especially if they are not located exactly in the center of the composition. If you are shooting from above and bottles, vases, glasses or tall glasses fall into the frame, then keep in mind that lemonade in a tall decanter will definitely “crawl” a little to the side. In some cases, this looks quite appropriate. But if this confuses you, then you can choose an angle at an angle of 30-40 degrees. and do not forget to leave "air" in the frame (space around) - do not shoot objects too close.
Accents. Do not put all the bright juices in the upper right corner at once, leaving the lower left “faded” and loaded only with large plates. Try to balance and naturally line up all the objects in the frame as much as possible. Fine dilute bulky, dark - light. And place bright details away from each other.
But in general I am I advise you not to litter the table , do not scatter a lot of small details, do not try to “shove” absolutely all the dishes into the photo - here, on the contrary, smaller ones are best.
And the last rule - there are no rules . Long gone are the days of perfectly lined up plates and mugs in the frame - it looks too unnatural and boring. Improvise by intentionally breaking symmetry. Bite off croissants, drink coffee and don't make your companion wait for the right shot while the dishes are cooling down. After all, it is much more pleasant to see live pictures with an olive pit, a crumpled napkin or a glass of wine almost drunk.