There are lots of people who post their Instagram pictures on WordPress. And there are a lot of plugins that let you incorporate your feed into your blog. But what if you want to go the other way? Publishing content from WordPress to Instagram might be something you want to do, not only to increase your blog’s reach and get more life out of your content, but also to expand your social radius and the content you provide your followers on a totally different platform.
Subscribe To Our Youtube Channel
Yes, really. You might be thinking this is an odd move because WordPress is a blogging platform and Instagram is a photo sharing social network. However, over the past while, people have begun to post longer and longer content on Instagram. It has very much turned into a true microblogging platform in addition to the social network it began as.
And when they opened up the Instagram API to allow external services to post to user accounts, things really opened up.
And given that you are already creating content on your blog, you can absolutely have it perform double duty on Instagram. Best of all, it’s not hard to do. You just need a good plugin. We happen to know of some. How about that?
First off, Blog2Social (as you may be able to tell by its name) is not limited to Instagram. You can use the plugin to post from WordPress to Instagram or any of 16 social media platforms. For this, however, we’re going to focus on Instagram.
The plugin itself is free. You can 100% post to Instagram and the other networks from WordPress using the basic version. The Premium version, however, is where you get access to automation. For $79 USD, you can automatically post to Instagram from WordPress. With the ease of the plugin and the other premium features you get, we feel that it’s worth it. But if you don’t want to pay, you can manually share from the plugin, too.
If you’re iffy on whether you want the premium upgrade, you can get a free 30-day trial of Premium. That way you can check to see which one is the better fit for you.
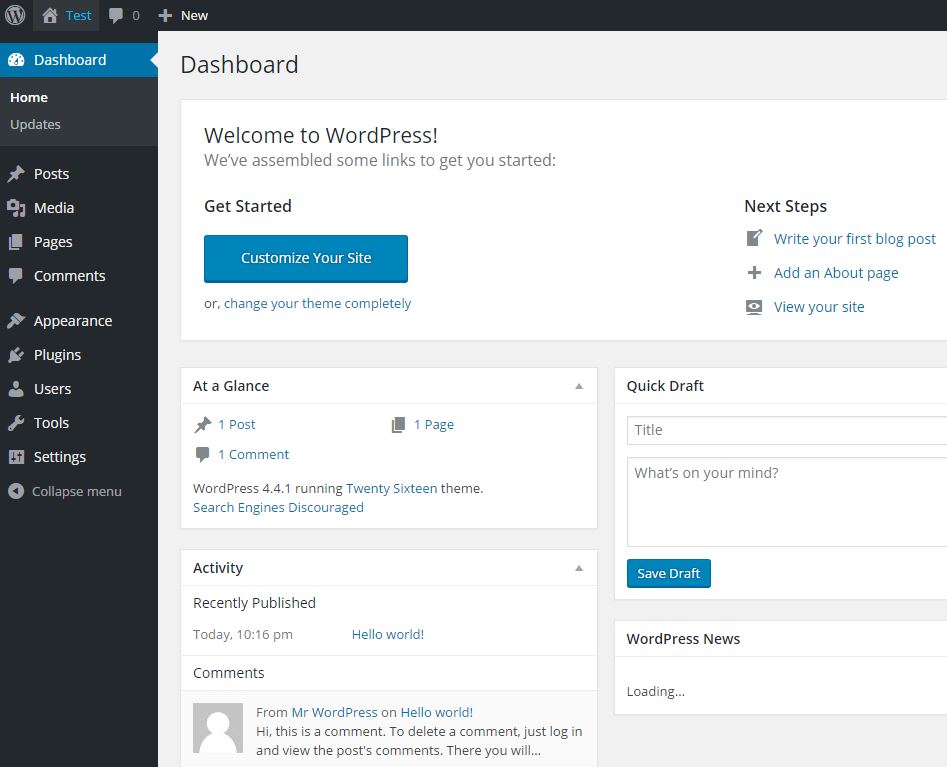
First, you’re going to need to install and activate Blog2Social. It’s in the WordPress repository, so it’s easy to install. Once activated, you will have a new Blog2Social option in your WP dashboard near the bottom.
When you hover over the new item, you should see the Settings page in the menu. Select it and check out the few things you might want to set up first.
In general, free users won’t haves a lot to tinker with here. However, we do urge you to set your time zone correctly since it ties to your social networks, too, and to add a URL shortener service if you use one. Since you’re sharing to Instagram from WordPress rather than a hub like Buffer or HootSuite, you will need to track your own URL analytics. That said, Instagram doesn’t allow live links in the body of a post, so this is less important for you than if you take advantage of other networks, too.
In the Auto-Post tab of the settings page, you can adjust the specifics of how the plugin handles pushing to Instagram on its own. Again, for free users, you won’t have access to this feature, but Premium users do. (And remember the free trial to give it a shot.)
Most sites will only want the Post option selected under New Posts, meaning that only newly published posts will get shared to Instagram. However, some might want to include Updated Posts, too, in order to get more eyes on a newly fixed or more relevant content. If you don’t update very often, this could be a nice way to re-share your content without much (or any) extra work.
Connecting your blog to Instagram is no trouble at all. The Networks page under Blog2Social in your WordPress admin panel gives you a full list of the 16 supported social networks. Instagram is near the top, and you will just need to sign in and verify your account credentials.
When you do sign in, you will be given a warning modal that looks like the image below. It warns that you may receive an email or message saying your account is being accessed from the Cologne area of Germany, and that it’s okay. Their server is located there, so you don’t have to worry about an account intrusion.
Also, Blog2Social will tell you they will contact you via your account for a verification code. This code will be sent to the account email by Instagram. You just need to enter the code into the box Blog2Social shows.
When you’re verified, it’s good to go, and you can start sharing from WordPress to Instagram immediately.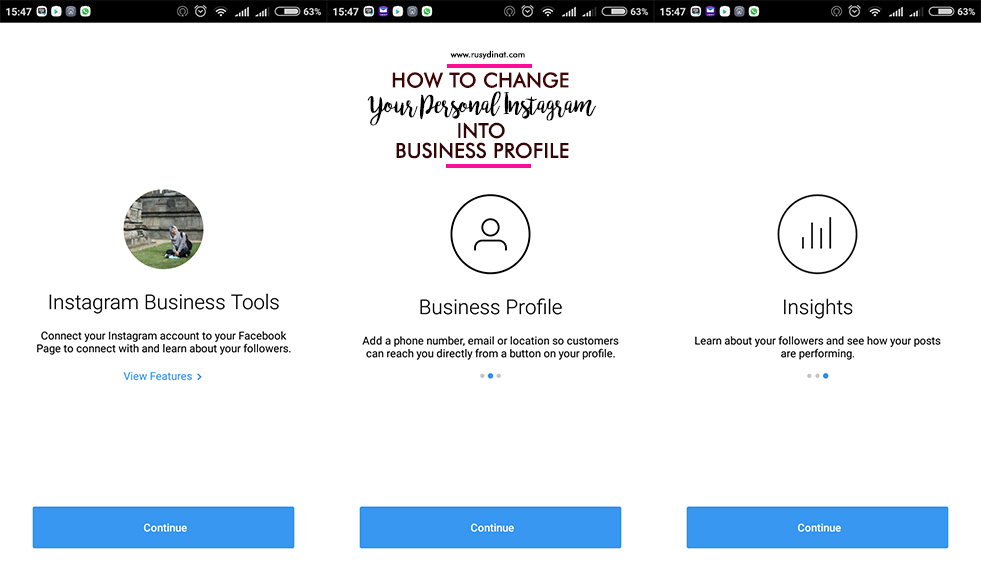
When you start a new post in WordPress now, you will see the Blog2Social Custom Sharing & Scheduling metabox in the right sidebar of the editor. It gives you overall sharing stats for the post (from re-sharing and so on, too), but also tells you whether auto-sharing is on. This will say either deactivated in red if you’re a free member or activated in green if you’re a subscriber.
Even though your posts will automatically be shared to your Instagram account, you may want to post something about them more than just that once.
Navigate to the Site & Blog Content menu item. You should see a list of all posts on your blog. You can filter and search by title, author, what’s already been shared, and so on.
Click on the Share on Social Media button to be taken to the setup page for a new social post.
The page here is straightforward. You can adjust the body and image of the post to be shared, both of which are pulled from the Featured Image and the post text. Decide when to post it, immediately or at a set time. You may also add other social profiles to cross-post with, too.
If you click the Show Calendar button in the lower-right of the pane. The content calendar appears, and you can schedule the post out for whenever it suits your marketing needs the best. Or save it as a draft for later.
Bear in mind that scheduling is also a Premium feature for Blog2Social. But if you’re using this as an automation tool for when you post, the automation of scheduling out Instagram posts from WordPress makes the upgrade doubly worth it.
We feel that the best option for WordPress users to get their content easily and quickly to Instagram is the Blog2Social plugin. It’s simple to use, quick and lightweight, and it offers both free and premium users a host of options. While it does take the Premium upgrade to get the automation, which is where a lot of the power comes, even free users can post from WordPress to Instagram in just a couple of clicks.
What uses do you see for posting content from WordPress to Instagram?
Article featured image by wild0wild / shutterstock.com
Do you want to automatically publish from WordPress to Instagram?
Instagram is one of the largest social media sites in the world with about a billion active users. By sharing your blog posts to Instagram, you can reach more people and get them to visit your website.
In this article, we will show you how you can automatically post to Instagram whenever you publish a new WordPress post.
Why Automatically Publish From WordPress to Instagram?As one of the largest social media websites in the world, many WordPress website owners use Instagram to connect with potential new readers, website visitors, and customers.
Once you have some followers on Instagram, you can use this social networking site to promote your WordPress blog. Every time you publish a blog post, it’s a good idea to let your Instagram followers know about your new content.
To make your blog post stand out on Instagram, you’ll need to add an eye-catching image and an interesting caption. While Instagram doesn’t allow clickable links in captions, you can link to your blog from your Instagram bio, so your followers can easily find your latest posts.
You can also add a link in bio page which lets you showcase more than link to your Instagram bio.
Since running an engaging Instagram account takes time and effort, you can save some of that time by automating the process of publishing to Instagram automatically.
That being said, let’s see how you can automatically post to Instagram whenever you publish a new WordPress blog post.
Automatically Publish from WordPress to InstagramUncanny Automator is the best WordPress automation plugin that helps you create automated workflows without having to write code.
It connects with more than 80 plugins and third-party apps, so you can build smart automation workflows that saves you time. For example, you can integrate Slack with WordPress, create a workflow that automatically posts to Facebook from WordPress, and much more.
The free version of Uncanny Automator comes with over 100 automation triggers and actions.
In this guide, we’ll be using the free version, so you can automatically publish from WordPress to Instagram even if you’re on a tight budget and just getting started. If you want to build more powerful and advanced workflows, then Uncanny Automator Pro includes over 400 triggers and actions.
The first thing you need to do is install and activate the Uncanny Automator plugin. For more details, see our step by step guide on how to install a WordPress plugin.
Upon activation, go to Automator » Settings. Then, simply click on ‘Connect your site.’
Uncanny Automator will now ask whether you want to upgrade to get more credits, triggers, and actions. If you do want to upgrade, then click on the ‘Upgrade to Pro now…’ button and follow the instructions to buy Uncanny Automator Pro.
If you want to automatically publish from WordPress to Instagram using the free version of Uncanny Automator, then simply click on ‘Connect your free account.’ You can always upgrade to Uncanny Automator Pro at a later date.
Uncanny Automator will now show a popup where you can create an account by typing in your name, email address, and the password that you want to use. After typing in this information, click on ‘Sign Up.’
After a few moments, Uncanny Automator will show a message confirming that you’ve set up the plugin.
Next, you need to click on ‘Return to dashboard.’
Before you can start automatically publishing from WordPress to Instagram, you’ll need to connect your Instagram account to Uncanny Automator.
Note: To post automatically, you’ll need an Instagram Business account that’s connected to a Facebook page for your business. Don’t already have an Instagram Business account? The good news is that it’s free. Here’s Instagram’s guide on how to convert a standard account into an Instagram Business account.
To connect Uncanny Automator to your Instagram account, go to Automator » Settings. Then, click on the ‘Premium integrations’ tab.
In the left-hand menu, go ahead and click on ‘Instagram.’
Since Instagram is owned by Facebook’s parent company, you’ll need to connect to the Facebook page that’s linked to your Instagram Business account.
To get started, click on the ‘Connect Facebook Pages’ button.
Uncanny Automator will now guide you through the process of connecting to your Facebook page. Once you’ve done that, Uncanny Automator will ask you to select the Instagram account that you want to use.
After choosing an account, you’ll need to select the actions that Uncanny Automator can take, and the information it can access on Instagram. Since we want to automatically publish from WordPress to Instagram, you’ll need to enable the first two options:
After that, go ahead and click on the ‘Done’ button.
Once you’ve done that, Uncanny Automator will take you back to the WordPress dashboard.
You should now see that Uncanny Automator is connected to your Instagram account.
The next step is creating the workflow that will automatically publish from WordPress to Instagram. Uncanny Automator calls these workflows ‘recipes,’ and they’re made up of actions and triggers.
To build a recipe, go to Automator » Add New.
On this screen, you’ll be asked to select whether you want to create a ‘Logged-in’ recipe or an ‘Everyone’ recipe.
Blog posts can only be published by a user who has a WordPress account. With that in mind, click on ‘Logged-in users.’ Then, just click on the ‘Confirm’ button.
You can now start to build your Uncanny Automator recipe.
First, you’ll need to add a title by typing into the field that shows ‘Add Title’ by default.
We’ll call the recipe ‘Automatically Publish from WordPress to Instagram’, but you can use anything you want.
Next, you need to define the condition that will trigger the action. For our recipe, the trigger is someone publishing a new blog post.
To add a trigger, simply click on the WordPress button in the Triggers section.
You’ll now see a list of all the Uncanny Automator triggers.
In the ‘Search for triggers’ field, start typing the following: ‘A user publishes a type of post with a taxonomy term in a taxonomy‘.
When the right trigger appears, click on it to add it to your Uncanny Automator recipe.
Next, you’ll need to decide the type of content that will trigger the recipe. Simply click on the Post Type dropdown and then choose between post, page, media, or any post type.
Since we want to post to Instagram every time someone publishes a new blog, you’ll typically want to click on ‘Post.’
At this point, you can tell Uncanny Automator to only run this recipe for posts that have a certain category or tag. For example, you may only want to automatically post when a blog has the ‘announcement’ tag.
This gives you more granular control over the content that gets published to your Instagram account, while still getting the time-saving benefits of an automated workflow.
To limit this recipe to a specific tag or category, open the ‘Taxonomy’ dropdown. Here, you can click on either ‘Category’ or ‘Tag’
Once you’ve done that, click on the ‘Taxonomy term’ dropdown.
You can now click on any of the categories and tags to add them to your recipe.
When you’re happy with the information you’ve entered, click on ‘Save’ to save your changes. Uncanny Automator will now show a summary of the action that will trigger your recipe.
The next step is choosing the action that will happen every time you publish a new WordPress post. Start by clicking on the ‘Add action’ button.
Uncanny Automator will now show all the plugins and apps that you can use for the recipe.
You simply need to find ‘Instagram,’ and give it a click.
Once you’ve done that, click on the ‘Search for actions’ field. In this field, start typing in ‘Publish a photo to an Instagram Business account.’
When the right action appears, click to add it to your recipe.
You’ll now see a new set of controls.
To start, we need to specify the image that Uncanny Automator will post to Instagram every time you publish a new WordPress post.
Sometimes you may want to use the same image for every post. For example, you might have used image editing software to create a special image advertising your website.
To use the same image every time, either type or copy/paste the image’s URL into the ‘Image URL or Media library ID’ field.
To get an image’s URL, simply find the image in your WordPress media library.
You can then copy the value in the ‘File URL’ field, as you can see in the following image.
Another option is to use a different image for every WordPress post, so you’re not posting the same image to Instagram over and over again.
Every time you publish a blog, Uncanny Automator can post the blog’s featured image to Instagram. If you need help adding featured images to your posts, you can see our guide on how to add featured images or post thumbnails in WordPress.
To post the blog’s featured image to Instagram, click on the asterisk button next to the ‘Image URL or Media library ID’ field.
Then, simply click on the ‘Search token’ field and start typing ‘post featured image URL.’
When the right token shows up, give it a click to add it to your recipe. Now, Uncanny Automator will get the post’s featured image and post it to Instagram automatically.
The next step is typing in the caption that Uncanny Automator will add to the Instagram post.
One method is to simply type text into the ‘Caption’ box, such as ‘We just published a new post. Read all about it on our blog!’ Uncanny Automator will then use this caption for every single Instagram post.
Another option is to add tokens to the caption. Similar to dynamic text, Uncanny Automator will replace the token with a unique value that it gets from the blog post, such as the post’s title or URL.
This allows you to create more engaging and interesting captions, instead of posting the same caption over and over again.
To see all the different tokens that you can use, go ahead and click on the asterisk button.
In the dropdown menu, find ‘A user publishes…’ and then click on the arrow next to it.
Now, find the token that you want to add to your caption, and click on it.
To create more interesting and helpful captions, you may want to use a mix of plain text and tokens, as you can see in the following image.
When you’re happy with your recipe, click on the ‘Save’ button.
The final step is activating the recipe so that it will start automatically publishing from WordPress to Instagram.
To publish your automated workflow, find the ‘Recipe’ section towards the right side of the screen. Then, simply click on the slider to turn it from ‘Draft’ to ‘Live. ’
Now every time someone publishes a new blog on your WordPress website, Uncanny Automator will make a new Instagram post automatically.
How to Get More Out of Your Instagram FeedAutomatically publishing your blog posts to Instagram is a great way to keep your Instagram content fresh and updated.
To get more attention to their Instagram accounts, often professional bloggers and online store owners will embed their Instagram feed on their websites.
This helps you add social proof, keep visitors longer on your site, increase engagement, and even boost sales.
The easiest way to embed Instagram feeds on WordPress is by using Smash Balloon Instagram Feed. It is the best Instagram plugin for WordPress and allows you to add Instagram content to your website automatically.
There’s a free version of the Instagram plugin that’s used by over 1 million websites.
You can use Smash Balloon to customize exactly how your Instagram feed will look on your website, and the content it shows.
You can even sort feeds based on Instagram hashtags, show likes and comments, create a custom Instagram photo feed in WordPress, and more using its simple editor.
After creating your feed, you can add it to any page, post, or widget ready area simply by using the Instagram Feed block.
For more details, see our guide on how to easily embed Instagram in WordPress.
We hope this article helped you learn how to automatically publish from WordPress to Instagram. Next, you can see our guide on how to embed a Facebook video in WordPress, or see our expert pick of the best social media plugins for WordPress.
If you liked this article, then please subscribe to our YouTube Channel for WordPress video tutorials. You can also find us on Twitter and Facebook.
WordPress is a solid platform - its many plugins and themes allow users to create beautiful and functional websites. However, the best feature of WordPress is arguably its potential to integrate with just about any other online service available. To highlight this point, in this article, we will teach you how to integrate WordPress with Instagram.
Instagram is an attractive platform for sharing photos and building an engaged follower. You can take advantage of its huge potential by pairing it with WordPress and promoting your own Instagram account in the process.
Without any further ado, get ready to learn five easy ways to integrate WordPress with Instagram using a combination of plugins and third-party services: is to show a follow button along with your follower count. The Instagram Followers Widget plugin allows you to do just that.
After you have installed and activated this plugin, the new widget will appear among your options in tab appearance/widgets in WordPress admin panel. The widget contains several fields that you need to fill in yourself, most of which are simple, including Instagram User ID and Access Token .
Instagram User ID is a unique numeric value assigned to each account and you can find yours using this tool. Just enter your name, click on Get Instagram User ID , and then copy the resulting value into the appropriate field for your widget.
To find your Access Token we will use another tool online - click on the Generate Access Token button, log in to your account, this is necessary to give it permission, and then copy the resulting string of letters and numbers into the field Access Token .
Save changes to your widget and update your WordPress site to check how it looks live:
Sometimes you want to go even further and show a little more than just a “Follow” button + number of followers, and this is where the Instagram Feed WD plugin comes in.
After activating the plugin, you will find a new tab named Instagram Feed WD in your control panel. Click on it and select options . Before using the plugin, you must be logged into Instagram in order to discover your access token , so click on the corresponding button and click on save changes when you're ready.
Select the Feeds tab and click on the Add New button. You can choose between two styles for your channel: Thumbnails and Image Browser . Choose the one that suits your style, name the feed and enter the username(s) of the feeds you want to display:
Adjust the rest of the options to your preference, save your changes, and then go to the editor for any page or post where you want to include the feed. When the editor loads, you will see a new option next to Add Media :
Click on it, select your new channel, click Insert , and then test your new feeds with the Preview option. We chose the Image Browser style for this example:
For efficiency, we will reuse the Instagram Feed WD plugin for this method. After all, why install another tool when one can do the job just as well?
Assuming you have already installed and activated the plugin, go to Appearance -> Widgets in your WordPress admin panel, find Instagram WD Widget and drag it to the right place. Next, select the ribbon from the appropriate dropdown - we'll reuse the same one from our previous example:
Click on the Save button and see how our new widget looks in the sidebar.
To achieve this, we need three things: If This Then That (IFTTT), a WordPress installation, and an Instagram account. You should already have those last two, so go ahead and take care of the other step before continuing.
IFTTT allows you to connect multiple apps with action chains called recipes - if you perform a certain action on Instagram, which will trigger a corresponding action on WordPress, for example.
After registering and logging into your new IFTTT account, add both Instagram and WordPress as feeds, search for recipes to automate the process using hashtags to display specific photos, then install it. A little laborious, but simple!
 Integrate Instagram with zapier
 Zapier allows you to integrate WordPress with Instagram in a similar way to IFFFT – in fact, we can configure it to perform exactly the same function as we covered in the previous step. Your first step should be to register with Zapier and then link your Instagram and WordPress accounts. This can be done by clicking on the drop-down menu at the top-right of the screen when logging in, and select option Connected Accounts :
Link both accounts, then return to the Zapier home page to explore the existing zaps (they will only show up if you're signed in). Select "Instagram" from the main menu:
Next, scroll down to the section "Popular Zaps for Instagram" . We are looking for integration “Add new tagged media on Instagram to WordPress” :
Click on Use this zap , and then go through a setup wizard to set up which hashtags to use and on which page the images should appear.
As you can see, learning how to integrate WordPress with Instagram will allow you to handle your social media presence more effectively. Gone are the days when you had to upload every image from your Instagram feed to your WordPress installation and insert them into your pages. If you value efficiency, implementing any of these methods should be a simple task.
Let's quickly recap the five ways you can now integrate WordPress with Instagram:
What's your favorite way to integrate WordPress with Instagram? Share your experience with these options in the comments section below!
If you find an error, please highlight the text and press Ctrl+Enter .
5233
Do you want to automatically post new Instagram photos in WordPress? Instagram is a popular platform that can be used to drive traffic to your website. In this article, I will show you how to automatically post new Instagram photos in WordPress.
Instagram allows you to find new profiles based on your likes. Users can also view profiles with hashtags, location, and reposts.
Automatically posting Instagram photos to your WordPress site is good for both. You can also help users find you on Instagram.
Let's see how to set up Instagram autoposting in WordPress
This method is for users who want to create a new blog post with their latest Instagram photo.
Open the IFTTT website and create a new account.
IFTTT is an online tool that allows you to automate your social media and WordPress.
After you are logged in, you need to click on "My Applets" - "New Applet".
Hover over "+this" and then select Instagram and activate.
A pop-up window will appear asking you to log into your Instagram account and allow IFTTT to access it.
You will then be prompted to select a trigger. Click Any New Photo.
Next you will see the statement "If this then + that". Select the +that icon. On the next screen, search for WordPress to add it as a service.
IFTTT will now ask you to connect your WordPress site.
When you click connect, a popup will appear asking you to provide your WordPress site URL, admin name, and password.
Then you need to choose an action - you can create a blog post with a new Instagram photo or just a photo.
You will then be prompted to match the Instagram fields to your WordPress post. You can add tags, custom captions, and more.
Click Finish and save the applet.
Now every new Instagram photo will be automatically uploaded to your WordPress site.
This method is for users who just want to show their latest photos without creating new blog posts.
The first thing you need to do is install and activate the Instagram Feed plugin.
If you don't know how to install the plugin, watch the 3 Ways to Install the Plugin video.
After activation, a new Instagram Feed tab will appear in the admin panel. Click on it to go to the settings page.
Click on the blue box to access your account: get an access token and user ID from Instagram. You will be prompted to sign in to your account.
After that, you will need to allow the plugin access to your Instagram account.
You will now be redirected to the plugin settings page on your WordPress site with an access key and user ID.
Don't forget to click the save changes button to save your settings.
The plugin allows you to display your photos in any area of the WordPress site. Just edit the WordPress post or page where you want to display your photos and add the following shortcode:
[Instagram-feed]
Save your changes and preview your new post or page.
You can change the number of columns by changing the shortcode like this:
[instagram-feed cols=4]
You can also add a shortcode to the sidebar widget to display your Instagram photos in the sidebar.
In my case, the Enfold theme already contains an embedded widget. If your theme also has this option, then you do not need to install the plugin additionally.
We have a separate review of the Enfold premium theme.
With the Instagram Feed plugin, you can also easily change the look of your photos. Go to the plugin settings on the "Customize" tab.
Here you can change the height and width, layout, background colors and more.
Hope this article was helpful.