Do you want to see the exact time of an Instagram post?
Maybe you want to find out the exact time that you posted a photo on Instagram.
Or maybe you want to find out the exact time that someone else posted on Instagram.
When you post something on Instagram, it will show how long ago it was posted (e.g. 1 second, 1 minute, 1 hour, 1 day).
If you’ve posted something over a week ago, it will show the date of the post instead (e.g. 18 December).
However, it does not show the time that it was posted.
In this guide, you’ll learn how to see the exact date and time of an Instagram post in 4 easy steps.
To see the exact time of an Instagram post, view the post on a desktop, right-click the date, select “inspect”, copy the timestamp, and convert it.
After you’ve converted the timestamp, you’ll be able to see when the photo or video was posted in “RFC 2822 time” format.
If you don’t convert the timestamp, it will not be easily readable.
However, you can only do this on a desktop as you need to open the developer tools.
You won’t be able to do this on the Instagram app as you won’t be able to see the post’s elements.
Below is a step-by-step on how you can do this.
Go to instagram.com > log in > navigate to the post.
Firstly, go to instagram.com on a desktop and log in to your account.
Do note that you cannot use the Instagram app for this as you’re required to inspect the page.
Similarly, you won’t be able to use Instagram on your mobile device’s browser as well.
Once you’re on Instagram, navigate to the post that you’re curious about.
If you found the post on the Instagram app, you can copy its link by tapping on the “triple-dots” icon and tapping on “Copy Link”.
Then send the link to yourself via Email, WhatsApp, Telegram, etc.
If you’re on the user’s profile, click on the post to expand it.
On the other hand, if you’re already viewing the post, you don’t have to click it again.
You’ve completed the first step of the guide—viewing the Instagram post on a desktop.
In the next step, you’ll learn how to inspect the date and time of the post.
Date/time of post > highlight > right-click > inspect.
Once you’re viewing an Instagram post, you’ll see a date under its likes (e.g. November 13).
However, if the photo or video was posted less than a week ago, it’ll show the seconds, minutes, hours, or days since it was posted instead.
Next, highlight the date, and right-click on it.
A pop-up will then be opened containing multiple options—copy, search, print, and inspect.
Click on “Inspect” to inspect the date.
You’ve completed the second step of the guide—inspecting the post.
In the next step, you’ll learn how to find and copy the timestamp of the post.
Navigate to the “datetime” element > double-click and copy the timestamp.
After you’ve inspected the date of the post in the previous step, the developer tools will open.
On the developer tools, you’ll land on the “Elements” tab.
On the “Elements” tab, you’ll see a ton of elements in HTML.
However, don’t be overwhelmed by this as you only need to copy one of it—the “datetime” element.
If you’ve right-clicked and inspected the date of the post from the previous step, the “datetime” element will be highlighted for you.
Double-click the timestamp inside the quotation marks (e.g. “2020-11-13T14:00:14.000Z”) and copy it using CTRL + C.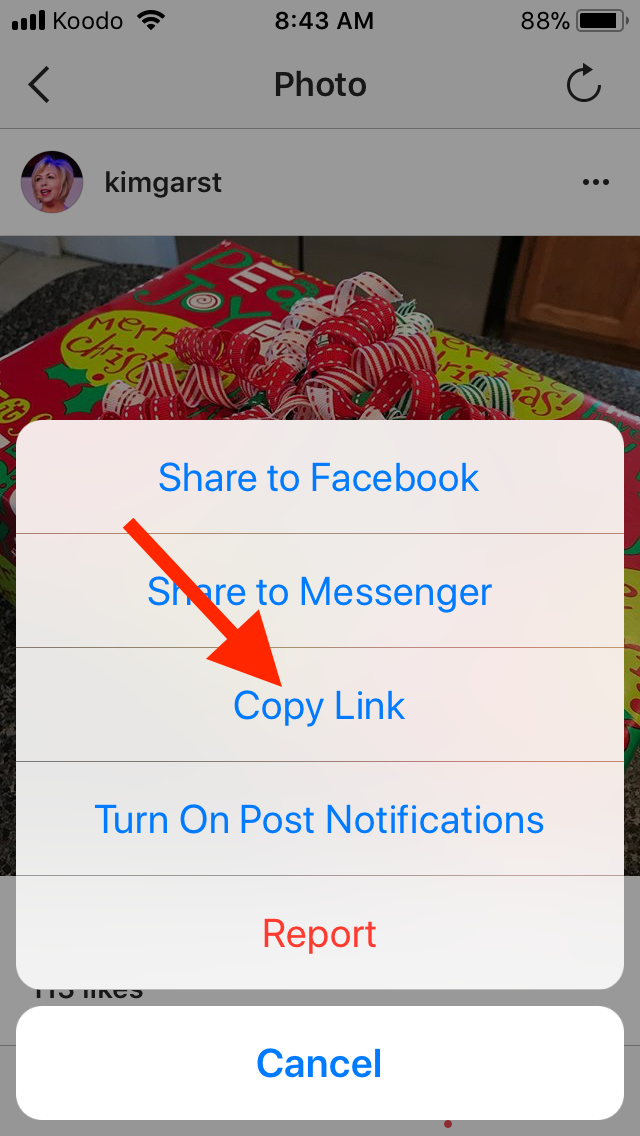
If the element is not highlighted, you must have inspected outside of the date.
To resolve this, close the developer tools, highlight the date, right-click it, and click on “inspect” again.
You’ve successfully copied the Instagram post’s timestamp.
In the final step, you’ll learn how to convert the timestamp into a more readable one.
Coder’s Toolbox unixtimestamp > paste timestamp in “ISO 8601 time” > view converted time in “RFC 2822 time”.
The final step is to convert the timestamp that you’ve copied in the previous step and converting it into a more readable one.
In order to do that, you need to use an online converter.
Use a UNIX time stamp converter like Coder’s Toolbox unixtimestamp.
Then, paste the timestamp in the “ISO 8601 time” field.
After you’ve pasted the timestamp in the “ISO 8601 time” field, check the result (converted date and time) in the “RRFCC 2822 time” field.
The result in the “RRFCC 2822 time” field will be a more readable one.
You should get a date and time that looks like this, “Fri, 13 Nov 2020 22:00:14 +08:00”.
“Fri” is the day that the photo or video was posted, and “13 Nov 2020” is the time that it was posted.
Lastly, “22:00:14 +08:00” is the exact time that the photo or video was posted.
Congrats, you’ve successfully found out the exact date and time of the Instagram post.
When a picture is posted on Instagram, the date and time at which it was posted can be seen under its comments.
Hence, you can find out when a picture was taken on Instagram by looking at its date/time under the comment section.
For example, if a picture was posted an hour ago, the timestamp, “1 hour ago” will be shown.
However, if a picture was posted more than a week ago, the timestamp will be changed to the date at which it was posted instead (e. g. December 23).
When the picture is more than a year old, the year that it was posted will be shown.
Alternatively, you can inspect the date and time of the post by navigating and inspecting it on a desktop.
There isn’t a feature on Instagram where you can search for posts by date as there isn’t a filter for it.
When you post something on Instagram, the date and time of the photo or video will be shown.
However, you cannot search for it by date on the Instagram app—you have to use a third-party app for this.
You can only search for stories by date in the archive section of Instagram.
To access your story archives, navigate to your profile > menu > Archive > Stories archive > calendar tab.
Once you’re on the calendar tab, you can scroll through it and see the dates when you posted a story.
Finding out when an Instagram photo or video was posted is simple.
All you have to do is to navigate to the post and check the date and time under it.
However, if you want to know the exact time of an Instagram post, you need to follow the steps above instead.
On the other hand, if you want to know when a story was posted, you can simply head over to your stories’ archive.
Your posts’ archive does not show the exact date of your posts, so there’s no point viewing it as it’s redundant.
How to Know When An Instagram Account Was Created
Can Someone See That I Viewed Their Instagram Highlight?
How to See How Many Videos a YouTube Channel Has
Lim How Wei is the founder of Followchain. Feel free to follow him on Instagram.
TagsInstagram
FacebookTwitterLinkedIn
Every event that happened in the past has a date stamp attached to it. The historical activities from a political, economic, or social perspective are traceable to a particular date in the past.
No wonder we have holidays mandated by governments all over the world to honor unsung heroes and celebrate memorable events.
For instance, valentine’s day, a season of love, is celebrated by everyone. But do we know the exact time the events transpired in the past? You could take a good guess, yet end up wrong.
I doubt if there’s anyone alive from that century to provide the accurate time these events occurred.
In this situation, however, the time doesn’t matter as much as the date it symbolizes.
But can the same be said for Instagram?
Social media, as we know it, is rife with countless posts- Photos and videos. Sometimes uploads could be so much that you only get to see as you scroll.
Except you know the Instagram handle or username of a person, you may never see the images or videos you’re looking for.
And if you’re lucky to have the handle, you may have to scroll to find that which you want. Even at that, if the person has over a thousand posts, the task becomes harder.
A timestamp at the right-hand side of the screen shows the time of post but it is never the exact time that is seen.
Most times, Instagram displays the time as the hours that have gone by since the post was uploaded.
The option provided doesn’t guarantee that you would be able to provide the exact time you uploaded a picture- It provides a faint idea which may not be helpful especially if you seek to be accurate in your findings.
So, is it possible to see the exact time you posted a video or image? Does Instagram have a feature in their settings for this? Or do I have to install a third-party app to get the information?
Whether this is possible or not depends on your familiarity with the working of the Instagram app. Or better still, the ways you’re about to learn as you read this article.
Now come along, let’s explore this in detail.
How to See the Exact Time of an Instagram Post?
Yes! that’s for sure.
A lot of folks don’t think it is possible because it isn’t shown on the app. I guess people still underestimate the powers of technology and the intelligence of software programmers and developers.
When you upload a picture or video on Instagram, the app shows how long ago it was posted. For instance, if your post was an hour ago, the timestamp is recorded as 1 hour ago. This changes with time. Because hours become days, weeks, then months.
After a couple of days, weeks, or months, you need to know the exact time a post was uploaded maybe for record purposes or to be accountable.
You log in your details on your Instagram app (mobile or desktop) to check and the exact time you posted your photo or video is not seen.
With the colossal figures posted per day, it becomes a case of searching for a needle in a haystack. Especially if you have to get the timestamp from a page other than yours.
According to research, over 95 million posts are shared on Instagram daily.
That’s a whole lot.
But it shouldn’t come as a surprise given the number of users on Instagram is more than a billion.
With that figure recorded daily, over 40 billion posts have been uploaded since the inception of the app in 2010.
Isn’t that mind-blowing?
With the human population roughly at 7 billion people, that figure can only go in one direction- UP.
With this in mind, the number of Instagram users will also follow the same trajectory, as social media use and engagement expands globally.
Consequently, these jaw-dropping data and projections might make tracking the exact time of your post tricky.
But here’s the thing, there is no virtual challenge without a practical solution. You can know the exact time you added a picture to your Instagram account.
Still in doubt, keep reading this article…
So, here we are, at the core of the article. You may want to get your laptop or launch your Instagram app as you follow the steps we shall discuss in this section.
There are two ways to know the exact timestamp on your posts:
You know how the solution can be right in front of us, yet we do not see it, yeah? Well, that’s the case of using this method to extract your timestamp for your posts.
Many Instagram users are only familiar with how to upload images, videos, comment, like, and share posts- which is fine. I wouldn’t want to bore myself with all that technicality the app has to offer either.
After all, I want to enjoy myself, share memories with others, and hold interesting conversations. No one signs up as an Instagram user to be a part-time tech expert. Sounds funny, but it’s the truth.
Let’s dive right in.
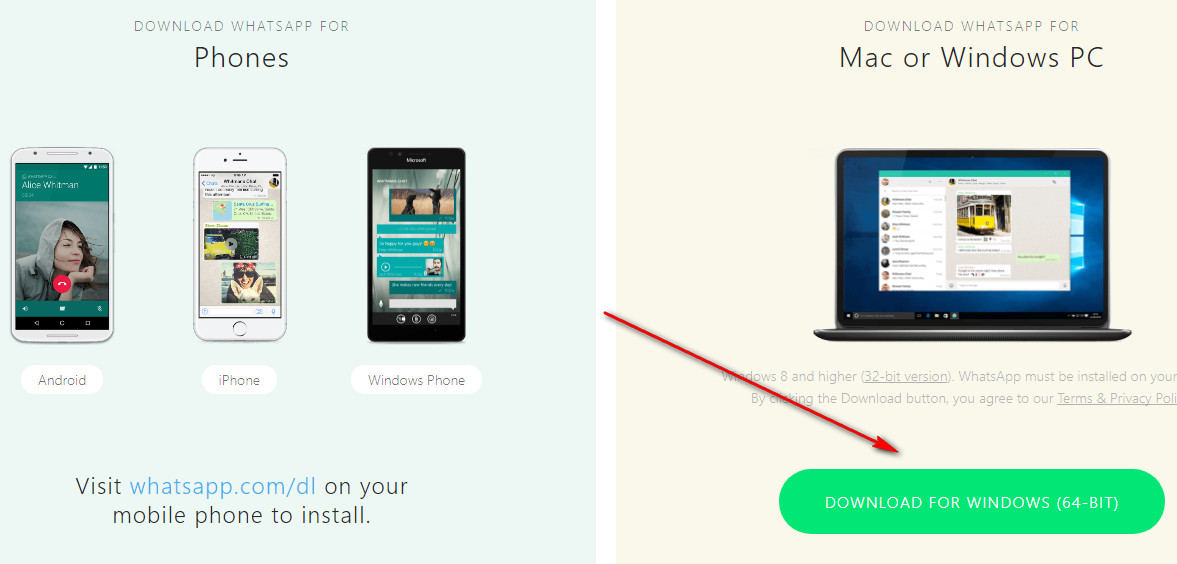
You may have your Instagram app either on your laptop or mobile device. But to get the best out of this method, you should view the image on your desktop or laptop. The Instagram app on your mobile phone cannot be used for this.
· Log in to your Instagram details and sign in to your account. This should take less than a minute.
· Once you’re signed into Instagram on your desktop, locate the post you are interested in.
· If the post you want a timestamp for was found on a mobile Instagram app, click on the triple-dot icon and select “copy link“.
· Get the link on your desktop to access the Instagram post.
Sometimes, you may find an interesting post on another user’s profile. Click on the post to get the link.
When you view the Instagram post, notice the date right beneath the number of likes the post has garnered. The representation of the date could be in hours, minutes, or seconds if the post is less than a week old.
· Highlight the date beneath the likes and right-click on it.
· Once you do this, a pop-up menu will appear.
· Select the “inspect” option.
· After clicking on the select option, the developer section containing codes appears on your screen.
· Click on the “element tab” option that appears at the top of your screen.
· Although a developer has the expertise in the computing language (HTML) of the app, what you need to be on the lookout for is the “timestamp”.
· Locate the time stamp and double click (For example, 2019-10-12T15:00:14.000Z)
· Copy the timestamp.
· There you have it; you have successfully located the exact time of your Instagram post.
In case, the element tab is not highlighted in the developer section, close the tab and repeat Step 3.
Step 5: Use an Online Converter
· Now that you have the time stamp you copied from step 4, use an online converter to get the exact time of the post.
· Use the Coder’s Toolbox UNIX timestamp
· Paste the copied link from step 4 in the “ISO 8601 time” text field
· Once pasted, the timestamp is immediately converted to the date and time in the “RRFCC 2822 time” text field.
· You should get a result like this: “Mon, 12 Oct 2020 15:00 +08:00”
· 15:00 +08:00 is the exact time the image or video was posted.
Nowadays, several third-party apps can help you complete different tasks. Instagram is no different. To know the exact time or date of an Instagram post can be tasking.
Unlike the steps we discussed earlier, some people prefer the option of using a third-party app. You might fall in that category. If you do, then this method will excite you.
InstaRealDate is one of such third-party apps that makes viewing the exact time of an Instagram post simple. Here’s how to use this app:
· Download the InstaRealDate App on your desktop or mobile device.
· Once downloaded, it is automatically configured to the workings of your Instagram app.
· Launch the app on your device and navigate to the posts you are interested in.
· At first, the app displays the day, month, and year of the post and leaves out the exact time of the post.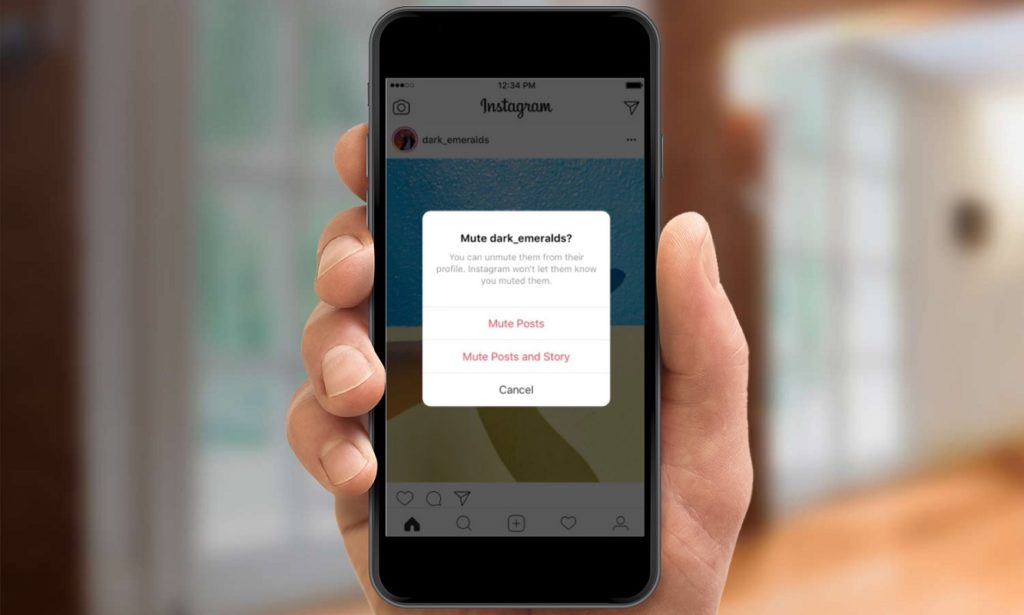
· Click on the button situated on the right side of your screen to access more information.
· You will find the exact time of the post once you click on that button.
Some users value their privacy on social media. Even as Instagram allows everyone sees your posts, some settings can ensure no one has unauthorized access to your posts.
If a person follows your account, you may have to block the user to restrict access to your videos and photos.
Let’s talk about these ways:
If you happen to be a new user on Instagram, you can tweak your settings in such a manner that another user only views your page after you grant them access.
There are a lot of accounts like this. People who have their privacy notifications turned on probably prefer to live a quiet life. Maybe they just love being private.
When you get a request alert from a random person on Instagram, you’re at liberty to either deny or grant access.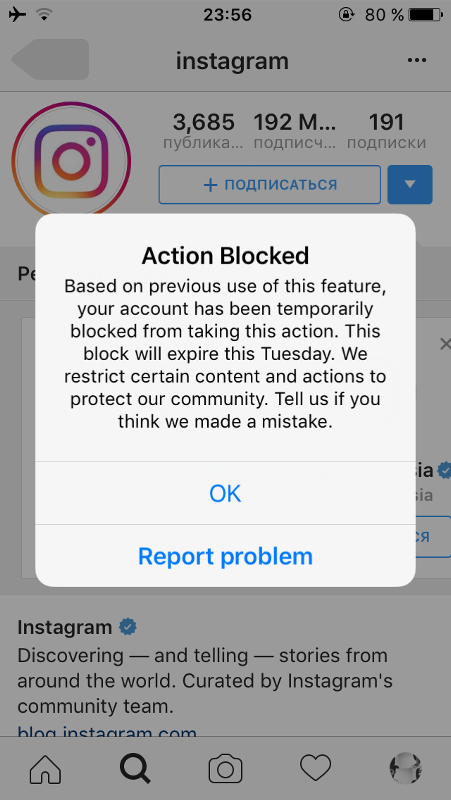 At this point, it’s all about your discretion.
Even at that, the use of your Instagram account is not limited. You could still send direct messages to whoever you’d want to reach out to.
Instagram users who activate the privacy settings after amassing a lot of followers sometimes use the block button. At other times, you could block a follower whenever you feel the need to.
I’m sure you may have experienced a situation where you used the block button for personal reasons. It may not necessarily be on Instagram. A block button is available to almost every social media app such as Facebook, WhatsApp, Twitter, and Snapchat.
When you block a follower, the person is not alerted by Instagram. They interact with your page and realize they don’t have access to your videos and photos.
However, Instagram permits blocked users to send you direct messages.
Have you ever been blocked by an Instagram user? Or did you do the blocking?
Personally, being blocked by a fellow Instagram stings, especially when the cause is unjust.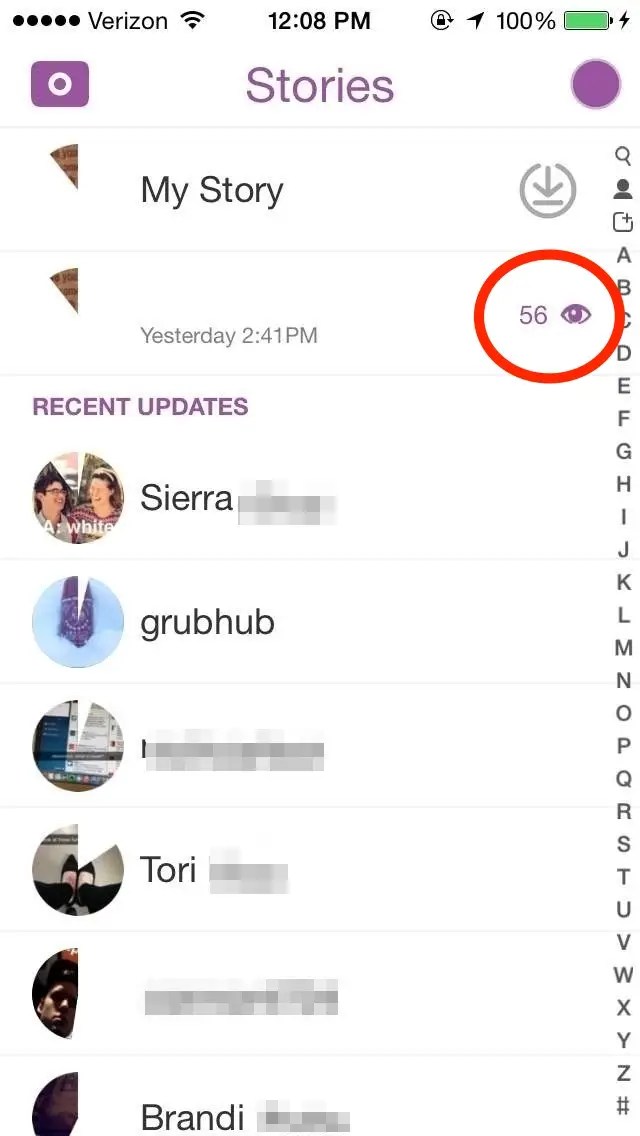 But we each have choices to make that we deem beneficial to having a great social media experience.
Unfortunately, activating the block button doesn’t completely cut off the relationship with the user. Although blocked, the user can still view your likes and comments on posts from mutual followers or friends.
Lastly, if your privacy settings are visible to the public, all users (blocked and unblocked) can view your Instagram page when they log in using a desktop instead of the app.
This article has explored ways of seeing the exact time of your post on Instagram. If you weren’t on your desktop at the time of reading, then you should try at least one of the methods afterward.
You realize that there is a whole lot to learn about the technical areas of Instagram. As discussed in one of the sections, there are no social media problems without solutions. Maybe just undiscovered solutions that require a little internet research from you.
Google may not have all the answers to social media problems, but it certainly gives you an idea of how to fix them. I hope this article provided the results you desire to enjoy all that Instagram has to offer.
Tags: Is it possible to see the exact time of an Instagram Post?, What are the ways to see the exact time of an Instagram post?
SearchThe most effective Instagram Growth tools on the Internet.
The most advanced and effective Instagram Automation tools. Grow your Instagram accounts without lifting a finger.
© 2021 All rights reserved. Team Gramto
How did followers come across your account? What posts do they most often save, which ones do they forward to friends, after which ones do they most often decide to call or write? What cities do they live in? How old are they? What days of the week and what time of day are they most active on Instagram?
Statistics Instagram allows you to find out this most valuable information and, thanks to it, work more accurately with your audience and increase sales.
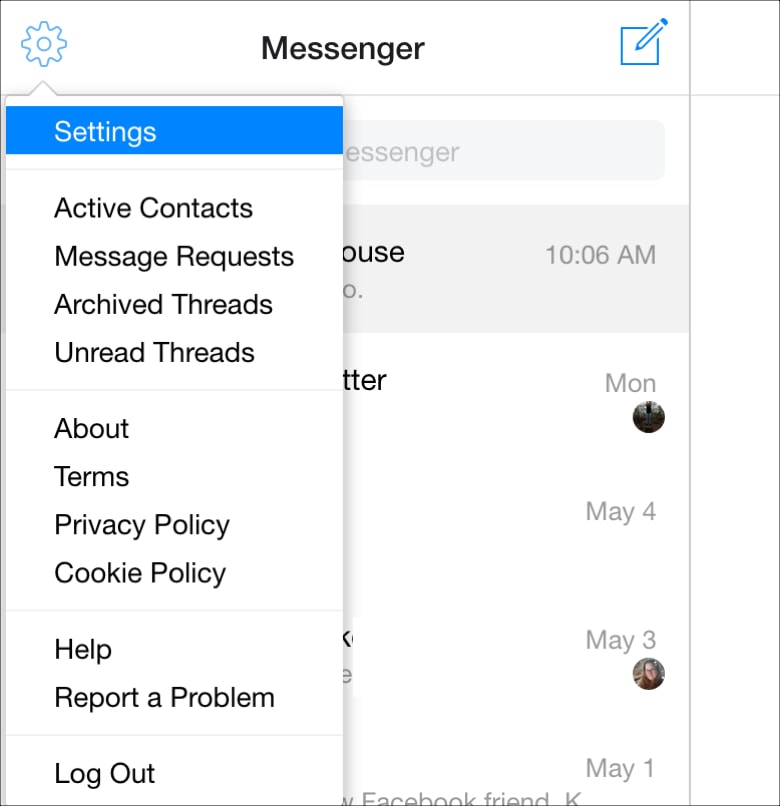
To access statistics, you need to switch your account to a business profile. Click on the menu (horizontal bars) in the upper right corner, select from the list "Settings" , then "Account" and "Switch to a professional account" .
More on this: "How to create a business account on Instagram."
Statistics will be collected from the moment you switched.
Now under each post we have a sentence "View statistics" . By clicking on it, we see several numbers.
We had information about the number of likes and comments before. But now we also have "airplane" - the number below it shows how many times your publication was sent to direct to other people. And also "flag" - it signals how many times your post has been saved.
"Profile visits - 9» . What do these words and numbers mean? The fact that 9 people who viewed the publication wanted to go to your profile.
Is it good or bad?
It may be different. This could mean that your subscriber thought:
“Wow, what a great post. I really wanted to buy from them. I’ll go see what kind of company this is, maybe I’ll ask them a couple of questions about the product.”
Or vice versa:
“Who wrote such nonsense? When did I manage to subscribe to this? What for? I’ll go look at their profile, maybe I’ll remember why I signed up, if this is not something promising in the future, I’ll unsubscribe as soon as possible.
It shows how many people actually saw your post. For some, this figure may be shocking. Did you think that you have 10 thousand subscribers, and statistics show that each of your posts is seen by no more than 1 thousand people? Yes, it happens, and very often. Coverage from 30% to 60% is a good indicator for commercial accounts, 10% -15% is very common.
By "swiping up" (i.e. tapping the stats with your finger and dragging it up the screen), we see more stats.
"Subscriptions - 2". This entry indicates that two people who saw your post decided to follow your account. That is, they were not subscribers before. How do you know how they came across your post? The answer may be further.
"Scope - 1026" . The post was seen by 1026 people, we have already talked about this. Curiously, more than half of these people (52%) were not our subscribers. How did they see our post? We will also look for the answer to this question in the following data.
"Impressions - 1597" . This entry means that the post was shown 1597 times. And Reach showed that our post was seen by 1,021 people – a lot less. How can this be? Very simple. The number of impressions is almost always greater than the reach, which means that part of the subscribers saw your post two or more times.
"From the Main - 770" . That is, 770 people saw your post just in their feed. These are your followers.
"From hashtags - 582" . 582 people came across this post thanks to hashtags. Here is a possible answer to the question of how 52% of people who were not our subscribers found our post, and where these two new subscribers came from. All of them came to you by hashtag, and two of them became interested in the account and stayed. Unfortunately, this cannot be said for sure, we can only guess by comparing the data on hashtags, subscriptions and the number of people reached who were not subscribed to you before.
"From profile - 7" . These seven first came to the main page of your account, and from there they already went to the post. In what cases does this happen? For example, another Instagram account linked to you, people came to your main page, and from there they went to the post.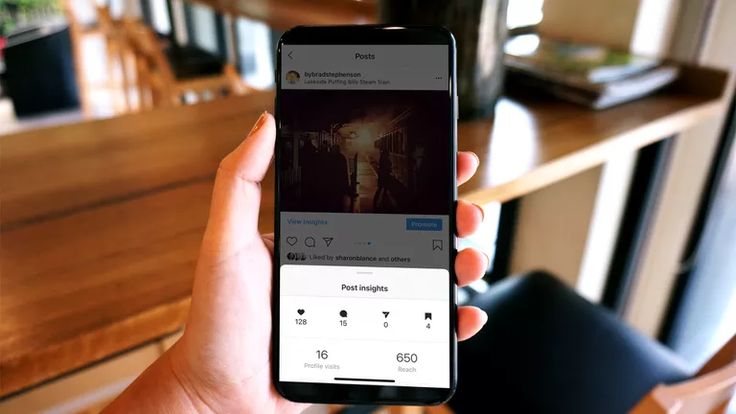 Either the link to Instagram was on your website, or customers saw the name of your account in the office. There may be many options. The main thing is that people first went to the profile, and then they came to this particular publication.
"From Another - 240" . This line tells you the number of people who came to your post from other sources. For example, someone sent them a link to this post in Direct or shared it in another way (in an email, via messengers, on a website), or your post was saved, and then they looked at it again, and this re-view was counted in the line " From the Other."
This way we can see the statistics of any post that was published after switching to a business profile.
We also have the opportunity to find out the statistics of the account as a whole.
To see the account statistics, we again need to go to the menu (horizontal bars in the upper right corner) and click on the line "Statistics" .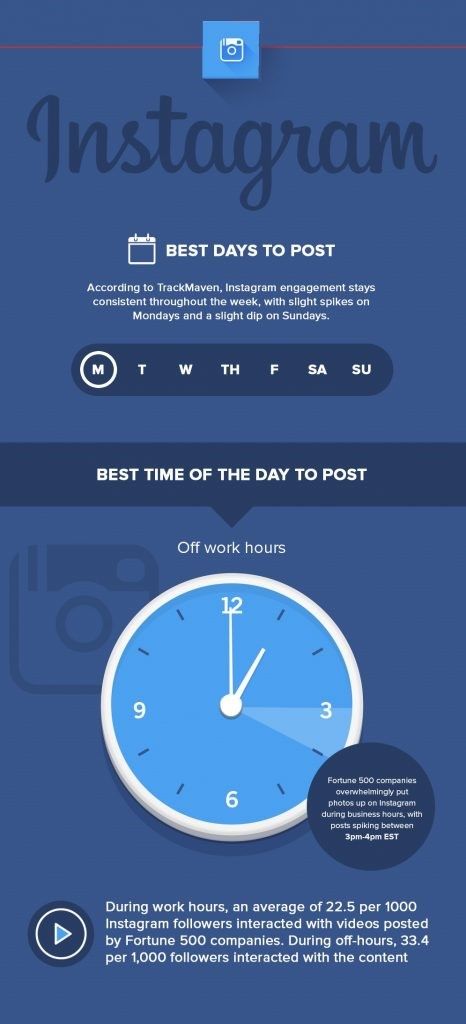
Here we see tabs "Content" , "Actions" and "Audience" .
In this tab, by default, we are shown our posts and stories sorted by reach. First, the most popular - that is, those who received the largest coverage, and then in descending order.
We are also told how many posts and stories we had in total in the last week (45) and how this compares to the previous week (5 more).
We can sort both posts and stories by different parameters and for different periods. By clicking on the button " All ", we get the opportunity to select posts with the most likes - to do this, select the line with the word "Like marks" . Or the one with the most comments. Or separate those posts, after viewing which readers started calling you - for this you need to select "Calls" . Or the ones that reposted the most.
You can also see the most successful posts by the sum of all these indicators - likes, comments, calls.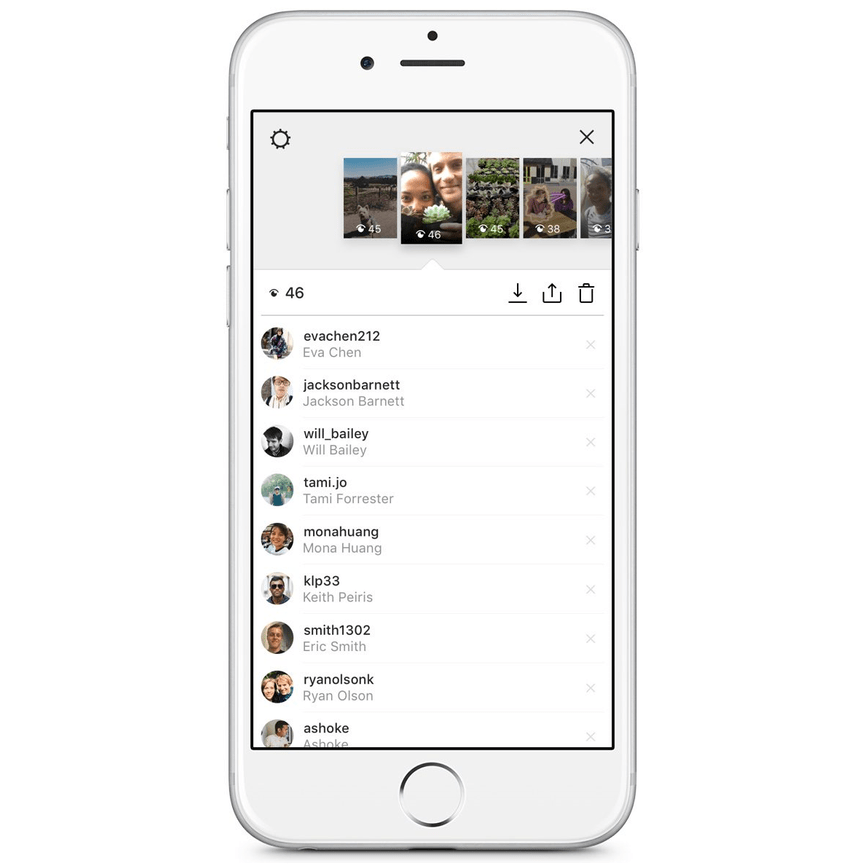 To do this, select the first line - "Involvement" .
We can also make a selection for different periods - a maximum of 2 years, a minimum of 7 days. And see separately the comparative indicators of photo posts, video posts, carousels.
The same with stories. We can sort them by ostentatious indicators - "reach", "clicks to the site", "calls" and others, and also make a selection for different periods, but the maximum possible period in the case of stories is 14 days.
In this tab, you can see how reach, impressions, and other important indicators have varied over the past week - the number of visits to the profile, clicks on the site, clicks on the "Getting Directed" button.
Featured shows our total reach and impressions for the last week.
We see that the coverage was 3854 people, and it is very much reduced compared to the previous week.
Total impressions - 17698 people, and also a noticeable decrease compared to the previous period.
Also on the graph, we can see which days the coverage was more or less.
And by pointing a finger at this graph, we see specific figures - one and a half thousand coverage on Monday and Wednesday, almost the same on Tuesday, on other days much less.
In the "Interaction" block, you can see how many visits to the profile, clicks on the site from the profile, clicks on the button "How to get there".
We are also shown a graph of the distribution of this activity during the week. We see that the most actions were on Wednesday - 57 pieces.
To see specific figures, touch this graph with your finger.
In this tab, we can see how the number of your subscribers has changed over the past week, in which cities and countries your subscribers live, how old they are, what time they are most active.
This tab gives us information about the number of subscribers. In particular, about how many people have unsubscribed from us, how many have subscribed, and what the result is an increase - it can be positive and negative, when after all the subscriptions-unsubscribes, the number of subscribers has decreased.
In our example, 12 unsubscribed, 16 subscribed, the final result is plus 4 subscribers this week.
Just below we see a graph of the number of subscribers. We see a failure on Saturday. We can press our finger on this failure, and we will be shown more detailed information about it. We see that on Saturday, December 7, three people unsubscribed from us and no one signed up.
And if we want to find out what kind of publications led to such a result, we can click on the button "View publications" and we will see just posts and stories for December 7-8 and statistics on them. In this way, you can understand which publications readers do not like. Although in our case the numbers are too small to speak of conclusions. Rather, they are within the bounds of statistical error.
Below we can see information about the cities in which our subscribers live.
As expected, the Moscow children's center, whose account we are considering, has the majority of subscribers from Moscow.
And by clicking on the button "Countries" , we will find out from which countries in what proportion we have subscribers. Also, most are expected from Russia, but there are also from Kazakhstan, the USA, Ukraine and even Brazil.
In the next section, we can see what age men and women are in our account.
We see that our subscribers are dominated by people aged 25 to 34 years, slightly less women and older men - from 35 to 44 years old.
Interestingly, our account is also followed by schoolchildren under the age of 17 and older people over 65. Where Instagram has gone!
Here we are shown that 71% of our subscribers are women, only 29% are men.
This section is called “Followers” for some reason, although it would be more correct to call it “Followers Activity”, because that is what it shows: at what time of the day and what days of the week your followers are most active on Instagram.
By clicking on the button "Days" , I see that the most intense color is on Monday, Tuesday and Wednesday. So, these days the audience is most active. The palest one is on Saturday, apparently on this day our subscribers take a break from gadgets.
With the button "Clock" you can view the activity by the clock. Expected little activity around 3-6 am, maximum activity around 6 pm.
So, we figured out what Instagram coverage is and why everyone is fighting so hard for it, how to see the place of residence and age of your subscribers, how you can really isolate the most effective publications.
I hope that this article will help you conduct high-quality analytics of your account and, thanks to it, work effectively with your subscribers and earn more.
I will not pour water about its importance, you already know this. Therefore, I go straight to the point and answer the question of how to view statistics on Instagram.
Important. Each “View” of the profile has its own characteristics, so some metrics may differ. And more metrics depend on the completeness of the profile (active buttons, links, etc.).
In order for you to have statistics at all, you need to switch to a business profile or an author account. It's a matter of three minutes. Go to Settings -> Account -> Switch to Professional Account.
Next, the social network will prompt you to select categories and type of account. After switching, new buttons will appear under the header.
To see some statistics, you need to maintain a page on a professional account for at least 7 days. Otherwise, she simply will not gather.
Now go to the statistics - click on the button of the same name. You can choose how long to display the data.
The number of unique accounts whose owners have seen any of your igtv posts, stories or videos at least once. Now about the metrics below:
Next, you can see the reach of popular posts, stories and IGTV videos.
If you need, for example, a different post, or if you want to see coverage for all posts, click next to the "All" section. Next, all posts will open, and you will see the reach on them in an oval.
In addition, you can select a period - display publications for the last 2 years, year, 6 months, 3 months, 30 days, 7 days and the desired metric to check.
By the way, read our article - how to increase the coverage on Instagram, it will not be superfluous
Popular posts based on interactions are also shown below.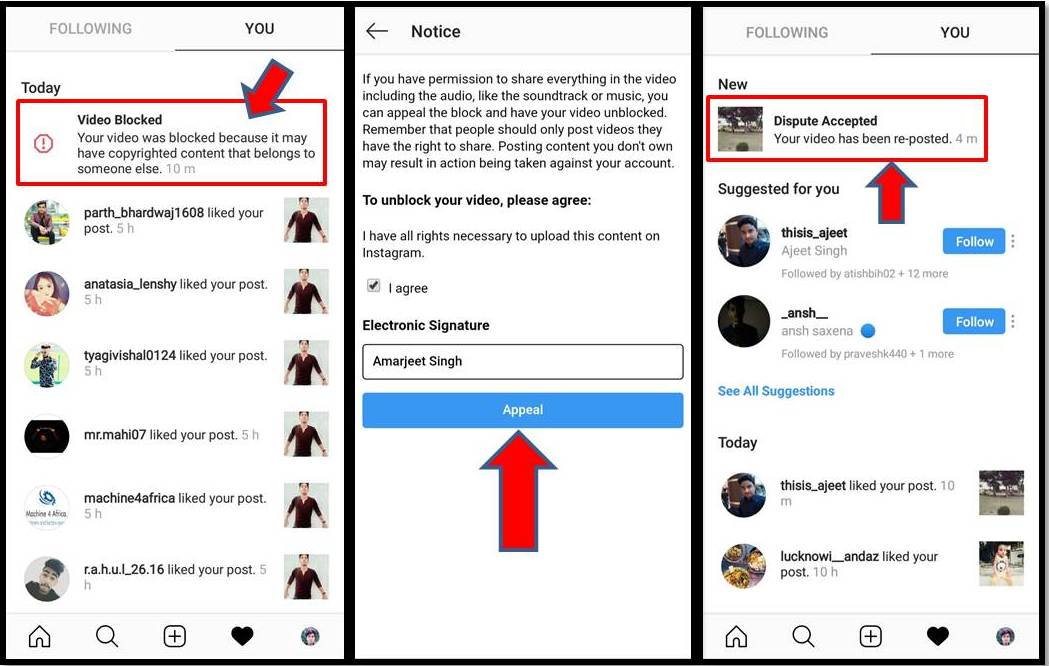
Important. Evaluate profile quality with InstaHero Follower Analysis. The service will provide you with a complete analysis of your audience and its activity on your page. Based on the results, you have every chance to increase coverage! Click and make a free analysis -> InstaHero
The section collects all statistics on your audience for the selected period. You can see the total number of subscribers, the growth over the period in percentage and in numbers, as well as the number of unsubscribes.
Audience data is available to you: by city and country, by age, gender, and most importantly - the periods of the greatest user activity in your profile by hours or days.
Audience dataLifehack. If an SMM specialist has already worked on the profile before you, it is useful to check for bots. This will help identify a real, live audience.
The number of posts, stories, active promotions and IGTV videos you have posted during the selected period, including today.
For each type of content, you can also go to the section with all, for example, stories and select the required metric.
You can view the statistics of an individual publication without opening the general one. Select a post, click "View Statistics" under it, and voila, analyze the metrics.
To view the story statistics - open the desired story, go to views, then click on the chart next to it.
You can also check advertising statistics in Instagram itself. This is done by looking at the statistics of a story or post that is being promoted as a sponsored post.
Advertising post Lifehack. Want to get targeted subscribers for only 1 ruble ? With the subscription page service - Instasub, it's real, besides, just : You create free useful material, launch ads on it with the call to “download for free”. And in order to receive it, the user must subscribe to you (this is already checked by the service). Click, see how to do it and test - Instasub .
Now, according to the laws of the genre, I will tell you in detail about the metrics that can be seen in the statistics of promotions.
Interactions:
Interesting:
Promotion:
 Duration of advertising in days;
 Audience:
Similar metrics are shown by the statistics of promotions carried out with the help of stories. The only difference is that it is supplemented with details about scrolling through stories, as well as exiting them.
Speaking about advertising, I will also mention a proven way to increase sales through Instagram. Chatbot from MyBotan will help you. Chatbot in Instagram Stories is something new, right? Find out about the new tool, which is incredibly increasing sales, at the link.
Profile statistics that can be obtained using standard Instagram tools do not provide all the information necessary for successful profile promotion. Therefore, many owners of commercial accounts use third-party services.
There are many different services for fast detailed analytics on Instagram. We recommend the first 3 in the table based on user experience. But this does not mean that the rest are somehow bad, we just did not test them and cannot vouch, but they will also provide you with analytics.
| Service | Free period | Cost |
| Livedune | 7 days | from 400 ₽/month |
| Instahero | No | from 99 ₽/check With the promo code "INSCALE" 30% discount for a full analysis |
| Trendhero | Single account verification | 732 ₽/month |
Details on how to view statistics through services were described in our other article, so also go there and study. We also talked about how to analyze competitors.
Now about how to view Instagram statistics through Facebook. I will say right away that Facebook is for advanced users, and it shows the statistics of ONLY your advertising posts. But with a huge number of different metrics.
And there is a special tool for viewing statistics from Facebook - Ads Manager. It connects through the Instagram account associated with the Facebook profile.
MetricsI won't list all the metrics. I will touch on, perhaps, the minimum list of standard metrics that Ads Manager shows.
By the way, Ads Manager allows you not only to view, for example, visit statistics, but also to create an advertising post for Instagram, but its settings are much more complicated, and that's another story.
As advertising
We figured out how to view statistics on Instagram. And I remind you that a systematic analysis of traffic statistics, interactions, etc. helps to maintain an account more efficiently, and due to this, increase not only coverage, but also engagement (and this is a very important indicator, you know yourself). You can even see who likes whom on Instagram, but more on that another time.
And in conclusion, I would like to highlight three main points in which statistics will become, well, simply an indispensable assistant.
GET INTO SOCIAL NETWORKS ALREADY 40 000+ WITH US
Catherine
Sergey
Ivan
Elena
Catherine
Subscribe