Looking to save Instagram photos and add user-generated content (UGC) into your Instagram strategy?
Start by saving photos on Instagram and sharing them on your feed and stories. While UGC is a great way to grow and engage your community — it comes with its own set of rules.
In this blog post, we’re outlining how to save Instagram photos, credit the original creator, and best practices on how to reshare (legally) on both your feed and Stories.
With Instagram testing removing likes in certain countries, there’s been a lot of talk about Instagram Saves and what it means for the Instagram algorithm.
What we do know is: the more saves a post gets, the higher the quality content is, the more likely it’ll show up in people’s feed.
For tips on how to get more Instagram Saves on your Instagram posts, read our blog post where we go deep into Instagram Saves.
So, how can you use Instagram Saves to elevate your content strategy? One way to do this is by searching for branded content (or on-brand content) on Instagram and saving it to a Collection for future use.
Collections are an awesome way to keep your saved content organized — think of it as a Pinterest board, just on Instagram.
Step #1: Select the post you want to save.
Step #2: Tap the bookmark icon on the bottom right corner.
Step #3: To see your Saved posts, go to your profile and press the 3 lines in the top right corner.
Step #4: Press “Saved”
Step #5: To create a collection, tap the ‘+’ button in the corner, and name your collection. Press “Next” to save.
Step #6: Now, select the photos you want to add to the collection.
Step #7: Press “Done”.
While the feature is there to keep your favorite posts together in one place, there is currently no way to save pictures directly to your camera roll from Instagram.
If you want to save images to your camera roll for future use, it’s best practice is to reach out to the original creator for permission. This is a crucial step — It’s very important to correctly credit the original creator.
Another way to do this is by using Later’s UGC Tool. With the UGC tool, you can search branded hashtags, posts you’re mentioned in and/or tagged in.
Ready to start using UGC in your Instagram marketing strategy? Later makes it easy for you to find, plan, and schedule your user-generated content.
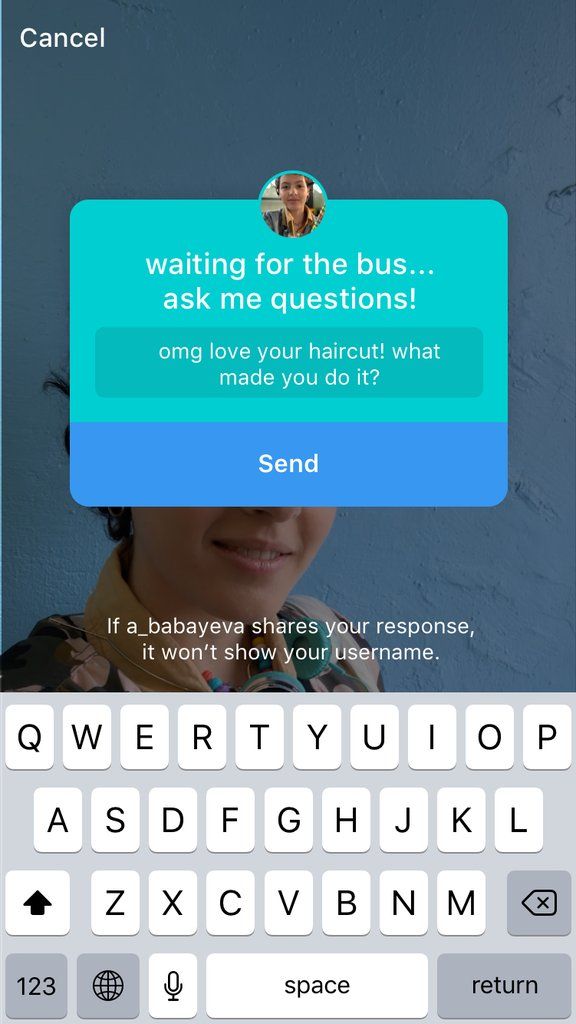
When you see a post on the News Feed from another profile that you’d like to share, or are tagged in a post, Instagram makes it easy to share it on your Instagram Stories.
When you find the post you want to share, tap the paper airplane below the post.
You’ll notice the “Add post to your Story” option — tap to see the feed post as a sticker on your Instagram Stories.
Here is where you can creatively edit your Stories. Tap to drag it to a new position, add in GIFs or text, and pinch the screen to change the size. The creative options don’t stop there — check out some of our design hacks.
Seeing as 55% of consumers trust UGC over other forms of marketing, now is a great time to consider UGC in your marketing strategy.
Cosmetics company, Lush Cosmetics, makes UGC a huge part of their marketing strategy.
One benefit of sharing users’ Instagram posts to your stories is that it’s quick and easy. Plus, it gives credit and links to the original post — avoiding any confusion on who the original creator is.
A downside of reposting other users’ posts is that the design options can be quite limited. Since you’re resharing in the app, it’s not possible to take the image itself and design it in an external app, like Storyluxe.
Start scheduling Instagram Stories with Later, available on all paid plans.
Now that you know how to repost to your Instagram Stories, let’s get into one of the most popular forms of UGC — sharing others’ Instagram photos on your Feed.
Why go this route?
To begin, UGC is a super effective form of marketing — 85% of consumers actually find UGC more influential than brand photos or videos.
Why? Because it’s coming from a trusted source — an authentic customer voice and not from the brand.
Curating your feed with user-generated content means you can spend less time creating the perfect post and share something that’s already out there. Plus, it’ll help you engage with your current followers and attract new ones.
@airbnb
Reposting UGC to your feed has a few more steps than sharing to your Stories does. But, no need to worry because if you follow the steps below, you’ll be ready to start sharing right away.
When choosing to repost UGC on your feed, there are two ways to go about it.
Posting UGC is all about asking for permission and giving credit where credit is due. It’s not enough to simply screenshot a photo off Instagram and share it on your feed with the original creator tagged in the photo.
Send the creator a DM.
Whether you’re sharing something a customer posted about your company or content created by someone in your community — you always have to ask for permission.
You can search for posts by checking your tags and mentions, searching relevant hashtags or by scrolling through your News Feed. Once you find the image you want to share, you should send the creator a DM asking for permission.
TIP: When asking for permission, ask the creator to email you the original file. If you take a screenshot, you risk the image being blurry or poor quality.
Alternatively, you can ask permission by leaving a comment on the post, like FabFitFun did below.
It’s always good to go the extra mile and shoot over a quick DM. Plus, 65% of people will grant permission to use their photos within 24 hours — so the chances are you won’t even lose any time by sliding into their DMs.
View this post on Instagram
A post shared by Later: Visual Social Marketing (@latermedia)
One way to start (and keep up with) using UGC in your marketing strategy is by using our UGC features. Later’s UGC Tool helps you collect, organize, and of course, repost content on Instagram.
When you open Later on a desktop, press “Collect Media” on the sidebar. Here is where you will find all the tools you can incorporate in your social plan.
Here are four ways you can find and share UGC with Later.
When you’re tagged or mentioned in an Instagram post, it’ll show up here. Select the posts you want to re-share and add them to your media library.
This is an easy hack to keep track of what your followers are saying about you while also giving them a cheeky shoutout!
Search by mentions and tags requires an Instagram business profile and is available on all paid Later business plans.
If you have a branded hashtag, like Mejuri’s #TheFineCrew, this feature is a way to keep track of everyone using your hashtag.
You can save branded hashtag searches on Later — it’ll display the last 7 days of posts using that hashtag across Instagram.
When you find posts you like, you can add them to your media library.
If you don’t use a branded hashtag, no need to worry. You can still find trending content within your community. Keeping with Mejuri as an example, you can search #FineJewelry or something similar to see what kind of content people are sharing.
Search by hashtag is available for free to all Later users with an Instagram business profile.
Lastly, if you work with partners — like influencers, brand ambassadors, photographers, or agencies — you can add them as contributors to make sure their content is sent straight to your Later account.
From here, you can approve or deny the content — your approved content is added to your media library.
Collaborate with Contributors is available on all Later Business Plans.
There you have it! Now you have all the tools you need to start finding, saving, and *legally* sharing UGC on your News Feed and Stories.
Ever since Instagram opened the floodgates to media beyond still images, the platform has become a prime location for watching videos. From insightful tutorials to funny moments captured on camera, there’s a plethora of content for you to discover. But what if you love a video so much that you want to save it and rewatch it? Luckily, there are a variety of ways on how to download Instagram videos, both within the app and on your iPhone.
In this guide, we’ll go over everything you need to know on how to download video from Instagram.
Now, before you get too excited and have a free-for-all downloading videos from Instagram, you should really make sure you have enough free space. Videos are typically big files. So, the more you want to download, the more space you’ll need on your iPhone.
The good news is, most of the storage on your iPhone is taken up by the photos and videos you already have. And thankfully, there’s an app that can help you clean up the photos and videos you don’t really need: Gemini Photos.
Once you download Gemini Photos from the App Store, it will scan your phone for duplicate, similar-looking, and even blurry pictures. Then, it will help you quickly get rid of them. Here’s how to use the app:
Now, you can tap Similar > Your Library at the top to go through the other categories and keep decluttering your phone.
You should remember that Gemini Photos only moves your pictures to the Recently Deleted album in the Photos app. Which means they’re still taking up space on your phone for the next 30 days. So, if you want to remove them immediately, just open the Photos app and tap Albums > Recently Deleted > Select > Delete All.
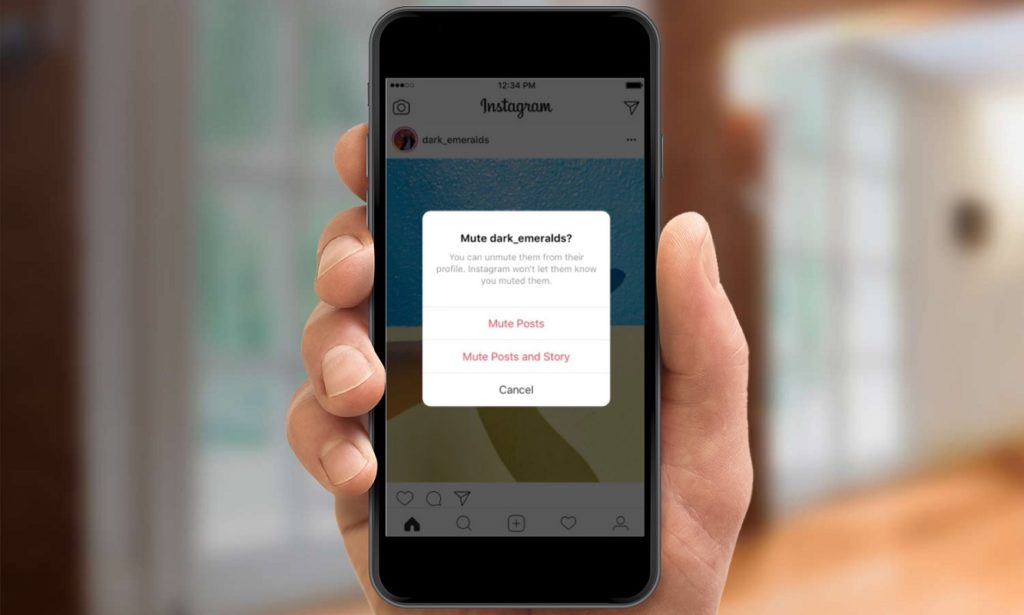
Maybe you love a video so much you want to show it to a friend — or maybe you just don’t have time to sit through the whole thing right now. You’ll be pleased to learn that saving an Instagram video for later is easy thanks to the app’s Collections feature.
Instagram Collections is an in-app feature that allows users to bookmark content like posts and IGTV videos from other users to view later. You can even organize your saves into Collections folders to make them easier to find.
While it is possible to save your own posts in Collections, this feature is primarily meant for saving content from other accounts. You can only save content from public accounts or private accounts that have accepted your follow request.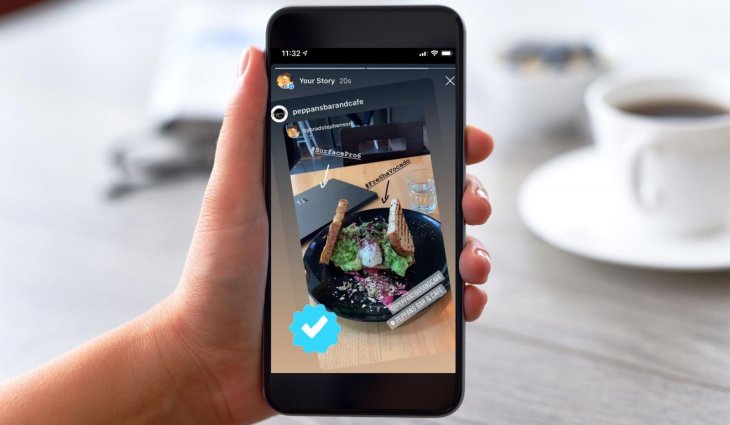
Here’s how to save an Instagram video post into your Collection:
Following those steps will save content to your Collections. Here’s how to find it once you’re ready to view it again:
From there, you’ll see all the content you’ve saved. If you wish to create a new folder within your Collection, simply press the + icon at the top-right of the screen.
While you can save your videos to Collections, you can also save them via your Archive.
The Archive is an in-app feature that allows users to remove posts from their profile and save them to a private folder that only they can see. It’s also a place to store Stories after they’ve exceeded the 24-hour lifespan on your profile and Stories feed.
Luckily, you don’t have to save these manually; you just have to make sure the Save Story to Archive feature is turned on. Here’s how to do that:
From there, your videos, photos, and posts will all be automatically saved to your Archive.
If you don’t want to store your favorite content in the app, you can use one of the following methods to download Instagram videos directly to your device instead.
While many users shoot their content with their device’s default camera app, others use Instagram’s in-app camera, especially when creating Stories. If you want to make sure those videos are saved to your iPhone, follow the instructions below:
After you turn this feature on, all videos and photos you take with the Instagram feed camera will automatically be saved to your iPhone’s camera roll.
The feature mentioned above will only save content from Instagram’s feed camera. To save videos taken with the Stories camera, you have to turn on a separate setting.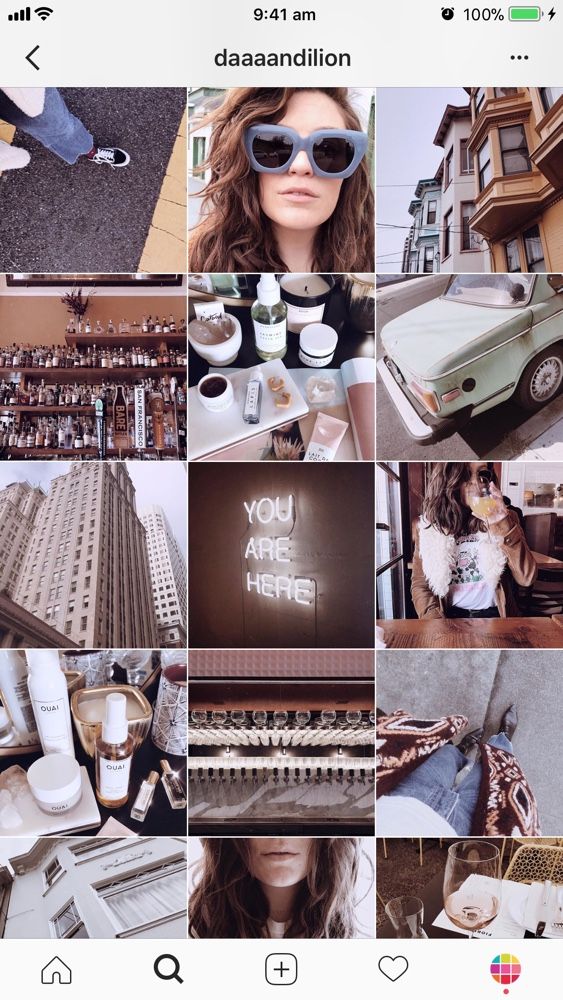
Here’s how to do that:
Following those instructions will download all your Story videos automatically. But if you only want to download one current Story, here’s how:
Doing this will add the video to your Camera Roll.
At the time of this writing, there is no way to download someone else’s Instagram video to your iPhone within the Instagram app. However, there’s an easy way to work around that issue: iPhone screen recording.
Before we dive into how to record a video posted on another account, it’s important to note that saving and reposting someone else’s content without their consent is a violation of copyright law. If you want to make sure you’re protected, get the original user’s written permission first.
Now that we’ve covered the legality around this option, here’s how to record (and save) someone else’s Instagram video:
Now, you might want to trim the beginning and the end of your recording or crop out the top and bottom where the Story controls were. Here’s how to do that:
From there, your newly saved video will be stored in your Camera Roll.
Unfortunately, this feature is only available for those with iOS 11 or later, or an iPadOS. However, there are third-party apps that can help you download an Instagram video if your iPhone doesn’t support screen recording.
There are multiple third-party apps and tools you can use to copy and download Instagram videos. But for the purpose of this guide, we’ll show you how to save a video using the free app Instake.
Here’s how to use it:
After you follow these steps, the video will be saved in your Camera Roll.
With videos becoming more and more prominent on Instagram, the ability to save content is a useful feature to keep in your back pocket. Luckily, Instagram and other third-party tools make this easier than ever.
Writer and editor, driven by curiosity and black coffee.
Elena
Sergeeva Targeted advertising specialistAccording to Facebook Ads, 70% of users learn about new products from Instagram. To help sellers promote them, Instagram created the Instagram Shopping tool, which became available in Russia in March 2021. We will tell you why to connect this tool and how to set it up.
Instagram Shopping is a tool that allows you to tag products in your posts and Stories. Instagram takes information about products from the catalog that the seller uploads.
The profile with the option enabled looks like this:
There is a bag icon on the photo, which means that if you open a post, goods will be marked in it. Source: COS Several items can be noted in the photo. When clicking on shopping tags, users will see the price and description of the product, and will also be able to follow the link and place an order on the site.
In addition to prices and the products themselves, the user also sees additional information about them: in the description, you can specify the composition of the fabric, size, available colors, etc. The user can also view the item from different angles in the gallery or learn about other products of the online store All this without leaving Instagram.
To get to the catalog with goods, you need to click on the "View store" button. Inside the store, products can be grouped into thematic collections, such as new arrivals or gifts.
US residents can pay for items within the app using Facebook Pay. In other countries, including Russia, this option is not yet available: users follow the link on the product to an external site and pay for the order there.
 And the seller can do without the same type of posts in the “follow the link in the description” format.
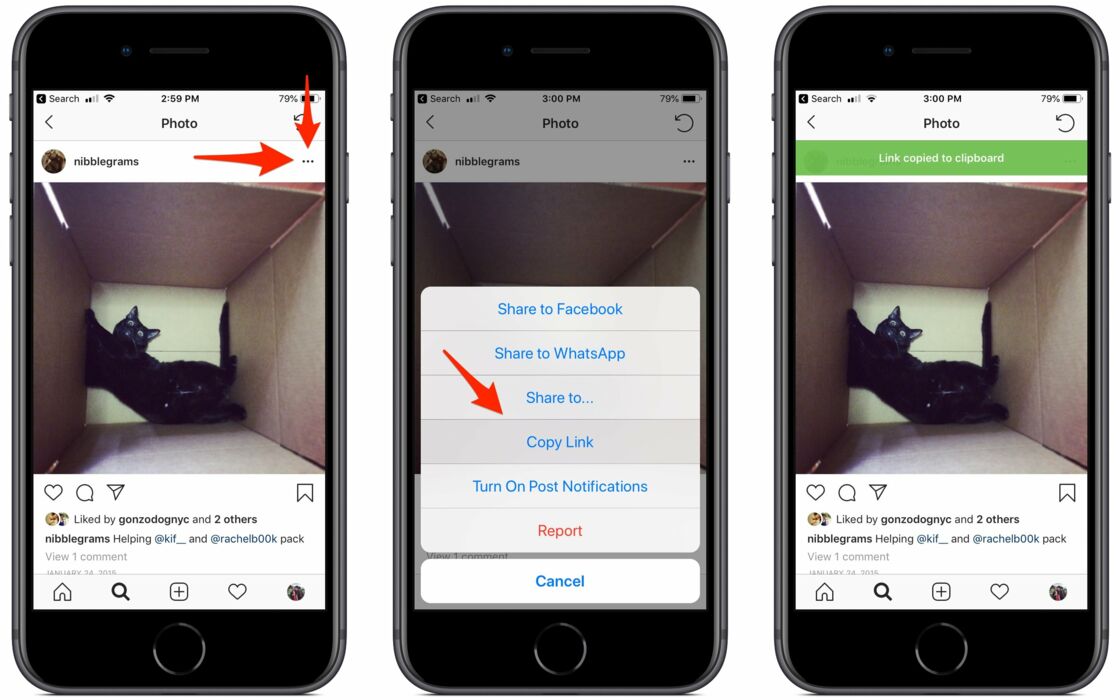
Log in to Commerce Manager, also found in your ad account.
The system prompts you to create a shop or catalog. The store is a single storefront for Instagram and Facebook, which is available to companies with physical goods. To promote products on Instagram, click Add Catalog. Choose the type of catalog depending on the subject of your business, e-commerce is suitable for online stores.
In the next step, you need to configure the parameters and method for loading products. From the drop-down list, select the advertising account to which the catalog will be linked.
You can create a catalog yourself - by uploading a spreadsheet or by connecting a pixel - or through integration with one of the partner platforms. In the second case, the goods will be loaded from an existing online store.
Click the "Create" button - the catalog is ready.
Important : the catalog must contain exact prices and information about the availability of each item. In addition, the rules for returning goods must also be indicated - on the store's website or in the Instagram account.
To proceed with product creation, select the desired catalog in Commerce Manager and then click Add Products.
Add products using one of the following methods:
 Files in CSV, TSV and XML (RSS/ATOM) formats are supported, as well as Google Sheets.
 If you choose to download manually, a form will open. In it you need to add the name of the product, its description, images, link to the site and price. The system will tell you which data is not required.
After completing the form and uploading, the products will appear in your catalog.
Inside the catalog, products can be grouped into collections: for example, by subject, season, upcoming holidays, etc. Collections help sellers to get to the user's interests more accurately, and users to quickly select goods.
You can create not only the standard collections, but also those that will attract more attention, such as "Top 10 coats" or "Gifts for best friends".
You can combine products into groups manually or using filters, for example, if there are a lot of products.
At the final stage, specify the name of the collection and click the "Create" button.
After creating a product catalog, you need to send an account for verification. The verification may take several days.
To add a catalog to Instagram, go to the "Settings" section in the application and select the "Company" tab.
Then click "Set up Instagram Shopping" and follow the prompts.
If the catalog passes the check, a "Purchases" section will appear in your Instagram account. Once your account is approved, turn on Instagram Shopping. To do this, in the "Purchases" section, select the product catalog that you want to connect, and click "Finish".
To tag an item in a post, start posting as usual - add a photo and post text, and then follow these steps:
You can also mark the product in Stories. To do this:
Up to 5 products can be tagged in one photo, up to 20 in total in the gallery. In Stories, a sticker is added to only one product, but you can change its color and text.
Instagram Shopping will increase sales and user engagement in your account. The product catalog can be used not only to familiarize subscribers with the assortment, but also to set up targeted advertising on Facebook and Instagram.
We especially recommend this tool for e-commerce: the user immediately sees the price and all information about the product. True, if a product or service involves preliminary communication with the client and a long transaction cycle, then the published price may scare the user away. Therefore, before using Instagram Shopping, consider whether the tool suits your product and the behavior of your target audience.
15+ systems in one service, tools to simplify the work with advertising, closing documents and support at every stage
Try eLama
There is a tricky way: choose a brush and paint over the entire screen with it for a long time. And there is a way five times easier.
How to Add a picture to your story, select any color for the brush, press and hold your finger - now there is a solid color background.
Almost the same way you get photos with a color translucent filter.
How to Add a picture to the story, choose any color for the brush, but then switch to the marker. Press and hold your finger on the screen - there is a photo with a color filter.
In addition to a solid background, there is another beautiful option - a background with a gradient, like in a story with text.
How to do Go to the text story, select a background and write one word. Click next and delete the text - you have an empty gradient on which you can add pictures in the same way as in the previous paragraph.
Are there only 27 standard colors in stories? In fact, there is a whole palette to find any color at all.
How to make Hold your finger on the color bar and choose something you like.
The main question of all Instagrammers is how to make a story collage. You can download an application with a bunch of templates, or you can do the following.
How to Open a story, add a picture, for example, a colored background. Then go to the photo gallery, select a photo, click the "Share" button, and then "Copy". Return to Instagram - a pop-up window will appear with the copied photo, click on it - it lies on top of the first picture. Repeat to infinity.
Several small videos are added to stories in almost the same way. The sequence of actions in this case is different.
How to Add a picture to the story, for example, a colored background, click on the sticker icon, and then on the round icon with the photo icon. Only in the gallery, select not a photo, but a video.
To record a story in the My Reaction to Anything genre, you need to quickly switch from the main camera to the front camera. That's how the genre works. There is a special button for this, but it is located in such a place that it is easier to break your index finger. Here is an alternative way.
How to Tap the screen twice quickly while recording, the camera will switch. Repeat to infinity.
Owners of older iPhones and Androids can't be happier with the beautiful blurring of the background when taking a selfie with the front camera. But the disadvantage can be compensated in the Instagram camera.
How to Go to the "Focus" tab in the camera and see if the selfie looks better if the background is blurred.
Live Photos on iPhones is an underrated feature. Instead of one photo, she makes a short video, from which they then choose the right moment. And another underestimated feature is boomerangs, because they are simply constantly forgotten about. It's not scary, because boomerangs can be obtained from Live Photos.
How to Add a Live Photo to your story, hold your finger on the screen or hard press it, the photo will turn into a short looped video.
Perhaps your stories are secret and you don't want your followers to send them to anyone. Of course, you can't make it so that random people don't see them at all, because you can always take a screenshot. But at least complicate this operation to the maximum.
How to Go to the camera, click on the gear and turn off the "Allow sharing" option
You may think that comments are a thing of the past decade and have no place in today's social media. There are many ways to remove them from your profile.
How to First, go to Settings - "Privacy & Security" - "Manage Comments" and choose who can leave comments under posts. Second, disable comments before publishing a new post. To do this, go to the advanced settings at the very bottom of the publishing screen. Thirdly, turn off replies to stories: on the camera screen, click on the gear and turn off replies.
Luckily, Instagram doesn't tell all your friends that you've been tagged in a bad party photo. Unfortunately, friends can still see the photos you're tagged in on their profile. This is a solvable problem.
How to Go to settings - "Privacy and security" - "Photos and videos with you" and hide all the photos that you do not like in the last menu. But be careful: this will remove the marks on the photos forever!
Shops, beauty salons and people who subscribe to 2500 people, you do not need, because they do not interact with your content and thereby reduce reach. There are two ways to unsubscribe them from yourself: a difficult one - go to the profile and block it - and simpler.
How to Go to the subscribers screen, click on the three dots next to the nickname and on "Unfriend". Save two taps!
Profile description supports a bunch of weird fonts not found in standard keyboard layouts. What if you always wanted a nice description like "𝖒𝖔𝖘𝖈𝖔𝖜 𝖌𝖔𝖑𝖉𝖊𝖓 𝖌𝖗𝖗𝖗𝖑" but didn't know how to write it. And very simple.
How to make Go to igfonts.io, come up with a cool description in English and choose the best font.
In 2008, we asked friends how to hide your online on VKontakte. In 2019-m this is more relevant on Instagram.
How to do Go to Settings - "Privacy and Security" - "Network Status" and turn it off. But after that you will not see your friends online either.
There are a lot of saved posts to make moodboards. The problem is that not all likes are added to saves. And it's good that there is also a list of likes.
How to do Go to settings - "Account" - "Posts you liked".
Instagram has a good photo editor, but there is one drawback: it does not save photos to memory. But the disadvantage is easy to get around.
How to Turn on airplane mode, process the photo, upload it and wait for the message that the post cannot be loaded. During this time, Instagram will save the processed picture to memory.
Maybe Instagram is your life and it would be nice to keep it in a safe place. Or maybe you just decided to leave? Then download the entire Instagram with photos and messages to your laptop memory.
How to do Go to settings - "Privacy and security" - "Download data". It will take several hours to create the archive.