Home »
Misc »
How to save instagram live videos of others
How to save instagram live videos of others
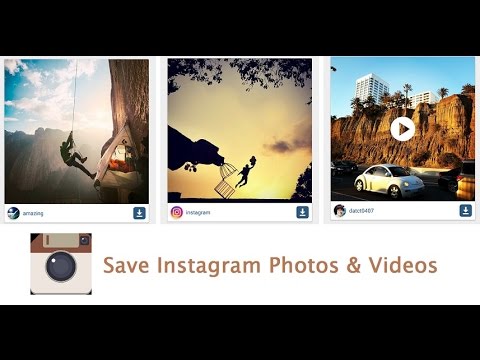
How to Download and Save Someone Else’s Instagram Video
Instagram continues to be the leading online photo and video sharing platform. Since its launch in 2010, it has expanded massively to include loads of exciting features and updates. Now, the app does not only allow you to share photos and videos in your Instagram posts, but it also allows you to upload images and clips that disappear automatically after 24 hours through Instagram Story.
Instagram is full of excellent media that others share; people might want to save them to their own devices. Some may wish to archive essential pictures or videos from their feed and even from other people’s feeds.
After much heel-dragging, Instagram caved to the overwhelming public pressure and started allowing users to save their own stories. However, they have stood firm on denying saving content belonging to other people: they don’t and won’t support it. Users can save their videos from their Instagram stories but aren’t supposed to meddle with others’ images.![]()
However, users still insist on saving other users’ media, so they have found ways to do it. There are many different approaches to downloading and saving someone else’s Instagram live video stream.
How to Save and Download Other User’s Instagram Videos
Our most uncomplicated way to save and download videos on Instagram is to use an online tool, but this can be very tricky as most free tools have some ads. That’s why the TinyWow team decided to add a new feature for downloading videos from social media platforms. Here’s a simple step on how to download Instagram videos using TinyWow on your PC.
- Log in to your Instagram account; click the three horizontal dots on the top right of the video and hit the “Copy Link.”
- Now, go to the TinyWow website and click on the “Video tab.”
- Scroll down and look for the “Instagram Downloader” button.
- Then paste the link in the URL box, and click Find.
- Once done processing, click on the “Download” blue button.
- And choose where you would like to save.
There are countless screen recording apps, both for desktop and mobile users. The iOS 11 Control Center comes with a built-in recording feature, so you don’t need to install anything extra. You can also use the macOS Control Center and customize it to record.
iPhone users can get TechSmith Capture for free. It’s pretty easy to use, and clicking on that link will lead you to the instructions to use it.
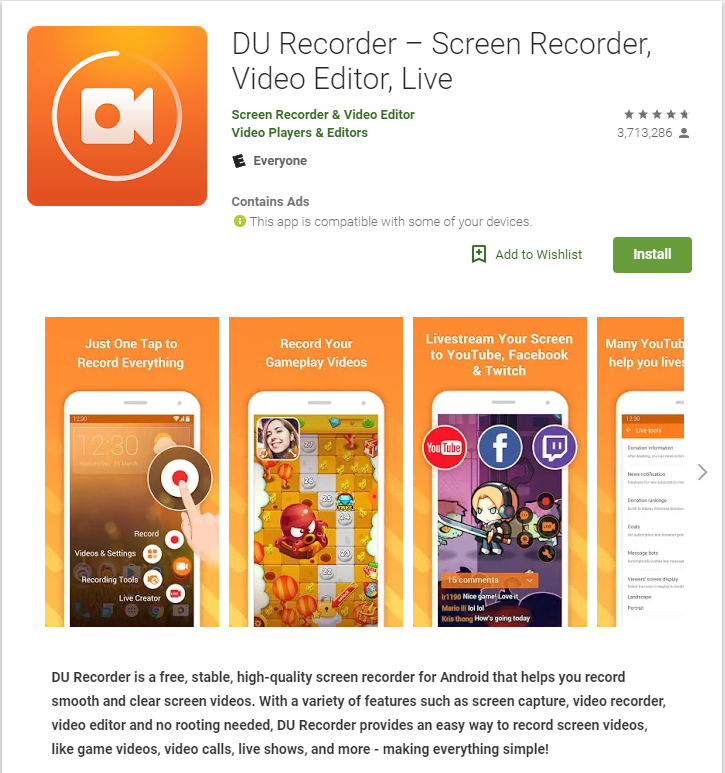
Over on the Android side, one of the most powerful free apps is Screen Recorder, a screen capturer and video editor with a wealth of features. Screen Recorder is ad-supported, so it is entirely free, and it doesn’t require root access to work.
Windows users might want Open Broadcast Software (a.k.a OBS), a free, open-source video recording and editing suite that captures great screen videos easily. OBS is also available on Linux and Mac, and it will run on any Windows version, Windows 7 and up. OBS Studio is still actively supported.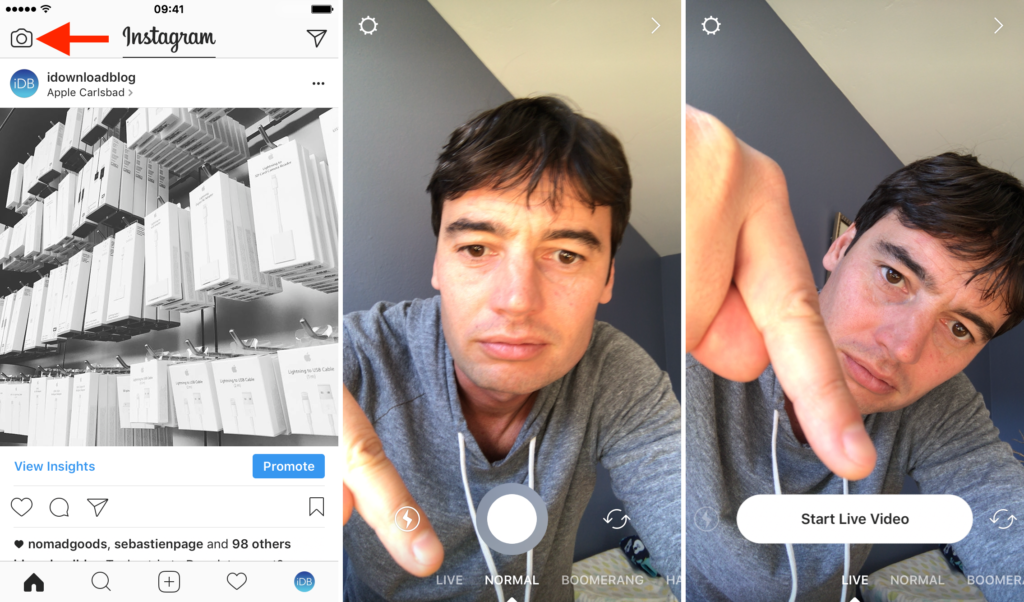
Use Instagram Apps and Websites to Download Other User’s Media
Whenever a significant site like Instagram refuses to create functionality that people want, third-party app makers leap into the gap to deliver the goods. Instagram’s embargo on downloading other people’s instant videos is no exception. There are a host of Instagram-enabled apps that will grab that video for you. Here are a few video grabbers for Instagram.
Blastup by Gramblast
Blastup by Gramblast is a website where you provide the media’s URL, and the site does the rest. Blastup gives you a free trial that will let you see if you like the service.
IFTTT
Available for iOS or Android, IFTTT (If This Then That) is a powerful scripting solution that can do just about anything. IFTTT runs a lovely little applet that automatically downloads any Instagram video that you like, or you can add to your feed or Dropbox account without lifting a finger. Getting IFTTT configured is a little trickier than just visiting a website, but it isn’t difficult. You’ll also want to ensure you set up a Dropbox account beforehand, which is decidedly not tricky, and it helps grab a lot of media from the internet. Memes, anyone?
To download Instagram videos using IFTTT, do the following:
- Connect Instagram and Dropbox to your IFTTT account.
- Choose a Recipe.
- Click Activate Recipe to download Instagram videos straight into your Dropbox.
Do you have suggested apps or websites for downloading Instagram live videos? Have any experiences with grabbing videos using these tools or others? Please, feel free to share them with us in the comments section below!
[Working] 3 Ways to Save Instagram Live Video or Download it Later
Apart from Instagram‘s Story, Posts, and IGTV, the Live video feature has recently gained tremendous popularity. Using this feature, you can instantly interact with all your followers from a single screen. If you’ve missed watching one, then worry not for we have listed 3 ways to save live video on Instagram or download it later for replay. Meanwhile, you should learn to schedule a live video on Instagram.
Also, Read | How to Stop Instagram Live Notifications for One Person
Ways to Save Live Video on Instagram
Table of Contents
Post and Save/Download Your Instagram Live Video
Instagram offers you the capability to save your Live Instagram session directly to your device or your Instagram profile by sharing it as a video post. If you’ve hosted a live Instagram video on your profile and wish to save or rewatch it later, then you need to follow these simple steps to achieve the same.
- Open your Instagram profile using the app and swipe towards the left to open the Camera. Here, choose the Live option and tap on the button to start hosting your live Instagram video.
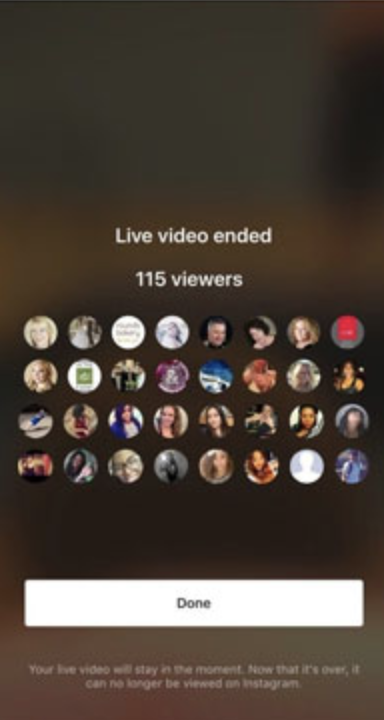
- After you’ve finished hosting your live video, tap on the X button present at the top right corner of the app to end the live video session.
- After the live video has ended, tap on the Share button.
- Choose a cover image to add to your live session video and tap on the Next button. You can also add a different cover image to your video by selecting it from your device’s gallery.
- Specify a title and description to your live video and press the Post button to save it to your profile.
- Your live Instagram video session will be posted on your profile as a video post.
- Now, follow this quick read to download and save any Instagram post or story.
- Please note that to save an Instagram Live Video to your profile/device, it should be at least 1 minute long in length.
Record or Download Someone else’s Live Instagram Video
Now that you’ve learned to save your own Instagram Live using the app, it is time to save the live video of someone else on Instagram. With that being said, let’s look at two different methods to download someone else’s live video on Instagram.
Use Screen Recorder App to Save Someone’s Instagram Live
One of the most effective ways to save someone else’s live Instagram session is to record it using the Screen Recorder app. While most smartphones come pre-equipped with a screen recording tool, you can also try some third-party Android apps to record screens on your device. Follow these easy steps to quickly record someone else’s live Instagram session.
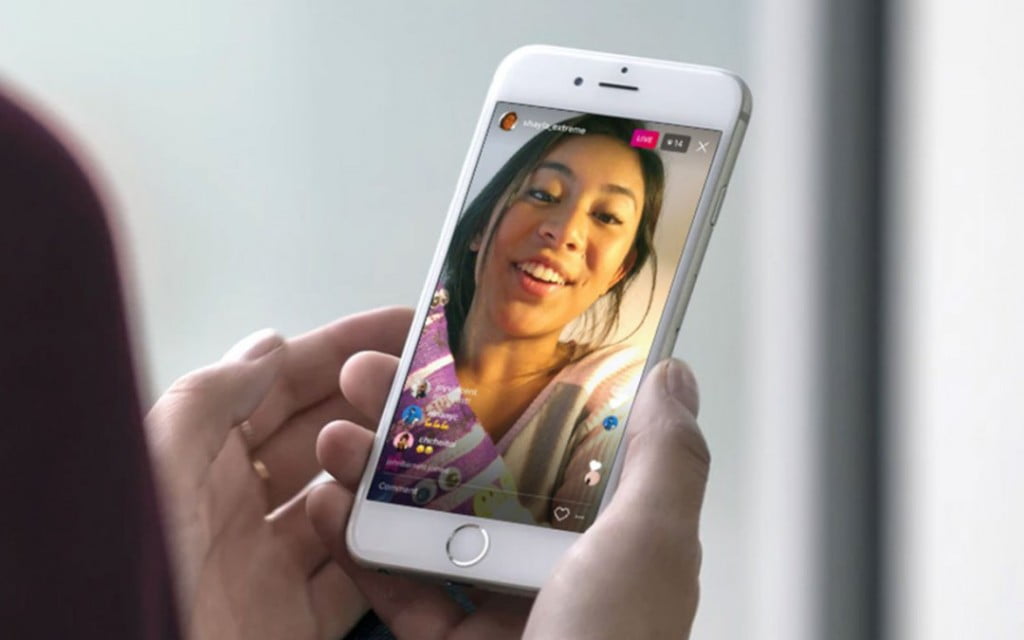
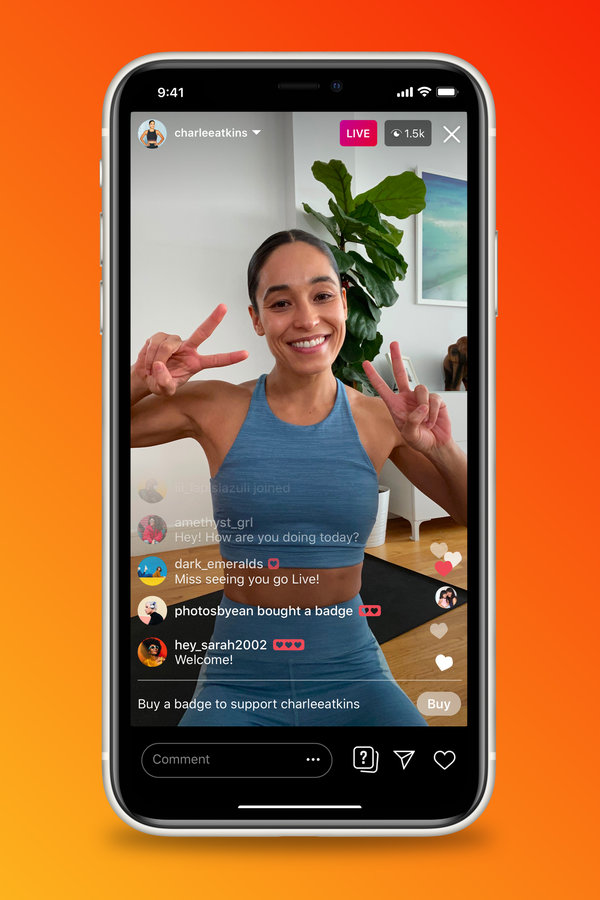
- Open Instagram on your device and tap on the profile icon in the story section labeled as LIVE.
- You will instantly start watching the live video of the chosen profile.
- Next, follow this quick guide to record your Android Phone’s screen to capture the entire Live Instagram video.
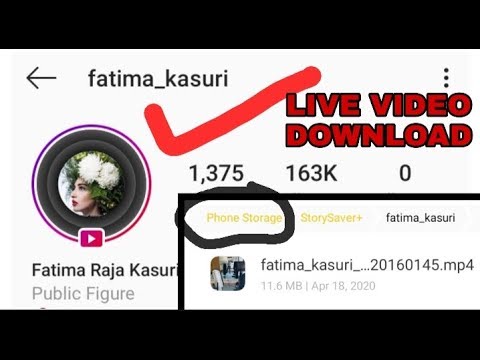
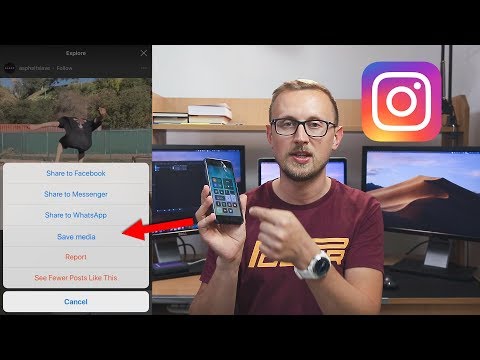
Use Third-party Apps to Download Instagram Live of Someone
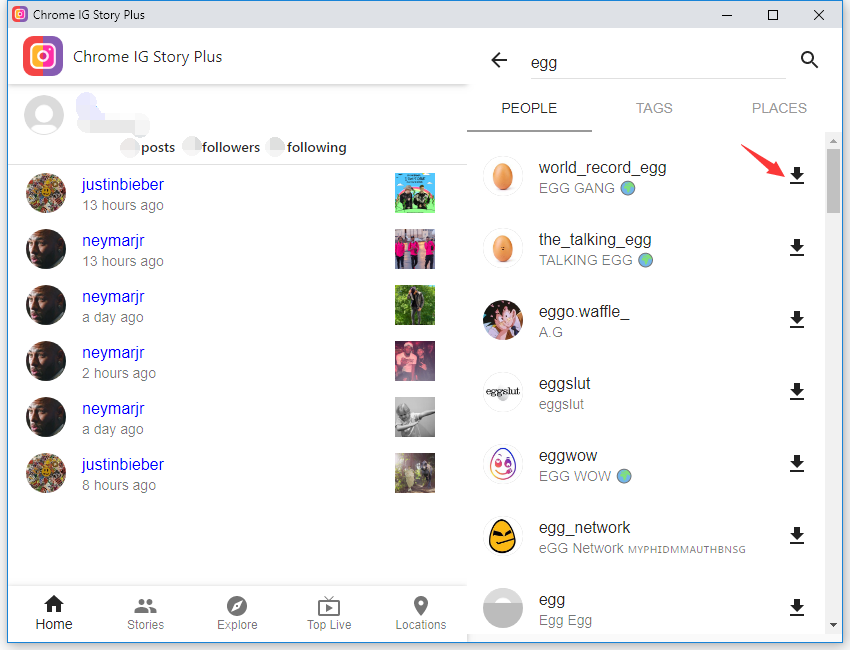
The second method to download someone else’s Instagram Live is to use certain third-party Android apps to download it by pasting the live video link. Follow these steps to achieve the same.
- Open the live video session of the Instagram profile that you wish to save.
- Tap on the three-dot icon at the bottom and press the Copy Link option.
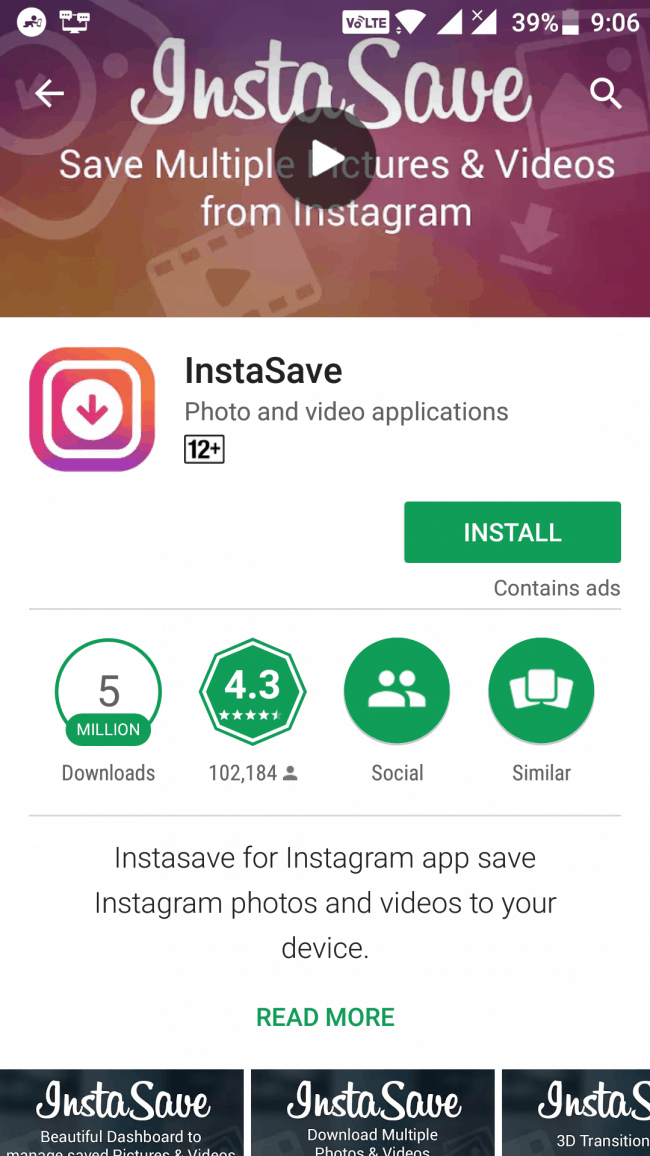
- Install and Open the Video Downloader for the Instagram app from Google Play Store.
- Open the app and provide the necessary access permissions.
- Tap on the Paste Link button to paste the copied link here.
- Wait for a few seconds to let the app grab the live video from Instagram.
- To download/save the live video to your device, press the Download button.
That’s it. You’ve successfully saved someone else’s live Instagram video to your device.
Replay Missed Instagram Live Video and Save it to Your Device
If you have missed joining the live Instagram video session of someone you were interested in, you can follow these steps to replay and view it using their profile. Do note that for this trick to work, the host must have shared his live session on their Instagram profile. Usually, when Instagram Live ends, the host gets an option to share it on their profile using a video post. Follow these steps to save their live video using this simple trick.
- Open the Instagram profile of the person whose live video you have recently missed.
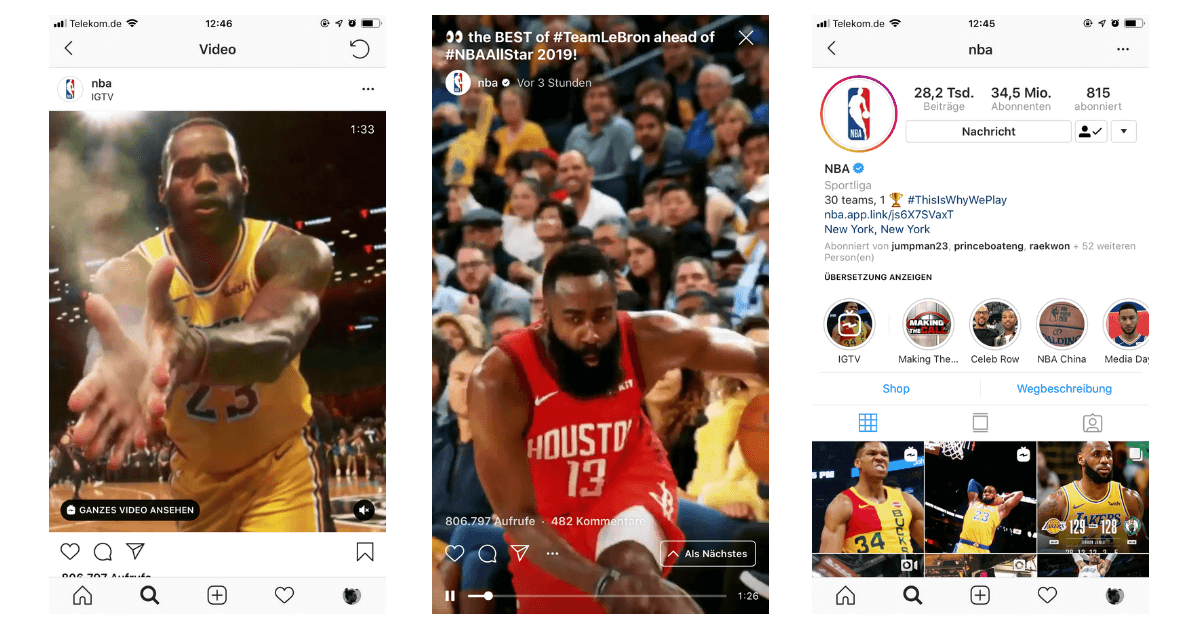
- Swipe right to open the video tab and click on the first video (in case you’ve recently missed their Instagram Live).
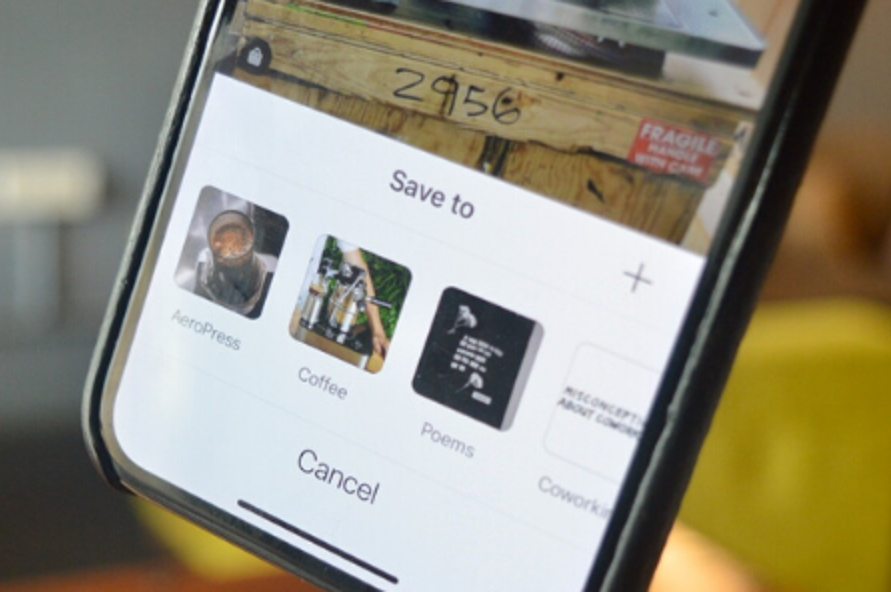
- Their live video will start playing as a video post. To save this video, tap on the three-dot icon at the top right corner.
- Tap on the Save button to save the video post.
- That’s it. Their live Instagram video is now saved to your profile. You can rewatch it by tapping on the Saved option in your Instagram profile settings.
Bonus Tip: Watch Someone’s Instagram Story Secretly
Now that you’ve learned to save yours or someone else’s Instagram Live video, you should learn to watch someone’s Instagram Story without them knowing about it. Follow this detailed guide to watching someone’s Instagram Story Secretly.
Wrapping Up: Replay Your Favorites
That’s a wrap for the 3 best ways to save your or someone else’s live Instagram video and download it later for replay. If this article has helped you in downloading or rewatching the live video then, hit the Like button and share this read among your friends to assist them while using Instagram. Stay tuned for more jaw-dropping reads.
You can also follow us for instant tech news at Google News or for tips and tricks, smartphones & gadgets reviews, join GadgetsToUse Telegram Group, or for the latest review videos subscribe GadgetsToUse Youtube Channel.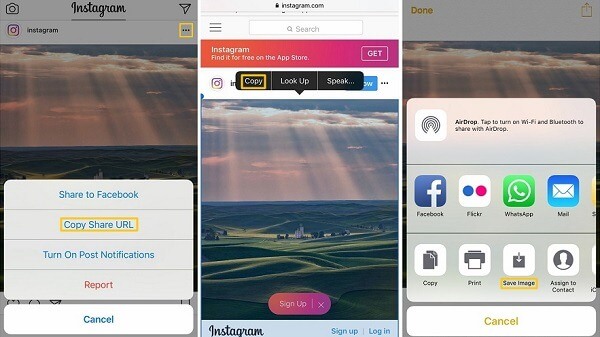
Where Instagram videos are saved – Followers ▷➡️
Although at the beginning of Instagram it was only an application and platform for photos. Later videos joined him. Integrating videos into Instagram posts was one of the first updates Instagram made to its platform. Today, we can't imagine what Instagram would be like without their videos. We also can't imagine how instagram would be without its constant updates, which is far from improving any bug. They give more visibility and use of the platform.
For new users of social networks, Some updates are not yet known. Some functions are also found in a similar way. So that users know better how they and where Instagram videos are stored . We have this basic guide.
Index
- 1 How and where can I store my Instagram videos?
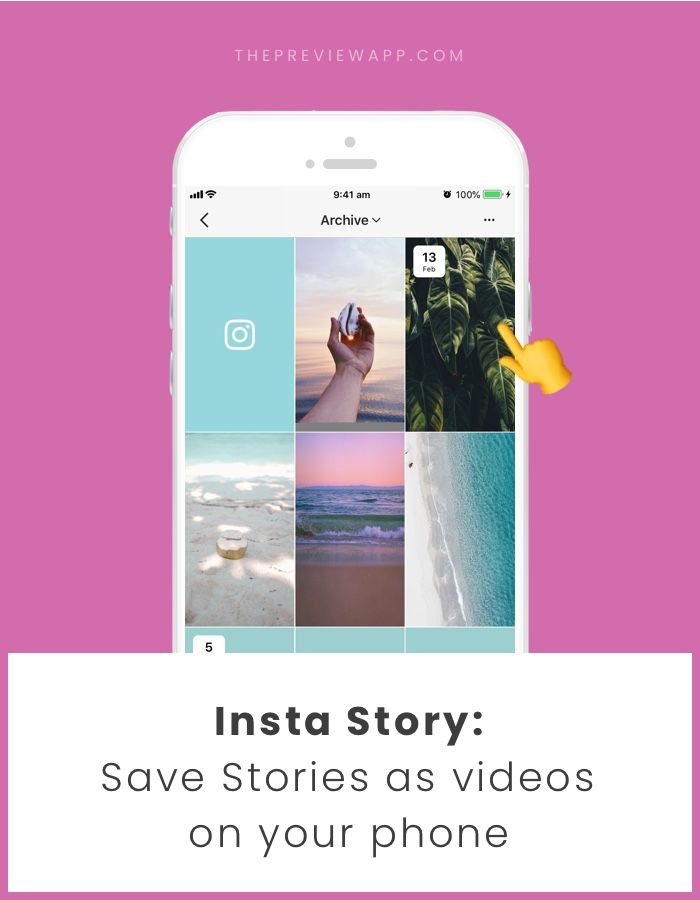
- 2 How to save videos from my Instagram stories
- 2.1 Save to album
- 2.2 Save after editing
- 2.3 Automatic storage
- 3 How the published video
- 4 are stored where the edited video
- 5 archive video
- 6 Save from Instagram
- 6.
 on mobile devices
 6.2 on computers 9001 6.2 on computers on computers
- 8 Live video update
How and where can I store my Instagram videos?
On and off Instagram, you can find many ways to save Instagram videos. To show you how and where to save Instagram video in a safer way. How and where to store Instagram Videos varies depending on the form you choose. Instagram save methods are as follows:
- Video feed
- Save them as Instagram stories.
- Video editing
- In Instagram save option.
- Inside the albums.
How to save videos from my Instagram stories
Instagram stories have become one of the users' favorite features. Knowing like where Instagram videos are stored These are some of the most frequently asked questions on today's platform. Instagram stories have the feature of having three different save methods. Next, we'll show them:
Save to Album
Instagram's newest save option doesn't just allow the user to appreciate important moments.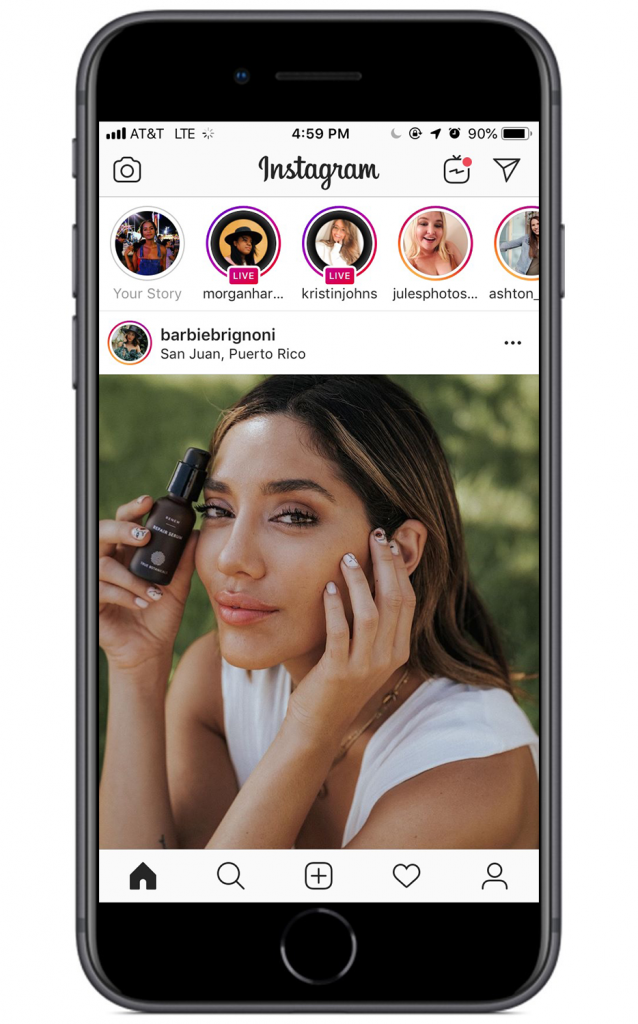 But also share it with your followers and other Instagram users. Ability to save and create albums in Instagram. This allows users to post their chosen stories in albums that will be visible to other users on their profile. Just below the description. The user can even add messages to albums, not just videos.
Unlike normal Instagram stories, stories saved in albums are not limited to 24 hours. They are always available.
Save after editing
Liked the photos. Instagram stories can serve as an editor. From where you can make changes to videos or photos for later storage without having to publish them. To save, simply click on the icon that indicates it. Later you can find out where Instagram videos are stored entrance to the gallery or videos from your mobile phone.
Automatic storage
If your Instagram is configured with automatic storage. Published stories or videos will be automatically saved to your phone's memory. And to know where instagram video you just need to search for video or gallery of your mobile device.
Another form of autosave that is a relatively new platform update. This is a filing cabinet. Where can you save not only ordinary instagram posts. But the stories made are also automatically saved. Videos are only visible to the user who owns the saved stories.
How posted videos are saved
Just like photo messages, video messages work. To save posted videos, the first thing you need to do is make sure that auto-save posts is enabled in your settings. If the answer is yes. What you need to do is post the video. To do this, click the third icon of the lower Instagram menu. This icon is a + sign.
After clicking the icon, a menu will appear, you will need to choose whether you want to record a video or select one from the phone's gallery. Regardless of which you choose, the next step remains the same. You will have to edit it and make it a subsequent publication. To find out where a video is on Instagram, you need to go to the top of your Instagram and refresh it. The other place where this video will be is in your feed. Finally to find out where Instagram videos are stored on your phone you must enter your gallery.
Where edited videos are stored
We mentioned earlier that videos work the same as Instagram photos. When editing a video or photo on Instagram. The only way to keep it is to publish it. And before that, there is an automatic save in the settings. If you don't, the post won't be saved to your mobile device.
Videos that have not been uploaded but have been edited. They remain in the publish menu. This feature is limited compared to stories that can be saved without publishing. There is also the fact that if the session is closed, the edited video will no longer be available.
Video archive
To save a video from your user profile by deleting it from the channel, but not from the platform. There is archiving them. This Instagram feature allows a user to remove videos from their feed by saving them elsewhere on Instagram.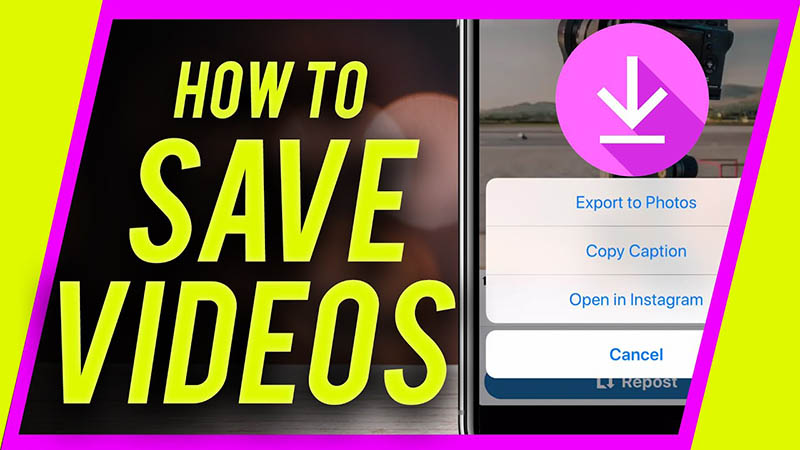 Unlike Instagram Stories. Publications must be selected by the user. And, as we mentioned earlier, it disappears from the user's profile.
To find archived videos. You must be logged into the user profile. Now, depending on what the system of your mobile device is. You can find the clock icon on the left for iOS devices and on the right for Android devices. When you enter this badge, you will find both archived posts and stories.
For video archiving. What you have to do is enter your profile video that you want to remove from it, but not from the platform. Then click on the three dots that appear in the top right corner of every post. Once this is done, a number of options will appear. Including the submission of the publication.
Saved from Instagram
One of the latest features added to Instagram is saving posts. From where the user can save for his own viewing both videos and other publications of other users as his own. Now you will find a new icon in every Instagram post. Saved icon. This icon is to the right of the comment icon.
To save any post, you must click on the save icon. To view saved messages, you can do the following:
On mobile devices
On Android devices, you can find an icon with three lines. Clicking on this icon will bring up several options. Among these options, a save icon appears. By clicking on this icon, you will find the publications that you have saved.
On PCs
On PCs, you will find this by entering your user profile. Just below the description, there are three options, the third of which has a save icon. Enter Here you can view the messages you have previously saved. Although the functions of Instagram from non-mobile devices are limited, the function to save and display saved photos is one of the available features.
The only limitation that can be found for this function. The fact is that the publications of other users cannot be saved inside the phone or computer.
Save alternatives
There are various ways to save videos on Instagram. Although some of them are not entirely safe. First, we will show you the common saved forms in Instagram. But it should be emphasized that these are not the only methods of storage. Instagram is limited if we are talking about saving videos or posts that are not their own in the phone. Photos can be captured on the screen. But this is another limitation that videos are subject to.
One of the alternatives for saving videos on Instagram are download apps. While many of them are not safe, some are exceptions. There are also apps that allow the user to save videos from stories that are not their own. In the same way, you can upload or download Instagram videos to computer through apps or websites. To download this type of content. First, you must be aware of your rights.
Live video update
One of the favorite features of Instagram among celebrities and their fans is direct. This Instagram functionality allows the user to interact with other Instagram people. Among the new updates instagram.![]() You can find direct saved in mobile phone.
You can find direct saved in mobile phone.
This new update allows users to own the copy I made even if it has been removed from Instagram. Live videos are automatically saved after the broadcast ends.
You may also be interested in:
Buy followers
Letters on Instagram for cutting and inserting
Secrets and Instagram chips: TOP-68 from the Marketer
Master these receptions and Create professional posts imes imes imes $
Total khaki on Instagram 9000 9000 9006 hacks for publications for publications and video
Story hacks
Profile description hacks
Hashtag hacks ov
Direct messaging hacks
General Instagram hacks
their reply.
How to: - Click the … icon in the upper right corner of the account you want to disable.

- Press Switch to silent mode .
- From the menu you can choose whether to block only the posts or also the stories of this account.
- You can also block posts and stories by tapping and holding the story circle from the taskbar or profile.
2. Reorder filters
Bring frequently used filters forward for faster publishing.
How to: - When posting a photo or video, go to Filter .
- Scroll to the end of the filters and click Management .
- Press and hold the line icon next to each filter on the left side of the screen to change their order.
- To hide or show filters, on the right side of the screen, check or uncheck the boxes next to each filter.
- Press Done to save the settings.
3. See all the posts you like from
Looking for inspiration? Why not take another look at what has already inspired you.
How to:
- Go to your profile.
- Open the menu with three lines in the upper right corner.
- Press Settings .
- Click Account .
- Click Posts you like .
4. Clear your search history
Don't let anyone with access to your phone know how obsessed you are with fake friends.
How to do it:
- Go to your profile.
- Open the three-line menu in the upper right corner.
- Press Settings . Security.
- Scroll down, then click Clear search history .
5. Hide specific searches
Permanently remove certain searches (accounts, hashtags, places, etc.) so they don't appear in searches.
How to do it: - Click on the magnifying glass icon , to go to the search page.
- Click on the search bar at the top of the screen.
- Press X, to delete unwanted items.
6. Get notified when your favorite accounts post new content
Never miss the posts of your favorite people and brands!
How to: - Go to the account you want to receive notifications from.
- Click on menu Subscriptions .
- Select Notifications.
If you change your mind, the option to turn off notifications is in the same place.
7. Create and manage new accounts
On Instagram, you can add up to 5 accounts under the same email address. And you don't have to sign in and out of the app to switch between them.
How to do it: - Go to your profile and click on the menu with three lines.
- Press Settings .

- Scroll down and click Add account .
- Enter the username and password for the account you want to add.
To switch between accounts you have added:
- Go to your profile.
- Click the username at the top of the screen.
- Select the account you want to switch to.
8. Save Instagram image to Pinterest
Pinterest is not listed as one of the app options where you can post an Instagram post, but there are workarounds for both the Instagram mobile app and desktop.
How to do it on mobile: - Navigate to the post you want to save to a Pinterest board.
- Click on the three-dot icon located above the post on the right.
- Select Copy link to copy the link to the clipboard.
- Open the Pinterest app on your mobile device.
- Go to your profile.
- Click the plus icon in the top right corner of the screen to add a new pin.
- Menu will appear Add board or pin , select Copy link .
- Pinterest will automatically open the link saved in your clipboard.
- Select the image you want to save and finish posting as usual.
How to do this on a computer: - Go to Instagram.com and find the post you want to pin.
- Right click on the message and select Open link in new window .
- Use the Pinterest browser button to select the image you want to attach and post as usual.
9. Delete comments
If you need to hide an offensive comment or erase a typo, deleting comments is easy.
How to delete your comment: - Click the comment icon below the post you commented on.
- Find the comment you want to delete.
- Swipe left over a comment.
- Click on the trash icon.
How to delete another user's comment on your post: - Click the comment icon below the post containing the comment you want to delete.
- Click on the comment.
- Click the trash icon or continue swiping left to delete the comment.
10. Filter and block comments by keywords
Dealing with a troll? Comment controls allow you to filter and block comments containing certain keywords.
How to do it: - Go to your profile and click on the menu with three bars.
- Press Settings .
- Click Privacy .
- Click Comments .
- Make sure filter Hide offensive comments is enabled.
- Press Manual filter to enable it.
- Enter specific words, phrases, numbers, or emoticons in the text field to filter comments.
When you enable filtering, it applies to both new and existing comments in your posts. When you disable comment filtering, hidden comments on your posts will be restored.
11.
 Turn off comments on a specific post
How to: - Start posting photos or videos as usual.
- When you get to the screen where you add your signature, location, and other tags, select Additional settings.
- Enable or disable parameter commenting.
Note . You can change this setting even after publishing. Navigate to the post by clicking the three dots icon above it and select Enable commenting . You can also disable comments on a previously posted post by following the same steps.
12. Reply to comments faster
Do your subscribers ask a lot of the same questions? For example: “When will the item be back in stock?” Or “What days do you not work?”
For iOS users, there is a feature that will help you quickly and conveniently answer these questions.
How to do it: - In your profile, click the three-line menu, and then Settings .
- Click General, and then Keyboard.
- Press Text replacement .
- Here you will see a list of pre-populated keyboard shortcuts. Click on the sign + in the upper right corner.
- In section Phrase , enter the response template you want to create (for example, "Hello. On Memorial Day we are open from 9 am to 3 pm").
- In section Label , enter a word or abbreviation that will mean the complete phrase. For example, Memorial Day is .
- When you want to insert this particular comment, enter the shortcut and your phone will automatically fill in the full phrase.
13. Save and organize posts in a space where only you can see them
The perfect way to draw inspiration. You can also use this feature to keep an eye on competitors.
How to: - Navigate to the message you want to save.

- Press bookmark icon under the message.
- Add a post to an existing collection, or click the + icon to create a new one.
- To view your saved posts and collections, go to your profile and click on the three-line menu. Then press Saved.
14. Remove old posts from your profile without deleting them
This is possible thanks to the archiving function.
How to do it: - Click ... at the top of the post you want to remove.
- Select Archive.
- Click the Archive icon in the top right corner of your profile to view all archived posts.
- If you want to restore content in your public profile, click Show on profile and it will be displayed in its original location.
15. Look at the details of the image
How to: - Navigate to the image you want to enlarge.

- Place two fingers on the screen and slowly move them apart.
- Look at the details of the photo.
16. See how much time you spent on Instagram
with three stripes. Click on Your activity is .
17. Set a reminder to limit your time on Instagram
Set a reminder to know when the allotted time is up.
How to: - Go to your profile and click on the three-line menu.
- Press Settings .
- Press Account > Your activity > Set daily reminder .
- Select how much time you are willing to spend on the social network and click " Set Reminder" .
18. Set up notifications
Do you want to receive only certain types of notifications? Or pause them all at once? Easily!
How to: - Go to your profile and click on the three-line menu.
- Click on Settings.
- Press Notifications.
- Click on each notification category to opt out of some of them. To pause all notifications, enable the Pause all switch.
Hacks for posting photos and videos
19. Make your captions more readable with line breaks
If you prefer long National Geographic captions, this hack will make your texts more readable.
How to: - Edit the photo and go to the caption screen.
- Write the text.
- To access the line feed, tap the 123 button on your device's keyboard.
- Use the Enter key, to add paragraphs to the caption.
Note . Typing will start a new line, but will not create a gap in the text that you want to separate one paragraph from another. Create a caption in the notes app and copy it to Instagram.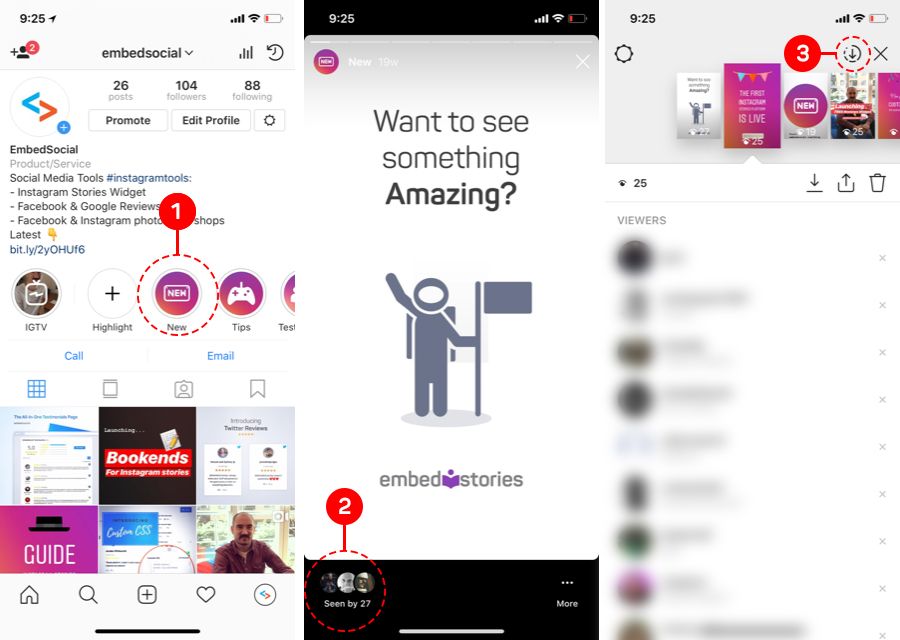 To break lines further, you can use punctuation, such as a bullet or period, to leave room for a blank line.
20. Plan your Instagram posts
How to do it right - watch the video in the original article on the Hootsuite blog.
21. Use individual photos to create one big one
Get creative and enjoy Instagram's grid format.
How to: - To share a #triplegram, post three related images in sequence. So that they occupy the entire line in a single unified form.
- To share a series of posts in a grid, try splitting one image into nine (these apps make it easy) and post them sequentially.
Image from reynoldkitchens Instagram account
22. Adjust the intensity of the filters
For those who want a photo that looks like the real thing, but not quite #nofilter.
How to: - After uploading or taking a photo, tap the filter you want to use.

- Click on the filter again to open the editing options.
- Use the sliding slider on the scale to adjust the intensity of the filter.
- Click Done, to apply the filter to the post and continue editing.
23. Upload or post multiple photos
These are Instagram Stories that will never disappear!
How to upload a post with multiple photos and video clips: - Click the + icon in the navigation bar at the bottom of the screen.
- Click Select multiple on the Galleries tab.
- Select the photos and videos you want to include in Stories.
- Select and customize filters (you can choose a different filter for each photo/video or apply the same filter to the entire post).
- Once you've selected a video, you can trim the clips, or press and hold your finger to rearrange them.
- To delete a clip, drag it to the center of the screen.
- Finish editing as usual and share your masterpiece.
How to record video with multiple clips: - Click the + icon at the bottom of the screen.
- Click Video.
- Click the circle icon to start recording.
- Want some clips? Lift your finger away from the round icon to pause, then press and hold it and the recording will start again.
- To delete the previous clip in the video, click Delete , then click again to confirm.
24. Post a video without sound
If the sound is bad and/or unimpressive, you can also remove it so it doesn't distract your audience.
How to: - Click the + icon at the bottom of the screen to select the video you want to download.
- Press Next .
- Press the volume icon at the top of the screen to mute the video.
This can also be done in stories. To mute the sound, after recording a video, tap the volume control icon at the top of the screen.
25. Save drafts for later
You've taken the perfect shot and edited it to perfection, but the perfect caption never comes to mind. Save the post as a draft with all your edits and come back to it later.
How to: - Tap the + icon at the bottom of the screen to take a picture or upload a photo or video.
- Edit the post however you like by adding filters, captions, tags or location.
- Click the icon < in the upper left corner of the screen to return to the editing screen.
- Press icon < again.
- A pop-up menu appears. Select Save draft .
- When you want to continue editing and publish a post, click the + icon, then select Gallery.
- The new section Drafts will now appear above Gallery .
 Click on the desired post or select Manage, to view all saved drafts.
 - Select the desired post, edit and share as usual.
Note . To remove a post from saved drafts, select Manage to go to drafts, then press Edit . Select the posts you want to delete and click Unpublish at the bottom of the screen, then click again to confirm the action.
26. Blur the background of the portrait
How to: - Open the camera and select Focus from the options under the record button.
- Take a selfie or switch to the second camera to take a picture of another person.
- The subject will remain in focus and the background will be blurred.
This feature is only available on select Android devices, iPhone SE, 6S, 6S+, 7, 7+, 8, 8+, and X.
Companies can use this feature to partner with other companies or influencers, for announcements, joint projects, etc.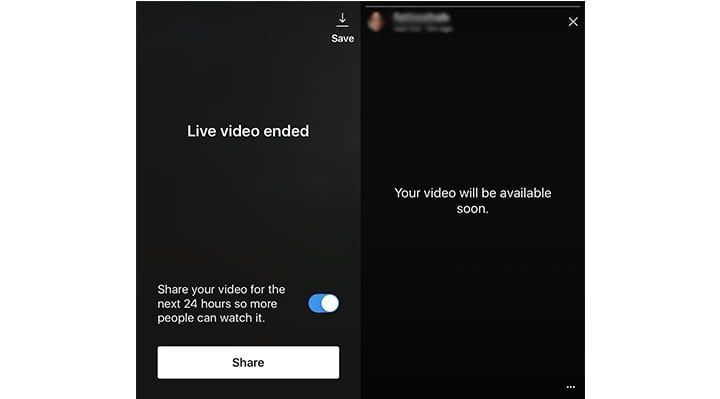 You can invite your subscribers to join the Q&A session you host.
How to request to participate live: - During the broadcast, press Request in the comment section.
- You will see the confirmation when the user accepts it and you will have time to prepare.
- As soon as you go live, the screen will split in half.
- You can leave the live broadcast at any time.
How to accept a request from a subscriber to join your broadcast: - When you go live, you will see a notification for each request in the comments section.
- Click View and then choose whether to add a speaker or cancel the request.
- The double smiley icon will show red numbers showing how many requests you have.
- Click on the icon and you will see both requests and the current number of viewers.
- You can accept the request or invite any viewer to join you.
 You can remove a guest and add someone else at any time.
28. Save the live video
How to: - After finishing the live broadcast, click Save in the upper right corner.
- Then click Done and your video will be saved in the Gallery but will no longer be available in the app.
Stories Hacks
29. Record Videos Hands Free
How to: - Swipe right on the home screen to open the story camera.
- Scroll through the options at the bottom of the screen ー normal mode, boomerang, etc. ー and stop at the recording option Hands free .
- Press the button at the bottom of the screen to start recording.
- To stop it, wait until all the time is up, or press the capture button again.
30. Add as much text as you want to stories
How to: - Swipe right from the main screen to go to the story camera.
- Take a photo or record a video.
- Tap the screen to add text OR tap the icon Aa in the top right corner.
- Write the text.
- Click the > icon.
- Repeat these steps to add more text.
31. Change the color of individual letters or words in text
How to: - Swipe right from the main screen to go to the story camera.
- Take a photo or record a video.
- Tap the screen to add text, OR tap the icon Aa in the top right corner.
- Write the text as usual.
- Press and hold a word or a single letter to select and highlight it.
- Select the desired color.
- Continue editing and posting as usual.
32. Change the color or text on the sticker
How to: - Select the sticker you want to add to your message.
- Click on it to choose a different color.
 If it's a temperature sticker, you can choose between Celsius and Fahrenheit.
33. Share someone else's post in your story feed
Regramming in stories is great for posting user-generated content, or for publicly showing your appreciation for a similar brand or influencer.
How to: - Click the paper airplane icon below the post you want to share.
- Click Add a post to your story .
- The post will appear as a sticker with a custom background.
- You can rotate, scale, move the sticker and click on it to try other styles.
- When you find the right option, press the button Your story for publication. The message will display the username of the original content. When someone clicks on a post, they can see the original post and more content from whoever created it.
You can only share posts from public accounts.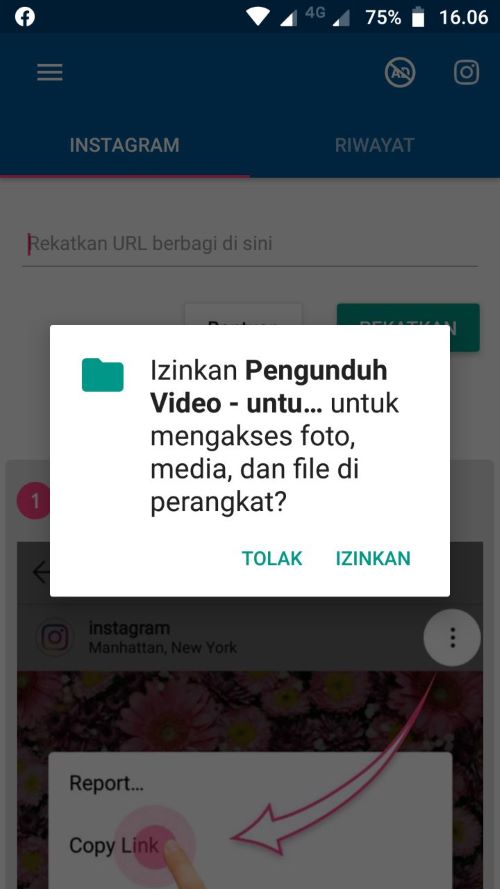 If you don't want your content to appear on other people's Stories, you can check it in your settings.
34. Add a soundtrack to a story from the Instagram music library
You can choose from thousands of songs!
- When you've taken a photo or video for your story, tap the stickers (smiley) icon at the top of the screen.
- Then click the sticker Music in the menu and open the Instagram music library.
- Select a song by searching for a specific track or by mood, genre or trend.
- Click Play to listen to the song before adding it to your story.
- After selecting a song, you can fast forward or rewind it to start playback from a certain point.
- Finish adding to the post as usual and click the Your Story button at the bottom to publish the post.
35. Share a Spotify song or album to your stories
Show how trendy your brand is.

How to: - Open the Spotify app.
- Find the song or album you want to share.
- Press the three dots to open the options menu.
- Scroll down and click Share.
- Click Instagram Stories .
- Instagram will open and you can add a sticker, text or picture to the picture of the album you're sharing (if you share a particular song, the app will still show the album it's in).
- Then click Your Story to add the song.
36. Get music recommendations with the question sticker
Whether you want new music to get you into the holiday spirit or new tunes to help you get through your final weeks of school, your friends have the perfect tracks.
How to: - Click the square emoji in your story to add a question sticker.
- Click sticker with questions and then music icon so people can send you a song.
 They can click on a sticker in your story and then write a question or send you a song.
 - When you view history and swipe up, you will see who replied. Click on someone's answer to share it. The photo and username will not be displayed.
37. Save the whole story to the gallery
If you want to publish it on another channel later.
How to do it: - Open your story.
- Swipe up on the screen.
- Click the arrow icon in the circle in the upper right corner of the screen.
You can also save individual posts from your history by downloading them by clicking the down arrow icon in the lower left corner of the screen. If you've published a post, go to the photo or video you want to save, tap the three-dot icon in the bottom right corner, and select Save Photo .
38. Post a story on your profile
If your story ー is fire and you want everyone to see it ー even those who haven't been on Instagram in the 24 hours it's showing ー post it on your profile.
How to: - Open your story.
- Tap the three-dot icon in the bottom right corner of the photo or video you want to share.
- Click Share as a post.
- Edit ー add filters, tags, captions, etc. ー and publish as usual.
39. Find out how your stories are doing
Want to know how your stories are doing? Take a look at this little-known feature to find out who has viewed posts.
How to: - Open your story.
- Swipe up on the screen.
- Instagram will show the number of views as well as the names of people who have seen each photo or video in your story.
40. Zoom in and out of the video with one finger
How to: - Swipe right to open the story camera.
- Hold down the capture button with one finger to start recording video.
- Swipe up or down with the same finger to zoom in or out.

41. Hide stories from specific users
How to do it: Method 1
- Go to your profile and press the three-line menu.
- Press Settings.
- Click Privacy > History .
- Click Hide my stories from .
- Select the people you want to hide the story from, then tap Done (iOS) or tick symbol (Android).
- To display your history again, tap blue tick and uncheck.
Method 2
You can also select the people your story will be hidden from when you view the list of people who have seen your story.
- Tap the three horizontal dots (iOS) or three vertical dots (Android) to the right of their name and select "Hide history from [Username]".
Hiding your story from a person is different from blocking and does not prevent them from seeing your profile and posts.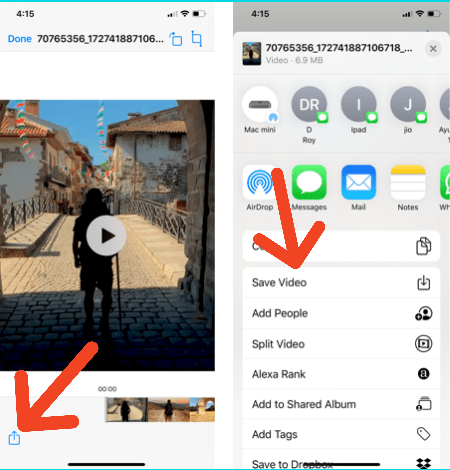
42. Hide your story from the location or hashtag page
How to: - Click Viewed in your story.
- Viewers who view your story via location or hashtag page will appear at the top.
- Click x to the right of a hashtag location or page to hide your story from them.
43. Only share your story with close friends
Make a "best friend list" to share private moments with a small group of your choice.
How to create a "best friends list": - Go to your profile and click the three-line menu.
- Click Best friends .
- Click Add next to the people you want to add to your close friends list. You can also click Search, to find a friend.
- Press Done when finished adding people to the list.
You can safely update the list and remove people from it.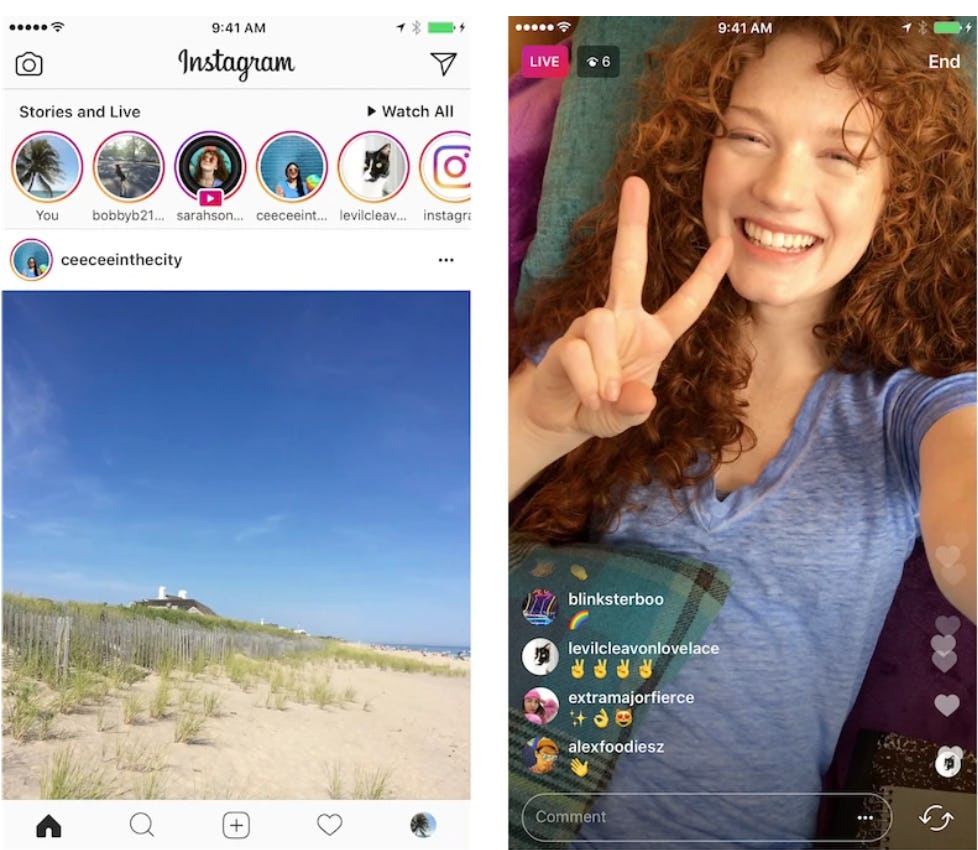 They will not know that you have added or removed them.
How to share your story with your best friends: - Tap the camera icon in the top left corner or swipe right from anywhere in the feed.
- Tap the circle at the bottom of the screen to take a photo, or press and hold to record a video. To select a photo from your phone's library or gallery, swipe up anywhere on the screen.
- When you're ready to post, click Best Friends at the bottom left.
People on your list will know they're on it, but won't be able to see who else is on it. If someone has added you to their list, you will see a green badge when viewing their stories and a green ring around their profile photo.
44. Hide anyone's stories by not unfollowing the profile
Whatever the reason, we are all subscribed to at least one account, the content of which we may not like, but for some reason it is impossible to unfollow the account. What is the solution? Switch his stories to silent mode.
How to: - Press and hold the profile picture of the account you want to disable.
- Press Switch to silent mode . This moves the history to the end of the queue and prevents it from playing automatically.
- To undo this, press and hold the history icon and press Unlock .
45. Add a text post to your story
A picture is worth a thousand words, but sometimes you only want to say a few words.
How to do it: - Go to history, select Text under the capture button.
- Touch the screen and write the text.
- Click the button at the top of the screen to view different styles.
- Select a background and text color.
- Click the icon > when you're done designing and publishing your story.
46.
 Post photos or videos of any size without cropping
 Now you can share a widescreen photo of a company of colleagues without cutting Gary out of the accounting department.
How to: - Upload a wide photo or video and slide your fingers to zoom out and share the photo at original size.
- The empty space will be filled with a color gradient that matches the photo.
47. Pin your best stories to your profile header
Businesses can keep their best stories forever with Instagram Stories Highlights.
How to: - Click on the circle New on the left side of your business profile.
- Select any stories from your archive (note: Stories from business profiles are automatically saved to the archive after the show time).
- Select an album art icon and name the collection.
- Your collection will appear as a circle on your profile that plays as a single story when someone clicks on it.

- To edit or delete pinned stories, on your profile, press and hold the icon.
Eternal stories remain on your profile until you delete them. You can post as many pinned stories as you want. Check out how to create forever story cover icons for free so that your icons really stand out from the crowd.
48. Share Instagram story in Facebook stories
You can do this for a single post, or you can set the app to automatically post all your Instagram Stories to our Facebook page.
How to do this for a specific story: - Start creating a story, then click Next .
- Click on Your Facebook Story .
- Click Share .
How to set up automatic posting to Facebook stories: - Go to your profile and click on the three-line menu.
- Press Settings .
- Click Privacy > History .
- Turn on the Share story on Facebook toggle to enable the export of posts.
49. Share the recording of the live broadcast in stories
Another feature available to business accounts.
How to: After the live broadcast ends, click Share at the bottom of the screen and the video will be added to your story.
Note . The recording will be available within 24 hours. During playback, all comments and likes from the original broadcast will be displayed. Companies will also be able to know exactly how many people watched the video ー both live and recorded in stories.
50. Share a story preview
Want to encourage your audience to watch the rest of your account's stories? We have a simple trick for this.
Keep scrolling to see the top 10 beach camping spots in British Columbia.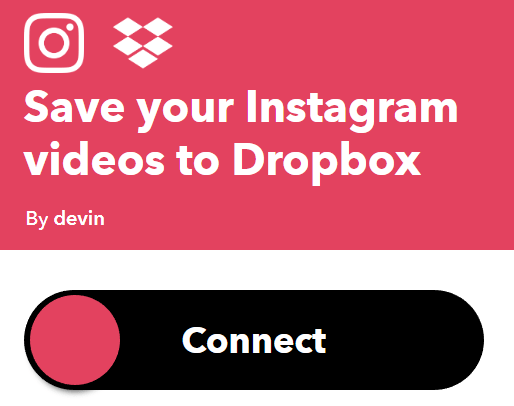
How to: - Open stories and take a photo or select one from your library by swiping up.
- Click on the pen icon in the upper right corner of the screen.
- Select a color.
- Press and hold on the screen for 1-3 seconds until the screen fills up.
- Click on the eraser symbol in the upper right corner.
- Erase the part of the image you want to show by swiping the screen or touching the screen with your index finger.
- Click Your Story, to share the image.
51. Link your IGTV video to your stories
If you just created an IGTV account, let your followers find your new content ー share it in stories.
How to: - In your stories, select the image you want to post (a screenshot or a still from your IGTV video).
- Touch the link icon in the upper right corner of the screen and select IGTV video from the menu Add link .
- Select the desired video and click Done in the upper right corner of the screen.
Now your followers will be able to go to the video on IGTV by scrolling through the story on Instagram.
Profile description hacks
52. Include a hashtag or profile link in your profile description
In your profile description, you can link to a hashtag page or other account.
How to: - Click the profile icon to log into your account.
- Click Edit profile and go to section
About me . - Enter # or @ and a list of recommended hashtags and accounts will appear.
- When you select the desired hashtags and accounts, they will become active and link to the section About me .
Note . When you mention someone else's profile in the description, their owner receives a notification and can remove the link.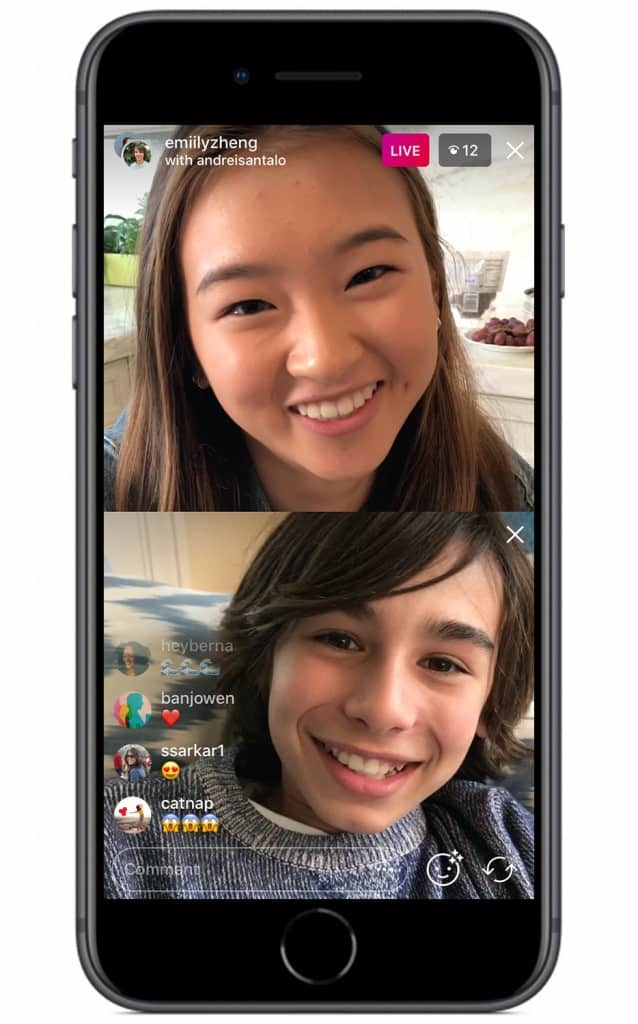 The account will remain in your description, but without an active link.
53. Hide photos you've been tagged in (or remove the tagging completely)
Has your company been tagged in an image you don't want to be associated with? There are ways to remove it from your profile.
How to: - Click the person icon to access your profile.
- Click on the person icon in the frame below the profile description to go to the tab Photos and videos with you .
- Click on the photo you want to remove from your profile.
- Click on the three dots icon in the upper right corner and select Posting Options.
- Select Hide from my profile or Remove label, if you want remove label.
Pro tip: If you don't want tagged photos to appear on your profile, go to the three-line menu, section Privacy > Tags and toggle the Add Automatically toggle to inactive.
54. Add line breaks to your profile description to make text stand out
If you want to break up a block of description text about yourself, this hack is for you. Line breaks are a great way to add information and enhance the visual experience.
How to do this on mobile: - Open the note app and write the text, including line breaks.
- Select all text and select Copy .
- Open the Instagram app.
- Click on your profile icon to access your profile.
- Click Edit Profile .
- Paste the text from the notes into the profile description field.
- Press Done to save the changes.
How to do it on PC: - Log into your Instagram profile in a browser.
- Select Edit Profile .
- Break text into paragraphs the way you want them to appear.
- Press Submit, to save the changes.
Note . It does not matter if the profile was edited from a mobile device or from a PC, when viewed from a desktop computer, the information will be displayed without paragraphs.
55. Include a link in your profile description to drive traffic
Profile Description ー A great place to link and drive traffic to your website or other social network.
How to:
Click on the profile icon and go to it.
- Click Edit Profile .
- Insert the link you want to share.
- Click Done to save your changes.
Pro tip: include UTM parameters in your URL to track the amount of traffic coming from your profile link.
56. Make your description appear in more search results
You can search for a person in the profile description by field Name . If you mention keywords related to your business in your name, you will appear more often in the search results of people who are looking for companies in your industry.
How to: - Click on Edit Profile .
- In section Name , change the text to include keywords.
- Click Done in the upper right corner of the screen.
57. Change profile description alignment
Tired of left alignment? There is a way to align the profile description to the center or even to the right.
How to do it: - Go to your profile on a PC browser (easier than on a mobile phone).
- Copy the space between the arrows (not the arrows themselves!): >> ⠀⠀⠀⠀⠀⠀⠀⠀⠀ <<
- Click Edit Profile .
- In field of description , paste the spaces you copied above before each line of text. Add or remove spaces to align text further to the right or left.
Note: you only have 150 characters to describe your profile and each space counts as a character.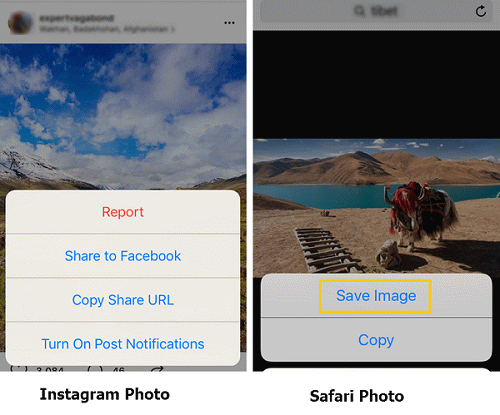
58. Add special characters to your profile description or caption
On some Instagram profiles you will see symbols such as hearts, stars and pencils. You can do that too!
How to: - Open a Word or Google document.
- Start typing about yourself. To place a special character, press Insert , then Special characters.
- Add icons.
- Open your Instagram profile in a web browser and click Edit Profile .
- Copy and paste text from a Word or Google document into the profile description and click Done .
59. Switch to a business profile to serve ads and get analytics
If you represent a business and still don't have an Instagram business profile, you're missing out on useful features and insights. Switch now.
How to do it: - Go to your profile and click the three-line menu.

- Press Settings .
- Click Account .
- Click Switch to professional account .
- We recommend that you connect your business account to a Facebook page that is linked to your business. This will make it easier to use all the features available to companies. Currently, only one Facebook page can be connected to your account.
- Add details such as your company or account type and contact information.
- Press Done .
Hashtag Hacks
60. Find the best (and most relevant) hashtags
Because with the right hashtag, your content will be found more often, and this will allow you to expand your audience.
How to: - Select the magnifying glass icon and go to the search tab.
- Enter a keyword and tap the tab Tags .
- Select a hashtag from the list.
- You will land on the posts page with this hashtag.

- Above the tabs TOP and Recent appears a small line labeled Similar . Next to it, Instagram will display a list of similar hashtags that you can scroll through for inspiration (and further search).
61. Subscribe to updates of interesting hashtags
Great way to get inspired to create content!
How to: - Select the magnifying glass icon to go to the search tab.
- Enter the hashtag you want to follow.
- On the hashtag page, click the Follow button.
62. Save the hashtags for later
If you often use the same hashtags for every post, save them in a note to save time.
How to: - Create a new document in the notes app on your mobile device.
- Add the most frequently used labels to the worklist.
- When you come up with a post, go from Instagram to the notes app, copy the text and paste it into your caption.

63. Hide hashtags in posts
Don't pollute signatures. Hide hashtags so the reader can focus on what's important.
How to do it ー method #1: - One easy way to hide hashtags ー is to remove them from your caption completely and put them in a comment under your post.
- As soon as someone writes another comment, your hashtags will be securely hidden in the comments section.
How to do it ー method #2: - Another method is to separate hashtags from the rest of the caption by burying them under an avalanche of line breaks.
- Press the key 123 when you come up with a signature.
- Select Enter .
- Enter part of the punctuation marks (period, bullet or dash), then press Enter again.
- Repeat steps 2 to 4 at least five times.
- Instagram hides captions after three lines, so hashtags won't be visible unless your followers click yet on your post.

64. Hide hashtags in stories
You can include up to 10 hashtags in a single story, which will greatly increase the number of people who see it. To keep your story from looking cluttered, there are two easy ways to hide hashtags and maintain a neat appearance.
How to do it ー Method #1: - After you have entered the hashtags, reduce them to the minimum size using your thumb and forefinger.
- Place a sticker, big emoji or GIF on top of them.
How to do it ー Method #2: - After you have typed the hashtags, reduce them to the minimum size using your thumb and forefinger.
- Click on the hashtags again.
- Then click on the eyedropper icon in the lower left corner.
- Click on the area where you want to hide hashtags. The hashtag text will be painted in the same color as the background, effectively hiding the captions.
Hacks for private messages in Direct
65.
 Disable activity status
 If you don't want your followers to know when you last logged into the app, you can disable your activity status in Instagram Direct Messenger.
How to: - Tap the profile icon in the lower right corner of the screen.
- Press Settings .
- Scroll down and select Online Status.
- Switch to inactive position.
66. Send disappearing content to other accounts
You can send a disappearing photo, video or boomerang to another account or group of friends using Instagram Direct Messaging.
How to: - On the home screen, tap the camera icon in the upper left corner of the screen. You can swipe right to open the camera, or open Instagram Direct by tapping the paper airplane icon in the top right corner of the screen, then tapping the camera icon in the top left corner.
- Take a photo, video or boomerang.
- Edit.
- Click the > icon in the lower right corner of the screen.
- Select a recipient OR click New group to send a message to multiple people in the same group chat.
- Click Send at the bottom of the screen.
If you select multiple recipients without creating a group, the same message will be sent to each user.
67. Send live video
You can send your live video or the video you are watching to a user or group.
How to: - When capturing live video, tap the Direct (paper airplane) icon at the bottom of the screen and send the live stream to your friends (you'll also have this option when you're streaming with a friend).
- After sending, the recipient will see your video in the Yandex.Direct mailbox. Friends can only view your video if you are currently live.
68. Edit a photo of a friend and send it to him
How to: - When viewing a photo message from a friend, tap the camera icon at the bottom and capture the reply.