Gone are the days when Instagram users were limited to posting their photos only in the form of cropped squares. As the popular social media app has grown its platform, it’s also increased the photo sizes allowed. You can still post in the classic square crop, but you can also post nearly full-length content in both vertical and horizontal formats.
While the possibilities are greater than ever with today’s Instagram, there are still restrictions on photo sizes. And if you’re not sure about the crop ratio or how to keep Instagram from posting lower-quality images, no worries. We’ve got you covered.
In this guide, we’ll go over all of the current Instagram image sizes to be aware of — and how to ensure that your content is being posted in the best format possible.
Unless you’re capturing and posting content directly with the in-app camera, it’s helpful to understand the different size requirements for Instagram. One good thing to note is that they are not identical across the board; there are different requirements for different posting formats, and the first one we’ll go over is Stories.
To upload a photo from your Camera Roll, it must be 1080 pixels by 1920 pixels. If you’re unfamiliar with these dimensions, that means your content will have to be 1080 pixels in width by 1920 pixels in height, which gives it an aspect ratio of 9:16 (“aspect ratio” is a term that refers to the ratio of a photo’s width to its height). These restrictions also mean that the maximum size in terms of megabytes (or MB) is 30MB.
You can upload a photo that does not fall within these dimensions, but Instagram will crop it to fit, as displayed in the example below.
However, if your photo doesn’t meet the Instagram Story requirements, you can easily resize it to fit. And you don’t even have to download any additional third-party apps to do so.
Here’s how to resize a photo for Instagram Stories through your Photos app on your iPhone:
After you complete those steps, your newly resized photo will be ready to be uploaded via Stories.
When it comes to your Instagram feed, there’s a little more wiggle room in terms of photo dimensions. But not all sizes are created equal. There are some restrictions and varying optimal sizes for each photo format to help you publish the highest-quality post allowed.
Sometimes, you want to keep it classic. And if that’s the case, then the square photo format is the way to go.
For this format, the recommended photo size is 1080 pixels by 1080 pixels, an aspect ratio of 1:1. Instagram will compress your file, so the photo that gets published on your feed will be closer to 600 pixels by 600 pixels.
Want to show off your full-length vertical pic? You can, so long as you adhere to the following requirements.
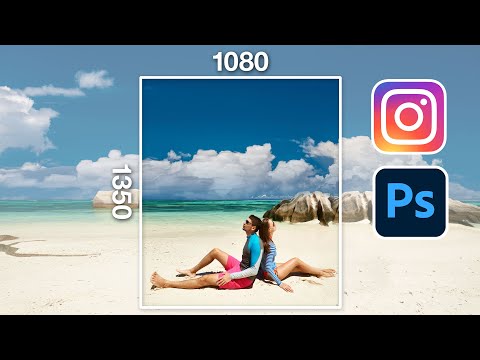
For vertical (also known as portrait) photos, Instagram recommends a size of 1080 pixels by 1350 pixels. That way, it will be displayed at 480 pixels by 600 pixels when compressed. The aspect ratio for that size is 4:5.
If you try to upload anything larger than that size — like an iPhone photo in its original 3:4 aspect ratio — Instagram will crop your content back down to 4:5.
Horizontal (aka wide-length) photos are where things can get a bit complicated. Instagram recommends an aspect ratio of 1.91:1 or 1200 pixels by 627 pixels. However, you can actually post a horizontal photo as large as 16:9, or 1920 pixels by 1080 pixels.
As long as you make the height of your photo 1080 pixels, the quality of your image should be retained.
By default, Instagram still crops your photo to a square aspect ratio. But a quick step in your posting process can revert your photo back to its full length. Here’s how to post a full-size vertical or horizontal photo:
Remember: If you don’t follow the previously mentioned steps, Instagram will automatically post your photo in the square format. So if you don’t want to publish a cropped photo, resize it to the allowed optimal size (see above) and follow the steps, as indicated.
Another example of a time when things can get tricky is when you attempt to create a post using multiple images (also known as a carousel or an album post) featuring photos of different sizes. Instagram requires album posts to all be the same aspect ratio. So if you want to post different images in different sizes, you can do that by adding frames to them with the help of a third-party app. In this case, we’ll be using the free app No Crop For Instagram Story.
Here’s how to post photos of different sizes in a carousel post:

If you need to resize your photo for an Instagram post, all you have to do is follow some instructions similar to those used for resizing for your Instagram Stories.
Here’s how to resize a photo for Instagram using the iPhone’s Photos app:
Instagram is believed to be the culprit of many users’ photo quality issues. While it is true that the social media app compresses photos upon publishing, they do upload them at the highest-quality resolution possible, up to a width of 1080 pixels.
However, if you’re uploading an image with an aspect ratio that isn’t supported, Instagram will crop it to fit a supported ratio. If you’re uploading a photo with a lower resolution, Instagram will enlarge it to a width of 320 pixels, and if you’re uploading a photo with a higher resolution, it will be sized down to a width of 1080 pixels.
So long as you’re uploading within Instagram’s photo restrictions, your photos will not be low-quality.
Finally, the last category of image restrictions you should be familiar with has to do with your profile photo. Displayed on your profile page, on your Story, and next to your posts, your Instagram profile photo must be a minimum of 110 pixels by 110 pixels. The maximum resolution allowed is 180 pixels x 180 pixels.
While uploading photos to Instagram is as simple as clicking a button — literally — it’s essential to make sure that the images you’re uploading fall within the platform’s size guidelines, so you’re only showing off the highest-quality content possible.
Writer and editor, driven by curiosity and black coffee.
4 min
This article shows you how to fit the whole picture on Instagram. If you have a full portrait (9:16) image or video or a landscape (16:9) image or video, you can fit the whole picture in your Instagram post by following this tutorial.
Instagram has a maximum aspect ratio of 4:5 on portrait posts (four pixels wide for every five pixels tall). Instagram’s restriction reduces the number of very tall images that take up a lot of vertical space in the feed. Although it’s nice that Instagram keeps users from publishing massive, obtrusive posts, the 4:5 limit makes it difficult to post a whole vertical picture or video that you shot on your phone.
Here's what your tall photos will look like on Instagram without added borders.If you want to fit your whole picture on Instagram but it is taller than the 4:5 aspect ratio, you need to modify your image before posting. Otherwise, Instagram will automatically crop your image to a maximum of 4:5. I recommend the Kapwing resizer as it allows you to add white space on either side to bring your image to the required aspect ratio. In this article, I’ll explain how to fit the whole picture on Instagram in three simple steps:
Start by opening the Kapwing’s Resizer tool on your phone or computer. Upload your image file from camera roll or import it from a URL. Kapwing supports images, videos, and GIFs, so you can use it to resize for any kind of media.
The video resizer tool in KapwingOnce your picture loads into the editor, you’ll be taken into the Kapwing Studio Editor where you'll see a preview of your image in the center of the screen.
In the Output Size section, select the 4:5 option. This allows your photo to take up maximum vertical space in the Instagram feed without getting sized down. There is a resizing option for Instagram, 1:1, but this shrinks your image to fit in the default square shape.
Resize the image to 4:5 using the button in the Output Size listOnce you have selected the size option, Kapwing adds white padding to either side of your image to make it fit the 4:5 aspect ratio. You can change this white background to any color you want so that it stands out in the Instagram feed.
Click the red Export Image button at the top of the screen. After a few moments of processing, Kapwing makes your resized 4:5 picture or video available for download. Whether you're using a desktop computer, iPhone, Android, or tablet you'll be able to instantly download the image to your photo gallery once published.
If you're not signed into a Kapwing account, sign in or sign up using your Google or Facebook account – once you've signed into a Kapwing account, the watermark in the lower right corner will be removed from your final image.
Open the Instagram app and upload your picture. You’ll notice that Instagram crops the picture to square by default, but you can click the expand arrows or pinch the image in the lower left to fit the whole picture on Instagram. When you publish it, Instagram will resize to image width to fit the screen, the white image background will blend in with Instagram’s white background, and your whole picture will appear on Instagram with no cropping.
Note: You can also choose a black background, if you and your followers use Instagram in Dark Mode.
This tutorial shows you a workaround for posting full portrait pictures and videos on Instagram. You can use Kapwing’s Resizer to post multiple images with different sizes on Instagram, add a thin white border around your media, and publish TikTok and Snap videos. I hope that it helps speed up your social media workflow and enables you to post your beautiful and fun candid moments to Instagram.
This is how your tall photos will appear on Instagram slides – you can see the whole thing!For more information on how to resize a video for Instagram, check out this video tutorial (we give you the best sizes for each type of video too!):
Check back in at the Kapwing Resources page or our YouTube channel for other content creation tips and tutorials! And remember to tag us @KapwingApp whenever you share your content on social media– we love to see what our creators are passionate about!
Related Articles:
Instagram's habit* of cropping photos in the most inappropriate places is frustrating. The user uploads a photo, and Insta boldly compresses and cuts off half of the picture. As a result, heads, legs, parts of the landscape remain behind the scenes, and I only want to delete such a post. Previously, to place a photo without cropping, you had to use additional software, but now there are other ways that we will talk about in our article.
This social network has several reasons to crop users' photos. She tries to adapt pictures so that they look on vertical phone screens, even if the photo has a strange aspect ratio. And besides, network owners want to save space on servers.
The main reason why a social network crops photos is to equalize the conditions for all users so that photos of any size and quality look attractive, and all pages are the same on the social network on all devices.
Insta by default crops photos that do not meet its requirements. If the image width is between 320 and 1080 px and the aspect ratio is between 1.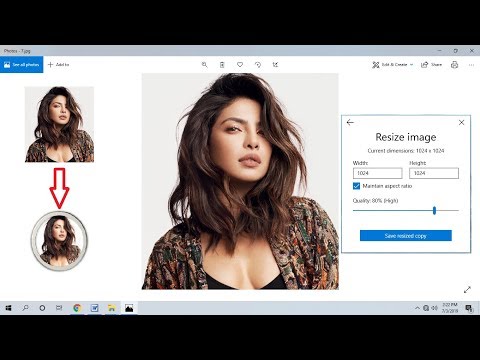 91:1 and 4:5, then the image is published unchanged. If the resolution is lower, Instagram* increases it. If more than 1080 px, then it compresses to 1080 px.
By default, Instagram* scales the photo and takes the center of the frame for publication. If you click on the zoom icon in the lower left corner, then Instagram * will take the entire frame for publication.
When you click on the zoom icon, the entire photo is in the frame. The frame can be sent to Insta without editing the edges if the aspect ratio is 16:9. Before publishing, you can see how it will look likeRecommended reading: Optimal image sizes for social networks: cheat sheet.
If the photo falls within the proportions Instagram* needs, then Instagram* will not crop part of the image.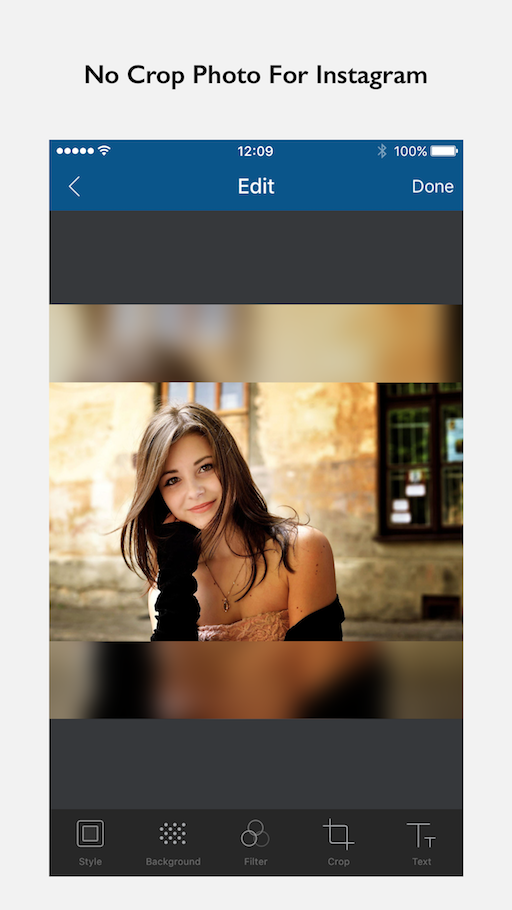
| Format | Approval | |
| Avatar photo | square, 1:1 | optimal 160 x 160 px, minimum 110 x 110 px, maximum 180 x 180 px |
| Post photo | horizontal 1.91:1, vertical 4:5, square 1:1 | horizontal, 1080 x 566 px, vertical, 1080 x 1350 px, square, 1080 x 1080 px |
| Photos for stories and IGTV | vertical 9:16 orientation | 1080 x 1920 px |
Official information from the support of Instagram* informs that the photo will be published in the best possible resolution with a width of up to 1080 pixels. This rule does not depend on whether the device is Android or iOS.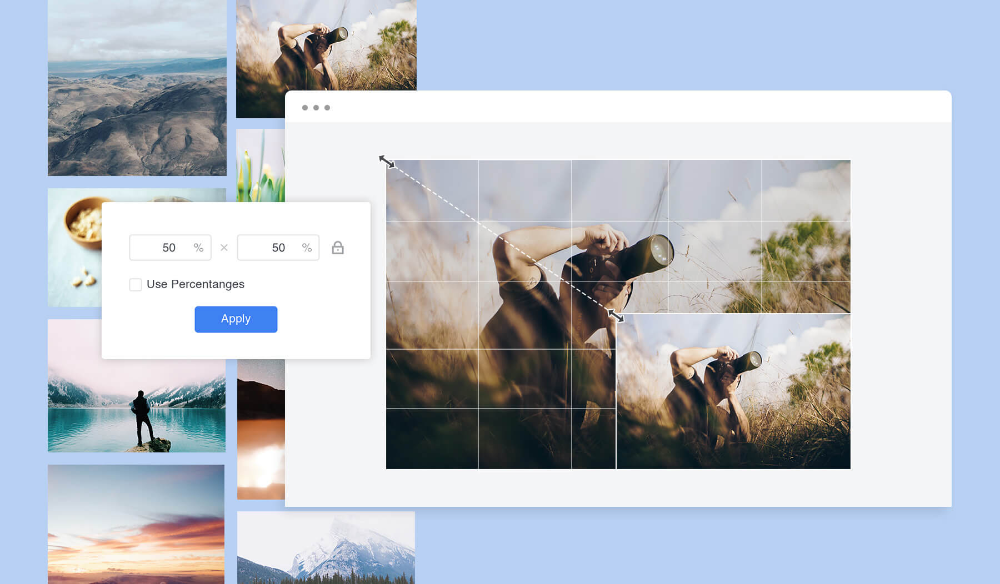
If the photo has a width of 320 to 1080 pixels, then its original size is preserved, but only in cases where the aspect ratio meets parameters from 1.91:1 to 4:5. In this case, the height should be from 566 to 1350 pixels, and the width should be 1080 pixels.
If you want to share a photo with a different extension, Instagram* will crop the photo to the correct size.
If the photo is smaller, then Instagram* will increase the width to 320 pixels. If more than 1080 pixels, then the width will be reduced to 1080 pixels.
There are several ways to add a full photo to Instagram*. To do this, select one of the options:
Let's consider these placement methods in more detail.
Previously, all images of non-standard sizes were published by the social network with a white background behind the frame. This was necessary if the width or height of the photo was not enough. Now you can do without it. Instagram* allows you to post pictures that do not fit the size requirements. When publishing, an automatic transparent background will appear on the image.
There will be no background if the photo is scaled when publishing. After the frame is selected, it remains to decide on the part of the picture that you want to publish. But there is a nuance - sometimes important parts of the photo disappear, because Insta crops them.
Half of the text at the bottom of the frame and part of the character's head are missing from the photo. But there is no transparent background on the sides. It is worth scaling if the essence of the image is in the center of the frame, and there is nothing important at the edgesRecommended reading: How to make your own stickers in Telegram.
Not so long ago, Instagram* introduced the ability to post vertical long photos.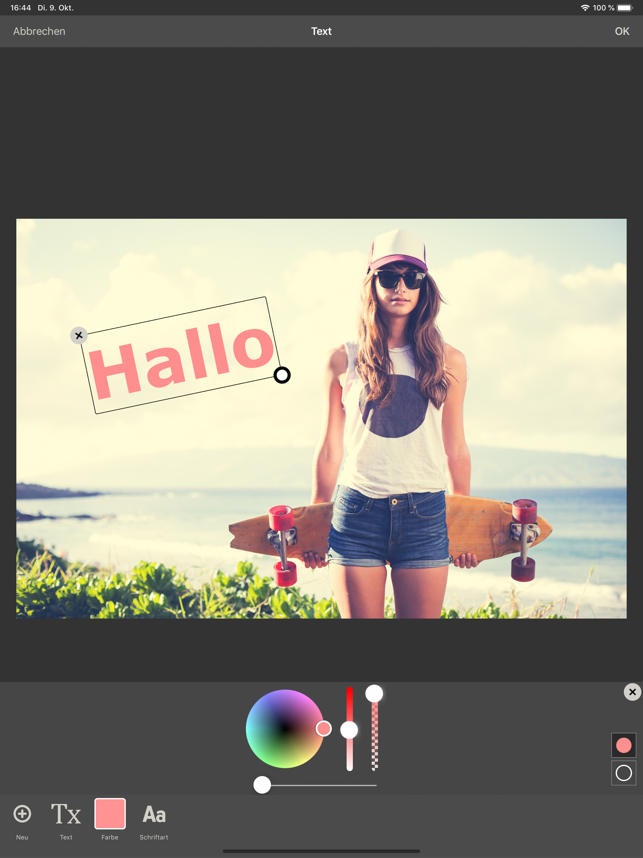 A special button has appeared in the interface that allows you to stretch the image on the sides and add a transparent background there. The photo will be in full size, but with frames.
Instagram* will not allow you to post a panoramic photo in the feed because it is too long horizontally. To upload a frame to the social network completely, without cropping along the edges of half the frame, you need to use special software.
There are 2 simple programs that will help you with this - SwieablePanorama (iOS only) and InSwipe Panorama for Instagram* (works on Android and iOS). In any of the programs, a photo is easily loaded and cut into several identical blocks. They can be uploaded to Insta in the form of a carousel. This is a rather unusual and winning way to publish a panorama without losing the quality and meaning of the image.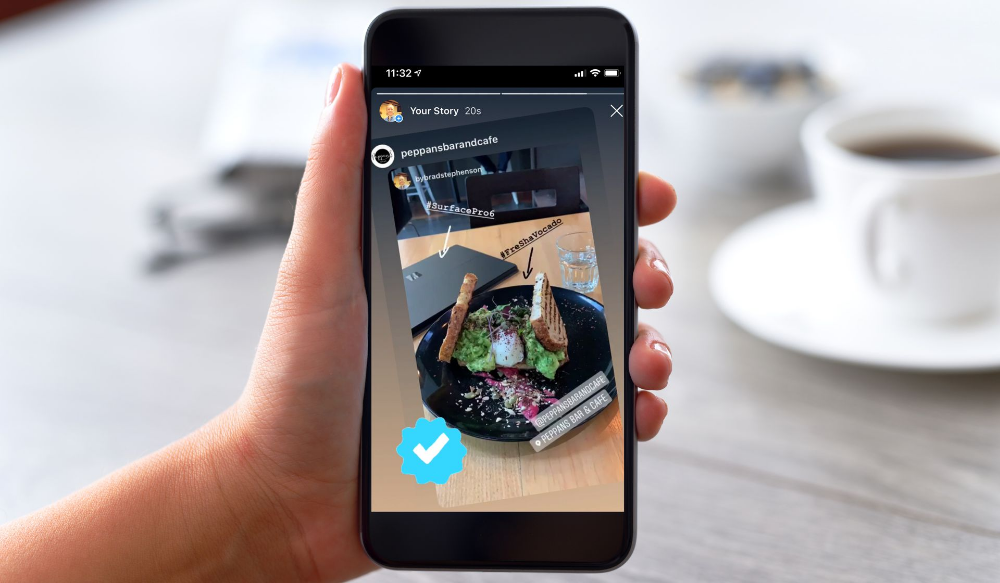
Recommended reading: How to make an attractive cover for a VK group.
To make the image meet the requirements of the social network, you can use special applications. Finding software that will help you crop a photo or fit it to the right size is not difficult.
In order for the image to be displayed on the network completely, you can crop it manually, through the program. Almost any graphic editor will help with this, even the simplest Paint will cope with the task of changing the size in pixels or as a percentage.
Here are a couple of programs through which photos are usually cropped:
 A huge number of functions and possibilities for editing. The only difficulty is that you will have to install this rather big software and understand its intricacies.
 The main thing is to remember the proportions and the maximum possible expansion of the image, depending on its purpose. After all, it can be square, vertical or panoramic.
The easiest way to check and adjust the aspect ratio is in Paint You can use any online program, including Canva. Through them you can upload photos, resize and edit. After such processing, Instagram* will not cut the edges.
Blogs usually prepare a lot of photos at once to provide a page with content for weeks and months. To do this, it is convenient to use SMMplanner delayed posting, where posts are posted in advance, and then become visible to subscribers exactly on schedule.
To understand this feature, we advise you to study Delayed Posting to Instagram* from a computer. Here we talked about how to work with it, how to create and plan Stories, how to publish carousels and much more.
Another way to upload full size photos is to use dedicated apps. Below are the most popular and simple among the programs.
Software for Android and iOS phones. There are both standard functions and other features - change the size, edge, frame characteristics. You can edit a photo for publication, create a collage or story. In addition - the function of zooming pictures. You can pull up a photo from the gallery, clouds, or take a picture right now.
In addition, the following functions are available:
Run the program and select a picture to share. A light frame will appear in the frame, under which you need to fit the image. After that, the frame can be published - Instagram * will no longer crop it.
We looked at the main ways you can post a photo to Instagram* without cropping half of the photo. All of them are easy to use, because the main thing is just to keep the proportion and resolution of the frame. And through the program, you can further configure filters, add frames and inscriptions, in general, fully prepare the photo for publication in all its beauty. If you know other ways - tell us about it.
The article has been updated. First published: January 26, 2021
Have you ever felt like posting a full size photo to your story or Instagram feed? But the social network ruthlessly cut off the most beautiful area in the picture. Let's see how to resize to instagram and upload a photo in original size.
If you want to post a story, but everything is cut off, then the easiest way to resize a photo for Instagram is to take a screenshot of it from the general Gallery. Only if you upload a picture to the story, the image will have black borders.
Everything is easier with posts. And uploading a full size photo is easy. Let's see how to do it. Instagram itself has a standard function with which you can adjust the size of the photo to Instagram.
What to do:
If you're a creepy perfectionist and want all of your photos to be edited the same way, then you can use an app called Instasize . You can download it in the AppStore and Google Play (in-app purchases are possible).
Leaving the photo in full size, you can choose any frame format in the application:
The following functions are also available in the program:
Be the most stylish! Use super effects: