- Advertisement -
With over a billion monthly active users, Instagram is one of the most used apps in the world. With such big numbers, it becomes absolutely necessary to make sure the servers are running at all times. To reduce the load on its servers, Instagram automatically scales down the media that users upload on the app. This means that any photo or video you upload to Instagram gets compressed and loses some quality before getting published. Apart from reducing the load on servers, this also increases the speed of the app and creates uniformity in browsing. While there is no way to bypass this downscaling, there are some ways to limit its effects. In this article, we bring you the 7 best ways to upload photos and videos on Instagram without compression or losing image quality.
Read Also: Flipkart Big Diwali Sale 2022: Get exciting deals on Poco smartphones
- Advertisement -
Table of Contents
- Advertisement -
Follow the upload guidelines- Advertisement -
Instagram has very particular upload guidelines in place to maintain uniformity across the app and offer an optimised and smooth browsing experience for all users. If you follow these guidelines, Instagram will not downscale your photos and no compression will take place during the upload. Here are the basic guidelines for every type of upload.
For images, make sure the image resolution is at least 1080p and the aspect ratio is between 1.91:1 (Landscape) and 4:5 (Portrait). For videos, follow the guidelines mentioned below.
Instagram StoryAspect Ratio: Portrait (9:16)
Frame: 30fps
Minimum Resolution: 720x1280p
Recommended Resolution: 1080x1920p
In-feed videosMaximum file size: 4GB
Maximum length: 60 seconds
Frame: 30fps
Aspect Ratio: Square (1:1), Landscape (1.91:1), Portrait (4:5)
Minimum Resolution: 600x600p (Square), 600x315p (Landscape), 600x750p (Portrait)
IGTVFile Size: 3.6 GB
Length: 60 minutes
Aspect Ratio: Portrait (9:16)
Minimum Resolution: 600x1067p
Recommended Resolution: 1080x1920p
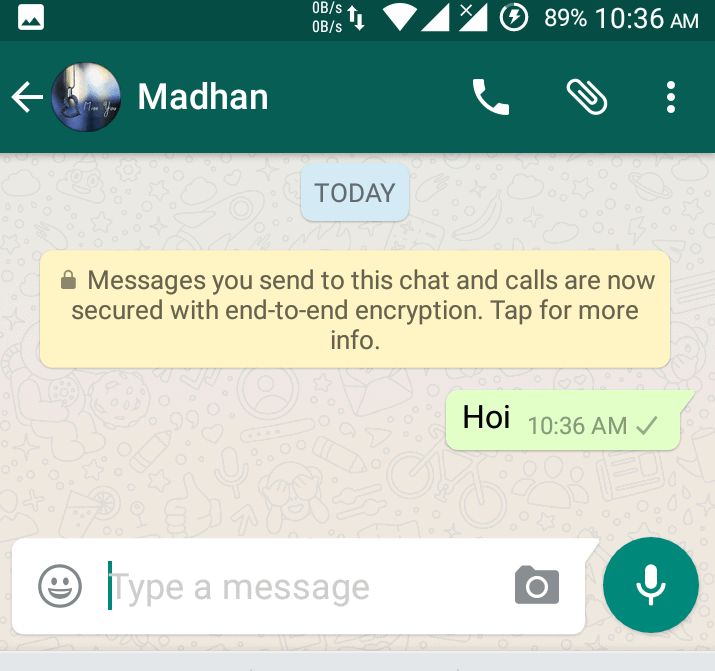
Make sure image quality isn’t lost in transfer between devicesIf you took an image from your DSLR or mirrorless camera and want to upload it to Instagram using your smartphone, make sure there is no loss in quality while transferring the image from your camera to your phone. Conversely, you need to ensure the quality of the image remains intact when you’re uploading an image to Instagram from your computer. AirDrop, Google Drive, and Dropbox will not reduce the quality of your image while transferring it to another device. However, WhatsApp and other messengers are notorious for downscaling the images you send through them.
Your smartphone’s default camera app is the best way to take highly detailed pictures. The native camera app is familiar with the hardware of the phone and is designed to make the most out of it. The in-built camera in the Instagram app doesn’t take the best quality pictures and often downscales the image while processing it. Use the native camera app to take the pictures and resize them later according to Instagram’s guidelines.
Compress the videos before uploading themIf your videos are of ultra high-quality, chances are Instagram will compress them before uploading. It is better to compress them yourself and have more control over how the output looks. Instagram usually compresses the videos more than required and it causes a severe drop in quality. There are a large number of software and online tools you can use to compress your video.
Similar to videos, Instagram can compress your images a lot more than required before uploading them. There are a lot of photo editing apps on Play Store that will help you in resizing the images for Instagram. Make sure the resolution is 1080p and the aspect ratio fits either the landscape, portrait, or square frame. Resizing the image prior to upload gives you more control over how it looks.
Do not add music to picturesAdding music to images for your Instagram Stories can reduce their quality. This is largely due to the fact that Instagram limits the size of every upload, and adding music bulks up the size of the media. As a result, the image quality takes a hit. To make sure this doesn’t happen, avoid adding music to your pictures.
Use the manual mode in your phone’s camera app to capture highly detailed images in maximum resolution. Resize these images later according to Instagram’s guidelines. This gives you greater control over how your image will look.
Read Also: Flipkart Big Diwali Sale 2022: Get exciting deals on Poco smartphones
ConclusionThese are the 7 best ways to upload photos and videos without compression or losing quality on Instagram. While uploading an image without any loss of quality is almost impossible, you can retain a lot of essential details in your images and videos using the tips listed above. Try these methods and let us know how they work out for you.
For the latest gadget and tech news, and gadget reviews, follow us on Twitter, Facebook and Instagram. For newest tech & gadget videos subscribe to our YouTube Channel. You can also stay up to date using the Gadget Bridge Android App. You can find the latest car and bike news here.
- Advertisement -
We are a humble media site trying to survive! As you know we are not placing any article, even the feature stories behind any paywall or subscription model. Help us stay afloat, support with whatever you can!
- Advertisement -
- Advertisement -
- Advertisement -
- Advertisement -
- Advertisement -
Komila Singh - 0
Apple Arcade released a new vintage driving game called JellyCar Worlds. According to Apple, the game features classic and unusual soft body mechanics and...
- Advertisement -
- Advertisement -
- Advertisement -
By default, Instagram compresses the photos and videos you upload on the platform. This reduces the quality, which could disappoint many people. While there’s no direct option to disable compression, you can follow some tips to get original image upload quality. Here’s how you can upload photos and videos without compression or losing quality on Instagram. Additionally, you can learn about Instagram Supervision and How to Use and Remove It From Your Account? (FAQS)
Table of Contents
When you upload photos and videos on Instagram, be it stories, posts, reels, or IGTV, they get compressed to reduce the file size and bandwidth. The compression may go overboard at times, causing the media to lose detail or appear pixelated.
Instagram uses its proprietary algorithm to apply compression to everything you upload. This is done:
If you don’t want the upload quality to suffer on Instagram, there are certain tips you can follow like checking the upload guidelines, resizing the image, changing how you transfer files, tweaking camera settings, and more. Check the guide below.
Instagram will upload the photo in its original resolution as long as you’re following the guidelines given below.
Use the latest version of the Instagram app.
Upload photos up to a width of at least 1080 pixels with an aspect ratio between 1.91:1 and 4:5.
Make sure you’re using a good quality camera because each phone has different quality cameras.
If you upload a picture with super high quality, Instagram will compress it to reduce the width to 1080 pixels. At the same time, if you upload a low-quality image, it will enlarge the image to a width of 320 pixels which again can mess with the clarity.
To make sure that Instagram places your photo in its original resolution, follow the requirements. Also, avoid using Add Music feature for photos in stories as it heavily reduces the image quality and makes it appear blurry.
Follow the recommended guidelines to upload videos without losing quality on Instagram.
 6GB
6GBYou can scale down your image size upfront to stop Instagram from applying compression. If your photo measures 4000 x 4000 pixels, scale it down to 1080 x 1080 pixels.
Follow the correct aspect ratio– 1:1 for square, 1.91:1 for landscape photos, and 4:5 for portraits. You can resize or compress the images via different tools on your phone or PC:
 Enable High-Quality Uploads for Instagram Videos
By default, Instagram reduces the video upload quality to suit network conditions. Here’s how you can turn it off to always upload high-quality reels and IG videos:
1. Open the Instagram app on your Android or iPhone.
2. Tap the profile icon at the bottom right.
3. Click the hamburger menu and select Settings.
4. Navigate to Account > Data Usage.
5. Here, enable the toggle for Upload at highest quality.
Once enabled, Instagram will always upload high-quality videos even if it takes a little longer. If the high-quality uploads option is not available, try switching to the creator’s account.
The easiest way to shell out the best quality for Instagram reels is to shoot in 4K and 60fps (provided you have ample light). Plus, Instagram is now testing HDR video uploads for iPhones. Here’s how to enable both options on your iOS device:
1. Open Settings on your iPhone.
2. Scroll down and click on Camera.
3. Click on Formats and select High Efficiency.
4. Next, go back, tap Record Video, and set it to 4K at 60fps.
5. On the same page, enable the toggle for HDR Video.
Make sure you have also enabled high-quality uploads in Instagram settings. Also, videos may not stay in HDR if you edit them before uploading. So, try editing in Photos or the iMovie app.
Once you upload the reel recorded in the above settings, the HDR status may disappear after some time. This is because Instagram takes time to process HDR videos- once it’s done, the status will be back again.
You can’t really get rid of compression while uploading high-quality videos on Instagram. However, you can compress the video yourself while keeping the maximum quality possible so that Instagram does not compress it further or reduce the quality.
You can use the free software called HandBrake to compress the video while keeping most of its quality. Instagram accepts both MP4 and MOV formats for uploads. H.264 MP4 is the recommended format to preserve the quality of the video after upload.
If videos are longer than a minute, it’d be better to upload them as IGTV instead of regular in-feed videos. If they’re short, you can still upload them as IGTV by either looping the video or adding blank footage.
Here are some easy ways to reduce video file size on mobile phones and PC.
If you’re transferring photos and videos from PC to phone or vice versa, make sure they’re not being compressed during the transfer.
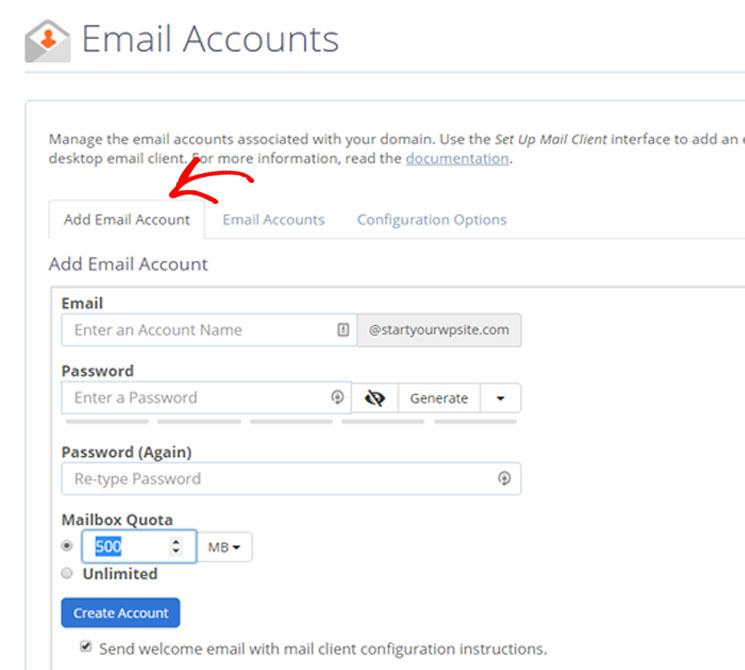
If you have an iPhone and Mac, use AirDrop. Else, use services like Google Drive, Dropbox, etc. You can also send photos and videos without compression via Telegram. If using WhatsApp to transfer photos, send them as documents.
Tweak your camera settings to make sure you get the best picture quality for Instagram. Always capture photos and videos in their full resolution. You can then resize them later.
If clicking pictures on your phone, it is better to use the stock camera instead of the Instagram app.
These were easy ways to upload or post photos and videos on Instagram without compression or losing much quality. I hope this helps you in uploading high-quality posts on social media. Do try the methods, and let me know if they make any difference in the comments below.
You might be interested in:
You can also follow us for instant tech news at Google News or for tips and tricks, smartphones & gadgets reviews, join GadgetsToUse Telegram Group or for the latest review videos subscribe GadgetsToUse Youtube Channel.

Posting clips to the Instagram social network is sometimes accompanied by some technical problems. One of these is the deterioration in the clarity of the “picture”. Such an anomaly is not only unpleasant for the author, but also unlikely to please the readers of the page. However, this is quite possible to avoid by following the rules.
Below we will figure out how to upload a video to Instagram without losing quality. Stay with us and check out useful tips on how to easily share your favorite video with your friends.
The first thing you should pay attention to before uploading a video to a common feed is the technical characteristics of the file. Ideally, they should fully comply with those set by the social network service. Namely:

Movie playback time is important:
The social network system will most likely not let you download the video:
Good to know. It will be possible to attach widescreen clips with a 16:9 aspect ratio to the post, but then white borders will appear at the top and bottom of the movie, and the video itself will be scaled down.

So why does Instagram degrade video quality? The reason for this may be several things:
It is from this that the “picture” of the clip can deteriorate. What to do in this situation? It's simple:

So, how to keep good quality video files when uploading to Instagram? Follow the standard algorithm of actions. And since it will be slightly different for iPhone and Android owners, we will consider them separately.
To publish a video clip with the best resolution on a smartphone with the Android operating system, you will need:
If the Instagram video is still uploading in poor quality, then install the auxiliary utility FilmoraGo on your smartphone. With its help you can:
For your information. FilmoraGo is a free Android app.
For Apple owners, the step-by-step instructions are almost the same. Only the location of icons and options in the application can differ. All you need is:
If the resolution deteriorates, then you need to upload such a video with pre-processing. To do this, install the InShot editor on your phone. It will help:
Note. To improve the quality, install only official and user-tested programs from the Market. Utilities from unknown sites in the browser can be malicious.
Another way to avoid poor quality video on Instagram is to convert it. After all, an incorrect file format can lead to the fact that the clip will either not be added to the post, or it will “compress” greatly.
To improve the quality or restore the sharp "picture" of the movie, follow the step-by-step instructions below:
Done. Now you can upload the resulting "short film" in the usual way.
Important. When processing a movie in the editor, always choose the best quality for saving.
To upload a video to Instagram without quality loss, you need to know the requirements of the social network. If the file is not suitable, then the system tries to adjust it automatically, which leads to a fuzzy and sometimes too “pixelated” picture.
parityNeuf TV team posted on
By default, Instagram compresses the photos and videos you upload to the platform. This reduces the quality, which may disappoint many. While there is no direct option to turn off compression, there are a few tips you can follow to get the original image upload quality. This is how you can upload photos and videos to Instagram without compression and quality loss.
summary
When you upload photos and videos to Instagram, whether they are stories, posts, videos or IGTV, they are compressed to reduce file size and bandwidth. Sometimes compression can go too far, resulting in loss of detail or pixels appearing on the media.
Instagram uses its own algorithm to compress everything you upload. This is made for:
If you don't want the upload quality to deteriorate on Instagram, follow the guide below.
Instagram will upload the photo in its original resolution if you follow the instructions below.
Use the latest version of the Instagram app.
Upload photos that are at least 1080 pixels wide and have an aspect ratio between 1.91:1 and 4:5.
Make sure you use a good quality camera, as each phone has different camera quality.
If you upload a very high quality image, Instagram will compress it to reduce the width to 1080p. At the same time, if you upload a low quality image, it will enlarge it to a width of 320 pixels, which again can affect clarity.
In order for Instagram to post your photo at its original resolution, follow the requirements. Also, avoid adding music to photos in stories, as this drastically reduces the quality of the image and blurs it out.
Follow the recommended recommendations to download quality lossless videos from Instagram.
 91:1 landscape) / 600 x 600 pixels (1:1 square) / 600 x 750 pixels (4:5 vertical)
 You can immediately reduce the size of the image so that Instagram does not apply compression. If your photo is 4000 x 4000 pixels, downsize it to 1080 x 1080 pixels.
Also keep the correct aspect ratio: 1:1 for square photos, 1.91:1 for landscape photos, and 4:5 for portraits. You can resize or compress images with various tools on your phone or PC:
You can't really get rid of compression when uploading high quality Instagram videos. However, you can compress the video yourself, keeping the highest possible quality, so that Instagram does not compress it and reduce the quality.
You can use free software called HandBrake to compress a video while retaining most of its quality. Instagram accepts MP4 and MOV formats for uploading. H.264 MP4 is the recommended format for maintaining video quality after downloading.
If the videos are longer than a minute, it's better to upload them as IGTV, not as In-Stream videos. If they are short, you can still upload as IGTV by looping the video or adding blank frames.
Here are some easy ways to reduce the size of video files on mobile phones and PCs.
If you are transferring photos and videos from your PC to your phone or vice versa, make sure they are not compressed during the transfer.