How to post old photos on instagram story
How to Add Old Photos, Videos to Your Instagram Story
Ever since Snapchat introduced Stories, the popular feature has been adapted by Facebook in its various apps, including Instagram, WhatsApp (known as “Status”) and even Facebook itself. “Stories” lets you share a stream of photos and videos that have a lifespan of 24 hours, and automatically expire beyond that duration.
To upload a story, you need to tap on the “You” bubble from the Stories section on top of the screen, and then either snap new photos/videos that you want to include in your story, or pick photos/videos from Camera Roll (iOS) or Photo Library (Android), by swiping up from the bottom.
Continue reading below
Now, here’s the catch. Instagram only lets you pick photos and videos from Camera Roll/Photo Library that have been shot in the last 24 hours. Anything older than that are discarded by the picker. So, if you want to create an Instagram Story using your older photos and videos, the app will not allow you to do that.
In this article, we’ll explore a certain workaround to let you use older photos and videos in your Instagram Stories.
Page Contents
- 1 Adding Old Photos, Videos to Instagram Stories – How it works
- 1.1 Add old videos, photos to Instagram Story from iOS Camera Roll
- 1.2 Add old photos, videos to Instagram Story on Android
The workaround, we’re going to use, basically changes the timestamp of a particular photo or video, so as to trick Instagram into thinking that it was shot within the last 24 hours. Thus, Instagram lets you access the particular file from the media picker on the “New Story” screen.
This can be achieved on both Android and iOS. And the process is a bit simpler on Android compared to that on iOS. Here, we’ll demonstrate both.
Add old videos, photos to Instagram Story from iOS Camera Roll
In order to alter the timestamp of a photo or video to the current date, so that they are usable on Instagram Stories, either we need to edit its metadata, or save it again as a new file. Manually, this process might be somewhat inconvenient as it’s not so straightforward. So, we have created readymade workflows that help you to do the same easily.
Continue reading below
You need to have the Workflow app installed on your iPhone or iPad, which is available for free on the App Store. Next, you’d need to install the two workflows, ReSave Photo and ReSave Video to your device by tapping on the “Get Workflow” button from your iPhone or iPad. The selected workflows will be added to the “My Workflows” section of the app.
Once this is done, the below steps will guide you to change the timestamp of photos and videos on iPhone and iPad, and make them available in the media picker for Instagram Stories.
- Open the Photos app and select the particular photo or video that you want to use in your Instagram Story.
- Tap on the Share button from the bottom and select “Run Workflow” option from the Action Extensions section of the Share menu. If the option is not available, tap on the More icon and turn on the Run Workflow extension from the list and tap on Done.
- Choose ReSave Photo or ReSave Video workflow, depending on the type of media you selected in Step 1.
The selected workflow will now execute and automatically modify the timestamp to the current date and time. Now, you can open Instagram, go into the New Story screen and pull up the picker from the bottom. The desired photo or video that you just processed should be available to pick. Repeat the same steps for all the photos and videos that you want to add to your Instagram Story, and they will appear in the story picker within Instagram.
Note: Both the ReSave workflows mentioned here, create copies of the original photos or videos. Hence, there will be duplicate files created in Camera Roll. If you want, you could delete the newly created duplicates soon after the files have been successfully uploaded to your Instagram Story.
You can achieve the same results using any app that allows you to re-save photos or videos with the current timestamp, or lets you modify the timestamp of the files.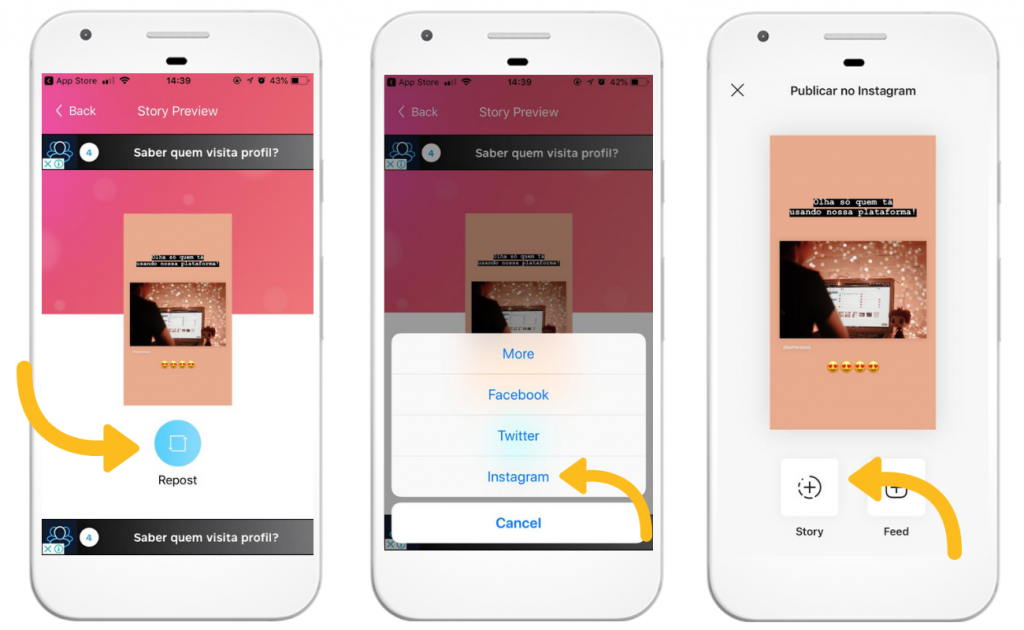
Add old photos, videos to Instagram Story on Android
On Android, file timestamps can be changed to the current date and time simply by a file transfer operation. Thus, you can use an old photo or video on your Instagram Story, just by transferring the file to another random location.
- Copy or move desired photo or video that you want to add to your Instagram Story, from its original location to any other directory, using a suitable file manager app.
- After the file operation is completed, the timestamp of the file in the destination directory is automatically changed to the current date and time.
Thus, after the photo or video is transferred (copied or moved) from one directory to another, the picker available in Instagram Stories will allow you to select the particular photo or video for your new story. You can repeat the same process for all the photos and videos that you want to add to your story, and the same will be available for you to upload from the new story screen.
#Android#How To#Instagram#Social Media#Tips & Tricks
All posts on 7labs, including this one, are compliant with our Content Disclosure policy.
5 Ways to Add Multiple Photos to an Instagram Story
- You can add multiple photos to any Instagram Story or post.
- Selecting multiple photos from your camera roll will upload each as its own slide in your story.
- Instagram also has a built-in collage feature that allows you to drop photos into the same slide.
Instagram gives you several different ways to add multiple photos at once to an Instagram Story. After all, sometimes just one photo isn't enough to tell your story. Whether you're assembling a group of family photos, preparing holiday photos or scheduling an Instagram post for your small business or marketing pitch, there's a method to bundle multiple images for your needs.
You can select up to 10 photos and videos from your camera roll, which get uploaded to your Story as 10 separate slides. Alternatively, you can layer several photos on the same slide as stickers, create a collage using Instagram's built-in Layout feature, or even rely on third-party apps to get the job done.
Add multiple photos to an Instagram StoryThe simplest way to add multiple photos to an Instagram Story is to use the Select button to choose up to 10 photos and videos that will play one after the other, like a slideshow.
1. Swipe right on the home screen to open the Stories page.
2. Tap the photo icon on the bottom-left of the screen to open your Camera Roll.
3. Tap Select, then select up to 10 photos and videos, and each will become its own side in your Story. Then tap the arrow at the bottom-right of the screen to continue.
4. On this screen, customize each photo or video with text, stickers, or other effects. There are a wealth of ways to further customize your Instagram Story.
5. When you're finished, tap the arrow at the bottom-right of the screen.
6. Tap the circle next to your intended audience (Your Story or Close Friends), then tap Share.
Quick tip: If you'd rather publish a short video than a series of photos to Instagram, you can create an Instagram Reel.
You can use stickers to add multiple photos to a Story. Start by selecting the background image, and then you can layer additional photos on top, adjusting their size and position, as well as rotating them for artistic effect.
1. Swipe right on the home screen to open the Stories page.
2. Tap the photo icon on the bottom-left of the screen to open your Camera Roll. Select a photo.
3. Tap the Stickers icon at the top of the screen.
Select a background photo for your Story, then use the Sticker button to add more. Dave Johnson/Insider4.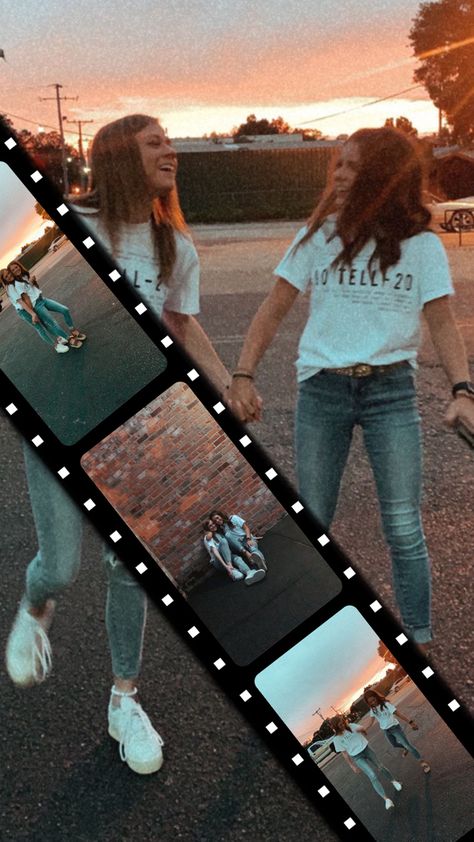 In the stickers library, find and tap the Photo sticker.
5. Select the photo you want to insert. Repeat this process until you have all the photos you want to include.
6. Tap each photo you want to edit and then drag, pinch, and rotate them as needed to position and size them to taste.
After adding a photo to your Story, you can pinch, zoom and rotate it. Dave Johnson/Insider7. Once you're finished, tap the arrow at the bottom-right of the screen.
8. Tap the circle next to your intended audience (Your Story or Close Friends), then tap Share.
Quick tip: If you're especially proud of a group of photos you've posted, you can save them permanently despite the fact that Stories usually expire after 24 hours. To do that, follow our guide to saving your Instagram stories.
Use Instagram's built-in collage makerInstagram's built-in collage maker lets you organize a set of photos into a grid-like pattern, so they appear organized on the screen without a background.
1. Swipe right on the home screen to open the Stories page.
2. Tap the Layout icon on the left side of the screen and then tap the Change Grid icon to customize the layout.
3. Tap the photo icon on the bottom-left of the screen to open your Camera Roll. Select a photo to add it to your collage. Repeat that process for each part of your grid.
4. Once you're finished creating your collage, tap the check mark at the bottom of the screen.
5. Add any additional elements you want to add, such as text or stickers, and then tap the arrow at the bottom-right of the screen.
6. Tap the circle next to your intended audience (Your Story or Close Friends), then tap Share.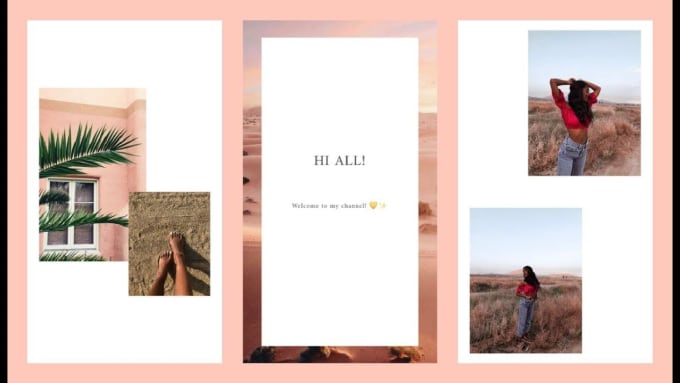
1. You can select up to ten photos to place in an ordinary Instagram post.
Create your Instagram post. Dave Johnson/Insider2. Tap the multi-photo select icon and then choose up to 10 photos that you want to appear in the post.
Add multiple photos to your Instagram post. Dave Johnson/Insider3.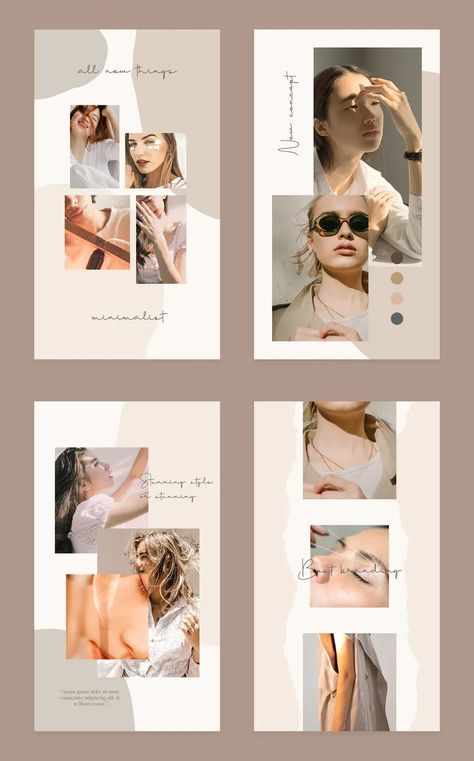 Tap Next and, if desired, add any filters you wish to apply. Then tap Next again.
4. Write a post caption and fill in the optional settings if desired.
5. Tap Share.
Quick tip: The order that you select the photos is the order in which they will appear in your finished story. You can tell the order based on the number in the corner of the photo's icon.
Check out third-party appsWhile Instagram offers a slew of ways to add multiple photos to a post or Story, you might yet be looking for more options. If none of these can quite get the job done, you can rely on other third-party apps for additional options.
- Use Canva. Canva is a powerful but free graphic design app that's especially handy for Instagram; you can use it to create sophisticated Instagram posts using the app's custom-designed templates.
 Canva has thousands of Instagram-ready templates to choose from, including many that let you create multiple-photo layouts.
 - Use Google Photos. You've probably used Google Photos to store your photo collection, but don't overlook its value as a way to customize layouts for Instagram. The app includes an easy-to-use collage builder in the Utilities section of the app.
- Try other free photo editors. There are a slew of photo editing apps which can help you create multi-photo layouts and collages in Instagram. Be sure to check out our roundup of seven of the best free photo editing apps for details.
Abigail Abesamis Demarest
Abigail Abesamis Demarest is a contributing writer for Insider based in New York. She loves a good glazed donut and nerdy deep dives into the science of food and how it's made.
Read moreRead less
Kyle Wilson
Kyle Wilson is an editor for the Reference team, based in British Columbia, Canada. Outside of Insider, his work has also appeared in publications like The Verge, VICE, Kotaku, and more. He periodically guest co-hosts the Saturday tech show "Tech Talk" on the iHeartRadio station C-FAX 1070. Feel free to reach out to him on Twitter, where he can be found most of the time, @KWilsonMG.
Read moreRead less
Hot on Instagram how to add a photo from the gallery, make it without history
Your page will become brighter with the category Hot on Instagram.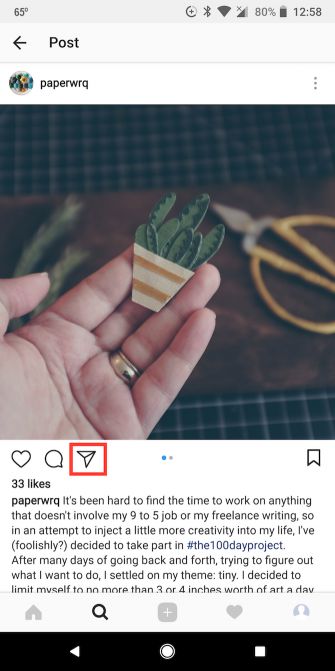 This section will help users learn more about you and your lifestyle. All memorable events, whether it's a party with friends or a romantic trip, nothing will be lost and will please the eye around the clock. We offer to improve your page right now by reading the article about the main features and manipulations of the section.
What are live stories
Instagram Stories is an extension of functionality that allows you to add temporary content to your page. Access to them is limited to 24 hours, which is not always convenient, because not everyone has time to see their content. To make it easier to save multiple photos or videos from stories on Instagram, the "Actual from Stories" section has been added. It allows you to collect your memories into albums by topic. In this case, you yourself choose what to add and what not. The added media will be displayed on the main profile picture, where guests and subscribers can easily find it.
What is section used for?
The space of pinned stories is used for personal purposes.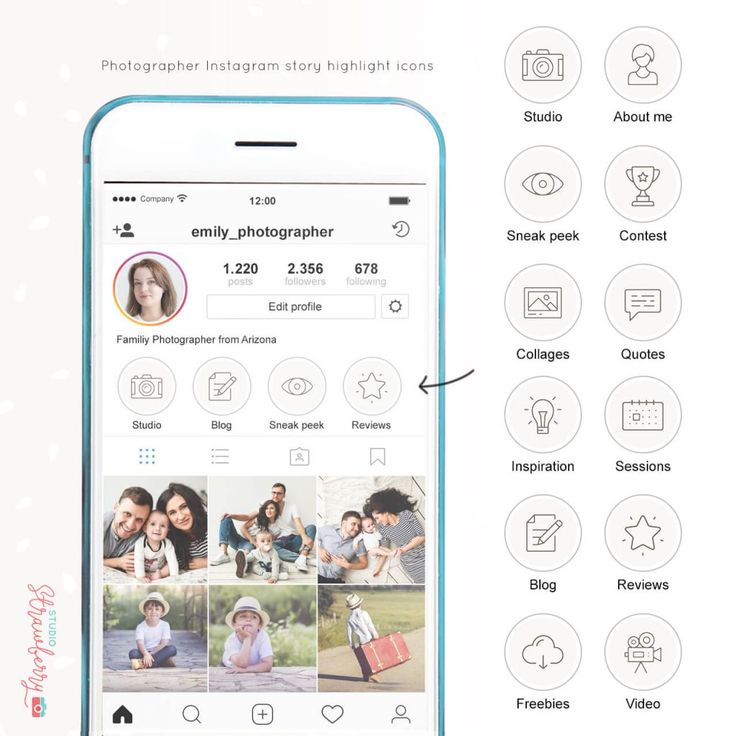 In this case, here you can add joyful moments from your life for you. Thus, new subscribers will find out interesting information about your work, loved ones, hobbies and entertainment.
The section is convenient to use to simplify business. Here they post answers to frequently asked questions from customers, the latest information about prices and promotions, as well as show the process of working or providing a service, positive customer reviews, answer questions and hold contests (GivEvei).
Rules for creating
When creating an interesting section, you should consider:
- the maximum number of characters for the title is 16;
- the name uses not only letters, but also numbers, signs and even emoticons;
- one story can be broadcast in several albums;
- stories will be on the page permanently until they are removed;
- you won't be able to see exactly who visited your story from this section, but the total number of views and clicks on the inserted links will change.

Designing the cover
A well-chosen cover will increase the number of clicks and views. You can add your own or edit an existing one in a few clicks:
- Go to the album with current stories.
- Click "Edit" at the bottom left and then "Edit Cover" at the top.
- Select a frame from the content by scrolling through the options below. Or click on the gallery icon and use the desired picture from the smartphone's memory.
To diversify your profile, use minimalist covers that match the overall color scheme of your content. It is convenient when a person, looking at the icons from the section, understands where he needs to go. For example, for a manicure business, you can create an album with prices and finished works, on the covers of which the dollar sign and nails will be depicted, respectively. For more information, let's understand the names.
Add photos and videos
In the first option, you can add directly during the loading history:
- Select an image or video from your phone.
- Add it to history.
- After clicking "share", the button "add to current" will appear at the bottom.
- Do not delete stories for the entire set time (24 hours).
The second option involves creating albums with content from the stories archive:
- Find the section with selected stories under the profile photo and click on the plus.
- Select the desired stories and click Next.
- Set the title and cover, click "Finish".
Images and videos are added to an existing publication in the same way.
Adding a photo not from the history
It is impossible to add a picture or video directly from the gallery to the current one. To do this, you first need to create a story and do not delete it for 24 hours. Only then will it be possible to fix it.
To get around this limitation, add a story and block access to it, or leave it open only for the Close Friends category.
How many stories can be included in the current
There are no restrictions when adding stories to albums. That is, you can publish as many as you want.
In terms of beauty and convenience, web designers and bloggers recommend creating no more than 4 albums, up to 10 stories in each. Thus, a person who visits your profile will not get lost in a large amount of media data and will easily find the necessary and interesting information for him.
Where to add stories to the current
Actual is generated from the history archive. To do this, click on the desired story and in the lower right corner of the screen, select "Select". This will be followed by the process of adding the album cover and title, as well as other photos uploaded earlier.
You can add a post to your story, and from there "Select" it into a separate category.
How to download
Download photos and videos by finding the corresponding story in the archive. To save to your device, select the desired story and click "More" in the lower right corner, and then "Save photo / video."
Is it possible to hide
To hide the current one, go to album editing and click the checkmark on the photo or video you want to hide. In the same way, it is easy to return all closed content to its place.
How to save
You can save media files by going to the stories archive. Find the photo or video you want, then tap "More" and "Save photo/video". Moreover, in the application settings, it is possible to save all your publications after downloading automatically to your phone. Thus, a folder will appear in the gallery, into which published files will be constantly uploaded.
How to view the archive
All pinned stories are placed in the stories archive. To search for the desired content after publication, click on the button with three horizontal stripes in the upper right corner of the screen, and then the "Archive" sub-item.
Deleting the current one from your account
The developers made this process as simple and clear as possible. To delete an unwanted photo or video file, you will need:
- Go to the desired album.
- Find the story you want to delete.
- Press the "more" and "remove from current" buttons in turn.
- Confirm your action "delete photo" or "delete video". If you change your mind, a cancellation clause is provided.
Newly introduced pinning Instagram stories makes this app easier to use. The section is easy to use, it is easy to add, edit and delete media files. Thanks to the ability to personalize the cover and title, they can beautifully complement the overall style of the page, increase traffic and interest a potential audience. To use the feature even more effectively, categorize stories, this, in turn, will facilitate communication with subscribers. The developers did a good job and worked out the possibilities of the section to the maximum, thanks to which popular Instagram bloggers are already actively using it.
How to add a photo to an Instagram story: all the ways and tricks
Article content:
- How to take a picture from the Instagram application
- How to add photo to Instagram story from phone gallery
- How to add a photo to a story from the feed
- How to add multiple photos to Instagram stories
- Applications for creating photos in instagram stories
- How to post a photo to stories from a computer
- Story ideas with multiple pictures
- Errors when adding a story to Instagram
How to take a picture from the Instagram app
The easiest and most obvious way to add a photo to your story is to take a picture directly from the Instagram app, in story creation mode.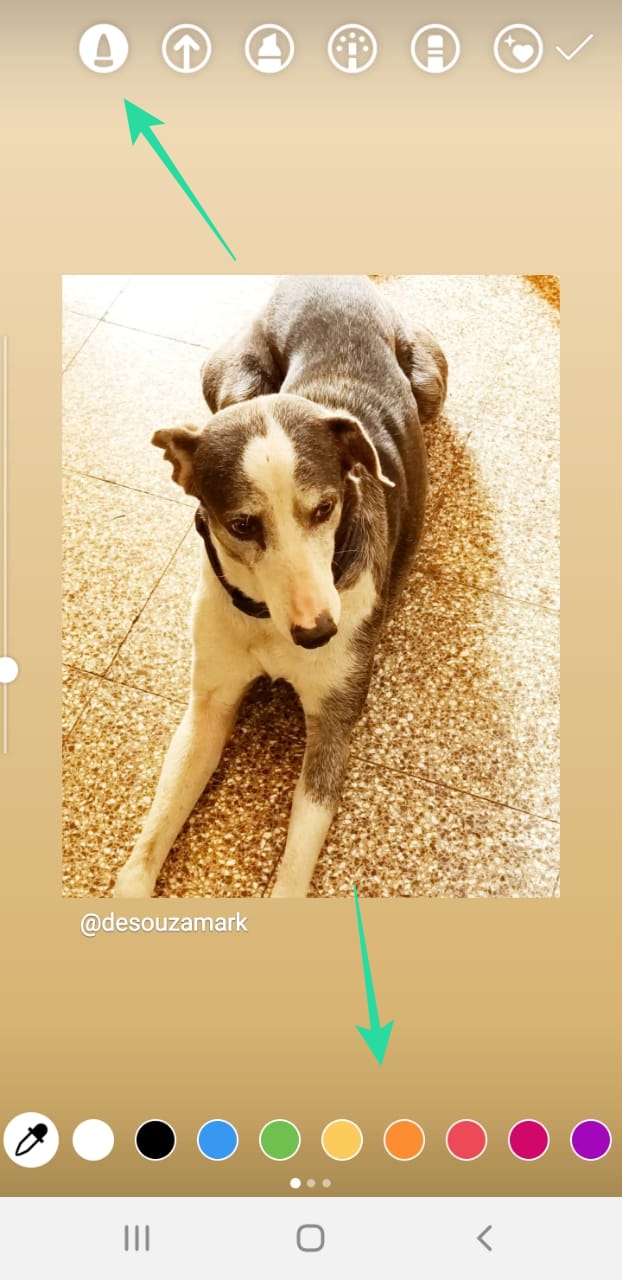 And in order to somehow diversify the pictures taken and decorate the story, a number of built-in tools are offered for this.
- Text editor for creating beautiful text labels;
- Sets of stickers and GIFs;
- Filters and masks.
To add a photo to your story, follow these simple steps:
Open the Instagram app and turn on the story. To do this, swipe to the right if you are on the main (home) screen or press "+" if on the profile page.
Open story creation from feed Open story mode from profileSelect camera (back or front) single tap the circle in the center of the screen to take a photo. If the photo didn't turn out well and you need to retake it, click the "x" in the upper left corner.
After a successful shot, publish the story by clicking on the caption "Your Stories". If necessary, add a gif or music to the story, indicate the geolocation and tag friends if there are several people in the photo.
Delete picture and take a new one Please note! You can take pictures in real time using built-in effects, and after creating a story with a photo, add stickers to it.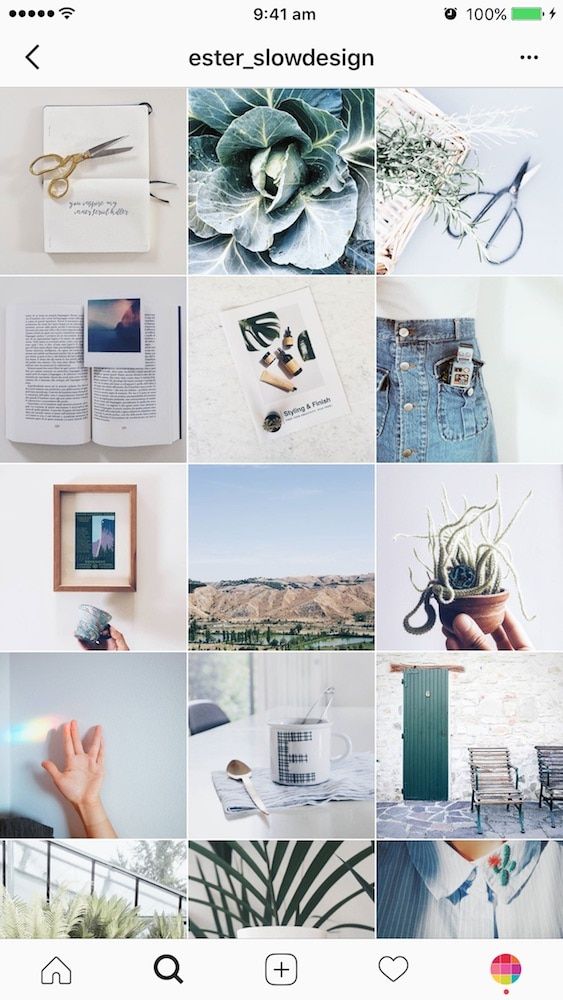 For example: add a poll.
In order to be able to view and re-publish old stories - memories in the future, turn on archiving of stories.
How to add a photo to Instagram story from the phone gallery
The procedure for posting photos to stories from the gallery on smartphones running different operating systems is almost the same. The differences may not be significant, therefore, the algorithm described below is suitable for both Android smartphones and Iphone.
- Go to the social network and click on the camera icon, or swipe right.
- Move your finger from the bottom up to show the gallery window.
- Select a photo, add stickers, text, filters.
- Click on the "your story" button, determine who this content is intended for.
Related articles:
- How to make text in Instagram stories printable
- How to delete live stories on Instagram
Please note! When publishing photos taken earlier, i. e. from the gallery, the date of shooting is added to the picture.
To remove a date from stories, you need to:
- Click on the date and move it to the trash;
- To change the color of the date, you need to click on it once;
- To change the size and position of the date on the screen, you need to press on it with two fingers, move it, stretch it, or reduce it.
The date itself cannot be changed.
Remove date from photoWhen posting photos to Instagram Stories or Gallery, i.e. pictures taken by third-party applications, always follow the photo size requirements, and when adding videos, use only recommended formats with the right proportions.
How to add a photo to the story from the feed
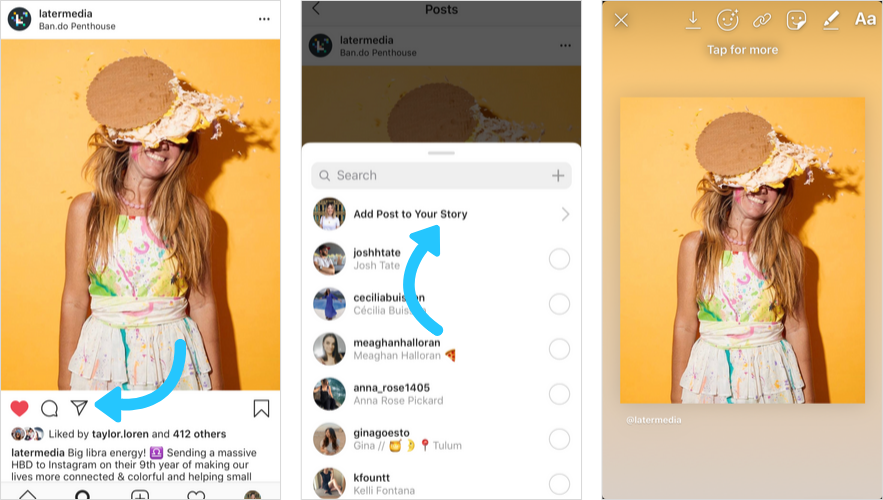
If you have previously published a photo to your feed, but the original has not been saved in the device’s memory, or you have a desire to publish a photo from another profile to your story, then this is also provided by the standard functionality .
To share your own or someone else's photo in your story, you need to do the following:
- Find the repost icon (paper airplane) under the desired photo and click on it;
- From the menu that appears, select "Add a post to your story";
- Arrange photo on canvas: reduce or enlarge;
- Change background;
- If necessary, add inscriptions and stickers;
- Choose who you want to show your story to and publish.
Important! When you add a photo from the feed to the story, the profile name of the person who this post belongs to appears on the photo, and the owner of the post will receive a notification that you mentioned it in the story.
How to add multiple photos to an Instagram story
The process of adding multiple photos to an Instagram story may not be obvious at first glance. We will describe several ways, tricks, tricks and lifehacks on how to add two or more photos to one story at the same time, both with standard functions and with the help of third-party applications.
If you need to create a story with an overlay effect, then read the article "How to overlay a photo on a photo in a story"
Built-in Select Multiple tool
The function built into the Instagram application to add several photos to the story at once from the phone's gallery, is used to post pictures following one after another.
- Open the app and switch to story creation mode;
- Swipe up from the bottom of the screen or touch the photo thumbnail in the bottom left corner to open the gallery;
- In the upper right corner, immediately above the image tiles, a double sheet icon will appear, click it, this will activate the mode for adding multiple photos;
- Select the pictures you want to publish and click "Next";
- The selected photos will appear as thumbnails at the bottom of the screen;
- Click “Next” again and specify who the story is intended for: for everyone, close friends, or send a personal message to Direct.

Please note! The photos added to the story follow each other in the order in which they were selected as separate stories. Therefore, when adding pictures, you need to edit (enlarge, reduce, rotate, apply stickers and inscriptions) each image separately.
Multi-Select ModeImportant! If the "Select Multiple" icon did not appear when opening the gallery, you need to allow access to the phone's memory in the device settings, the Instagram application. You can add up to 10 pictures.
Built-in "Collage" function
The function allows you to create a simple collage in the story without installing third-party applications, while adding two or more photos to one sheet, you can either from the gallery or shooting in real time and even mix these pictures.
Brief instructions on how to apply the mode:
- Open a story in the Instagram application;
- On the left, select Collage mode;
- From the drop-down list, specify the template, how many photos you want to add;
- Take a photo or select a photo from the device's memory;
- Arrange the pictures in the correct order;
- Post a story.
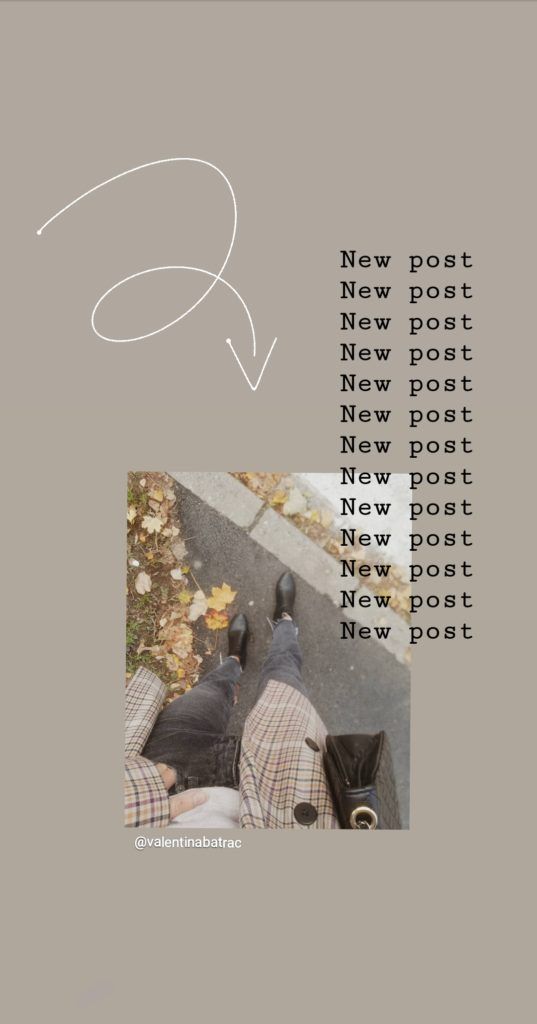
For more information about the "Collage" method, see the article "How to make a collage in Instagram Stories".
Create a collage in the Instagram applicationIn the mode of adding photos to a collage, masks and effects can be applied during shooting.
Photo booth mode
This mode allows you to take four pictures in a row and place them in the story. Before shooting, you need to immediately decide on the script, that is, think in advance how the story will look like. Then activate the function.
So, for the whole process of creating stories in the “Photobooth” mode, the user has only 7 seconds, three for preparation and four for shooting.
- Open the app and go to stories;
- On the left, activate the "Photobooth" mode;
- When you're ready, release the shutter;
- The application will count down three seconds and automatically start taking pictures;
- While shooting, move the camera and pose;
- The camera takes four pictures at one second intervals and combines them into one slide show.
Immediately after processing the photos with the application, in the slideshow you can change the transitions between the pictures, apply filters, and also add stickers to the story.
Setting up a sweet showTo understand how the "photo booth" mode works, you need to experiment with it, try to shoot several takes, evaluate its capabilities and potential. In fact, the mode is quite interesting and, with the proper approach, you can implement cool ideas with it.
Result of PHOTOBOOK mode operationHow to add several photos to a story using a sticker
In the Instagram application, special stickers are preinstalled to add several photos to one story.
Sticker for adding real-time photos: available in IOS and Android versions.
Sticker for adding photos to story on AndroidSticker for adding pictures from gallery: only in IOS versions.
IOS Photo Stickers
IOS Paste Function
IOS-based smartphones have a useful feature that helps you post more than one photo to your Instagram Stories by copying and pasting.
The main advantage and difference of this method from those described above is that it is not tied to a specific template and you can place photos on the canvas as you like, as intended, and not as provided by Instagram itself.
This method works on the “copy-paste” principle, through the tool for writing text in stories. Those. you need to create a story and add a background image, then go to the smartphone gallery and copy the image from there, open the story again and click "insert sticker".
Copying photos on iPhoneThis technique is described in detail in the article "How to make a collage in Instagram Stories".
Adding two photos to one story on Android using SwiftKey
A working technique for creating stories from multiple photos on Android devices is the way using the SwiftKey virtual keyboard. Yes, to implement this technique, you will have to install an additional application, otherwise how! Since in android devices in the gallery there is no "Copy" function.
This method works in a similar way as on iPhones, but there are differences. Read more about this in the article “How to overlay a photo on a photo in an Instagram story”.
Briefly how to do it:
- Install the SwiftKey keyboard
- In the smartphone settings, make it the main one and give access to the device's memory;
- Create a story in the usual way and add a background image;
- Next, activate the text input "Aa" and switch to the sticker mode on the keyboard;
- Enable the sticker creation function by clicking on the carnation;
- Go to gallery – camera image;
- Select a photo and make a sticker out of it;
- Add to history.
In this way, using the Swiftkey keyboard, you can add an unlimited number of photos to stories.
Remember, if you want as many people as possible to see your stories, your account must be public.
Applications for creating photos in instagram stories
To implement all your ideas and turn your idea into reality, we recommend installing profile applications for working with graphics. There are many more options in photo editors for creating bright and unique content.
Mojito
MojitoThis application has the ability to edit a static picture or video, add a second photo to the canvas, make an unusual background. The developers offer over 500 templates and frames to create vibrant stories. The photo editor is available for download and installation in stores for both platforms.
Download: Play Store App Store
Story Maker
Story MakerThe mobile photo editor has a good range of filters. Special frames allow you to place pictures on one screen. The application is completely free, the only drawback of the application is advertising, but for the sake of all its useful features, you can survive this.
Download: PlayMarket
StoryArt
StoryArt More used by bloggers who make money on Instagram. The photo edited in it looks more attractive than in other editors. It is possible to add a second snapshot, it is also possible to create icons for highlights.
Download: PlayMarket App Store
How to publish a photo to Stories from a computer
Without using additional programs and services, it is not possible to publish a photo to Instagram Stories from a computer. Let's look at a few online tools to get around this limitation.
Socialkit
Universal Windows program for managing Instagram accounts. In the "arsenal" of the application, in addition to tasks for promotion, the function of posting stories is included. The advantage of this approach is that publications can be scheduled in advance and the program will automatically publish stories at a given time. With this approach, you can solve marketing problems.
SocialkitDownload the program from the official site to evaluate its capabilities. The developer's website has detailed instructions for working with the software.
Overview of the Socialkit service
SocTool
Social tool is a program with a set of functions and tools for working on Instagram, including posting photos to stories. Create a task, add material for publication and specify the time, then the program will do everything itself.
After installing SocTool on the computer and activating the account, the user will have three days to test the program in a free mode.
SocTool service overview
Bluestacks Android emulator
Bluestacks is a program that creates an Android virtual environment inside Windows. Those. The official Instagram app will work exactly the same on a computer as it does on a mobile phone.
BluestacksDownload the emulator from the official site, install the Instagram application into it, log in with your username and password. After that, the user will be able to publish photos in stories.
Bluestacks is not only Instagram, but also all applications and games from the PlayMarket application store, only on a computer. BlueStack is a free program.
Overview of the Bluestacks service
Supa
Online service "sharpened" for creating content for social networks. With it, you can add a photo to your Instagram story, attach a video, or arrange a slideshow. Has more than 150 templates, allows you to quickly perform any action.
The service has a free tariff, when editing a photo, a watermark will remain on it, in the pro version, the user has access to advanced functionality and there is no watermark on the created videos.
Overview of the Supa service
SMMplanner
Scheduled posting service SMMplanner has all the tools for posting stories on Instagram. The Kanva graphic editor is integrated into the online program, so using SMMplanner you can not only publish photos to stories, but also create them using ready-made templates and unique fonts.
SMMplannerThe service has a free plan, but you will need to pay for a license to publish stories. Enter the promotional code INSTASERVIS_PRO to get 15 days of the initial tariff.
SMMplanner service overview
SmmBox
Universal platform for auto-posting. The service can work with eight social networks, including posting photos on Instagram. It has browser extensions in its arsenal in order to collect content from the Internet and immediately transfer it to your account.
Try the service during the test period, using the promotional code INSTASERVIS you will receive a 10% discount on the payment of the tariff.
SmmBox Review
Multi-Picture Story Ideas
Interesting content always gets users excited, so here are some versatile photo story ideas that you can adapt to your business or niche.
Final result
Post a video to the story of a recipe, and attach a photo of the finished dish on top. This technique can be applied not only to cooking, but also to any process, shoot a video about how you do something, and show the finished result in the photo.
Before/after
A universal idea to show what you do. Share with your subscribers the results of your work, for example: makeup. Insert a photo from the story as it was before and, respectively, after. Followers will definitely appreciate your work.
Poll
Create a story from several photos in different outfits and show them to your followers. Attach a poll sticker to your story and ask them to vote. You benefit, subscribers interest.
Assortment
In order not to make +100500 stories with product photos, put the entire selection on one photo. In this way, a significant part of the range can be demonstrated. You can also attach a sticker with a vote to the story, which product you like best.
Details
Showing a photo of a product in your story and want to show small details close-up? Then make a story with the main photo in the background, and complement the image with other pictures. So you show both the general plan of the product and its not obvious advantages.
Errors when adding stories to Instagram
If you can't make stories even with one picture, then you should check what caused the error.