When Instagram first hit smartphones, every image uploaded had to be shaped like a perfect square.
This is all well and good for selfies and pictures of your kids, but for those majestic panorama shots of the Grand Canyon, Instagram's always struggled.
Nowadays, you can upload any sort of photo to Instagram. However, they don't always look so good.
Here's the best way to post panorama shots to Instagram on your iPhone or Android device, along with an app for iPhones that will help them look better.
The simplest way to post panoramas is:
1. Open Instagram on your iPhone or Android and tap the plus icon at the bottom of the screen to upload a photo.
2. Once in your photo gallery, select the panorama shot you want to use.
3. Touch the image preview at the top with two fingers, then squeeze them together to zoom out. Zoom out until as much of the panorama as possible is visible.
Much of your longer pano shots may be lost when you use Instagram to crop them. Steven John/Business Insider4.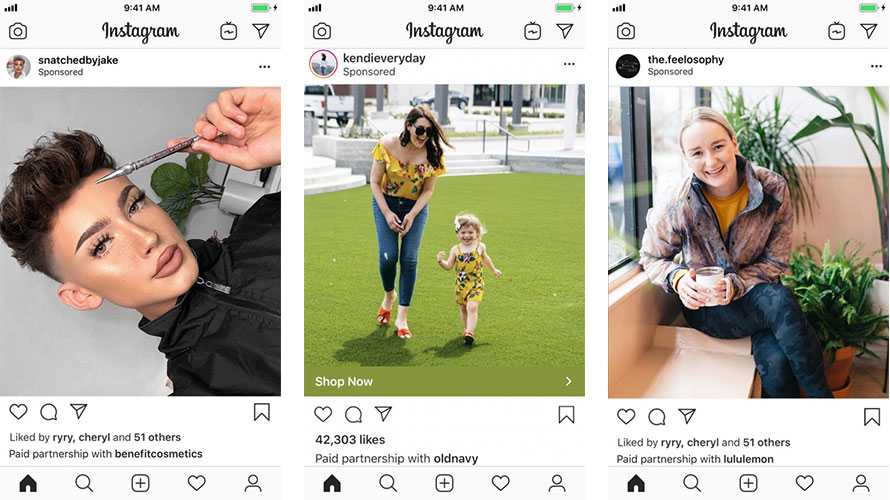 Add filters and post it as usual.
The result here is a rectangular picture with large blank spaces on the top and bottom. This will do your photo some justice, but for full-sized panoramas, you likely still won't be able to fit the whole photo.
For the full effect, you'll need to use a program like Photoshop to cut the panorama into smaller, square images. If you have an iPhone, there's an app that will do this for you automatically: "Unsquared for Instagram."
Download the Unsquared app on the Apple App Store and give it the permissions it needs to access your photos. Then, follow these steps to cut up your photos.
1. Open the Unsquared app and tap the image of a stack of photos at bottom right.
2. Tap the pano image from your library that you want to use, then tap the blue check mark.
3. Your image will appear with the Unsquared watermark on it. Tap the blue icon that looks like a series of squares at the bottom of the screen, and you can pick how many photos you'd like the panorama shot to be split into — once you choose an option, the watermark will shrink.
Note that the more pieces you cut it into, the more of the top and bottom of the shot that will be cut off. In general, if you want to include every part of the photo, try to pick "3 Pieces."
4. Once you're satisfied, tap "Done." The split-up photos will be saved to your phone, and you can post them to Instagram.
You'll be able to post the split photos as a series to Instagram. Steven John/Business InsiderSteven John
Freelance Writer
Steven John is a freelance writer living near New York City by way of 12 years in Los Angeles, four in Boston, and the first 18 near DC.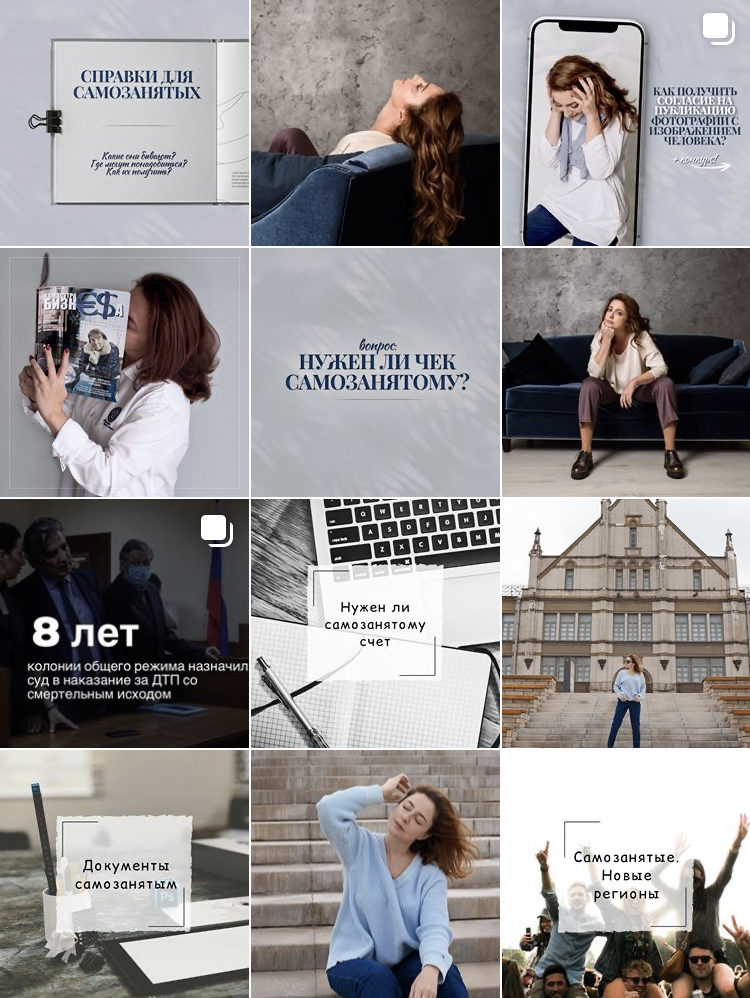 When not writing or spending time with his wife and kids, he can occasionally be found climbing mountains. His writing is spread across the web, and his books can be found at www.stevenjohnbooks.com.
Read moreRead less
Insider Inc. receives a commission when you buy through our links.
When Instagram was launched, it only allowed users to upload square photos. This meant that a substantial portion of your photos had to be cropped.
Instagram’s square photo dimensions became a major drawback to photographers and Instagram users as the image quality, content, and resolution of images were often be sacrificed.
Fortunately, Instagram has seen the need to resolve this major issue. Instagram has given its users more freedom to be creative with their images. Now, pictures can be uploaded in landscape or portrait orientation.
So how can you post portrait photos on Instagram without cropping?
The vast majority of Instagram images are squared off. That’s fine for the most part, but it does tend to impact the composition of a photo — especially if it’s a portrait or landscape subject.
When you upload an image or load it into Instagram, the image is automatically cropped to 4:5. No one wants to put a lot of time and effort into capturing the perfect photo only for Instagram to ruin it by cropping the image.
Instagram did add different orientations not long ago, but images still take a little tweaking to get right. Now, you can post images at a maximum size of 600 x 600 for square images, 1080 × 607 for landscapes, and 480 × 600 for portraits. The actual stored size differs slightly, but when you measure images within Instagram, these are what typically come up.
So, if you’re one of the many Instagram users that’s tired of having their photos cropped, let’s take a look at how you can post portrait or vertical photos on Instagram without cropping.
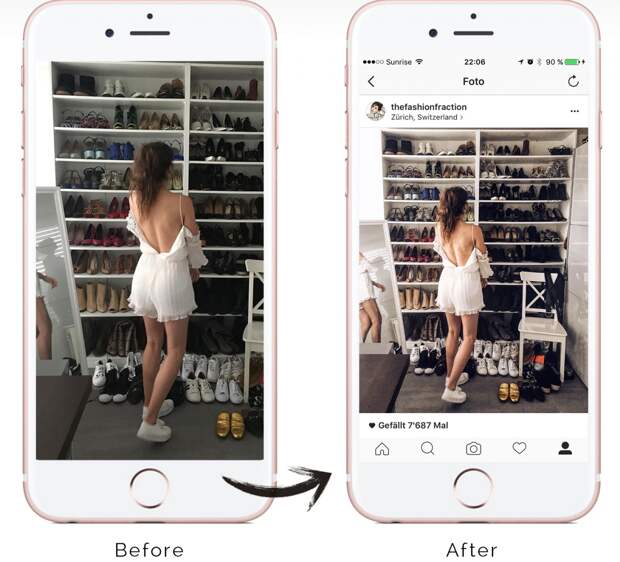
Depending on the size of your image, you may now be able to post a portrait image on Instagram without having to crop it.
Here’s how you can check:
Open Instagram and create a new post.
Select the image you want to upload from your photo gallery.
Select the small crop icon in the bottom left of the main image screen.
Adjust the image within the grid until it’s to your liking.
Using the crop icon shifts the shape from the usual square to its vertical or portrait orientation. This way, you won’t need to shave off the edges of your photos.
What if you want to post a landscape picture without cropping?
Well, fortunately, the same process above works in landscape orientation too. Since the two sizes were added to Instagram, it will pick up the shape and size of the image and let you post the most suitable size.
The same instructions apply for portrait and landscape photos, so you can simply refer to the above steps and select a landscape image that you want to upload.
Sometimes, the image just doesn’t look right with the new setup on Instagram and you need to do a little bit of manual editing first.
The new orientation feature is good but also has a few glitches, and if it won’t show your image off at its best. It may be better to manually edit the image and upload it as a square — even if it means sacrificing the composition.
There are a lot of photo editing apps that can help you edit your images first before uploading them to Instagram.
Just follow these simple steps to get started:
If that doesn’t quite work or leaves the image subject hanging out to dry, you can add a white border to either side of the image to create the 5:4 ratio.
This can often make the image look better. It has the advantage of leaving your image in its original form, but it will be slightly smaller than usual.
This method works great if you aren’t happy with the way your image looks when you upload it straight to Instagram without editing.
There are a number of third-party apps that can help prepare images for Instagram and help you resize an image with or without cropping. Even though you can now post portrait and landscape, these apps still make life a little easier when preparing something for publishing.
Two of the photo editing apps we can recommend are No Crop & Square for Instagram for Android and Whitagram for iPhone. Although, there are a lot more photo editing apps for you to explore.
Both of the apps mentioned above achieve the same goal as the manual editing method and will resize your images for Instagram. If you want to keep everything on your phone and not download it to your computer, these and other apps like it are well worth a try.
Most photographers find squaring off an image takes something away from the effect. Instagram users have been stuck on using the square dimension for years, but thanks to the app’s recent updates, there is now more flexibility in uploading photos.
Adding portrait and landscape orientation gives the professional photographers and those enthusiastic amateurs more options when composing their shots.
Want to find more apps to help you create eye-catching Instagram posts?
Check out our article on the Most Popular Instagram Apps.
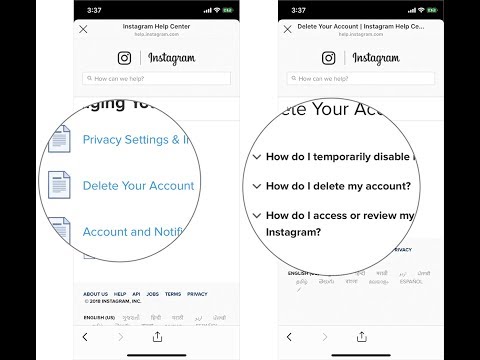
Uploading a whole photo on Instagram can be quite difficult for an inexperienced user of the social network. The edges of the photo are automatically cropped so that people and other objects are not fully displayed. To solve this problem, you need to use special programs.
Content of the page
There are many reasons why a social network crops photos. This includes saving space on servers, and the desire to fully adapt images to vertical phone displays, and maintaining proportions for non-standardly placed photos with an unusual aspect ratio. The main goal is to create conditions for all people when pages scroll in the same way on any device.
The photo is cropped if the photo does not meet the requirements of Instagram. The resolution must be no greater than 1920×1080 , format - either PNG or JPG . If the restrictions are violated, the image will be automatically resized.
There are 2 methods of posting a photo without cropping on Instagram: through a social network program on a mobile device or through a special software.
The Instagram app can be installed on both phones and tablets. There is also a PC version of the program, but it has reduced functionality. To upload a photo without cropping, follow the algorithm below:
There are apps for people who need to upload full size photos to Instagram. Using them, you can post images to social networks with saved edges. Consider the most popular programs.
This Android app has paid features, but free features are enough to upload a full size photo. Run the program, select the required picture. A light frame will be displayed - you can either leave it as it is, or set the Instagram dimensions for the photo. In any case, all parts of the photo will remain in place.
Software for Android and iOS devices. In addition to the usual options, there are functions for changing the color of the edges, sizes, and other characteristics of the photo. There is also an option to zoom photos.
This application is suitable for those who do not need additional functionality. The only thing Whitagram can be used for is uploading a full size photo to Instagram. However, this application does a great job.
To avoid cropping your Instagram photos, you can use the No Crop app. You can download it from the Play Market. It allows you to publish images without cropping.
The application is open source, includes many collages. It has the following functionality:
Consider other ways to improve the quality of a photo or change its format when uploading.
To quickly send the uploaded photo to the server, Instagram automatically compresses it (small pixels are transferred faster). But you can upload photos to Instagram without losing quality. To forget about muddy pixels, users of gadgets with the Android operating system have the opportunity to change the settings. To do this, you need:
The latest version of Instagram allows you to upload a vertical photo to the social network. Using the option is easy - when you upload a snapshot, an icon with 2 arrows will be displayed (at the bottom left of the upload frame). Click on it and set the photo options.
To upload a disappearing photo (a picture that cannot be viewed before sending - it is immediately sent to other people), follow these steps:
In Instagram, you can post not only ordinary, but also moving photos. These can be created on iPhones. The file is not saved as a video or GIF, but as a photo. Once added to a social network, the live photo will be displayed as a regular static image. To transfer the entire effect, you will need to download third-party programs for turning pictures into gifs, for example:
Although the programs differ in their names and interfaces, they operate on the same principle - they convert an image into a gif. The resulting file can be uploaded to Instagram.
If you want to post a live photo to stories, you can do without third-party programs. To do this:
If you want to post a picture of nature, a beautiful city, the best option is to post a rectangular photo on Instagram. To make a photo horizontal, click on the icon with 2 arrows located at the bottom left of the picture. Then click "Next", make additional adjustments to the photo (if necessary) and post it.
Instagram often uses hashtags. This is a label that allows you to assign content to a topic so that it can be easily found on a social network. To upload a photo with a hashtag, follow these steps after editing the photo:
Instagram has an option that allows you to upload up to 10 photos and videos in one post. This feature is called a "carousel" or a selection. To create an Instagram carousel without cropping, select multiple photos or videos when posting and make the settings you want. It is possible to apply one filter to all materials and edit individual images. It is possible to change the sequence of photos and videos in the carousel by moving files around the screen. In the feed, such posts are marked with 3 dots at the bottom. To switch between the materials included in the carousel, swipe to the left / right side.
For a social network, a small size of a photo is a significant plus, but for users it is not always good. Often, pictures lose clarity, dark pixels appear on them, and colors are distorted. To upload a photo without reducing quality, pay attention to the following recommendations:
If Instagram greatly degrades the quality of the photo, you need to check if the picture meets the required conditions:
Online communication, viewing content through Instagram is a great way to spend your leisure time. Using the social network will be even more comfortable if you understand its functionality. The order of uploading photos without cropping is something that anyone who plans to post their pictures on a social network frequently should know.
Suddenly
Nikolai Udintsev
May 7, 2020 21:46
Very long pictures started to be published on Instagram, which break the feed and confuse subscribers. In the comments they are surprised and ask: how to make the same? We briefly describe how this is possible and how to hack the feed yourself.
Long posts posted on Instagram by Vetememes, a parody clothing brand that photoshops models in Vetements and Balenciaga and replaces logos on Vetememes and Boolenciaga . The brand has its own lookbook, however, you can’t buy anything from it, you can only pre-order it. On the project's Instagram, which is signed with the phrase "A parody of a parody", mostly memes are posted.
After Vetememes, other brands and users started posting long pictures (however, they deleted them almost immediately).
The posted posts are so long that they don't fit on the screen of even the tallest phone. If you send such a post to stories or paste it on the desktop version of the site, then it will remain incredibly long. The Instagram app, of course, officially does not allow you to upload such tall pictures. Portrait photos are limited to 4/5 aspect ratio and 1080/1350 pixels, so any taller photo, such as 2/3 aspect ratio, will need to be cropped.
You need to create a very narrow and long picture. On a phone, this can be done in PicsArt (iOS, Android), Adobe Sketch (iOS, Android) and Photofox (iOS) applications: in the list of suggested aspect ratios, select "Manual" (or "Custom") and specify the aspect ratio, for example 16/6000 pixels.
The smaller the width, the longer you can make the picture, so the ideal option is a canvas with a width of one pixel. In this case, the height of the image will most likely be limited only by the capabilities of the photo editor. While writing the material on Instagram, I managed to upload an image with an aspect ratio of 1/10 thousand pixels.