Let’s face it: we’re living for all the fantastic new ways you can post your best photos and videos on Instagram. From portrait, landscape, and square photo options, Instagram Stories, Reels, IGTV videos, and videos in your feed…
There are so many incredible ways to engage with your followers and deliver eye-catching content.
However amazing these new options are, it can be a little tricky to figure out the ideal Instagram image size for your content, right?
That’s why we’ve put together a quick guide for you to decode all the different Instagram post dimensions for each piece of content, and the best photo resolution to upload to Instagram for optimal clarity.
(Yes, posting pictures on Instagram can lower image quality!)
And just in case you need a cheat sheet to keep track of all these Instagram image sizes (because let’s face it, there are a lot!), we’ve included a handy cheat sheet and a Pinnable infographic. Major score! 🥅
Before we dig in, we wanted to let you know about a feature that might come it very handy (and make scheduling a lot faster!) Tailwind can plan, schedule and post Reels on Instagram – so be sure to check it out!
Instagram video and photo sizes have varying dimensions depending on the orientation of the photo and tool it’s being posted with. Here’s a quick list of the most common Instagram photo and video dimensions:
When Instagram first launched in 2012 (it seems so long ago now!), users could only upload photos in a 1:1 aspect ratio.
Users who wanted to display their beautiful landscape and portrait photos were forced to crop their photos into a square or use other apps to create workarounds. Talk about time-consuming!
Thankfully, Instagram listened to user feedback and introduced horizontal and vertical photo capabilities in 2015. 🙌
With that in mind, let’s talk about the best image size for Instagram photo posts, including the traditional square, portrait, and landscape!
Ideal Size: 1080px by 1080px
The aspect ratio of a traditional photo post is 1:1 square.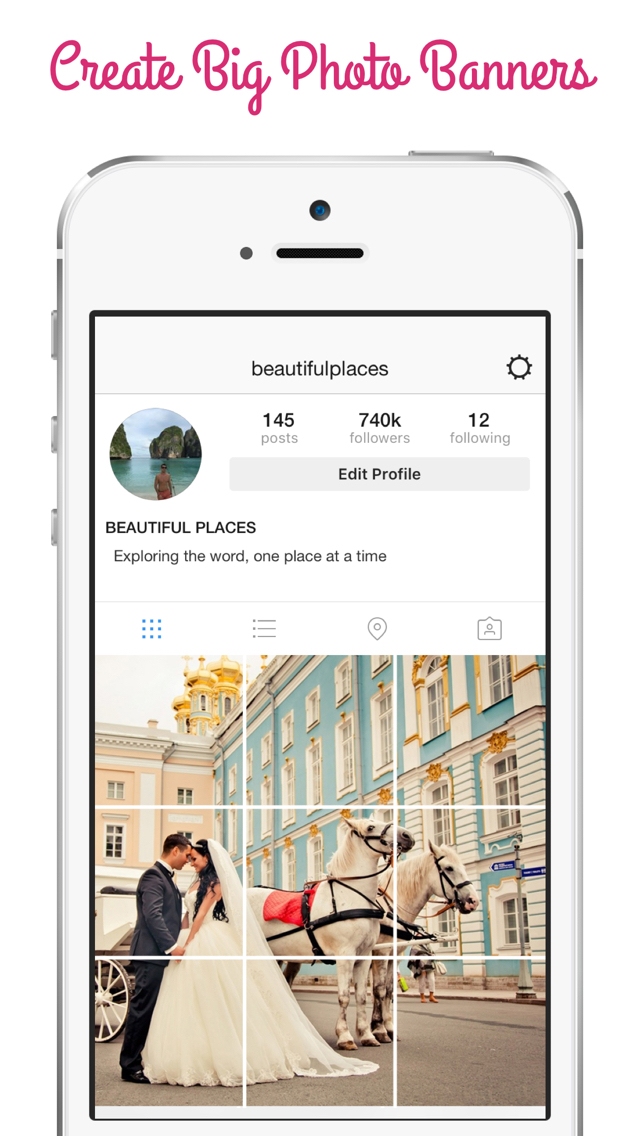
This is usually the easiest photo size to get right on the first try because of the auto-cropping function on most photo editing apps and Instagram itself.
Not to mention, you can shoot a square picture directly in the iOS or Android camera!
For best results, your photo should be between 320px by 320px and 1080px by 1080px.
Ideal Photo Size: 1080px by 1350px
Wondering how to fit a full picture on Instagram without cropping?
You can do that with portrait and landscape photos! Portrait photos are also fairly easy to get right on the first try, although you will have to crop oversize vertical photos to fit within the Instagram dimensions.
What size is an Instagram portrait?
The ideal Instagram portrait aspect ratio is 4:5, and the ideal photo size is 1080px by 1350px.
If you upload a larger portrait, say 4:6 or 9:16 (the size of a Snapchat photo), you’ll be prompted to crop a portion of the photo out to fit.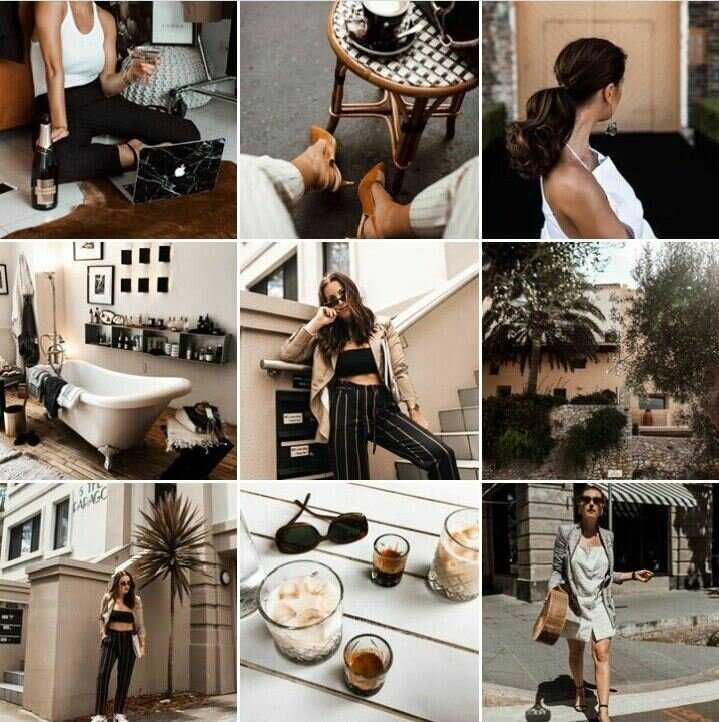
Ideal Photo Size: 1080px by 1350px
We’ll be honest: getting the right Instagram horizontal photo dimensions can be tricky!
That’s because the perfect Instagram landscape photo aspect ratio is 1.91:1.
With these dimensions, your horizontal photo will display beautifully on Instagram without a border.
However, you can actually upload landscape photos up to an aspect ratio of 16:9, and the app will automatically add a border around the photo.
Instagram has made adding landscape photos to your feed easier than ever. Here’s how to do it:
If you frequently use landscape photos in your feed, it’s best to stick to the same aspect ratio for each.
Otherwise, your followers may be unnecessarily distracted from your show-stopping photos as they scroll!
To nab the best horizontal photo size for Instagram on the first try, make sure the height of your photo is at least 1080px (we’re sensing a theme here! 🔍).
This will keep your photo quality high on mobile and desktop!
Before we move on to Instagram video post dimensions, let’s do a quick recap!
Instagram has three available aspect ratios for your photos and videos.
Previously, the 1:1 aspect ratio (square) was the only available option, but Instagram now allows portrait and landscape photos!
The aspect ratio for portrait photos is 4:5, while the aspect ratio for landscape photos is 1. 91:1.
91:1.
The best Instagram image size for posts are:
1080px by 1080px (Square)
Whew, that’s a lot of different aspect ratios to keep track of! 🤯Thankfully, Tailwind for Instagram has a handy cropping function that automatically trims your uploaded post image to the closest acceptable ratio.
If you want to crop your photo to a square, portrait, or landscape, you can just click on our Crop button and choose your desired ratio! 💥
Ideal Instagram Stories Size: 1080px x 1920px
Instagram Stories are another amazing tool for connecting with your followers and posting everything from text posts, hosting Instagram Lives, and uploading photos and videos!
Instagram Stories content is meant to be viewed in portrait mode, so even though you can post landscape photos and videos, they won’t show up as well on Stories.
That’s also another reason that the aspect ratios for Instagram Stories are different from the other post sizes we went over before!
You can upload photos and videos to Instagram Stories in any aspect ratio from 1:9:1 to 9:16.
However, you’re more likely to capture attention (and make your posts easier to see and understand) if you fill up the entire Stories screen with no borders.
The photo dimension you need to fill the entire Instagram Stories screen perfectly is a 9:16 aspect ratio, and a 1080px by 1920px size.
Instagram Reels use the same dimensions as Instagram Stories – 1080 x 1920 px and an aspect ratio of 9:16.
However, there are some things you should know!
-Instagram Reels preview in the feed at a 4:5 Portrait size (cropped from the top and bottom and centered).
-The caption of your Reel displays in an overlay in the bottom corner of the video.
-Reels can be any length up to 90 seconds.
You can upload any image from your phone to make the Reels thumbnails. Instagram Reels thumbnails are a secret view magnet if you do them right! Using images with captions or a screenshot of an important moment in the Reel are some handy tips for your next Reel thumbnail. But don’t forget the dimensions and aspect ratio for the perfect thumbnail.
Wait, there’s more about getting the perfect size for your Reel thumbnail. While Reel thumbnails have two aspect ratios, you can only edit one version–the 9:16–for display on the profile Reel feed.
The 1:1 aspect ratio will crop out your original thumbnail so that it blends in with other Instagram posts. So keep it in your mind when deciding on the thumbnail for your next Reels.
Here are the steps below to upload a cover for an Instagram Reel:
Step 1: Head to the profile page, then your Reels feed, and choose the Reel you want to edit.
Step 2: Open the settings menu in the triple dot icon and choose ‘Manage.’
Step 3: Choose ‘Edit’ and then ‘Cover’ at the bottom of the Reel preview.
Step 4: Choose a frame cut from your video or choose ‘Add from camera roll’ to upload a custom Reel cover.
Step 5: Tap ‘Done’ to save!
TikTok videos and IG Reels have many things in common, but they are two distinct types of social media content. By utilizing both platforms in your marketing strategy, you can increase your brand awareness, drive engagement, and build relationships with potential customers.
TikTok is a popular social media app amongst younger users, with nearly 70% of US teenagers using it regularly and 90% of its users logging in daily. TikTok videos are often characterized by witty, lighthearted content that often goes viral quickly, thanks to its music and editing tools. As TikTok is one of the most popular video-sharing platforms, it’s a great way to reach a larger, younger audience.
IG Reels—Instagram’s answer to TikTok—allows content creators to showcase longer-form, more refined videos. It provides a more sophisticated platform for creating and sharing content, which appeals to a more mature audience.
Both platforms use vertical, short-form videos with the dimension of 1080×1920 for mobile users. It’s a great idea to publish your new content on Instagram and TikTok at the same time. Because dimension-wise, there’s no difference between TikTok and Instagram, but the combined user base offers a huge opportunity for broadening your reach. Just make sure your videos are not too long and don’t have any platform’s watermark on, and you’re good to go!
Ideal Video Resolution:
If video is your favorite medium to connect with your followers, it’s important to get the right dimensions to make uploading and posting your content a breeze.
That way, you can upload on-the-go footage!
If you’re looking to dive deeper into video, we penned a complete guide to Instagram video sizes and dimensions that is jam-packed with tips and tools to edit your Instagram videos.
It also contains all the video requirements you ever wanted to know about when it comes to Instagram.
But don’t worry, we’ll still cover some of those requirements below, including aspect ratios, length, and required dimensions!
What are the dimensions for Instagram video?
Just like photo posts, you have the option of using square, horizontal or landscape videos in your feed. The ideal dimensions for each are:
The aspect ratio of each is the same as photo posts, except our recommendation for landscape videos:
The reason that we recommend a 16:9 aspect ratio for landscape videos is that it will take a lot of time and effort to edit your video into the 1. 9:1 aspect ratio used in photo posts.
Instagram users are accustomed to viewing videos in 16:9 ratio, so the time and effort to crop and edit your video to change it from 16:9 probably isn’t worth it. 😪
There are also some minimum and maximum requirements to know when it comes to uploading your Instagram videos to your feed. Your Instagram video post must have a maximum of the following:
If your video exceeds any of these requirements, you won’t be able to upload, so keep these important numbers in mind when planning your video content! 😎
Like Instagram photo posts, the orientation you shoot your video in (square, landscape, or portrait) will determine what the minimum and maximum resolutions are for each.
The minimum resolutions are:
Because your video file will be compressed when you upload, we suggest using the maximum resolution allowed.
The maximum resolutions are:
Tip: By using the max resolution in your videos you can preserve crystal clarity.
Do Instagram photos have to be square?
Your Instagram photos don’t have to be square – you can also upload rectangular portraits and landscape photos to your grid without cropping! The trick is to make sure that your photo is up to 1080px on the shortest side.
Keep in mind there are limits – If you upload a photo that exceeds the aspect ratios (the width-to-height ratio of a photo), you’ll have to crop your photo. 😩
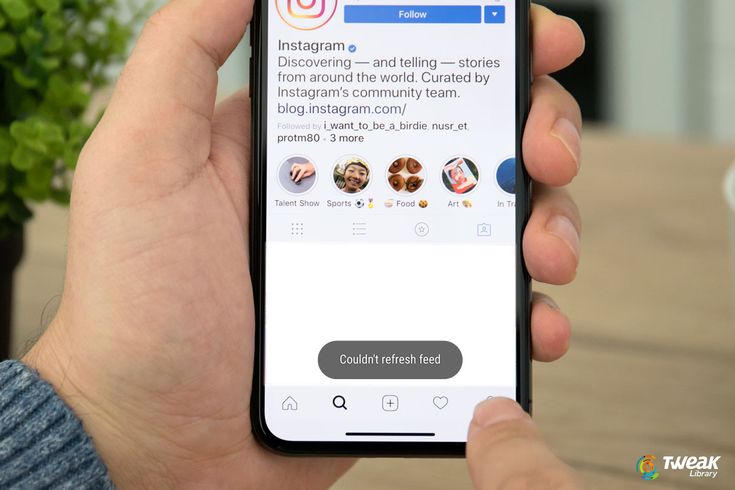
Does Instagram lower image quality?
Noticing that your photos are uploading fuzzy? Uploading files that are larger than 1080px may be the culprit.
If you upload an image that’s larger than these measurements, Instagram will automatically compress the image for display. Extreme photo compression can distort image details, majorly impacting quality. 😔
The same is true when you upload an image that’s smaller than 320px by 320px.
Instagram will expand the image, causing pixelation and fuzziness. 👎
To get the best possible photo in your feed, aim for square photo sizes of 1080px by 1080px.
The compressed version that displays on Instagram will be around 600px by 600px, which will appear flawless on the Instagram mobile and desktop without affecting resolution!
If nothing seems to solve your compression woes, try uploading from your desktop.
Instagram’s web application preserves photo quality much more effectively than the mobile app!
How do you fit a full picture on Instagram?
If you want to upload your full portrait creation to Instagram without cropping to a square, you can use the handy full-size button when uploading your photo to automatically adjust your portrait (or landscape photo) to the maximum aspect ratio available.
Just tap the expand arrows in the bottom left corner of your photo to fit the whole picture on Instagram!
Speaking of detail, the same rules about photo compression and enlarging apply here.
To get the best resolution for Instagram, size your portrait photo around 1080px by 1350px. That way, automatic compression won’t affect the quality of your vertical shot!
Whew! All the exciting new features on Instagram have opened up a world of new content opportunities and amazing ways to engage with your followers. They’ve also created a few new aspect ratios and dimensions to keep in mind when creating that content!
what size should photos be for Instagram?
| Type of Instagram Post | Aspect Ratio | Instagram Post Size |
|---|---|---|
| Square Photo | 1:1 | 1080 x 1080px |
| Landscape Photo | 1.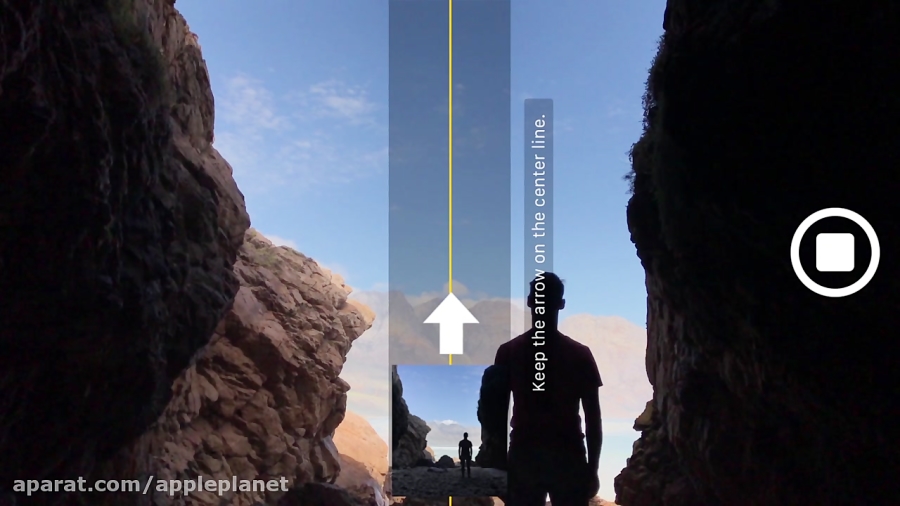 91:1 91:1 | 1080 x 608px |
| Portrait Photo | 4:5 | 1080 x 1350px |
| Instagram Stories | 9:16 | 1080 x 1920px |
| Instagram Reels | 9:16 | 1080 x 1920px |
| Reels Cover Photo | 9:16 | 1080px x 1920px |
| Instagram Square Video | 1:1 | 1080x1080px |
| Instagram Landscape Video | 1.91:1 | 1080x608px |
| Instagram Portrait Video | 4:5 | 1080x1350px |
If you’re stressing about which type of image size makes the most sense for your content, and whether using a mix of portrait, landscape, and square photos will affect the look and feel of your 9-grid… don’t worry!
Your content will appear in a landscape, portrait or square aspect in your users’ feeds, but will be cropped to a 1:1 square preview in your actual 9-grid.
Your users will have to select your photo (or stumble across it while scrolling!) to see the full picture.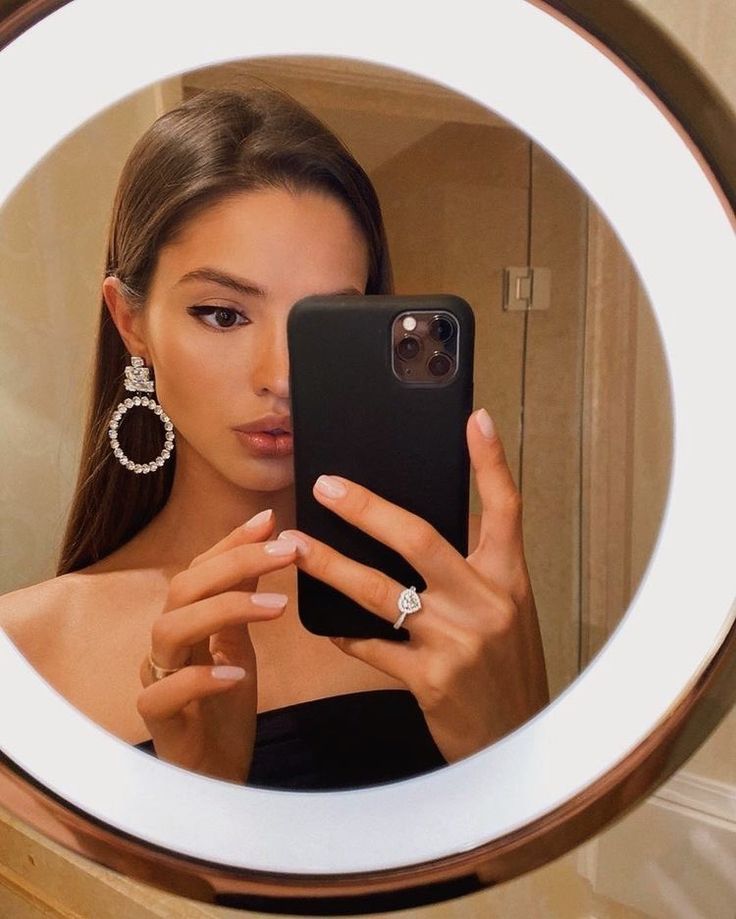
Plus, you can always plan out your feed and double-check how all of your photos work together with an Instagram planning tool, like Tailwind’s 9-Grid Preview!
Carousels on social media in general are having a moment, including TikTok carousels and LinkedIn carousels. But they can’t quite match the comeback that Instagram carousels are having. Recent reports have shown carousels on Instagram are generating similar levels of engagement as Reels. You’ve likely noticed more photo carousels in your feed, too.
It’s a great time to share more photo content to Instagram using this format. Not only are carousels being pushed by the algorithm, because you're posting multiple pictures on Instagram at the same time, the reach is better.
Carousels offer multiple opportunities for followers to see your content in their feed, showing different images from the same post at different times. There are some limitations to Instagram carousels, though, specifically when it comes to sharing multiple photos of different sizes all together in one post.
Instagram allows you to publish up to ten videos and photos in a single carousel, but they all need to be the same aspect ratio. Otherwise, Instagram will automatically crop the image and you won’t be able to fit the whole photo in the post.
In this post, I’ll show you how to post multiple photos or videos with different sizes without cropping by first resizing the canvas.
How to make a carousel on Instagram with images of different sizes:
That’s the tl;dr version of how to post multiple photos with different sizes as a carousel.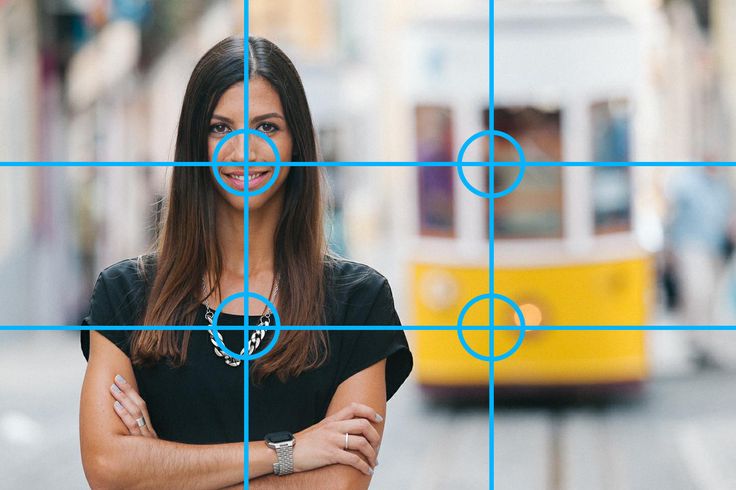 Let’s get into the specifics as I walk you through it, step by step.
To post multiple photos or videos with different sizes on Instagram, you need to use a tool to resize them first. To avoid cropping out content, add a neutral background so that all of the photos and videos have the same aspect ratio. The aspect ratios for carousel are the same as the standard Instagram image size: either 4:5 or 1:1.
I recommend a black background – most Instagram users have dark mode turned on, so the black will disappear into the platform interface.
Then, you can post multiple pictures in the carousel without cropping out or changing the size of your image.
Here’s a step-by-step tutorial on how to resize images and videos that with Kapwing, an online video and image editor:
Head to Kapwing.com on your device and click Get Started. Open a new project and choose the “Start with a blank canvas” option. For an Instagram carousel, you want to choose an aspect ratio of either 4:5 or 1:1. I’ll be using a square canvas for this tutorial, since I want to post landscape and portrait orientation photos together.
One at a time, upload the photos or videos you want to post. Tap the Media button and then tap “Click to upload” to choose images on your device. You can also upload photos from a link or with the Google Drive integration if your photos or videos are stored in Google Drive, Google Photos, or elsewhere online.
Before you add your photos and/or videos to the canvas, I recommend changing the color of the background to black. As mentioned previously, most users have their phones (and therefore their Instagrams) set to dark mode, so a black background will blend into the feed, making your content stand out, rather than distracting from it.
To change the background color from the default white background, tap the “Edit background” button above the canvas.
Then scroll down to the Background color options and choose black.
This step is easy because you’re not manually resizing anything – no cropping, no stretching, no photoshop skills required. You’re just adding it to the canvas.
Open the Media tab again and select the photo or video you uploaded in the first step.
Tap the blue plus sign in the bottom right corner of the thumbnail. This will automatically add the photo or video to the canvas and center it on the background.
Here's what it will look like for a landscape image or video and a vertical image or video:
After resizing your posts, it’s time to download them to your device so you can share them on Instagram as a carousel. Since each photo/video now has a 1:1 aspect ratio (or 4:5, depending on what you chose), you can publish them without cropping.
Once you export, use the "Downloads" gallery to find the file you just made and save it to your phone.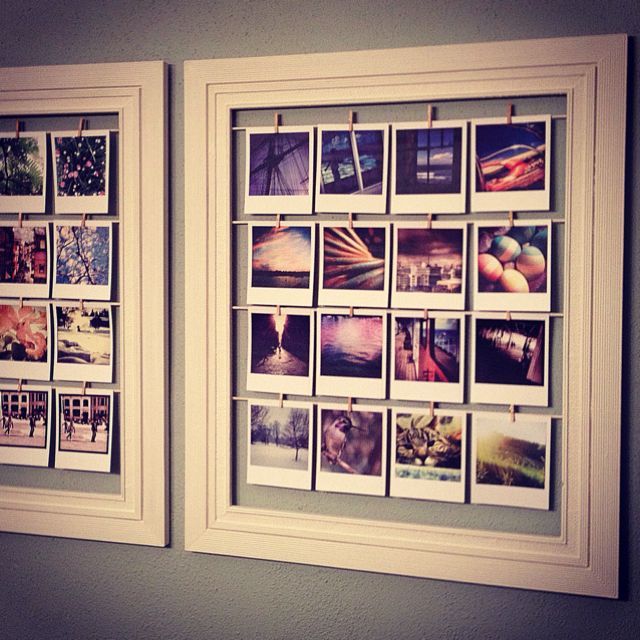
If you're not signed into a Kapwing account, sign in or sign up using your Google account or preferred email address. Once you're signed in, each of your exports will be saved in your workspace so that you can download them later.
Repeat these steps for each of the photos and videos that you want to share in your Instagram carousel. After you've downloaded each of the resized posts, open the Instagram app and upload them as a single post.
To do so, open a new post and tap the multiple images icon that appears in the right hand corner beneath the image preview. Now you can select all the images and videos (up to ten) you want to include in your carousel.
Tap each of the resized posts in the order you want them to appear and share your post as normal.
The above tutorial is a great way to share multiple images and videos with different aspect ratios. For images with landscape orientation, though, especially panorama style images, it’s not always the best way to showcase the photo. You lose a lot of image quality by shrinking the photo down to fit into a square or 4:5 canvas.
There’s a quick solution, though.
To show the whole landscape image in your Instagram carousel, follow these steps:
The first image in your carousel should be the whole photo. So following the previous tutorial for resizing photos, center your landscape photo on a black background. Instagram carousels allow for 4:5 or 1:1 aspect ratios. For this example, I’m setting the background to 4:5.
Save this new, resized photo to your device.
Add your photo to the canvas by tapping the blue plus icon on the thumbnail in the media tab. This will center the image on the canvas, but that’s not what you want.
Tap the “Edit image” button and select Crop. Because the canvas is 4:5, that’s the crop preset I’ve selected. If your canvas is a square, select 1:1.
Move the image within the crop preview so that the corners line up with one side of the image. For my image, this splits the photo exactly in two. You may need to adjust the line up slightly for your post, depending on how wide your landscape photos are.
Export and save this half of the photo as a single image.
To get the other half of the photo, scroll down on the download page and select “Edit this project.”
Once you’ve reopened the project, select “Edit image,” tap Crop, and move the image to center the other half of it within the crop preview. Export and save the second image.
Open a new post on Instagram and select the multiple images icon. Select the whole image with the black background first, then the two slides.
You’ll be able to preview what they’ll look like on the feed. It should look like a continuous image.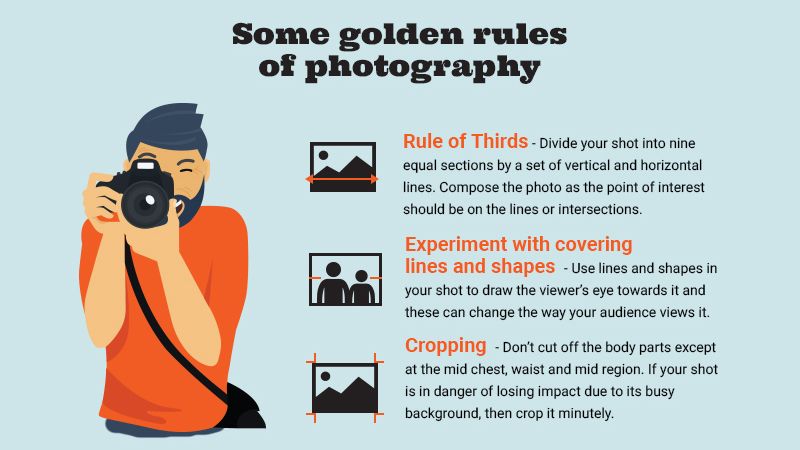
In the caption for the carousel, you can include a quick note encouraging viewers to swipe to see the whole image, although most users swipe on instinct when they see a carousel.
And that’s how you fit a long photo into a single carousel!
For more ideas, tutorials, and features, check out ourResources Library or visit ourYouTube channel.
Related Articles:
• How to Caption Videos Using Instagram Threads
• How to Download Anyone's Instagram Stories
• How to Make Social Justice Slideshows for Instagram
• How to Download Instagram Reels
Recently, Instagram announced support for both landscape and portrait formats, but only when you post multiple images and videos in one post. It soon became allowed for individual downloads as well. While welcomed, this move is still limiting as I can't post vertical photos to Instagram unless they have a specific aspect ratio.
I've put together a few methods for adjusting your photos to the correct aspect ratio. These are multi-platform applications and tools that will allow you to upload Instagram vertical images in a few clicks. Let's start.
Read: Make a photo square without cropping - online tool
Windows programs, mobile applications, games - EVERYTHING is FREE, in our closed telegram channel - Subscribe :)
There are two options for cropping images for Instagram:
While Instagram isn't perfect, there are ways to fix this problem. Some tools and applications allow you to post vertical photos with a few clicks. Let's see how.
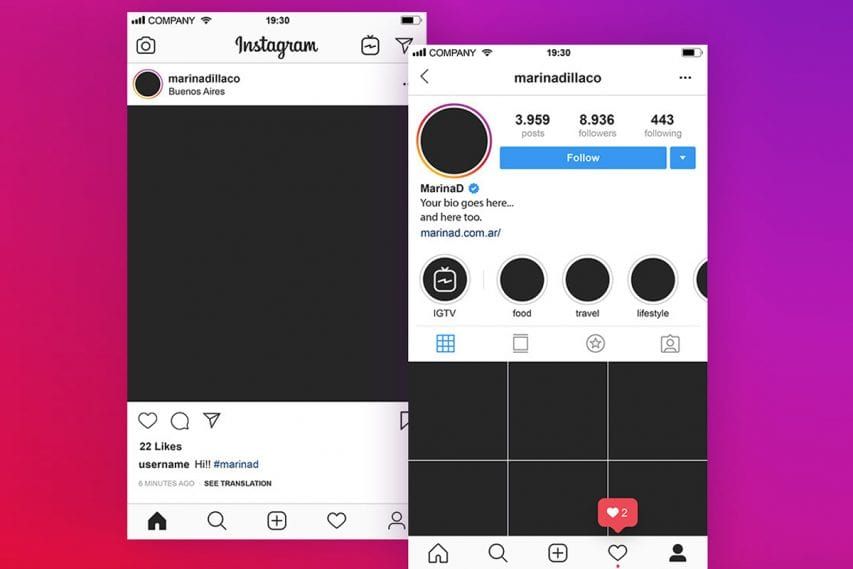
A strange and curious name, but a very popular app for those who want to upload vertical images to Instagram without cropping them. No Crop and Square won't let you post vertical photos like the one you see below.
The process is quite simple. You open the app and select the image you want to share on Instagram. There are a number of filters and effects to choose from. You can apply whatever you like. There are also emoji, stickers, emoji, and 3D emoji if that's what you're looking for.
You can create a collage in no time. Just add all the images you want to add with the collage tile button. The ability to add text with different fonts, patterns, resize and rotate images makes No Crop and Square a complete Instagram app.
The app is free to use, but with ads that can be removed with a $0.99 upgrade. In my experience, the ads were unobtrusive, with the exception of full-screen pop-ups.
Download No Crop and Square (Freemium)
Whitegram does for iOS devices what No Crop does for Android. It allows you to post full size images and photos to Instagram without having to crop or resize them. Simply select the image you want to upload in vertical mode and the app will automatically crop it to perfection against a white background.
You see the beauty of this. By adding a white background, it misleads Instagram into thinking the image is square. There are other apps in the App Store that will give you the results you want.
Tip: Always choose the highest resolution when working with a vertical image.
Download Whiteagram (Free)
Here is the easiest trick from the book. Instagram has a hidden option that will let you upload vertical images if you know how to crop images to the right size. You can do this on any platform because it is an online tool. Pixlr is a free and powerful image editor.
You start by selecting an image and cropping it to a 4:5 aspect ratio. Pretty easy, right? Now, in order to upload an image to Instagram using your PC's browser, you will have to fake it. Follow this guide. It will tell you how to make Instagram think that you are posting from your mobile phone, when in fact you are using your computer.
This is what your screen should like when you faked your browser. You should see the familiar "+" icon at the bottom to add a new image.
Read: 8 (+1 new) ways to post to Instagram from your computer
When you click the plus icon and add an image, you should see an expand button that looks like an arrow from either end.
Clicking this button will place your image in its original portrait mode with a 4:5 aspect ratio. You will also notice that there are no borders on a white or black background. No more square images that can be annoying as hell when they're crisp, portrait should be the obvious choice.
Note that the developer mode trick mentioned in the tutorial above will also work on Mac OS using the Safari browser. In fact, it works in all browsers on all platforms.
Visit Pixlr (Free)
I can't stress enough how annoying Instagram rules are. I agree that this gives a uniform look to the whole platform, but the tools that do this are not in the application. Instapadder is a web service that completely solves this problem. You can use it on your computer and Android devices to quickly adjust images to match Instagram without cropping content. iOS users cannot get a piece of this particular cake due to their own rules, but they can try the iOS specific method above.
To add padding around images, simply go to the website in your web browser, click the download button and select all files. It uploads images to a server and converts the images to an Instagram compatible format. The best part about this method is that you can upload and process images right away.
It accepts most image formats and outputs converted images fairly quickly. The only limitation I found with this service is the lack of a preview option before uploading augmented images, so you can't choose which images to upload. Otherwise, Instapadder is pretty good.
Visit Entrance Staircase
Polarr Photo Editor is available from the MacOS App Store and can be used as an integration with the iPhoto editor or as a standalone editing tool.
Once you have downloaded the Polarr Photo Editor (link below), just open it and import the photo you want to edit for Instagram.
Once you enter the editor application, click the settings tab on the right side of the screen. Scroll down and click "Border" '. Now select the aspect ratio and border color from the available custom menu. When you click on the Save button, the changes to the photo will be saved and the iPhoto library will be updated immediately. If you're using an iPhone, it's probably also in your iPhone Photo Library.
Download Polarr Photo Editor (Free, $24 per year)
If you're using a Windows tablet with touchscreen support, Instagram has announced an app just for you. The app is available on the Windows Store, but what about other users? This is where Gramblr comes into play.
Gramblr didn't support vertical images before, but I think they made some changes to their API since the current version supports it. Here is a screenshot.
As you can see, Gramblr does its job. The application is free and works on all Windows computers, including 32-bit versions. You will need to create a free account, but there is no need to verify your email address. Just select, crop, add filters, add a caption and post it to your Instagram.
Download Grambler (Free)
Instagram was originally designed to be used on mobile devices such as Android and iOS. But that doesn't mean you can't use it on your PC or Macbook. Whether you need an online tool or offline software, we take care of your Instagram needs.
Also read: How to turn off the last activity feature on Instagram
Windows programs, mobile applications, games - EVERYTHING is FREE, in our closed telegram channel - Subscribe :)
many other formats. These features provide excellent opportunities for creating new content; however, navigating through IGTV, stories, videos, and other posts can be difficult.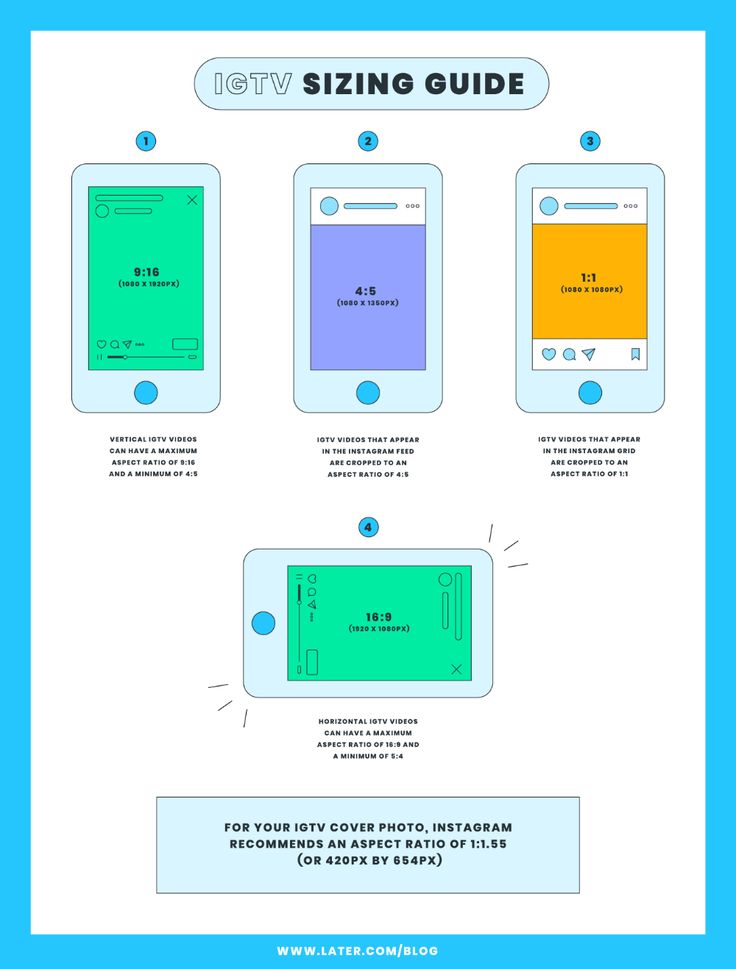
This guide will help you understand the optimal sizes and scales for different Instagram formats. We hope this helps you and makes things easier. Once you learn the basic rules, you will be able to create high quality content and your social media page will grow faster and more efficiently.
Before we get into the technical specifications of Instagram, there are a couple of terms you need to know - size and aspect ratio. Although at first glance they describe the same thing, you need to understand the difference, especially in units of measurement.
Size, also referred to as resolution, refers to how many pixels are contained across the width and height of the image. It is expressed in two numbers; for example: 320px by 1080px. The width is indicated by the first number, and the second is the height.
Resolution is important when taking and uploading high quality photos and images.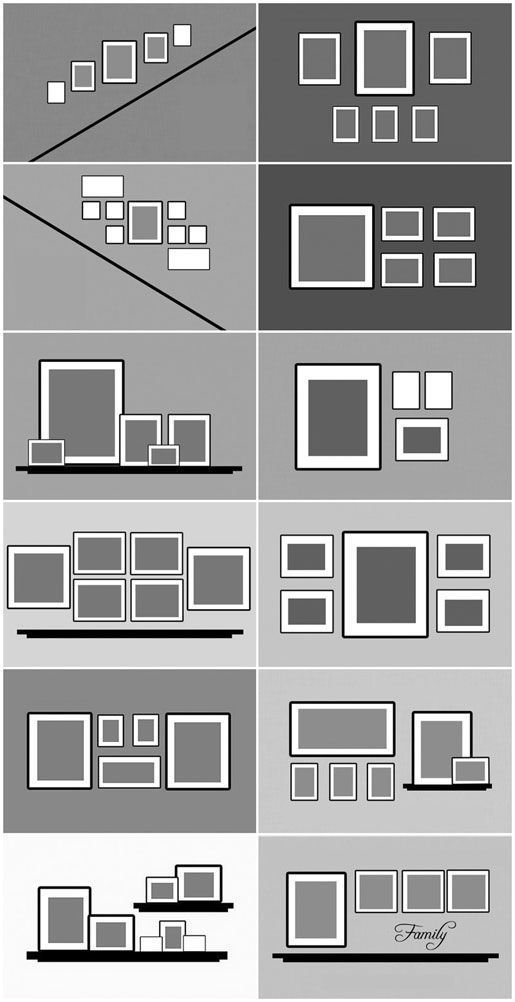 If the resolution is high, then it contains more pixels - in other words, more data. Thus, the higher the resolution, the higher the image quality. A pixel-limited screen or platform modifies the source material to fit within the specified dimensions.
The aspect ratio is the ratio between the width and height of an image. This dimension is referred to as x:y. For example, it could be 9:16 where 9 is how wide the picture is and 16 is how tall it is.
The importance of aspect ratio comes down to resizing images without distortion. Some users make the mistake of changing images - they ignore the recommended aspect ratio. As a result, they get strange photos, although this could be easily avoided.
Even if you want to post sharp photos, uploading images in high resolution, such as 5400px by 5400px, will not achieve the desired result. On the contrary, it will negatively affect the image quality. Therefore, you should take the time to study and follow the recommended sizes.
The table below will give you a basic idea of common ratios and sizes for various Instagram photos.
| Instagram image format | Aspect ratio | Size |
| Avatar | 1:1 | 180 x 180 px |
| Square photo | 1:1 | 1080x1080px |
| Landscape photo | 1.91:1 | 1080 x 566 px (608 px) |
| Portrait/vertical photo | 4:5 | 1080x1350px |
| Carousel posts | 1:1 | 1080x1080px |
| Stories | 9:16 | 1080x1920px |
The avatar is located next to the username and profile header, so you should take it seriously. The requirements for an Instagram avatar for mobile and desktop versions are slightly different, so it’s better to choose larger images so that they fit well under both versions.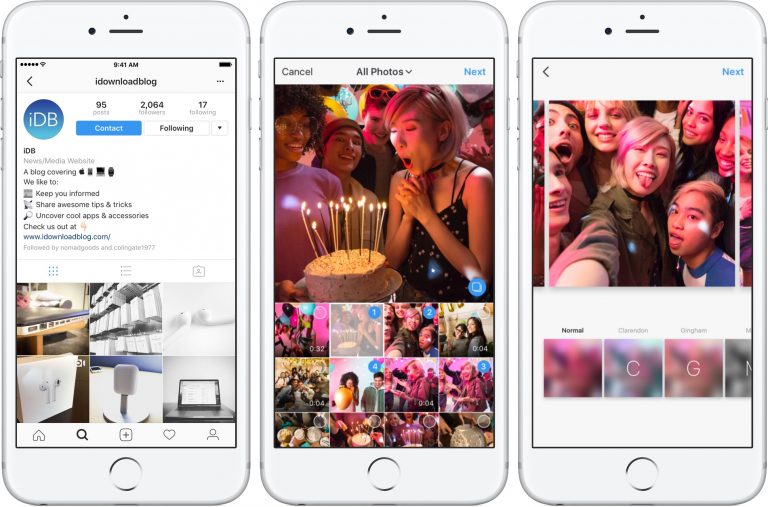
Note: The rules do not imply that your avatar must be exactly 180x180px when uploaded. Theoretically, you can upload images much larger than this. More importantly, they must be square in order for the system to display them correctly.
Before uploading a photo, crop it into a square shape to see what details will be cut off and what will remain visible. The finished avatar will be in the shape of a circle, so you should check that there are no important elements around the edges of the image. You should also remember that the photo will be very small, so it makes sense to enlarge it a little and crop it.
Square is the original format that all Instagram users are well aware of. It is still the choice of many users, especially when you consider the fact that posts are displayed in this ratio in the profile grid.
Note: When you're composing a square photo, it's best to center the main element. Since there is not much working space on the sides, crop the photo so that the focus is in the center.
Another working method is symmetrical composition. Even if it breaks the rule of thirds that everyone in the world of photography talks about, it works great for Instagram. Symmetrical composition creates harmony and a sense of aesthetic satisfaction, balance and proportion. Play with lines, mirroring and patterns.
Landscape photo orientation is not the best choice for most profiles, but some use it to maintain the look of a professional photo. The standard will still be a square, but you can easily change it with the edit button.
 91:1
91:1 Note: Most cameras shoot in 16:9 ratio, not 1.91:1. If you don't resize the photos, they will either be loaded with black edges or the sides of the image will be cut off. Black edges are highly undesirable as they change the look of the image and make the tape look inconsistent.
There are several advantages to creating landscape photos or cropping them to this format. This ratio seems more natural to the human eye and conveys a sense of space or panoramic perception. Landscape orientation is great for horizontal or horizontally moving objects. And in conclusion - this format is most suitable for viewing from a computer.
Portrait is a favorite format for marketers as it takes up more real estate on users' screens whenever they're not opening the app. While Instagram gives users room to get creative with non-square formats, there are some limitations.
Note: As we mentioned earlier, the reason portrait photos are prioritized is the most common: they fill almost the entire user's display space. This means that it catches the eye more and gives more chances that the photo will be noticed. In addition, this format literally gives you more physical space to place your brand.
In this case, the rule of thirds comes into play. Vertical lines can be divided into foreground, middle and background. Ideally, it's best to place something eye-catching in all three parts. As a last resort, there should be at least one main focus point.
The carousel allows users to upload up to 10 images that match the same aspect ratio. Sometimes it's not easy to align all the photos properly, but it's handy for posting multiple images, close-ups, and other pictures in one post.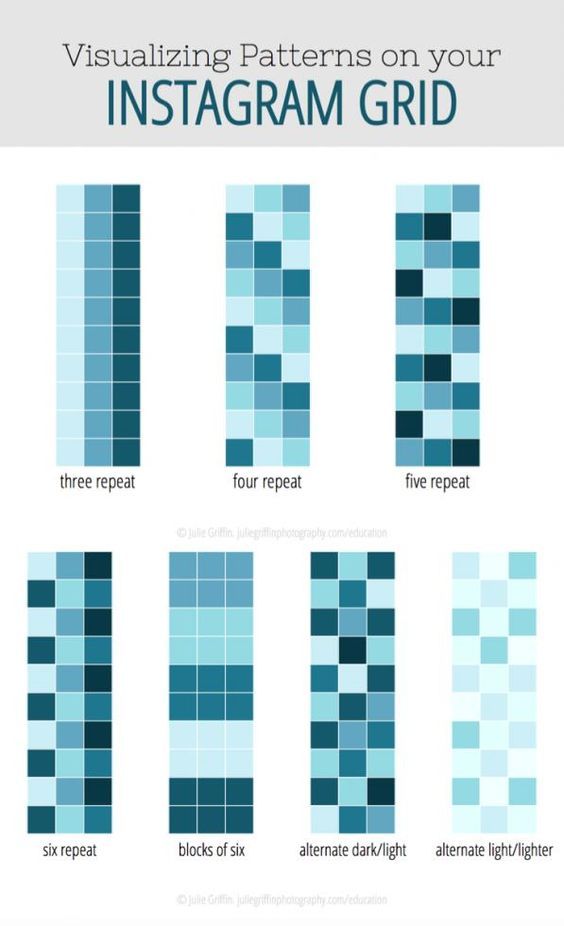
Note: If you have very high resolution product photos, you should consider uploading these photos in slices in the carousel, ie. you need to enlarge each part of the photo and divide it into parts. In this way, you can showcase the product with all the details, as well as give a general idea of it.
You can also try posting additional items that complement or are part of the set. This way, you won't clutter your feed with multiple posts that might annoy some users. You can even achieve a panoramic effect by posting a layout carousel, where each photo is a suggestion of the previous one.
Instagram Stories are very engaging, accessible and easy to follow. Since stories are an effective way to increase reach, engagement, and conversions, you can't afford to upload content in an incomprehensible way.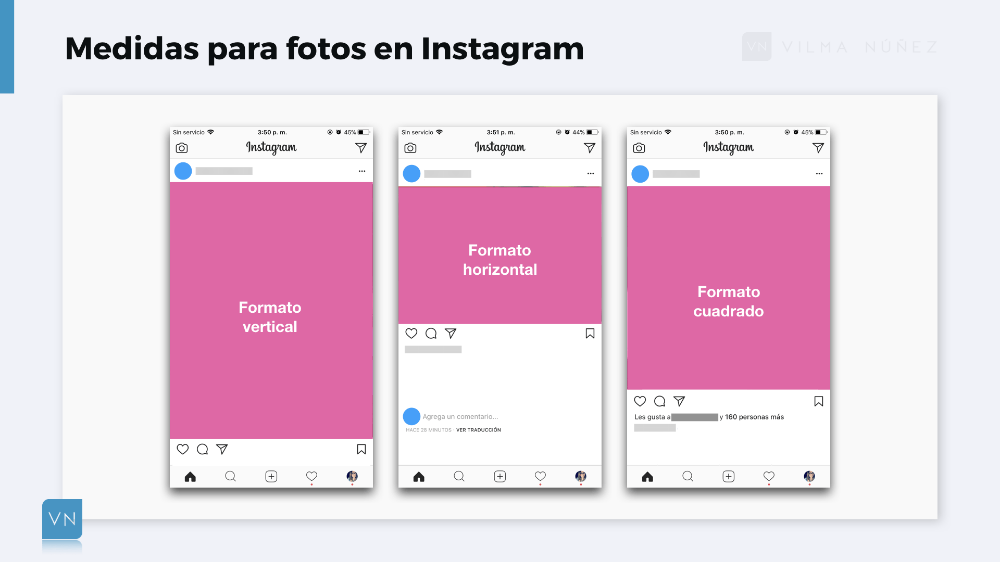
Note: Instagram provides specific options for different ratios. Photos that do not meet the recommended parameters will not be stretched; instead, the app will add a border around the edges to match the main color scheme of the image. This option allows you to upload even horizontal photos (however, they will be much smaller than vertical ones).
However, you should still opt for a vertical format in Stories. People use their smartphones vertically, so you don't have to force them to rotate their phones to see the full size image. If you do without using a frame to fill the entire screen, and also rotate the photo vertically, then you will be pleased with the end result.
If you want to create the perfect Instagram video, then you need to consider the features of the platform. Check out our guide on how to post videos to Instagram and try playing around with different formats. There are many nuances in the publication of videos that are worth getting to know.
Here is a short table of allowed video formats and their features.
| Instagram video format | Aspect ratio | Size |
| Square video | 1:1 | 1080x1080px |
| Horizontal video | 16:9 | 1080x608px |
| Vertical video | 4:5 | 1080 x 1350px |
| IGTV | 9:16 | 1080x1350px |
| Storys | 9:16 | 1080x1920px |
Just like with photos, Instagram provides the ability to work with square videos. This format is standard and universal for all kinds of devices. The technical requirements for square videos are almost the same as those for photos.
Our recommendations for horizontal videos are almost identical to those we gave for photos. The reason why we recommend using a different aspect ratio is that it's too complicated to convert a video to 1.9:1. In addition, most people are used to watching videos in 16:9 format.
Vertical video and full screen are not the same thing. If you're filming a clip on your phone, or recording a video on TikTok or Snapchat, then you'll need to resize the video before posting it to your feed.
IGTV is Instagram's first attempt at adding a longer video option.