How to pin a text on instagram story
How to Pin Text in Instagram Story Videos?
One of the latest and most amazing Instagram features is the Instagram story. It allows you to post a particular video or picture that would be highlighted. The cool thing about this feature is that it stays on your profile for the next 24hrs.
So, whenever any user opens your page, they would see the colored ring around your profile avatar that indicates there’s a story.
And if after they have been viewed and you still want them to be visible you can include them in your Instagram highlights permanently
While watching Instagram videos, you might have come across different ways people have personalized their posts. This, of course, is outside just posting their videos.
They can add text to their post as well as pin it to the video, which makes the videos much more interesting to interact with.
Sometimes the text could be moving with another item on the screen like a sticker. These are all parts of the way you can make your Instagram stories more interesting,
Using the pin a text feature on Instagram enables you to look different from everyone else as well as give your brand a boost.
If you want to know how this feature works and how to best utilize it, keep reading this article
Contents
- Pin a Text Feature on Instagram Stories
- Pinning a Text to your Instagram Stories
- Pin Stickers on Instagram Stories Video
- How to Easily Create an Instagram Story
- TYPE
- BOOMERANG
- LAYOUT
- LIVE
- NORMAL
- FOCUS
- REWIND
- HANDS-FREE
Pin a Text Feature on Instagram Stories
On Instagram, you can pin a text or a sticker to your Instagram stories. This switches up your stories and they look entirely different from just being plain to even funnier and more interactive. Your text can be anything you feel like typing in.
There are even options that allow you to curate your own text through colour, font style, alignment, and appearance. Because Instagram is efficiently flexible you can adjust the size of your text as well as the position your text should hold on the post.
Asides from the above, your text can also move alongside your video. So, if you’re posting a video of someone running or you running, the text beside it would move with you in the video. This just adds more interactivity to your Instagram stories.
But how do you Pin a text to your Instagram stories?
Pinning a Text to your Instagram Stories
Pinning a text to an Instagram story video is quite easy to do and also to remember for future posts. This method also applies, if you want to pin a sticker or a gif to your Instagram stories.
The method also applies to those who use both android and iOS devices. So don’t worry, your phone can access this feature anytime you want.
Something you would want to do before you start this process is to make sure your Instagram app on your device is actually up-to-date.
This ensures that there are no problems while you’re using this feature. The following steps will take you straight to the experience that is pinning a text to your Instagram story.
- Open your Instagram app on your mobile device, either Android or iOS.
- Go to your IG camera screen by tapping on the Camera icon at the top left of your screen or swiping right on your Instagram news feed.
- Once you’re on your Camera screen, record a video or upload one from your phone’s Gallery/Camera Roll. whichever works best for you.
- When you’re done recording your video or uploading an already existing one, tap on the Sticker icon that is at the top row of the text option to insert your desired text.
- Next, type your text. You can be as long as you want or even separate sentences.
- Tap on the text you have selected and hold (long press). Looking at the bottom of your screen, a slider should pop up.
To further tweak your text and make it unique;
- You can choose to turn on the sound of the video or you can keep your viewers curious and turn it off
- Opening the Text tab located at the top of the screen and denoted by a bigger and smaller letter Aa, you can change the way the text appears on the video, the colour of the text, and the font style.
- The next thing you can add is a filter. Pick from the array of filters, the one that best suits your video. You can do this as well as other things with and on your stories.
Aside from text, you can also pin stickers to your Instagram stories and here’s how to do it
Pin Stickers on Instagram Stories Video
- Once you’re done setting up your text, the next pop-up window will show you the stickers tab.
- Once open, select your desired sticker, tap on the sticker and hold, a slider with two options would appear at the bottom of the screen
- On the slider, you can move to different parts of the video till you find where it’s much easier to pin the sticker
- Once done, tap on the pin tab.
You can now adjust the size of the sticker or text by using your fingers to pinch your screen. This will zoom in/out to make it smaller or bigger. Do this until it is the size you want.
Should you wish to delete the just created text, tap on it and hold. The trash can should appear. Move the text to the trash icon at the bottom of the screen and it would be deleted. If you wish to type in another text, you can do so now.
If after making desired changes and you find that you don’t like the current position of your text and you want to change it, then long-press the text, move it around and until it’s right where you want it. Then tap the pin once more. And you’re done.
You can now post your story and you will see your text, sticker or gif appear on the video exactly where you put it.
How to Easily Create an Instagram Story
However flexible Instagram has proven to be, not all the features available to the mobile version are available for you on your desktop. The Instagram story is one of those features.
You can only create Instagram stories on your mobile device. The only thing you can really do on the desktop version is view images and videos, like them, comment, and save.
So, just before you start creating amazing stories, make sure you have downloaded the Instagram app and successfully installed it on your device. You can get it from your Apple Store or Playstore.
- Open your Instagram app and log into your account (if you don’t have simply follow the instruction to create one from the webpage)
- Once you’re in, swipe left to your Instagram camera or tap on the plus icon at the top right corner of your screen and then select story and your camera
- Once the stories section opens, there will be different types of stories you can create on the left-hand side of your screen
Because each of the types of stories you can create is fascinating and has a different feel to it, we’ll be looking at each one of them.
TYPE
This is the first on the list and the most basic one. Here, you can create a text-only update. This works perfectly if you’re just trying to give an important update.
It’s simple and straight to the point without distracting the viewer with images and videos. But it’s best to not use this type of story too often. It can become boring and reduce how viewers interact with your posts
BOOMERANG
Next up is the Boomerang story. This type of story is similar to a gif maker. When you press the record button, several different shots are taken which would be used to make a sort of animated image.
To fully enjoy the Boomerang experience, make small body movements, like a smile, a wave, or even a kiss, this would follow the boomerang effect to come to light
The Boomerang is not just interactive, it is also fun. Depending on the kind of community you’ve built around your brand or personal account, it could easily go viral. Thus boosting your visibility and followers
LAYOUT
This is a newer type of Instagram story. This allows you to take four to eight different shots of yourself or someone else and post a collage.
If you’re out and about and you want to show different versions of what activity you are engaged in all at once, this is the best story for you to use.
LIVE
LIve! As the name implies, it means you will be doing a live video broadcast on your Instagram channel. Your followers will be able to interact with you like they would on a video call.
But just because it’s a live broadcast doesn’t mean it’s easy to just go after. Make sure you’re prepared or even get yourself a script. It is important to note that you can’t correct any mistakes made here.
Live allows you to talk with your followers and answer a lot of questions they would want to ask. If you’re a singer and you want your fans to hear you sing as easily as you do in your songs, singing on a live broadcast will aid you in this, it will also further lessen the gap between you and those who follow you.
NORMAL
This is the regular Instagram camera. Here, you can just take normal images or videos. Although it’s just a regular picture, it doesn’t come with special effects like the Boomerang story.
But still, it can be edited with all the Instagram story settings as others.![]() So don’t worry, just because its a picture doesn’t mean it will look dull
So don’t worry, just because its a picture doesn’t mean it will look dull
FOCUS
This is an easy feature to use. The Focus feature makes sure that the people in a picture stand out more prominently. When taking a picture, the camera focuses more on the people than on objects around.
The background of the picture becomes soft and blurry. This surely will keep the eye of the viewer where or on whom you want it to be.
REWIND
This is Simple. This kind of story does exactly what the name says. It takes the video you’ve made and plays it backward. This is usually hilarious but also very creative.
It can serve as comic relief to your Instagram stories and an opportunity to engage with your followers
HANDS-FREE
You know how you take an Instagram story video, right? You have to keep your finger on the record button to record your video.
This is because once you hit record and remove your finger the recording will end, thus cutting your video mid record.
And this has proven a bit difficult because there are some positions you might want to take that require the use of your two hands.
The new and improved way to do this is to use Handsfree. Using hands-free, you can start recording and remove your finger from the record button and it won’t end until you tap it again. You can do what you want with your two hands on your video.
Instagram stories are easy to create, fun, and very engaging. Using it, you can easily get to see how your viewers see you. It also works well for business accounts in the area of business promotions.
Now that you know to use the Instagram stories you can apply in your everyday Instagram social experience
How To Pin Stickers On Instagram Stories
Home » How To » How To Pin Stickers On Instagram Stories
by Hemant Mendiratta
As an Amazon Associate and affiliate of other programs, I earn from qualifying purchases.
Have you ever come across a video in Instagram stories with a sticker or text moving along with a particular object?
Well, that is nothing but a sticker pinning feature that came earlier this year. If you too want your videos to stand out from the crowd then follow this guide to learn how to pin stickers or text on Instagram stories.
Apart from that, is your sticker pinned in an incorrect location or it’s too large in size? Don’t bother we have got you covered.
Contents
- 1 What Does Pin Text Or Sticker Mean?
- 2 Pin Stickers Or Text On Instagram Stories
- 3 Final Words
What Does Pin Text Or Sticker Mean?
As I mentioned earlier, pinning a text or sticker will make it stay at the desired spot. So, if you are capturing a moving car, pinning a sticker on it would make it move along with the car in the video. Got the hang of it now? Well, it’s time to go ahead and see how to get it done.
Pin Stickers Or Text On Instagram Stories
The method is exactly the same for stickers and text. Here, I have used steps and screenshots from the iPhone app but there isn’t any difference for Android users.
Before proceeding ahead make sure the Instagram app is updated to the latest version so that there is no issue while pinning.
- Open the Instagram app and go the Camera screen either by tapping on the Camera icon at the top left or swipe right on the news feed.
- Record a video or upload one from Gallery/Camera Roll as you would usually do.
- After the video is there, tap on Sticker icon at the top row or text option to insert text.
- The next pop-up window will show you the stickers. Select the desired one. If you selected text then type the text as usual.
- Now, long tap/press on the sticker or text you inserted. You will see a slider at the bottom with two options.
- Adjust the size of the sticker or text by pinching and zooming in/out to make it smaller or bigger.
 Just in case you want to delete the sticker, simply press it and move it to the Trash icon at the bottom. After which you can select the new one.
 - Move the slider to go to different parts of the video where it is easier to pin the sticker in the desired place. Finally, tap on Pin.
- If you want to change the location of the sticker then long press again and make the desired changes and tap Pin.
That’s it.
Now, post your story and you will see the sticker not leaving that particular location.
Final Words
We hope that you are going to make use of the pin sticker/text feature to give your videos more traction. Note that you can do the same thing with your stories on WhatsApp (if you are using it, of course).
If you like the information in this article then share it with fellow Instagrammers.
13 cool features of Instagram Stories - SMM
Categories
May 23 | 2019
Yulia Chelombitko
May 23 | 2019
Instagram stories seem to be as simple and intuitive as the social network itself.
However, not all of its features and functions are immediately visible, and even SMM specialists who have been promoting on Instagram for a long time do not know about some.
We've found 13 cool features that make our job easier.
1. Find out how many people shared your post in stories
You can find out this data, which is not shown in the statistics, by going to the post itself and clicking on the three dots. There should appear the item “view reposts of stories”.
If you don't see it, it means that there are currently no active stories with reposts of your publication.
This feature will help you understand how users react to content or determine how much they like a new product from their comments on the repost.
2.Insert image
Copy images directly from the camera roll on your phone.
Just click “copy” and then go to instagram, open the story, press and hold your finger until the “paste” option appears.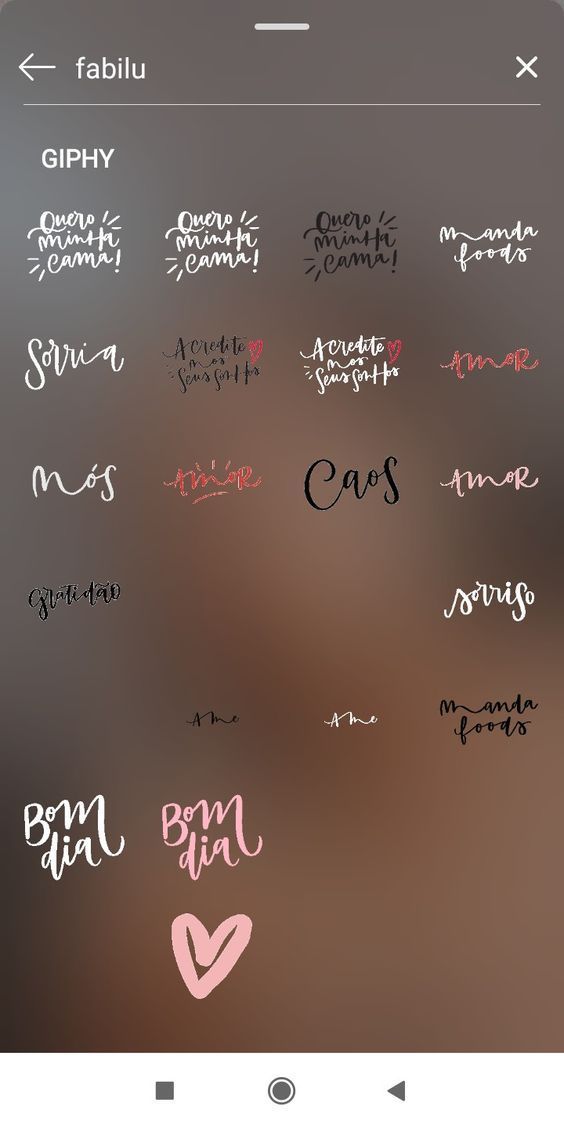
Or download the Google Gboard keyboard and insert images directly from the search.
3. Turn live
into a photo boomerangThis life hack is the least known of our list.
But to make a boomerang, you just need to upload a live photo to your story, press hard on the screen and hold your finger until “boomerang” appears on the screen.
You can return a photo to a static original in the same way.
4. Fill the font with a gradient
Do you want the color of the text to stop being just monotonous?
It is enough to select the written text, select the initial color and at the same time (with both hands) drag to the left over the text and the color scale.
5. Add glowing emoji effect
Open the text tool and select the neon font. Then choose any emoji. All is ready!
In this simple way, you can make the story look more original and make emoji play in a new way.
6. Add custom fonts to stories
To make this feature available, you will first need to download the Over application (available in the AppStore and Google play).
After installing the application, you can download fonts in OTF format to your phone from your computer by transferring them via Airdrop.
7.Align any font to the right or left
For some fonts, such as classic or typewriter, this feature is available automatically.
But when switching to a modern or neon font, this button disappears. However, a simple swipe across the screen to the left or right side will fix the situation.
8.Fill effect
Do you want to make a solid background? Easily!
Upload or take any photo, select the brush tool, click anywhere on the screen and hold until the screen is the color you want.
By the way, this problem can also be solved using the “marker” tool, however, then the background will be translucent.
And with the help of an eraser, you can later make an interesting pattern.
9. Hide hashtags
Hashtags in stories increase coverage, but can spoil the overall picture. There are two ways to hide them:
- Make them as small as possible and cover them with a GIF.
- Use the eyedropper to select a background color and paint your hashtags with it.
10.Create a text shadow effect
This effect is very easy to achieve.
Write your text. Then copy the text, and make another inscription of the same size, but in a different color.
Place them on top of each other with a slight offset. Ready!
11. Share multiple answers to your question sticker at once
To do so, click share the answer, download the story and upload it as an image when you share next.
Repeat until you have shared all the answers you want.
12. Attach text or GIF so that it appears on your video at the right time
Did you know that you can not only overlay elements on the video in the story, but also choose the moment when they appear?
To do this, click on the text (gif) and hold it until the slider appears at the bottom.
Place the element where you would like and click “attach”.
13.Copy GIFs directly from the GIPHY app
We all know that Instagram already cooperates with this service. Actually, all the gifs that can be attached to the story come from there.
However, it is quite difficult to find the one among those offered.
Therefore, we offer another option: go to the application, find the gif you like and copy the link to it.
After, paste this link into your story and your GIF will appear on it.
- #SMM
- #stories
Subscribe
Blog
Vacancy
Subscribe
Blog
Vacancy
Get a special offer
Email entered incorrectly
Please fill in the fields markedUP
How to make text for Rils on Instagram: disappearing, popping up and simple
Author of the article:
Anatoly, personal brand development.
Reading time:
6 minutes
11850
It is possible to make text in Rils Instagram using the built-in text editor or through third-party applications. In the text editor section, you can choose animation effects and different fonts.
Content
- Create Reels with text on Instagram
- Make disappearing in Reels via sticker
- We use applications for Instagram
- Change the text in Instagram Rils
Creation of Rils with text in Instagram
Expert opinion
Anatoly
Personal brand development and promotion on Instagram.
Ask a question
In Instagram's video editor, you can add text, edit its tint, and add an animated appearance. These options are available both when creating a clip through the "Camera" and by uploading from the Gallery.
How to make text on a video if you record a clip using a camera:
- Go to Instagram - click on the top: "Publish".

- Select "Reels" - record a clip of any length.
- Next - three tools will appear at the top, including "Text".
- Enter the desired quote - select the font.
- Various options for displaying the font, animation are available from above.
- Preview - Publish.
When adding text to Instagram Rils, the same set of tools is available as for Stories. The same fonts, animations that you can add to a video clip.
Make disappearing text in Reels with a sticker
There are two ways in Reels to make disappearing text:
- use the timeline. When adding several quotes, a timeline will appear below, where you can place the text in time;
- use the animated text feature.
How to make text using the timeline:
- Go to adding an entry - at the top tool: "Text".
- Add quotation - timeline appears.
- Select the right or left of the clip border to specify the position of the label.

- Make a few more text notes - indicate their time of appearance.
Unlike Tik Tok, in Rils the mechanism for adding text and selecting its time is more complicated and inconvenient. This is noticeable at the moment of adding a large text note, where the previous quote will be highlighted on the screen and, when previewed, will overlap the new one.
In Reels, adding text one by one is also possible through the standard animation function:
- Go to Rils Creation - record a video or use a clip from the Gallery.
- Go to adding text - top button: " A " with two horizontal stripes.
- Select how the text appears.
Animation depends on the font chosen by the author. For example, for machine text, the display method is fast printing, like on a typewriter.
Using applications for Instagram
In addition to making disappearing text in Instagram Rils possible through standard tools, there are additional applications. In them, you can edit not only the text component, but also the visual for further placement on the social network.
TOP 3 apps for Instagram:
- Canva. A full-fledged editor and a catalog of ready-made clips, where you can choose up to a hundred new fonts, animation of the appearance;
- VN. Video editor that supports working with separate tracks, linking text to a moving object;
- Alight Motion. Add text to the video, change the shade of individual parts, make 3D animation.
VN can make text suddenly appear:
- Download and install the application using the Play Market ( link above ).
- Open - bottom: "Project".
- Select video from Gallery - the entry will appear on the timeline.
- Click on the side of the symbol "T" - add text.
- The function will appear: "Animation" - specify the effect for the appearance of the inscription.
- Save video - go to Instagram and publish.
The application supports up to five templates and one that is made as a layer mask. It covers the entire screen, so you can choose other patterns that don't obscure.
Edit text in Rils Instagram
After posting Rils, editing the text caption is prohibited. Therefore, the only option left to the user is to delete and republish again.
To edit in the preview menu:
- In the video, highlight the text that has been added.
- Enter new or delete completely.
Now the inscription will disappear from the timeline and you can add any new one. If you republish, you will have to rewrite the entire text.
Reels supports the following editing modes after posting:
- change cover. Choose from video or Gallery;
- edit description;
- mark users who participated in the video recording or are shown in the video sequence.
To go to the description edit menu:
- Select from the Reels Publication Feed.


