If you have a business, you need a Facebook Business Page. With 1.82 billion daily active users, Facebook is simply not a social network you can ignore.
Perhaps that’s why more than 200 million businesses use Facebook’s free services. That includes business Pages—yes, creating a Facebook Page is a free way to market your business.
The good news is, creating a Facebook account for a business is pretty simple, and you likely already have all the components you need to get started. Let’s dive in.
If you’d rather watch than read, watch this video to learn how to create an effective Facebook Business Page:
What is a Facebook Business Page?
How to create a Facebook Page for business
How to optimize your Facebook Business Page
Bonus: Download a free guide that teaches you how to turn Facebook traffic into sales in four simple steps using Hootsuite.
A Facebook Page is a public Facebook account that can be used by brands, organizations, artists and public figures. Businesses use Pages to share contact information, post updates, share content, promote events and releases, and — perhaps most importantly — connect with their Facebook audiences.
Pages can be connected to Facebook ad accounts and Facebook Shops.
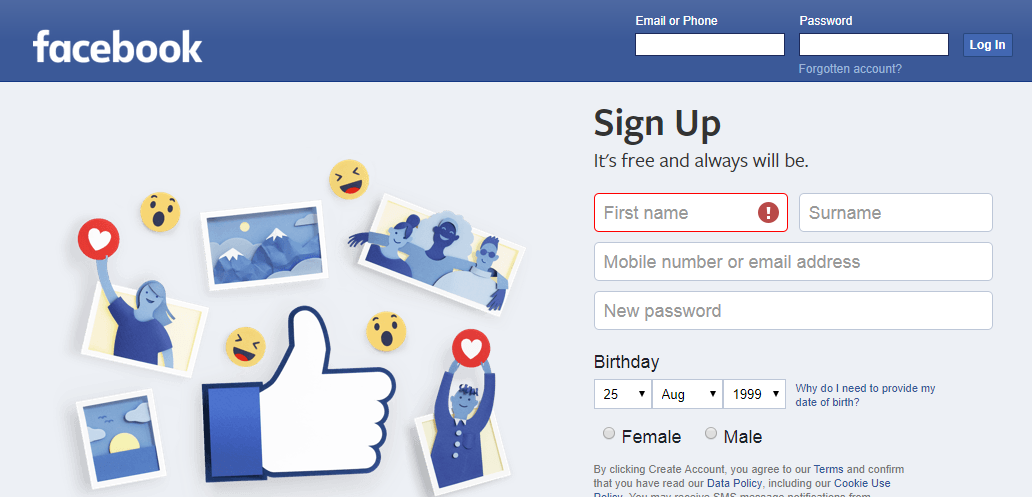
How to create a Facebook Page for businessBefore you can sign up for your Facebook Business Page, you need to log into your personal Facebook account. Don’t worry—the information from your personal account will not be publicly visible on your business Page.
This is simply because every business Page is managed by one or more page administrators. The administrators are people with personal Facebook accounts. Your personal account works like the key to let you into your new business Page. If you have team members helping you with your Page, their personal accounts will also unlock their specific roles and capabilities.
So, if you’re not already logged into your personal account, log in now, then dive into the Page creation steps.
Step 1: Sign upGo to facebook.com/pages/create.
Enter your business information in the panel on the left. As you do so, the page preview will update in real time on the right.
Source: Facebook
For your page name, use your business name or the name people are likely to search for when trying to find your business.
For category, type a word or two that describes your business and Facebook will suggest some options. You can choose up to three of the suggestions.
Source: Facebook
Next, fill in the Description field. This is a short description that appears in search results. It should be just a couple of sentences (maximum 255 characters).
When you’re happy with your description, click Create Page.
Source: Facebook
Step 2. Add pictures
Next, you’ll upload a profile and cover images for your Facebook Page. It’s important to create a good visual first impression, so choose wisely here. Make sure the photos you choose align with your brand and are easily identifiable with your business.
You’ll upload your profile photo first. This image accompanies your business name in search results and when you interact with users. It also appears on the top left of your Facebook Page.
If you have a recognizable brand, using your logo is probably the safest way to go. If you’re a celebrity or public figure, a picture of your face will work like a charm. And if you’re a local business, try a well-shot image of your signature offering. The important thing is to help a potential follower or customer to recognize your page immediately.
As we explain in our post on the best image sizes for all social networks, your profile image should be 170 x 170 pixels. It will be cropped to a circle, so don’t put any critical details in the corners.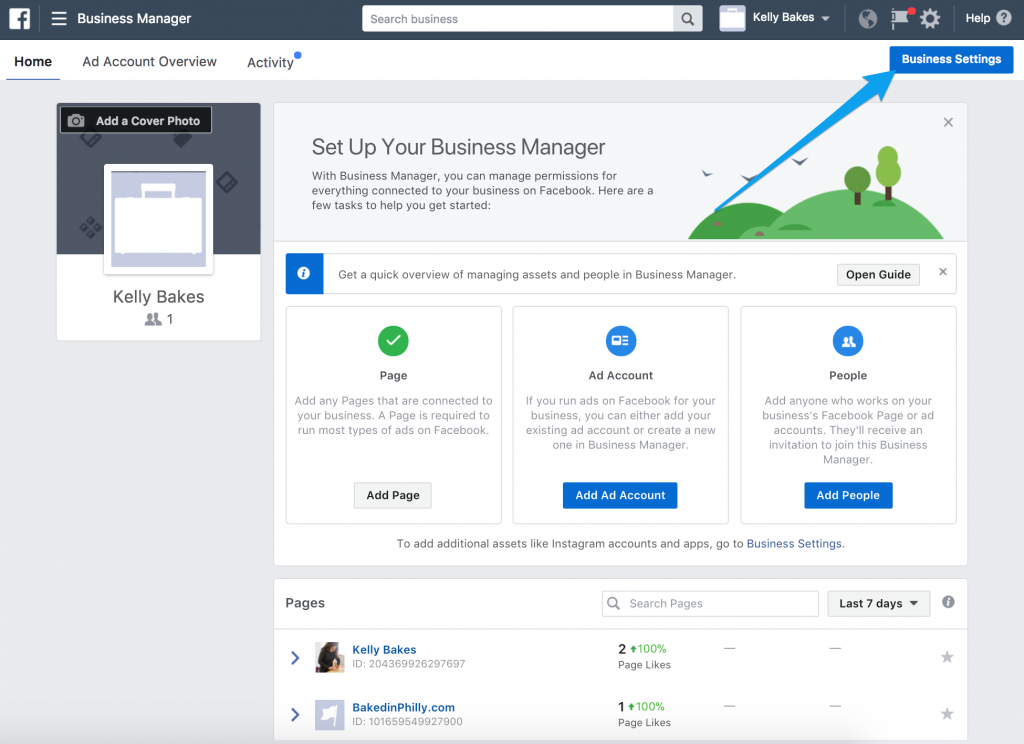
Once you’ve chosen a great photo, click Add Profile Picture.
Now it’s time to choose your Facebook cover image, the most prominent image on your Page.
This image should capture the essence of your business and convey your business or brand personality. Facebook recommends you choose an image that’s 1640 x 856 pixels.
Once you’ve selected an appropriate image, click Add Cover Photo.
Source: Facebook
After you upload the photos, you can use the buttons in the top right of the preview to toggle between desktop and mobile views. Use these to make sure you’re happy with how your images look in both displays. You can drag the images in the left column to adjust their positioning.
Source: Facebook
When you’re happy with your selections, click Save.
Ta-da! You have a Facebook Business Page, although it is extremely sparse.
Of course, while the skeleton of the Facebook Page for your business is now in place, you’ve still got a lot of work to do before you share it with your audience.
After you click Save, you’ll see a pop-up box asking if you want to connect your business to WhatsApp. This is optional, but it does allow you to add a WhatsApp button to your page, or send people to WhatsApp from Facebook ads.
Source: Facebook
If you want to connect your business to WhatsApp, click Send Code. Otherwise, close the window to continue without connecting WhatsApp. You’ll get one more pop-up box asking if you’re sure. Since we’re skipping this, for now, we’ll click Leave.
Step 4: Create your usernameYour username, also called your vanity URL, is how you tell people where to find you on Facebook.
Your username can be up to 50 characters long, but don’t use extra characters just because you can. You want it to be easy to type and easy to remember. Your business name or some obvious variation of it is a safe bet.
To create your username, click Create Username on the Page preview.
Enter the name you want to use. Facebook will let you know if it’s available. If you get a green checkmark, you’re good to go. Click Create Username.
Source: Facebook
You’ll get a confirmation pop-up. Just click Done.
Step 5: Add your business detailsWhile you might be tempted to leave the details for later, it’s important to fill out all of the fields in your Facebook Page’s About section right from the start.
As Facebook is often the very first place a customer goes to get information about you, having it all there is important. For example, if someone is looking for a business that’s open till 9, they want to confirm this information on your Page. If they can’t find it, they’ll surely keep looking until they find another place that’s more forthcoming.
Fortunately, Facebook makes this very easy to complete. Simply scroll down on your Page view to the section called Set Your Page Up for Success and expand the item called Provide Info and Preferences.
Source: Facebook
Fill in the appropriate details here, starting with your website.
If your business is open to the public during specific hours, make sure to enter those here. This information appears in search results.
Don’t forget to complete the Add an action button section.
Facebook’s built-in call-to-action button makes it very easy to give the consumer what they’re looking for and it allows them to engage with your business in real time.
The right CTA button will encourage visitors to learn more about your business, shop, download your app, or book an appointment.
To add your CTA, click the blue box that says Add Button, then choose which kind of button you want.
Source: Facebook
If you don’t want to complete all of these steps now, you can always access them later. In the Manage Page menu on the left, just scroll down to Edit Page Info.
Bonus: Download a free guide that teaches you how to turn Facebook traffic into sales in four simple steps using Hootsuite.
Get the free guide right now!
If at any time you want to take your Facebook Business Page offline while you work on the details, you can choose to unpublish your page. From the Manage Page menu, click Settings, then General. Click Page Visibility and change the status to Page unpublished.
Source: Facebook
Follow the same steps to republish your page when you’re ready.
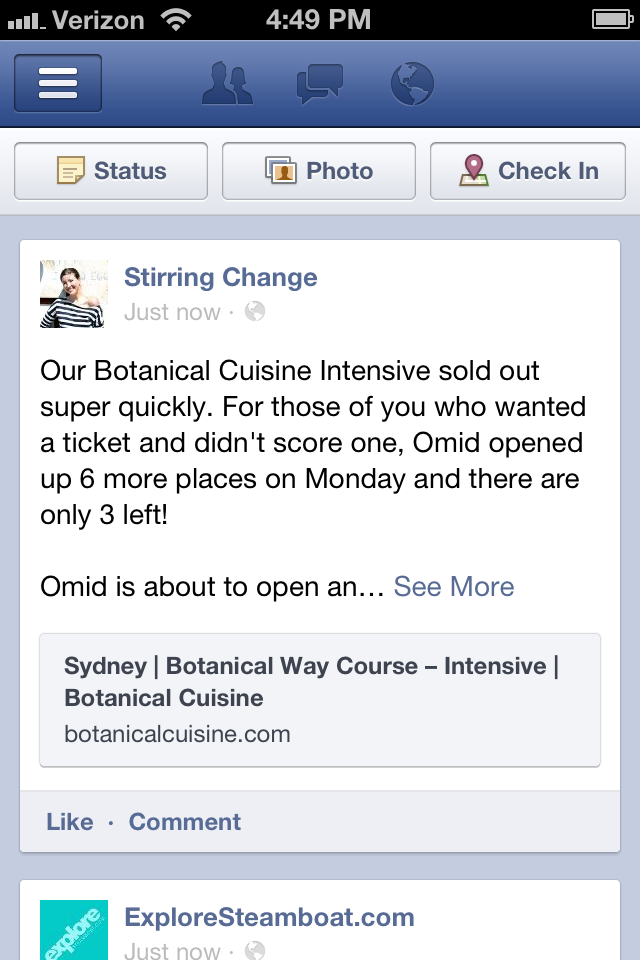
Step 6. Create your first postBefore you start inviting people to like the Facebook Page for your business, you should post some valuable content. You can create your own posts, or share relevant content from thought leaders in your industry.
For inspiration, check out our blog post on Facebook marketing.
You could also create a specific type of post, like an event or offer—just click one of the options in the Create box at the top of your page.
Source: Facebook
Make sure that whatever you post offers value for your visitors when they arrive at your Facebook Business Page, so they’ll be inclined to stick around.
Step 7. Invite an audienceYour Facebook Business Page now represents a robust online presence that will make potential customers and fans feel comfortable interacting with you.
Now you need to get some followers!
Start by inviting your existing Facebook friends to like your Page. To do so, just scroll down to the bottom of the Set Your Page up for Success box and expand the section called Introduce Your Page.
Source: Facebook
Click the blue Invite Friends button to bring up a list of your personal Facebook friends. Select which friends you want to invite, then click Send Invites.
Use your other channels, like your website and Twitter, to promote your new page. Add “follow us” logos on your promotional materials and email signature. If you’re comfortable doing so, you can ask your customers to review you on Facebook, too.
To grow your audience quickly, check out our post on how to get more Facebook likes.
Now that you know how to create a Facebook Page for business, it’s time to think about ways to optimize your Page. These strategies will help maximize engagement so you meet your Facebook (and social media) marketing goals.
Here’s a quick video overview of the steps you can take to optimize your Facebook Business Page. We’ll dig into these components in more detail below.
Add a pinned postIs there important information you want all visitors to your Page to see? A promotion you don’t want them to miss? A top-performing piece of content you want to show off? Put it in a pinned post.
A pinned post sits at the top of your Facebook Business Page, just under your cover image. It’s a great place to put an attention-grabbing item that will draw your visitors in and make them want to stick around.
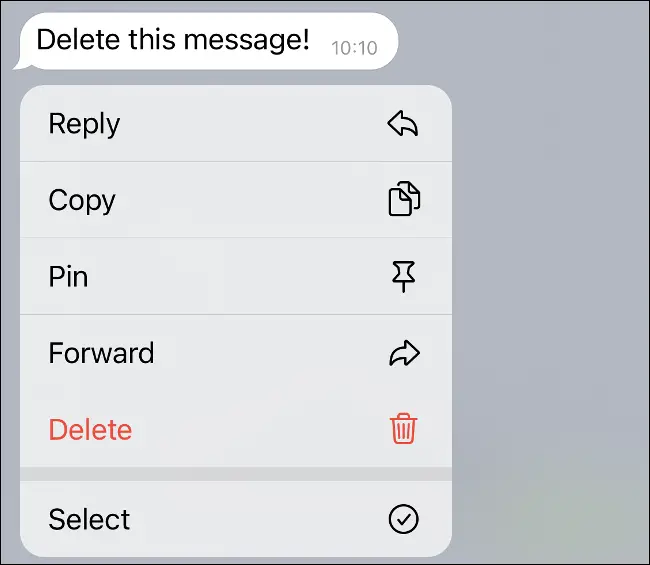
Start by publishing a new post, or scrolling down your feed to find an existing post you want to pin to the top of your Page. Click the three dots on the top right of the post, then click Pin to Top of Page.
Source: Facebook
Once you’ve pinned the post, it will appear under the heading PINNED POST at the top of your page.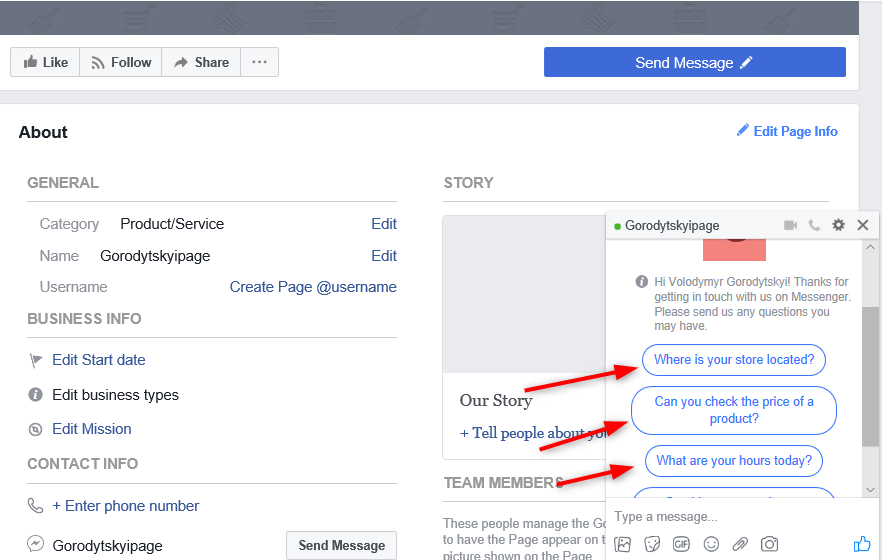 This is only for your internal view. To visitors, it will just show as the first item under Posts, with a blue thumbtack icon to indicate it’s pinned.
Source: Facebook
Make the most of templates and tabsTabs are the different sections of your Facebook Page, like the About section and Photos. You can customize which tabs you want to include and the order in which they appear in the left Manage Page menu.
If you’re not sure which tabs to include, check out Facebook’s various templates.
Source: Facebook
Each template has a set of buttons and tabs designed for particular types of business. For example, the Restaurants & Cafes template includes tabs for a menu, offers and reviews.
To access templates and tabs, click Settings in the Manage Page menu, then Templates and Tabs.
Like other PagesSince Facebook is, after all, a social network, it’s a good idea to use your Page to build a community for your business.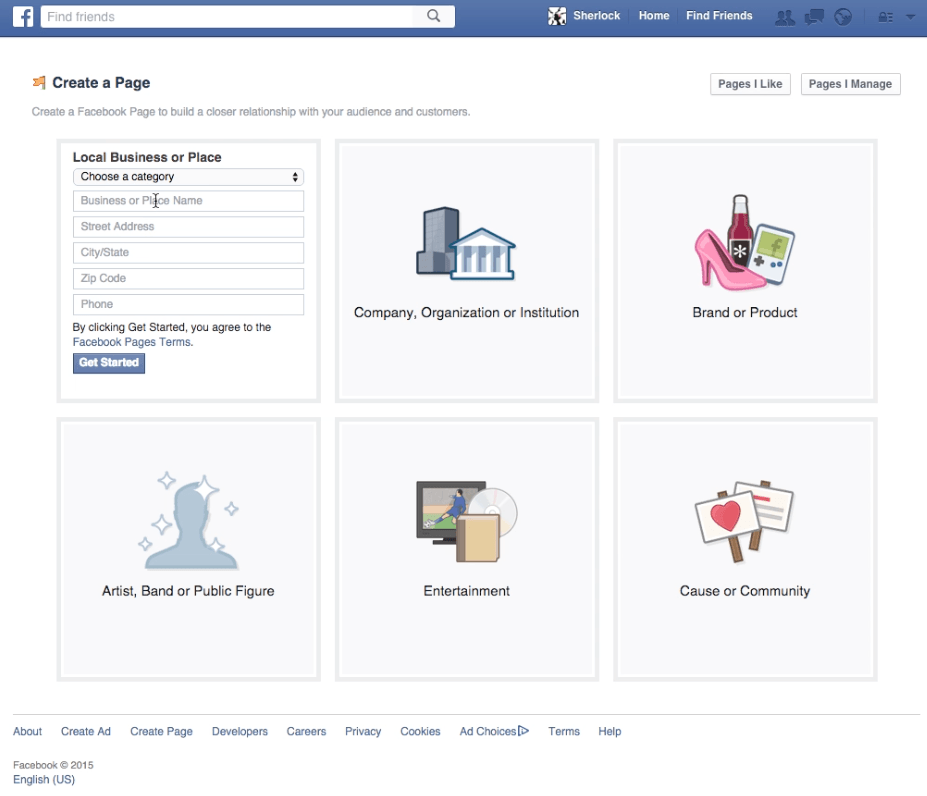
One way to build community is to connect with other Pages that are relevant to your business (but not competitors).
For example, if you run a shop in a popular shopping area or mall, you could connect with other shops in the same area. Think of this as an online version of your local business improvement association or chamber of commerce.
If you have a virtual business, you could connect with other businesses in your industry that could provide additional value for your followers without competing directly with your products.
To follow other businesses, navigate to their Facebook page, then click the more icon (three dots) under the page’s cover photo. Click Like as Your Page. If you have more than one Facebook Business Page, choose which one you want to use to like the other business, then click Submit.
Source: Facebook
Pages will receive a notification when you like them and may check out your Page or even give you a like in return.
Your business page gets a news feed separate from your personal profile, so you can interact with all the businesses you follow from your business profile. To see all the content from the Pages you’ve liked as your Page, just select your Page and click News Feed in the left menu. If you haven’t liked any Pages yet, Facebook will provide a list of suggestions to get you started.
Source: Facebook
Facebook Groups represent an organic opportunity to reach many people who are interested in a specific topic, but without paying for ads. Joining and posting to a relevant Group as your Facebook Page helps anyone who is curious about your post click through to your business page, rather than your personal profile. Here’s a quick tutorial that explains how to join as a Page (it can be tricky!)
Review your settingsYour Facebook Page settings allow you to get into some pretty fine detail about who can administer the Page, where your posts are visible, words banned from the Page, and so on. You can also see people and Pages who have liked your page, control your notifications, and so much more.
Think of the Settings tab as your behind-the-scenes console for every adjustable parameter available to you. Take a few minutes to go through each setting and make sure that it’s optimized for how you want to manage the Page and how you want your audience to interact with you.
To access your settings, just click Settings at the bottom of the Manage Page menu.
Source: Facebook
Check your settings regularly, as your preferences and requirements may change as your business—and social following—grows.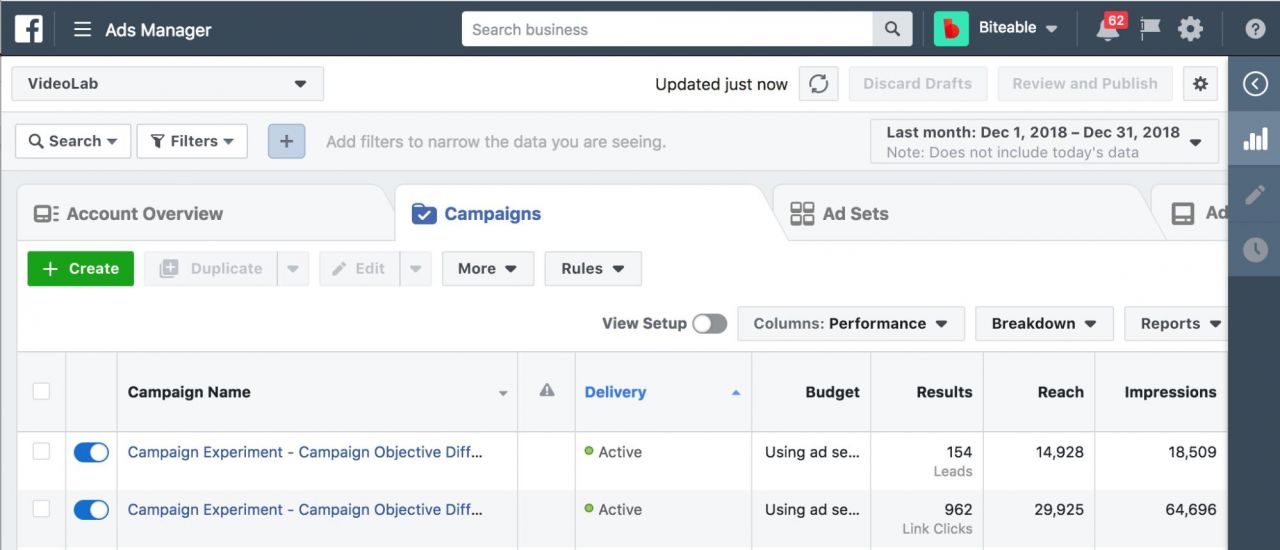
For even more control over who can administer your Page, and to control the roles filled by team members, contractors and agencies, consider setting up Facebook Business Manager.
Learn from Page InsightsThe more information you have about your audience, the more content you can create to satisfy their needs.
Facebook Page Insights makes it easy to gather data about how your fans are interacting with your Page and the content you share. To access Page Insights, click Insights in the Manage Page menu.
Source: Facebook
Insights gives you information about your Page’s overall performance, including some data on audience demographics and engagement. You can see metrics on your posts so you can understand how many people you’re reaching.
You’ll also see how many comments and reactions are gained from specific posts—data that helps you plan future content.
A key feature of Insights is the ability to see how many people have clicked on your call-to-action button, website, phone number, and address.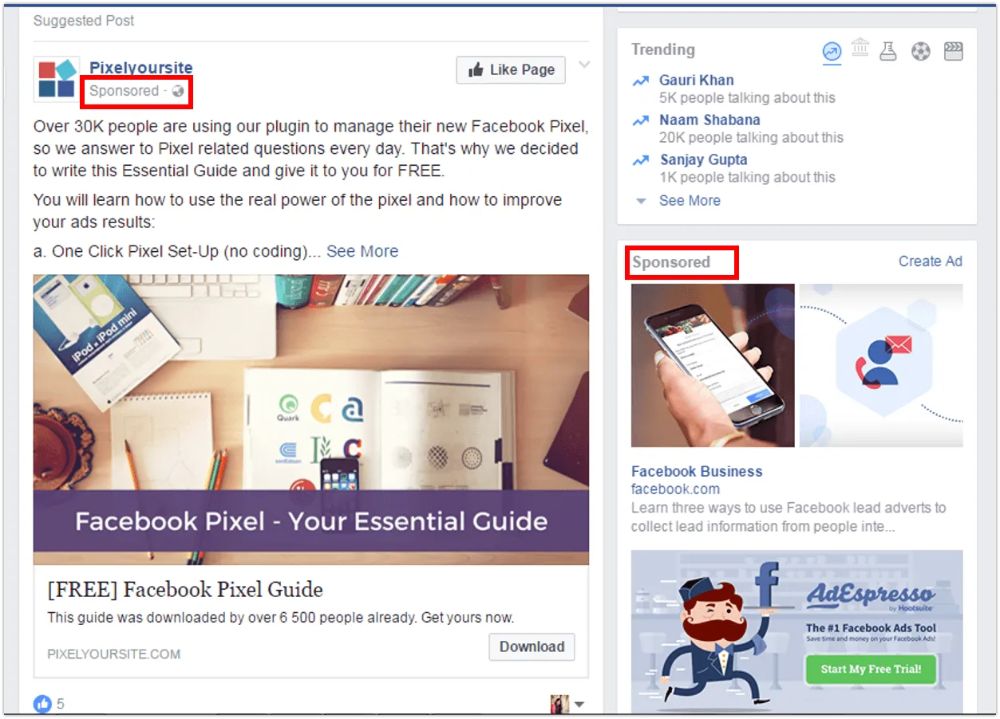 This data is divided by demographics such as age, gender, country, city and device, making it easier for you to tailor future content to your audience. To access this information click Actions on Page in the Manage Page menu.
For more details, check out our post on how to use Facebook Page Insights.
Link to your Facebook Page from other web pagesBacklinks help boost the credibility of your Facebook Business Page and may help improve your search engine ranking. They also help direct new potential followers to your page.
Include a link to your Facebook Page at the bottom of your blog posts and where appropriate on your website. Encourage other companies and bloggers to do the same when you collaborate.
Once your Facebook Page is set up and optimized, check out our full guide to Facebook marketing to take your Facebook strategy to the next level.
Manage your Facebook Business Page alongside all your other social media profiles using Hootsuite. From a single dashboard, you can create and schedule posts, engage followers, monitor relevant conversations, measure (and improve!) performance, and much more.
Get Started
Grow your Facebook presence faster with Hootsuite. Schedule all your social posts and track their performance in one dashboard.
Free 30-Day Trial
Facebook business pages can help you reach a new audience, gain popularity, and grow your brand.
It's easy to create a Facebook business page and customize it with photos, business hours, page roles, upcoming events, and more. Here's how to create a Facebook business page.
How to create a Facebook business page1. Go to the Facebook website and log in to your account.
2. From the homepage, click Pages in the sidebar menu on the left.
Go to "Pages." Grace Eliza Goodwin/Insider3. Click the Create New Page button in the menu on the left.
Click the "Create New Page" button.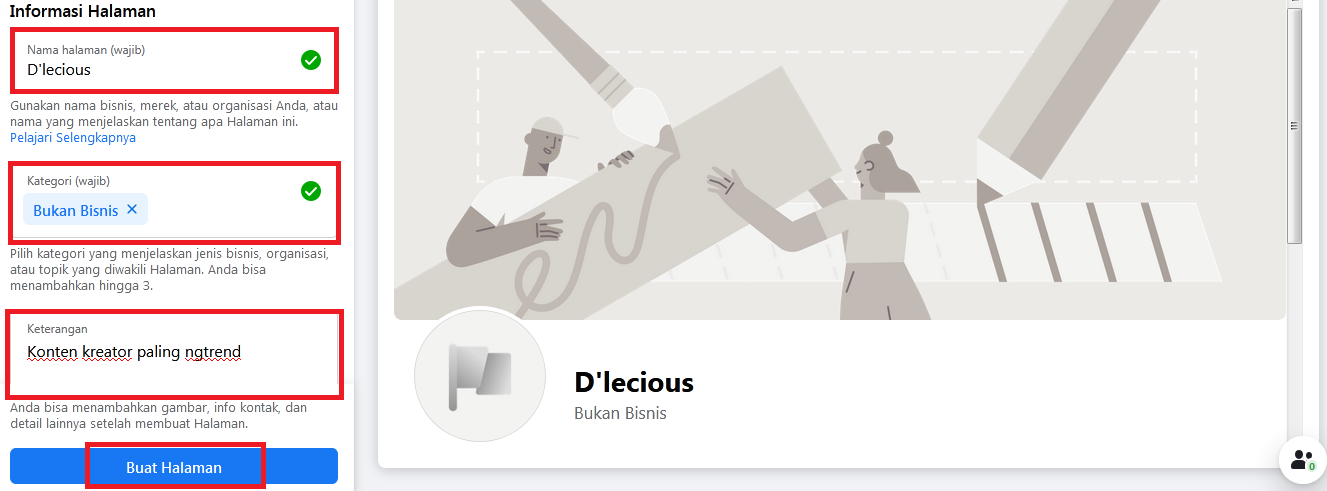 Grace Eliza Goodwin/Insider
 4. On the left side of the next screen,enter a Page name, select a Category, and write a Description. The right side of the page shows you a preview of your page as you add information to it.
Fill out your page information on the left. Grace Eliza Goodwin/Insider5. Scroll down and click Create Page.
6. Next you can add images. Click Add Profile Picture or Add Cover Photo to upload photos from your device. Hit Save at the bottom.
Add photos to your page and click "Save." Grace Eliza Goodwin/Insider7.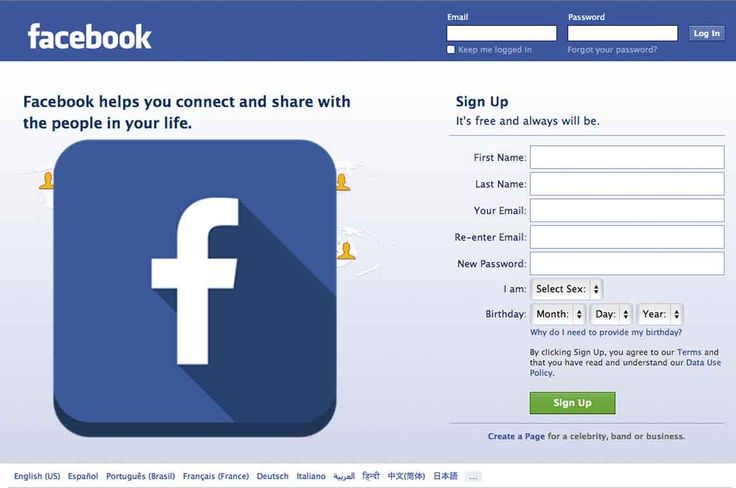 A pop-up may appear asking if you want to connect your page to WhatsApp. If you want to, enter your phone number and click Send Code. If you don't want to, click the "X" icon in the top-right corner of the pop-up.
8. Your new Facebook page is now created, and you can continue customizing it to your liking.
Additional set-up tipsBefore you write your page's first post, be sure to update your page with additional information for your business.
1. Make a call to actionAdd a call-to-action button to your business page by clicking Add a Button at the top-right of your page. Choose an action from the available options. You can have visitors book appointments, contact you through Facebook Messenger, download your app, and more.
Click "Add a Button" to add a call to action on your page. Grace Eliza Goodwin/Insider 2. Choose a page username
Choose a page username by clicking Create @username under your cover photo and page name. This username will become the web address for your business page (e.g. facebook.com/businessinsider).
Click "Create @username" to make your page easier to find. Grace Eliza Goodwin/Insider 3. Enter upcoming events
To add upcoming public events, click the Events tab at the top of your page and select Create New Event in the top-right of the Upcoming Events section.
Click "Create New Event" on the Events tab. Grace Eliza Goodwin/InsiderQuick tip: Make it easy for your future fans to find information about your business's scheduled events. Fans of your page can show interest in your events by clicking a button to indicate their intention to attend.
4. Update the About sectionTo get to the About section, click the More tab at the top of your page, beneath your page name. In the More drop-down, select About. Here you can add a location, business hours, price range, contact information, and more.
In the sidebar menu on the left, click Settings, then click Page roles to assign roles to other coworkers or brand managers.
In the Assign a new page role section, enter a name or email address into the textbox and in the drop-down menu on the right, select a role: admin, editor, moderator, advertiser, or analyst. Click Add when you're done.
Facebook has built-in scheduling tools that allow you to plan and publish your posts according to a schedule of your choosing. These tools help you automate the process of posting updates. You can save draft versions of your posts here as well.
7. Convert a personal profile to a business pageIf you have been using a personal Facebook profile for your business, you can convert it to a business page using Facebook's conversion wizard.
While the process is called a conversion, it actually copies your personal profile to a page. Your personal profile will remain intact and a new page based on that profile will be created. You can update the newly created page as you would a page created from scratch.
8. Select page visibilityFacebook pages are published as soon as they are created. This means an incomplete page would be visible to the public as soon as it's created.
If you would prefer to work on your page in private before making it available to the public, you can update its visibility from the page settings menu — click Settings at the bottom of the sidebar menu on the left, and on the General tab, click Page visibility to unpublish your page.
You can unpublish your page from the "Page visibility" section of Settings. Grace Eliza Goodwin/Insider
 This will prevent the page from being available until you're ready to publish it again. Remember to update the visibility setting when you are ready to publish it.
A business page on Facebook is a page of a company (similar to a business account), a brand, and any other organization. Potential customers can find your contacts, a list of services, see reviews from other users, and contact you on this page. For you, a business page is an opportunity to run ads on Facebook and Instagram, communicate with customers, as well as another way to promote.
In this article, you will learn how to create a Facebook business page, set it up properly, and use it to attract customers.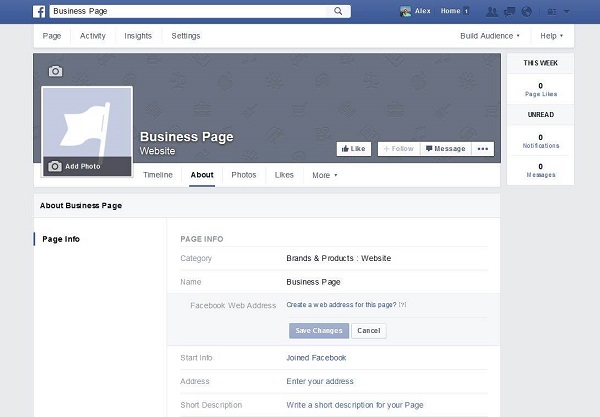
Reduce the budget of targeted and contextual advertising with click.ru
Click.ru will return up to 15% of advertising costs.
Cut the budget >> Advertising
Read also : 10 best targeting courses
Let's not languish for a long time and get straight to the point. We will show the process of creating a business account from a computer, if you are making a page from a phone, then the procedure is exactly the same.
Step 1: Create a business page.
In order to create a business page, you need a personal account. If you are already registered, go to Facebook, press the big plus sign on the top panel and select "Page".
Step 2: Name, category and description.
The page creation window opens. In the left part, you need to enter the name of the business page on Facebook, select a category and add a description. On the right - a preview will be available and all the changes that you make will be displayed.
Here are a few suggestions:
Finally, click "Create Page" at the bottom. After that, a notification will appear that the page has been created and you can continue to edit it here, or by clicking "Save", go directly to the page. So let's do it, and proceed to the configuration.
Step 3: Cover page.
Before you put the cover, make it according to our instructions: "How to make a beautiful cover for Facebook." After, in the place where the cover will be, click "Edit", select "Upload photo" and upload the picture from your PC.
If you want to be creative, but nothing works out, you can peep ideas from competitors or take ready-made templates from services like Canva. Alternatively, you can set a video as the cover.
Step 4: Profile photo.
A profile photo accompanies all your comments and posts. Here, a personal photo or company logo would be ideal. To set a profile photo, click on the camera icon, then "Edit profile photo" and upload a picture from your computer.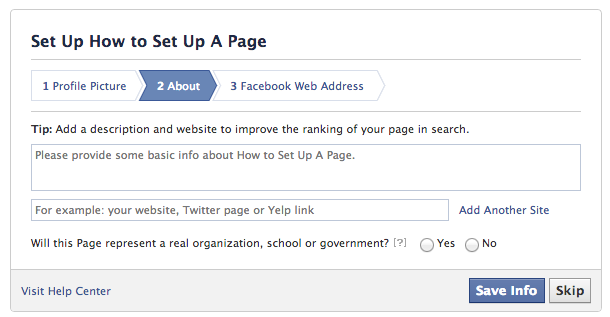
After uploading, you can change the scale and position of the picture.
Please note that your profile photo must be at least 180 pixels wide and high. In order for the page avatar with your logo or text to be shown in higher quality, use a PNG image.
Step 5: Unique username.
Set a unique username - this is the part in the URL of the page that is displayed in the address bar of the browser, after facebook.com/. Click "Create @username".
A window opens where you need to enter a unique nickname for the page. No more than 50 characters without spaces, only letters of the Latin alphabet and numbers can be used. If the name is free, a green checkmark will appear next to it.
Step 6: Action button.
Here, in the header of the page, we immediately set up a button that will be visible to all guests of the page. Click "+ Add button".
In the window that opens, select the appropriate option.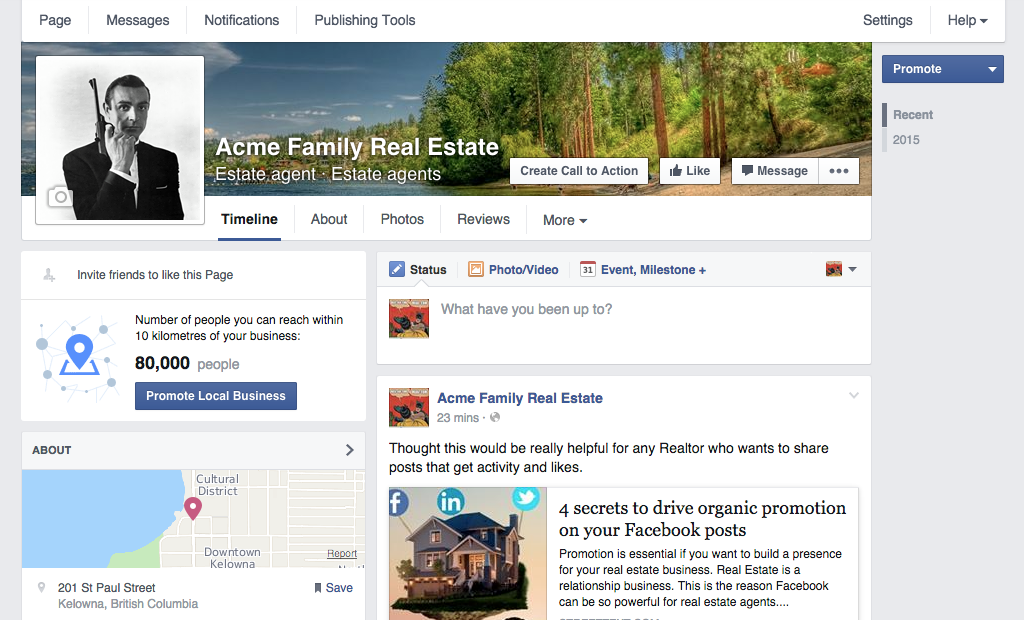 You can put a subscribe button, send a message to WhatsApp, go to the site and others. The button can be changed at any time.
Step 7: Contact information.
In the menu on the left, click "Edit", on the right, a field for entering information opens. Here, first we indicate the phone number (you can specify the number to receive messages in WhatsApp), email address and website.
Go down below and enter the address.
Specify the hours of operation. Below there are additional options that allow you to specify the operating mode on holidays.
You can also specify other data: products, price range and pages in other social networks.
This completes the basic page setup. This page can be linked to an Instagram account, it contains contact details and an action button is configured. Next, we move on to advanced settings that will allow you to use your Facebook business page even more efficiently.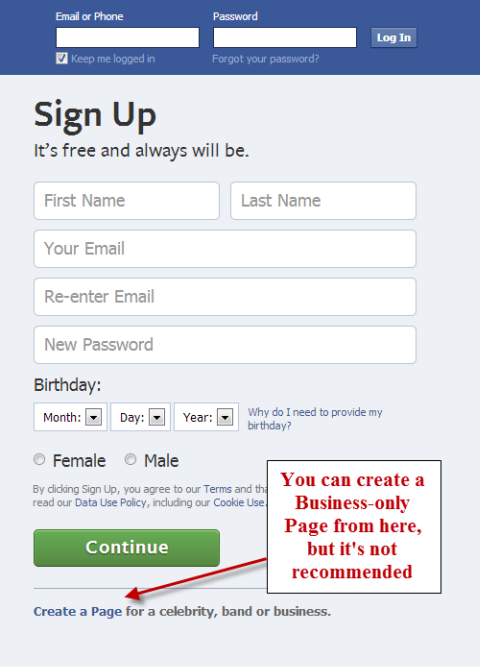
Interesting: How to set up Facebook ads
For example, if you use the cafe page template, the Offers and Jobs tabs will appear, and the action button will change to Directions.
Tip : Experiment with patterns by changing them. So you will choose the most suitable one. Then you can manually customize the template by turning off unnecessary tabs or swapping them.
If you enable this option, every time someone visits your business page, a welcome message will automatically be sent to them. This will increase the conversion of the page and allow you to quickly build communication with a potential client.
We go to the page settings, open the "Messaging" section, find and activate the "Show greeting" item. Then click "Edit" to set your message.
Enter the text of the welcome message. The character limit is 160 with spaces. You can use emoticons and username. At the end, click "Save". Please note that the message will go to Messenger.
In the "Instagram" section, you can link a business page to your Instagram account. This will allow you to publish content immediately on Facebook and Instagram, reply to messages on any social network, and respond faster to new comments. To communicate, click "Connect account", then you will need to log in through Instagram to confirm adding an account.
After linking the business page with Instagram, you will also have access to Creator Studio ( free auto-posting and statistics service ) and in the Rights Manager ( copyright protection ). Also, if you plan on having both Instagram and Facebook presence, we recommend that you manage your Pages in Business Suite.
In the WhatsApp section, you can link your business page to a messenger and you can be contacted on WhatsApp directly from an ad or from your Facebook Page. This is handy if you're used to replying to people on WhatsApp.
To get in touch, select a country code and enter a phone number. You will receive a verification code to verify that the number belongs to you.
We also recommend that you set up a WhatsApp business account to access more features.
In general, Facebook promises to remove the Like button from business pages, but even when it is removed, everyone who likes your page will remain subscribed to it. Therefore, we do not ignore the opportunity to attract the first audience. On the business page itself, scroll down a little and find a column where you can invite friends. Click "View All Friends".
In the window that opens, select all friends or those who will definitely be interested. Also, in the lower left corner there is an option that allows you to send invitations to private messages ( no more than 50 pieces at a time ). Once selected, click "Send Invitations".
There is a "More" button, you can also invite friends through it.
To keep track of how effectively the page is developing, there is a "Statistics" section. You can access it through the settings.
Statistics provides an overview of all indicators in general, as well as detailed statistics for each metric separately ( left menu ). Here you can also download all the data, the "Export data" button in the upper right corner.
At some point, you may need to transfer control of a business page or add other team members to collaborate. For example, a sms manager who will be responsible for posting or a targetologist who will run ads.
To add new users who will be able to manage the page, go to the "Roles on the Page" section in the settings. In the "Assign a new role on the Page" field, write the username ( he must have a personal page in FB ) and select the role. Thus, you can assign an advertiser, editor, moderator, analyst, or a new page administrator.
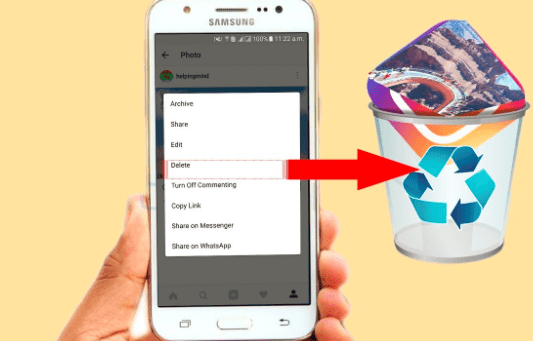
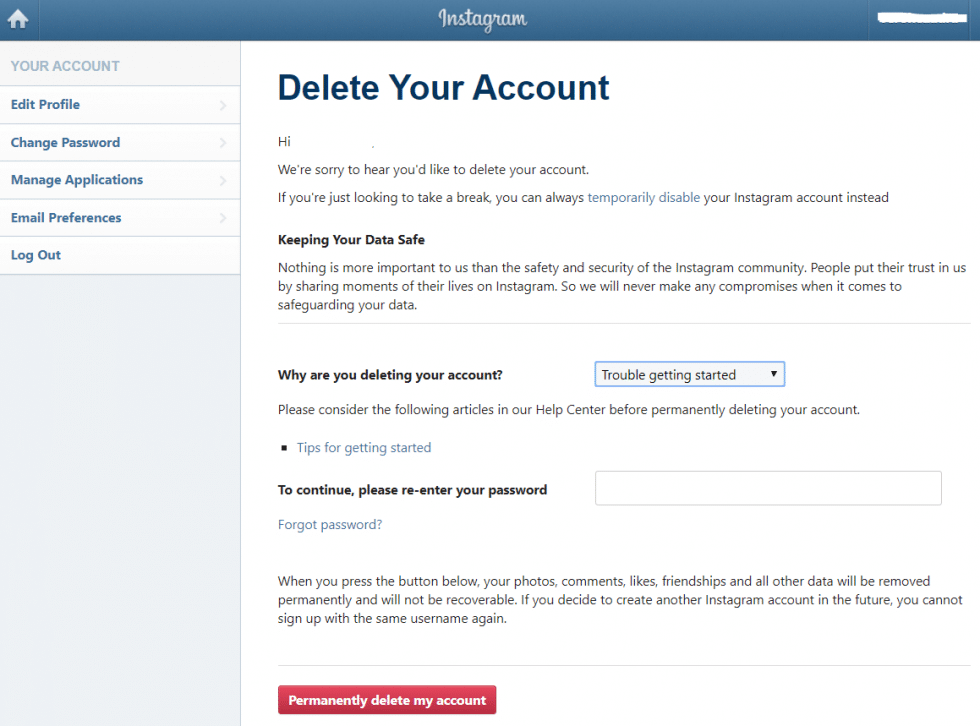
If your organization has ceased operations or you no longer see the point in a business page, you can always delete it. To do this, open the "General" item in the settings and at the very bottom we find the option to delete the page. We click on it, then click "Permanently delete the page" and confirm the deletion.
A Facebook business page is a must for marketing, whether you plan to promote on Facebook itself or not. It will make your company visible to more potential customers, as well as enhance your Instagram experience.
Useful links :
A business page represents your company on Facebook. On it, potential customers can communicate with the brand, find contacts, view a list of services or reviews of other users. And most importantly, it is an opportunity for advertisers to launch campaigns on Instagram and Facebook. We share step-by-step instructions on how to create a page for business on Facebook.
A business page requires a personal Facebook account. If you are already registered, log in to your profile and click the plus in the upper right corner, and then select the "Page" tab.
In the window that appears, fill in the information about the company: name, category and description. In the preview on the right, you can see what your page will look like.
What can not be used in the title of the page:
 You can write the whole word in capital letters, but only if it is an abbreviation.
 Add a brief company description. It will be displayed in search results, so it is important to indicate how the company will be useful to customers. The more fields you fill out, the more information users will receive. This will increase their loyalty to your product.
Save the page, it can now be found in the "Pages" tab in the right menu of your personal profile.
What should be on the page:
Let's take a closer look.
Cover pages tend to get more hits and likes.
If you skipped this step when creating the page, you can add a cover image in edit mode. Click on the "Change" button and select one of the options. If there is a logo or text on the cover, then it is better to upload the file in PNG format so that the quality does not deteriorate (photo upload rules).
Your profile photo will appear in your posts and comments. To download it, click on the camera icon and select "Edit profile photo".
@username is the URL of your page. If you have a brand, then just enter its name in Latin. If your page title contains key characteristics, then you do not need to write them. The shorter the better. The username is written in Latin and may contain numbers. Maximum 50 characters.
If the name is free, a green checkmark will appear.