Summary: This post mainly talks about tips on how to make pictures fit on Instagram. Four step-by-step guides on adjusting the photo to Instagram size are provided.
Make Picture Fit on Instagram!
Instagram is a great social media platform for sharing record-worthy things or highlighting moments of your life in the form of pictures or videos. Everyone wants the photos they share on Instagram to be liked or complimented by others, but the uniformly prescribed photo size can be a pain for many people. This is because Instagram will crop out content that is not specified by the image guidelines.
However, there are actually multiple ways here to help you solve the problem of how to make pictures fit on Instagram, including cropping them directly on Instagram and using third-party software to indirectly help you accomplish photo adjustment. Read on to learn how to make your photo size more suitable for Instagram.
When sharing on Instagram, you can post square images, portrait photos, or landscape photos. However, the aspect ratio rules for your Instagram posts are different from the aspect ratio for Instagram Stories posts. Keep these pixel aspect ratios in mind when resizing images.
When Instagram first started, it only had the option to upload square images with a ratio of 1:1, but after the update in 2015, Instagram started to allow uploading photos with a ratio of 4:5.
It's easy to resize images for Instagram using the crop feature. When adding a new post, you'll see a light gray icon with a white box at the bottom left of the post screen. Click it and it will automatically resize your image to fit the frame. You can also pinch your fingers together to shrink your image so that it fits the post.
The main disadvantage of this method is that it is limited and may not completely cover the excess, or may awkwardly resize them because the zoom feature can only do so much. If this method doesn't work for your images, there is a better way to look for help from third-party photo editors.
Want to make photos fit on Instagram easier? You’d better choose third-party applications. Generally speaking, they offer better and more comprehensive photo editing features that can satisfy more actions you can't do on Instagram. Here we highly recommend Fotor, a powerful one-stop photo editor. It covers a wide range of free online photo editing tools and they are easy to use. With just a few clicks you can do all kinds of editings on your pictures. Next, I will introduce the three best ways to make images fit Instagram perfectly with Fotor.
Start Editing
Cropping a photo is the simplest way to make a picture fit on Instagram but it is also easy to lose parts content of the image. You can effortlessly crop out any unwanted parts of your photos with Fotor's best online photo cropper which allows you to crop your images to any size you need.
There are a variety of preset sizes available for you to crop directly, including Instagram sizes of course. You just need to choose a style and crop off any excessive pixels if necessary to make the image fit on Instagram perfectly.
Following are the detailed steps of how to crop a photo in Fotor:
 Now you can share your image on Instagram directly.
If your photo size is just a little different from the size required by Instagram but you want to keep the full content of your photo intact, you can choose Fotor's online photo resizer. With Fotor’s resizer, you can easily resize your images to any size you want without losing quality. Just enter the width or height or percentage you want and Fotor will automatically resize your image.
Pay attention: Using the photo resizer may cause distortion of the photo if there is a large difference between the photo size and the original Instagram size.
Following are the detailed steps of how to resize a photo in Fotor:
When your photo size is quite different from your Instagram size, and you do not want to give up any content of the picture, you can choose to add border to photo. Adding a white or colored border according to the content of your picture can not only make the photo size suitable for Instagram but also give your picture a stylish touch because of the decorative effect of the frame.
Fotor has a large number of border materials that can be adapted to most of your photo styles, and you can customize the border size and layout to create perfectly sized border photos for Instagram without manual adjustment.
Following are the detailed steps of how to add a border to a photo in Fotor:
 You can choose the border styles, layouts, and colors to suit your taste.
Not only those basic adjustments of image, Fotor also provides more material resources to improve your Instagram aesthetic. Many Instagram post templates designed by professional designers can help you create stunning and porfessional posts, impress your followers, and increase your Instagram engagement. You can also add stickers, filters, or even make collages to make your account content rich and diverse. Come and explore more ideas about Instagram in Fotor!
Instagram is a very popular photo social program. If you want to have a certain amount of attention on Ins, you must not be able to do without post content. So, it is essential to understand and learn how to make picture fit on Instagram.
In this post, we introduce the various sizes specified by Instagram image guidelines and 4 different ways to make the picture fit on Instagram. We hope this blog will be helpful to you, thanks.
Although it's been a long time since Instagram limited users to just posting square images, Instagram still has a maximum aspect ratio of 4:5 for image posts. This limit makes it difficult to fit the whole picture on Instagram without cropping if you’re posting a very tall vertical image or any horizontal images.
So, how can you make a picture fit on Instagram?
To fit the whole picture on Instagram, you need to manually resize it. Otherwise, Instagram will automatically crop it. Use an image resizing tool, like Kapwing, to add a 4:5 canvas to the background of your photo and center the image. Set the canvas color to black or white so it’s less noticeable against Instagram’s user interface.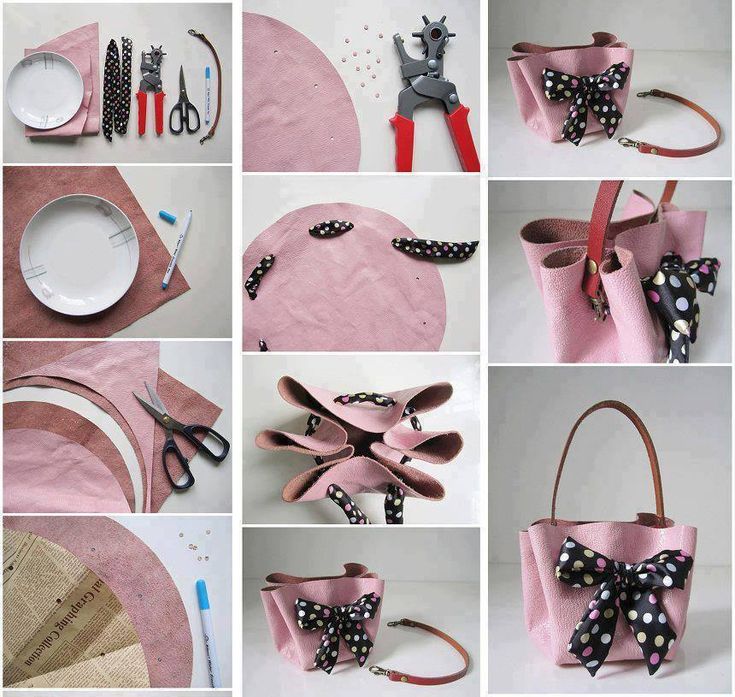 Then export and upload to Instagram without cropping.
In this article, I’ll walk you through how to make photos fit on Instagram using Kapwing, step by step.
Open Kapwing's image resizing tool on your phone or computer. Select the 4:5 preset aspect ratio under "Start with a blank canvas."
Now that you have a blank canvas that fits Instagram’s size limits, you can upload the photo you want to turn into a 4:5 post.
Tap the Media tab on the menu bar at the bottom of your screen then tap the “Add Media” button.
Upload your image from your device or import it from a URL. Kapwing also integrates Google Photos and Drive, if your image is stored on the cloud.
The photo will be added to the Media tab.
Tap the blue plus icon over the image to add it to the canvas.
Kapwing will automatically center the photo in the middle of the canvas. This will add a white border to either side of the image.
Tap outside the image to select the background. The edit button at the top of the screen should change from “Edit image” to “Edit background.” Tap it.
Scroll down until you see the canvas Background Color options.
You can choose any background color you want using the custom color picking tools, but if you want your Instagram post to look like it doesn’t have a border, set the background to black. More on why in the next section.
Tap the export button in the top right corner of your screen and export as a JPEG.
Once the image has been exported, scroll down to the “Download file” button and tap it and save the image to your phone’s camera roll.
Open Instagram and publish as normal.
Related: How to Post Multiple Images with Different Sizes to Instagram
Resizing an image to fit on Instagram can be frustrating, especially when it adds a background behind the image, which could distract from your photo.
Normally, you could turn the image into a PNG and remove the background, turning those pixels transparent. However, Instagram doesn’t currently support transparent background PNGs. It converts PNGs to JPEGs and converts any transparent pixels to black pixels.
You could resize your photo by using a cropping tool to make it fit the entire post size. Or, to make a resized Instagram photo look like it doesn’t have a border, adding a black border is actually best. Here’s why:
More than 80% of smartphone users have dark mode turned on and Instagram uses your phone’s settings by default. That means that most Instagram posts will be viewed in dark mode on a mobile device. Including yours, probably.
It’s an imperfect solution, but until Instagram supports transparent background PNGs, it’s the best way to fit the whole picture on Instagram without a super obvious border.
Related: How to Post a Portrait Image or Video to Instagram Without Cropping
Hopefully this article has helped you make your photos fit on Instagram. For more info and tutorials like this, visit our Resources Library or check out our YouTube channel.
And if you still have questions about how to fit the whole picture on Instagram, you can browse the frequently asked questions below.
Instagram imposes a maximum 4:5 aspect ratio limit on all image posts. That means if your image is between 1:1 (a square) or 4:5 (a vertical rectangle that is four pixels wide for every five pixels tall), you can post it. If it’s taller or wider than that, like portrait photos or landscape photos, Instagram will automatically resize the image by cropping it to fit those dimensions.
If Instagram is cropping your 4:5 images to square, tap the expand arrows in the left corner of the post preview. This will toggle the post size to 4:5. If your image is taller than 4:5, you can resize the photo with a third-party tool like Kapwing. Center your photo on a 4:5 canvas and save.
Instagram allows for several different aspect ratios. It has an aspect ratio limit of 4:5 for image posts, but also supports 1:1 images for users who still post square images. Instagram also has a 9:16 video size limit for Reels.
Related Articles:
Table of contents:
It's no secret that social networks are different. For some, the desktop version is the main one, while others mainly exist as an application. And this specificity greatly affects the frames in which the images we upload fit. Computer social networks have much more opportunities in this regard. It's not just about the size, it's also about the fact that computer screens are bigger and can give you a better view of your photos. For Instagram, as a service for phones, it is important to know the conditions that must be taken into account in order to create and post photos that are ideal for mobile screens. Let's talk about how to reduce a photo for Instagram.
In the past, people had to be very strict about pictures for publication. The original format of the posts was a photo from a Polaroid, a small instant camera: a square image and a border, and it was thicker at the bottom. People took pictures as a souvenir and gave them, signing their wishes below. Doesn't it remind you of anything?
Now, of course, the square format remains the main one, but such cropping is optional. You can, spreading and pinching your fingers in the picture, increase or decrease it. But, if you increase it, be prepared to cut off what will not be included in the “frame” - in this case, the publication will be exactly square.
Although it is possible to fit the image to the publication, most of the time users on a social network spend viewing posts, which means that it is important to be able to use the features of social networks for viewing.
Is it possible for us to enlarge the picture in order to see all the details? Yes. This feature has been added in recent updates. It is enough to spread two fingers in the picture to enlarge the image. If you fix your fingers and move around the screen at the same distance from each other, you can also move the photo to see certain parts of it without changing the size anymore.
As I wrote above, restrictions are imposed on users on Instagram. But now the trend is such that the framework is less and less. Previously, the social network constantly cropped uploaded photos, fitting them to the format. Now this is no longer the case, but there are still some limits.
The question is not so much about image quality in the literal sense - the maximum resolution is 1080 by 1080 for a square post and 1080 by 1350 for a vertical one. Much more important is the aspect ratio. The square entry has a ratio of 1 to 1, which is logical. Horizontal - 1.9to 1 and vertical to 4 to 5. Anything that doesn't match this will be clipped.
If this article was written in 2015, then I would give you a whole selection of applications that supposedly allow you to add "full-length" photos. But often such applications could only harm. Some of them made it possible to make an image square by adding white borders to a vertical one. Others, like many other fraudulent tools, either asked for money for zero functionality, or hacked pages. Perhaps it was this kind of fraud that provoked the introduction of the ability to upload vertical and horizontal images. Now it’s not necessary to google “How to reduce a photo for Instagram?”, Because there are now corresponding opportunities in the social network itself.
You need to do the following:
As you understand, cropping photos for Instagram in third-party tools is now essentially useless - why, if there are built-in features, and even if the aspect ratio is not suitable, the social network itself is fix. But this is sometimes not very convenient - cropping may be needed more serious than what Insta offers.
Therefore, I can offer the following tools to solve the question “How to enlarge and crop a photo on Instagram?”
The use of social networks requires knowledge of the interface, functionality and, importantly, the restrictions imposed on users. Some of the most tangible frames affect images. Although the photo grid empowers people in this regard, cropping is often still necessary.
#1. The resolution of my photo is small, so Instagram stretches it, which makes the image blurry. What to do?
One solution to this problem is to add white borders. This way you can leave the original resolution.
#2. How to download full size photo carousel?
At the moment there is no such functionality in the social network. If a series, then square pictures.
#3. How to upload an image without cropping through a computer? Doesn't work in browser.
For the full functionality of the social network via PC, you will need to install the Bluestacks emulator or some of its analogues.
To ask your question or express your opinion - write in the comments. And also watch a helpful video on the topic.
[Total: 13 Average: 1.5/5]
Like the content? Share with your friends!
Making your images fit your Instagram is a great way to make your Instagram feed enjoyable. It can be assumed that not all of our pictures are the same size. Some require a smaller size; some should be more. We are all looking for ways on the internet to find out what is the ideal way to resize an image for Instagram . Whether it's a photo from the beach, a photo from a formal party, or even a selfie, we always want to achieve the perfect image size to upload to our Instagram account. Now we will go over the steps to successfully resize an image on Instagram. Please continue reading below.
How to resize photos for Instagram
For years, Instagram has created an aesthetic feel, especially when posting to our feed. If you belong to the social elite, you might want to find ways to engage with your Instagram followers. When shooting a beautiful landscape, you will always find the right size for it. These are fancy ways to fit your images from landscape, portrait, or square mode.
When deciding which Instagram image to post, you need to know all the best sizes you can apply. Find out what works best for your photo before posting it. Thanks to this post, you will know the ideal size for your Instagram. Instagram has different sizes that show up whenever you post. Here is a list of the most standard Instagram sizes you can check out.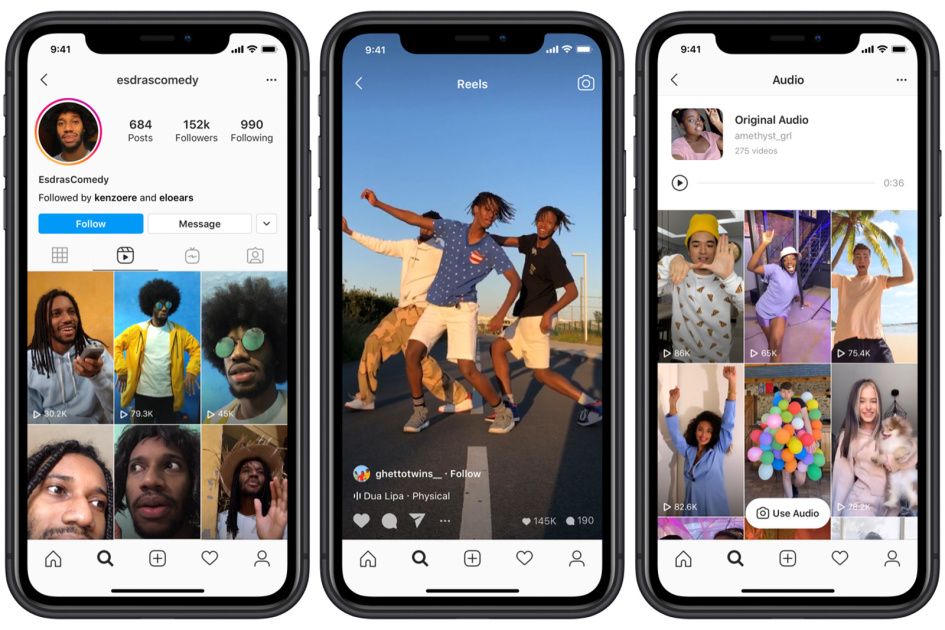
This site is usually the most common size used on Instagram. It has an aspect ratio of 1:1. What's more, it's the most convenient size you can apply to your post because it has an auto-crop feature. The ideal photo size that you can use in Square Photo is 1080x1080. This will fit perfectly into the applied aspect ratio. Other than that, you can directly take a photo in square mode if you have an iOS device.
Ideally, portrait size is the ideal size for posting on Instagram. A photo looks good when it's featured in your feed. However, when it comes to photo editing, it's quite difficult. It would be helpful if you could crop some areas vertically to fit the Instagram size standard. Portrait mode has a feature where the subject is in focus and everything else is blurred. This was once called the bokeh effect. Indeed, the use of this size is suitable for those who model a lot. The ideal photo size is 1080×1350. At the same time, its ideal aspect ratio is 4:5.
Landscape size is ideal for capturing beautiful landscapes. It has wide and wide dimensions. Its ideal image size is 1080x1350. At the same time, an excellent aspect ratio for this size is 1.91:1. Moreover, it is defined as a photograph of horizontal orientation. However, to make it suitable for Instagram dimensions, you have to cut out some areas vertically. The size of a landscape photo depends on how wide you can capture the subject. Landscape size gives the impression that you are shooting a three-dimensional object.
There are many noticeable differences in your photos when you start uploading them to Instagram. For example, in portrait mode, there is a bokeh effect feature that you can use. While in landscape size there is an element of a spacious and wide area. The use of these meters also has a significant emotional impact. In portrait size, it can give you a more intimate feel. On the other hand, landscape size can make the subject look smaller. So the size we choose for our photos can say a lot about what we create.
AnyMP4 Image Upscaler online is a web-based tool focused on zooming and enlarging photos. It is equipped with artificial intelligence (AI) technology, which helps to scale the image without sacrificing quality. You can use this software by visiting its official website on your phone. You can certainly use this tool to resize your Instagram image. You won't worry about the crisp resolution this tool offers when posting your photos to your Instagram feed.
Also, it helps reduce noise and sharpen images you can add to your IG feed. In this way, edges, lines and other details are also improved. Similarly, you can select a specific zoom level between 2x, 4x, 6x, and 8x. This feature will allow you to choose which size is best for your chosen photo. Learn how to resize an image for Instagram with this tool.
1 Visit AnyMP4 Image Upscaler online through its official website.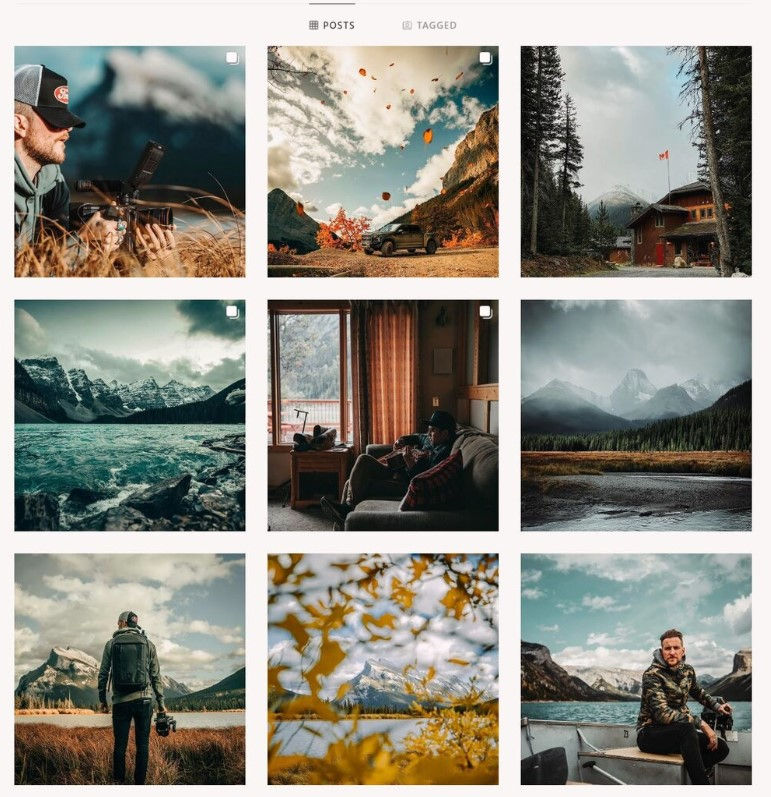
2 In its main interface, start uploading your photo by clicking Upload photo. Choose the best photo that you can share on your Instagram feed.
3 A dialog box will appear and you can choose to enlarge your photo between 2X, 4X, 6X and 8X. This feature will allow you to see the most suitable post size for your Instagram feed.
4 After scaling the photo, you can click Save to save and upload your image to your phone and successfully upload the finished work to Instagram.
PicResize is an online photo editing program that you can use to resize a photo. With this tool, you can quickly reduce or enlarge your Instagram photo. In addition, the tool can crop and rotate your images. You can certainly use this tool for your social networks. Also, with this tool, you can reduce the image file size. Finally, to save image resolution, it can convert photos or graphics to various standard formats such as JPEG, BIMP, GIF, and JPG. Below are the steps to use the tools.![]()
1 Visit the PicResize official website.
2 You can drag and drop an image file to start uploading an image. Or you have the option to import it from your PC or copy and paste the URL of the photo. Click Continue editing image to proceed to the next step.
3 The window will be redirected to editing the tool selection. You can select the crop selection tool on the left side of the application. Also, you can choose the size percentage below. The interface also displays a set of sizes.
4 In this part, you can choose a special effect for your photo. You can also select an image format type. Click Done, resize my image to complete the photo.
Adobe Express free image resizer is Adobe's online photo editing software that allows you to resize your photos for free. You can freely adjust the size and dimensions of your photo. There are also preloaded sizes and aspect ratios for you to choose from. Indeed, there are many different sizes available for different social media accounts. It has background removal feature and filters can be applied to your photo. In addition, there are many templates available, both in portrait and landscape mode. More on the steps below.
1 Start importing your photo into the program by clicking Upload Photo.
2 You can view from your PC or drag and drop an image to the interface. On the right side of the app, you can choose the preset size and aspect ratio you prefer for your social media platform. In this case, you should choose Instagram. You can also adjust the image scale.
3 After selecting a specific size for your image. Click Download to complete.
Which Should I Choose? Portrait or landscape mode?
It depends on the preferences of the photographer. You can set the tone of your photos according to the subject, scene and mode. For example, a portrait has a relatively close emotional difference to a landscape because the subject is more focused.