Last Updated: January 6, 2023
Don’t have a phone but still want to use WhatsApp on your PC? Spending enough time on your computer and don’t want to pick up your phone, again and again, to reply to your WhatsApp messages?
Luckily now, it’s very easy to use WhatsApp on pc with or without a phone and you’re going to learn exactly that in this article.
We’re going to learn how to use WhatsApp on pc with 3 different methods:
Let’s begin with the first method!
In this method, we are going to use the desktop version of WhatsApp known as WhatsApp Web.
Here’s a simple 2‑step process to use WhatsApp on PC with phone:
Step 1: Go To WhatsApp WebOn iPhone devices, the process is almost the same, the only difference being that when you open WhatsApp, you tap on WhatsApp Settings instead of Three dots, then on Linked Devices, and so on.
After scanning the QR code, you will see all your WhatsApp contacts.
Please note, the desktop version of WhatsApp does not support sending files. However, you can send text messages or receive media files from your friends and family members.
This method is similar to the first one, the only difference is that you will have to download WhatsApp on your computer and the rest process is the same.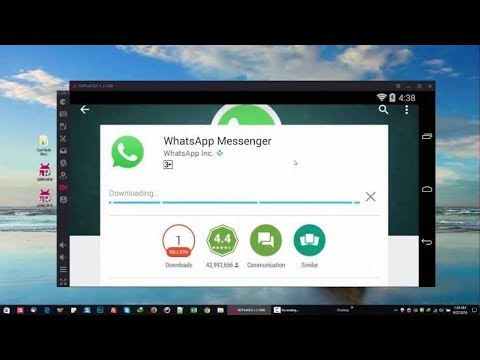
By clicking the setup file, it will install and launch on your computer, and you will see a screen like this:
Step 3: Pair Your Phone with WhatsApp WebWatch the video to understand even better.
Want to use WhatsApp on a PC without a phone? This method is for you.
For using WhatsApp on your computer without a phone, you will need an emulator. You can download and use any emulator you want, however, I am going to use BlueStacks for this purpose.
Step 1: Download Any Emulator (BlueStacks)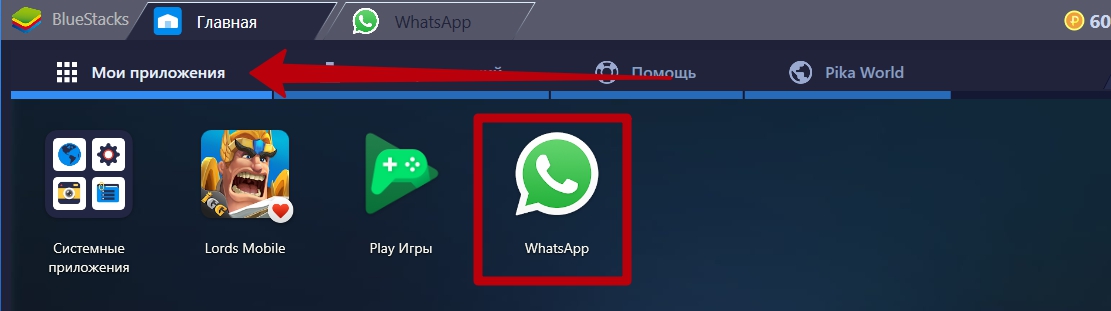
Many of you may have smartphones but want to use WhatsApp on your computer to eliminate the notifications on your phone, while others may not have a phone but need WhatsApp on their computer.
Using WhatsApp on a PC with or without a phone is easier than ever and it’s a very easy process.
If you have a phone and want to use WhatsApp on a computer, all you’ve to do is Link your device with WhatsApp Web in your browser or the WhatsApp desktop application. The choice is yours!
However, those who don’t have a phone can use WhatsApp on their computer with the help of an emulator.
Simply download any emulator you like, install it, open Playstore, download WhatsApp, and add your account.
Hopefully, all your doubts are cleared up now but if you still have any questions or want to share your thoughts about this topic, feel free to leave a comment below.
Hey I'm Arslan, the guy behind Ecomsay. I am passionate about anything that touches entrepreneurship and on this website I share my experience with people about different online services and platforms.
by Editorial Team
Don’t you have time to see WhatsApp messages on the phone while working with a PC? Want to get WhatsApp messages on PC? You can use WhatsApp on PC in Windows 7/8/10 when you need fast chatting.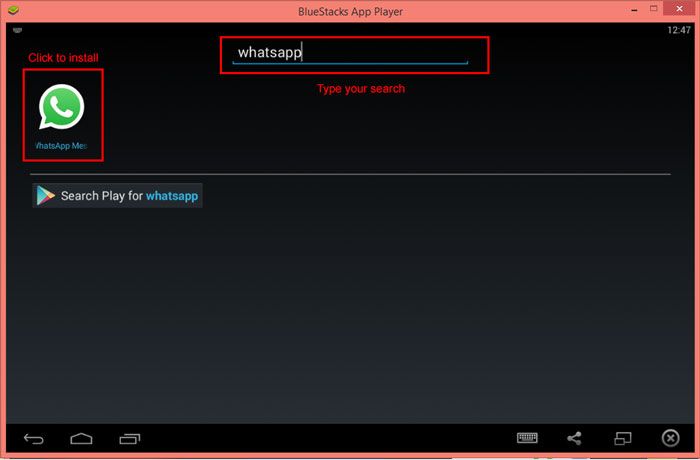
Typing a message on the computer is easier than typing a message on a mobile. If you have your mobile’s WhatsApp on your computer, you can easily type a message from the computer. You can send messages and images easily from the computer itself.
There are two ways of using WhatsApp on PC: The first way is to install emulator Bluestacks for Windows 7 or others; The second way is described below.
Table of Contents
WhatsApp messenger is a mobile messaging app. But WhatsApp developers launched WhatsApp web (WhatsApp messenger for PC). This WhatsApp web is the PC version of WhatsApp messenger.
By using the WhatsApp web, you will send and receive WhatsApp messages right from your computer. It is easy to share your images or videos from your computer. WhatsApp messenger PC is more comfortable to the users than using WhatsApp messenger on smartphones.
Here I share with you simple steps to use WhatsApp messenger for PC.
 How to Install and Use WhatsApp on PC : The Easy Way
4. Steps to use WhatsApp on your smart phone to scan this QR code:
Tap on OK, GOT IT to remove the instruction screen and let your mobile to scan the QR Code.
5.Now place the smartphone camera nearer to your pc and scan this QR code. Within a few seconds, you can scan the QR code.
6. After scanning you will see the WhatsApp screen on your computer.
Now you can enjoy chatting with your WhatsApp contacts right from your computer. If you have any trouble with doing this, read the requirements for installing WhatsApp messenger for PC as below.
1. You must be a WhatsApp user in your Smartphone.
2. You must upgrade to the latest version of WhatsApp messenger in your Smartphone.
3. WhatsApp web works on following browsers only
4.You must keep your phone and PC connected to the internet, during use of WhatsApp web.
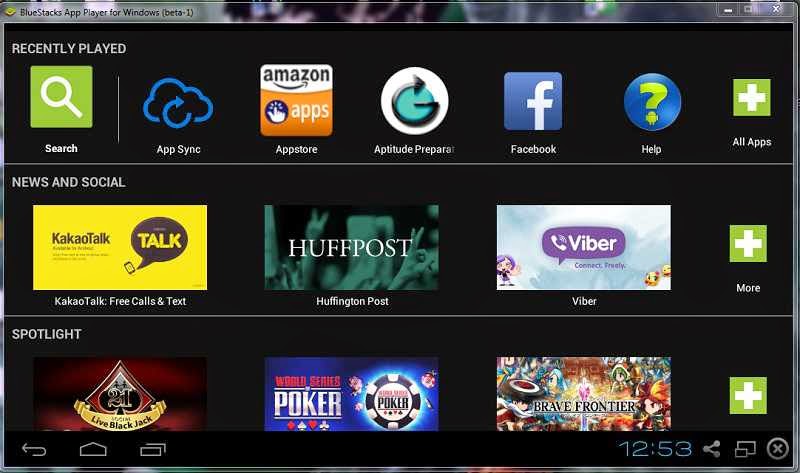
STEP-1: Download the BlueStacks application
Visit Bluestacks official website on your browser and click on the download option. Then, the installer will start downloading automatically. If you are using Windows 7, you can download Bluestacks for Windows 7.
STEP-2: Install Bluestacks
Run the downloaded installer application to start the installation wizard. It takes some time to download the resource files of the application.
After the completion of downloading the resource pack, Bluestacks will be installed on your computer.
STEP-3: Download & Install WhatsApp APK
Visit the official site of WhatsApp Android on a browser and choose the android version to download it. The downloaded file will be seen in the downloads folder. Locate & Double click on the downloaded WhatsApp APK, then the APK application will be installed on the Bluestacks.
STEP-4: Setup WhatsApp
After installing the Whatsapp application, it will be seen on the “Home > My games” section of Bluestacks as showing in the below screenshot. Locate and double click on the application to launch WhatsApp app from Bluestacks.
After launching the application, click on Agree to the Terms and conditions of Whatsapp and click on “Next”. Then, you will find the interface as showing in the below screenshot. Provide the mobile number for which you want to set up WhatsApp and then click on “Next” to continue.
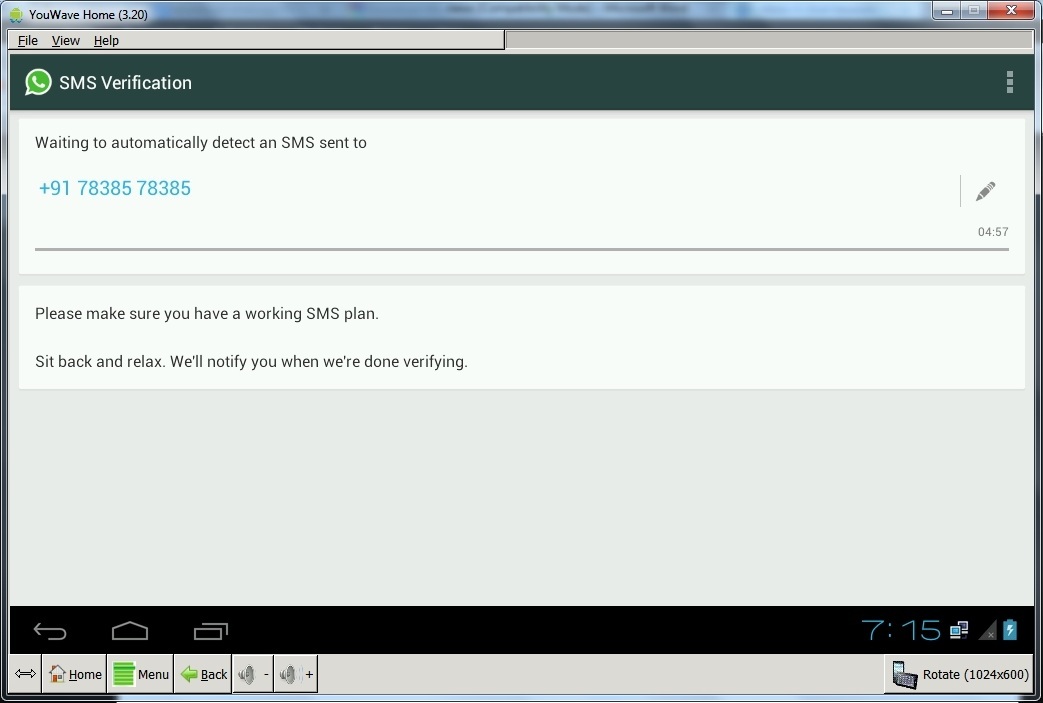
Then, you are redirected to the verification stage. A verification code will be sent to the provided mobile number and WhatsApp automatically scans for the verification code. As WhatsApp is scanning on your PC, it doesn’t find the verification code.
Then, tap on the “Call Me” option to get a verification code through voice call. Lift the call and hear the verification code. Enter the code and click on “Verify” to complete the verification process. That’s it, WhatsApp has been created and the interface will be seen as a regular WhatsApp.
STEP-5: Adding Contacts
After successful installation of WhatsApp, you will see your contacts list as empty. You have to add every mobile number to your contacts list. To add a new contact click on the chat icon, which is on the right bottom. From there, select the “Add New Contact” option and save contacts by entering the name and contact number.
In this section, I will show you a method to use WhatsApp on your Pc without using a QR code or BlueStacks. For this, use a virtual machine known as VMware.
Thanks for reading my article about WhatsApp messenger for pc. If you know any other methods to install WhatsApp messenger on PC, do share in the comments section.
If you like this article, please like it, share it. Want more tips, Please follow whatvwant on Facebook and Twitter. Subscribe to whatVwant channel on YouTube for regular updates.
Today, Whatsapp is the most famous messaging application used by more than 1 billion smartphone users every day. The application is supported by operating systems such as iOS, Android, Windows and Symbian.
[toc]
In turn, computer users can use Whatsapp using the web version of the client or Android emulators. Today we will take a detailed look at how to use this application on your Windows computer/laptop.
So, as we mentioned earlier, the WhatsApp application can be used for free on a computer. There are three options for working with the application on a computer:
The web version of WhatsApp is lighter, simpler and more convenient. You just need to perform a couple of manipulations, which we will discuss below.
 Then you need your phone to enter the WhatsApp application, click on the 3 vertical dots in the upper right corner of the screen, and select item "WhatsApp Web" .
 After Once the client has been downloaded to your computer, install it. The installation usually takes about a minute. Upon completion, a window with authorization in the WhatsApp profile will open.
 Using Whatsapp Messenger with Bluestacks
 Emulator Bluestacks is a great tool that allows you to run any Android apps and games on your Windows/Mac computer. We can say that the Android emulator is a visualization of your smartphone. With the help of it, we will now launch the WhatsApp messenger.
But, let's list the pros and cons of this method compared to the methods described above:
Benefits of using the Bluetstacks emulator to work with the WhatsApp application on a computer:
Cons of using the Bluestacks emulator to work with the WhatsApp application on a computer:
If you still decide to use this method, then the detailed instructions are described below: Click on the green button with the inscription, as in the image below.
 When the installation is completed, click on the button "Finish".
 At the first start, you will need to accept the user agreement, for this, click "Accept and continue".
In this article, we have provided many ways to use WhatsApp on your computer. We hope that you managed to accomplish your plan, but if not, then we offer you to watch video instructions that will tell you how to use WhatsApp on a computer.
WhatsApp is one of the most popular instant messaging apps. WhatsApp already has more than 1 billion users, and in 2014, "only" for 19billion dollars, the messenger was acquired by such a giant as the social network Facebook. WhatsApp allows you to send instant messages over the Internet at no additional cost.
The application has become very popular. All this thanks to a simple user interface and the absence of unnecessary and useless features. WhatsApp is available on almost all mobile platforms including Android, Windows Phone, BlackBerry, Nokia S40 series, iOS and Symbian.
However, there are people who want to install the messenger on their computer. So, is it possible to install WhatsApp on PC? You can use WhatsApp on your laptop, and here's how to do it.
How to install WhatsApp on a computer
There are several ways to install WhatsApp on your computer:
Contents
 QR code problem
 WhatsApp for PC is a long awaited request from the users of the most popular WhatsApp instant messaging application. Previously, the messenger was only available for smartphones and phones, including Android, iOS, BlackBerry, Windows Phone, Windows 10 Mobile, Symbian and Java. Later, the messenger had a web version known as the WhatsApp network. However, users did not like the service. Finally, WhatsApp Inc. has released the official Messenger WhatsApp for PC.
There are several ways you can install WhatsApp on your computer. The first and most popular method was to install WhatsApp using Bluestacks. Apart from Bluestacks, there are several other Android emulators that allow you to install WhatsApp on PC using the Android WhatsApp application (.apk).
How to install the official WhatsApp Messenger for PC
The problem with installing WhatsApp and using Android emulators is that the application may not run as smoothly as on a smartphone. In addition, emulators are resource-intensive applications that require the smooth operation of the PC and its decent technical characteristics.
Now that WhatsApp Inc. released a standalone WhatsApp installer for desktops and laptops, eliminating the need for special Android emulators.
In order to use the official WhatsApp messenger on your computer, you need to do the following:
Step 1. Download WhatsApp for PC installer from official website. Download the WhatsApp 64-bit or 32-bit installer, depending on the bitness of your system. The application is 61 MB in size, so you will have to wait for the download to complete.
Choose 64-bit or 32-bit WhatsApp installer and download to computer
Once downloaded, run the installer and the application will start installing. Unlike other apps, the WhatsApp installer will install right away and you won't need to do any extra steps. Once the WhatsApp app is installed, you may be asked to accept the terms.
Step 2. Now you need to scan the QR code shown in the WhatsApp for PC application using your phone's WhatsApp.
Scan the QR code using WhatsApp on your phone
Step 3. Open WhatsApp on your phone, click on "More" and select "WhatsApp Web". Turn your phone's camera to the PC screen and scan the QR code shown. This is necessary for data transfer and synchronization of both programs.
On the phone, select "Advanced" and click "WhatsApp Web"
We scan the QR code with a phone from a computer
Step 4. If the QR code is validated successfully, your WhatsApp messages will be successfully synced to your computer. From now on, you can read and reply to all WhatsApp chats from your PC.
Synchronizing WatsApp data on the phone with a computer
WhatsApp for PC is a handy application that syncs WhatsApp messages from your phone to your computer. Thus, if you are working on your laptop, there is no need to constantly check your phone, as you can read messages and reply to them directly from your computer.
Important! However, the official WhatsApp Messenger for PC is still not perfect. To use it, you must have an activated WhatsApp account on your phone, and in order to receive messages, your phone must be connected to the same network as your computer.
When you open WhatsApp on your computer, you may receive an error message like the one below.
Error message when you start WhatsApp on a computer
This basically means that the computer is trying but not being able to connect to the phone. To fix this error, make sure your phone is connected to the internet.
When setting up WhatsApp on your computer for the first time, you may encounter an issue such as "Login failed when trying to scan the QR code". This usually happens if the PC is unable to verify the QR code scanning process. To fix this error, make sure you are connected to the internet and your internet connection is working properly.
WhatsApp Web is a web version of the application and allows you to chat directly in the browser using a computer or laptop. WhatsApp Web does not require installation on a computer, so you are free to download and install the application. The WhatsApp website is not a standalone application, but an interface where WhatsApp messages from a smartphone will be synced to a PC.
Web version of WhatsApp Web
If you receive a WhatsApp message on your phone, the message will also be displayed on your computer. This is useful for people who don't want to use only their phone to check whatsapp messages.
This way you can view the message on your laptop screen and reply to it from your computer.
Important! The only requirement here is that you need to connect your smartphone to the Internet as well as to your computer. Without an internet connection, the WhatsApp website cannot sync messages from your phone.
Here's how to use the WhatsApp website on PC.
Step 1. Go to web.whatsapp.com . Select the "Remember me" checkbox. Open WhatsApp on your phone and select "WhatsApp Web".
Open WhatsApp on your phone and select "WhatsApp Web"
Step 2. You will see the scan code screen. Click OK.
Press "OK"
Step 3. Now scan the QR code from the WhatsApp web screen on your PC (do not scan the image below).
Scan QR code from WhatsApp web screen on PC
When the phone successfully scans the QR code, you will see your contacts and incoming messages displayed on the PC screen. As mentioned above, scanning is necessary for data transfer and synchronization, in this case it is a mobile application and its web version.
Important! Please note that here you can view incoming and outgoing messages only after scanning the QR code. So there is no way to look at previous posts.
If you do decide to use an Android emulator, Bluestacks is your best bet.
Installing WhatsApp with Bluestacks
Today, Bluestacks is one of the most popular Android emulators. It works well with Android apps on Windows and Mac.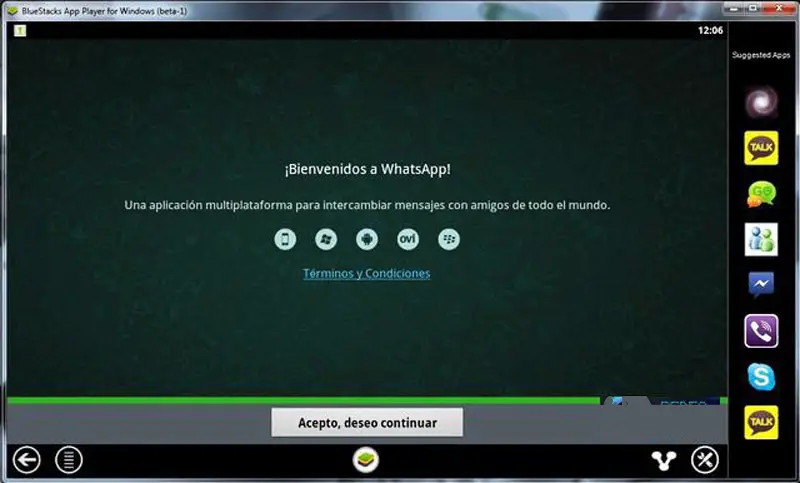
In order to install WhatsApp using Bluestacks, you first need to download and install an emulator.
Step 1. Download and install the Bluestacks emulator. You can download it from the official website www.bluestacks.com.
Download and install the Bluestacks emulator on your computer
Step 2. Once downloaded, run the installer and wait until Bluestacks is fully installed. The application is quite heavy, so it will take a few minutes to install it.
After installing Bluestacks you have 2 options:
If you want to download WhatsApp APK, you can do it on the official website.
Step 1. Download the WhatsApp APK, then right-click on it and select "Open with Bluestacks".
Select "Open with Bluestacks"
Step 2.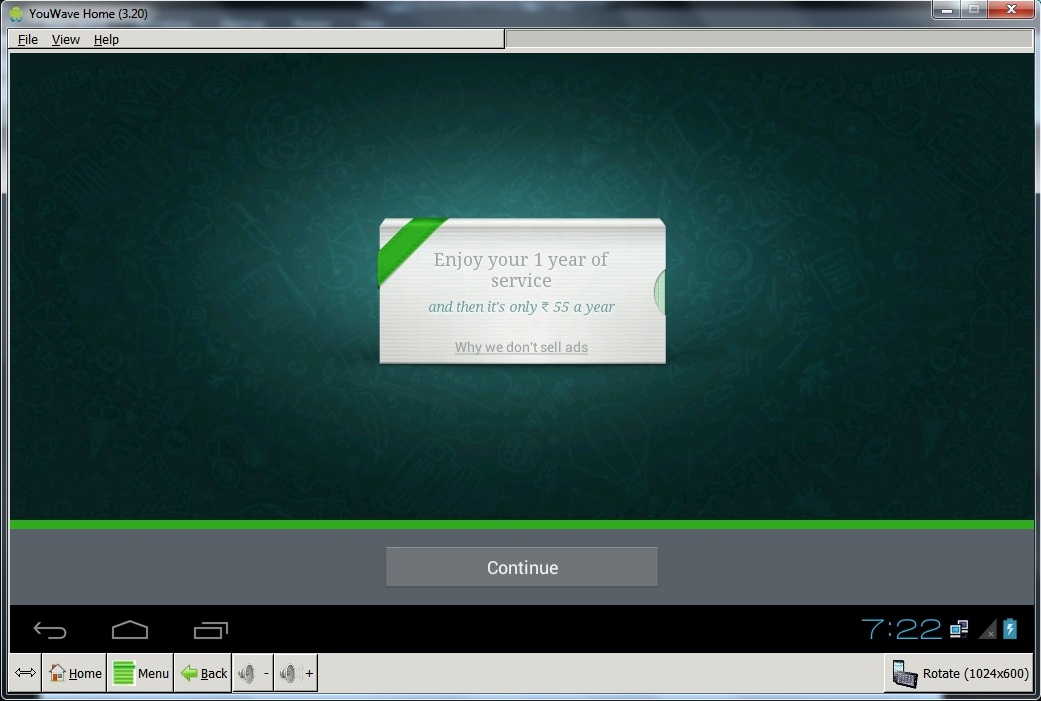 After installing the Apk, open "Bluestacks" and it should have WhatsApp installed on it.
After installing the Apk, open "Bluestacks" and see WhatsApp
If you don't want to use the apk, you can use the second option. To do this, do the following:
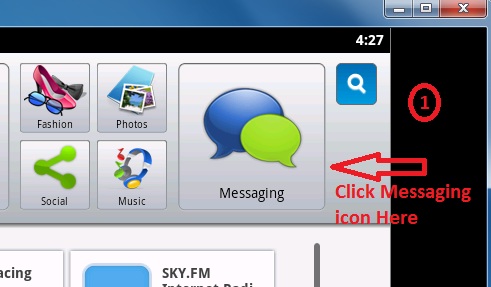
Step 1. Open Bluestacks and click on the app search bar.
Open Bluestacks and click on the app search bar
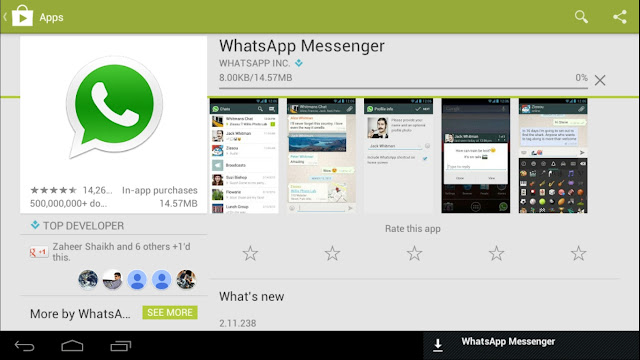
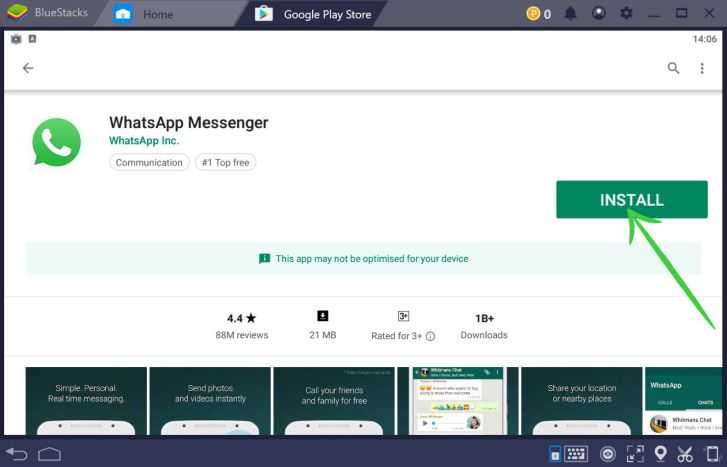
Step 2. Find WhatsApp and install it from the Google Play Store.
Now you need to register with WhatsApp.
Select country and enter phone number
Since you don't have a SIM card on your laptop or PC, you need to export all your contacts from your phone to Bluestacks as a vCard (vcf) file. After that, you can add contacts to WhatsApp on PC.
Here's how to do it:
Copy the vCard file to C/Program/Data/BlueStacks/User/Data/SharedFolder
Step 1. Open Bluestacks and click the "All app" button.
Open Bluestacks and click the "All app" button
Step 2. Click and open "Settings" (gear icon).
Press and open "Settings"
Step 3. Click and open Manage Contacts.
Click and open "Manage Contacts"
Step 4. Now click on the menu icon (three dots) and select Import/Export.
Click the menu icon and select "Import/Export"
Step 5. Select "Import from SIM card". Bluestacks will now search for available vCard files on your PC.
Select "Import from SIM card"
Step 6. Then select Import one vCard file and click OK. If you want to import multiple vCard files, select the multiple vCard file option.