How to make your logo fit on instagram
The Right Instagram Profile Picture Size For Your Brand Logo
You’ve got your brand set up and ready to go. The next step is to get all your social accounts decked out with your new branding. One of the social platforms that you must consider for your brand is Instagram. Here's why:
- Instagram is estimated to have 1.074 billion users worldwide in 2021.
- 71% of the 1 billion monthly active users on the Instagram app are under the age of 35.
- With Instagram becoming increasingly popular, an estimated 71% of US businesses claim that they use Instagram for business.
- 500 million Instagram accounts use Instagram Stories every day (Instagram, 2018). Not just that, but a third of the most viewed IG stories are from businesses.
A key element of your Instagram presence is your Instagram profile picture (the one that'll constantly be in your Instagram stories, reels, and everything else you do on the platform). It’s important to get this right as it helps your customers, new or returning, recognize your brand and gives them their first impression of your business.
As a business, the best option for your Instagram profile picture would be your business logo, but:
- What size should your logo be to upload to Instagram as your profile picture?
- Should you leave some white space around your logo?
- What format should it be in?
- How do you update it?
We’ll cover everything you need to make your business logo look great on Instagram, including your Instagram profile picture size. If you're still in the initial stages of your branding, you can use our Instagram logo maker to design a logo and get it for free.
Please enter a valid business name.
Build a beautiful logo in just a few minutes.
5 ways to make your Instagram profile picture look professional
Listed below are five easy ways you can give your business Instagram account a more professional and cool look.
1. Choose the right version of your logo for your Instagram profile picture
If you got your free logo from us, you will already have a cropped and padded version of your logo ready to go, so you can skip straight to #5. If not, keep reading.
It's important to choose one version of your logo to share across all your social platforms. Your logo might have a full color version, a 2-tone version, a greyscale version, and a black and white version, but you should only choose one for your profile photo on all platforms.
Choose one color of your logo for your brand’s social accountsChoose one version of your logo for your profile picture to help your users recognise your accounts and keep your branding and messaging consistent across social media. You may need to make a version of your logo specifically for your Instagram profile picture and then use it on your other social accounts.
💡Tip: If your business name is unusually lengthy and you're using a logo, consider utilizing initials or a recognizable icon in your signature brand Instagram color palette to save space and provide a memorable detail.
2. Get your margins right for your Instagram profile picture
The first thing to remember is that Instagram uses a square (1:1) aspect ratio.
The second is that any logo you upload as your Instagram profile picture will be cropped into a circle.
Your logo will be cropped to fit in the circular Instagram profile photo cutoutThis means that even if you have a wide logo, you want to make sure you leave some margin on the sides horizontally.
To make a logo look great for Instagram, crop it in advance to an aspect ratio of 1:1 and leave some padding (30% of the image width is often a good place to start) around the logo so it doesn't get cut off.
3. Be mindful of your Instagram profile picture size
In the Instagram app on your phone, your profile photo will be:
- 100 x 100
- 1:1 aspect ratio (square)
In the Instagram web app, your profile photo will be:
- 180x180 pixels
- 1:1 aspect ratio (square)
Finally, the actual file Instagram stores is 320 x 320 pixels and 1:1. Because of this, you should ideally upload a 320x320 pixel image (the size of your Instagram profile picture) so that it will be clear even in the desktop app and as future-proof as possible for Instagram updates.
Be careful about uploading an image that is too large, either in file size or resolution, or that has an aspect ratio that Instagram doesn't support. If you do upload an image that doesn't meet their guidelines, Instagram will resize and compress that image, as stated here:
"When you share a photo with a width between 320 and 1080 pixels, we keep that photo at its original resolution as long as the aspect ratio is between 1.91:1 and 4:5 (a height between 566 and 1350 pixels with a width of 1080 pixels). If the aspect ratio of your photo isn't supported, it will be cropped to fit a supported ratio. If you share a photo at a lower resolution, we enlarge it to a width of 320 pixels. If you share a photo at a higher resolution, we size it down to a width of 1080 pixels."
Check out the Instagram Help Center for more information.
In addition to the pixel and ratio limits given there, their compression will also kick in if your image file size is too large. If you have already shrunk it to a 320 x 320 pixel image, you should be fine for size, but if you are seeing compression, you may need to reduce the quality a bit.
In general, you want to avoid as much image compression as possible as it can lead to blurring.
An example of image compression artifactsIf you want to add filters, layers, or effects to your Instagram profile, you can use a third party app, like Instasize or Canva, before you upload your image.
To sum up, the ratio is always 1:1, and it will be:
- 100 x 100 in the mobile app
- 180 x 180 in the desktop app
- Stored at 320 x 320
For optimal results, you should upload your logo to Instagram as a 1:1 aspect ratio, 320x320 pixel image for your profile picture.
💡Tip: An eye-catching profile picture is achieved by positioning the subject of the picture (a headshot or logo, for example) in the middle of the frame and making it as large as feasible within the available space.
4. Choose the right logo file format for your Instagram profile photo
You can upload your logo as your Instagram profile photo as:
- JPEG
- PNG
- BMP
- non-animated GIF
Instagram converts any logo you upload to a JPG. Generally speaking, you want to avoid them converting your image because of quality loss and artifacting on conversion (as mentioned in #3).
Please enter a valid business name.
Build a beautiful logo in just a few minutes.
So, JPG should be your first choice but not maximum quality to keep the size down. PNG also seems to convert well, with minimal artifacting and rich color.
🔎 In short: You should upload your logo to Instagram as a JPG image, or a PNG if you don't have a JPEG.
5. Upload your Instagram profile picture
It's easy to upload your logo to Instagram. You can find their official guide to posting or updating your profile picture here. Here is how to upload your first profile picture or change your existing profile picture:
- Sign in to Instagram. If you haven’t signed up already, you can sign up here.
- Go to your Instagram profile.
- Tap “Edit Profile” to start editing your Instagram profile.
- On your Instagram settings, tap “Change profile photo."
- Select your custom logo image for Instagram.
- Press Next (Android) or Done (iOS)
If you followed our five steps, you should now have a great looking Instagram page with your logo front and center.
💡Tip: Stick with a photo or emblem that is ageless and requires only occasional updates.
What are the best practices for your Instagram profile picture?
Here are some best practices that you should follow when choosing a good Instagram profile picture:
- As a business, choose your business logo instead of your personal or team picture.
- Creative angles are good but avoid off-center photos.
- Choose a photo with good lighting and clear contrast.
- Avoid trendy photos that you have to update often.
- Consider your aesthetic and professional style when choosing a photo.
- When building a personal brand, avoid a full-body photo.
- Crop and resize your photo before uploading it.
Follow these steps and the best practices to make your Instagram profile stand out and look good.
Frequently asked questions: 3 popular FAQs about having the right Instagram profile picture
What are some commonly asked questions about having the right Instagram profile picture? Get your questions answered with these three FAQs.
1. Which profile picture is best for Instagram?
It's ideal to utilize photos with a 1:1 aspect ratio because Instagram profile photos are circular. They have a display that is only 110 × 110 pixels, so it's crucial to utilize every available pixel. A subject that is poorly cut or too far away won't help your brand be recognized right away.
2. What profile picture should I use?
Use only crystal-clear, high-resolution pictures. Always choose photographs that look clear and spacious; avoid selecting any that appear cluttered. Verify that each profile photo is properly cropped for both desktop and mobile displays.
3. What makes a bad profile picture?
So what constitutes a poor profile photo? If your profile photo does not accurately represent you as a professional, it is bad.
For example, LinkedIn is a network for professionals. Your "personal brand" on LinkedIn might not benefit from what you post on Facebook or Instagram. Likewise, your profile picture on LinkedIn may be too formal for Twitter or Facebook. A good profile picture for business is about understanding your brand and the platform and how they intertwine for the best results.
Summing it up
Always keep in mind that your Instagram profile picture will be shown in other places outside of your profile page, such as your story feed, comments, and search results. As a result, using the incorrect IG profile pic size might have a significant influence on your social media visibility.
Congratulations, pro! You are now an expert at choosing the right Instagram profile photo proportions. But there’s more:
If you need a free logo, use our logo maker, and you'll have one in less than 30 minutes!
Please enter a valid business name.
Build a beautiful logo in just a few minutes.
Instagram Profile Picture Size | Make Instagram Profile Pics Online
When designing your pic be sure to account for Instagram doing its own circle crop on your design (as seen above).
There’s no argument to be made against a brand taking advantage of the behemoth-sized opportunity that is creating stories, posts, and other social assets for Instagram. In fact, 71% of businesses already do so, and 51% of Instagrammers follow at least one business. If that business isn’t you, then it’s someone else. Maybe even a competitor?
You can build your Instagram account into a precious gem for followers to “ooh” and “ahh” over. It all starts with the perfect Instagram profile picture size and a well-designed profile. To help with this, we’ll show you how to create stunning profile pictures in PicMonkey, how to resize images so that they fit just right on Instagram, and leave you with a few design tips for making eye-catching Insta designs.
The correct Instagram profile picture size
The display size for your Instagram profile pic is 110 x 110 pixels. However, we recommend uploading your design at a higher resolution in order to maintain image quality. (PicMonkey's Instagram profile templates come pre-sized at 360 x 360 pixels.)
Remember that your Insta profile pic will show up in more places than just your profile page; your story feed, comments, and search results, just to name a few. For that reason, having the wrong IG profile pic size can impact your social media presence drastically.
Size your photo correctly to prevent it from looking funky wherever it appears. While it's true there's only one Instagram profile pic size, knowing the other Instagram photo dimensions can help clarify your design concept. These specs can help.
More Instagram image sizes for 2022
| Social media image type | Dimensions in pixels |
|---|---|
| Instagram Post | 1080 x 1080 (1:1 ratio) |
| Instagram Profile Photo | 110 x 110 (1:1 ratio) |
| Instagram Landscape Photo | 1080 x 608 (1.91:1 ratio) |
| Instagram Portrait | 1080 x 1350 (4:5 ratio) |
| Instagram Story | 1080 x 1920 (9:16 ratio) |
| IGTV Cover Photo | 420 x 654 (1:1.55 ratio) |
Crave more deets about each? We got you.
Instagram post
Instagram posts are the most common function of the platform. Post daily happenings, announcements, events, musings, or anything else you want your followers to see on your feed that represents who you are and what you offer.
Instagram profile photo
The reason we're all here, folks. Instagram profile pics can sport your pretty face, a business logo for professional pages, or whatever you want followers to see first. While faces are more popular, it can be strategic to use IG profile pics for brand development too. Whatever you choose, go for bright colors, smiles, the outdoors, or whatever will captivate your audience.
Instagram landscape photo
Instagram landscape photos are similar to regular Instagram posts, just with a different shape. The most popular Instagram posts are squares, but they can also be landscape, vertical, or portrait.
Instagram portrait
Instagram portrait photos are another way to adjust the orientation of an Instagram post to maximize viewer engagement. You can easily shift the Instagram specs you seek using PicMonkey's Resize tool.
Instagram Story
Instagram Stories last a mere 24 hours — so they're not as long-standing as Instagram profile pics. They exist to drive people to your feed. You can post stickers, graphics, images, text, music, and links to engage followers any minute of any day.
IGTV Cover Photo
Lastly, the IGTV cover photo exists to capture your video content in one pic. Consider it another way to organize your content so viewers are compelled to click on your videos. You can also bridge colors from your IG profile pic with your IGTV cover photos to build consistency.
Now that you know the differences between Instagram's posting options, you can make a stellar Instagram profile pic that resonates with the rest of your content.
And if you need more social sizes, see: Crop an Image to All the Social Sizes
Create an Instagram profile picture with a pre-sized blank canvas
Start with a blank canvas in PicMonkey.
If you want to design from scratch, the easiest way to do so is with one of PicMonkey's pre-sized blank canvases. Worry no more about creating the right Instagram profile pic size — it's been done for you!
Once you're logged into PicMonkey, click Create new > Blank Canvas.

Scroll down to Insta sizes, and select "Instagram Profile."
Upload your image or logo.
If you'd like to apply a background color first, click Background color on the left tools menu. Choose from solid colors or our super cool color gradients.
Export your finished design and upload to Instagram!
Two ways to size photos for Instagram
If you have an image ready but need to size it just right for Instagram, PicMonkey has two speedy ways to do so: Crop and Resize.
Using the Crop tool:
When you crop an image, you change its aspect ratio. This is the right tool to use if your image can stand to lose a bit on either side without cutting off the focal point (in this case —YOU). To use crop:
Open your image in PicMonkey.
Click Crop Canvas in the Edits menu on the left.
Use the Aspect ratio drop-down menu to select "Instagram Profile.
 "
"Move your crop box around as desired.
Click Apply to save your changes. Looks good!
Using Resize:
If your image already has the right aspect ratio but its file size is either too small or too large, use PicMonkey's Resize tool. Be careful, though — making an image larger runs the risk of flubbing the image quality (take note of step #3 in order to prevent this). To use Resize:
Open your image in PicMonkey.
Click Resize in the Edits menu on the left.
Make sure Keep proportions (chain icon) is clicked; the chain will appear closed. This automatically updates the height or width of your photo so that your image quality isn't distorted.
Click Apply to save your changes.
Learn more: How to Resize an Image Like a Pro
Master Instagram profile pic sizes with a PicMonkey template
See all circular profile image templates in PicMonkey.
Starting from scratch is a great way to channel your own creativity and still design with speed, but if you reallllly want to get the jumpstart on your Instagram profile pic and never have to worry about botched sizing, try one of our Instagram profile templates. We have pre-sized square options, or pre-sized circular profile images (not to mention, you can pretty much commandeer any template and resize it for Insta with our wondrous Smart Resize tool). To edit a template:
Open your template in PicMonkey.
Swap out our image with your own (if using a circular image, click Edit image fill to replace the image with your pic).
Customize further with trendy photo effects, graphics, and textures.
Export and upload to Instagram!
Read more: Create Your Best Profile Pic
Our best advice? Speak to your audience. This starts with an eye-catching profile that lives up to your brand. Also keep in mind that, more often than not, your audience will be visiting your profile via mobile devices. Take a second and do some mobile Instagram scrolling of your own...it’s a small space, right? Let’s tackle a few design questions you might have.
Q: What should I use for my profile picture?
A: What’s your brand? If your brand is Y-O-U, then you should use a photo. If you’re building a corporate Instagram presence, then a logo is the better call.
To learn how to clarify your brand for social media marketing, read our tutorial: Brand Building 101: Your Guide to Branding Your Business for Success.
Q: Should I account for the circular profile shape when designing?
A: Yes! Place the focus of your image in the center, that way when the cropping comes, it’s no big deal. The circular shape is just going to cut around your edges, so account for this when you’re designing and you won’t have to run into trouble later. Or...simply grab one of those circular profile image templates!
Q: Will my picture only appear on my profile page?
A: Negative.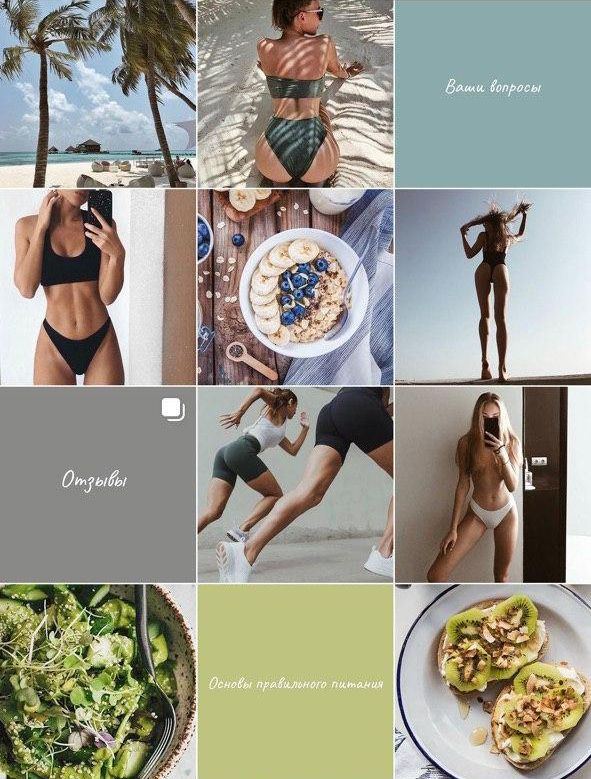 That’s why the best thing you can do for yourself with a profile picture is to keep it simple. You want an image that'll still look good when it's smaller.
Q: I’m torn on my color scheme. What should I do?
A: We can help with that. Above all else, stay on brand. Use colors that match your brand’s palette and speak to who you are. Check out our posts on color theory and creating brand color palettes (or secondary brand color palettes).
Q: Can I have more advice on building my Instagram account?
A: Absolutely! Check out these posts to get started:
Instagram Photo Sizes for 2022 & Templates
Instagram Post Design Ideas & Tips
2022 Instagram Story Size and Design Tips
Create Instagram Story Collages for Sweet Multi-Image Looks
20 Ideas for Your Instagram Story Background
How to Use Instagram Story Templates to Create Multi-Slide Stories
Congrats, pro! You've mastered the art of Instagram profile picture dimensions (and then some).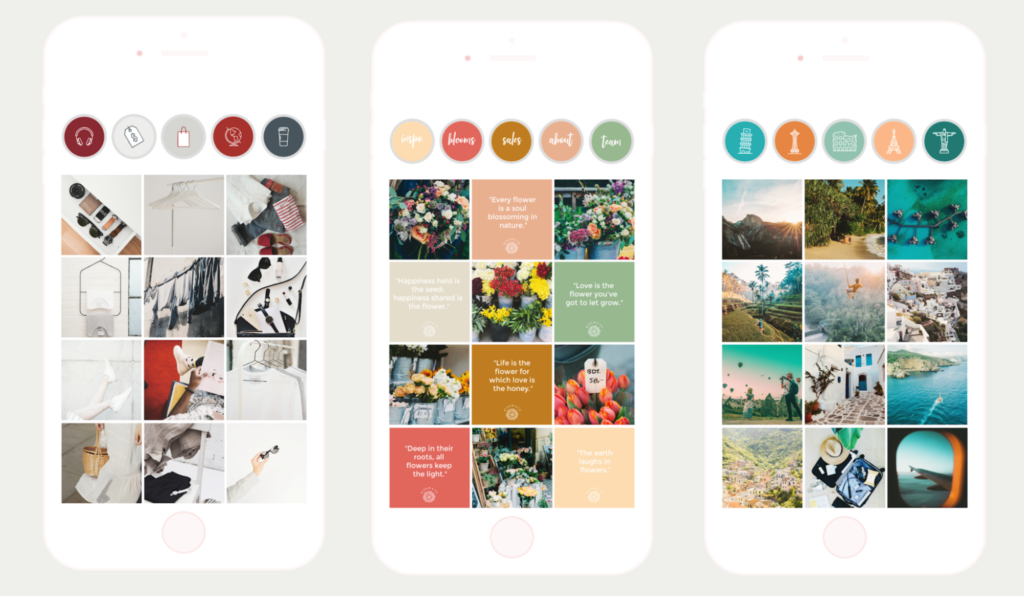 New content for your next Insta post, perhaps?
How to watermark photos for Instagram in 2023
It used to take a lot of effort, hard work and often money to put your creative work on public display because there were not many options where you could do it. And now you don't even need to leave your home to share your creations: with just a couple of taps on your phone screen, your photos will float across the boundless internet.
Instagram has nearly 1.3 billion active users worldwide. In this application, you can meet and communicate with like-minded people, who will then become your closest friends and most devoted fans. It provides incredible opportunities to turn your favorite hobby into a profession through deals with various brands and attract new customers. This platform has helped hundreds of people achieve their dreams. Instagram has greatly influenced not only the business sector, but also our daily lives.
However, the good was not without the bad, because this platform also made it easy for people to steal other people's work. Luckily, watermarks can not only help protect your creations, but also make a statement.
Image theft is quite common on Instagram and usually happens for two reasons: to get attention or to make money.
First, some people want to grow their accounts and reach a large audience without spending their time and energy honing their photography skills. Why would they do this when there is an easier and faster solution? They can simply steal photos from different photographers and pass them off as their own.
You may think that stealing a picture from Instagram is very difficult and dreary, because there is no “download” button anywhere. But in fact, a number of applications have been developed specifically for downloading photos from Instagram; The whole process only takes a couple of minutes, if not less. In this case, more often than not, people steal images not for profit. Their theft will not bring them money. But one way or another, they still violate copyright law while still getting the attention they want. Surprisingly, sometimes it is stolen photos that are noticed by large thematic accounts dedicated to a particular topic. Unaware of the theft, they post a photo in their feed and mention the thief's account, thereby bringing new subscribers to the wrong person.
Secondly, Instagram is brimming with truly immersive and stunning visual content, and some brands are taking advantage of this to their own advantage. You will be unpleasantly surprised to learn how many companies steal the work of various accounts. Stolen photographs, paintings or designs are used as prints for clothes, bags and other items, which are then put up for sale. The problem here is not only copyright infringement. People have invested a lot of work and time in their creations, but for this they will not receive a penny. All honors and money will go to thieves.
If you think that your work is not in danger due to a small number of subscribers, you may need to think again. Unfortunately, companies most often steal from little-known authors with a small audience. Indeed, in this case, the likelihood that someone will find out about the theft is very small. Of course, there is a chance that the account holders themselves or one of their subscribers will stumble upon a T-shirt or bag with stolen work. But this will not happen immediately, but will take some time, during which the company will have time to earn a lot of money.
No matter what the purpose of image thieves is, you can watermark your creations to prevent theft.
However, not everyone on Instagram wants to deliberately steal your visual content. Pinterest is another popular platform where people save images to their virtual boards for ideas and inspiration, including photos from Instagram. Alas, there can sometimes be a slight hiccup that results in someone saving your work without a clickable link to your profile. Another scenario: the Facebook community published your photos without asking your permission and without mentioning you as the author, but indicating that the images do not belong to them. In both cases, your work will float namelessly across the vast expanses of the Internet, and you will lose dozens or even hundreds of potential customers.
By placing a watermark with your name, logo or contact information on your photos, you will show who is the author of the work and give people the opportunity to find you.
Our iOS and Android mobile app will brand your Instagram photos in just a couple of minutes. It includes all the necessary tools to create the perfect watermark. It allows you to add multi-line text and align it to the center, right or left sides, as well as adjust the spacing between lines. No matter what font style you prefer - calligraphic, futuristic, minimalist, fun or classic - you're sure to find what you need in our library of 1000 fonts.
If you're not interested in a text watermark, you can choose a logo from our icon collection or upload your own and remove its monochrome background by clicking on the "Remove Background" button. Our mobile app allows you to resize the watermark, position it anywhere in the image, rotate it to any angle, and set the transparency level. We have a large selection of colors including several gradient options. You can fill the entire image with repeating watermarks by enabling the fill feature, this will provide maximum protection.
In the output settings you will have the option to select the quality of the branded copies, as well as enter new size options and choose whether you want the watermark to be automatically scaled or not. If you need to process a mixed batch of horizontally and vertically oriented photos, then in the preview section you can change the position, size and transparency of the stamp on each photo. The watermarks on other photos will remain unchanged.
Download Watermarkly for Android
Download Watermarkly for iOS
Instagram is an insanely popular platform with all sorts of people, good and bad. For this reason, watermarking the photos you want to post there is important, and sometimes even absolutely necessary. Displaying your name or logo will ensure that your work is protected from ill-intentioned intruders or accidental thieves. A watermark will also help promote your work, as your potential clients and fans will always be able to find your Instagram account. Our application will allow you to quickly and easily watermark photos, while enjoying the editing process.
Open the app and upload your images by clicking "Add Photo". To delete all uploaded photos, click on "Clear". If you only want to delete one image, tap on it and then tap on the cross that appears. Click on Next Step.
If you want to add a logo, click on Add Logo. Select "From Gallery" to access our icon collection, or "From My Phone" to upload your own logo.
If you want to add text, click on "Add Text". The word Sample will appear on the screen. To change it, tap the input area called "Text", erase the word and enter your text.
Click on "Font" to open the drop-down menu. If you know the name of the font you need, enter it in the Font Search. Tap the box next to "Color" and choose the color you like.
You can change the size, transparency, and angle of your watermark using the Size, Transparency, and Rotation sliders. Click on one of the two icons with four circles next to the word "Fill" to fill the entire photo with repeating watermarks. Selecting the square-shaped circles option will give you a parallel fill, while the diamond-shaped circles option will give you a checkerboard pattern. Choose from 33 effects in the Effect section.
When you're done editing your watermark, click on Add Watermark. Automatic watermark scaling is enabled by default. To disable it, uncheck the blue checkbox.
Click on "JPEG Quality" and choose from four options: "Fine", "Excellent", "Good" or "Medium". Click on "Resize Images" and select one of the options: "None", "Fit Width", "Fit Height", "Fit to Rectangle", or "Percentage".
To go to the preview section, click on "Brand Preview". Tap a photo to see how your watermark looks on it. Drag the watermark to a different location to change its position. Adjust the "Size" and "Transparency" sliders to change the size and transparency level of the watermark. Click on the purple cross in the upper right corner to exit the preview section.
Click on Add Watermark to start the stamping process. Branded copies will automatically be saved to your gallery. To send a watermarked photo directly to your Instagram, click on "Share Photos" and select "Instagram Stories" or "Instagram Post".
Done!
Add logo to stories. 5 Options for Instagram
Instagram Stories are one of the most compelling forms of content on the high engagement platform, so wanting to use them is a smart choice. When you compose a story, you put images and video clips together into a collage of sorts, but what if you want to brand it?
On the one hand, you can simply use your logo image as one of the images in your story. It works, but it's not very exciting. If you don't use it as a title screen, it can break the plot or even make people think it's the last slide when it isn't. Of course, it won't always be attractive on its own, and it doesn't have a built-in call to action.
So, how can you add a logo to your stories? There are several ways, let's talk about them.
Contents
- Getting Started: Preparing Your Logo
- Option 1: Logo Only
- Option 2: Embed Your Logo on Another Image
- Option 3: Turn Your Logo into a Sticker
- Option 4: Advanced Image Editing on PC
- Option 5: Smart Incorporate into Video Clips
Getting Started: Preparing Your Logo
The ideal logo source file is a 600 × 600 pixel square at 300 dpi.
Depending on the complexity of your logo, you can also make sure it has a transparent background. It's hard to put a big white border on top of your other images and make it blend into them, but with a transparent background, it can overlap other elements without causing problems. If you don't already have a transparent version, it's easy enough to make your own. Here are some simple instructions.
If you want to be more prepared, you can create a whole "signature kit" in advance. This can include everything from creating a transparent logo to creating a color palette to match your brand's look and feel. It's a good idea to have a few commonly used graphic design elements handy. This article gives you a good rundown of the different elements that a branded kit can include.
Put your logo on your phone the way you can. You can email it to yourself, you can put it in your Google Drive account, or even send it to yourself. I recommend keeping it on your camera roll in an album labeled "Logos" or some other similar place where you can always find it. If later you end up making variations on your logo—with and without text, for example—you can save them all in one album for quick and easy selection.
Option 1: Logo only
Using your logo page to introduce your story is a good idea. It brings your brand to the forefront, makes your presentation more professional, and lets you keep the same opening thumbnails for all the stories you create. On the other hand, it doesn't really work for you; it's just there, like the title page that the user has to go through to get to the real meat of your Story.
Option 2: Inserting the logo on top of another image
The second option is to use your logo as an element that you add on top of another image in your story. This is where the transparent background version of your logo comes in handy. Please note that the instructions below are for the iPhone; you can follow a similar process for android devices, but the steps are not quite the same. You can also get better results by downloading the advanced clipboard app, which will provide you with additional features.
Open your camera roll and open the logo album you created earlier. Find the logo you want to use and click "Export". This will give you various options for exporting the image. Select "Copy" from this list and your logo will be copied to your phone's clipboard.
Then download the Instagram application to your phone. If you haven't started creating your story yet, do so now. If you've already started creating a story and just want to add your logo on top of anything in it for now, open a draft story.
Double tap the screen and select "paste" when the option appears. This will paste the current contents of your clipboard, which should still be your logo. It will likely be large and centered, so adjust it by moving, rotating, and scaling with your fingers as needed. Position it where you want it to look good and then continue with the normal process of creating your story.
Option 3: turn your logo into a sticker
This is not an easy option. Instagram doesn't technically let you create your own stickers, but you can trick it into making one for you using a process similar to the one above. In this case, you need to prepare your story to work with the open app while you start the rest of the process. So, the first step is to open Instagram and go to your story where you create it.
Then go to the camera roll and find the export option again and copy it as in option 2. Now go to the application, there will be an option asking "do you want to add a sticker?" that you just copied.
Option 4: Advanced Image Editing on PC
Now all of the above options are basically workarounds to create images with your logo on your phone. However, many brands do not work with their phones; they create their images on a PC, and upload their images and videos to their mobile devices for publishing. Well, a lot of brands use platforms like Latr these days, but none of these platforms can create stories, so you still need to use a mobile device.
In this case, just add your logo to any image you want to use in the story.
If you don't want to pay for Photoshop, I recommend the free Paint program.
You can do a lot of editors, unlike the simple tools provided to you on Instagram or on your mobile device. However, if you can't get what you want, it might be better to hire a graphic artist to do your images for you.