Instagram presets are a no-brainer for any social media marketer.
Not only do they help speed up your workflow, they add that extra polish that sets your brand apart. And with more than 25 million businesses on Instagram, a little polish can go a long way.
Whether you’re new to presets or you consider yourself a preset pro, there’s plenty here for every skill level, including:
So, ready to get started? Ready, preset, go!
Save time editing photos and download your free pack of 10 customizable Instagram presets now.
Instagram presets are predefined edits that allow you to transform images in a single click. In other words, they’re basically filters. Presets can be downloaded on your computer or phone, and are available from a variety of sources.
You can also create your own presets for Instagram using the photo editing app Lightroom. This can come in handy when you like the edits you make on a specific photo and want to remember them for later. Or it’s good timesaver when you find yourself making the same edits to photos repeatedly.
Here are the top three reasons you should consider using presets for Instagram:
No more fussing over photos for minutes upon hours. The whole point of presets is that they are hassle-free. They can be applied to images one by one, or to batches of similar photos.
The nice thing about using Lightroom presets over Instagram’s editing tools is that you can size and save your photos in high quality.
That way you can easily format it for a post or Instagram Story, where editing options are limited.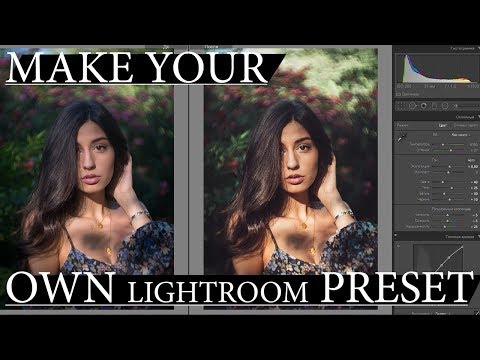 You can also share the photo on other social media sites with minimal extra effort.
Bookmark this social media image size guide for future reference.
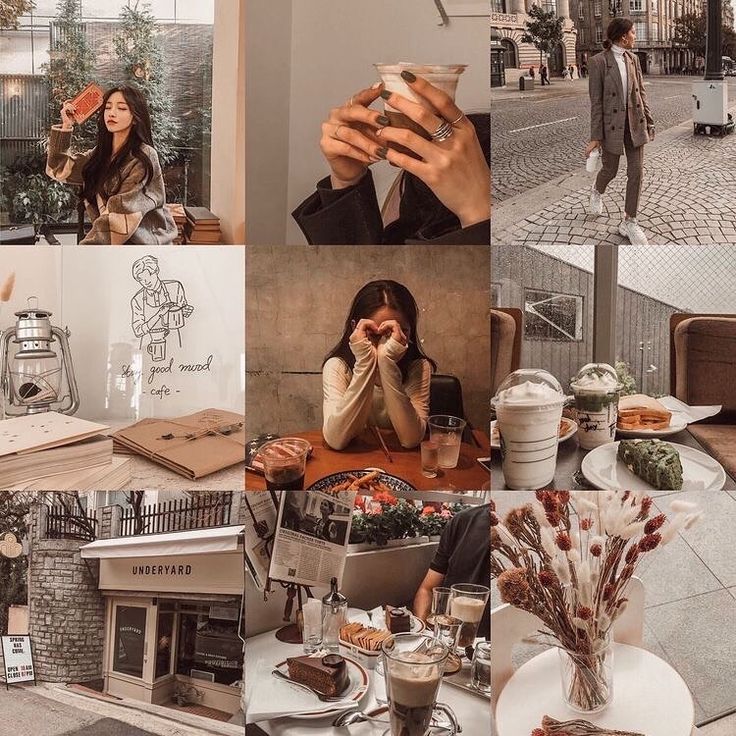
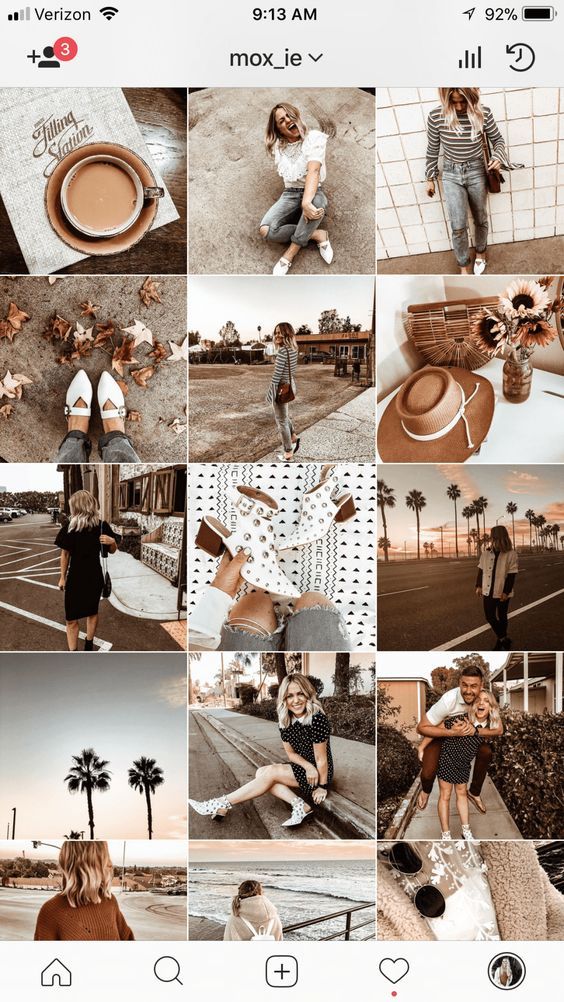
Instagram filters allow you to create a cohesive aesthetic. That may not seem super important. But it could be the difference between someone following your company or not.
Visuals convey a lot of information. Without a streamlined style, your brand’s personality can get lost in the shuffle. Even worse, it could come across as chaotic and untidy.
Presets can help define your brand’s visual identity. For example, a dark and moody editorial look might fit a premium clothing company. Bright and sunny might be a better fit for a travel or childcare business.
Once you determine a preset that works for your Instagram photos and fits with your brand, you can use the same one for all your photos instead of fiddling to achieve the same look every time you create a new post.
The #nofilter days are long gone, especially if Instagram is an important channel for your business. Presets add the polishing touches that make your content look professional.
Creating strong visuals was once expensive. Now, with so many free tools available, there’s no excuse for a brand to post subpar content. Poor-quality images reflect on your brand. The good news is, high-quality visuals can have the opposite effect.
Show your customers and clients that your business pays attention to detail. Take advantage of Hootsuite’s free Instagram presets to sharpen your visual game.
If you’re new to using presets for Instagram, they can seem a bit daunting. But our simple, step-by-step guide takes all the mystery out of it.
1. Download the app Adobe Lightroom Photo Editor on your mobile device.
2. On your desktop, download the zip file below for our free Instagram presets, then unzip it.
Save time editing photos and download your free pack of 10 customizable Instagram presets now.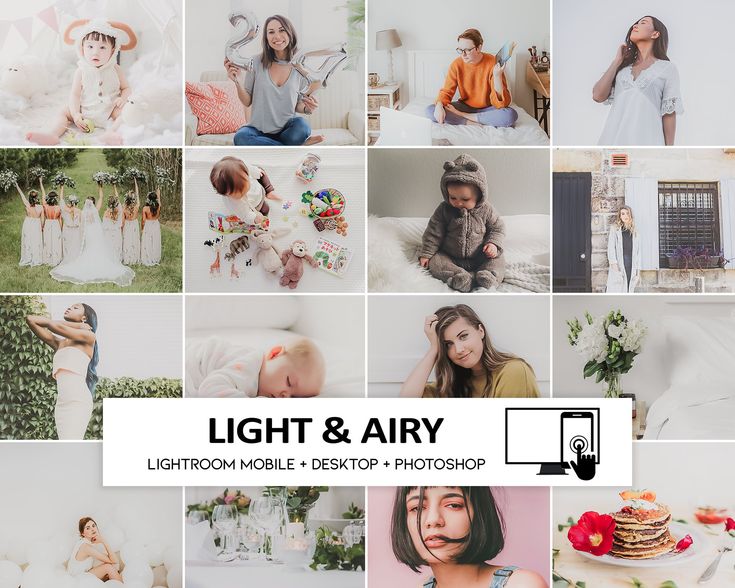
3. Open each folder to make sure it has a .png and .dng file in it.
4. Send the .dng files to your phone by email or using Airdrop. Open them on your mobile device.
5. Open each file. To save it to your phone, tap save icon (on Apple devices this is a box with an upward arrow). Then select Save Image. You may see a message that reads “Unsupported file type.” This is normal.
6. Open Adobe Lightroom. If you do not already have an account, sign up. Tap the import icon in the lower right-hand corner to import the .dng files.
7. Hootsuite’s free Instagram presets should now be in your Lightroom photo library.
8. Choose the preset you would like to use. Tap the three dots in the top right corner. Click Copy settings and then the checkmark ✓ in the upper right corner.
9. Click the arrow icon in the upper left corner to go back to your Lightroom photo library. Select the photo you would like to edit.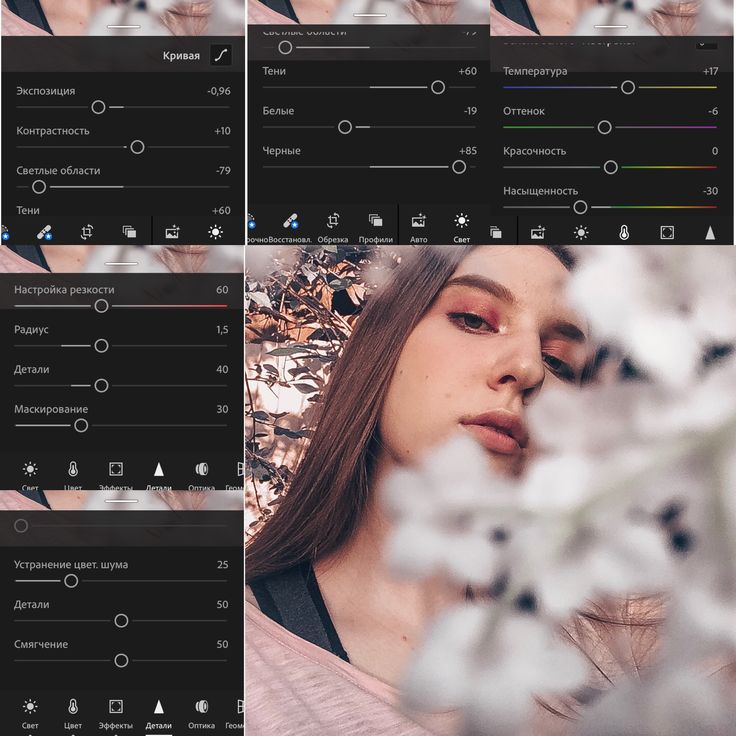 Tap the three dots in the top right corner, and select Paste settings. If you don’t like the effect, just tap the under arrow at the top of your screen.
10. Once you are happy with your image, click the save icon and to save the image to your camera roll. Make sure to choose the maximum size available.
Now you’re all set to share your photo on Instagram, or any other social media network.
Save time editing photos and download your free pack of 10 customizable Instagram presets now.
Get the free presets right now!
Lightroom presets for Instagram do most of the work for you, but there’s always room for a little fine-tuning. Use these tips for maximum preset potential.
Not even the best Instagram presets can rescue a bad photo. So before getting started, make sure you brush us on photography 101.
Image quality is important. But that doesn’t necessarily mean you need a fancy digital camera. If you have access to one and know how to use it, you should. If you don’t, use your phone. Smartphone cameras keep getting better and better.
Here are a few photography basics:
Here are some more tips for creating engaging visual content on social media.
There’s no such thing as a one-size-fits-all Instagram preset. Some presets simply won’t work with certain photos, in which case you shouldn’t use them.
In other cases, minor adjustments may be required. For example, perhaps the Instagram preset makes the photo too dark. Something like this can be easily fixed by upping the exposure or reducing the shadows in the Light tab.
You can also use Lightroom to straighten crooked photos, or to crop out the unwanted photobomb. These features can be found in the Crop tab.
A cardinal sin in the creative world is oversaturation. There are almost no cases where a supersaturated image is called for—and those times are best left to professionals.
Watch out especially for high-volume blues and reds, or the lime green and neon pinks that are caused by chromatic aberration. To remove chromatic aberration, scroll through the menu at the bottom of your screen and select optics. Then tap Remove Chromatic Aberration.
Vibrant colours can be created in various ways. In many cases it can simply be a matter of brightening the exposure photo that was taken in a dark setting. You can also adjust colour temperature and vibrance in the Color tab of the menu.
Remember, one of the best reasons to use Instagram presets is to ensure your feed has a cohesive look.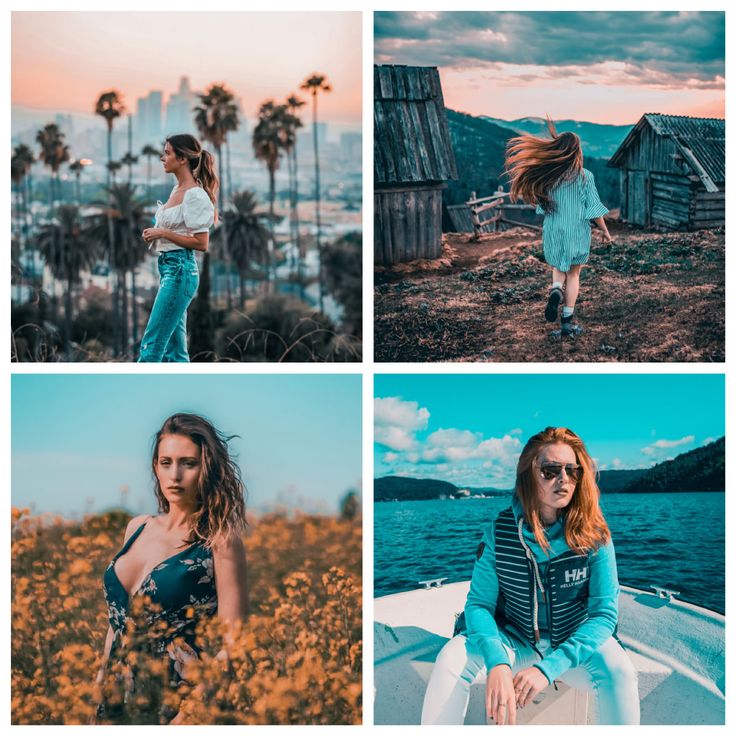 That won’t work if you use too many different kinds.
Keep a few filters on hand that work for different styles of photos you post. This way you can add variety to your feed without compromising its overall cohesion. Take a checkered pattern approach so that you evenly alternate between presets and styles.
You can plan and preview what your feed will look like with Instagram tools like UNUM or Preview App. Or do it the free and old-fashioned way and storyboard. Just copy images into three-square grid in a Google Doc or related program.
After that you can go ahead and schedule your posts. Here’s how to do it.
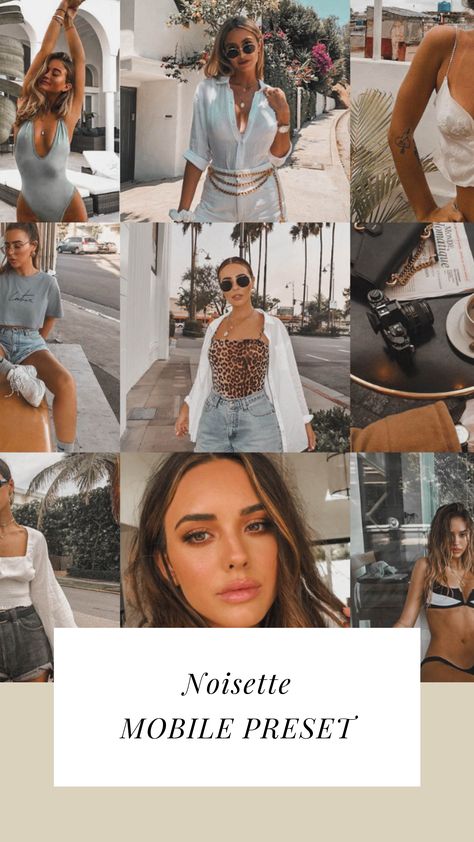
Light (02)
Sepia
Neon
City
Golden
Mountain
Beach
Save time managing your Instagram presence using Hootsuite.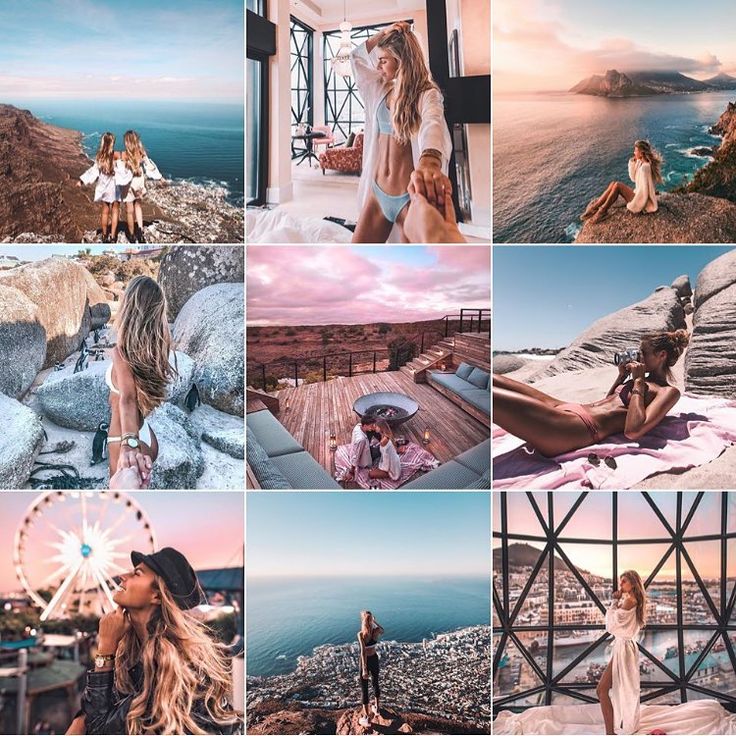 From a single dashboard you can schedule and publish your perfectly edited photos directly to Instagram, engage your audience, measure performance, and run all your other social media profiles. Try it free today.
Get Started
Have you ever scrolled through Instagram and thought, “Dang. These people have their stuff together”?
Some accounts just have a beautiful, cohesive look that makes you want to binge-stalk their feed for an hour.
Believe it or not, these people aren’t using a magical formula or hiring a high-end designer for their Instagram. Nope.
The Instagram accounts we know and love owe their popularity to one thing: filter presets.
Instagram presets help you get a beautiful, consistent effect on your photos without slaving away in Photoshop.
Instagram presets are filters you use consistently on your Instagram posts.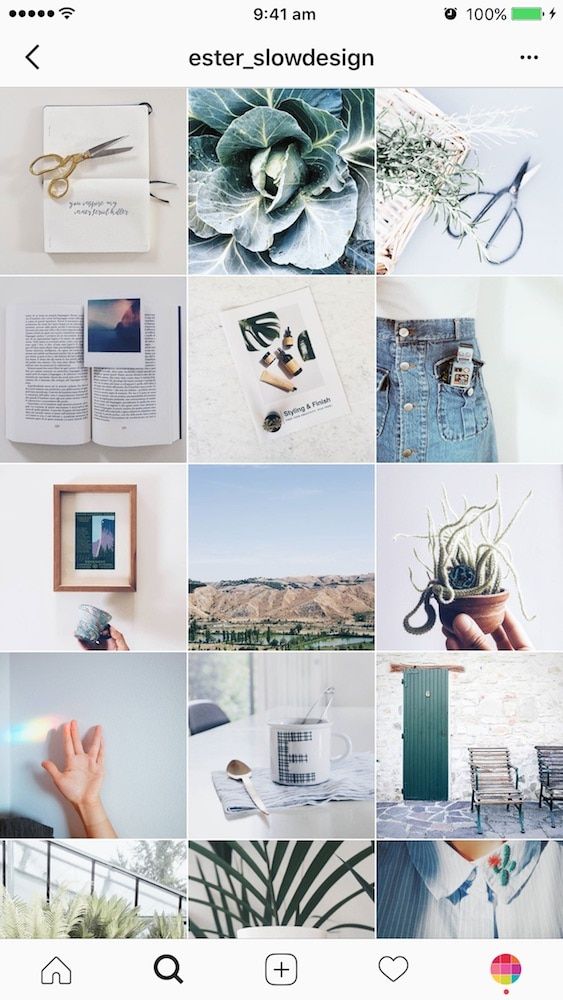 These presets are a combination of different photo settings that help you get a very specific look to a photo.
You can reuse these filters to your heart’s content, giving your followers the cohesive, delectable content they crave.
You can’t save these presets in Instagram proper, though. Most folks create filters in Adobe Lightroom.
With just one tap, Lightroom automatically edits your photos to fit your presets. You upload the edited photo to Instagram and watch the likes roll in.
(Oh, and did we mention you can make this preset 100% unique to your business? No need to use the Lark filter ever again.)
Presets are still flexible enough that you can make manual adjustments even after applying a filter, too.
While some brands create their own Instagram presets, you can also buy specialized presets, too. Some influencers even sell their presets so you can get their very particular look.
If this sounds like some Photoshop voodoo magic to you, don’t worry. Here’s a quick breakdown of how brands can actually use presets:
But are presets really worth the hassle? Does importing a photo from Lightroom really make a difference on Instagram?
Our answer is, “Hell yeah, it does.”
You have just a few seconds to impress people on Instagram.
Make the most of that first impression with presets. We love them for 3 big reasons.
You have to post quality images on Instagram. It’s non-negotiable if you want to grow your following organically.
Instagram presets help you enhance a photo’s natural beauty, giving your followers the quality and consistency that they expect from your brand.
Do you really have time to edit 50 photos by hand?
We didn’t think so.
Instagram presets help you quickly apply the same filter to tons of photos at once.
Of course, you should still check the photos before posting, but still. Presets simplify a process that would normally take hours.
You probably have multiple people managing your social media. When that happens, your consistency can suffer.
Instagram presets take the guesswork out of posting on social media for your team.
Show a consistent color palette, tone, and effects on your Instagram account. Immediately communicate your brand feel with consistent presets designed for your audience.
Interested in jazzing up your Insta with some badass presets?
Great!
Save yourself the headaches by following these quick do’s and don’ts of using Instagram presets.
Don’t assume a preset will completely revamp your Instagram overnight. The same preset can look amazing on one photo and look fugly on another.
That’s why you shouldn’t spend too much money on just one preset. You might need to buy several to get the exact look you’re going for.
Speaking of which, make sure you’re using the right preset for the right picture.
You don’t want to use a dark, sinister filter on a happy photo at the beach, right? Or a preset designed for nature photos that makes human beings look like death warmed over?
You get the picture.
Be discriminating about where you apply each preset. Always check how the photo looks with the preset before uploading it to Instagram.
Don’t treat Instagram presets as a cure-all for bad photography. Your photos still have to be high-quality—don’t try to put lipstick on a pig.
Use the Rule of Thirds when taking photos on your smartphone. Source images from trusted content creators and professionals to get the most out of your investment.
Yes, you should always use your presets! You paid for them, after all.
Even if you’re sharing a simple image, subtle changes in contrast and colors have a big impact on your overall aesthetic.
You’re investing in consistent, quality content, so don’t skimp on using the filters you’ve created.
Instagram presets won’t create something out of nothing. Don’t assume a preset will lead to a swarm of engagement and sales.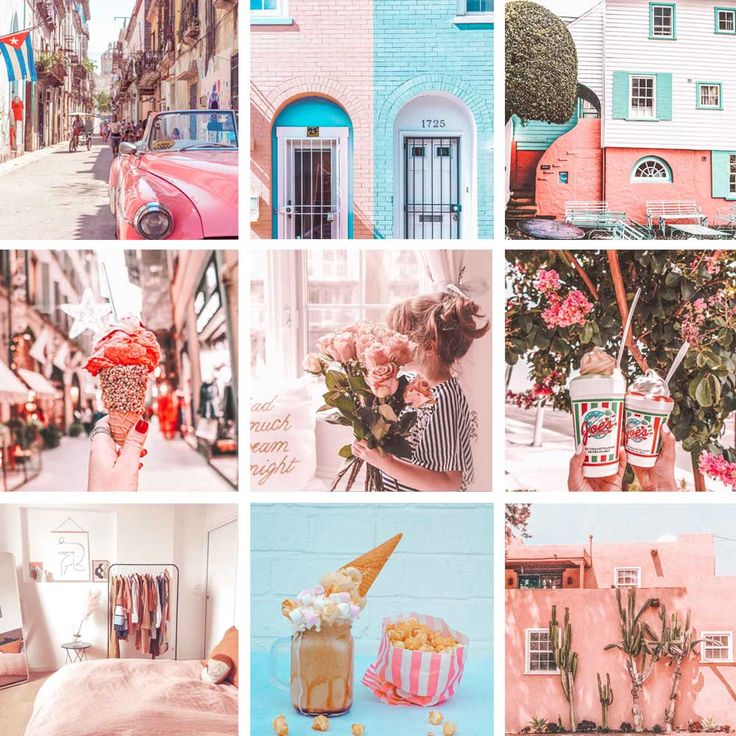
It doesn’t work that way.
Presets enhance the quality that’s already there. If you’re not getting traction on Instagram, look first at your content and approach.
Unless you have a graphic designer on staff, you probably should buy an Instagram preset.
But not all presets are created equal. You need to download a preset from someone reputable.
Not sure where in the world to buy something like that? We’ve got you covered.
Check out these 4 places to buy high-quality Instagram presets for your brand.
Presets are the fastest way to save time and share a consistent image on Instagram.
Presets should highlight your brand’s best features, but they aren’t a miracle worker. Remember, quality content should always come first.
But what if you need help with Instagram content?
Trend’s network of vetted influencers can create content on your behalf, creating the exact look and tone you need.
Test drive Trend now to see why more brands are trusting their content to experienced influencers.
Useful
22 Jun
Maintaining a consistent visual style is the golden rule of an Instagram profile. It is it that helps bloggers develop popularity and win the high-profile title of influencers. While regularly creating photos with a consistent visual concept seems like a daunting task, there is a powerful tool that can make it easier. nine0003
Instagram presets are a pre-saved set of settings that allow you to transform images. In other words, it is a set of parameters such as exposure, white balance, curves, etc., that can be applied to a photo instantly with a single mouse click or screen tap.
For example, if a person thinks their photos look dark, they should apply a preset to increase the exposure. Or, if there is too much noise in the image, you can choose a preset to reduce noise. This also works with other settings. Presets significantly speed up the processing process. nine0003
The popularity of presets on Instagram is justified by a simple reason - they help to maintain a profile in a single style.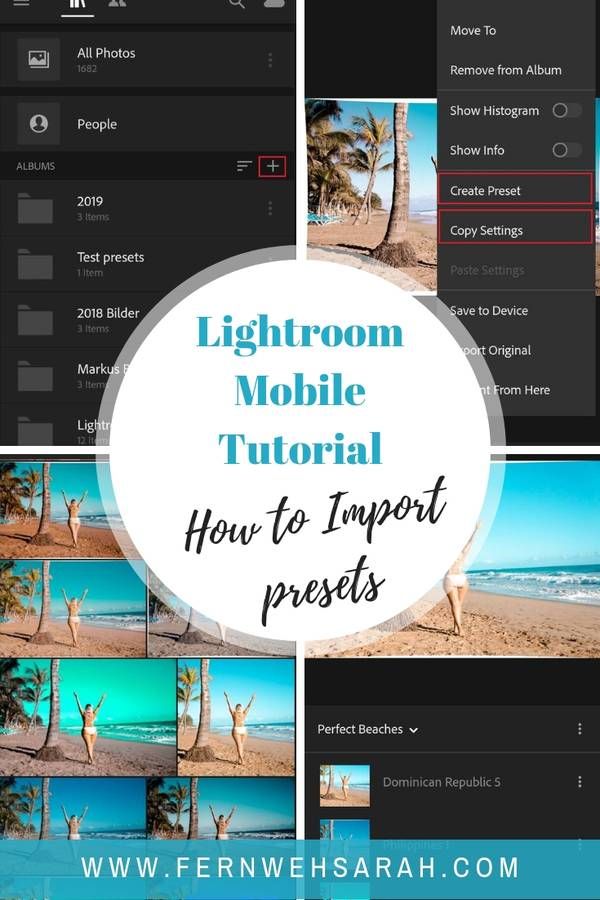 Initially, one photo is processed. After that, the set of settings can be saved and applied to other pictures. Presets help maintain visual harmony in your account.
A few more benefits of presets:
When it comes to using presets, there is one thing to keep in mind: the image must be of high quality initially, otherwise there will be no point in processing. In order for the profile posts on Instagram to be aesthetic and combined with each other, in the process of shooting, one should not forget about good lighting and maintaining the same color scheme.
To keep your Instagram profile consistent, you can download a preset or design your own. nine0003
Lightroom is a photo editor from Adobe. It is thanks to this program that the popularity of presets on Instagram has increased. It can be downloaded on Android or iPhone, or installed on a PC.
Instructions on how to create presets in Lightroom for Instagram using the application:
Here's how to make presets for Instagram through the program on the computer:
There are many filter packs available on the Internet. You usually have to pay for the best ones, but if you search well, you can also come across free presets for Instagram. Some bloggers who specialize in photo editing often share filter selections on their profiles. nine0003
Public pages on VKontakte, Telegram channels and thematic online forums are the best places to find presets for Instagram for free. By simply entering “free presets” into the search box, the user will see many groups.
On smartphones, it is best to use Telegram channels. It only takes one click to download the filter pack through this app. Here is a more detailed instruction:
 nine0008
 The preset photo will be saved in the mobile device memory. It remains only to copy the filters and use them on the desired images.
Important: smartphones can only support .dng files. Files with .xmp or .irtemplate in their names are for computers. nine0003
To install a preset in Lightroom on your computer, you need:
Another method:
How to use the preset with a mobile device:
To use a preset on multiple images:
In addition to Lightroom, there are several other decent applications for creating and using presets:
 All of them are divided into groups according to similar presets. Also, VSCO users have the opportunity to develop their own unique settings package in the "Recipe" section.
 An alternative way to use a preset:
Presets make photo editing faster and easier. Almost all successful Instagram users with a strong personal brand use original filter packs to maintain a consistent visual concept across their profiles.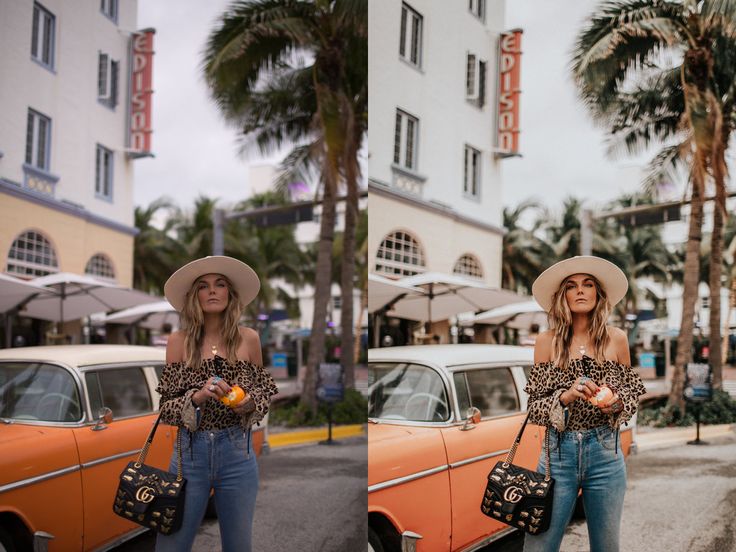 In the online space, you can find many beautiful presets that can transform a photo beyond recognition. To achieve popularity on Instagram, you should choose one and use it on a regular basis.
5768
6 min.
The Instagram interface only gives you one chance to make a first impression. The profile opens in the "layout" mode, without the texts of the posts, therefore, only the general appearance is evaluated.
A competent combination of visuals or “a single style on Instagram” is called the buzzword layout. A good layout has two main criteria:
As has long been known, 80-90% of information enters the human brain through the eyes. When visiting your profile, the user only needs seven seconds to decide on the “need” of subscribing to the account. Maintaining a profile in a single style, or rather, a preset, helps to increase the chances.
Preset are saved settings for photo processing. That is, remember all the exposure, contrast, hue, saturation and sharpness values when editing the first picture, and then use them when editing subsequent ones. nine0003
By the way, the conversion of the number of subscriptions for accounts with a harmonious feed is several times higher than for ordinary ones.
You must have noticed that many bloggers have their own processing style. Due to the unity and at the same time diversity, a harmonious, interesting and attractive tape is obtained, which you want to watch.
It's also important to know that applying filters and setting the color balance on the picture takes place directly in the Lightroom mobile app. nine0003
Lightroom is an essential application for photo editing. The user can add different shades, resize photos, work with gradients and a standard photo editor. Instagram photo preset can be added and saved in this way:
To create and share your own preset, just follow these steps:

How to process photos in Lightroom using saved presets, we found out. Everything is quite simple: find, download, copy. Let's decide on the palette and how to choose it correctly.
Very often when we take photos and post them randomly, the photos don't line up with each other. nine0003
Follow these 5 rules to match them:
In a light-colored tape, each dark photograph will be a large black spot. If you want to get a beige and pastel ribbon, then you must understand that bright colors will spoil your photos.
A selection of presets is ideal for maintaining a consistent profile. One and for “all occasions” will not work. The ideal scheme is the formation of a personal library of 3-7 presets in the same tones. They will create the same layout. nine0003
It is important that the ribbon looks interesting. To do this, you need to learn how to combine different plans, angles, details, macro and blur shots to create a common atmosphere.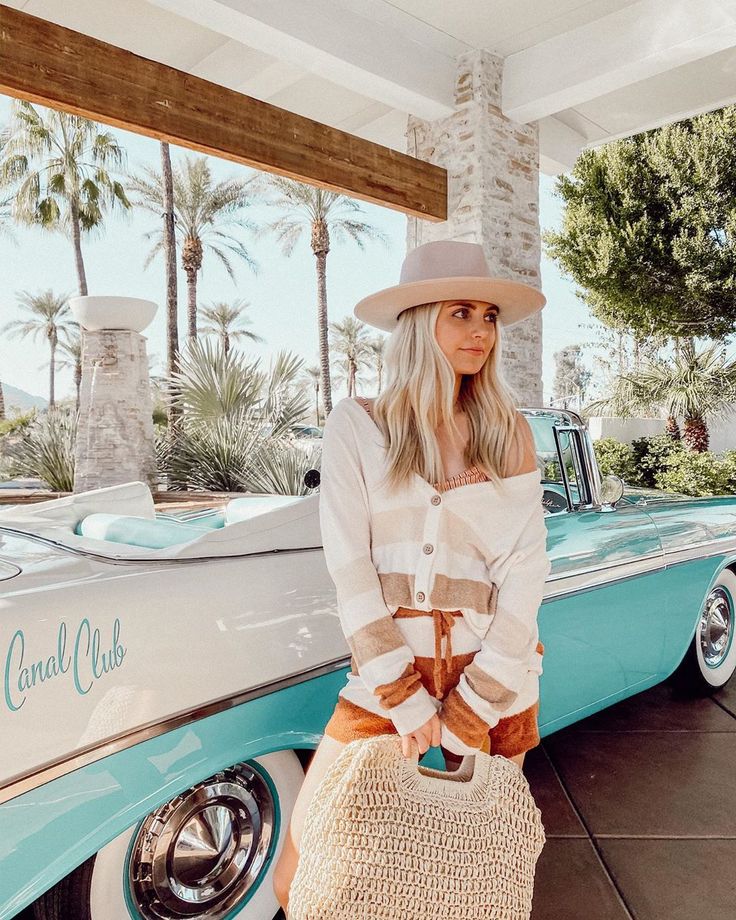
No matter how informative your posts are, the picture is important. Watching only the “face” is not interesting. You need to dilute the photos with what you yourself like: shooting food, photographs of architecture, flatley.
Ideally, the preset fits only one photo or a maximum of two. But this does not mean that every time you need to create a new preset and spend half an hour or even an hour of your time on it. It is enough to “twist” the preset for the selected photo, spending 2-5 minutes on it.
“Correction” is less expensive, and at the same time you will definitely not lose the unity of the profile style and save time, which is very important.
If you really want to add something extraordinary, upload the photo to the carousel. Leaving the “main” photo with the color you need, you will preserve the naturalness and not lose the layout. And the unexpected “film frame” creates a black spot that will let you down. nine0003
Very often photos do not corny match in light. And no matter how much you like them individually, they look bad together. That is, random order is not about a single style and not about a beautiful visual.
The following applications will help you with this:
Most often, trends are seasonal. But there is a classic that will last forever. The main thing is not to go too far with diversity, and then a single style cannot be avoided.
Here's what will help shape the aesthetics of your profile in 2021: