Facebook is, by default, set to make all your information public. But what if you want to keep your profile private and have more control over what other Facebook users, who aren’t your friends, can see on your profile? Is it possible to change your account’s default settings?
Unfortunately, there’s no magic switch to make your profile completely private by default. However, if you know the correct settings to tweak, you can make your profile effectively 100% confidential.
If you’ve been wondering how to make your Facebook profile private, this article walks you through the steps.
If you want to make your Facebook profile private via a browser, here’s what you should do:
Nowadays, many people only use Facebook on their phones. Fortunately, the process for those who want to make their profile private is reasonably straightforward. It is primarily the same for both iPhone and Android devices. There are two ways to change your privacy settings on the Facebook mobile app.
If you want to do a quick checkup, follow these steps:
Going through the Privacy Checkup settings makes it easy to limit what others can see. But, if you want to have more options, you can follow these steps to make more details private:

These steps allow you to make things other than your posts and contact information private. For example, the Followers and public content option lets you limit who can comment on your public posts.
What if you want to hide your Facebook profile content from those who aren’t your friends? How can you do this? Just follow the steps below.

You can also change this setting on each of your posts by tapping the three dots in the upper right-hand corner (of that post). Here, you can select who can see your status (public, friends only, private, custom, etc.).
In closing, anonymity doesn’t happen with one click, but making your Facebook profile private is relatively simple. All the options appear in the “Security and Privacy” section within “Settings. ” Just follow the steps provided in this article, and you’ll have no issues.
Here are the answers to more of your questions about Facebook privacy.
Yes, anyone can see your profile picture, even if they don’t have a Facebook account (search engine results, profile URL, etc.). When you set your profile to private, other users can still see your profile picture and a few details about your account, but they can only see posts you made “Public.”
One of the convenient features of Facebook is the ability to see what your profile looks like to others. This feature is precious when checking what information you have set to “Public,” such as posts, ‘Friends’ lists, etc. You can follow these steps to view your profile as it appears to the public:
1. Open Facebook and tap on the arrow in the upper right-hand corner.
2. Tap on the Hamburger icon(three horizontal lines) in the upper right (Android) or in the lower right (iPhone).
3. Go to your profile.
4. On your profile page, tap on the three horizontal dots to the right of Edit Profile.
5. Click or tap on View As.
Unfortunately, you cannot make your profile picture private. If you upload a photo to use as a profile picture, anyone can see it. However, you can reset your profile image to Facebook’s default photo (the silhouette of a person on a blank background). Navigate to your “Profile Picture photo album, select your current profile picture, and click on the three-dot icon to delete the image.
You can also set your profile image to something commonplace, like a favorite superhero or symbol. Be careful with copyright infringement laws, though.
Home » How To » How To Make Your Facebook Completely Private To Non-Friends Or To Hide From Public
by Hemant Mendiratta
As an Amazon Associate and affiliate of other programs, I earn from qualifying purchases.
If you are worried about anyone stalking your Facebook account then there is no need to bother as different account settings on Facebook allow you to make Facebook private from Public or friends. This article will solve all your problems on Facebook regarding your privacy and visibility of your content (Photos, Profile Pictures, Posts, Status, Friends) to the public. Here, we will let you know about all the settings you need to configure to make Facebook completely private from the public.
Also Read: How To Change Facebook Name Without Waiting
Contents
Watch this video to see how to do it:
Here we will list out all the different settings you need to make to make Facebook completely private to non-friends.
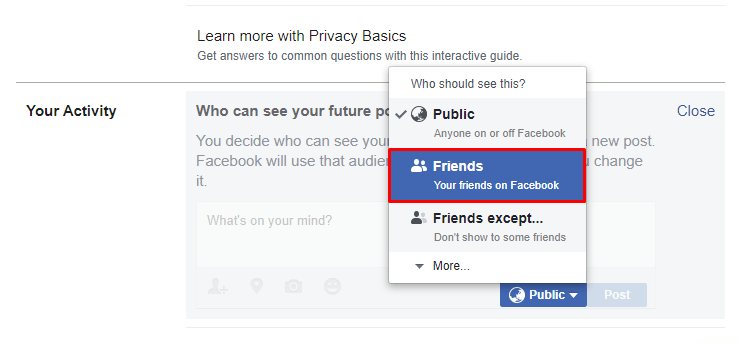
1. Log in to your Facebook account and click on the drop-down menu icon at the top right and select Settings. Under Settings select Privacy from the left-hand side. Here, you need to change the following settings under Your Activity :
 After confirming click Close and your settings will be saved.
2. Under How People Can Find and Contact You, make the following settings:
 Click Close to save the settings.
3. On completing with Privacy now Select Timeline and Tagging from the left side of the screen. Change the following settings under Timeline and tagging settings.
There are three settings under Timeline and Tagging, Timeline, Tagging, and Review respectively. To change these settings follow the steps shown below:
Under Timeline:
After this your settings should look like as shown in the screenshot below :
Under Tagging:
Under Review:
With this, you can stop someone from tagging you on Facebook.
4. Now from the left side of the screen select Stories and make sure both the options under it are changed to Don’t Allow as shown in the screenshot below.
5. After that select Public Posts on the left side and change Who Can Follow Me from Public to Friends.
6. Other than that you can also disable the face recognition feature on Facebook to enhance your privacy. This will ensure that Facebook doesn’t automatically suggest you as a tag in a photo in which you are present.
7. Now let’s hide your personal information.
Similarly, you can change other settings like Contact Information and others and make them private and not visible to the public or non-friends.
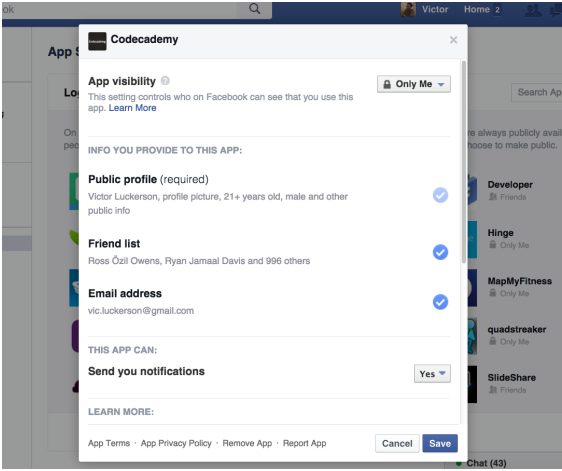
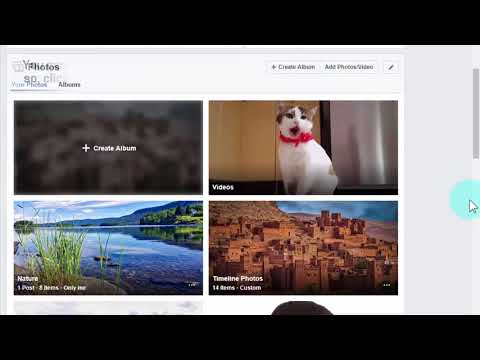
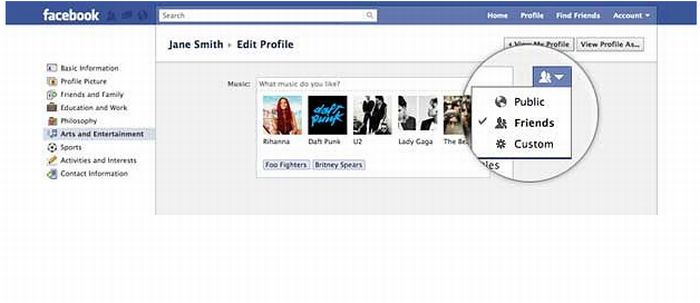
8. In order to make your Facebook profile picture private from the public go to your Profile Page and click on your profile picture. On the right-hand side of the screen under your Name click on the globe icon or people icon and change it to Only me to make your profile picture completely private even private for the people who are friends with you.
Choose Friends if you want to make it visible to your friends.
9. For more privacy on Facebook, remove the location information from your posts. This way no one will get to know about your location when you upload a new post on Facebook next time.
So these were the settings you need to make in order to make your Facebook account private from the public.
Also Read: Most Interesting Facebook Facts
Following these tips, you can now easily reveal less information about yourself on Facebook to the public. Also, note that Facebook keeps on changing its UI, so these settings might change a bit while you are reading this article, however, the steps remain the same for all the settings.
Do let us know if this tutorial helped you to make your Facebook account completely private except for friends. Also, share any other settings which we might have missed.
Help Center
We are updating the mobile version of Facebook.com. More
Open profile
This feature is currently only available in some countries and on certain devices.
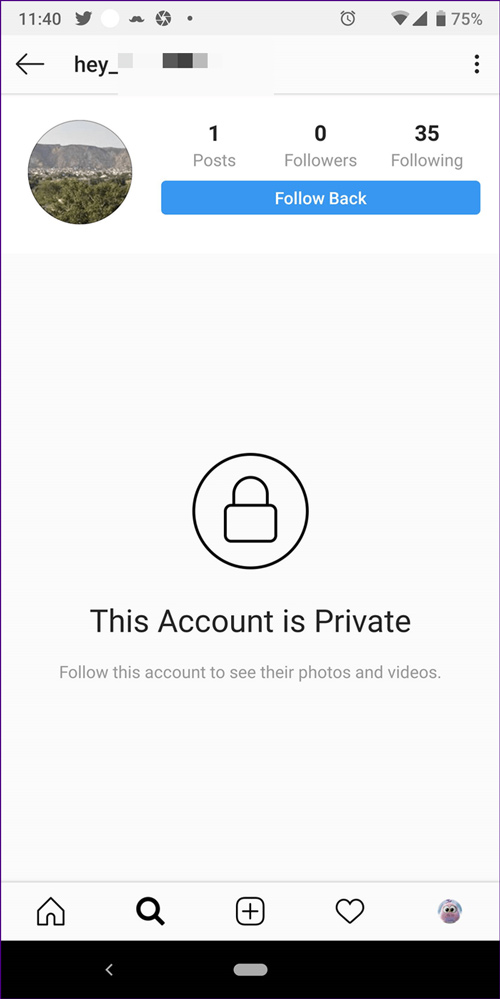
If you see the icon on a person's profile, it means they have closed their profile and restricted access to their content to people who are not on their Facebook friends list.
When a person closes their profile, only their friends see the following content:
Profile photos and publications.
Full size profile and cover photos.
Stories.
New publications and photos.
Also:
Any public posts that this person has previously shared will only be visible to their friends.
The profile and label verification function will be enabled.
Information from the "Information" section of his profile will only be partially visible.
Other ways to manage privacy
If you are unable to close your profile, manage your privacy using your privacy settings:
Use the privacy check.
Select the audience for the publication.
Edit basic profile information and choose who will see it.
Change history privacy settings.
Enable the profile check feature.
Apply the mark check function.
Enable profile photo protection.
Manage settings for adding friends and subscriptions.
Choose who can find your profile using your email address and mobile phone number.
Was the article helpful?
How do I enable Facebook profile photo protection?
Can I see who is viewing my Facebook profile?
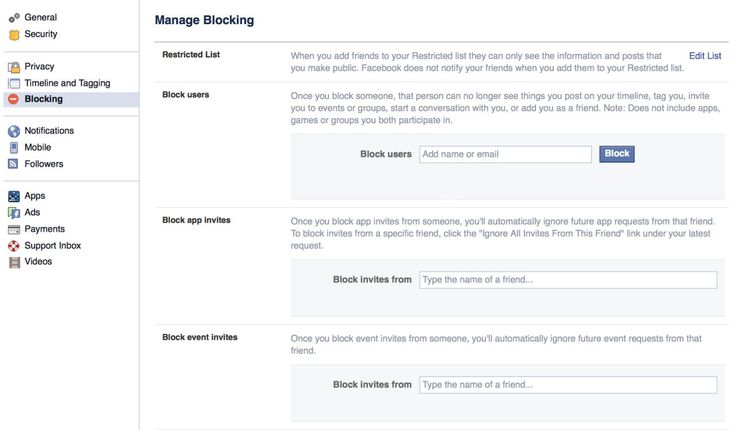
Blocking Facebook profiles
How do I report a Facebook profile?
How do I delete my Facebook Dating profile?
Information
Confidentiality
Conditions and rules
Advertising preferences
Vacancies
COOKIE
Create an ad
Create a page
Facebook-excellent online. where people meet, communicate, start business and even personal relationships. However, for a considerable number of people, the degree of openness and transparency that Facebook offers to its users is not an easy test. After all, these people value privacy very much.
Therefore, we will analyze how to protect your account from unwanted interest, and how to make sure that information about one user does not become public domain.
Content:
There are no so-called "private profiles" on Facebook, when information about the user is available only to him. However, this does not mean at all that the social network toolkit does not contain the components necessary to protect information. Each user is able, using individual settings, to determine the degree of accessibility of the information contained in his profile.
Facebook's privacy settings are responsible for this segment. This is a very extensive section in the settings menu. In addition, users should be aware that the social network offers them to choose the privacy settings for the published content.
When placing a post or any information, the user can see icons in the form of a padlock, a silhouette or a globe next to the field to be filled. They are the regulation of the degree of confidentiality of information and content posted on the social network. What is not for prying eyes should be marked with a padlock, since this level of confidentiality means that the publication is completely closed to everyone except the account owner.
In the desktop version of Facebook, you can block access to your personal profile in the following way:
If there is a desire that any information in the Facebook profile should not be available to outsiders at all, and if privacy settings apply to it, then you can safely use the "Only me" option.
Allow only some friends: if there is something that can only be accessed by some friends, then you can allow them access using the "Specific Friends" access.
Exclude only some: there is an option "Friends except", which optionally allows you to filter access to users who are in the list of friends.
Important! Every Facebook user should know how to check the availability of personal information that he entrusts to the social network.
To do this:
In particular, if you don't want everyone to know where you work, remove the default globe icon in the Work and Education section. Select, for example, "Friends only". The same is desirable to do with the email address and phone number.
When using a social network using a mobile device, you can hide information that is not supposed to be available, so to speak, to the general public.
What you need to do:
The lower part of the section is given for options that are responsible for the degree of confidentiality of publications, subscriptions and stories. In the same place, if necessary, you can configure accessibility levels.
As you know, a page is a kind of Facebook account that is available to all users. Therefore, the page cannot be closed.
But certain actions can be taken to regulate the degree of confidentiality.
If an unwanted publication appears on the page, you need to click on the name of its author, then on the ellipsis and click "Deny access to the page."
To introduce these restrictions, you need to:
If you need to enter a restriction for users of a certain age, then in the "General" section there is a subsection "Age restrictions".
Facebook groups can also set different levels of accessibility for users who are not members of these communities.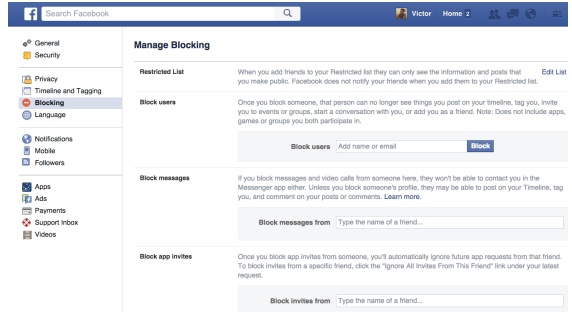 By this parameter, groups are divided into:
Facebook group privacy settings are specific: you can only change the privacy level of a group once every 28 days. If the group has less than 5 thousand members, there are no problems with group status changes. But if the number of participants is more than 5 thousand, and the group positions itself as closed, it will not be able to switch to open status.
How to change the status of a group: