Whether you're setting up a brand new Facebook Page for your brand, or you just want to make the most of your existing one, it’s probably a smart move -- Facebook is home to nearly 2 billion monthly active users.
It should be easy enough, right? Just slap together a photo, a couple of posts, and expect the leads and customers to roll on in, right?
Wrong.
If you're not creating a Facebook Page with a comprehensive strategy to get noticed, Liked, and engaged with, the chances of actually generating leads and customers from it are pretty slim.
For example, you can’t just choose any picture -- you have to choose one that’s the right dimensions, high-resolution, and properly represents your brand.
But it doesn’t end there -- so we compiled the tips below to make sure you're creating an engaging page that takes full advantage of everything Facebook marketing has to offer.
Listen to an audio summary of this post:
Don't miss this live virtual event with Facebook and HubSpot on how to grow your business faster than ever with Facebook
We’ve come across many well-meaning marketers and entrepreneurs who create personal profiles for their brands, instead of an actual Facebook Business Page. That puts you at a huge disadvantage -- you’re missing out on all of the content creation tools, paid promotional opportunities, and analytics/insights that come with a Facebook Business Page. Plus, a personal profile would require people to send you a friend request in order to engage with you, and the last thing you want to do is make that more difficult for customers.
And while you’re at it -- don’t create an additional public, “professional” profile associated with your business. For example, I already have a personal profile on Facebook that I largely keep private; the practice I’m talking about would be if I created a second, public one under the name “AmandaZW HubSpot,” or something along those lines. People usually do that to connect with professional contacts on Facebook, without letting them see personal photos or other posts. But the fact of the matter is that creating more than one personal account goes against Facebook's terms of service.
We’ve all heard those horror stories about folks who accidentally published personal content to their employers’ social media channels -- a marketer’s worst nightmare. So to avoid publishing mishaps like those, assign Facebook Business Page roles only to the employees who absolutely need it for the work they do each day. And before you do that, be sure to provide adequate training to those who are new to social media management, so they aren't confused about when they should be hitting "publish," what they should be posting, if something should be scheduled first, and who they should be posting it as.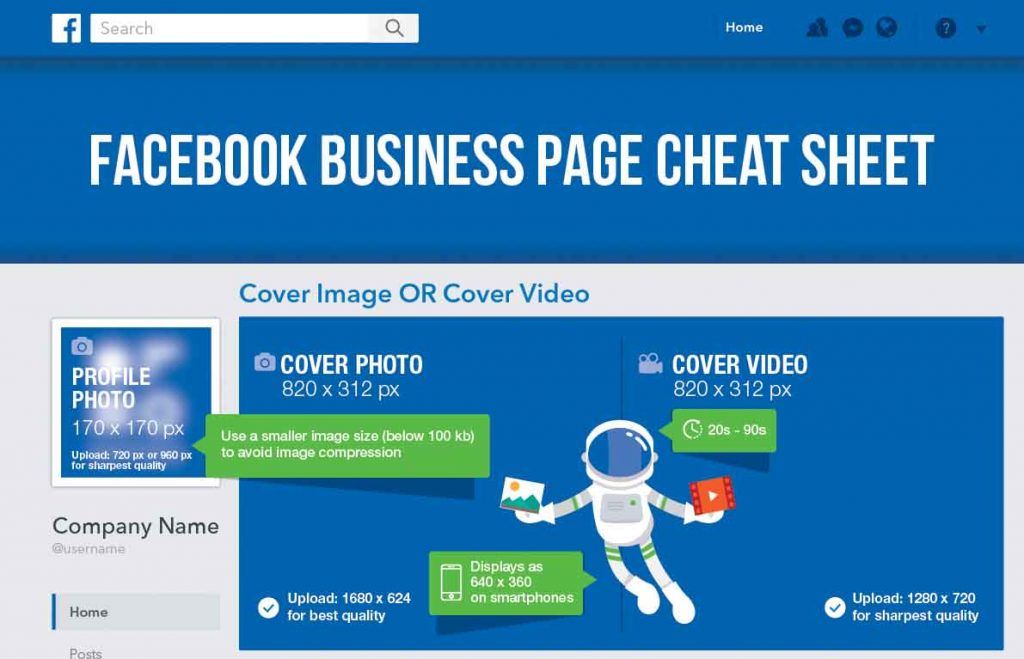
To assign these, on your business page, click “Settings,” then click “Page Roles.”
Also, when sharing content on behalf of your brand, make sure you're posting it as your brand, and not as yourself. You can check that by going into your settings and clicking “Page Attribution.”
You'll want to pick a profile picture that’s easy for your audience to recognize -- anything from a company logo for a big brand, to a headshot of yourself if you're a freelancer or consultant. Being recognizable is important to getting found and Liked, especially in Facebook Search. It’s what shows up in search results, pictured at the top of your Facebook Page, the thumbnail image that gets displayed next to your posts in people’s feeds … so choose wisely.
When choosing a photo, keep in mind that Facebook frequently changes its picture dimensions, which you can find at any given time here. As of publication, Page profile pictures display at 170x170 pixels on desktop, and 128x128 pixels on smartphones.
Next, you'll need to pick an attractive cover photo. Since your cover photo takes up the most real estate above the fold on your Facebook Page, make sure you're choosing one that's high-quality and engaging to your visitors, like this one from MYOB's Facebook Page:
Keep in mind that, like profile images, Facebook Page cover photo dimensions also frequently change, so we advise keeping an eye on the official guidelines. As of publication, Page cover photos display at 820x312 pixels on computers, and 640x360 pixels on smartphones.
Since Facebook first launched the feature in December 2014, the options for brands to add call-to-action buttons to their Facebook Page's have vastly expanded. These are things like “Watch Video,” “Sign Up," or "Book Now" -- and each can be customized with a destination URL or piece of content of their choosing.
It’s a great way for marketers to drive more traffic to their websites, or to get more eyeballs on the Facebook content they want to promote. This is a great way for marketers to drive traffic from their Facebook Business Page back to their website. Check out how Mandarin Oriental uses the "Book Now" button in this way, to make it easier for viewers to make reservations.
To add a call-to-action to your Page, click the blue “Add a Button” box.
You'll then be able to choose which type of CTA you want to create, and which URL or existing content on your Facebook Page you want it to direct visitors to. To get data on how many people are clicking it, simply click the drop-down arrow on your button and select “View Insights.”
We’ve arrived at one of the most important sections of your Facebook Page: the 'About' section.
Although visitors no longer see a preview of your “About” text when they land on your page -- instead, they have to click on the “About” option on the left-hand column next to your content -- it’s still one of the first places they’ll look when trying to get more information about your page.
Even within the “About” section, however, there are many options for copy to add. Consider optimizing the section that best aligns with your brand -- a general description, a mission, company information, or your story -- with brief, yet descriptive copy. By doing so, your audience can get a sense of what your Page represents before they decide to Like it.
You might also want to populate sections that allow you to record milestones and awards -- like when you launched popular products and services -- as well as the day/year your company was founded, or when you hosted major events.
Visual content has pretty much become a requirement of any online presence, including social media channels. After all, it’s 40X more likely to get shared on social media than other types of content.
And while photos are a wonderful way to capture moments and an actual look at your brand, you should probably invest a good amount of time and other resources into video. The 2017 State of Inbound report cited video as the “main disruptor,” with 24% of marketers naming it as a top priority.
“Watch video” is one of the CTAs that Facebook allows brands to add to their Pages for a reason -- because it’s becoming one of the most popular ways to consume content. But it’s not just pre-recording videos. According to the social media channel’s newsroom, “People spend more than 3x more time watching a Facebook Live video on average compared to a video that’s no longer live.” So don’t be afraid to give viewers an in-the-moment look at what your organization does, but do make sure you’re prepared.
Not sure what your videos should look like? Here's a fun one that we put together on business lingo.
An important consideration in your Facebook content strategy should be how frequently you post, and when. If you don’t post frequently enough, you won’t look as reliable or authentic -- after all, how much faith do you put in a brand that hasn’t updated its Facebook Page for several months? Post too often, however, and people might get sick of having their feeds flooded with your content.
Here’s where a social media editorial calendar can be particularly helpful. Like any other online content, it can help you establish a schedule for when you share particular posts according to season or general popularity. You’ll probably have to adjust your calendar several times, especially in the earliest stages of setting up your Page, since you’ll want to check the performance of your updates in your Facebook Insights (which you can navigate to via the tab at the very top of your page). Once you’ve observed popular times and other analytics for your first several posts, you can tailor your posting frequency and strategy accordingly.
Wondering how to schedule posts? You can either use an external publishing tool like the Social Inbox within HubSpot software, or the Facebook interface itself. For the latter, click the arrow next to the “Publish” button and click “Schedule Post.”
Facebook allows you to target certain audiences with specific updates -- be it gender, relationship or educational status, age, location, language, or interests, you can segment individual page posts by these criteria.
Just click the small bullseye symbol on the bottom of the post you want to publish, and you can set metrics for both a preferred audience, and one you think might not want to see your content.
When you post new content to your Facebook Page, older posts get pushed farther down your Timeline. But sometimes, you might want a specific post to stay at the top of your page for longer -- even after you publish new updates.
To solve for this, Facebook offers the ability to "pin" one post at a time to the top of your page. You can use pinned posts as a way to promote things like new lead-gen offers, upcoming events, or important product announcements.
To pin a post, click on the drop-down arrow in the top-right corner of a post on your page, and click 'Pin to Top.' It will then appear at the top of your page, flagged with a little bookmark. Just keep in mind that you can only have one pinned post at any given time.
If you want your Facebook fans to be able to privately message you directly through your page, definitely enable the messages feature. You can do so by going to your settings, clicking on “General” on the left-hand column, and then looking for “Messages” on the list of results.
We recommend enabling messaging on your page to make it as easy as possible for your fans to reach out to you -- but only do so if you have the time to monitor and respond to your messages. Facebook Pages now have a section that indicates how quickly a brand responds to messages, so if you don’t want that section saying that you’re slow to answer, you might just want to skip enabling that feature.
Speaking of monitoring the interactions your fans have with your page, don't forget about comments. You can monitor and respond to comments via the 'Notifications' tab at the very top of your page.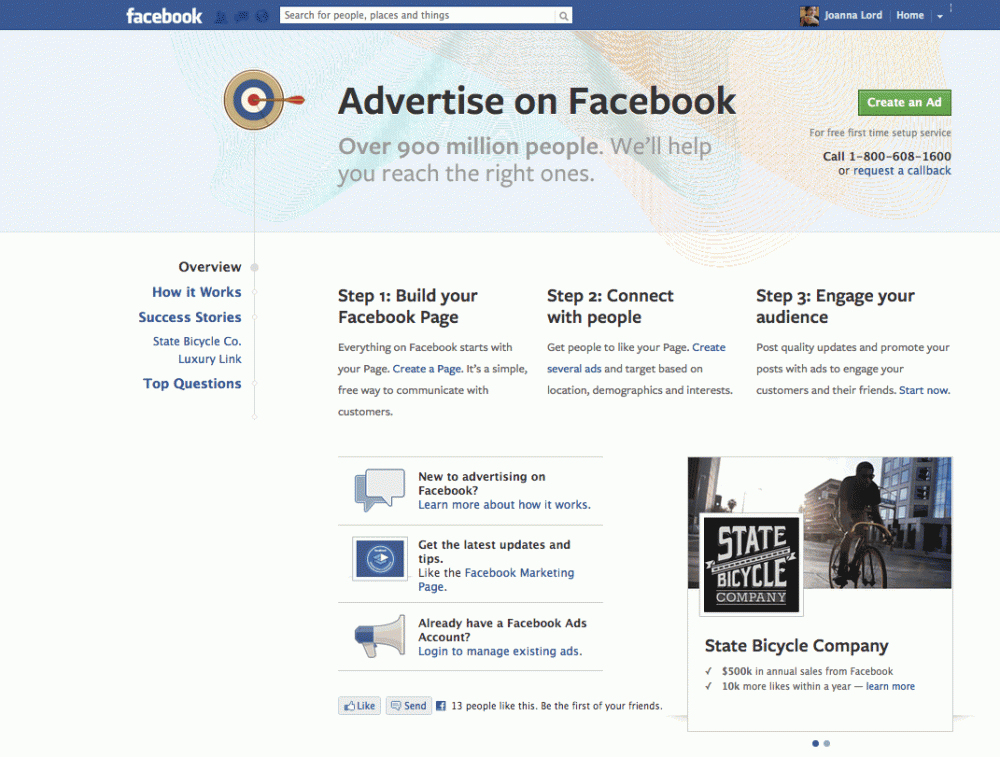 While it may not be necessary to respond to every single comment you receive, you should definitely monitor the conversations happening there (especially to stay on top of potential social media crises.
Now that you've filled your page with content, it's time to promote the heck out of it.
One of the first things you can do is to create an ad promoting your Page. To do that, click the three dots at the top menu bar above your posts and select “Create Ad.” From there, Facebook will let you start creating an ad from scratch based on your goals -- things like reach, traffic, or general brand awareness. Choose yours, then scroll down and click “continue.”
After that, you can choose your targeted audience (similar to what you did with your promoted posts above), where on Facebook you want it to be placed, and your budget -- you can learn more about paying for Facebook Ads here.
You’ll probably also be asked to add some creative assets or copy.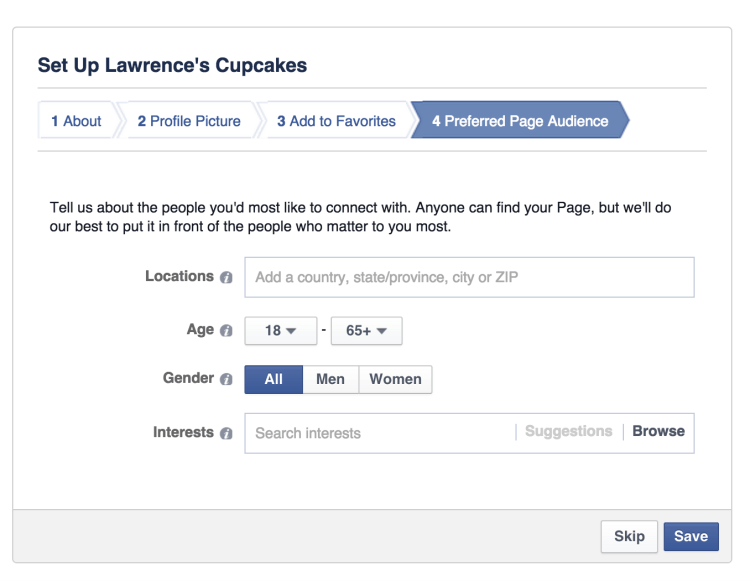 Remember, you’re paying for this, so choose something that’s going to grab attention, but also has high quality and represents your brand well.
There are a couple of ways to execute this step. You can use something like the social media reports tool in your HubSpot software, and you can dig into your Page's Insights, which allow you to track Facebook-specific engagement metrics. Here, you'll be able to analyze things like the demographics of your Page audience and, if you reach a certain threshold, the demographics of people engaging with your page and posts. As we mentioned earlier, the latter is especially helpful to modify your Facebook content strategy to publish more of what works, and less of what doesn't. You can access your Facebook Page Insights via the tab at the top of your page.
How have you set up top-notch Facebook Pages? Let us know in the comments.
Topics: Facebook Business Pages
Facebook is the most used social media platform for marketers around the world. No matter what your marketing goals are,
Facebook needs to be a part of your strategy.
It’s crucial to learn not only how to create a Facebook Business Page but also how to use it effectively to promote your brand. We’ve put together our guide for setting up and customizing a professional Facebook page and share our advice for how to use that page to grow your business by engaging with your Facebook audience.
💡
Schedule your Facebook posts and save time with Buffer
Plan, schedule, and analyze your posts to Facebook Pages and Groups with Buffer's Facebook scheduling and analytics tools.
To create a Facebook Business Page, log in with your personal Facebook account and go to
https://www.facebook.com/pages/creation/
Once there, see two options: Business or Brand and Community or Public Figure. Click Get Started under Business or Brand.
To create a Facebook Business Page, select the Business or Brand option.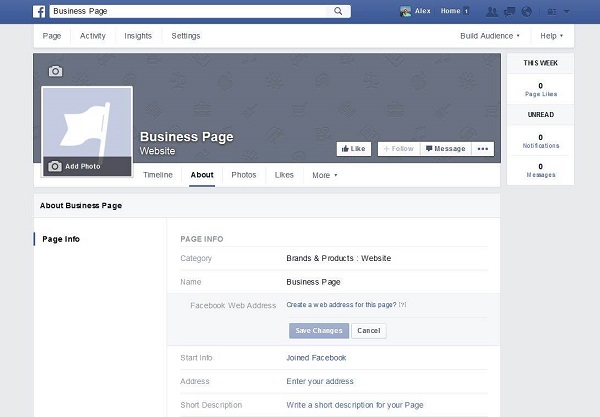
After you select Business or Brand, you’ll be asked for a page name and category. Keep in mind that you can change your category later on, but your page name is forever.
The category you choose will determine what other fields you’ll need to fill in. For example, if you select Restaurant, you’ll fill in the address and phone numbers for your location(s) along with your business hours.
Social media image size standards are important — if you use the wrong size, you could end up with awkward cropping or pixelated images, so keep these recommended image sizes handy.
Facebook profile image size: 170 x 170 pixels
Facebook cover photo image size: 820 x 462 pixels
Your profile picture will appear as your icon every time your page’s content shows up in the Facebook News Feed and when you comment on other posts. Ideally, this will be your company logo. Square dimensions are best, but Facebook will crop the photo into a circle for ads and posts, so leave empty space around the edges. When you upload the image, you can preview the crop and make adjustments.
Cover photo – 820 x 462 pixels
Your Facebook cover photo appears across the top of your page and is a great opportunity to deliver a visual element that supports your branding, draws attention, or elicits emotion from your visitors.
According to Facebook, your cover photo is displayed at different sizes on desktops and smartphones — 820 pixels wide by 312 pixels tall on desktops and 640 pixels wide by 360 pixels tall on smartphones. In our experience, 820 pixels wide by 462 pixels tall seems to work best for both mobile and desktop. But make sure you keep important text and design elements in the center of the image and preview how the image will appear on mobile and desktop.
If you don’t have a designer on staff to help out with images, free tools such as Canva have pre-made templates that you can customize, or you can simply enter in the custom dimensions and create your own image. You can even upload a cover video or feature a slideshow of images. For more information and fun ideas, check out our Facebook cover photo guide.
Google indexes Facebook Business Pages, so the text you include on your profile can help you rank in global and local search engine results. When you create a Facebook Business Page, you’ll see tips that guide you through filling out all your page information. If you need to go back to make changes, go to your page’s About tab and click Edit Page Info.
Here are the fields to fill out:

All of these details will appear in the About section of your Facebook Page, where you can add even more information, such as your business’ story, awards, menu, etc.
If you plan on sharing your Facebook marketing duties with a team, you’ll want to grant access and assign roles to various folks. To add collaborators, go to your page settings and the Page Roles section. You can type in the name of any Facebook friend or person who has liked your page. Alternately, you can type in an email address associated with a Facebook account. Either way, you must be Facebook friends with anyone you add as a collaborator.
Role options include:
Once you fill out the basics, you can further optimize your page with customization options. While on your page, click on the More drop-down menu and select Edit Tabs. From there, you can select templates that cater to different types of businesses such as Nonprofit, Shopping, Services, Restaurants & Cafes, etc.
Each template has a default call to action (CTA) button and tabs that you can preview by clicking on the template. For example, the Restaurants & Cafes template changes your primary CTA button to Get Directions and includes tabs for your menu, offers, reviews, and photos. Once you select a template, you can customize your tabs by either removing the ones you don’t need or rearranging them to list the most important ones first.
Each Facebook Business Page template has preset buttons and tabs that cater to different types of businesses.While it’s tempting to share your professional Facebook page the second you finish creating it, we recommend you get some content ready before you start inviting all your friends to Like the page.
Before you promote your page, publish three to five posts and have at least another week’s worth of content planned out and scheduled. Experiment with different types of social media content such as video, images, short text posts, long text posts, links, Facebook Lives, Facebook Stories, etc.
In 2020, status (text) posts earned the highest average engagement rates, but it’s important to use a range of post types so you can appeal to a larger audience. Remember — the more often people engage with your content, the more often your posts will show up in their News Feed, so figuring out what types of content your fans interact with is key.
When your page is promotion-ready, link to it on other social media networks and your website, and then invite friends to Like the page. If you have page collaborators, they can send invites to their friends as well.
As of June 30, 2021, Facebook shut down the Facebook Analytics tool, which allowed you to build reports for both Facebook business pages and Instagram business accounts. However, Page Insights are still available.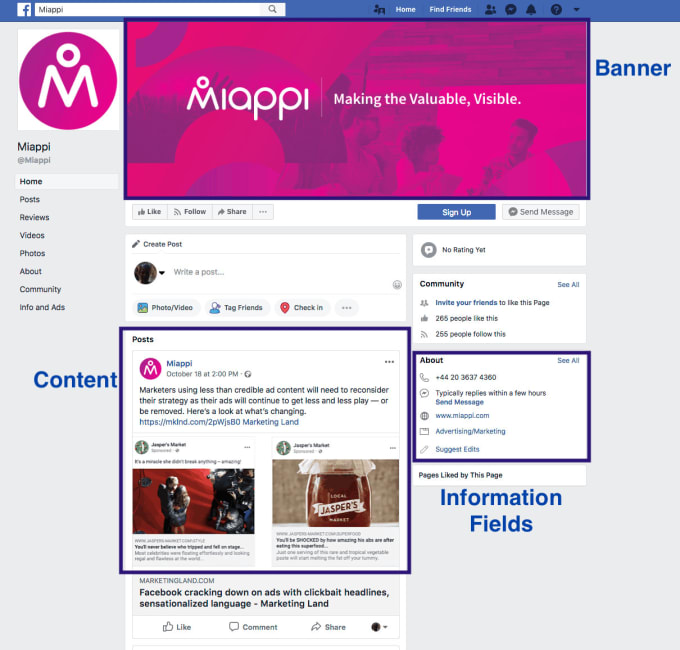
When you look at your Facebook business page, you’ll see an Insights tab on the left side of your Facebook menu, between Notifications and Publishing Tools. At the top of the Insights page, you’ll see your stats such as Page Likes, Post Reach, and Engagement for the week, along with a comparison to the same stats from last week.
Buffer's Facebook Page Insights.Facebook Insights also gives you a closer look at audience demographics such as age, gender, and location. Plus, you can check what days and times your fans are online by going to Page Insights then Posts. There’s no single best time to post on Facebook, but posting when your fans are active online is a great start. For more guidance on scheduling posts at optimal times, check out our guide for finding the best times to post on Facebook for your brand.
Buffer's When Your Fans Are Online tab.For more in-depth insights, use Buffer's analytics dashboard to dig into how each individual post performs. Not only can you monitor key metrics such as engagement rates and total reach, but you can also build and share custom reports that align with your business’ social media goals.
Keeping track of how your content performs helps you continuously cater your content to your audience’s preferences. For example, you might discover that your engagement rates are highest on video posts, but your text posts get the highest number of shares. So, if you’re looking to boost engagement, you’d focus on sharing more videos, and if you’re trying to increase brand awareness, you’d include more text posts.
Once you’ve got the hang of Facebook Analytics, check out our social media for small business guide to learn how to use those insights to fuel your Facebook marketing strategy.
Learning how to create a Facebook Business Page is just the first step. Once you have your page, it’s crucial to be consistent with your content. You don’t want to spend all that time customizing your page and building up your following and then only post sporadically.
Rely on Buffer to manage your Facebook posting schedule and analyze your results, all in one place. Get started today with a free trial.
Brought to you by
Get started for free now
A business page on Facebook is a page of a company (similar to a business account), a brand, and any other organization. Potential customers can find your contacts, a list of services, see reviews from other users, and contact you on this page. For you, a business page is an opportunity to run ads on Facebook and Instagram, communicate with customers, as well as another way to promote.
In this article, you will learn how to create a Facebook business page, set it up properly, and use it to attract customers.
Advertising
Read also : 10 best targeting courses
Let's not languish for a long time and get straight to the point. We will show the process of creating a business account from a computer, if you are making a page from a phone, then the procedure is exactly the same.
Step 1: Create a business page.
In order to create a business page, you need a personal account. If you are already registered, go to Facebook, press the big plus sign on the top panel and select "Page".
Step 2: Name, category and description.
The page creation window opens. In the left part, you need to enter the name of the business page on Facebook, select a category and add a description. On the right - a preview will be available and all the changes that you make will be displayed.
Here are a few suggestions:
Finally, click "Create Page" at the bottom. After that, a notification will appear that the page has been created and you can continue to edit it here, or by clicking "Save", go directly to the page. So let's do it, and proceed to the configuration.
Step 3: Cover page.
Before you put the cover, make it according to our instructions: "How to make a beautiful cover for Facebook. " After, in the place where the cover will be, click "Edit", select "Upload photo" and upload the picture from your PC.
If you want to be creative, but nothing works out, you can peep ideas from competitors or take ready-made templates from services like Canva. Alternatively, you can set a video as the cover.
Step 4: Profile photo.
A profile photo accompanies all your comments and posts. Here, a personal photo or company logo would be ideal. To set a profile photo, click on the camera icon, then "Edit profile photo" and upload a picture from your computer.
After uploading, you can change the scale and position of the picture.
Please note that your profile photo must be at least 180 pixels wide and high. In order for the page avatar with your logo or text to be shown in higher quality, use a PNG image.
Step 5: Unique username.
Set a unique username - this is the part in the URL of the page that is displayed in the address bar of the browser, after facebook. com/. Click "Create @username".
A window opens where you need to enter a unique nickname for the page. No more than 50 characters without spaces, only letters of the Latin alphabet and numbers can be used. If the name is free, a green checkmark will appear next to it.
Step 6: Action button.
Here, in the page header, we immediately set up a button that will be visible to all guests of the page. Click "+ Add button".
In the window that opens, select the appropriate option. You can put a subscribe button, send a message to WhatsApp, go to the site and others. The button can be changed at any time.
Step 7: Contact information.
In the menu on the left, click "Edit", on the right, a field for entering information opens. Here, first we indicate the phone number (you can specify the number to receive messages in WhatsApp), email address and website.
Go down below and enter the address.
Specify the hours of operation. Below there are additional options that allow you to specify the operating mode on holidays.
You can also specify other data: products, price range and pages in other social networks.
This completes the basic page setup. This page can be linked to an Instagram account, it contains contact details and an action button is configured. Next, we move on to advanced settings that will allow you to use your Facebook business page even more efficiently.
Interesting: How to set up Facebook ads
For example, if you use the cafe page template, the Offers and Jobs tabs will appear, and the action button will change to Directions.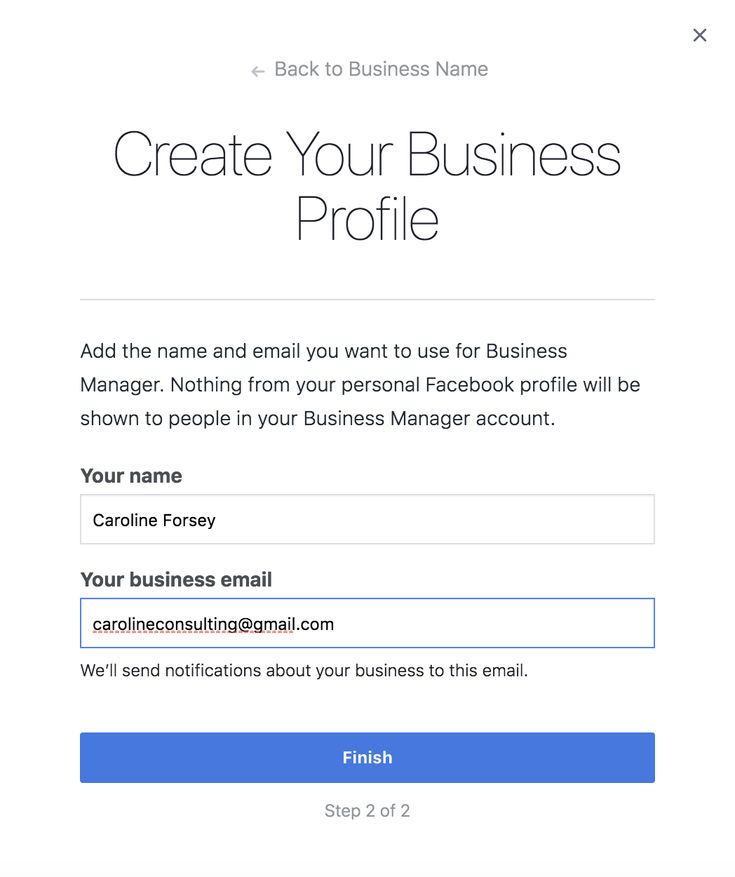
Tip : Experiment with patterns by changing them. So you will choose the most suitable one. Then you can manually customize the template by turning off unnecessary tabs or swapping them.
If you enable this option, every time someone visits your business page, a welcome message will automatically be sent to them. This will increase the conversion of the page and allow you to quickly build communication with a potential client.
We go to the page settings, open the "Messaging" section, find and activate the "Show greeting" item. Then click "Edit" to set your message.
Enter the text of the welcome message. The character limit is 160 with spaces. You can use emoticons and username. At the end, click "Save". Please note that the message will go to Messenger.
In the "Instagram" section, you can link a business page to your Instagram account.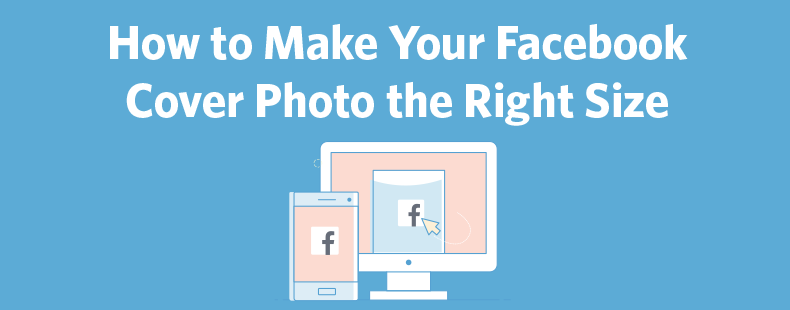 This will allow you to publish content immediately on Facebook and Instagram, reply to messages on any social network, and respond faster to new comments. To communicate, click "Connect account", then you will need to log in through Instagram to confirm adding an account.
After linking the business page with Instagram, you will also have access to Creator Studio ( free autoposting and statistics service ), as well as in the Rights Manager ( copyright protection ). Also, if you plan on having both Instagram and Facebook presence, we recommend that you manage your Pages in Business Suite.
In the WhatsApp section, you can link a business page to a messenger and you can be contacted on WhatsApp directly from an ad or from your Facebook Page. This is handy if you're used to replying to people on WhatsApp.
To get in touch, select a country code and enter a phone number. You will receive a verification code to verify that the number belongs to you.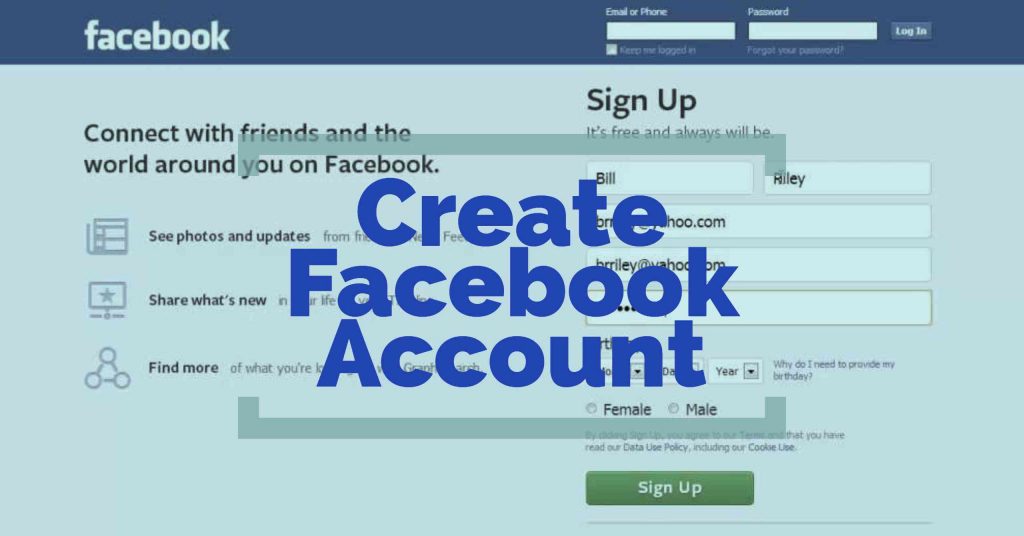
We also recommend setting up a WhatsApp business account to get access to more features.
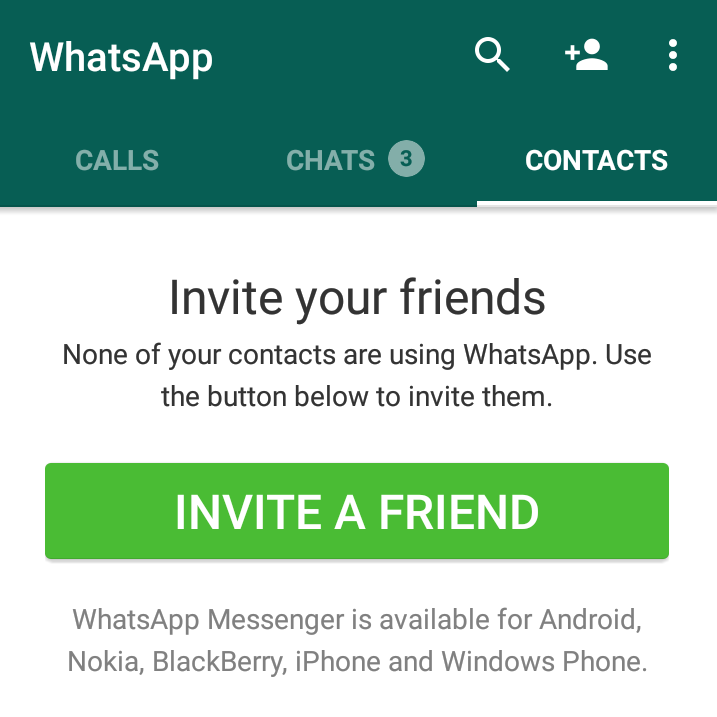
In general, Facebook promises to remove the Like button from business pages, but even when it is removed, everyone who likes your page will remain subscribed to it. Therefore, we do not ignore the opportunity to attract the first audience. On the business page itself, scroll down a little and find a column where you can invite friends. Click "View All Friends".
In the window that opens, select all friends or those who will definitely be interested. Also, in the lower left corner there is an option that allows you to send invitations to private messages ( no more than 50 pieces at a time ). Once selected, click "Send Invitations".
There is a "More" button, you can also invite friends through it.
To keep track of how effectively the page is developing, there is a "Statistics" section. You can access it through the settings.
Statistics provides an overview of all indicators in general, as well as detailed statistics for each metric separately ( left menu ). Here you can also download all the data, the "Export data" button in the upper right corner.
At some point, you may need to transfer control of a business page or add other team members to collaborate. For example, a sms manager who will be responsible for posting or a targetologist who will run ads.
To add new users who will be able to manage the page, go to the "Roles on the Page" section in the settings. In the "Assign a new role on the Page" field, write the username ( he must have a personal page in FB ) and select the role. Thus, you can assign an advertiser, editor, moderator, analyst, or a new page administrator.
If your organization has ceased operations or you no longer see the point in a business page, you can always delete it. To do this, open the "General" item in the settings and at the very bottom we find the option to delete the page. We click on it, then click "Permanently delete the page" and confirm the deletion.
A Facebook business page is a must for marketing, whether you plan to promote on Facebook itself or not. It will make your company visible to more potential customers, as well as enhance your Instagram experience.
Useful links :
Step 1. You need to go to the main page by clicking the Facebook logo.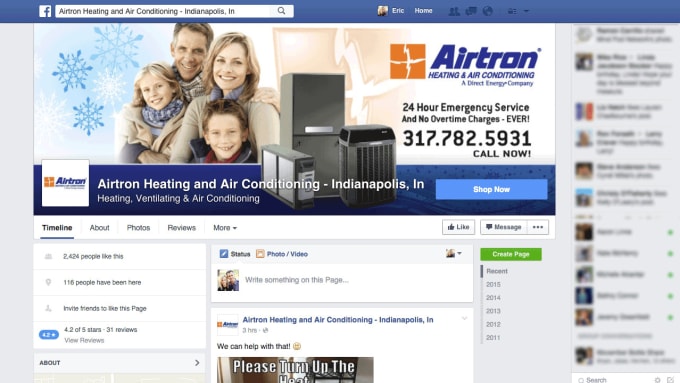 Please note that Facebook has groups and pages. Groups are more suitable for thematic communities, where the content is created by the users themselves. If you want users to create content themselves in the same community, choose a group. If you want to create content yourself, you will have a page for your company or your personal page to advertise you or your company, then you need a page.
Step 2. Open this section, here we have options - you can see the pages that you manage, and you can also create a new page. Go to the page section, there is an item "create a new page".
Step 3. Click "Create a new Page". You need to come up with a name. It should be short, concise, preferably optimized for search, contain key queries. If you have a regional community, you may also use the name of the city.
Step 4. Next, Facebook prompts you to select a category. There is a drop-down list if you click on the categories. Then you write a short description in two or three sentences, what kind of company you have, what kind of page.
Step 5. Click "Create Page".
Step 6. After Facebook says that the page has been created, you can either just save it or continue with the design. You can add a profile photo.
Cover and avatar parameters are easy to find on the Internet, the size of the top header changes, so just make a widescreen image in HD quality, at least 1900 pixels.
Step 7. So, the page is created. Then you can: add a button, a link to the site, if it exists, or a link to messages so that a person can write to you.
The default settings are pretty good. But there are some points to which you need to pay attention.
An important setting is the prohibition of user publications. You don't want someone to write something on your wall. Therefore, prohibit other users from writing on your page.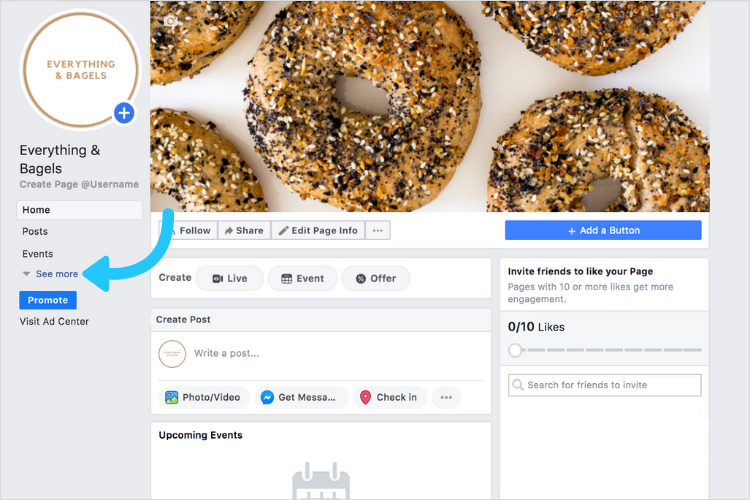 This doesn't mean they won't be able to comment, but they won't be able to add a post to your feed. We also recommend that you turn on the obscene language filter.
If you will be writing posts in different languages, there is a special feature that you can enable, it is disabled by default.
You can enable a greeting and write a welcome text that will automatically be sent when the user wants to write a message.
You need to enter a username - this is the URL of your page. It is important that you have one nickname on all social networks and sites so that people can easily and quickly remember your corporate hashtag and your nickname.
Next, you need to provide contact information. If necessary, indicate the phone number, e-mail, website. If you have a regional business, be sure to include the address. Write down the geolocation, check that Facebook correctly shows and reads the desired house. You can set the opening hours.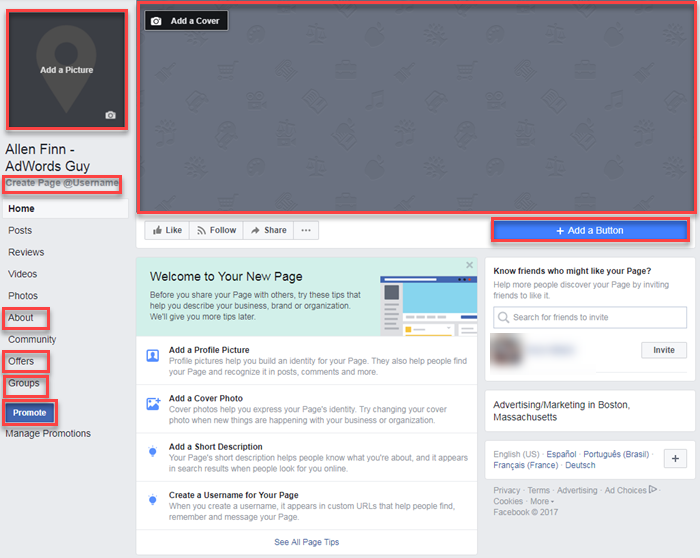
The next step is to set up sections - active and inactive. There are a lot of them, customize the ones you need and leave what you don't need.
An important point: these sections can be dragged and moved. If you want the block with the latest videos to be at the very top, you can move it to the very top. Or vice versa: if you will not have videos, or they will be very rare, you can move this section to the very bottom.
You can set up various notifications to be sent to you by SMS, email, messages, for example, when someone likes, subscribes or writes a comment.
Social or political advertising related to targeting. This feature is for political ads and things related to politics - in terms of ad safety. If you don't, ignore this section.
If you have several administrators or will have an editor - all this can be configured in the access section. Here you write the username or email address to which the Facebook account is registered, you can assign its role:
Access to analytics and advertising account: in this section you can see the current administrators, if necessary, you can add or remove someone.
In this section you can connect your Instagram account. Instagram has regular user accounts and business accounts that have the ability to create ads, have analytics and statistics. You can switch to a business account from Facebook. If you haven't done so yet, you have a regular Instagram account, here you can link it. You will be able to create ads, set up targeting, view statistics.
Notifications will also be shown here if you write to Facebook technical support.
Next, you can add different photo albums - from events, thematic, group. Create a new album, come up with a title, description and upload photos. This is convenient when you need to show a lot of different media content. The same with video.
You can also create playlists. Let's say you have themed videos with different headings - organize them using playlists.
When publishing, you can upload photos and videos, add geolocation, YouTube videos.