Instagram’s clearly where your business needs to be in 2022. It’s where 9 in 10 users follow business accounts, proving that there’s ample opportunity for your brand to gain the followers and engagement it needs to grow. And when it comes to creating new ways to engage with audiences, we’ve seen a couple of interesting options. From stickers to polls and swipe-up functionality, there definitely is a lot for brands to work with.
But there’s another option available, one that allows your brand to get even more engaging. AR filters are available and they are helping create interesting and ways of helping your brand get exposed to more people. But what are Instagram AR filters?
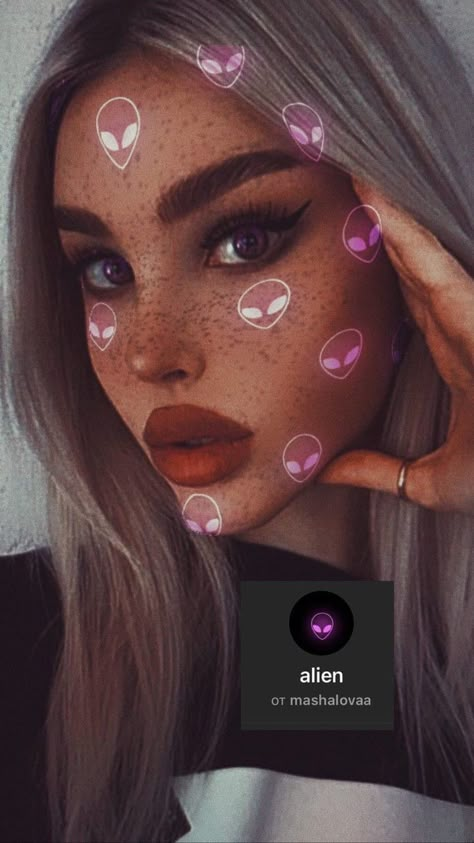
Augmented reality (AR) filters are computer-generated effects designed to be superimposed on real-life images. AR filters work with your camera, adding a layer or imagery in the foreground or background of your image. There’s a good chance you’ve come into contact with an AR filter in one way or another on Instagram. For example, the Fresh AR Prince filter is a throwback to Will’s Smith iconic role as The Fresh Prince of Bel-air.
While Instagram AR filters were introduced back in 2017, it wasn’t possible for anyone to create their own AR filters until recently. Facebook released its in-house AR filter application called Spark AR Studio, a tool that gives you the chance to build your very own Facebook and Instagram AR filters. What’s more, Spark AR Studio Player is also available on Google’s Play Store for Android devices and Apple’s App Store for iPhones. The app gives users the chance to see what their AR filters will look like on a smartphone. The filter adds a hat to selfies or adds graffiti on the background if you flip your camera.
Source: instagram.com
Spark AR Studio makes it possible to customize images and videos for both Facebook and Instagram.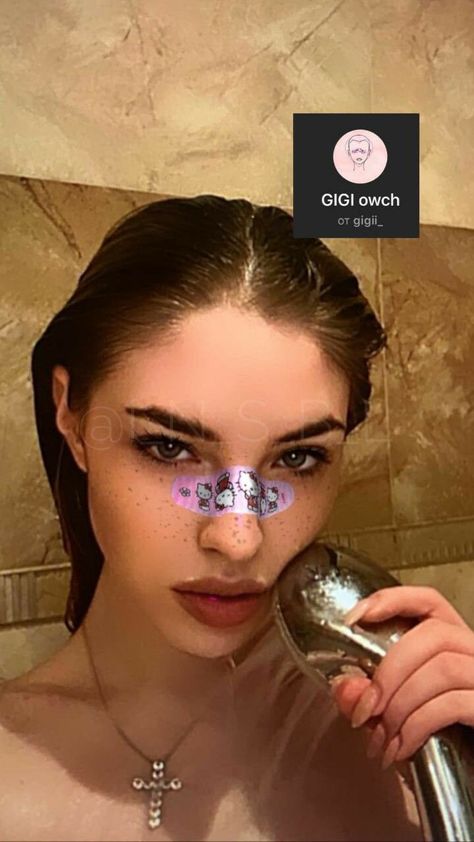 While creating your own AR filters sounds like a complex undertaking, Spark AR Studio was built to make the process easy. It also comes with a host of features. Here’s a breakdown of each feature and what it enables you to create:
Codeless design isn’t a new concept. Today, many applications for mobile and design websites use drag-and-drop functionality. In Spark AR Studio, the same concept applies. You can use visual programming to add interactive elements, animate objects you design, and build logic based on how your object should react in response to interactions with it. Spark AR Studio also allows you to create custom textures and materials to use in your scene.
Building your own Instagram AR Filter requires adding objects to your canvas. Spark AR Studio enables you to add your own sound files and 3D objects which can then be manipulated for the desired look, feel and interactivity. If you’re new to AR filter design, Spark AR Studio offers a free library filled with objects you can use. These are all high-fidelity models available through a partnership between the social media giant and Sketchfab.
Source: sketchfab.com
Nothing says convenience like the ability to publish your AR filter directly to Instagram. Once produced, Spark AR Hub helps you submit your AR filter for approval. The process can take days, and if your AR filter meets the various guidelines, it will appear for use. Spark AR Hub also gives creators the opportunity to manage and understand your AR effect performance across Facebook and Instagram.
Instagram AR filters allow you to extend the functionality of your filters with effects which can be applied to faces. This creates a more interactive experience for users. As Spark AR Studio allows for logic to be added to filters, you can design yours to react to movements on a subject’s face.
Features include:
Make a faceSpark AR Studio allows advanced design capabilities and allows you to create filters that apply facial tracking for interactive and realistic effects.
Elevate your filters for even more creative user experiences by applying sync and movement effects. These are based on gestures your users make with their hands.
World effects allow you to incorporate various effects into a scene and then apply the scene to any image or video. Scenes and objects can be applied to surroundings and vehicles, making for an immersive AR experience.
Features include:
Connect Effects With Objects and PlacesSpark AR Studio leverage advanced plane tracking functionality that makes the application of various objects into scenes possible. The plane tracker can be used to track surfaces, recognize objects within a frame and understand various locations.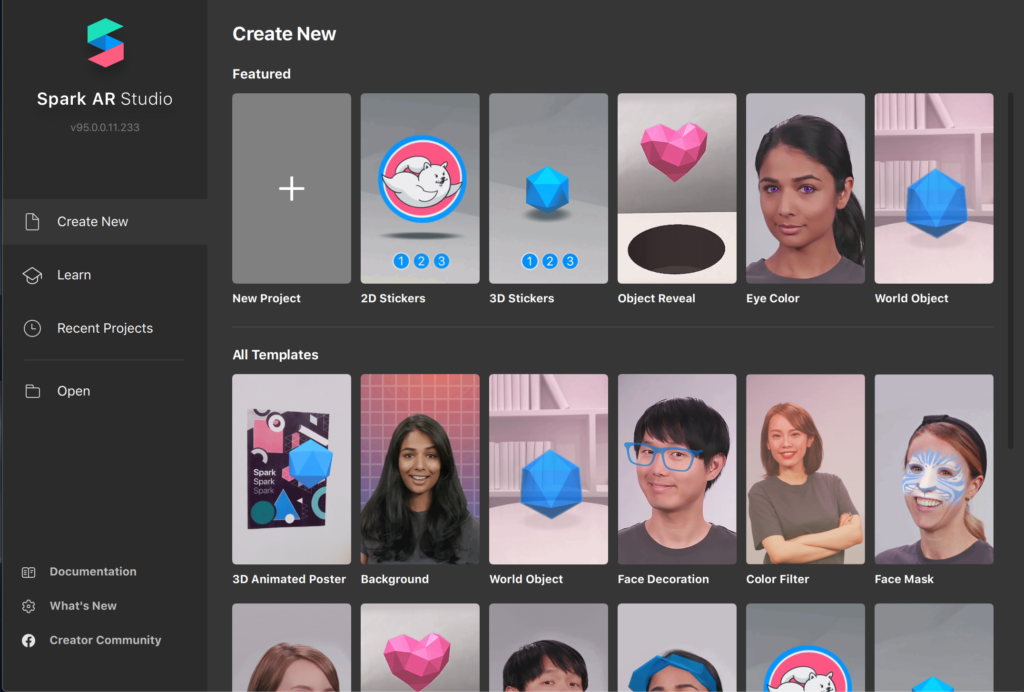
One of the more exciting features is the ability to create entire backgrounds that can be added to images and videos. These backgrounds transform content more than other objects can.
Educational LibrarySpark AR Studio also comes with a robust collection of educational content. They offer tutorials for each for the features above, making it easy to start creating your own Instagram AR filters. They also have FAQs answering almost any question about features, functionality and how to get the best out of your Spark AR Studio experience.
Cretating your very first Instagram AR filter will mean learning a few new ideas and terminology, but nothing you can’t grasp. Here’s a step-by-step guide on how to get started creating yours.
Spark AR Studio is a desktop application and comes in at 464 MB in size. While relatively small, it’s a powerful tool that you’ll find very easy to use the more you work with it. It is currently only available for Mac and Windows users with no mention if Linux users will see a version of the app. If you are a Linux user, consider using Wine, a popular compatibility layer designed to allow Linux users to install and enjoy Windows applications. While we haven’t tested Wine and
Spark AR Studio, give it a try, it may work.
Once installed, we recommend that you take some time to cover a few tutorials to get familiar with the platform. Spark AR Studio comes with a helpful welcome tour. It lasts five minutes and will help you get familiar with most aspects of the platform.
If you need more guidance, head to the learning centre where you’ll find a collection of tutorials. The Getting Started section includes basics that will help you quickly come up to speed with features and how to navigate Spark AR Studio.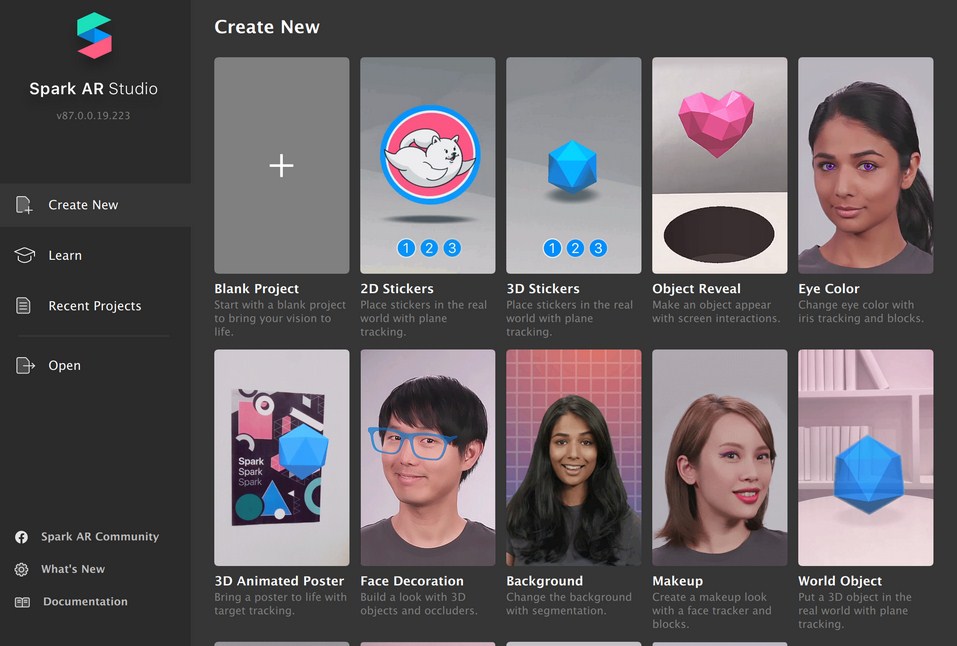 It also includes tutorials on creating a face tracking effect, previewing Spark AR Studio effects, using the face reference assets, using templates, features and processes, effect lifecycle, policy, and more.
Next, pick the type of AR filter you’d like to create. In our example, we’re going to create a world object. This option allows us to place a 3D object in a real-world setting.
To get started, click on the project of your choice and you’ll be transported to a canvas, also called the Viewport, with your object placeholder preloaded.
Note: if this is your first time using Spark AR Studio, you will need to accept their policy agreement before gaining access to your canvas.
The Viewport may look like a complex canvas, but remember to use the tutorials section for guidance on using each feature if you get stuck. When in the Viewport, you’ll need to add an object. You can import one or access Spark AR Studio’s growing library of objects. We’re going to use the AR Library to import an object. To follow along, click on File in the main menu (top left of application), then click on Import from AR Library.
A new window will open with various options. Select 3D Objects from the left-hand menu.
Once you’ve found your object, click on the Import Free button.
As Facebook uses Sketchfab’s library of assets, you’ll need to create a Sketchfab account or log into their site using your Facebook, Google or Twitter account.
Adding SoundWhile in the AR Library, you have the option to add sound to your AR filters and can import clips directly from the library.
With your object in the Viewport, it’s time to add effects. These will relate to how your object reacts to user manipulation. Effects include how your object will move and how it will look when positioned at different angles in the real-world. For our object, we’re going to use a rendering of the moon. To animate our object, we’ll drag-and-drop it from the Assets panel into the Scene panel, just below the “drag here” menu item.
With our object in place, we can begin to change its colour, there are various ways to manipulate it. You can:
To test your new AR filter, you can send your test file to Instagram or Facebook. This will give you a preview of how your filter works on each platform.
When you’re ready to publish your AR filter, click on the “upload” button in the bottom left-hand corner of the app.
AR filters are subject to review by Facebook.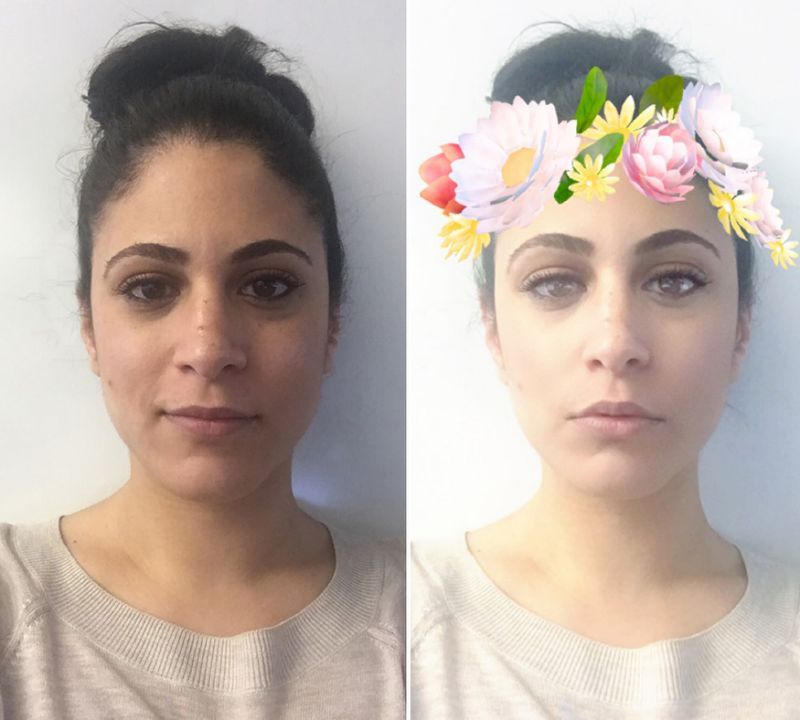 The process can take a few days. Ensure your filter meets Spark AR’s policies and guidelines. For more on creating filters that are approved without fail, read the submitting newly created effects for approval.
Instagram AR Filters are a great way for brands to produce interactive content to stay top-of-mind with their audiences. As your filters can be applied to Facebook and Instagram, you have access to a large audience filled with users who love customizing posts and stories, meaning more reach for your brand.
Instagram is constantly innovating and introducing new features and updates that would...
Influencer Marketing • Social MediaBranded content is 22x more engaging than display ads and other types of advertisements...
Influencer MarketingConsumers are becoming more aware of brands’ ethical responsibility. Though, this...
If your brand uses Instagram for business, you’re probably already aware that Instagram Stories is an effective way to engage with young users. In 2019, 500 million accounts used Instagram Stories every day and 67% of all Instagram users are ages 18 to 29. Stories’s interactive features—like polling, questions, and Instagram AR filters—are fun ways for brands to engage those users. (Not sure how Instagram Stories can build your brand? We’ve got tips to help you use it like a pro.)
Augmented reality (AR) sounds futuristic, but Instagram Stories has used augmented reality filters since 2017 when it launched its face filters. And recently, Instagram Stories took augmented reality to a new level. The Facebook-owned platform Spark AR Studio lets users create their own interactive AR filters. In August 2019, that platform was opened to the public.
Now, anyone can create custom AR filters for Instagram Stories.
Here, learn what Instagram AR filters are, why creating unique filters might be right for your brand, and how to get started with Spark AR Studios.
Get your free pack of 72 customizable Instagram Stories templates now.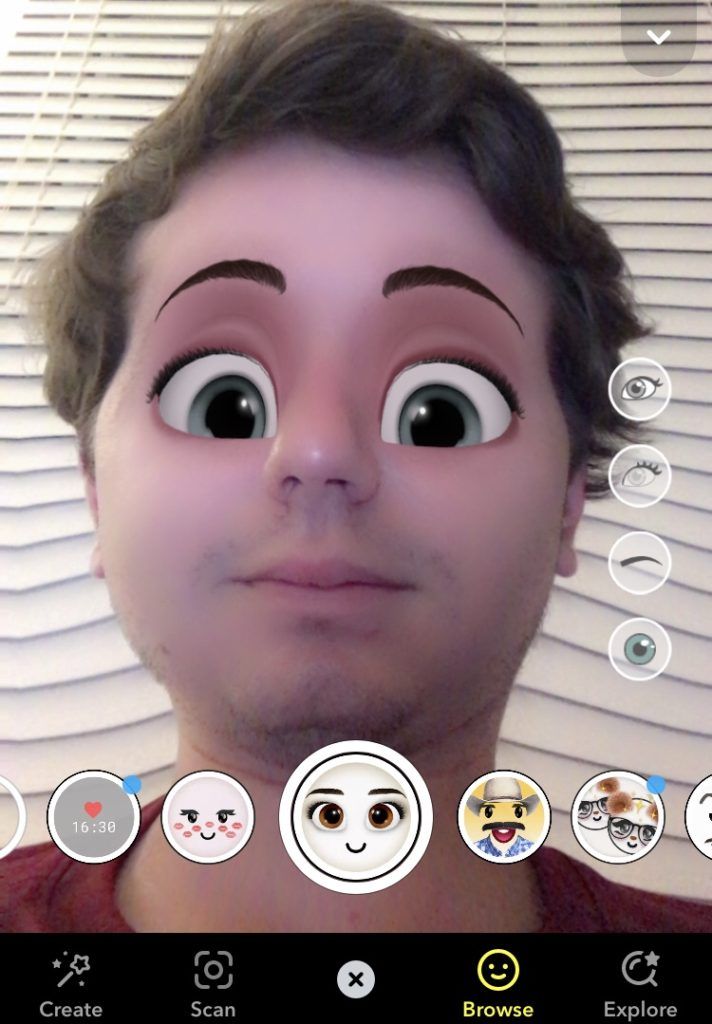 Save time and look professional while promoting your brand in style.
Augmented reality (AR) filters are computer-generated effects layered over the real-life image your camera displays. In Instagram Stories, an AR filter alters the image your front or back camera displays.
Think of Instagram’s face filters. For example, the puppy filter superimposes a dog’s ears and nose over top of your image. Those digital effects move with you as you move.
Or its “Hello 2020” filter: 2020 glasses are superimposed onto your face and digital balloons fall down the screen.
Keep in mind that Instagram AR filters are different from its preset filters. Instagram’s preset filters elevate the quality of photos in one click, so you don’t need to spend lots of time editing photos for Instagram. In contrast, Instagram AR filters are an interactive element only for Instagram Stories.
At its F8 Conference in May 2019, Facebook announced that anyone can build custom AR filters using its Spark AR Studio platform.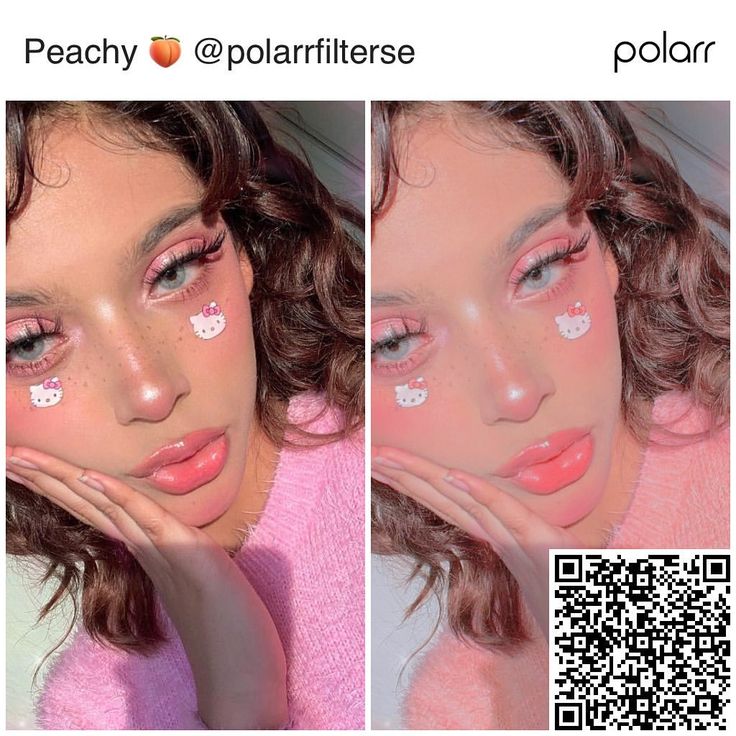 This new platform allows users to create original augmented reality effects for Instagram Stories, Facebook Stories, Messenger and Portal.
Before this platform became public in August 2019, Instagram users had to be invited to use Spark AR. That meant only select Instagram users could design and publish custom AR filters. Now, anyone who downloads Spark AR Studio can get creative with filters.
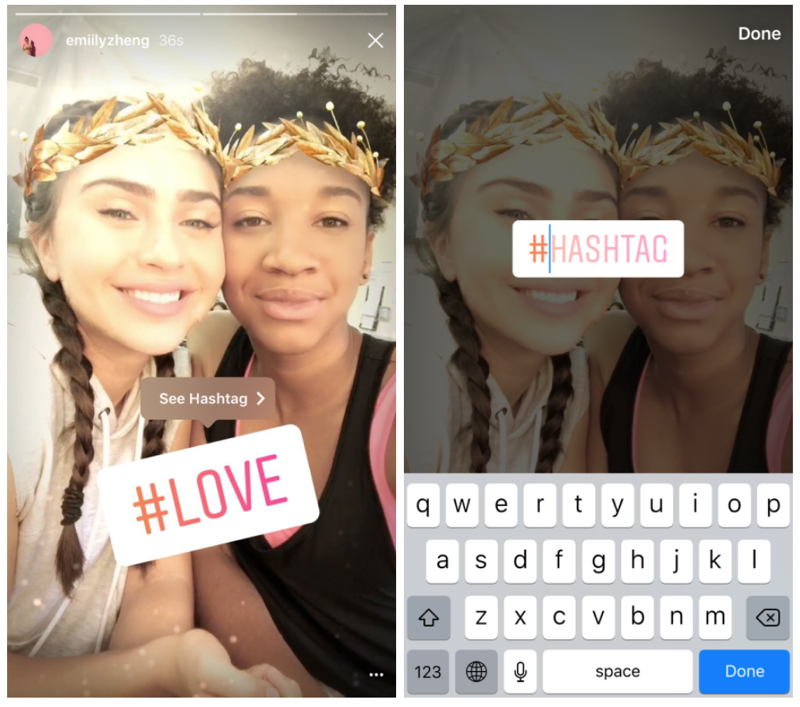
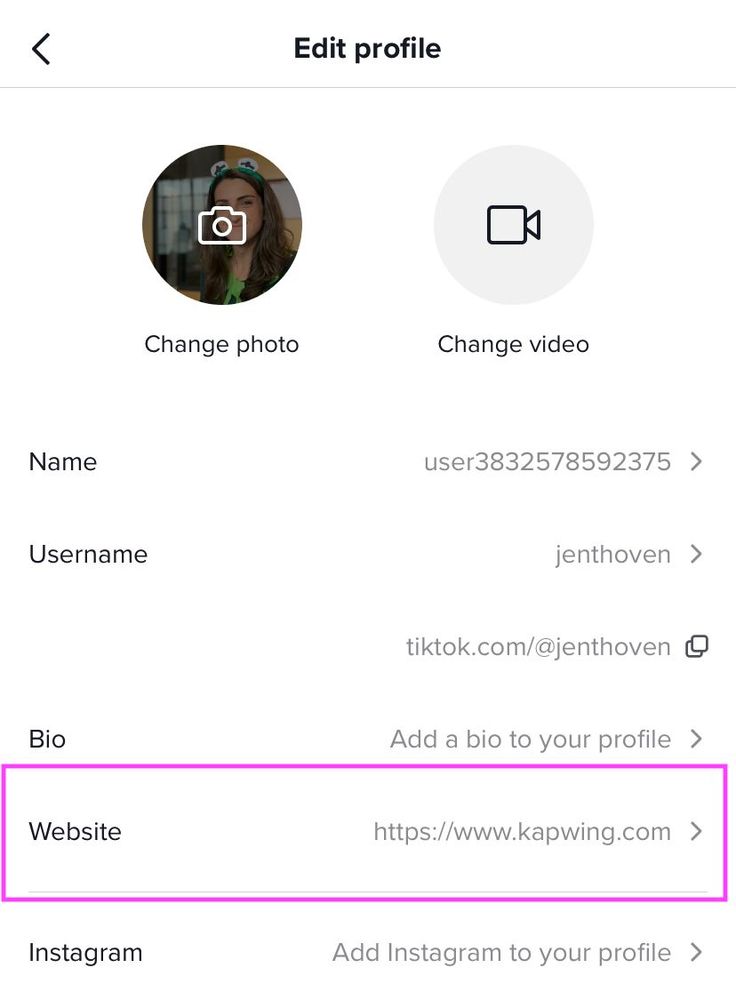
It’s easy for Instagram users to find these filters. Anyone visiting your brand’s Instagram profile can click the new face icon. All the AR filters you create are compiled here.
Click on the new face icon (third icon from left) while visiting a user’s profile to see all the filters they’ve made.
Plus, Instagram users can discover original filters in the new Effect Gallery. However, branded or promotional posts will not show here.
Original AR filters are categorized in the Effect Gallery. There are categories like “selfies” and “color and light. ”
”
While this tool might not be right for all businesses, it’s a great option for brands trying to reach younger individuals on Instagram. Remember: 67% of all Instagram users are ages 18 to 29. Additionally, one-third of the most viewed Instagram Stories are from businesses.
Here are a few examples of how custom AR filters could leverage your brand:
Show off your brand’s personality
Connect with your audience
Be ahead of the curve
Increase brand awareness
When viewing an AR filter for Instagram Stories, there’s a “try it” button on the bottom left-hand side of the screen. Users can save the filter to use later by pressing the “upload” button. That’s the first button on the bottom right-hand side of the screen.
Here are five examples that show how different brands are getting creative with AR filters.
AritziaAritzia created the SuperGlow filter. This custom filter increases brand awareness and recognition.
Coca-Cola PolandCoca-Cola Poland uses an AR filter to digitally superimpose the brand’s polar bear on top of the real world.
This Paris-based artist publishes artistic AR filters and shows just how creative brands can get with custom filters. She also uses this tool to show her support for social causes.
Ray-Ban’s custom Reindeerized filter is a playful way to interact with the brand. It’s also a way to virtually try on a Ray Bans product, which is super helpful for customers looking to purchase Ray Bans online.
Tiffany and Co.’s custom filters incorporate the business’s branding.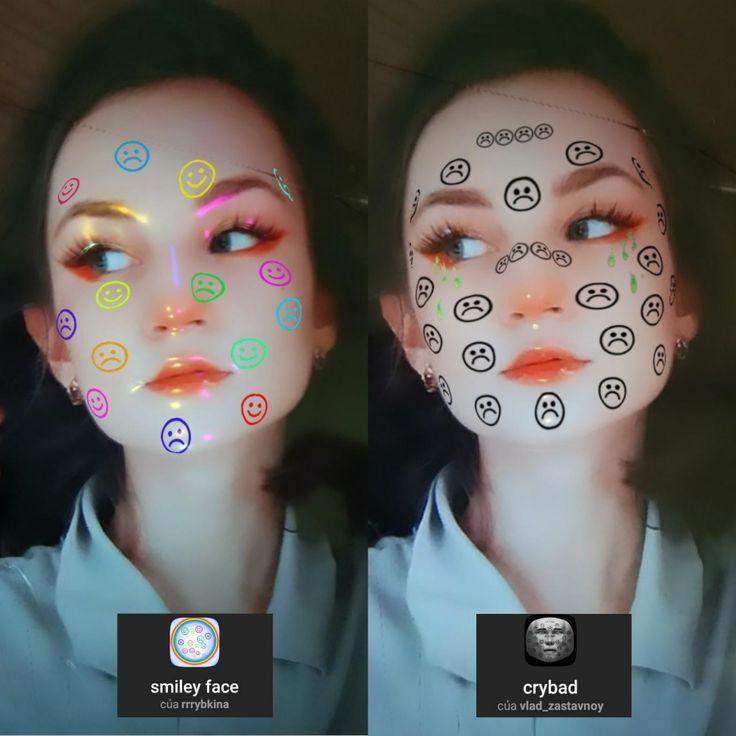
That’s right! We made our own AR filter for Instagram. It’s called Emoji Roulette and you can try it for yourself by going to our Instagram profile and tapping the smiley face icon.
This step-by-step guide shows you how to start creating custom filters for Instagram Stories.
Step 1: Download Spark AR StudioSpark AR Studio is the easy-to-use platform you need to create custom filters and effects. Currently, it’s available for Mac and Windows.
Step 2: Decide on your effectNext, walk through the tutorials in the Learning Center to get a feel for the program’s interface. Once you’re ready to get started, decide whether you’ll create a filter from scratch or choose from one of the eight templates.
We’re going to walk through the World Object template. This involves putting a 3D object into the real world, just like Coca-Cola Poland did with its polar bear.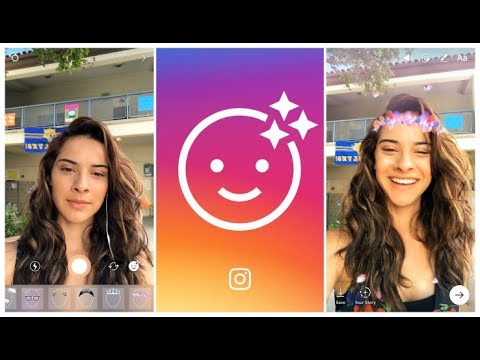
Get your free pack of 72 customizable Instagram Stories templates now. Save time and look professional while promoting your brand in style.
Get the templates now!
Step 3: Getting startedYou’ll see a placeholder object in the central panel when you open the template. That central panel is called the Viewport. This is where you’ll build your filter.
The iPhone 8 in the corner is the Simulator. This is where you’ll preview your work. Using the dropdown, you can change the Simulator from an iPhone 8 to another device.
To the left is the Scene panel. You’ll use the options here to edit your Instagram Stories AR filters.
Step 4: Upload a 3D assetChoose a 3D asset for your filter from the AR Library or import your own. For this guide, we are importing a free asset from the AR Library.
The AR Library also allows you to choose from free audio files, animations and more.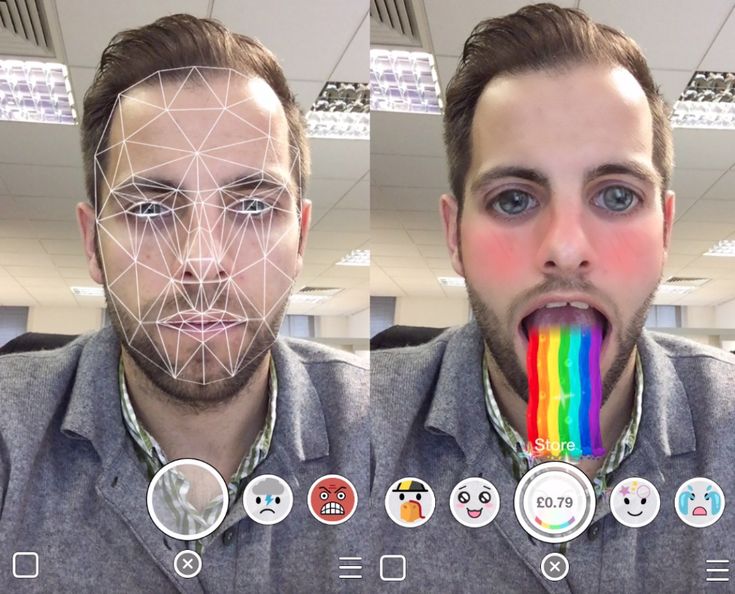
Now, you’ll see your uploaded asset—in our case, a rotating pizza—in the Viewport. Using the Scene panel, edit how it looks, moves and interacts with the real-world. The edits will result in your custom AR filter.
For example, you can change the colour and intensity of ambient light. The below images show the 3D asset without ambient lighting (top) and with ambient lighting (below).
As you explore the Scene panel on the left, you’ll see that you can also:
You can send your test file to Instagram or Facebook to see how it works in Instagram Stories or Facebook Stories. Or you can download the Spark AR Player app.
Now, press the “upload” button in the bottom left-hand corner. You’ll find it right below the “test on device” button.
Keep in mind that your new effect won’t be published immediately. First, your creation will be reviewed to make sure it meets Spark AR’s policies and guidelines. This review process might only take a few days, or it could take up to one week.
Spark AR also has more details in its Learning Center on submitting newly created effects for approval.
Step 8: Keep learningAs you familiarize yourself with this platform, you’ll quickly learn how to work with its other templates—or how to create an AR filter on a blank canvas.
Need more guidance? Curious about face filters, lighting filters or other AR effects? Spark AR has tons of useful guides in its Learning Center:
Now, it’s your turn. If you think creating your own AR filter for Instagram Stories is right for your brand, it’s time to get creative. Good luck!
Save time managing your Instagram presence—and all your other social media accounts—by using Hootsuite. Create and schedule posts, respond to comments, track competitors, and measure performance. Try it free today.
Get Started
Grow on Instagram
Easily create, analyze, and schedule Instagram posts, Stories, and Reels with Hootsuite. Save time and get results.
Free 30-Day Trial
In this step, we are aiming to expand both rectangles to cover the entire filter.
4. Set the size of the rectangles. Select the background rectangle (previously known as "Rectangle0") and you'll see its properties in the panel on the right. Click on the boxes next to "Size" to change the width ("Fill width") and height ("Fill height") of the fill and stretch the rectangles to fill the screen of the device. Do the same for the second rectangle. Your viewport will be completely covered by rectangles, which will be displayed as a checkered pattern called "Alpha". This means they are transparent, but they are still there. nine0005
5. Separate the layers. By default, any object you add is attached to the layer you last worked on. If you don't need it, move it to another layer. For the segmentation effect to work, you need rectangles on different layers. So the background is "drawn" after the foreground. That's what the background rectangle in the Scene panel is for. In the Inspector panel on the right, click the "Layer" field and select "Create New Layer". You can rename layers if you wish by selecting the Layers tab in the upper right corner of the Scene panel and double-clicking on each layer name in turn. nine0005
6. Create new materials. Time to give these transparent rectangles a solid, visible shape. This is what the "Materials" function is for. You can assign each rectangle its own material: select them one by one in the Scene panel, and then in the Inspector panel on the right, click the plus sign next to Materials and click Create New Material. As a result, two materials should appear in the Assets panel (under each rectangle)
Materials can also be renamed. Once you've selected your materials, you'll see a host of new options in the Inspector panel. You can change the color, texture, transparency, blending, and so on. If you want to experiment with your filters, change these settings and see what happens. nine0005
7. Create a segmentation texture. This will turn any video taken with your camera into a texture, which means it will separate you (or whoever you're pointing at) from the background. In the Scene panel, click Camera, and in the Inspector panel, click the plus sign next to Segmentation. A new resource will appear in the Assets panel, named personSegmentationMaskTexture0 by default.
8. Add texture extraction to the front of the material. First, click Camera in the Scene panel, and in the Inspector panel, click the plus sign next to Texture Extraction. Another resource named "cameraTexture0" will appear in the Assets panel. nine0017 To use it as a new texture, click on the foreground material in the Assets panel. In the Inspector panel, change the Shader Type to Flat, which will give this material the properties of a flat 2D element.
In "Diffuse" (the second item in the "Inspector" panel), find "Texture" and select cameraTexture0 from the drop-down menu. At the bottom, check the box next to "Alpha", in the "Texture" field, open the drop-down menu and select personSegmentationMaskTexture0. nine0005
9. Change the background.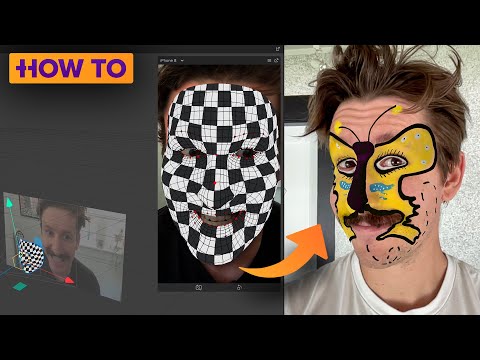 It may seem like nothing happened, but you're almost there, as you've set the base for your filter. Click on the background material and in the Inspector panel, under Diffuse, change the color to something that contrasts with the object in the camera. This will help you adjust the segmentation edges by changing the mask size and edge softness. You'll find these options in the Inspector panel when you double-click personSegmentationMaskTexture0.
Select a material for the background, and in the Diffuse section, reset the color to white. Below, next to "Texture", click "Choose File From Computer" and upload the image you want to use as the background. Keep in mind that photo files can be too heavy for Instagram or Facebook, so keep them as "light" as possible. nine0005
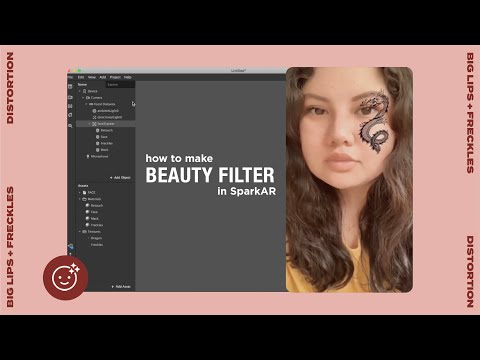
Watch this video tutorial for example, you will learn how to use camera segmentation and texture to create an effect that separates someone from the background. Change backgrounds however you want.
Content
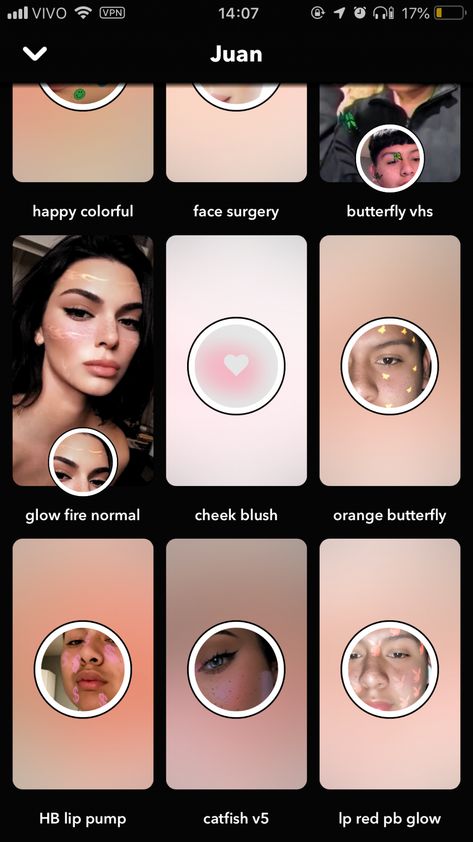 9004 9004 Instagram filters for stories
Although it may seem somewhat trivial, Instagram filters can make or break your post. Choose the perfect one and the photo will blow up Instagram. Pick the wrong one and your once beautiful picture with so much potential will be a flop. nine0005
Everyone edit photos and apply face filters for instagram. If someone says they don't, they are lying. When famous bloggers edit their photos, they put one filter on top of another and then spice up the image with another overlay, here's how it works:
Few bloggers are photography experts, but using filters, they can turn their photos into candy, making a beautiful ribbon in the same style.
Instagram has over 40 built-in filters. We take a look at the most popular photo filters based on 79 data0 000 users.
But before we get started, let's take a look at a brief history of built-in options.
In a 2018 marketing study, marketers found that native Instagram filters are used 10.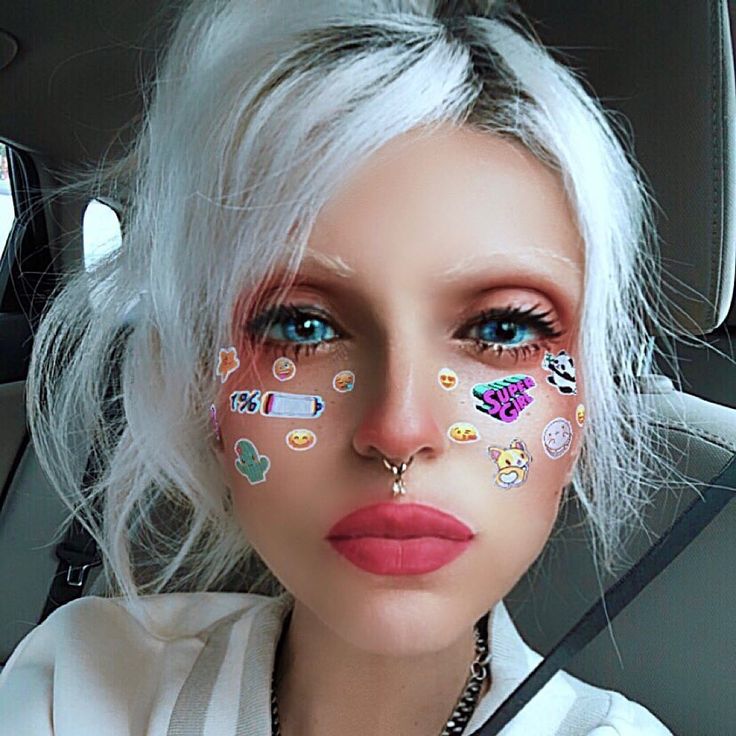 5% of the time. The fact is that Instagram was created as a photo sharing app, not a photo editing app. Filters came much later.
You may not have heard the name Cole Rise before, but he played a huge role in what Instagram is now. He was the 75th user on the platform, helped design the app icon, and most importantly, he also created some of the first built-in filters, including Sierra, Mayfair, Sutro, Amaro, and Willow, for example. nine0005
Instagram photo filters have become popular very quickly. But there was a problem - there were few of them, and the pictures began to look the same.
At the time, you couldn't swipe down on the screen to reduce effects. This explains the emergence of VSCO, Snapseed, A Color Story and other editing programs. Applications differed from IG's built-in options.
These applications gave more creative freedom and advantages to those who wanted to stand out from the crowd. So it's not that the filters were bad, but that people used them excessively. nine0005
The built-in options are located in the effects gallery. If you don’t know how to find a filter on Instagram, here’s the instruction just in case:
So now that you've had a quick look at the nature of effects, let's take a look at the top 10 Instagram filters.
That's right, the most popular Instagram filter is the "Normal" filter, in which no effect is applied to the image. It is clear that this is not a filter. "Normal" was popular last year when it was overdubbed in 89.5% of cases.
This doesn't mean that bloggers post their #NoFilter natural photos. In most cases, they still pre-process their photos in other apps where they add aesthetic Instagram filters. And the finished photos are uploaded to Instagram. That's why they don't need IG's built-in options, they just choose "Normal".
Second place goes to Clarendon. An Instagram filter that adds light to lighter areas and darkness to darker areas. nine0005
What Clarendon does is “cool down” photography. Because the image increases saturation and contrast, but then adds a blue tint to clean highlight areas and cools shadows and highlights.
Its midtones, however, are relatively warm, allowing the skin in portrait photos to look natural despite being chilled. Good for: selfies.
The Juno Effect is not only a great movie, but also a very good filter. It's simple and doesn't do anything special other than slightly manipulating the contrast and brightness of the photo. nine0005
Enhances reds and yellows, making them slightly more visible than blues.
Guess the riddle: if Beethoven was on Instagram, what filter would he use? You answered correctly: Ludwig.
Joking aside, this effect is named after the very long-named architect Ludwig Mies van der Rohe, who coined the famous minimalist mantra “less is more”.
Ludwig reduces saturation and lightness for yellows, greens, cyan, blues, and magenta, except for reds, which become more saturated. With very little contrast reduction, Ludwig brings out the vibrancy of the red color. Good for portraits, geometric shapes, architecture. nine0005
When you need to lighten up a photo, keep a cool feel and make it a bit washed out, Lark is your best friend. It increases the exposure, which makes the picture brighter.
Slightly reduces vibration, making it more "quiet". Reduces the saturation of reds and magenta tones, and increases the saturation of blues and greens. Bloggers put Lark on nature shots.
Gingham gives images a vintage effect as it mutes the color of the photo. Gingham reduces highlights (by about 48%), reduces saturation (by about 31%), and applies a white vignette to the image. nine0005
This creates a slight haze and gives the painting a subtle warm atmosphere.
Lo-fi has been a strong player for many years and has been one of the top filters on instagram. When the author turns on the option, the image becomes more intense.
The option adds shadows and increases saturation for that super dramatic look that any mascara model would be proud of. It creates the atmosphere of the 90s.
nine0115 Aden
Option Aden is retro with pastel shades. The style works great if the author needs to soften harsh light.
It dims bright photos a little, making them more delicate and a little dreamy. Photographers add Aden for autumn shots.
Also on the list is good old Valencia. This filter will add a yellow tint to your image, instantly warming up the entire photo, as if it were being lit by a nightlight.
nine0002 Use for photographs with light pinks and pastels.
Last but not least, the X-Pro II. It rounds out the top best photo filters and is the highest contrast and probably the least reserved on the list.
XPro adds a lot of shadows and a vignette that darkens the edges of the photo. X-PRO II is based on a "cross-processing" photo development method, where photographs are processed in a chemical solution for different film types. nine0005
In instagram, this is one of the centenarians. It was designed for below-average camera phones in 2010, when the social network had just launched. Surprisingly, this is still one of the most popular filters on the platform.
Superimpose to turn ordinary photos into very intense ones.
And here's the thing about applying effects: what's popular now may be outdated in a year or two. Therefore, follow the trends.
Beautiful Instagram filters can be great if you know how to apply them. Apply them sparingly and mix them together. And don't forget to compare the result with the original photo. nine0005
Instagram filters should be used like makeup: it should enhance your features, not change your whole face.
First, upload a photo to Instagram with the + button on the main screen. Then select the desired image from your phone's gallery and click the "Next" button. Use Instagram's built-in camera to take a photo, but it's usually easier to use your phone's camera.
Instagram makes photos square by default. Use the <> button in the lower right corner to resize the photo to its original size. nine0005
If you keep the square format, put your fingertip on the photo to move it and get exactly the frame you want.
The grid lines that appear will help you adjust your visual composition. This is no accident a 3x3 grid; it helps to follow the classic “rule of thirds”.
Once you click "Next", the application will take you to the filter screen. When you click on any of the filter thumbnails at the bottom - Clarendon, for example - the app immediately applies that effect to the image. (This works exactly the same if you're posting a video.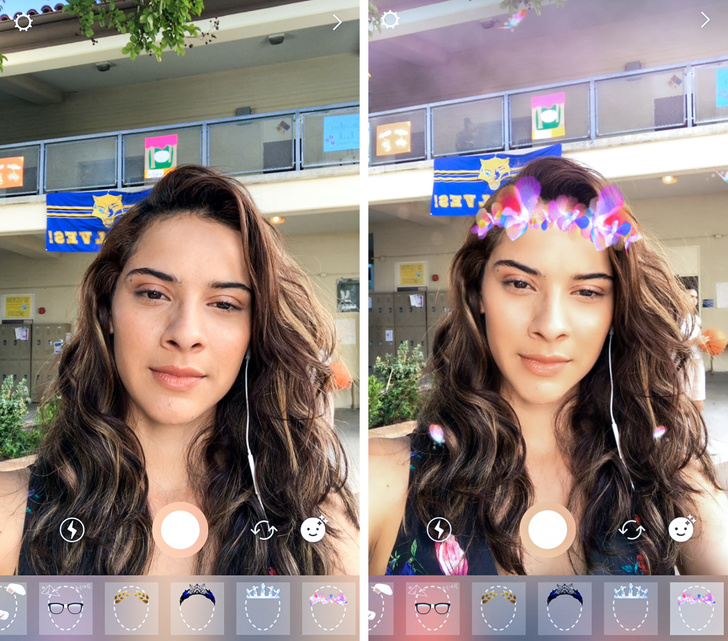 )
)
If you click on the same filter thumbnail a second time, Instagram will reduce the intensity of the filter to achieve a more subdued look.
If you're taking a photo with an iPhone, click on the small square icon to add a simple frame.
Before selecting "Next", click "Edit" at the bottom of the screen. And adjust the alignment of the photo: contrast and brightness, warmth, saturation and color, and a few other categories. The setting is changed by linear sliders or buttons. nine0005
Once everything is as you want, click "Finish" and then "Next" to go to the publishing page where you can fill in the text for the post.
As you get more experience with effects, you'll start developing favorites that you'll come back to over and over again.
Scrolling the list of effects all the way to the right, you will see the option “Control” to go to a new menu that changes the order of the filters with a button with three bars on the left. nine0005
You can hide filters by clicking on the checkmark. This way, your favorite filters will appear first and you won't have to wade through the ones you never use.
Unnecessary options can also be hidden without a menu. On the filter page, press and hold any thumbnail for a few seconds. The thumbnail will become slightly larger and ready to be moved.
You can then drag the thumbnail left or right to change its position in the ruler. Or drag up to the drag to hide area that temporarily appears in place of the photo you are editing. nine0005
AR - short for Augmented reality (translated from English - augmented reality). Sounds futuristic, but Instagram has been using them since 2017.
In Facebook's Spark AR Studio platform, photographers and designers create interactive AR filters. In August 2019, this platform was opened to the public to make AR effects for stories.
Augmented Reality (AR) are computer-generated effects superimposed on a real image displayed by your camera. In AR stories, the filter changes the image displayed by the front or rear camera. nine0005
For example, the Instagram dog filter (Puppy) overlays the ears and nose of a dog over the face. When you move, these digital effects move with you.
Or else, for example, the "Hello 2020" filter is superimposed on the face of glasses 2020, and digital balloons fall down the screen.
Be aware that AR filters are different from instagram preset options. The pre-installed Instagram filters that we talked about above improve the quality of photos in one click. Unlike them, AR is an interactive element only for Instagram stories. nine0005
At their F8 conference in May 2019, Facebook announced that SparkAR Studio is designed to create augmented reality effects for Instagram, Facebook, Messenger and Portal stories.
Before this platform went public in August 2019, Instagram users were required to receive invitations to SparkAR. This meant that only a select few could develop and publish AR filters.