By
Evi Abeler
Evi Abeler
Evi Abeler is an award-winning photographer who shoots for various food publications, cookbooks, and brands.
Learn about The Spruce Eats' Editorial Process
Updated on 11/26/18
Capture your next party with an Instagram video Evi Abeler PhotographyIf you are on Instagram and are following accounts of food brands or chefs like @Starbucks, @MarcusCooks, @JamieOliver, or @Hatchery you have probably seen these short and sweet Instagram videos. Many culinary ventures have discovered Instagram videos as an engaging tool to spread their message. Most videos are upbeat and showcase simple recipes, techniques, or a snippet of behind the scenes life.
Ready to make one? First think about a recipe, technique, or story that can be shared in 15 sec. Don’t start with a recipe that has more than a handful of ingredients, a technique with more than a few steps, or a story with a complicated plot. Think quick, simple, and fun. How to make a cocktail, cut an avocado, or operate a mixer is where to begin.
Prepare your setting and have all ingredients and props ready to go. If you want to keep it simple use the Instagram app and attach your camera phone to a tripod or camera stand. (A Gorillapod can be attached to almost everything.) This way you can film and arrange the scene without also holding the camera. However, you’ll find out quickly that another set of hands will make life easier. Ask a friend to film you or to be the model for your Instagram clip.
Open the Instagram app and tap the camera button to go into photo shooting mode, then tap the video camera icon on the bottom right to enter the video mode. Hold the big video button down—it will shoot as long as you hold it. This means you can capture one long stream or shoot a series of short clips. Keep in mind that you are recording the sound too. Use your headphones' built-in mic if you are planning to talk over your video.
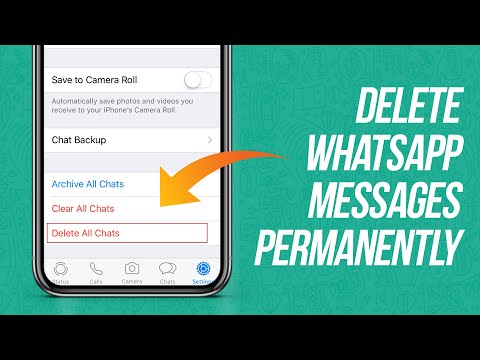
Instagram lets you view your video and then go back and delete or add shots. To delete a shot, go back to video shooting mode, tap the “x” button on the bottom left. It’ll highlight the last shot in red. Tap the button again to confirm that you want to delete that shot. Now you can keep adding new shots or leave it as is. Once you have your sequence in place add filters (or not) and pick a thumbnail. This is the image that will show up in your stream, make sure it’s one that will make your followers stop, click, and like.
Add a description of the video, the recipe, or technique to your video. Don’t forget hashtags such as #foodvideo, #recipevideo, #howto and tag anybody who helped or was in the clip.
If you want to step up the image quality, add titles or have more controls over your edit, you can use a professional camera and edit your video with iMovie or FinalCut. With a quick file transfer, you can upload your videos to your phone and then import into Instagram. Keep in mind that most videos are rectangular and Instagram will crop them to a square format.
Clipchamp is a free online video editorTry for free
Share this post
On this page
Looking for the secret weapon to get eyeballs on your video content?
Food. It’s always food.
Nothing stops a hungry internet browser in their tracks faster than a juicy cooking video. It’s one thing to read a recipe from a cookbook or blog, but recipes that ‘show’ not just ‘tell’ are the most engaging for all cooks, especially the first time making a recipe.
In this craving-inducing blog, we’ll break down how to make recipe videos, how to elevate them with art direction and music, how to adapt them for YouTube, Facebook and Instagram, and more.
Get ready to dig in!
There’s hundreds and thousands of cooking videos and cooking tutorials out there. From quick creative recipe ideas in under a minute to step-by-step tutorials viewers can follow along with.
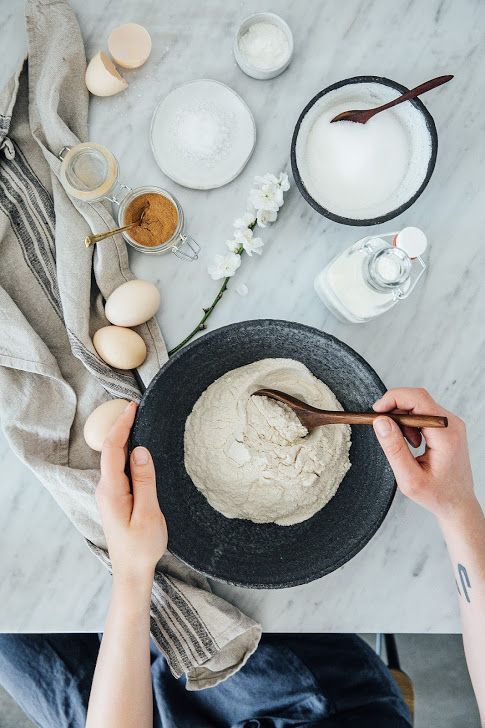
Lay it out. Jot down the steps of your recipe before filming and have your ingredients clearly laid out.
The 3-second rule. Like any video, be sure to grab your viewers attention ASAP - show a shot of the amazing finished recipe to entice your viewer to watch from start to finish.
Make it move. Video is all about movement, capture the action of the kitchen with exciting pour, dusting, and sizzle action.
Angles. use two cameras or phones to get both aerial and side views.
Bright, soft lighting. Lighting is to photography as flour is to baking.
Keep it clean. make sure your workspace isn’t too cluttered and there aren’t crumbs or stains.
Text overlays. include instructional information from ingredients lists to key step-by-step actions.
Here’s where you can elevate your video - customise it for your various social platforms, and why not add a professional touch with your brand logo as a watermark in the corner of your video.
YouTube is a great platform for creating a cooking ‘channel’. You can categorise recipes by themes or types of meals with Playlists and a feature video on your YouTube channel homepage.
You can create playlists for your recipe videos on Facebook too, but you can also add a handy ‘shop now’ button if your brand also sells a product.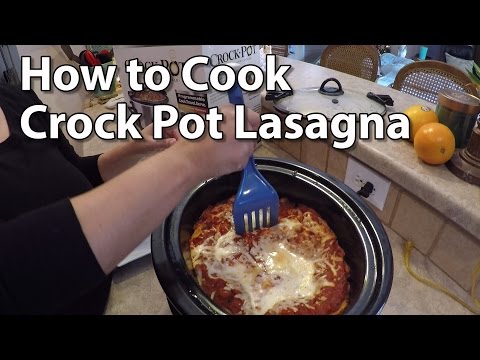
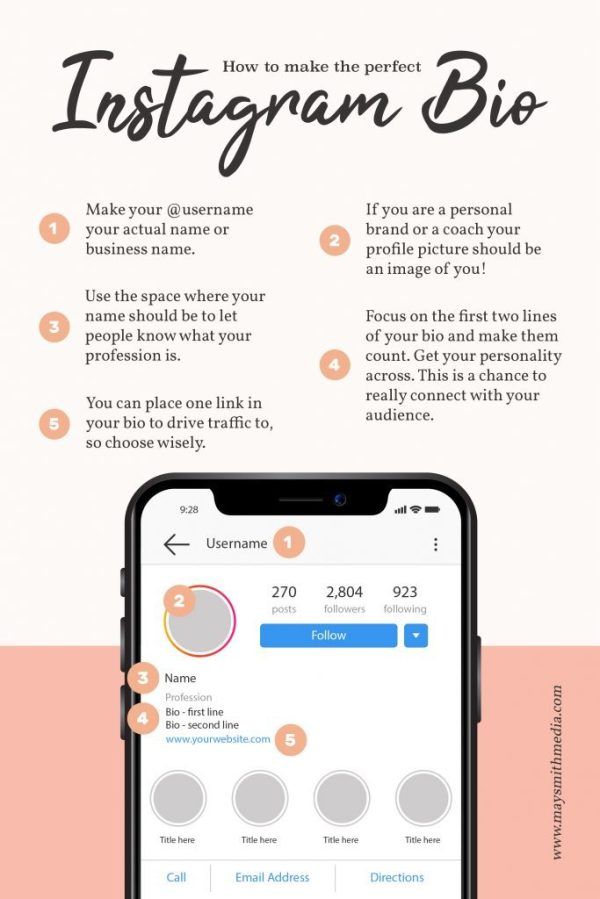
Use a short 30 second or less video in your Instagram feed to entice viewers to watch the full video and/or get the recipe with the ‘link in bio’ method. You can use the same method for clickthrough with Instagram Stories. Or, post longer recipe videos in IGTV (15 minutes when uploading from a mobile device and up to 60 minutes when uploading from the web).
Here’s a sweet YouTube tutorial on how to edit an Instagram story with Clipchamp.
Lights, camera, action!
This might seem like a no-brainer, but learning to use your gear will help you put your best fork forward. If you’re shooting on DSLR camera, get into the habit of using manual mode to adjust for the right light and atmosphere (you know - the ISO, f-stop and white balance) to get the best quality video footage.
And, you’re going to want to perfect that ‘top down’ angle.
Lighting.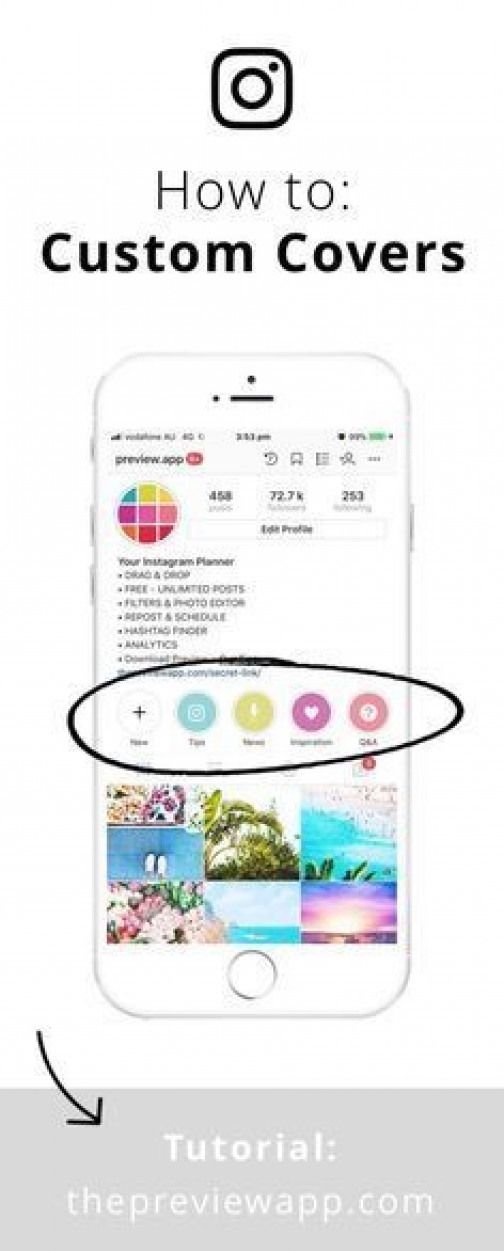 Grab a lamp and safely attach some heatproof baking paper to create ‘diffused light’ in place of a professional soft box.
Tripod. If you haven’t got a rig, a tripod with a reversible centre will do the trick for that top-down angle.
Coverage. Use a wide enough lens or perspective to capture the full view.
Close-ups. Adjust your zoom for the most drool-worthy moments (like capturing that grilled cheese pull apart).
If you don’t have access to a DSLR, you can still apply these principles to shooting on your phone. Tip: Experiment using the time-lapse function on your phone to speed up parts of the video. You can create live video for Instagram or Facebook or even record an entire recipe video on your phone then edit it with Clipchamp direct from your web browser.
Though you may fear the editing process more than a batch of burnt cookies - it doesn’t have to be complicated or expensive!
All you need is the basics.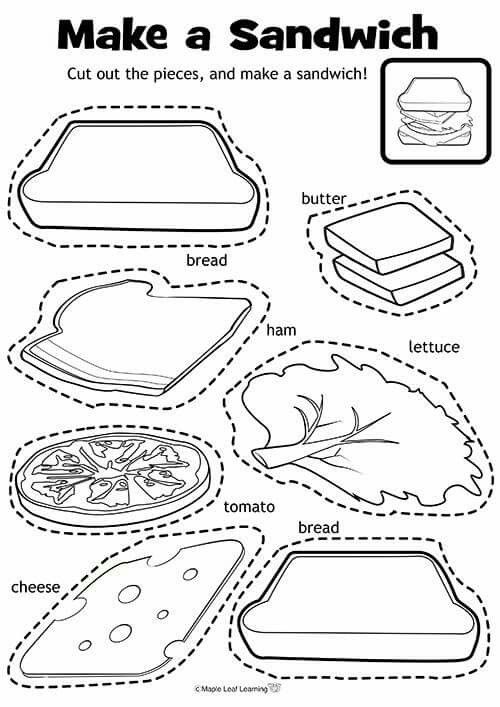
Viola! Or should we say bon appetit! All these basic tools and more are at the ready with Clipchamp’s video editor!
They say a picture paints a thousand words, so video says a heck more! You need the right soundtrack to stand out from the wallflowers!
For example, doesn’t this IGTV video from chef The Tuscan Gun make you wanna cook arancini while dancing? That’s the kind of effect your cooking video background music should have.
View this post on Instagram
My friend Anthony Bourdain used to say: “When you travel, always try to skip airplane meals, only a few things are as exciting as arriving hungry in a new place”. Last summer, for the very first time, Debi and I traveled through Sicily with our daughters; as they are growing up, the level of adventure, and the excitement is becoming more “adult”, as we explore places we have never been together before.
I will never forget our arrival at the Palermo airport around 2pm in a super hot summer day. After a quick flight from Florence we were eager to jump on our rental car and drive straight to Scopello (one of the most beautiful places in the world), where we had reserved our little apartment in an old tuna fishing farm. As we exited the airplane and started walking to the luggage area, we found ourselves engulfed in a cloud of hot fried air that carried along the warmest sense of welcome and homecoming. Without looking at each other, without pausing to think or discuss, we all walked straight toward a small counter at the very end of the concessions’ stand line… and like us, at least another dozen of passengers from our same flight, decided to start their Sicilian vacation by savoring a few traditional and hyper local Arancini di riso. Common throughout Sicily, but historically connected with the cities of Palermo and Messina, Arancini are deep fried balls of saffron infused risotto with a filling of either meat sauce and peas, or mozzarella and prosciutto.
As simple as it gets, as delicious as you might hope, as comforting as your grandmother’s best hugs, this recipe is incredibly easy and fairly quick to execute… well, kind of. While tradition is always great to keep alive and pass down to new generations, I invite you to use this recipe to recycle any risotto recipe or filling you might like: last week I repurposed our zucchini and shrimp risotto recipe into a banging mid afternoon snack that went great with a couple of iced beers! FULL RECIPE AT - THETUSCANGUN.COM Food by @thetuscangun Music by #MINIMONO - The Clover rmx Courtesy of @bosconirecords Jewelry by @cristianfenziofficial
A post shared by Gabriele Corcos (@thetuscangun) on
If there was a Michelin Star rating for cooking videos, it would surely go to the ever-drool-worthy, Tasty. Buzzfeed’s Tasty cooking videos are legendary (98 million Facebook fans kind of legendary).![]()
They follow a simple no-fuss formula: make it food, make it informative, and make it inspiring. Here’s some totally snackable recipe video examples from Tasty, notice variation of video formats for different platforms.
View this post on Instagram
Special Thanks: TikTok accounts:https://www.tiktok.com/@willedmond IG: https://www.instagram.com/willedmond/
A post shared by Tasty (@buzzfeedtasty) on
(this one is repurposing a TikTok video - another platform going gangbusters for cooking videos).
See, even with big budgets, Tasty still talks to the people with it’s down to earth approach to food, often simply honing in for the sheer realness of cooking food, and having fun.
Hungry for more? Feast your eyes on further handy tips for video editing with Clipchamp.
Share this post
Return to the Clipchamp blog
March 12, 2019
It's no longer a secret that Instagram video is a new trend. The video attracts more attention, allows you to tell a story, create an atmosphere and convey a mood. Global brands have been using this for some time now, and advertising has migrated from TV to where the new generation of consumers lives - to social networks. But it is absolutely not necessary to be a brand in order to create and publish sketches from life. First things first - how to shoot and "upload" video content on Instagram so that it's right - quickly, beautifully and without loss of quality.

I have tried a million and one video editing software in my own skin and I can tell you about my favorites that I would not trade for anything now:
Sony Vegas Pro is a sophisticated professional desktop program for post-production. It will be easy for beginners to get lost in it, but if you don’t get scared right away, it will give you a lot of opportunities for editing and video processing.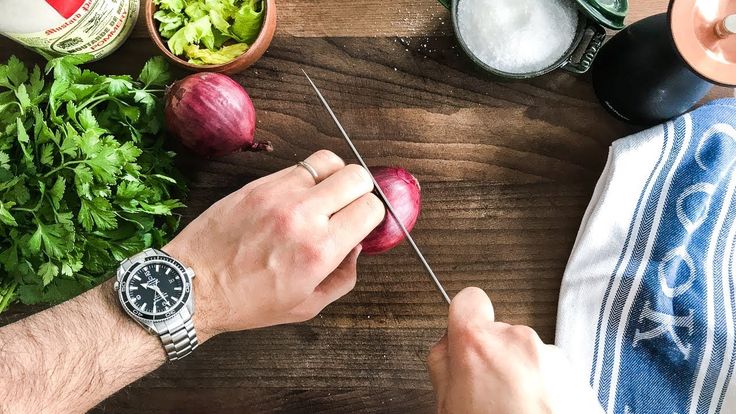
InShot is an application for video editing and photo editing. If you want a process without recamera, and the result of the work - watermarks "made in InShot", you will have to buy a paid subscription. The interface is simple and clear, it gives you everything you need - transitions, cropping, cropping (among the options you will find both the story format, and the format for the Instagram feed and many others), photo filters and various effects with the ability to adjust the intensity, overlay graphics, text and music. The application has a small library of music for which Instagram will not block your video, it is also possible to attach music from the library on your device. You can mix several audio and video tracks, which can also be useful (when, for example, you want the main character's voice to sound in the frame along with the musical accompaniment). Most importantly, InShot will not "eat" the quality of your video and will suggest what resolution to save the output video in (choose the maximum, and you won't go wrong).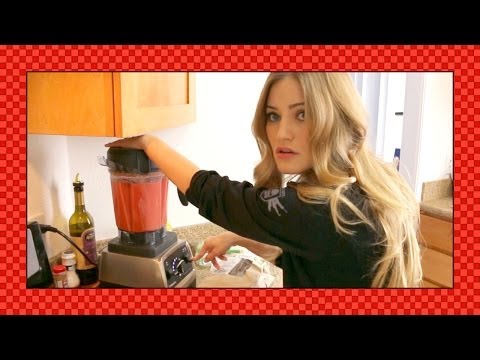
Splice is another very handy editing application: editing, editing, adding music, effects and text.
IMOVIE - this video editor is suitable for those who need a simple as an ax interface, in addition, as a bonus, there is also a desktop version of IMOVIE.
VSCO - the same application with an endless set of filters and tools for color correction of photos, as it turned out, it is also suitable for video: the only thing you need to access this feature is to purchase a ready-made subscription for $ 20, but it's worth it if you are going to edit regularly.
8mm is an application for creating an old film effect on video. As a result, your 4K video can turn into a video from a worn cassette from the eighties - with noise, dates, scuffs. If you do not overdo it with such effects, it is quite an interesting application.
Glitche is the latest in the digital world, used even by pop stars and famous directors of pop star music videos. The application is paid, by subscription, and contains a huge number of digital errors and effects, some of which are present in InShot - film effects, various distortions, lighting effects, textures, digital defects.
Unfold is probably the most promoted collage service in Stories, which allows you to create collages, including from videos. Templates are updated periodically, but all collections are usually paid.
KIRAKIRA+ - Downloads of this app seems to be increasing closer to the New Year holidays - it adds a glamorous glow effect to everything that glows in the frame - from the lights of the garlands to the sparkles on your lips or dress. You can shoot directly in the application, or you can add an after-the-fact effect to photos and videos from the library on your device. Several of my girlfriends were extremely surprised that Kim Kardashian's butt in a sparkling dress sparkled so much at one time only thanks to this application.
Almost the entire collection, as you can see, is a smartphone application. Just editing on a computer makes sense if you are a professional and deal with large amounts of data. In the case of personal videos and small creative sketches for social networks, using a smartphone is much more convenient. A few minutes, and the result can be "filled" to the audience. And besides, you can already fully appreciate how your video looks on a mobile device already during editing.
 Do not think that the higher the quality, the better. If the video is larger than Instagram accepts, it will be crookedly compressed automatically, and the result that your subscribers will see will be deplorable.
 Video | ZARA, MANGO
Before you start recording a video, prepare everything you need.
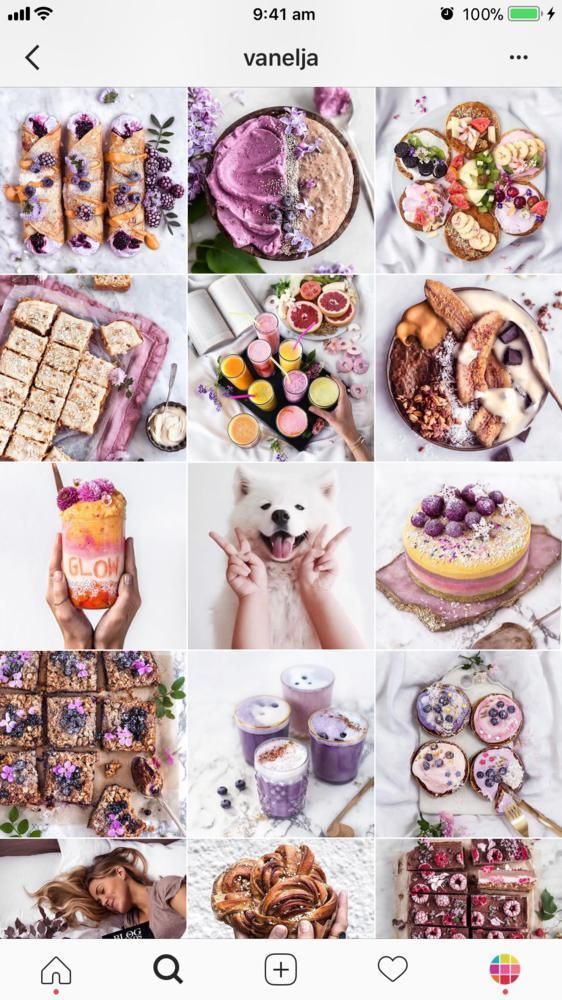
1. First of all, we are talking about choosing a recipe. If you're in the mood for long-term blogging, try to plan a menu for a couple of weeks ahead.
Think over the menu in advance so that there are enough ideas for several episodes
2. Cooking eggs without eggs will not work - the shooting will have to be postponed. Check if everything is in place. To make the products in the frame look prettier, rinse them in advance.
Make sure all groceries are in place
3. Clean out the kitchen. Creative clutter is great, but your followers won't be happy with clutter. Hide all dirty dishes and wipe the table:
don't hesitate, greasy traces and food crumbs will not go unnoticed.
Keep your frame clean
4. Be mindful of lighting: shooting in daylight will produce more natural and saturated colors. In this case, the camera should be directed away from the window. At night, take care of the required number of lamps.
Open the curtains and clear the window sill
5. How to shoot video recipes from above? If you did not have time to get a personal operator, there is no way without a tripod. For a novice blogger, an ordinary tripod is enough.
What about those who decide to take prescriptions on their phone? You will have to use a special tripod
The scenario of such videos often develops as follows: a greeting,
frames with a dish that should turn out as a result, listing the ingredients, the cooking process itself, demonstrating the result, farewell. However
you can always experiment with angles and shooting techniques.
Don't be afraid to be creative
If you decide to make a recipe video for Instagram or TikTok, you can apply the stop motion effect. To create an animation, you need to capture each stage (for example, adding products to pizza), and then arrange them in the correct sequence on the video editor's timeline. More on this later.
To process the material, use the Video MONTAGE editor. You do not have to understand the interface for a long time - this program is completely in Russian, there are no incomprehensible buttons and complex terms. It works great on PCs of any size and is compatible with earlier versions of Windows up to XP.
1. First, install the software on your computer. Download the distribution kit from the site and follow the instructions of the installer. The installation will take no more than a couple of minutes.
Install the program VideoMONTAZH right now:
Download for free!Works great on Windows 11, 10, 8, 7 and XP
2. Open the program, create a new project and load files from explorer.
How to edit video on a computer? To proceed to editing a fragment, click on the corresponding button. Here you can set a new duration using the sliders, change the speed and adjust the image settings - automatically or manually. Don't forget to click "Apply" when finished.
The speed can even be increased by 10 times.
3. Add a start screen. The Titles tab contains dozens of stylish screensavers that you can edit to your liking.
You can change the background image to your own
If you don't like the static image, upload the video from your computer and place the text manually. Also, subscribers will appreciate the tips along the video. There are 50+ interesting fonts in the Labels tab. You can change the fill, transparency, shadow, and outline of the letters. To set up smooth text animation, select an option from the menu.
To change the font size, drag the frames
4. Insert voice acting. Record comments from the microphone and embed them into the project via "Add Audio Files". Hold the line to change the volume. Want to mute the sound at some point? Right-click on the voiceover and select "Add volume point", and then move it to the desired location.
Adjust volume manually
5. To create a stop motion effect, load the photos into the editor and arrange them in order. The program will automatically dilute them with smooth transitions - you need to get rid of them. To do this, select them and click on the urn icon. If you notice that there are black bands in the frame, use the "Crop Clip" function. It remains to adjust the duration of the fragments - 5 seconds is enough. Stylish effect is ready!
To adjust the photo quality, look at the Image and Enhance tabs
6. Save the result. Video MONTAGE allows you to export the result in all popular formats: AVI, MP4, MOV, MKV, etc.
Choose the format
You can speed up the upload of the video to social networks. To post a video on YouTube, enter your account information and designate its parameters. It remains to wait for the end of the conversion - all the likes will be yours!
To upload to YouTube, enter your login and password
As you can see, becoming a food blogger is not difficult at all.