When designing your pic be sure to account for Instagram doing its own circle crop on your design (as seen above).
There’s no argument to be made against a brand taking advantage of the behemoth-sized opportunity that is creating stories, posts, and other social assets for Instagram. In fact, 71% of businesses already do so, and 51% of Instagrammers follow at least one business. If that business isn’t you, then it’s someone else. Maybe even a competitor?
You can build your Instagram account into a precious gem for followers to “ooh” and “ahh” over. It all starts with the perfect Instagram profile picture size and a well-designed profile. To help with this, we’ll show you how to create stunning profile pictures in PicMonkey, how to resize images so that they fit just right on Instagram, and leave you with a few design tips for making eye-catching Insta designs.
The display size for your Instagram profile pic is 110 x 110 pixels. However, we recommend uploading your design at a higher resolution in order to maintain image quality. (PicMonkey's Instagram profile templates come pre-sized at 360 x 360 pixels.)
Remember that your Insta profile pic will show up in more places than just your profile page; your story feed, comments, and search results, just to name a few. For that reason, having the wrong IG profile pic size can impact your social media presence drastically.
Size your photo correctly to prevent it from looking funky wherever it appears. While it's true there's only one Instagram profile pic size, knowing the other Instagram photo dimensions can help clarify your design concept. These specs can help.
| Social media image type | Dimensions in pixels |
|---|---|
| Instagram Post | 1080 x 1080 (1:1 ratio) |
| Instagram Profile Photo | 110 x 110 (1:1 ratio) |
| Instagram Landscape Photo | 1080 x 608 (1.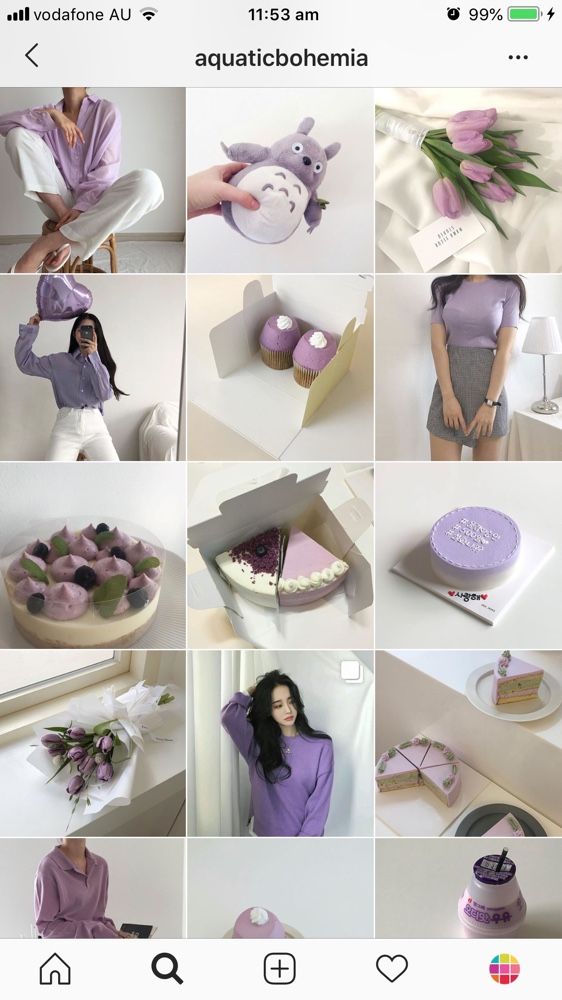 91:1 ratio) 91:1 ratio) |
| Instagram Portrait | 1080 x 1350 (4:5 ratio) |
| Instagram Story | 1080 x 1920 (9:16 ratio) |
| IGTV Cover Photo | 420 x 654 (1:1.55 ratio) |
Crave more deets about each? We got you.
Instagram posts are the most common function of the platform. Post daily happenings, announcements, events, musings, or anything else you want your followers to see on your feed that represents who you are and what you offer.
The reason we're all here, folks. Instagram profile pics can sport your pretty face, a business logo for professional pages, or whatever you want followers to see first. While faces are more popular, it can be strategic to use IG profile pics for brand development too. Whatever you choose, go for bright colors, smiles, the outdoors, or whatever will captivate your audience.
Instagram landscape photos are similar to regular Instagram posts, just with a different shape. The most popular Instagram posts are squares, but they can also be landscape, vertical, or portrait.
Instagram portrait photos are another way to adjust the orientation of an Instagram post to maximize viewer engagement. You can easily shift the Instagram specs you seek using PicMonkey's Resize tool.
Instagram Stories last a mere 24 hours — so they're not as long-standing as Instagram profile pics. They exist to drive people to your feed. You can post stickers, graphics, images, text, music, and links to engage followers any minute of any day.
Lastly, the IGTV cover photo exists to capture your video content in one pic. Consider it another way to organize your content so viewers are compelled to click on your videos. You can also bridge colors from your IG profile pic with your IGTV cover photos to build consistency.
Now that you know the differences between Instagram's posting options, you can make a stellar Instagram profile pic that resonates with the rest of your content.
And if you need more social sizes, see: Crop an Image to All the Social Sizes
Start with a blank canvas in PicMonkey.
If you want to design from scratch, the easiest way to do so is with one of PicMonkey's pre-sized blank canvases. Worry no more about creating the right Instagram profile pic size — it's been done for you!
Once you're logged into PicMonkey, click Create new > Blank Canvas.
Scroll down to Insta sizes, and select "Instagram Profile."
Upload your image or logo.
If you'd like to apply a background color first, click Background color on the left tools menu. Choose from solid colors or our super cool color gradients.
Export your finished design and upload to Instagram!
If you have an image ready but need to size it just right for Instagram, PicMonkey has two speedy ways to do so: Crop and Resize.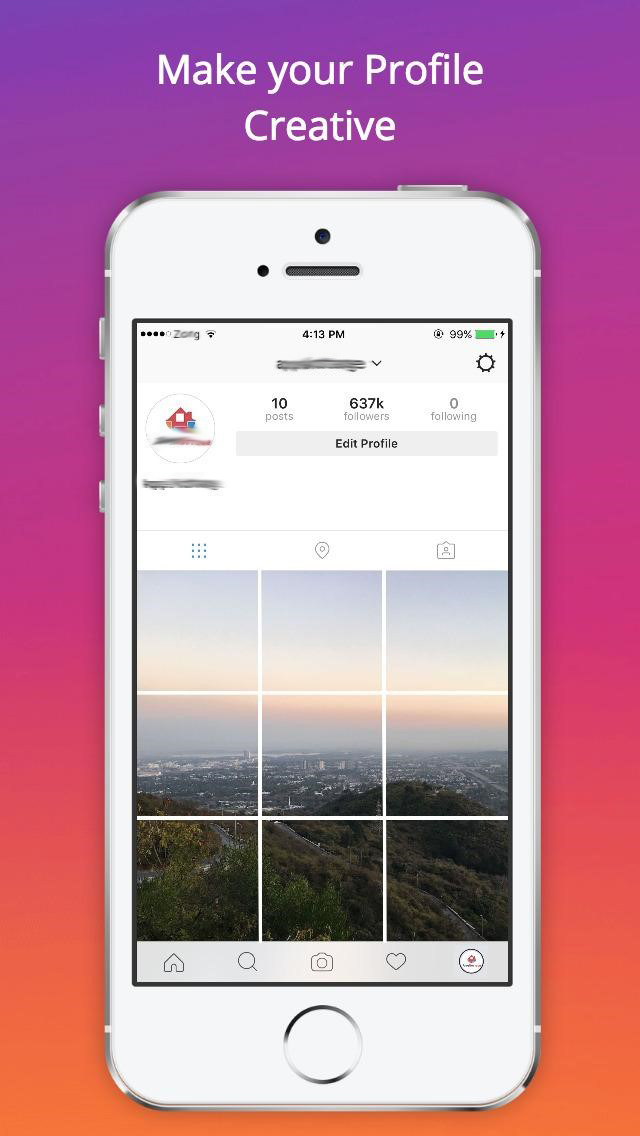
When you crop an image, you change its aspect ratio. This is the right tool to use if your image can stand to lose a bit on either side without cutting off the focal point (in this case —YOU). To use crop:
Open your image in PicMonkey.
Click Crop Canvas in the Edits menu on the left.
Use the Aspect ratio drop-down menu to select "Instagram Profile."
Move your crop box around as desired.
Click Apply to save your changes. Looks good!
If your image already has the right aspect ratio but its file size is either too small or too large, use PicMonkey's Resize tool. Be careful, though — making an image larger runs the risk of flubbing the image quality (take note of step #3 in order to prevent this). To use Resize:
Open your image in PicMonkey.
Click Resize in the Edits menu on the left.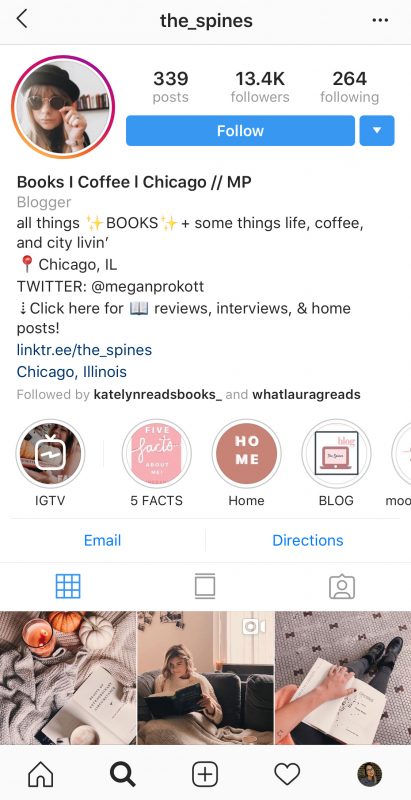
Make sure Keep proportions (chain icon) is clicked; the chain will appear closed. This automatically updates the height or width of your photo so that your image quality isn't distorted.
Click Apply to save your changes.
Learn more: How to Resize an Image Like a Pro
See all circular profile image templates in PicMonkey.
Starting from scratch is a great way to channel your own creativity and still design with speed, but if you reallllly want to get the jumpstart on your Instagram profile pic and never have to worry about botched sizing, try one of our Instagram profile templates. We have pre-sized square options, or pre-sized circular profile images (not to mention, you can pretty much commandeer any template and resize it for Insta with our wondrous Smart Resize tool). To edit a template:
Open your template in PicMonkey.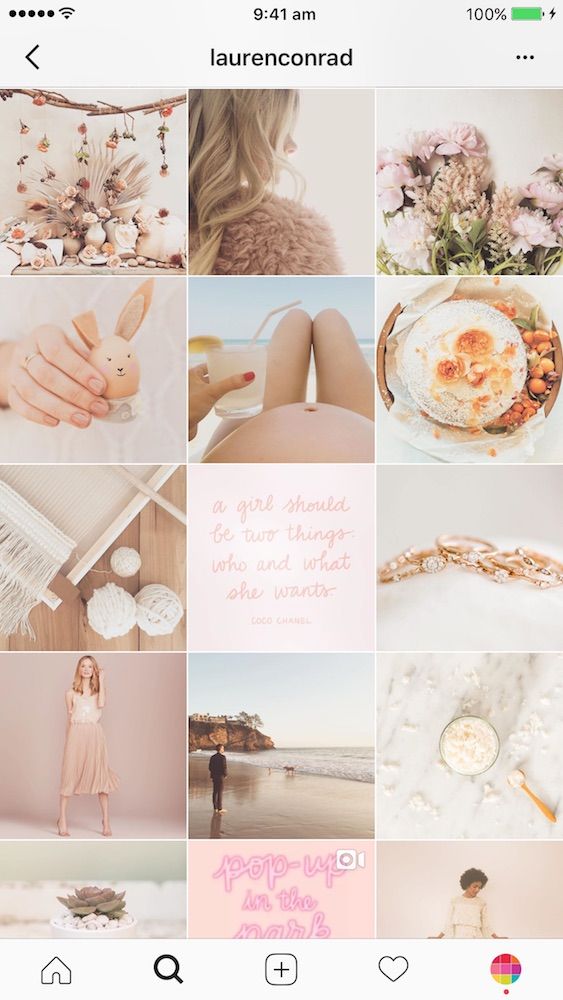
Swap out our image with your own (if using a circular image, click Edit image fill to replace the image with your pic).
Customize further with trendy photo effects, graphics, and textures.
Export and upload to Instagram!
Read more: Create Your Best Profile Pic
Our best advice? Speak to your audience. This starts with an eye-catching profile that lives up to your brand. Also keep in mind that, more often than not, your audience will be visiting your profile via mobile devices. Take a second and do some mobile Instagram scrolling of your own...it’s a small space, right? Let’s tackle a few design questions you might have.
A: What’s your brand? If your brand is Y-O-U, then you should use a photo. If you’re building a corporate Instagram presence, then a logo is the better call.
To learn how to clarify your brand for social media marketing, read our tutorial: Brand Building 101: Your Guide to Branding Your Business for Success.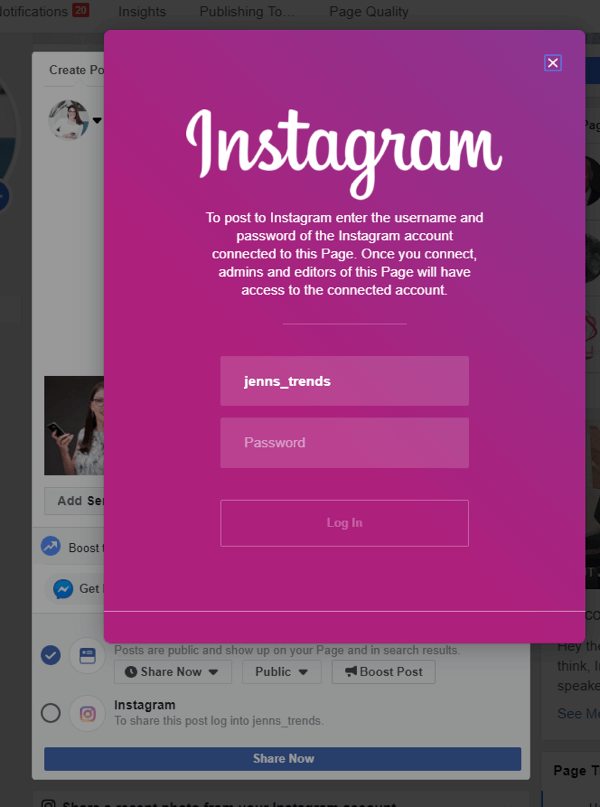
A: Yes! Place the focus of your image in the center, that way when the cropping comes, it’s no big deal. The circular shape is just going to cut around your edges, so account for this when you’re designing and you won’t have to run into trouble later. Or...simply grab one of those circular profile image templates!
A: Negative. That’s why the best thing you can do for yourself with a profile picture is to keep it simple. You want an image that'll still look good when it's smaller.
A: We can help with that. Above all else, stay on brand. Use colors that match your brand’s palette and speak to who you are. Check out our posts on color theory and creating brand color palettes (or secondary brand color palettes).
A: Absolutely! Check out these posts to get started:
Instagram Photo Sizes for 2022 & Templates
Instagram Post Design Ideas & Tips
2022 Instagram Story Size and Design Tips
Create Instagram Story Collages for Sweet Multi-Image Looks
20 Ideas for Your Instagram Story Background
How to Use Instagram Story Templates to Create Multi-Slide Stories
Congrats, pro! You've mastered the art of Instagram profile picture dimensions (and then some). New content for your next Insta post, perhaps?
We’ve talked about the ideal dimensions for your Instagram posts and images, as well as the best days and times to post on Instagram, but what about your profile picture?
Your Instagram profile photo is one of the first impressions you make on visitors, so obviously you want to make it a good (and lasting) one. In this post we’ll let you know not only the right size for your profile picture, but will share examples and specific tips to make sure your Instagram profile pic is great.
What’s displayed on your profile is a 180 x 180 photo.
That doesn’t mean that your photo has to be this precise size when you upload it, though; you can upload photos much larger than 180 x 180 pixels. The key is to ensure that your profile photo is square, with an aspect ratio of 1:1, to ensure that it displays properly. In general, a high-quality image of about 320 x 320 pixels works well without risking any blurriness or distortion when the resized image is displayed to users either on mobile or on the web.
People draw conclusions about a person or brand from a photo in as little as 40 milliseconds. Instagram’s profile photo size is small (even at the full size), and coupled with the shockingly short amount of time you have to make an impression, getting your profile pic right is paramount. Here’s what you need to know about Instagram profile picture size to ensure a perfect profile photo.
Screenshot via @kyliejenner
The visible size of an Instagram profile photo is 110 x 110 pixels on a mobile device (Android or an iPhone), and 180 x 180 pixels on the web. That means that’s the size of the photo as displayed on your profile. In the feed, it’s scaled down even smaller, to 40 x 40 pixels. Just to throw a wrench in the mix, your profile photo doesn’t actually display as a square image: it’s a circle located near your Instagram username in the Instagram app. So, you’ll need to leave some empty space in the corners.
Screenshot via @gordongram
AGAIN: That doesn’t mean that your photo has to be this precise size when you upload it, though; you can upload photos much larger than 180 x 180 pixels. The key is to ensure that your profile photo is square, with an aspect ratio of 1:1, to ensure that it displays properly. In general, a high-quality image of about 320 x 320 pixels works well without risking any blurriness or distortion when the resized image is displayed to users either on mobile or on the web. The minimum size is 110 x 110 pixels, but regardless of what size profile photo you upload, it’s stored at 320 x 320 pixels, so it makes sense to upload a photo that’s at least that size. If you upload an Instagram profile photo that’s too large, though, Instagram may compress the image quality, resulting in a photo that’s pixelated and not as crisp and clear as you had in mind.
If your original photo isn’t a perfect square, you can simply crop it to eliminate the excess (or if you want to change profile photo to a different headshot for the perfect Instagram profile picture). Just be sure to keep the elements that you want to focus on in the visible area, leaving enough empty space in the four corners so important visual elements are aligned perfectly when the image is displayed as a circle.
Whether you’re using a photo of your own smiling face or something else as your profile photo, there are a few tricks and tips to follow for a great profile photo.
The first decision to make is whether you’ll use a photo or a logo – or some other branded image. The answer depends on the type of profile that you have. If you’re a solopreneur (meaning that essentially you are the brand), a photo of yourself makes sense for your profile image. The same is true for personal profiles as well. The more professional-looking your Instagram profile photo, the better. That doesn’t necessarily mean you need to hire a professional photographer, but if your selfie game isn’t on point and you don’t have any friends with impressive photo-snapping or editing skills, it’s not a bad idea.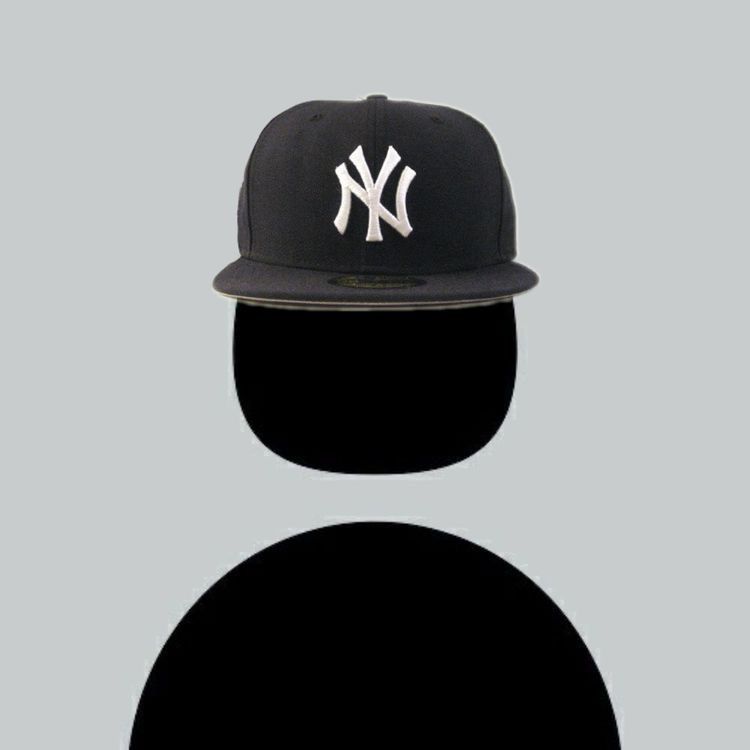
Screenshot via @cocacola
For brands that are widely recognized by the company logo, the profile photo is the perfect location to add your brand’s stamp to your business profile. If your logo isn’t square, you might consider creating a modified, square version of your logo for your profile photo. The good news is that logo will come in handy for other social media platforms, too, as images with a 1:1 aspect ratio work well for Twitter and Facebook, as well.
Alternatively, brands might opt to use a photo that features a product. Whatever option you choose, make sure it’s on-brand and in sync with your other social media profiles.
Sure, there are lots of fun and flattering filters on Snapchat you can use to take a flattering selfie, but you should actually avoid using selfies for your Instagram profile photo. Save the selfies for your Instagram feed instead. Why? First, it’s difficult to get a selfie that looks professional. Another thing to consider is that it’s difficult to get the most flattering angle when taking a selfie, and the self-facing cameras on many smartphones can actually distort your face.
While you want to be authentic, there are better ways to show off your personality while still appearing professional in your Instagram profile photo. If you don’t have a friend who can snap a few flattering pics, use the timer on your camera to take a few photos using your phone’s front-facing camera. Choose clothing in flattering colors that complement your skin tone – just be sure your clothes don’t clash with the background. (More on that below.)
If you’re not using a logo, there are other aesthetic considerations. One of the main considerations is the background: it should be flattering, yet provide enough contrast. Neutral backgrounds work well for most purposes. If there’s a prominent color in the background of your Instagram profile photo, make sure it’s a color that flatters your skin tone and aligns with your overall brand identity.
Another background consideration is clutter. If you’re using a photo of yourself or a product, a bunch of magazines stacked up in the background or a visibly messy room can detract from the power of your profile photo by competing with the main focus of the image.
Natural light tends to work well for most photography, particularly when the subject is a person. But you should also avoid direct sunlight, as you’re more likely to capture shadows. For this reason, the natural light right around sunrise or sunset (aka ‘golden hour’) tends to work well. If you need to take a photo in the bright midday sun, go indoors near a natural light source like a window to get a similar natural effect.
Screenshot via @kerrywashington
That is, unless you’re going for a dramatic effect, in which case direct, bright sunlight works to your advantage for creating dark silhouettes. Dim lighting conditions can also make for an especially dramatic, impressive Instagram profile photo, so the right lighting conditions really depends on the effect you’re going for.
Let’s face it: the small Instagram profile photo size means you don’t have a lot of room to work with. If you’re using a photo of yourself, you want your head and shoulders to be prominent in the photo, but that doesn’t mean you can’t make creative use of props to showcase your brand or personality. If you’re a photographer, use a photo of yourself holding a camera. A writer? Hold a pen or pencil. Hair stylists and makeup artists can make creative use of scissors, makeup brushes, or eyeshadow palettes as props for an Instagram profile photo that’s perfectly on-brand.
Use Tools to Refine Your Instagram Profile PhotoWhile you don’t want to make yourself unrecognizable, there’s no harm in using Photoshop or another photo editing app to correct any imperfections and tweak your Instagram profile photo to perfection. There are plenty of photo retouching apps for those who aren’t graphic design-inclined, such as PicMonkey, Facetune, Perfect 365, and more. Of course, there’s nothing wrong with using an un-retouched photo either – you’re beautiful just the way you are!
Chances are, you’re going for a certain vibe in your Instagram profile photo, but how can you be sure you’re coming across the way you want to be perceived? Use an app like Photofeeler to find out if you’re coming across as confident, likeable, influential, or trustworthy in your photos and choose an Instagram profile photo that conveys precisely what you want it to.
Once you’ve created the perfect Instagram profile photo, stick with it for a while. Some users change their profile images every few days, or even every day. But if brand recognition is your goal, using a consistent profile image will help your long-term followers (as well as new followers) easily recognize your posts when your profile image appears in their feeds. Visual appeal and recognition is key on social media, and changing your Instagram profile photo too often – and using a mix of profile photos with widely different aesthetics – can make it more difficult for your followers to find you.
Screenshot via @maccosmetics
You can even import a photo from Twitter or Facebook to use as a profile photo on Instagram. When you use this option, Instagram automatically uses the profile photo you’re using on the network you’re importing from.
Other Instagram Image SizesNow that you know the ideal Instagram profile photo size and how to take a great Instagram profile photo, what about other Instagram image sizes? With so many Instagram image types, orientations, and other factors that go into the ideal Instagram image sizes, there’s a lot to cover. We cover Instagram image sizes in more detail in this post, but here’s a quick overview.
Instagram Image Sizes for ThumbnailsInstagram thumbnail images should have a 1:1 aspect ratio and should be at least 1080 pixels wide, making the ideal Instagram image size for thumbnails 1080 x 1080 pixels. Thumbnails display at a resolution of 161 x 161 pixels, but they’re stored at a resolution of 1080 x 1080 pixels, so uploading thumbnail images at this size ensures they’ll display at the best possible quality.
A portrait Instagram Stories image in a 9:16 aspect ratio with a resolution of 1080 x 1920 pixels is ideal. These recommendations also apply for Instagram Stories Ads images. Keep in mind that while this is the ideal Instagram Stories image size, they’ll display at various sizes depending on the device on which they’re viewed.
IGTV Cover Photo SizesThe recommended resolution for IGTV cover photos is 420 x 654 pixels. Your IGTV cover photos should have an aspect ratio of 1:1.55. Your IGTV cover photo might be cropped to appear on different devices, so you’ll want to ensure that all the important information is located in the center of the cover photo so it’s not cropped out for some users.
Instagram Feed Image SizesInstagram feed images can have a portrait, landscape, or square orientation. The recommended Instagram feed image sizes and aspect ratios for Instagram feed images are:
 91:1 and 16:9)
Instagram Carousel images should be 1080 pixels wide and between 566 and 1350 pixels tall, depending on whether it’s a portrait, landscape, or square image. Otherwise, the recommended image resolution and aspect ratios for Instagram Carousel images are the same as for Instagram feed images as noted above.
Instagram Ads DimensionsWhile Instagram ads images can be square, portrait, or landscape, Instagram recommends square images with a resolution of 1080 x 1080 pixels and a 1:1 aspect ratio for Instagram ads. Instagram ads images must be at least 500 pixels wide.
An aspect ratio of 4:5 with a resolution of 1080 x 1350 pixels is recommended for video ads in the Instagram feed.
For Instagram Explore image ads, a 9:16 ratio is recommended with a recommended resolution of 1080 x 1080 pixels.
Images for Instagram Stories ads, as noted above, have the same recommendations as for organic Instagram Stories posts. (A 9:16 aspect ratio with a recommended resolution of at least 1080 x 1920 pixels.) The same recommendations apply to Instagram Stories video ads.
Instagram videos can display as square videos, portrait videos, or landscape videos; however, square videos are the most successful. Instagram videos have the same recommended resolutions and aspect ratios as Instagram feed images:
An aspect ratio of 9:16 is recommended for IGTV videos, as these videos are only shown in portrait orientation. The resolution for IGTV videos should be at least 1080 x 1920 pixels. In the feed (where only the first 60 seconds will play before prompting users to click through to watch the full video on IGTV), your IGTV videos will display at a 4:5 aspect ratio and a 1080 x 1350 pixels resolution, meaning your videos will be cropped slightly when appearing in the Instagram feed.
If you’re trying to grow your Instagram account following, keeping these best practices in mind to create an amazing Instagram profile photo will help to make a killer first impression when new visitors land on your profile. We also suggest installing the Instagram follow button to help you get more followers. Likewise, using a high-quality photo that’s on-brand will help to solidify your brand identity on Instagram and beyond.
If you’re looking to get more Instagram followers, another way to do that is with Instagram giveaways – our post on the subject will help you with all aspects of a giveaway from rules and regulations down to the giveaway wording.
Looking to grow your following on other social media sites?
GET LINKEDIN FOLLOW BUTTON
GET TWITTER FOLLOW BUTTON
GET SNAPCHAT FOLLOW BUTTON
GET WECHAT FOLLOW BUTTON
Profile photo on Instagram is an important element of the page, it is important when promoting and perceiving the account as a whole.
In the article we will tell you what options for avatars are, what is better to put and how to make a beautiful avatar for Instagram in a circle using a free photo editor.
Reduce the budget of targeted and contextual advertising with click.ru
Click.ru will return up to 15% of advertising costs.
Cut the budget >> Advertising
Read also : How to promote an Instagram account from scratch
The recommended size for Instagram ava is from 110 × 110 px, aspect ratio is 1:1 (square photo).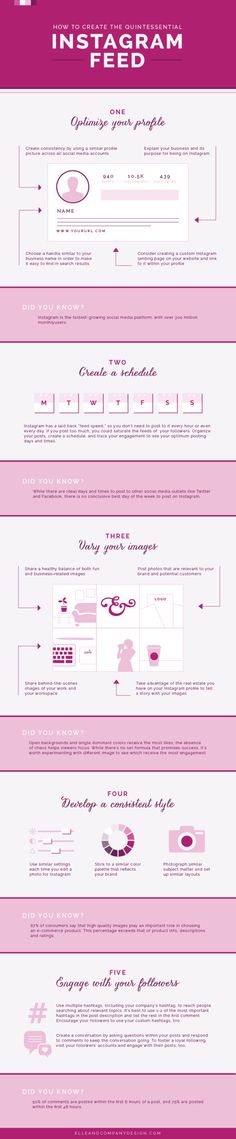 After uploading, the photo is cropped into a circle. You don’t have to bother with cropping and resizing photos, but you can’t go wrong with one of the square photos of posts sized 1080 × 1080 px.
Advice : do not choose photos with a lot of small details, they will still not be visible on a small avatar. It is better to choose a photo where there is one central element - an object or a close-up of a face.
Understanding what is best to use as Ava.
For commercial accounts :
- logo.
- a thing or interior that reflects the type of activity, for example, if you have a cafe, you can put a photo of the establishment on your ava, if you sell key chains, let there be a key chain on the profile picture.
1 of 3
For bloggers is a bright photo from life or a close-up photo of a face.
For experts is a business photo showing the expert's face.
For the photographer - photo with a camera.
For the pet account, the profile picture of the pet must be his photo.
For the creative team - team photo.
For girls :
For guys :
More ideas :
- processing in the editor (there are additional elements in the photo, for example, an object in the background, geometric shapes)
- black and white
- 3D photo or photo in a circle. The person seems to go beyond the avatar, an interesting 3D effect is obtained
- art
- cartoon AVA
3D cartoon AVA:
In the style of watercolor drawing
- charismatic photo to show the nature of
- family photo (more suitable for girls , but men also sometimes put on an avatar).
- sports photo
- part of the face
- photo where the face is not visible
from the back:
Option, when a person is closed with hands
- a photo showing the type of activity
Race champion on a motorcycle
Coach in eastern martial arts
- romantic - romantic - romantic - romantic romantic - romantic romantic photo, relevant for those who have a paired account or who want to show their marital status
- a photo with a solid background
- a dark photo with subdued light
- Photos in the form (they like to set themselves military, police, firefighters to emphasize their status)
- Photo with a shadow of
- Duotone effect
- gliti effect
9000 - photo with a slogan (relevant during socially important events, such photos are posted on the profile picture to express their civic position).
We show how to quickly style an avatar for Instagram.
Step 1 . We stylize the photo.
Use any photo editor with filters. For a smartphone, you can download Picsart, Pixlab, PicsKit, PicShot and others. We will do it on a computer, the free online editor Photomania.net will do.
Select a suitable filter, for example, Tintbrush from the Painting section (stylized as a drawing with paints).
You can make a solid fill with a filter or select the desired fragments with a brush. The intensity of the effect can be adjusted. In this example, the intensity is at maximum.
Save the photo to your computer.
We get this photo.
Step 2 . Adding a circle in Canva.
Go to the Canva editor, we need a square. Since the original photo has a size of 600x900 px, you can make the square a little larger - 700x700 px, the size is set in the "Custom Sizes" section.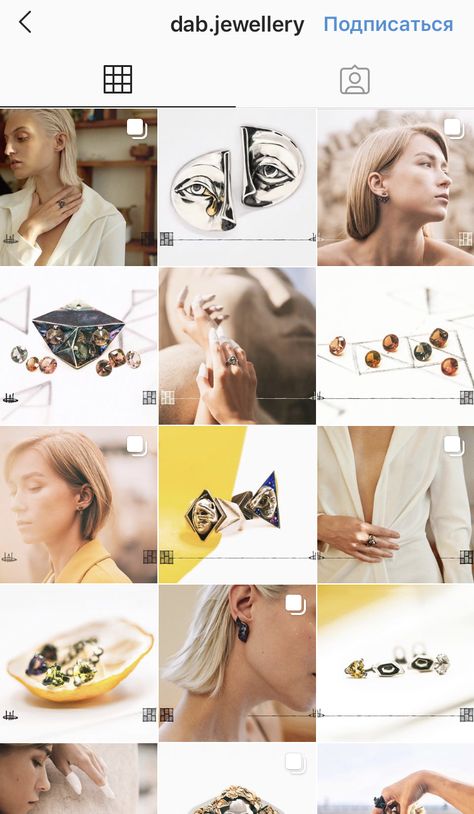
While we have just a white square, we need to add a mask with a circle. We go to the "Elements", go down to the "Frames" section and select the circle.
The circle turns out to be small; Align to the center.
Now we need to place our photo in the circle. We go to "Downloads" and upload our stylized photo from the computer.
Now drag the photo into the circle.
You can add an additional frame around the circle, again go to the "Elements", and select not a mask, but a circle shape.
The frame should be slightly larger than the main photo, to make it easier to adjust the size, you can make the circle transparent.
Add a color for the frame and remove the transparency.
The colored circle needs to be moved to the background behind the photo, right-click on the circle and select "Send to Back" or "Move Back".
It turns out such a frame. Save the photo, click "Download".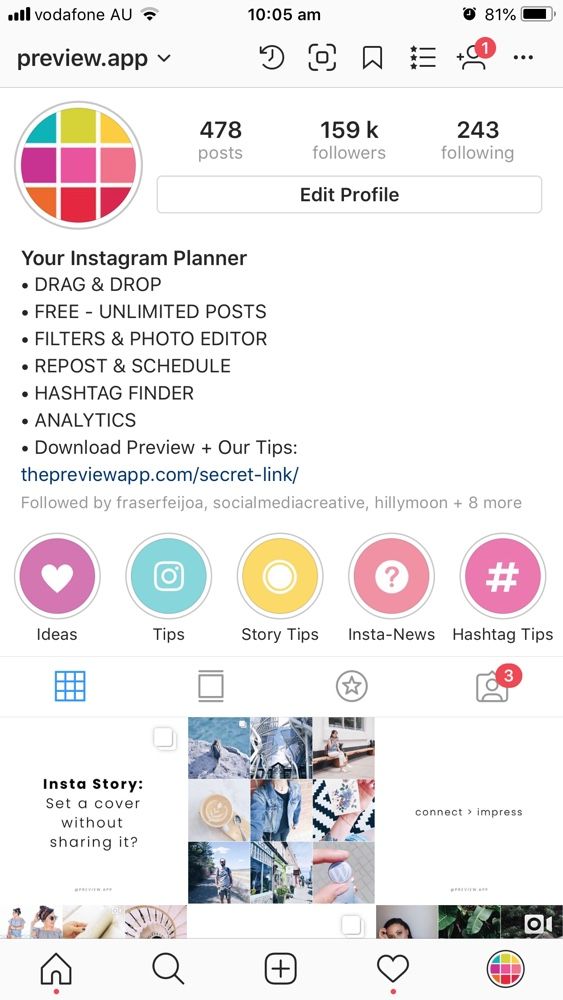
You can make not a solid color frame, but a gradient one, you can also add not only a circle, but also objects of other shapes. Go to "Elements" and scroll down to the "Gradients" section or type in the search for the word gradient.
There are many objects of different shapes. All colors are customizable, you can change the size and orientation of the shapes. We got several options for the avatar.
Step 3. We put it in the profile - we show it in the next section (How to put a photo or picture on an ava on Instagram).
The essence of such an avatar is that part of your photo should go slightly beyond the circle and then the effect of a 3D avatar is obtained.
There are several ways to take such a photo, we show ours. First you need to choose a photo. We advise you to find or specifically take a photo on a plain background - such a background will be easier to remove.
Then you need a program or application that removes the background. You can use Photoshop or any other software, we will take Teorex PhotoScissors. We add a photo there. With a green brush, select what needs to be left, with a red brush, then - what to remove. The program is convenient because there is no need to select the entire object - just mark the colors.
Click "Cut".
We finalize the details and save the photo with transparency in PNG format. It is not necessary to bring the photo to the ideal, since the profile picture on Instagram is still small and small errors will not be evident.
Go to Canva, again make a white square as in the previous example and add a circle mask there.
Paste the original photo with the background into the mask.
You can add a small border (Elements - Gradients).
Now load a photo of a person with no background on top of all layers. The task is to make part of the photo go beyond the circle, sometimes you need to slightly increase the photo with transparency.
It turns out such an interesting effect.
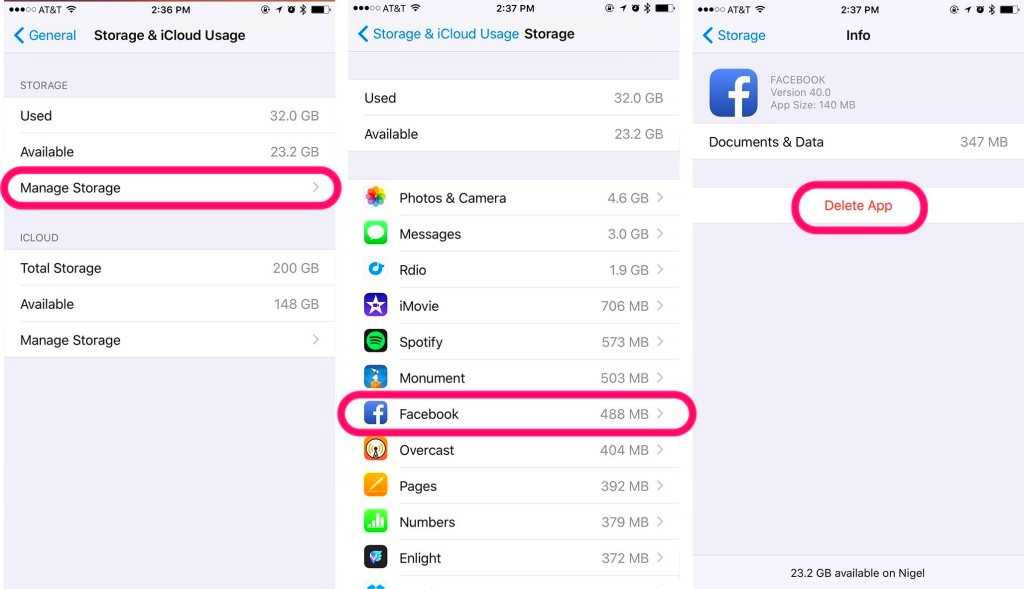
Open your Instagram account, click on the "Edit profile" button.
At the very top above the name and nickname is a circle, click on it.
Then New Profile Photo.
You can take a photo or upload from the gallery. If the photo is prepared in advance and taken in the correct aspect ratio (1:1 square), then the avatar is immediately cropped into an even circle. You can enlarge or reduce the photo, for example, make the main elements in the mug larger. When everything is ready, click "Next".
You can apply a filter to a photo or edit it. In the editor, you can work on alignment, brightness, contrast, saturation, color, add shadows, blur or sharpen. When finished working on the photo, click "Next" again.
On a computer, everything is a little simpler - open your profile and click on the avatar itself.
Then click "Upload photo", the rest of the steps are repeated as in the previous paragraph.
To change your photo, use the same sequence of steps as when you first set up your avatar — go to "Edit profile" and click "Change profile photo".
Tip : do not change photos too often, firstly, it annoys subscribers, and secondly, you may not be recognized. It is better to immediately choose a good photo, with the expectation that it will stand on the avatar for several months. Then you can replace it with something else.
Article in the topic : How to beautifully design a page on Instagram
You can’t see the avatar photo in full size on Instagram - if you click on it, nothing happens. But there is a free third-party service that solves this problem - Gramotool. You need to enter the user's nickname in the input field and press Enter. By the way, in this application you can also watch stories and highlights anonymously.
The web version of the service may be unstable, so it is better to download the Gramotool application to your smartphone right away.
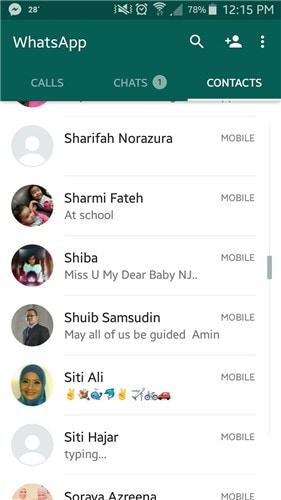
Search works in the application - you can enter the whole nickname or the first letters, and then select the desired account in the list.
Open the desired account. There are 3 sections - Stories, Highlights and Avatar. We need an avatar.
A full-size photo opens and can be downloaded to your phone.
Why this function is needed:
Choosing an ava for Instagram should be approached responsibly - you shouldn't put anything on the photo, because this is the face of your profile.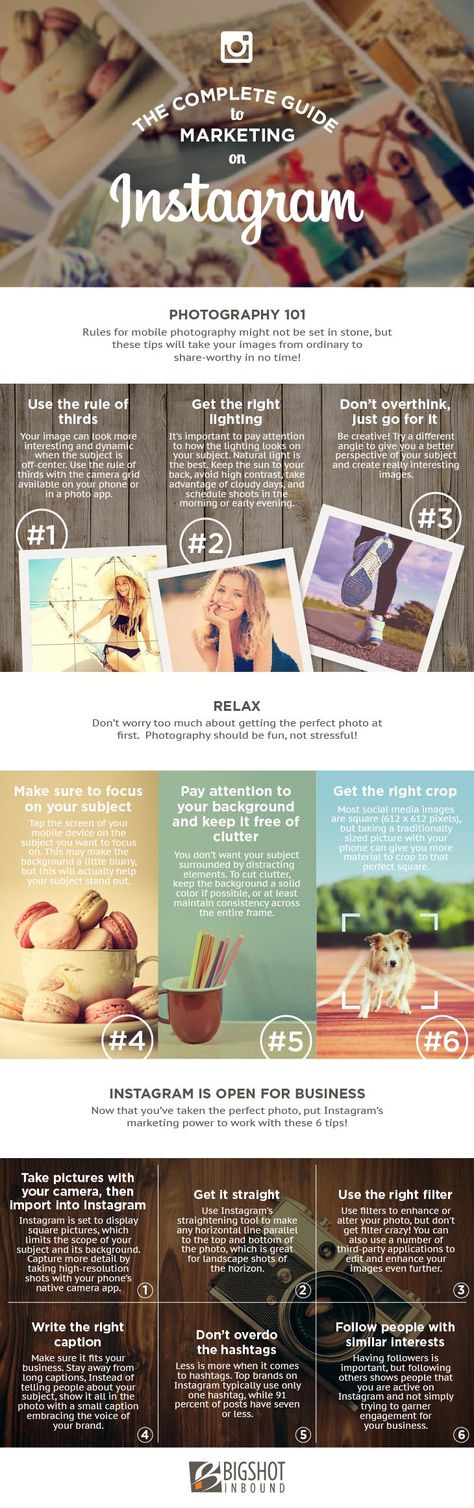 Prepare in advance a high-quality photo that will be associated with your profile. Try not to change avatars too often.
Useful Links There are 3 main ways to add a photo to Instagram* from your phone: upload via the Instagram* mobile app, from your phone gallery, or via third-party apps. We will analyze separately how to publish a photo in a post and a story. Download the Instagram app* from the AppStore or Google Play. After registering or logging into your account, you will see the [+] icon in the upper right corner, click on it, and then in the menu that appears, click on the "Publish" button. Next, you will open the interface for adding a post, you need to go through several steps: Let's take a closer look at how to post photos on Instagram* from your phone. Select media files. After pressing the "Publish" button, you will be taken to the gallery on your phone. Select the photos or videos you want to post. At this stage, you can also change the resolution or select multiple files for one post. Editing files. After choosing all the settings, click the "Next" button in the upper right corner and go to the editing interface - here you can apply filters, adjust contrast, add sharpness, level the horizon, and so on. Add text and labels. Once you've finished editing your media, click the "Next" button again, and the last settings will open: choosing other social networks for publication, adding text, geotagging, user tags. Read more in our article “Instagram tags*: how and why to use”. Big text cannot be posted on Instagram*, the limit is 2200 characters. But if you really need it, we have an article with recommendations for the design of such publications. Publication . When you're done with the settings, click "Share" in the upper right corner and the post will appear in your account feed and in the news feed of your followers. Hooray! This is a quick way when you just need to post one file with a caption, because this way you can not customize the display format, add multiple files to one post, edit media files, add geotags and tag other users. How to post photos on Instagram* from your phone using the gallery: That's it - the publication has been uploaded to your profile! If you do not know what, why, why to publish and how to design, I recommend our free course "7 Steps of Content Marketing". In the course, we tell you what content marketing is, how to create, design and promote content on the Internet. All this will help you understand how content works, why publish posts and how to make them beautiful and interesting. You can upload photos to Instagram* from photo and video editing apps, feed maker, and so on. Almost all of these applications have the ability to automatically add media files to Instagram*. For example, the Canva photo and video editor app has a Share button in the top right corner. In the additional menu, the Instagram icon appears *, when clicked, it transfers to the social network application with the option to select a placement: Stories or feed. You can upload a photo to Instagram stories* from your phone both directly from the Instagram application* and through third-party applications. There are 3 ways to post a Story via the Instagram app*: After clicking, the interface for creating Stories will open. By default, the camera opens, and you can immediately take a picture or video for stories. If you want to add files from your phone's gallery, tap the button in the bottom left corner of the screen or swipe up from the bottom of the screen. The story editing interface also has many useful features: Once you're done with your stories, select the publish option at the bottom of the screen: Stories, like posts, can be posted from other applications, only when choosing a placement, you need to click "Stories". Check out the Instagram Stories* section of our blog for inspiration on how to use Stories on both your personal blog and brand account. How to add a photo to Instagram from your phone
How to publish a post in the feed
Method 1: through the Instagram app*
 ;
; 
Method 2: through the phone gallery

Method 3: Through other apps
 After clicking on the "Feed" button, the standard Instagram interface * opens to add a post to the feed.
 How to post a Story
Ways to add a new Story: the icon next to the avatar and the icon on the right 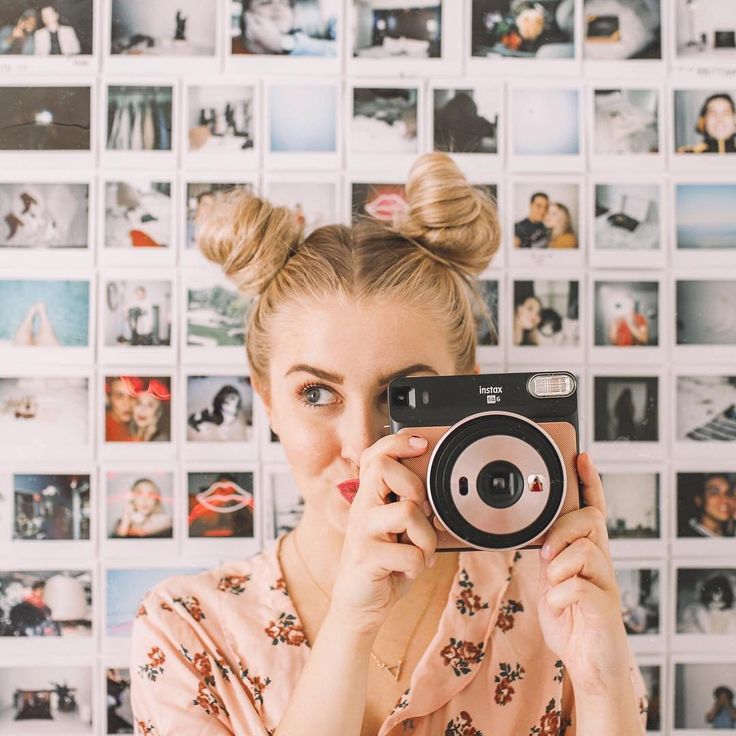
Stories editing interface 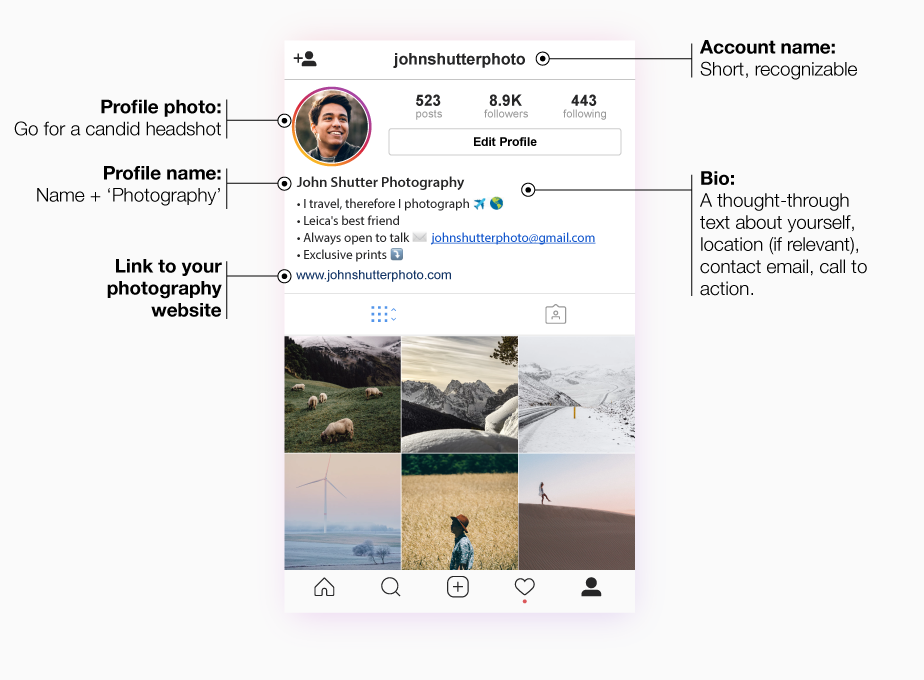 There are masks both from Instagram* itself and from users. To get as many creative masks as possible, subscribe to major bloggers who create such masks. For example, bloggers ya.molli or georska.
Selecting a publishing location Stories