Instagram is all about sharing pictures in various forms with your followers and other people, and one way to do that is through collages. Collages allow users to add more than one photo to their Stories and posts. This tutorial shows you how to create a collage on Instagram and via other third-party apps and websites.
This is perhaps the easiest method that Instagram users have to create a quick collage. You can use as many photos as you would like for these creations, which isn’t possible with other methods. Follow these instructions to create a collage in Stories.

Note: Do you want to post a collage on your Instagram profile instead of Stories? Before pressing the “Your Story” button to post the Story, tap on the three dots in the upper-right corner and select “Save.” This will save the image to your phone’s Gallery. From there, you can use it to make a regular post on Instagram.
This easy method won’t add your photos into a nice grid. But you can arrange them manually on a background. If you prefer something a bit more controlled, you may want to try the second option.
Using a layout to create a collage is a bit more restrictive, as you’ll be limited to a number of photos when creating your collage. If you don’t mind this aspect, follow the below steps.
 You can tap on a photo, then on the “Trash” icon to remove it.
Note: you can download the Story to your phone, then use the image to do a regular post on Instagram.
If you feel Instagram’s options are a bit restrictive, you can easily turn to third-party apps to make your collages, as they usually have more options (although not all of the apps are free). You can try using Instagram’s own Layout app. The app boasts a few additional features that make it convenient to use. Follow the steps below to create a collage using this app.

Another app that allows you to make collages is PicCollage (Android | iOS). However, note that it will add a watermark to your creations that you will only be able to remove if you pay a subscription.
There are other apps that can help you create collages quickly, although most of them add watermarks to the end results. Here are some examples:
PicBow is a web collage maker that is free to use. It doesn’t look as modern as other options yet doesn’t make you pay for its features. The only annoying thing is that it adds a watermark. Fortunately, you can crop out the watermark
The advantage of this third-party method is that you can use Instagram for desktop to post the results of your work, but that only allows you to upload posts. Yet, this method makes it very easy to create a collage and post it from the same device.

Yes, with Instagram’s integrated Layout feature for Reels.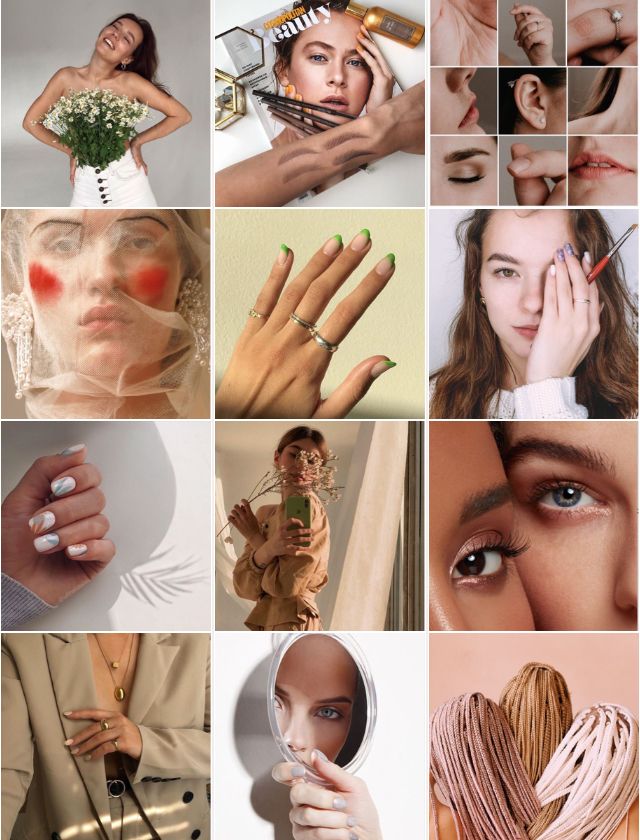 Swipe left from your feed and select “Reels” from the menu at the bottom, then tap “Layout” and choose between the three options. Alternatively, you can use an app like InShot to make a video collage that you can then post on Instagram.
Yes. You’ll need an app like InShot that lets you overlay images over videos. You’ll need to use the “PIP” option when creating your Instagram collage.
Yes, but you’ll need to prepare the collage beforehand using one of the apps or websites in this tutorial, then upload the creation as an Instagram Reel.
Image credit: Unsplash All screenshots by Alexandra Arici
Alexandra Arici
Alexandra is passionate about mobile tech and can be often found fiddling with a smartphone from some obscure company. She kick-started her career in tech journalism in 2013, after working a few years as a middle-school teacher.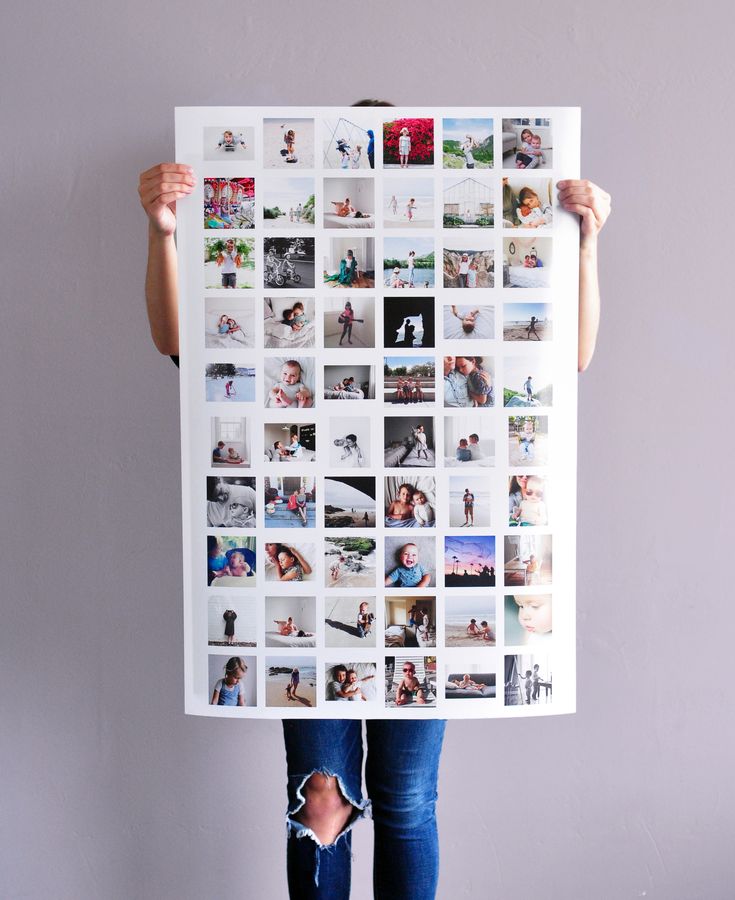 Constantly driven by curiosity, Alexandra likes to know how things work and to share that knowledge with everyone.
Subscribe to our newsletter!
Our latest tutorials delivered straight to your inbox
Sign up for all newsletters.
By signing up, you agree to our Privacy Policy and European users agree to the data transfer policy. We will not share your data and you can unsubscribe at any time.
There are a few different ways you can create a collage grid for Instagram. First, though, what is a collage grid, and why might you want to make one?
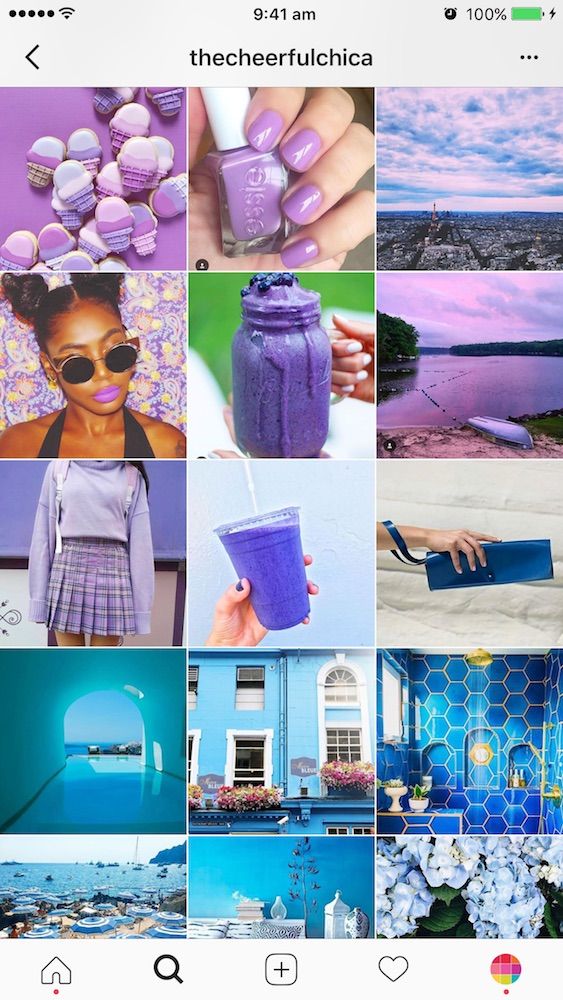
A collage grid is simply a creative way to merge more than one image into a single post on Instagram. This is one example, albeit a simple one. It’s four images that would make up a cohesive outfit centered around a color. Here’s another example, of six pictures framed in two columns of three each.
Both of the examples above are simple, but with the Instagram layouts feature, you can set up various different, more creative grids. You can, for example, stack three images on top of one another with different proportions. Here’s an example.
The way I see it, there are three different ways to make collages on Instagram, though one of them is not strictly a typical collage.
Method 1: Layouts by Instagram
Method 2: PC Editing
Method 3: The Profile Collage
The first method is to use an app that links into Instagram – and your photo library – to create collages and upload them. In the past, you would have to find and use a third party app. However, a couple of years ago, Instagram released their own app to perform the functionality they wanted for their primary app. It’s called Layout.
There are two ways you can access Layout. The first is to go through the Instagram app itself. The second is to download the app directly via the app store of your choice.
I’ll cover how to get the app through Instagram momentarily. For now, let’s follow the whole process of creating and posting a collage from start to finish.
Step 1: Make sure any images you want to use are accessible on your device. This means they have to actually be on the device; Layout doesn’t seem to be able to access cloud storage, like Google Drive or Dropbox.
It’s fairly typical to want to edit your images on a computer before you then go to post them on Instagram. If you have done so, and added your images to your cloud storage, make sure you download them onto your local device to make your post.
Step 2: Load up Instagram. Download it if you have to, and make sure you’re logged in on the account you want to use to post your collage. It makes no sense to make a collage and then go to post it, only to find you’re posting with the wrong account. Personally, I don’t know for sure if it breaks anything when you try to switch accounts, or if it just saves the collage as a new image. Either way, it’s always a good idea to make sure you’re on the right account before you go to post anything.
Step 3: Tap the new post icon, which will either be a photo silhouette or a plus icon in the center of the bottom navigation bar. It’s one of those minor differences between iOS and Android that don’t really make sense, but hey, what can you do?
Step 4: Tap to load up your existing photo gallery. On iOS this will be the “library” button, while on Android it will be the “gallery” button. You might need to give Instagram permission to access your photos if you haven’t done so in a while, or ever.
Step 5: Tap the Layout button. It will generally be a small icon hovering above your gallery to the right, and it looks like a rounded square with a sideways T in it. Something like this.
Step 6: Tap to get Layout, if you don’t already have it. This will redirect you to the app store used by your device so you can download the app. It’s free, so just download it. It’s also very small, so it won’t take long to download and install.
Step 7: Swipe past the tutorial. It’s a very simple app, and I’ll teach you how to use it as well.
Step 8: Scroll through your gallery and find images you want to use as part of your collage. Tap them to add them to the collage preview up above. You can choose up to a total of nine images. That’s fine; if you want to add more than nine to a collage, you probably don’t want to be limited to the predefined layouts and would rather do all this using method 2 anyways.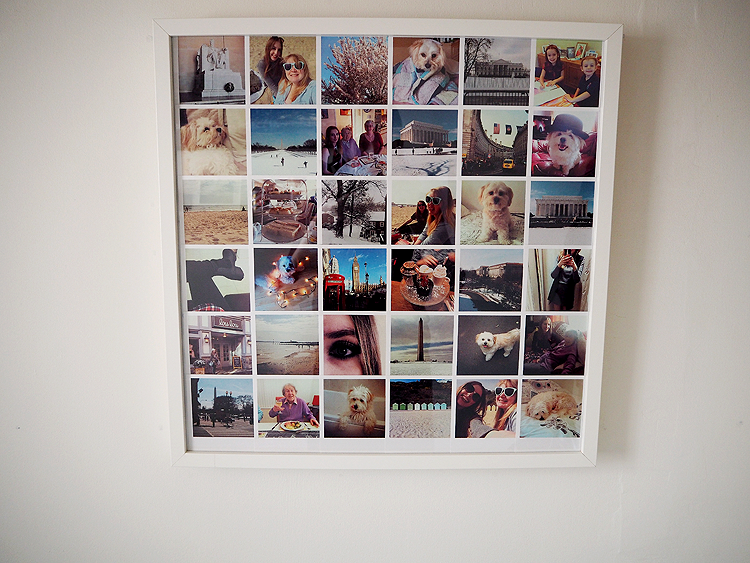
Step 9: Swipe through the layout preview until you find one you like, that works with the images you’re using. The more images you have selected, the more different layouts you can pick through.
Step 10: Adjust the borders of the images to resize them, move them from place to place, mirror them, flip them, or otherwise adjust the whole collage until it works the way you want it to. You can adjust the images to display in whatever way you want them to, to create an image that is evocative and gets your point across. If this means mirroring certain elements, go for it. You can also toggle the actual borders on and off, if you want lines between the images or not.
Step 11: Save the collage and go to back to make a post. The collage will appear as an image you can add a filter to, though whether you do that before or after creating the post depends on your device. You can then add a geographic location, a caption, hashtags, tags for people, and you can post the image on Instagram, share it on Facebook, post it on Twitter, or post it on Tumblr.
In some cases – primarily on iOS – you will need to exit Layout and go back to Instagram. On Android, it seems like a smooth transition.
So that’s method 1. What about the second option?
The second method is the one you see a lot more when you go to Instagram and look at the #collage tag. Some of the collages you see there are made with Layout, and some of them are more item collages taken in a single photograph, but others are the more traditional collage, images composited together in some way or another.
With this style of collage, you have way more flexibility. Here are some examples:

Now, the trick with all of these is that you need to have access to some kind of image editing program. GIMP, Photoshop, Paint.net, and others can all fit the bill, but you need something more advanced than Windows Paint or a basic app editor.
Contrary to some people’s belief, you don’t need a Mac to do graphic design these days. It might have been more valuable than a PC a couple decades ago, but these days there’s so little difference between the two platforms that it’s not really important.
Step 1, then, is to decide on the type of collage you want to make. Do you want to make something simple, something complex, or something creative? Don’t get in over your head. The strawberry example up above, for example, is great, but it’s something created by an actual artist, not a marketer looking to be outside the box.
Step 2 is to gather up your materials, the images you need, in sufficiently high quality. Having the right raw materials makes it easier to have the right finished product. Don’t start with fuzzy, low-resolution images or phone photos; get someone who actually has photography skills with a good camera to take the pictures.
Step 3 is to decide whether you can put something together yourself or if you need to hire a professional designer or artist to do it for you. If all you’re doing is stitching together a couple of images, you might be able to do it yourself, though you need to remember to work with layers, be able to undo your mistakes, and otherwise work appropriately with graphics. I’m not a graphic designer myself, so I can’t give you advanced tips and tricks on that subject. Thankfully, there are a lot of tutorials available.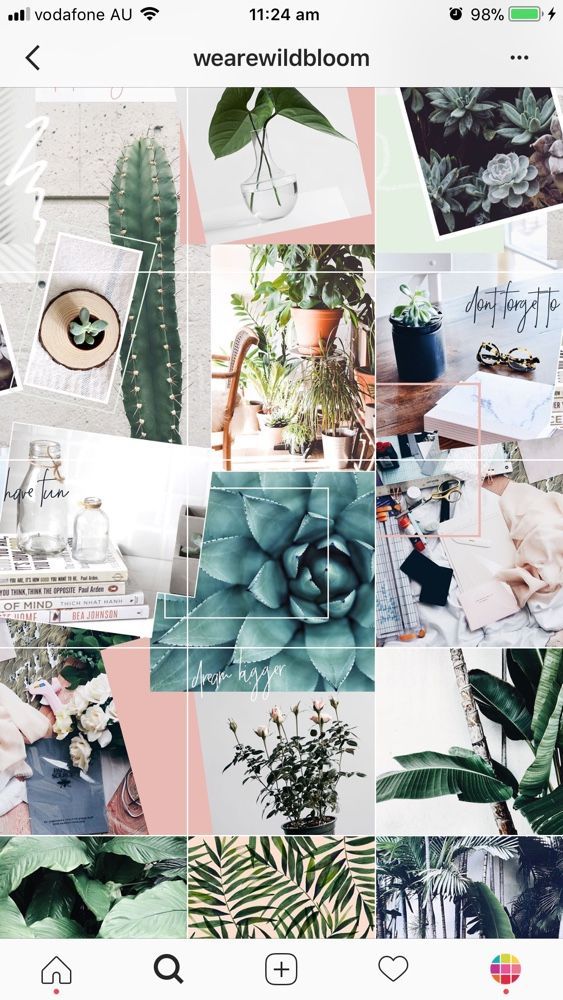
If you’re going to hire someone, go through a vetting process first. Look through their portfolio to see what kinds of work they have produced in the past. You might even look for someone on Instagram who has made the kind of content you want made for your page. Why not hire them? If you know they can produce what you want, you can pay them to produce more of it just for you. Plus, this way you can share with their audience and gain the extra promotion they bring to the table.
Make sure that if you’re going to hire someone, you’re actually willing to pay them what their rates are. Don’t whine about the price, don’t claim you could do better, don’t belittle their skills, and generally avoid doing anything that will get you quoted on ForExposure.
From there, it’s just a matter of working with your artist – or your free time – to make the image you want to make. Then, just like any other image you might want to upload to Instagram, you need to format it properly for the site. Make it the right kind of square and upload it to your phone. Access the app, make the post, add your caption and tags, and let it fly.
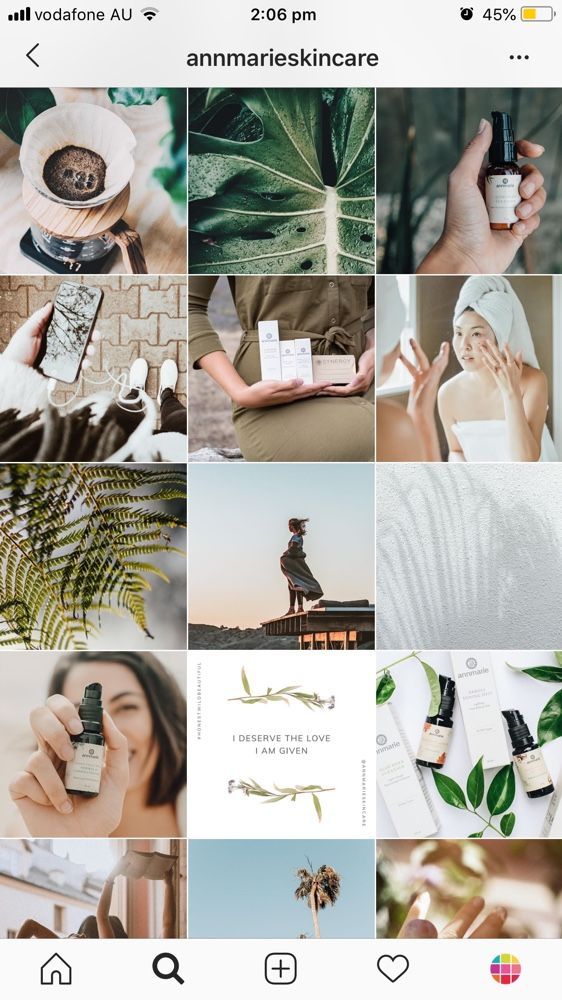
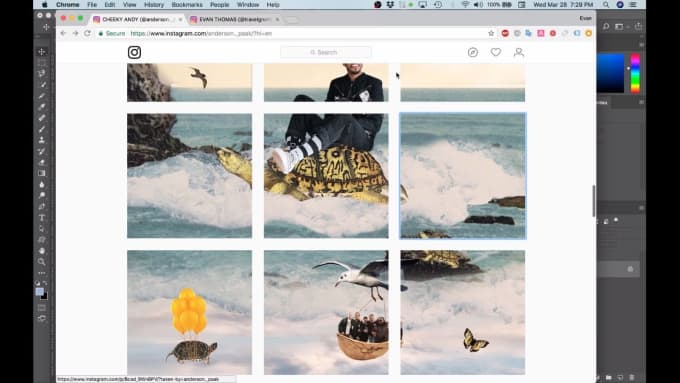
This one isn’t really a collage, but it’s an interesting technique so I thought I’d bring it up. You can make a sort of “soft collage” on your Instagram profile page, by using the natural three-wide grid of images that display on a profile.
Essentially, you just upload your images three at a time, for the display on your profile. It works best if you have some kind of consistency between the images, though; if they’re disconnected, they aren’t a collage, they’re just pictures on your profile.
Confused about what I mean? This guy is a good example. He posts images in sets of threes, chopped up squares of a panorama. Each scene is vibrant, unique, and compelling to look at. As added value, Andrew writes one caption for the three images and splits it up between them. It encourages you to view each image in full and click through to the next to see the full description.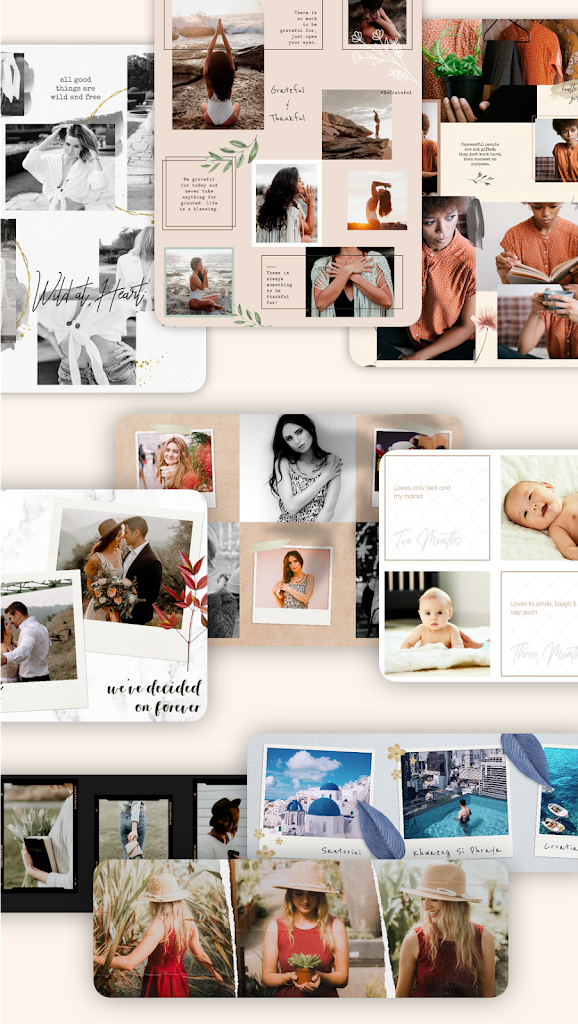
There are two downsides to this. The first is that you don’t get the description right there; the user has to tap on the image to expand it. The second is that if you ever post images in numbers less than a multiple of three, it shifts everything out of order. People viewing your feed will then see every picture out of sync, and the entire panorama effect is ruined.
Still, it’s a technique that’s worth looking at, simply because it’s a creative way to use the app. It doesn’t even require any special tools, other than the ability to take panoramic images and split them up.
Menu
Content
What to do if your stories have become monotonous and you are already running out of ideas, how can you diversify them? Collage is the perfect way to get out of this situation.
In addition to decorating your Instagram stories feed, it will also make your followers happy and they will be looking forward to new stories. In addition, it takes a little effort and time to create it, so anyone can handle it.
In this article, we'll take a look at a few examples of these tools, and show you how to create such an Instagram photo in five easy steps.
You can create a collage on Instagram in Stories or using graphic editors, which is somewhat more complicated. And using various applications and online services.
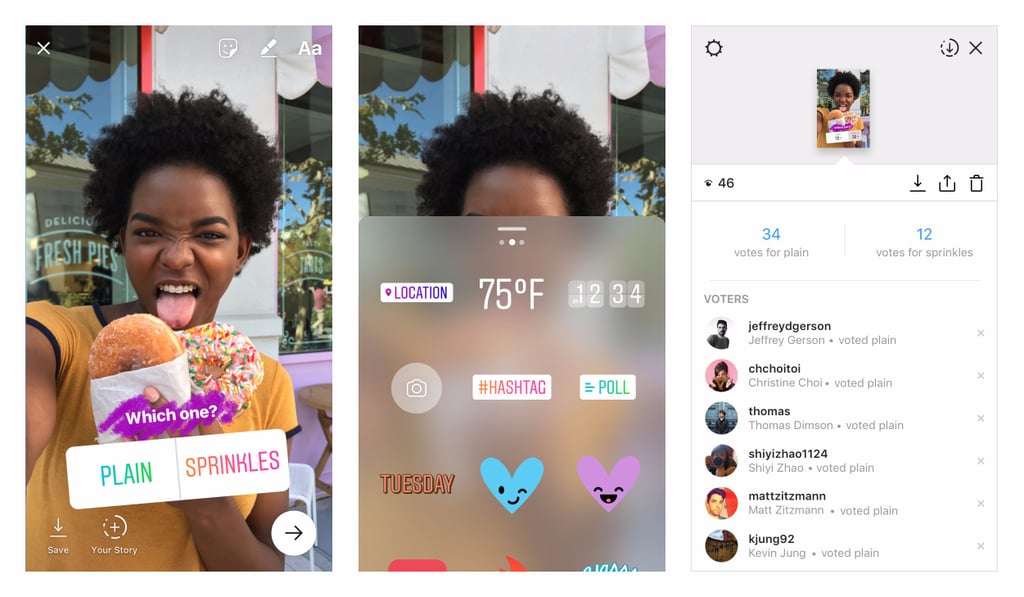
In 2019, the app added a new feature: you can add multiple photos to your story at once. For this:
Now edit the resulting photo like a normal story: add a location, hashtag, stickers, or process with an Instagram filter.
Almost all applications and services for designing Instagram stories have a collage creation function and corresponding templates. Even though this feature has been on Instagram for a long time, it is still trending on Instagram 2021.
In this case, the sequence of steps in most of these applications will be the same, and you will find differences only in the very design of the service.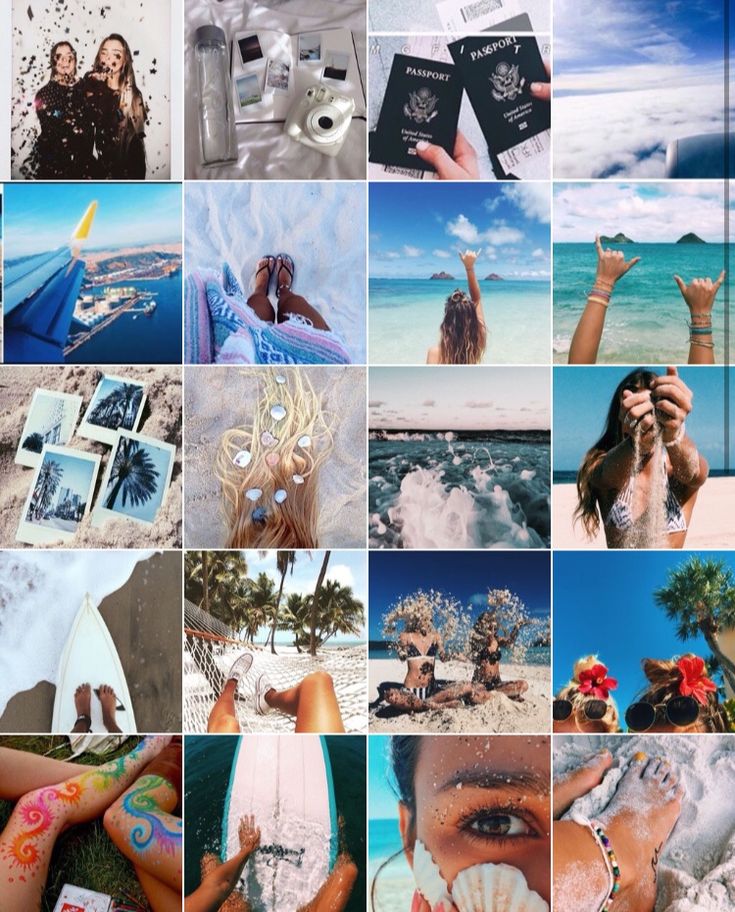 So, how to create a collage of photos using the Instories app as an example.
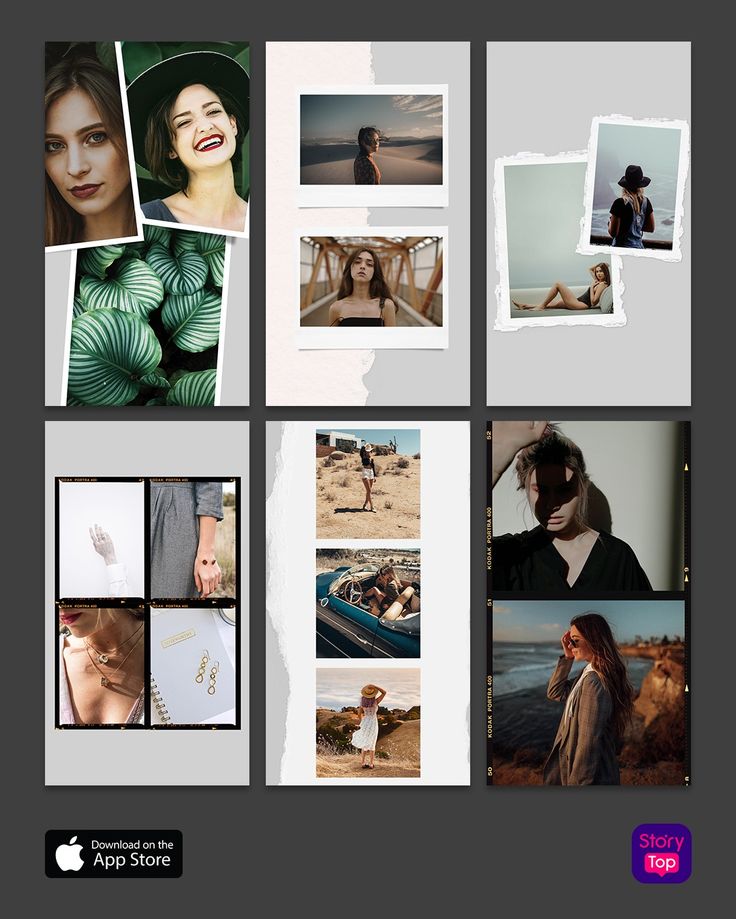
The first step is to open the application. Most services will immediately offer to select a suitable template from those available.
To do this, simply click on the selected template. It will open as several blank windows where you can add your own images, positioning them however you like.
To do this, simply click on the frame and select photos from the gallery of your smartphone. You can also style it with text by clicking on the appropriate icon and selecting the desired font.
After you add a photo and text to the resulting photo, you can see how it all will look together.
Most applications have a preview function. Also, many of them support animations that will play when viewing an image.
If you are satisfied with the result, you can save the resulting image by clicking on the corresponding button in the upper right corner.
In addition to the collage for interesting stories, you can add photo frames to Instagram.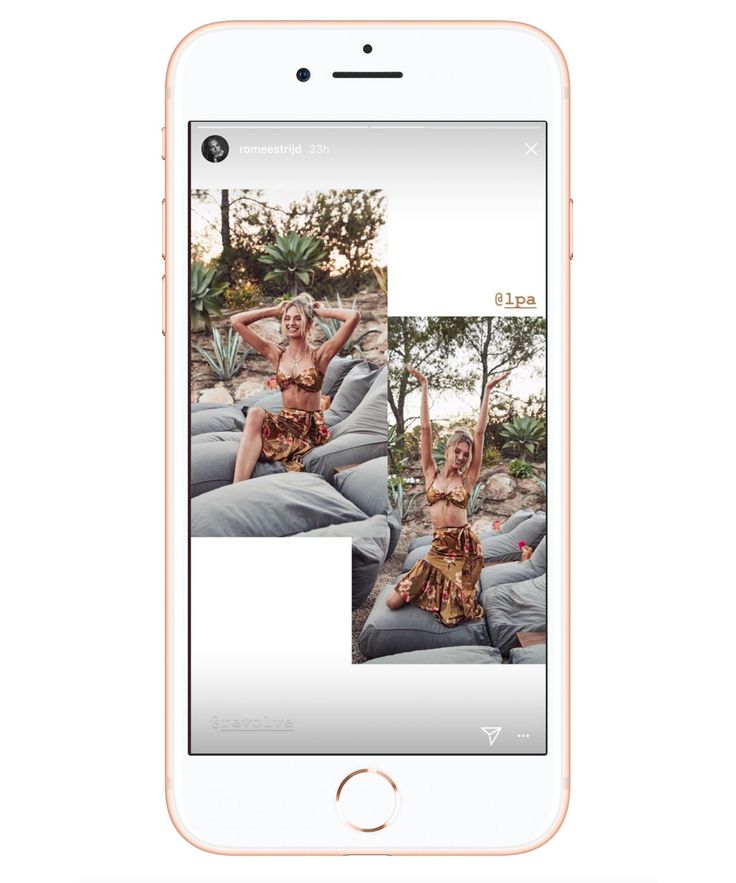
In addition to the photo collage, you can also combine multiple videos in one ad layout and put them on Instagram stories. The procedure for this is not much different from the previous instructions.
However, you will notice a noticeable difference when uploading a video to a template, because due to the weight of the files, this process takes more time than uploading simple images. Let's see how you can make an Instagram video collage using Story Maker.
As with Instagram photo collages, you can add beautiful fonts and stickers to your video layout using the dedicated buttons at the bottom of the screen.
However, in this case, you should be more careful with additional design. The fact is that the videos themselves carry a sufficient semantic load for your viewer, and if you add too many decorative elements, subscribers will simply be confused and will not know what to look at first.
When everything is ready and you are happy with the result, you can export the resulting image to the gallery and add it to the Instagram story in your profile.
Share with friends:
Twin
Share
Share
Send
Grade
ADBLOCK
DETECTOR
Instructions December 14, 2021
A social collage is the result of combining several photos or videos into one creative. It allows you to show a series of scenes in one frame. This format is good for Instagram due to its expressiveness and versatility.
Publishing a post with a collage on Instagram requires preliminary installation of a special application - Layout, recommended by the social network itself.
To post a collage in the feed, follow these simple steps:
After that you will be taken to the post editor for the social network: the blue arrow in the upper right corner,

You can use the same Layout application to publish a photo collage in Stories. At the stage of sending the finished collage to Instagram, you need to select not “Feed”, but “Story”:
It's easier to mount a collage right away in the Instagram application using the built-in tool. To do this:

There are two ways to combine several videos into a collage and publish to Instagram:
In Reels - short videos up to 1 minute - you can still use the same "Collage" button:

There are many collage apps besides Layout. Usually their functionality is wider and more versatile.
For example, Polish has an intuitive interface and allows you to fit up to 18 photos into one collage.
From opening the application to publishing the finished creative, you only need to go through a few steps:
Of the minuses: the inability to create video collages, advertising and limited functionality when installing the free version.
Video Collage Maker: Mix Videos allows you to create photo and video collages.
The application offers a variety of layouts and forms for editing. A minimum of instructions and a maximum of clear icons make it easy to learn and use. At the output, the application offers to save the video in the desired extension. Of the minuses - intrusive advertising.