If you use social media platforms such as Instagram, Facebook, Twitter, and Pinterest, you may already know they go a long way in helping you connect with your customers in a direct and personal way.
But clients and customers might not be well acquainted with your social presence. Therefore, the smart way to build a massive online following is to embed Instagram feeds and other social media profiles to your website. In this article, we will explore how you can embed your Instagram feeds directly into your website.
If you want to add your Instagram feed in a sidebar, your home page, your footer, or a blog post (like this), then keep on reading!
Curator.io is an easy-to-customize aggregator that lets you pull from over a dozen sources. If you'd like to give Curator.io's free forever plan a spin sign up today.
Instagram offers a lot of different types of posts. It's important to take a step back and think about what you want to aggregate. Do you just want to embed your Instagram feed? Or do you want to embed photos and videos that other users post about your business?
You can embed all of these types of content:
Here's an example of an embedded feed using Curator's free plan. You'll see the "Powered by Curator" link at the bottom. Compared to our competitors, we have the least noticeable branding on the free plan, and that link can be removed on any paid plan.
And here's another example—this time using a paid plan to remove the "Powered By" link. This is a great example of embedding an Instagram feed in order to display user generated content and encourage more customers to post their photos.
Embedding your Instagram feed is different than embedding an individual post. You need to connect your Instagram account to an aggregator, choose your feed layout, and then copy and paste the HTML code where you want the feed to appear in your website.
A social media aggregator is an easy-to-use app that pulls in your social media content and gives you the tools you need to organize and stylize that content. Then, you simply paste the HTML code in the footer of your website, your home page, or wherever you want your Instagram feed to appear.
Here's how to embed your Instagram feed for free:
Let's review these steps in more detail.
The first step is to sign up for a social media aggregator that offers a free plan.
This is important because...
Now it's time to create a feed and give it a name.
You can give it a simple name like "Instagram Feed" or "My Instagram Posts" or "Instagram Posts from Branded Hashtag."
You also need to choose the default post status.
Do you want everything to be automatically approved to show up on your site? Or do you want to have to greenlight each image?
In the settings of your feed, you have two options:
When you add an Instagram feed to your website, you have a lot of options for the type of content you want to aggregate.
This is because Instagram has the highest amount of post types of any social media platform.
With Curator, you can aggregate all of these different types of content:
(You can even add social media content from other platforms, but we'll save that for another post!)
You can choose to curate an Instagram feed made up of your Instagram business account, or a few different hashtags.
For this tutorial, we'll go with an Instagram business account. You just sync in via Facebook and select the associated Instagram business account you want to use.
Curator.io is an easy-to-customize aggregator that lets you pull from over a dozen sources. If you'd like to give Curator.io's free forever plan a spin sign up today.
Next up, it's time to curate your feed. You can remove the images that you don't want showing up in the feed you'll embed on your website. You can also update the settings for automatic curation if you want to change them.
If you choose automatic approval, then you need to delete the posts that you don't want to show up. If you choose that approval is required, then you need to approve the posts you do want to show up. If you're set to "Needs approval" and you don't give some posts a green checkmark, then no posts will be able to be added to your website.
The next step is to update the design of your feed.
You can choose from our pre-set designs that include different ways of portraying the captions. Some designs let you hover over the image to see the captions, while others put the caption below or next to the image.
If you want, you can even upload your own custom posts to your feed. Yup, these are images that you didn't upload on Instagram. You might want to do this if you're promoting a product or a freebie offer.
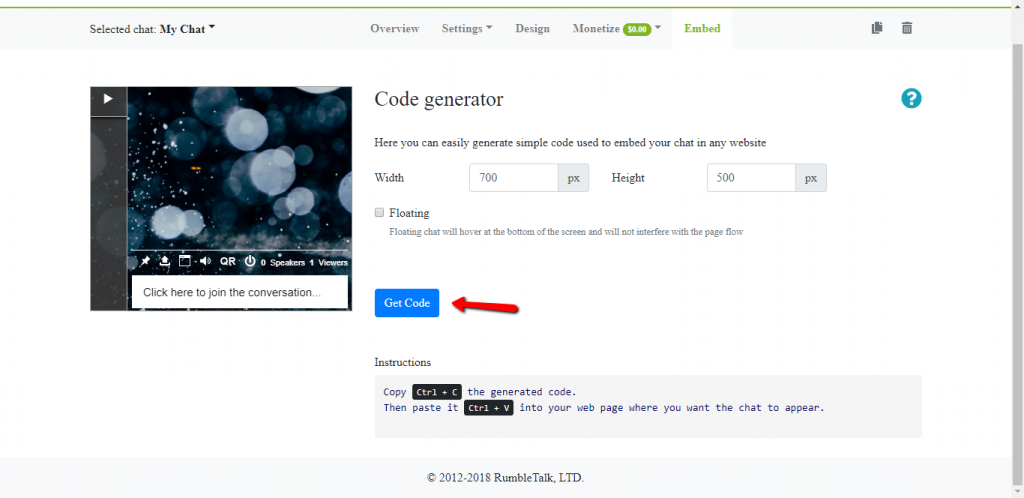
Finally, it's time to embed the HTML code into your website. Just hit "Get code" and then "Copy to clipboard."
Then you can paste it wherever you want: a section of your home page, a blog post, a landing page, or even the sidebar of your blog post.
Let's go ahead and add it to the sidebar.
To do embed the Instagram feed HTML code into Wordpress (for free!), we just need to drag and drop a Custom HTML widget over.
Next we paste the HTML code from Curator.io over to the Custom HTML content box. There's no need to add a title, unless you want to. You could write something like, "The latest Instagram posts" or anything creative you can think of.
And it's done! Here's what the feed looks like in the sidebar of a blog.
This style puts the caption right below the image and it moves through the posts in an automated slider. It's a very engaging and eye-catching addition to your blog!
But of course, if you prefer a simpler look, you can create a grid style where the captions don't show unless you hover over them, like this example feed:
You'll want to continue checking your website to make sure that only the best content is showing up.
Moderate your website based on the approval setting you choose
Curator.io is an easy-to-customize aggregator that lets you pull from over a dozen sources. If you'd like to give Curator.io's free forever plan a spin sign up today.
While the above is the simplest and easiest way to embed Instagram feeds on your website, there are other ways to do this too.
Maybe you want to embed individual posts, or try other methods for feed embeds, or write your own custom code to create a feed.
Pros:
Cons:
You may want to embed individual posts to your website. While this is easy to do, it can be cumbersome in the long run, because you have to keep on embedding to particular posts. In other words, if you would like this embed to display the most recent post, then you’d need to move back and edit your embed whenever you create a new Instagram post. For most people, who post on a daily basis, this would be a lot of trouble for not much value.
Embedding an individual post is easy. Simply navigate underneath the post, and you will notice a […] button.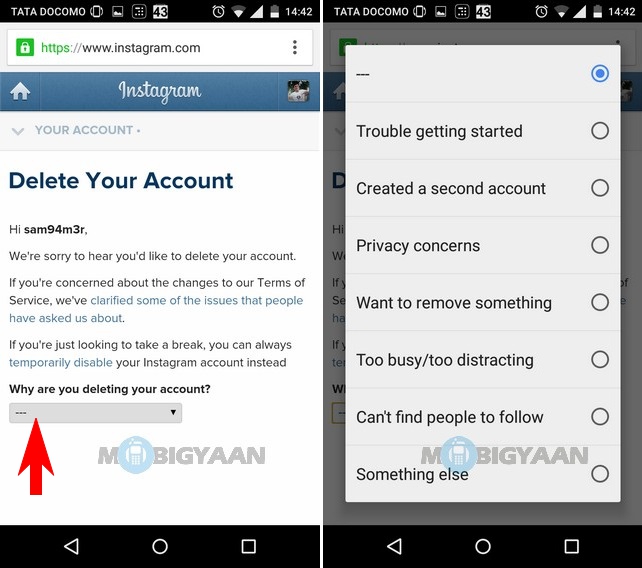 Proceed to click this button, and you will see several options, including embed. Tap embed.
Copy the code that will appear. Next, paste it in your WordPress blog post, and it will automatically convert into an embed. You are done! The process is that simple. You may also add extra parameters such as specifying the width of the post, hiding the captions of the post and display just the image with Instagram’s frame trappings.
Instagram does not offer a single box plugin to help you display content from your account. Therefore, to embed your Instagram feeds or entire Instagram profile, you will need to use third-party plugins.
Instagram feed plugins work by allowing you to enter your Instagram account ID and then displaying a gallery of your recent posts. This includes your latest photos, a page, and the sidebar area of your website.
Curator.io is one of the most popular Instagram feed embed tools.
You don't have to do numerous feeds either. Curator.io will let you aggregate all of the different sources into a single embedded feed. In other words, you do not need to have your RSS feeds, Twitter, Facebook, Instagram feeds, and others in different locations and format. You use a single central feed instead.
Using a single feed is more convenient for you and your site visitors. Otherwise, you're looking at a cluttered site that's not pleasant for anyone.
Curator.io offers free versions as well as paid versions. Using the free version, you can still access content from various social media platforms all at once and even filter by hashtag. However, the advantage of the paid version is that get more customization options, refined filtering and many other features you will find useful.
You can start with the free version and once you see the benefits, you'll likely want to upgrade for even more engagement with your Instagram feed and other social feeds.
Curator.io is an easy-to-customize aggregator that lets you pull from over a dozen sources. If you'd like to give Curator.io's free forever plan a spin sign up today.
SnipWidget isn't just a single widget, but a variety of widgets you may consider to embed posts in several ways. Some of its unique features include:
 Just like Curator.io, it offers a free version, but you can go for a premium version to access custom CSS, more marketing options and built-in analytics.
As you can see, there are several options and features to choose from.
EmbedSocial is also a series of plugins. Perhaps you may have come across some of them, such as EmbedStories, EmbedFeed, EmbedAlbum and EmbedReviews. With the free version, you can access, aggregate and create up to ten Instagram albums or Facebook albums. However, if you are looking to increase the number of data sources or turn your gallery into a shop, then you may consider a premium version.
With Tagembed, you can add content from Instagram, Twitter, Facebook, Slack, and other channels. You can also embed not only content from profiles but also from hashtags. This is great if you have a branded hashtag for user generated content or if you have a wedding hashtag. With Curator, you can also embed content from hashtags, not just profiles.
If you are tech savvy and you can code, you may also consider writing a plugin code yourself. You will need to apply for a token for authentication allowing you to access the Insta API (and this where things get tricky for most programmers). You can always add your embed code to your website even if it was built with a website builder. For non-tech savvy users, it should still be easy to know how to build your own website using the platform.
To begin with, following several privacy breaches, Instagram is in the process of changing their API. There is an accelerated plan to drop their API in favor of Facebook Graph API. The potential outcome you should expect from this move is getting rid of ID which enabled you to aggregate photos from other users.
One issue with creating your own plugin is you'll also be required to update it yourself as Instagram makes changes. With every change, your Instagram feed will become unavailable until you're able to update the code.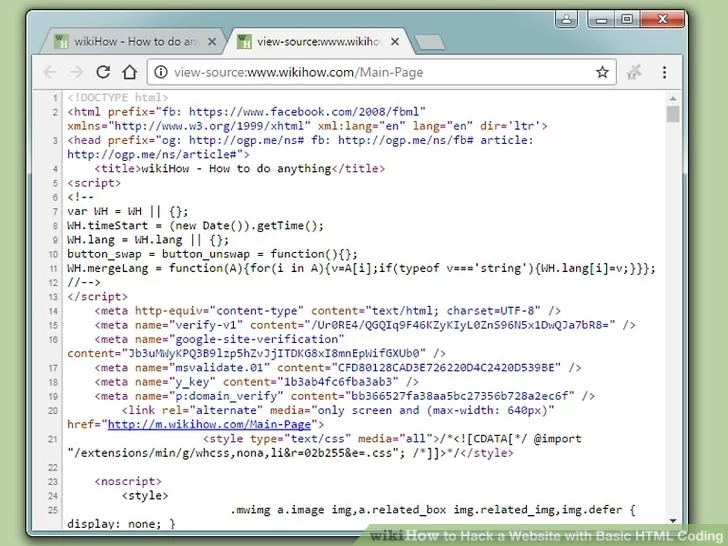 Doing this and applying again could take days or weeks, which leaves site visitors thinking your site is incomplete.
If you don't want to do it yourself, you can hire someone to create an Instagram embed plugin for you. This works well for custom websites or when you need a highly customized look and feel for your embedded Instagram feed. If you choose custom software development, it will help meet your concerns and key needs.
Curator is an excellent WordPress Instagram widget.
When embedding your Instagram content in your WordPress site, the steps are mostly the same as outlined above. The only main difference is that when it comes to actually installing the feed you have two options: 1) copy the HTML code or 2) use Curator's WordPress plugin so that you can copy and paste short code instead.
Below, we'll review these steps in more detail.
The first step is to choose a social media aggregator. Depending on your needs, the platform should be free or affordable. You need a social media aggregator so that you can embed your entire feed instead of copying and pasting code for every post.
Next, create your first feed, give it a name and choose your approval style. We recommend choosing "Approved" if it's your content and "Needs approval" if you're aggregating content from event attendees, customers, or influencers. This way, you can approve everything and there won't be any surprises showing up on your website.
Next, choose Instagram as your feed source and choose the type of Instagram posts. For most WordPress websites, people choose their Instagram Business Account and aggregate all of the content from their profile.
The next step will be to approve or deny posts, based on your approval setting.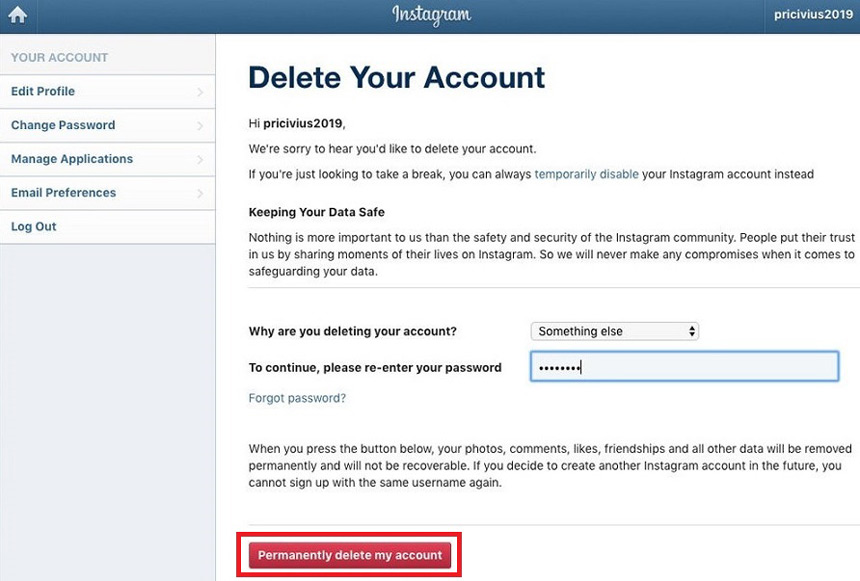 If you're manually approving, make sure to approve what you want showing up. If you're allowing your content to be automatically approved, then simply delete anything you want to remove from your WordPress website.
Now it's time to stylize your Instagram WordPress feed.
Choose the theme you'd like.
There are several different themes that work great with WordPress websites:
Most people like to keep their Instagram feeds clean and simple and let the posts shine all on their own. However, you can add borders and backgrounds, and change the font color of the text and icons.
For professional WordPress developers, a custom CSS section is available so you can add your own code.
Now, you need to add the feed to your WordPress website.
No plugin option:
Just click "Publish Feed" and copy the HTML code into the clipboard. Paste it where you want the feed to go, such as in your footer or sidebar. With WordPress, all you have to do is add a custom HTML widget to your website and then copy the code into the box.
With plugin option:
Download the Curator plugin and upload it to your website. Or go to the plugins section of your WordPress website, search Curator, and hit Install. Make sure to activate the plugin.
Then, you can copy short code and paste it where you want it to go instead of having to copy the long HTML code.
After you embed the feed in your WordPress website, go ahead and check how it looks. If needed, go back to the Style section of Curator and make changes to your feed. If you're not using the WordPress plugin, you'll need to copy and paste the HTML code again. If you are using the plugin, you won't need to do that step again.
Make sure to login to Curator occasionally to either delete or approve new posts. Depending on how often you post on Instagram, you might want to do this weekly or monthly
To embed an Instagram feed on a SquareSpace website, the only step that is different than what described above is Step 6.
You'll need to add a block to your SquareSpace website for custom HTML code. Then simply paste the feed embed code into that block.
Here's a tutorial on how to add the custom HTML block:
Follow the WordPress instructions above.
Then, for Step 6, follow these instructions:

Follow all of the instructions for the WordPress website feed above. The only step that is different is Step 6.
For Step 6, follow these instructions:
Shopify is an ecommerce platform, and ecommerce companies typically like to add their Instagram feeds to the footer of their websites.
To add your feed to the footer, use these steps:
If you want to create a different feed for each of your products, then simply add each feed's HTML code to the correct product page. This way, customers can see UGC images of that exact product when deciding to purchase it.
Most website owners and developers want to add their own Instagram feed to their website. But what if you want to add posts from other Instagram users?
Maybe you want to add posts from your customers to your website.
To do this, simply choose Instagram Hashtags when selecting the type of content. This will pull in all posts tagged with that hashtag.
Make sure to use manual approval and approve everything individually so you don't get the wrong types of images showing up on your website!
The options for embedding Instagram feeds above do vary in difficulty. However, choosing the right one or even the right combination is beneficial for your brand and can strengthen your brand identity. Becoming an authority in your niche is crucial for gaining more organic traffic.
Embedded Instagram feeds showcase your expertise on your website. For people who may not be on Instagram, this offers additional exposure to your expertise. Think of it as additional site content. Giving your visitors more is always a great idea.
Plus, you're increasing the visibility of your Instagram posts. While Instagram's daily active user base is substantial, it's still not as huge as its parent company, Facebook, which has over a billion daily active users.
Some of the biggest benefits of embedded Instagram feeds include:
Embedded Instagram feeds are only effective, though, if you stay active on the platform. Don't forget, you can also embed more than just your own personal feed. Use hashtags to also embed feeds mentioning your brand. Just make sure you monitor posts to avoid irrelevant posts. Display social proof is a proven way to increase sales and leads driven by your website. This can come in the form of reviews, user-generated content such as Instagram Feeds or product/ service awards.
Ready to start bringing your Instagram and website followers together?
Curator.io is an easy-to-customize aggregator that lets you pull from over a dozen sources. If you'd like to give Curator.io's free forever plan a spin sign up today.
A reminder that if your profile is public, it can be shared anywhere.
By John Kennedy | Published Dec 20, 2021 4:11 PM
No one we know uses Instagram on a computer, but it's currently the only way to get an embed link. Ben Kolde / Unsplash
It’s now possible to embed a public Instagram profile on a website, and that’s important for two reasons. One, it’s useful for people who use the social media platform for business or otherwise want to share a preview of their account with a wider online audience. Two, you’ll want to know how to turn this feature off if you don’t want your grid showing up in random places.
Individual Instagram posts have been embeddable for a while now, so this ability is just an expansion of the site’s overall shareability. Instagram head Adam Mosseri announced the feature among a couple others in a video on December 16. He noted that profile embeds are currently only available for users in the US, but the company said in a blog post that it would be looking to include other countries “soon.” You also can’t get a profile embed link from the app, at least right now.
When you embed a public Instagram account on a website, visitors will see a preview of the profile, plus the last six images it posted.
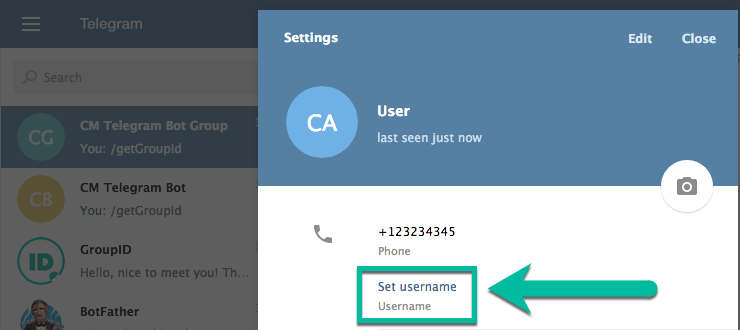
To start, go to the account in a web browser—you don’t have to be logged in. From there, click the three dots next to the handle, then Embed, and Copy Embed Code. If you want to embed your own account and are logged in, click the gear icon next to your username and follow the same steps.
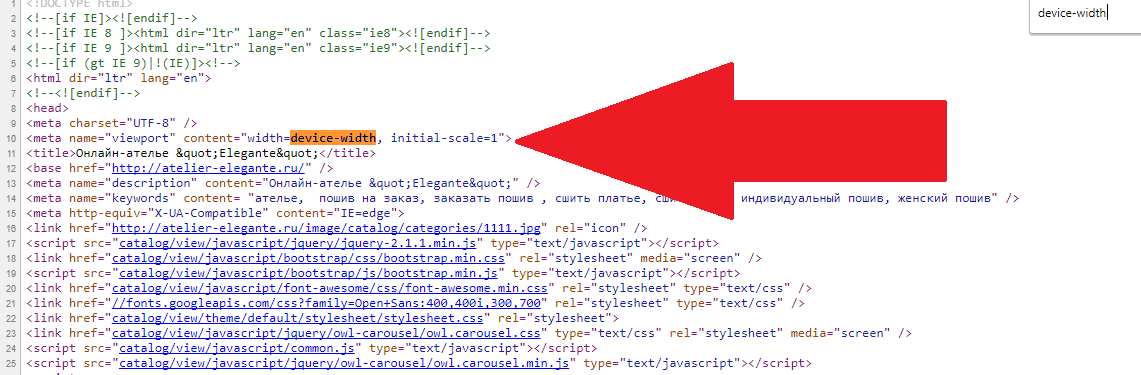
Now that you have the embed code, all you have to do is paste it into the page you’re building. A note, though: You will likely have to paste it in an html block or code reader. If you simply plop the embed code onto the page as text, it will probably all show up as dozens of lines of computer-speak.
Do it right, and it’ll look like this:
View this profile on Instagram
Popular Science (@popsci) • Instagram photos and videos
If your Instagram profile is public, anyone can embed it or any individual posts anywhere. To prevent that, go to your profile on the app or in a web browser. The steps are slightly different depending on which you choose.
In the app, tap the three lines at the top right. Then hit Settings, Account, Embeds, and turn off the toggle switch next to Allow people to embed your posts or profile on other websites.
From a web browser, click the gear icon next to your username, then click Privacy and Security. Find the Embeds heading and uncheck the box next to Allow people to embed your posts or profile on other websites.
Now your personal grid won’t show up on a poorly made test website cobbled together by someone teaching themselves to code.
Have you ever wanted to post a certain Instagram photo or video on your website and then unsuccessfully tried to save the photo to your computer and upload it to your website?
Instagram has a built-in feature that you can use to easily embed photos or videos into your website or blog's HTML, and you don't need to be a web designer to figure out how to do it.
The benefit of embedding Instagram posts directly into your web pages is that your site visitors can interact with the post as if they were on Instagram. They can click on it to go to the post page or user profile, which they will appreciate if they are already Instagram users.
Click on the following steps to see how you can easily embed an Instagram photo or video on your website in just a few minutes.
First things first: to do this, you need access to Instagram on the web, not the mobile app.
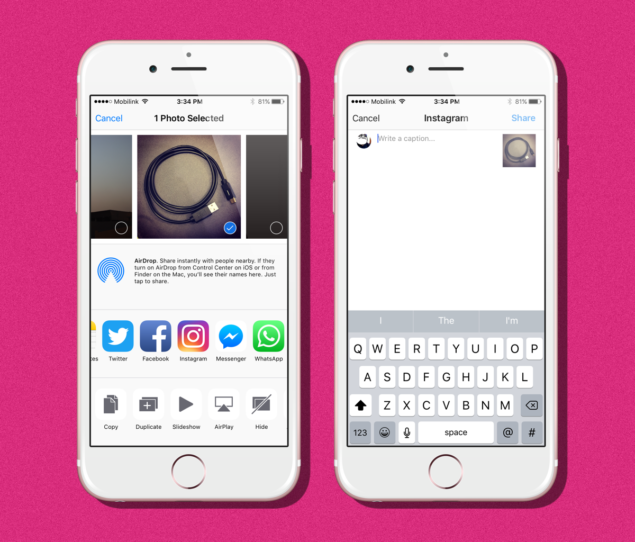
If you need to paste a message that you found in the application, you can click on the three dots , that appear in the top right corner of any message.
Then tap the option " Copy link", which appears in the menu for copying.
Paste it somewhere to access it online.
For example, you can paste it into an email message and send it to yourself to open the link to this post on your desktop.
If you didn't find an example to copy in the first three steps, we'll use the photo post from the official Lifewire Instagram account, but you can use any Instagram post you want.
If you already have a post URL, just click on it or copy and paste it into your web browser. The URL for an Instagram post would look something like this: instagram.com/p/xxxxxxxxxx/ .
However, if you're already on Instagram.com (not in the app, but on the web), viewing your home feed, profile, tag, or view page, you don't even need to open the post page to embed it on a web page.
Instead of right-clicking and selecting "Save As" or taking a screenshot of an image, you'll just search for three dots in the lower right corner of the image field, which will be where you are. You view the post as a popup on the page, in your feed, or on the post's own page.
Select these three gray dots and you should see several pop-up options. Click Embed .
A box will appear in the middle of your screen displaying a line of code and a blue button. If you want to enable the signature to be displayed on the web page, you can leave checkbox " Enable caption" disabled, but if you just want to show a photo or video, you can uncheck it.
You don't need to know how any code works or what it means to properly embed a photo or video on your site. Just click Copy Embed Code, to automatically copy the entire line of code.
You are done with the Instagram page now. Next, you can go to your website or blog where you want the post to appear
Since you're unlikely to be editing your website on your phone, you'll need to paste this code into an email and send it to yourself so you can use it on another device. If you're editing your site on the same device as the Instagram app, you only need to paste the code into your site's HTML code, as explained below.
You can access the admin area or toolbar of any website or blogging platform you use and find the correct area to paste the code.
For example, if your site is running WordPress, you just need to access the post or page you are editing in text mode (not in visual mode).
If you're building a site using raw HTML or a static site generator, you can paste the raw HTML you copied into your site and bypass it.
Right-click in the editor and select Paste, to paste the copied embed code into the field.
Save, center if you like, publish and you're done.
Take a look at a published page on the web to see a new Instagram photo or video neatly embedded right into it.
You should see a photo with a link to your Instagram username at the top, and the number of likes and comments below it.
If it's a video and not a photo, your site visitors will be able to play the video directly on your site.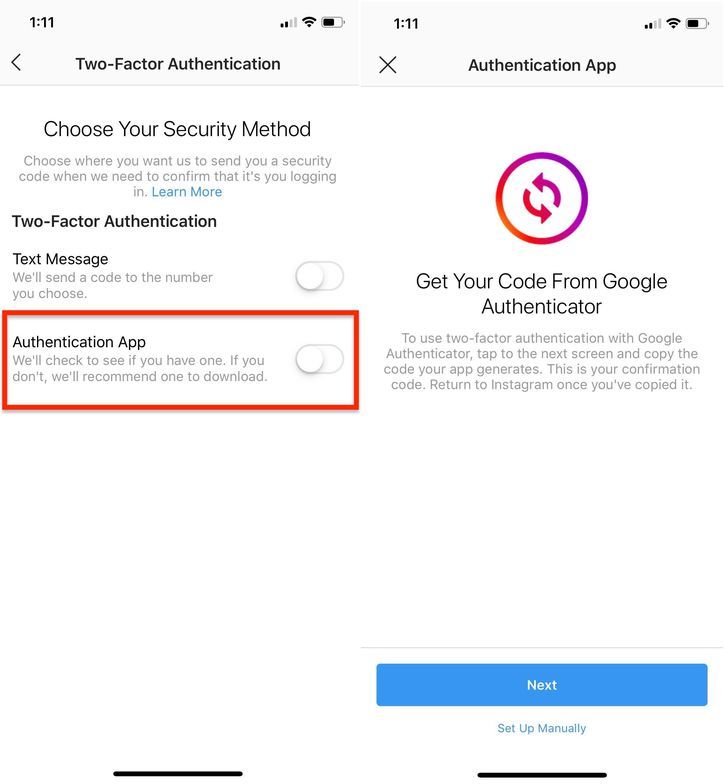
Of course, if nothing is showing up on your site, you may have pasted the code in the wrong place, or you may not have copied the entire line of code. If you're having any issues, check out this great WordPress help article.
Help Center
Instagram features
Your profile
If you turned on two-factor authentication but were unable to receive the code due to communication or upload issues, you can sign in to your account using a recovery code.
How do I get a list of recovery codes for my account?
Instagram app for Android and iPhone
Tap the or icon on your profile picture in the bottom right corner of the screen to go to your profile.
Click the icon in the upper right corner of the screen and select Settings.
Select Security and then Two-Factor Authentication.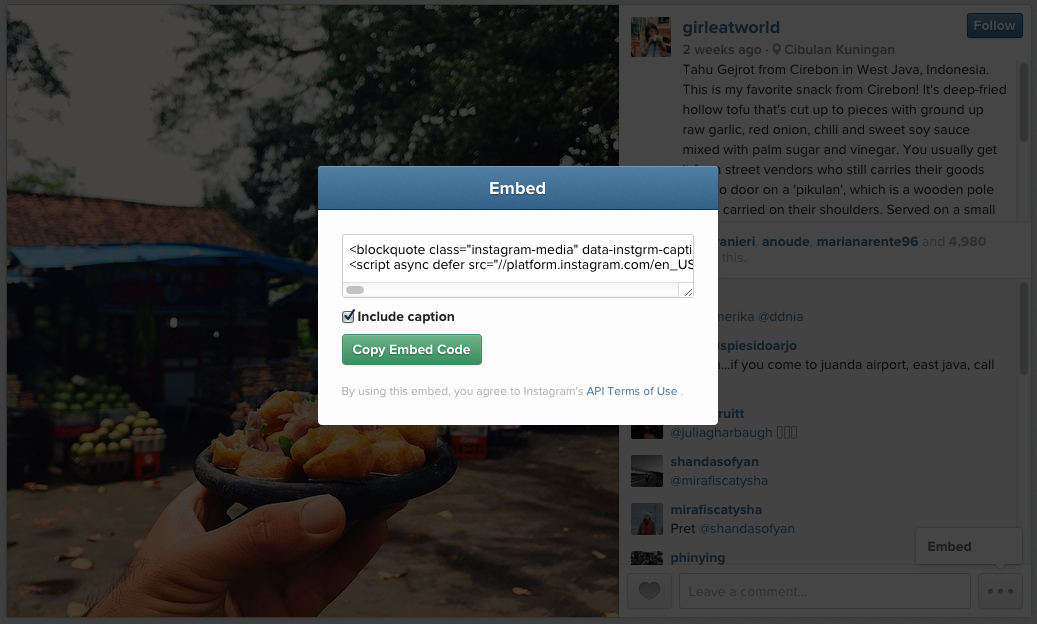
Click More Methods.
Select Backup Codes.
instagram.com in browser on mobile
instagram.com in browser on desktop
Instagram Lite app for Android
How do I disable my current recovery codes and get a new list?
Instagram app for Android and iPhone
Tap the or icon on your profile picture in the bottom right corner of the screen to go to your profile.
Click the icon in the upper right corner of the screen and select Settings.
Select Security and then Two-Factor Authentication.
Click Backup Codes and then Get New Codes.
instagram.com in a mobile browser
instagram.com in a desktop browser
Instagram Lite app for Android
To view a list of recovery codes or get a new one, you need to be logged into your Instagram account. Copy the codes to your clipboard, take a screenshot of them, or save them in some other way so that you have them at your fingertips when you log into Instagram.