How to get a sponsored page on facebook
How to drive results with sponsored posts on Facebook
Unless you’ve been living under a rock, you’ve probably heard how organic reach on Facebook has been on the decline over the last few years, driving the need for brands to focus more on Facebook sponsored posts.
But what are Facebook sponsored posts? How do they work? And how are they different from Facebook ads? We’ve got the answers for you here.
What are Facebook sponsored posts?
A Facebook sponsored post is a post that businesses pay for, in order to reach a larger audience than they otherwise would be able to organically.
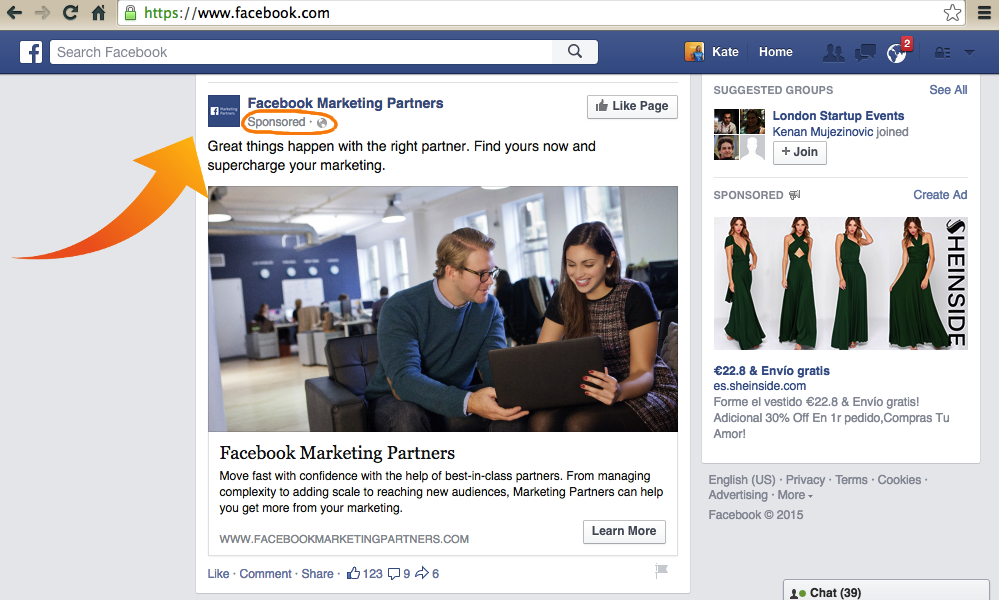
A Facebook sponsored post is almost entirely like an ordinary post in appearance, as it looks just the same as all other posts inside a user’s feed (formerly known as “newsfeed”), the only difference is that a sponsored post is labelled as such.
Sponsoring a post on Facebook is an easy and quick process and a great way to get more - and more relevant - eyes on a post. It’s important, though, that when you sponsor a post, you have a clear audience in mind and your messaging is appropriately targeted toward that audience, but we’ll talk more about this later.
First, let’s take a look at how Facebook Sponsored Posts work.
How do Facebook Sponsored Posts work?
A Facebook sponsored post is essentially a normal organic post that you pay to ‘boost’ in order to reach an audience outside of the people already following your business on Facebook.
Why should you sponsor a post on Facebook?
Why sponsor a Facebook post instead of just posting it and hoping for the best?
The answer is simple. Organic reach on Facebook, was estimated to be somewhere around 2.2% as of 2021 (depending on different variables – such as the size of your following – some brands can experience as low as 1% organic reach). This means that when you simply post on your Facebook business site, people most likely won’t see it or interact with it despite how engaging or relevant the post might be.
We saw dwindling Facebook organic reach as early as 2014, and by 2017, it had dropped from 26% in 2011 to 0.5%. This was largely attributed to an increase in competition, as more and more businesses were taking to Facebook, crowding out feeds.
The dramatic drop-off we've seen over recent years, though, has been largely attributed to continuous changes in the Facebook algorithm. These changes are aimed at making users’ feeds more relevant to them.
As Facebook’s organic reach continues to decline for businesses, it becomes increasingly more important for brands and marketers to leverage paid content to boost the visibility of their Facebook business pages.
In other words, if you want to make sure that a greater number of your followers are able to see your content, you often have to pay to get a better reach.
A shift away from users being inundated with low-quality news stories or content is perhaps a welcomed change. But it does make it harder for brands to get their content seen. This is why it’s so critical for businesses and brands to sponsor their posts.
What’s more, a recent update to sponsored post content allows you to encourage users to visit your site or landing page instead of just engaging with your post.
How to boost a post on Facebook
The good news is, sponsoring - also called boosting - a post on Facebook is extremely simple. We’ll help you do it in 9 simple steps:
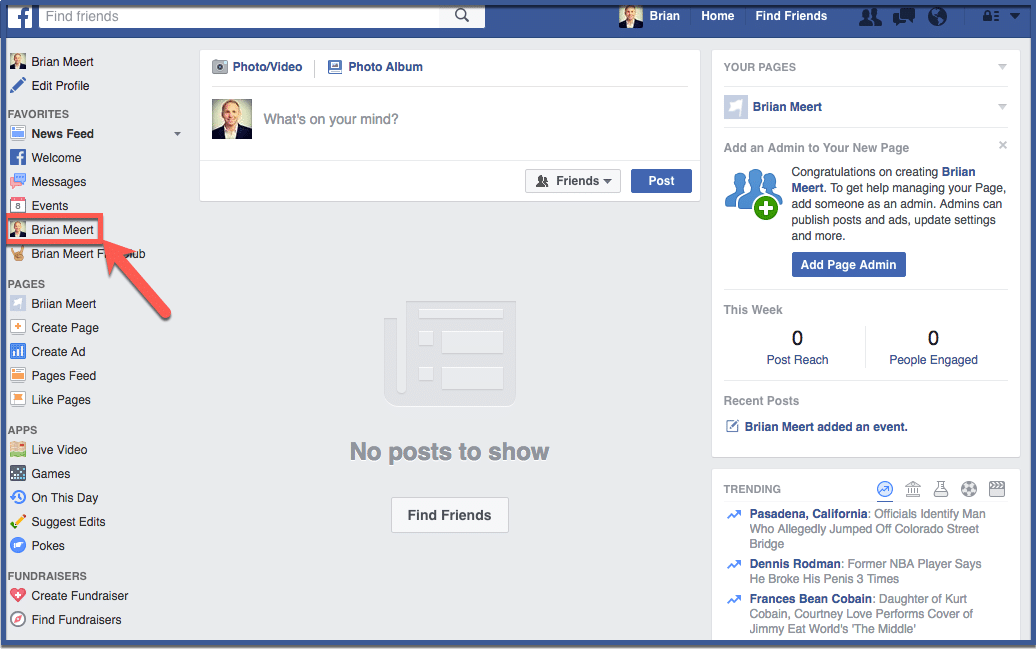
1. Go to your Facebook business page.
Once on Facebook, you can access your Facebook business page by clicking on it in the left-hand toolbar.
2. Either create a post to sponsor or sponsor an existing post.
One method is not necessarily better than the other. A good approach, though, might be to post organically. You can then see which posts are naturally gaining traction with your intended audience and then boost the posts performing well to get more eyes on it. You can analyse how your organic posts are performing in the “Insights” – keep an eye on important metrics such as Reach and Engagement.
Regardless of the option you choose, your next step is to select boost.
3. Specify your goal:
- Getting more website traffic
- Getting more engagements: reactions, comments and shares
4. Select a CTA button between a number of preset options.
The option you choose will likely hold relevance to the kind of content you’re offering as well as the products or services you sell. Keep in mind, though, certain CTAs tend to work better than others.
5. Specify your target audience.
Choose between:
- People you choose through targeting: you can create an audience, whereby you specify an age range, gender, location and specific attributes, such as demographics, interests or behavior. You can also choose to specifically exclude certain audiences.
- People who like your page
- People who like your page and their friends
- People in your local area
- You can also select an automatic audience: This is the one that Facebook decides upon, based on who it thinks would find your content relevant.
 This is the selection that Facebook recommends for the sake of getting the most bang for your budget.
6. Set the duration of time you wish to sponsor your post for.
You can do this by selecting the number of days you want it to be sponsored, or by selecting an end date for sponsorship.
7. Set the budget for your sponsored Facebook post.
The amount of money you allocate will be split between the amount of time you specify for your post to be sponsored.
Once you’ve finished inputting your budget, be sure to turn on conversion tracking, which you can do with the slider icon at the bottom of this section. This will allow you to better understand the engagements you get from your sponsored efforts, in order to get a better indication of your return on ad spend.
8. Enter in your payment info.
Once you save your credit card info, you won’t need to complete this step again to sponsor a post.
9. Hit boost, and keep an eye on the results!
You’ll want to compare the results you’re seeing to the initial goals you set for the post. You can optimise your post copy, pictures, targeting, etc in line with what you learn. It good approach is to keep some sort of log with your learnings.
Facebook sponsored posts cost
Sponsoring a Facebook post can be rather affordable. In fact, you can set as little as a $1 minimum. The amount you pay depends entirely on the size of the audience that you want to see your post. Facebook will provide you estimates of the number of people you can reach with the budget you specify.
A good approach is to first determine who exactly you want to reach, what you want those people to do and how much that action is worth to you.
Facebook sponsored posts vs ads
While they’re essentially the same - paid ads on Facebook - there is a difference between Facebook sponsored posts (boosted posts) and Facebook ads, which you should know about.
Facebook Ads
Facebook ads are created in Meta Ads Manager (now simply called the “Ads Manager”). So rather than simply creating them through your business profile, you would need to set them up through Ads Manager, which may require a bit of time to get to know.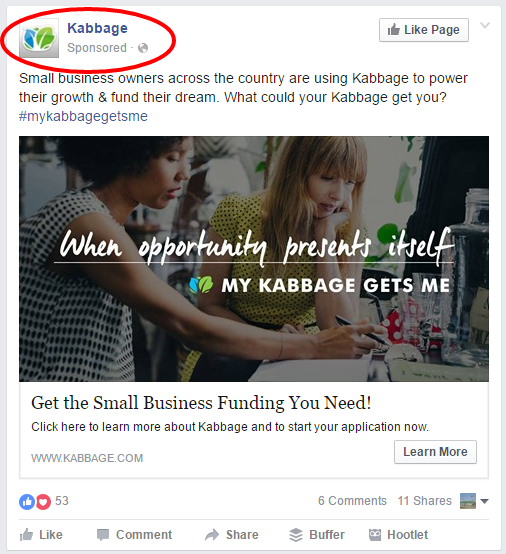
Once you do, though, Ads Manager will allow you more specification options when it comes to creating your audience and allocating your budget. Here are the main advantages:
Advantages of Facebook Ads
- No time limit: A Facebook Ad can run for as long as you like.
- More complex targeting and budgeting options
- With Facebook Ads, the following marketing objectives can be accomplished: awareness, traffic, engagement, leads, app promotion and sales. (Facebook used to have the objectives of brand awareness, reach, traffic, app instals, engagement, video views, lead generation, messages, conversions, catalogue sales, and store visits but these have been simplified to just six. If you used the previous objectives – Meta guides you here on how to select your new objective based on your previous objective.)
Disadvantages of Facebook ads
- You can’t create an ad straight from your business account, you will need to use Meta Ads Manager
- There is a slight learning curve you will need to get over before you can navigate Ads Manager and learn the best targeting and budgeting options.
 In this way, it’s a bit higher risk.
When should you use a Facebook sponsored post over a Facebook Ad?
- A Facebook Ad might be your best bet if your focus is a more long-term ad, built into a strategic campaign or content plan. Many companies, for example, appreciate the added control and greater customization that you get with Facebook Ads.
- A Facebook sponsored post is quick and easy to disseminate and great for one-off efforts. If your goal is increased awareness at an affordable price a Facebook sponsored post might be the best bet for you.
What is a Facebook Automated Ad?
Facebook Automated ads are those that Facebook helps you to create and disseminate on an ongoing basis with minimal maintenance needed.
How do Facebook Automated Ads work?
Facebook will ask you a series of questions about your business and your goals. They’ll then give you suggestions about how to set up your ad, including inputs on images, budget and audience, based on these objectives.
Your ad will then run continuously and Facebook will instruct you as to how you can optimise it for the best results.
Success tips for Sponsored Facebook Posts and paid distribution in general on Facebook
Now that you’ve nailed down the basics, it may be time to consider the content you are posting to Facebook and how it fits into your overall strategy. We’ve got some resources that can definitely help you on this journey.
- First off, learn from industry best practices. While thinking out of the box and doing something different is the best way to get attention, you have to start somewhere. Your first step should probably be laying down the foundations and understanding how others were successful.
- Along the same lines, check out some great examples. We’ve put together some of our favourites here.
- Put it all into a larger strategy with set KPIs. Learn how here.
- Be aware, Facebook users are inundated with ads all the time. Your best bet is to be informative, not interruptive.
 Discover how you can approach Facebook in a non-disruptive way right here.
Feeling like an expert yet?
Now that you’ve mastered paid distribution on Facebook, perhaps you’re wondering about the other social media channels. Luckily, we’ve got you covered. Be sure to visit our article dedicated entirely to advertising on social media.
The Beginner's Guide to Facebook Sponsored Posts
If you’re finding that your organic posts on your Facebook business page aren’t getting the reach they once had, you are not alone. Over the years, as Facebook’s algorithm has continued to evolve and with more brands coming into the channel, organic reach has been dwindling further. If you’re lucky, you may get a full 1% of your fans that actually see your posts these days, but chances are low.
After all, as brands, we have to compete with personal user posts ranging from cat videos, baby photos, and other friend updates. The visibility in user feeds that we are vying for as brands is not what it once was and if you want more, you have to pay to play. One quick, easy, and affordable way to do that is to boost your organic posts through a sponsored post, or boosted post.
In this guide, we’ll cover:
- What Facebook sponsored posts are.
- How to run sponsored posts.
- How to fit them into your Facebook marketing strategy.
- How to make your sponsored posts successful.
Let’s get to it.
What is a Facebook sponsored post?
In a nutshell, it’s an ad created by using a post on your Facebook business page. If you want your organic post on your Facebook business Page to get more visibility and to reach new and/or larger audiences, you can boost, or promote your post. Your post will be seen by more people, can help drive more direct brand awareness and user engagement as well as indirectly impact website traffic if there is a link and possibly conversions, too.
How do I run a Facebook sponsored post?
There are two ways you can boost a post at this time: directly through your organic post or through Facebook Ads Manager. I’m going to walk you through both.
Set up directly through your organic post
Facebook makes it easy for small businesses and individuals to sponsor a post. While there are several ways you can boost a post, the quickest and easiest is directly on the organic post itself, on your Facebook business Page. On each of your posts, a blue “Boost Post” button can be found, as so:
Click the button on your post and allow the pop up window to present itself with the targeting, duration, budget, and conversion tracking options.
Images via Birdies
Here, you will want to select your audience or create a new one. If you want more of your fans to see it, you can target “people who like your page” or through some broader audiences to get in front of more new people and get them into your funnel. One of many ways that you can begin reaching people is to target people that live in a location that you can ship to or service and the age range that may be interested in your products or services.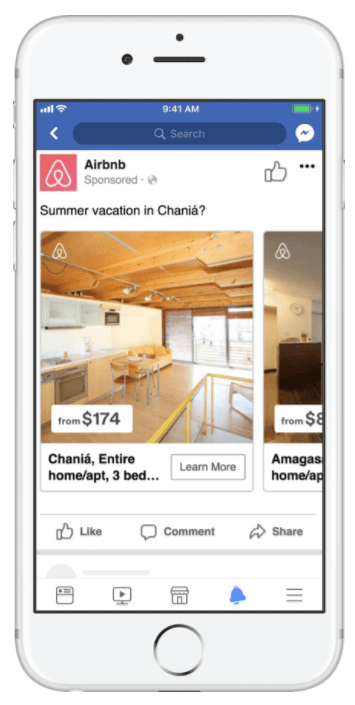 An effective way to reach new people is if you have any lead or customer email lists, import them into Audiences in Ads Manager and create a lookalike from them. Or you can take your website visitors or cart abandoners and create lookalike audiences off of those. Another way is that you can take an interest or behavior based targeting approach by targeting people that are interested in your types of offerings.
Next up, you can set the ad to run in all ad placements, as recommended in the “Automated Placements” area. I typically recommend running these to see how they perform with certain audiences and in which placements, they perform best. If you run your sponsored post for enough time (seven days max) and budget, you can later go into Facebook Ads Manager to run an ad placement report. If you see that an ad placement is under-performing, you can then go into your sponsored post campaign, to the ad set level, and edit the ad placements to unselect any of those under performers. This can help optimize, or improve, the performance of your particular sponsored post. You can also take the learnings of this sponsored post run and apply them to other campaigns if it makes sense to do so and see if its successful, there, too—and this will save you time and money on testing your copy and creatives with new audiences.
In the next area, you will set the duration and budget. Under “Tracking Conversions,” make sure the Facebook Pixel is selected and blue, meaning it is set up and active. This way, you will be able to track various actions, such clicks to your website if there is a link included in your post and conversions. If this is your first time running an ad on Facebook, you will need to add your payment information such as a debit or credit card before you can activate your boosted post. If you have run ads, your payment information should be on file. Lastly, click the “Boost” button and let it run!
Set up through Facebook Ads Manager
If you have some Facebook advertising experience, head over to Facebook Ads Manager and set up a campaign with any campaign objective that makes sense for your boosted post goal.
To set these up, head over to the ad level and where you select your creative, select “Use Existing Post.” A window will open where you will then be able to select a post from Facebook, Instagram, or branded content if another brand tagged you in a post of theirs. Please note, only Facebook branded content is available at this time. Instagram is not, but keep an eye on it as we imagine that it will be available in the near future.
While there are countless ways tactics, one way we set up sponsored posts through Ads Manager is in retargeting campaigns, where we are reaching warm audiences that have not yet converted. For example, our custom window insert client, Indow, has some interesting and informative organic posts we often boost in preexisting awareness campaigns to keep costs lower and to keep their brand and products top of mind with our warmer audiences that have indicated interest in their products with prior touch points but have not yet converted. By showing users posts with higher social proof and don’t necessarily push a hard sell, these ads convert very well and at lower costs.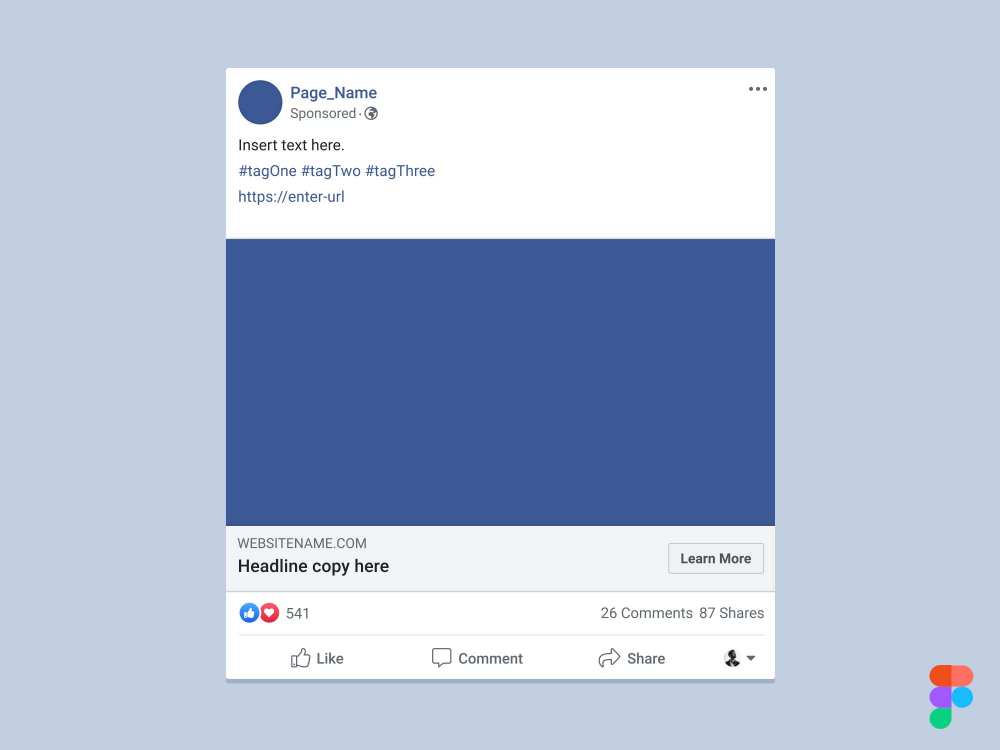 For example, we use customer stories, as seen here.
Facebook sponsored posts vs. traditional Facebook ads
Facebook sponsored posts are very easy to use, create, and launch, especially if you are a small business owner or an individual with limited or no Facebook Ads managing experience. These are also effective for short term runs, ranging from one to seven days in duration, whereas traditional ads can run long term. If you have any engagement, such as reactions, comments, or shares on your organic post, one of the benefits of boosting that post is that your engagement will also be promoted to the audiences you target, which increases your social proof. You can boost and re-boost your post across various audiences and the engagement will remain, even further increasing your social proof.
Another added benefit of choosing a sponsored post is that you can do it for a very low cost. With an affordable $1/day ad spend minimum on boosted posts, you can begin reaching people. Of course, the more budget you have, the more users you will reach, the quicker you can learn, and the faster you can optimize your posts and ads going forward with your learnings.
While Facebook sponsored posts are easy to set up, they do come with limitations, compared to what you would find in the more advanced advertising area of Facebook, in Ads Manager.
A traditional Facebook ad campaign and ads are set up in Ads Manager, where you can use many more features, see reporting, and make optimizations. Traditional Facebook ads provide you an option to select a campaign objective, such as awareness, engagement, website traffic, event attendance, mobile app installs, leads, or conversions, whereas, sponsored posts, do not. Sponsored posts are primarily effective in driving brand awareness and engagement, though, if you add a website link to your post, you can also indirectly drive website traffic as well.
With traditional ads, you can also set more advanced targeting options with inclusion and exclusion audiences, utilize bidding strategies, and optimization strategies such as landing page views, link clicks, conversions, and more. With more options, there is a level of complexity that can come into play—as well more time needed for set up—but the payoff can be much larger when setting up traditional ads.
There is much more flexibility in Facebook Ads Manager, which is worthwhile to explore. However, if you are looking to quickly and easily gain more traction on your organic posts in the interim, sponsored posts may better suit your needs.
How to add Facebook sponsored posts to your strategy
Sponsored posts perform best if they are run occasionally and alongside your traditional Facebook ads campaigns as these are short term and have limitations, thus, unable to solely achieve your lower funnel goals, like sales.
If you have an engaging post about an upcoming new product launch, a sneak peak post would make for an excellent sponsored post. If you have an already successful organic post, boost it further to new audiences that may also be interested. If you have a more expensive product or longer conversion funnel, target your warmer retargeting audiences with boosted posts to keep your brand top of mind.
While running an occasional sponsored post, set up campaigns in Facebook Ads Manager, too, to help drive more awareness by introducing people to your brand and then moving them down your funnel so that they eventually take the final action to complete your conversion. Think of traditional Facebook Ads as the foundation of your marketing efforts and sponsored posts as occasional bonus add ons to help with awareness and engagement.
How to create wow-worthy Facebook sponsored posts
Facebook sponsored posts might be easy to set up quickly, but these sponsored posts require thought and planning to be successful. Here are four ways to make sure your Facebook sponsored posts are wow-worthy.
Determine your goal
If you plan to use sponsored posts, be mindful of your goals. If your goal is to drive awareness and engagement, proceed with a boosted post. If you want something beyond that, such as driving more website traffic, mobile app installs, leads, and conversions, do so with traditional ads. The full list of available campaign objects can be seen here:
Harness high-quality posts
While you can promote just about any post from your business page, except for posts that you are featured in, photo albums, or mobile app install posts if that relates to your business, you will want to choose your highest quality posts to spend money on and promote. A high quality post users relevant and strong messaging, utilizes captivating creative that complements your text, and includes a call to action for users to take. Calls to action can be “Learn More,” “Shop Now,” “Donate Now,” “View More,” and so forth.
Captivate with your creative
Do you have a great image? Something bright, colorful, engaging? Boost it! Or perhaps you have an excellent video that you’re proud to show off? Boost it! Always aim to have a creative along with your text in a post so that you can maximize on your sponsored posts’s real estate. This way, as users scroll down their feeds, you can give them a reason for them to stop and see what you are sharing. One thing we have noticed that works very well, if relevant to your brand and post, is to use smiling people that may reflect your target audience. This makes the image, and the whole post, more relatable and click-worthy.
Select great social proof
If you have a post that has high organic engagement but you want to further increase that with a new audience, promote it and expand its reach and shelf life. People tend to engage with a post or an ad if more people already have. Plus, it helps if it is entertaining, inspiring, helpful, informative, and relatable, and even more so if you ask a question in your post, as the image below exemplifies.
Boost your bottom line with Facebook sponsored posts
Now that we’re familiar with the benefits, limitations, and best practices for Facebook sponsored posts, integrate them into your marketing strategy. Easily set them up and launch them to reach larger audiences, expand your reach and visibility, and drive more engagement. They’re an excellent and affordable way to get your feet wet with Facebook ads and to get new people into your funnel!
How to Create an Advertising Account on Facebook?
Step 3. Specify business information
After clicking “Get Started” , a context menu will appear where you will need to specify the name of the business page and the field of activity, for example, retail, auto sales, online store, real estate, law, web design, restaurant or other. Just enter the keywords that characterize your business in the "Category" field, and the system will display the available options.
Next, fields for entering the address and phone number will appear. The address entered in this step will be displayed on the business page profile as a map with a marker in the center. If you do not want this, then the address can be hidden from page visitors by checking the box next to "Don't show my address ...". At the same time, the system will save it and will use it to determine the time zone and the target region for displaying ads. Specify the address with the phone and press "Continue".
Step 4. Upload the logo (avatar)
In a new window, the system will prompt you to download the logo (avatar) for the business page profile from your hard drive. This should be a square image with some kind of picture or photo in the center that users will see as a circle, not a square. Optimizing an image on Facebook will not work, it must be done in advance using Canva, Crello or other similar services.
Step 5. Loading the cover of page
After the avatar, you also need to upload a cover image (displayed at the top right in the business page profile). This should be a photo, picture, map or video that will be displayed on the screens of computers and laptops with dimensions of 820×312 pixels, smartphones - 640×360 pixels.
After uploading the cover, the business page will open, where you will see that the cover space is empty.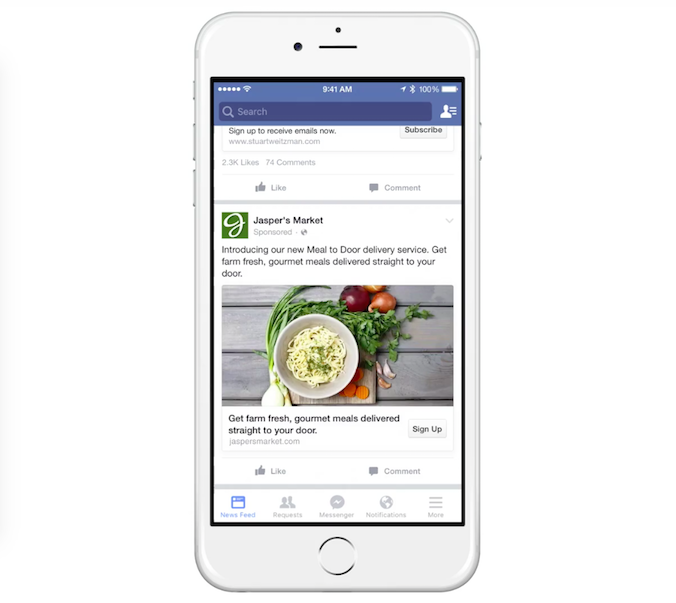 To fix this, click "Add a Cover" and then "Choose From Photos" or whatever.
In the new window, double-click the right button to select the desired image.
Step 6. Set up Ads account
Your business page has been created and you now have a Facebook Ads account. Next, you need to make sure that the settings are correct and link the payment instrument to it. To do this, go to Ads Manager by clicking "Create" and then "Ad".
In a new tab, click on the "Ads Manager" icon at the top left of the screen and then "Settings".
In the window that opens, there will be data on your advertising account, including its ID, which can later be used to launch advertising campaigns, link new users to it, and more.
Check that all information about your ad account is correct. If necessary, change the time zone and currency. But note that any change will automatically create a new ad account (with new ID). The old one will also be visible to you, but it will be suspended, as well as all advertising campaigns launched from it.
If you plan to work in a team, you can add a new member by clicking on the "Add People" icon. In the box, you need to specify the Facebook user ID and indicate its role: administrator, advertiser, or analyst.
Administrators will have access to almost everything :
- Manage settings, payment methods and spending limits.
- Adding people and assigning roles to an ad account.
- Creating, viewing and editing advertisements.
- View ad account reports.
Advertisers will only have access to two features:
- Creation, viewing and editing of advertising.
- View ad account reports.
The analyst will have access to only one function :
- View ad account reports.
To link a payment method to an advertising account, go to section "Payment Settings" and click on the "Add Payment Method" icon.
In the window that opens, select your preferred payment method and enter payment details. It is important that you have at least a few dollars in your bank card or digital account.
You now have a Facebook ad account ready to use to promote your business on the world's largest social network. If you plan to use multiple ad accounts or need to create an account for a client, read the next section.
Via Facebook Business Manager
Now we will tell you how to create a new advertising account using Business Manager (BM) - a tool for managing all business processes on this platform, including the promotion of other campaigns (users).
Step 1. Create an account in BM
If you already have a Facebook Business Manager account, open it and proceed to the second step. If there is no account in Business Manager, you need to create one. To do this, click on the "CREATE ACCOUNT" icon in the upper right corner of the screen and follow the instructions.
In a new window you will be asked to name your account in Facebook Business Manager, to enter your first and last name, as well as your business email address.
Next, you need to enter your business data: location, phone number and website. All fields are required, except for the second address.
Step 2. Create a new ad account
Once you open Facebook Business Manager, you must click on the "Business Setting" icon at the top right of the screen.
Next, go to the "Ad Accounts" section and click "+ Add". A context menu will open where you need to select "Create a New Ad Account".
Enter a name for your new ad account and specify your time zone and currency. Please note that the currency must match the currency of the payment method you choose later to activate your ad account.:max_bytes(150000):strip_icc():format(webp)/facebookmarketplace-whereis-5c8e0e5346e0fb000146ad3d.jpg) Whereas the choice of time zone will affect when the system will show your ad to users.
Whereas the choice of time zone will affect when the system will show your ad to users.
Next, you'll be asked if you're creating an ad account for your business or someone else's. Choose the option you want and click "Create".
Step 3: Add yourself as an Administrator
Next, you need to specify who will have access to the created account and in what role. Usually, administrator rights are left to themselves, and the rest are assigned the rights of a manager or analyst. If you are a marketing agency and create an account for a client, then you need to agree on access rights in advance.
After entering these details, a Facebook ad account will be created and you will see the following notification.
To quickly go to the next step, click on "Payment Methods" in the text of the message.
Step 4. Add a payment method to activate your account
In the "Payments" section, click on the "+Add" icon.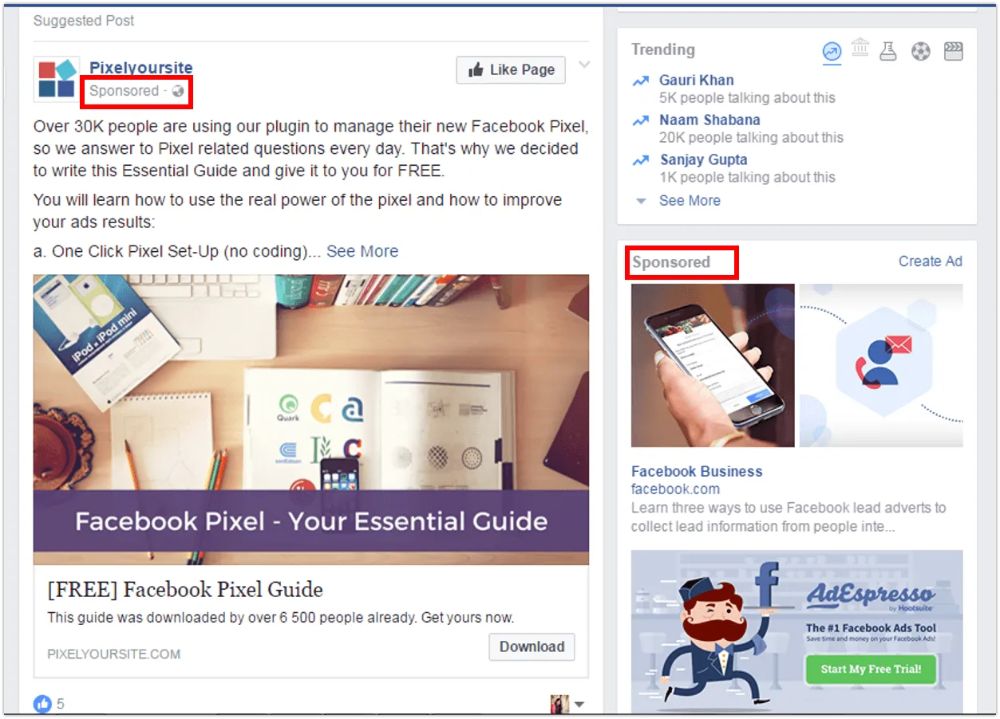
A window will open where you need to select a payment method and enter payment details. This is an important point that affects what type of account will be created: with manual or automatic payment, that is, prepaid or postpaid. This will be discussed in more detail in the next section.
Please note that the advertising account will be activated only after the successful connection of the payment instrument, which you should be notified about. Sometimes at this stage the system freezes for a long time. In this case, simply reload the web page, return to the "Ad Accounts" tab, and if everything is fine, you will see the activated account.
2 types of Facebook Ads account
When you attach the payment tool to your ad account or create your first ad on Facebook, you also decide how the payment will be made:
Automatic postpaid . You link a bank card or a PayPal fiat money account to your Ads account and run ads without any advance payment. As soon as your debt exceeds a certain threshold (billing threshold), the system will write off the debt from your account on a bank card or PayPal. If the debt for displaying ads does not exceed such a threshold, then the money is debited on a certain date of each month. The threshold for spending funds and the number for debiting them can be set in the settings.
Consider examples:
- You have linked a bank card to an advertising account and launched a campaign with the following settings: $40 threshold or charged on the 1st of each month. On the first day, you spent $20. The money was not taken from the card. On the second day, you spent another 20, and the system immediately deducted them from your card. If there is no money on the card, the advertising campaign stops.
- Settings: $200 threshold and charged on the 1st of every month. If you spend $5 per day on Facebook ads, then the money will be debited from your card on the 1st of each month.
Manual payments (prepayment) . First, you make a deposit to your Facebook ad account and only then launch the campaign. Ad impressions will go on as long as there is money in your account. You won't have a billing threshold, but you will be able to set a threshold for ad spend per day.
Consider an example:
- You have deposited $50 into your ad account and run ads with a limit of $10 per day. In this case, the campaign will last 5 days, after which the display will stop. If you set a limit of $5 per day, the campaign will stop after 10 days.
How to choose a payment method . If you are interested in manual payment, then you can see which instruments with this payment mechanism are available in your country by following this link. Select the country and see the table.
All other available payment instruments will use automatic postpay. You can see their entire list at this link.
How to give access to Facebook advertising account
- 1.
 How to give access to an existing advertising account
 - 2. How to create an advertising account in FB and give access to it
A new course for promoting a Telegram channel in 2023!
50%
Leave a request for pre-order course
and book a price for it with a 50% discount telegram.positive2b.ru
How to give access to an existing advertising account
Bottom left link Advertisement
Expand the menu, if it is not all open, then click the blue link at the bottom "All tools", then Settings
And add friends there
cabinet and make basic settings
1. Follow the link https://www.facebook.com/business/ .
2. Click the "Create ad" button.
3. This will take you to Ads Manager - this is the name of the advertising account on Facebook. The image below shows what it looks like
4. Next, you need to complete the initial settings. Click on the button with three stripes (in the upper left corner). A menu will open, select "Settings".
5. On the page that opens, you can change the account name (1), time zone (2) and currency (3).
Please note! If you later want to set a different currency, Facebook will offer to create a new account. This will deactivate the old account. Therefore, we advise you to immediately indicate the currency you need.
You can also create an advertising account through Business Manager .
To do this, go to Accounts / Ad accounts, click the "Add" button and select "Create an ad account".
Next, a window will open in which you need to set the basic settings (name, currency, time zone) and click the "Create an advertising account" button.
How to give access to the Facebook advertising account
If you need to give access to your advertising account to another person, then you can’t just give him your username and password.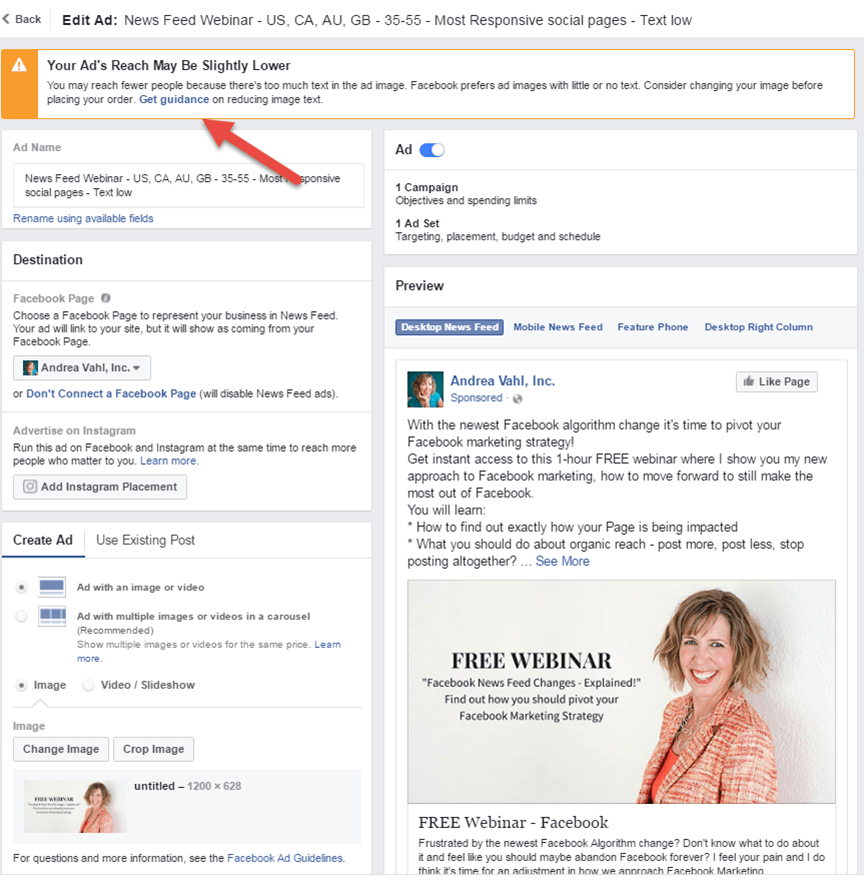 Facebook monitors IP addresses and if it sees that the account was accessed from a different IP address, then this is considered suspicious activity. In this case, the advertising account falls into a ban, simply speaking - being blocked.
Therefore, in order for another person to be able to set up ads, you need to give him separate access.
There are two ways to grant access to the advertising account: through the "Settings" section in Ads Manager or "Settings" in Business Manager.
We provide access through Ads Manager
1. Go to Ads Manager in the menu item "Settings".
2. In the "Ad account roles" block, click the "Add people" button.
3. In the window, in the input field, specify the friend's name (1), select the rights in the drop-down list (2) and click the "Confirm" button.
Please note! There are three options for rights:
- Analyst - you can only view ads and reports
- Advertiser - you can create, edit and view ads and have access to reports
- Administrator - in addition to creating, editing ads, viewing reports, they can also edit payment methods and manage administrator rights
Usually, to conduct advertising, it is enough to give access with the rights "Ad account advertiser"
You can open access by entering the name / surname or e-mail. An important point - this person should be your friend on FB.
We provide access through Business Manager
1. Go to Business Manager. We click on the button with stripes in the upper left corner and in the menu that opens, select the item "Company settings".
2. Next, go to Users/People and click the "Add" button. After that, we indicate the e-mail of the user we want to add, assign rights and click the "Next" button.
At this step, we advise you to give employee rights, then at the next step you can choose which tools will have access.
3. In the next step, specify which advertising accounts users will have access to and click "Invite".
Please note! It assumes that there are ad accounts in Business Manager. If you want to add existing ones, you need to go to the Accounts / Ad accounts section and click on the "Add" button. You can add only those accounts for which at least one payment has been made.