Your profile photo is one of the most important aspects of your Facebook account, but if your profile picture is outdated, it might be time to update it with a new photo. After all, a profile picture on Facebook is the first thing that grabs the attention of others. It also separates you from other users with the same name.
But how do you change a profile picture on Facebook? And can you hide it from your timeline? Keep reading to find out.
Changing a profile picture on Facebook is relatively simple. First, we’ll cover the steps to update your profile photo using a web browser. Just follow the steps below:
If Facebook users want to change a profile picture without posting it on their timeline, there are two methods:

Although you’ll still see a post on your profile, other people won’t. They’ll only notice the new profile picture if they check your Facebook profile.
To change your profile picture on Facebook without notifying other people, here’s what you should do:
For the time being, it isn’t possible to change a profile picture only on Facebook Messenger or through Facebook Messenger. A Facebook account and Messenger are synced, so once users change the profile picture on Facebook (through the app or the browser), the photo on Messenger will automatically change.
If Facebook users don’t want any photo to show as their profile picture, they need to delete the current profile picture without choosing the new one. This is how to do it:

If you’re having problems trying to change your profile picture on Facebook, there are a couple of things you should do.
Firstly, if you’re trying to do it via the app on your phone, close the app, and wait for a while before opening it again. Then, try to change the profile picture.
Next, make sure you’re connected to the internet. This might be the reason you can’t change the picture.
If you’re trying to change the photo via your computer, close the browser. Wait for a few moments, and open Facebook again. Then, try to change the profile picture.
However, if none of the steps above work, reach out to Facebook support.
Once Facebook users change a profile picture and want to hide it from the timeline, this is what they must do:
Keep in mind other people will still see your new photo, but the status won’t be visible on your timeline.
If a profile picture is too large, users might need to adjust it to fit the profile picture circle. Zoom it out as much as possible, which should do the trick.
The only way to change a profile picture without losing likes is to use the old profile picture. Here’s how to find it and use it as a profile picture again:
If you have any further questions regarding changing your profile picture on Facebook, take a look at the next section.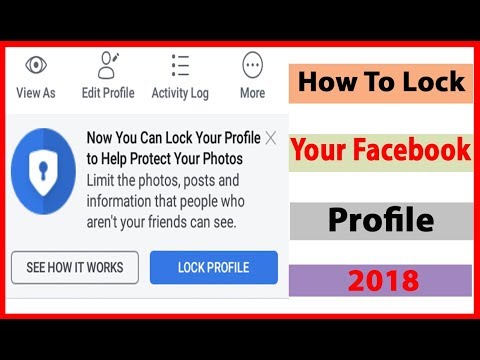
The easiest way to do this is through a phone. Once you’ve selected the photo you want to be the new profile picture, make sure to uncheck the box next to “Share your updates to News Feed.”
There’s no limit to how often users should change their profile picture. That said, they can upload a new profile picture every day if they wish to do so.
It was possible to hide your profile picture from the rest of the world at one time. But these days, your profile picture is public by default. The only way to hide your photo is to delete it completely. If you want more anonymity, keep in mind that you can make your picture anything you want it to be. It doesn’t have to be a selfie.
Changing a profile picture on Facebook is straightforward once you know the steps. Facebook also offers an option to hide the picture from your timeline or ensure only you see it.
Have you tried changing your photo yet? How often do you plan to update it? Let us know in the comments section below.
Did you know that as you make a new account on Facebook you are typically given a numbered ID?
Ever wondered what this ID is for?
Well, this ID is for your homepage and helps redirect people directly to your homepage as they use it.
But sharing a numbered ID everytime you wish for someone to see your homepage is not favourable.
So, what is the next best thing?
Facebook gives you the option to replace this numbered ID with a custom-made URL. Are you confused about how to change Facebook URL?
Well, let us guide you through the process.
Before we begin to answer the “How” part of Facebook URL, let us first find out more about what Facebook URL is.
Your Facebook URL is simply the name of your page placed right after the web address of Facebook. This means that if your page is named – xyz then your Facebook URL would look like – https://www.facebook.com/xyz.
While the URL is applicable to personal accounts and Facebook pages, it can be a useful and convenient way to reach a Facebook page. Some also call Facebook URLs vanity URLs.
Each URL is based on the username of your account or page. It directly takes the name of your account. This is why we call it customized, as each URL is unique.
The key to making your URL is to be mindful of the username you set for your account or page. Since each URL is required to be unique, it is obvious that the username should be unique as well.
This is why Facebook has a few specifications that must be followed while creating a typical username. We have listed them below for you:
These are the basic rules for constructing username and, in turn, URL. You will have to follow these, and in case you do not, Facebook would show an error and not accept the username until it complies with all the rules.
So, now that you have a general idea of what Facebook URL is, we can go ahead and find out how to change it when you want to.
While you can change your Facebook URL via phone and desktop, let us first understand how to do this via desktop.
The first step to changing your page or account URL is to head over to the official website of Facebook.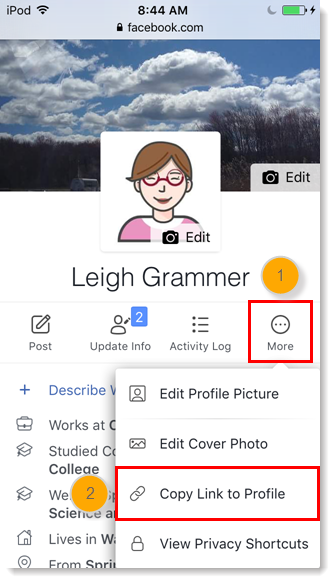 For this, you can type the word “Facebook” in your browser or use the link https://www.facebook.com/ in your browser address bar.
Once the Facebook page opens up, you will come across the screen asking you for a login or a sign-up by creating a new account.
If you already have a Facebook account, you can simply write your e-mail address or phone number and type in your password to Log in.
If you do not have an account, click on “Create New Account” to make a new one.
Once you open your account, you have to navigate the settings tab. For this, go to the top right corner of the page and click on the downward-facing arrow.
A dropdown box will open; from within this box, you can see the option of “Settings & Privacy” click on this option.
The above tab will open; from within this tab, select “Settings.”
As you click on “Settings” a new window will open. Here, you will find your username, name, contact, etc. listed under the “General Account Settings.”
From here, you can edit your username by clicking on edit in front of Username. Once you click on edit, a box will open. Within this, you can change the username, and Facebook would notify you if your typed username is available or not.
You can only set the username that is available.
You can also use your phone to change the Facebook URL of your page or personal account. For this, follow the below-given steps:
As the first step, you need to have the Facebook Messenger App on your phone. If you do not have it, simply download it from your play store.
But, if you do, then open your app. While Facebook also has the Facebook Mobile App, you cannot use it to change your URL. Only Facebook Messenger App can be used.
Once you open the app, Login or Sign-up with your Facebook page or personal account. For the same, type in your e-mail address or phone number used to create the account and type your password.
In case you cannot find the Messenger App, you can tap on the lightning bubble on the Facebook Mobile App in the top right corner.
Once you have opened the messenger, tap on the profile icon. If your app opens in a different window, press the “back” button to head back to see the profile icon.
The profile icon would typically have your profile photo on it. Once you click on it, a window will open.
Over here, you can see the tab with the word “Username” written on it. This tab is under the “Profile” section.
As you will click on the tab “Username”, a pop-up will open below. Here you will have the option to either edit your username or copy the link.
Press on edit to change your username.
Changing your username and, through that, your URL is a very easy task.
While Facebook has rules and guidelines laid out for account URL, some best practices can help you select the best URL.

Choose your username wisely. At times, unpublished page usernames are also claimed already, and you cannot use them.
If your Facebook URL is too long and you have decided to change it for good. While you are free to change it, the URL you previously had would be of no use anymore.
Once you change your Facebook URL, your username will not change, nor the title that appears on your page. But since the prior link will not work, your discoverability can be hampered in the initial phase after the change.
If someone tries to search for your page using the old URL, a message saying “Sorry, this page isn’t available” will show up. This message might make your followers think that the page has shut down.
There might be a possibility that Facebook only allows you to change this URL once. This used to happen before, but you never know when this would be implemented again. So, why take a chance?
If your page has been around for quite some time and has been actively promoting it, your URL must be actively posted in multiple places. Remember that once your URL is changed, those links will become obsolete right away. Not just that, but if someone searches your page using the page name alone, there might be various pages that may show up in the search results.
It is strongly suggested that you change your URL to what you want at the very inception of your page.
But if you end up changing your URL when your page URL is in multiple places, simply try to figure out the places where your URL might be located. For this, check the places where your URL link is attached so that you can replace it from there once the change is made.
After all, you do not want to send your visitor to a dead page. Let us try to understand this using a timeline:

Following all these steps before you finally change your username might be a good means to ensure your discoverability does not suffer.
If the username you wanted is already taken, do not be sad. Take the next best thing. If you ever notice a change in your facebook URL and you have not made that change, beware as your account might be hacked.
The next step is to secure your account by resetting your password, and once your account is secure try to re-change your username to what it was before or something new altogether!
Make sure you stay fresh with your content as a changed URL might require you to attract a new audience while staying good enough for the ones already there.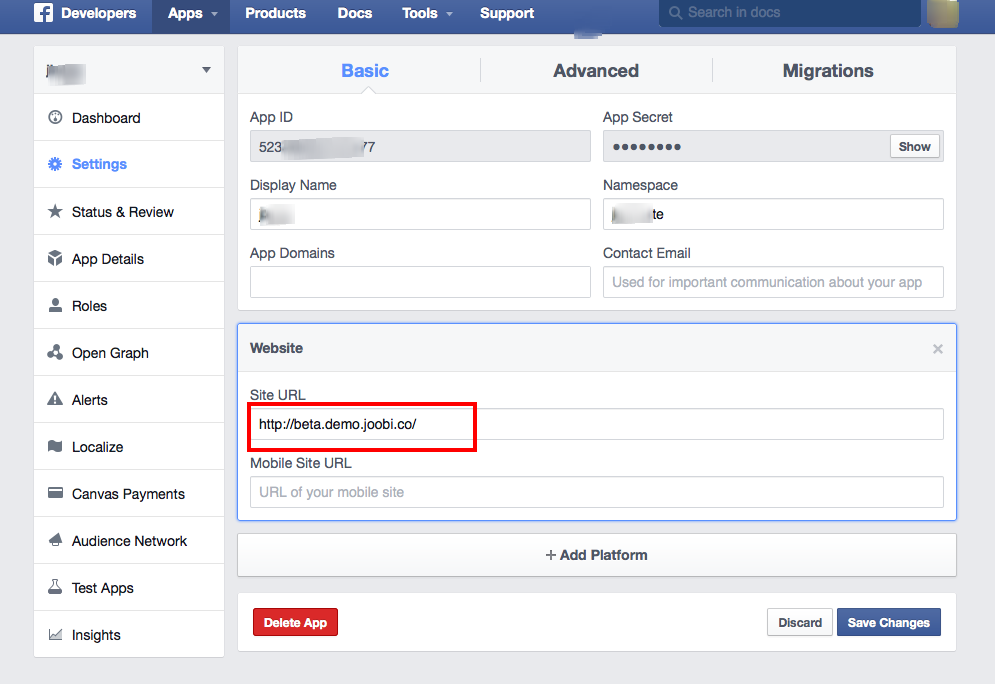 For this, post content regularly with the help of SocialPilot’s Social Media Calendar.
Help Center
Using Facebook
Your profile
We are updating the mobile version of Facebook.com. More
To edit basic profile information:
Classic Mobile Browser
Click the icon in the top right corner of the Facebook window, then select your name.
Select Edit profile under your name.
Click to add information, or click EDIT next to the information you want to edit.
To control who can see your content, use the audience selector in each section.
If you set the gender to Other and enter one or more gender options, you can also select an audience for this information. In addition, you will be able to choose a Pronoun, which will always be available to everyone. This feature is not available in all regions.
Some information on Facebook will always be public. Learn more about public information on Facebook.
New version for mobile browser
Click the icon in the upper right corner of the Facebook window, and then select your name.
Click under your name.
Select or Add next to the information you want to change.
Edit the information and use the audience selection tool to determine who will see it.
Click Save.
You can also:
Edit your name.
Change your marital status.
Add or change an email address.
Add a mobile phone number.
If you can't edit certain information on your mobile device, sign in to Facebook on your computer.
Was the article helpful?
Related articles
How to change your name on Facebook?
Information
Privacy
Terms and Conditions
Advertising Preferences
Jobs
Delete Cookies
Create an ad
Create a page
in your current profile sectionHelp Center
Using Facebook
Your Profile
By adding trending photos or stories to your profile, you can edit or remove them from the Featured section. You can create collections by combining several relevant photos and publications in the story.
Deleting a photo or story post from the Relevant section does not delete the original content. The photo will be shown where you originally added it, and to the audience that you originally selected. The post will be archived in stories and will only be visible to you.
Current photos are available and visible to all people.
Removing a Collection from the Trending section
Click the icon in the upper right corner of the Facebook window, and then select your name.
Under More about me, tap and hold on a collection.
Select Delete Hot Collection, and then press OK.
Remove a photo or story post from a collection
Click the icon in the upper right corner of the Facebook window, and then select your name.
Under More about me, tap and hold on a collection.
Select Edit Topical Collection.
Click on the photo or story post you want to remove from the collection.
Click Save at the bottom of the screen.
Editing a Collection in the Featured section
Click the icon in the upper right corner of the Facebook window, and then select your name.
Under More about me, tap and hold on a collection.
Select Edit Topical Collection. Here you can do one of the following:
Add more photos or posts to stories. To do this:
Click Add more, and then select the desired photo or publication in the story. You can select multiple photos and posts in your story at the same time.
Click Next.
Click Save at the bottom of the screen.
Select a cover photo for the current selection. If you've added multiple posts to your story or photo, you can update your cover photo. To do this:
Click on the desired photo.
Click Save at the bottom of the screen.