As one of the most popular social media apps, Instagram constantly keeps coming up with new ways to share snippets of your life with others. One of the major breakthroughs over the years has been the release of Stories, adopted from Snapchat.
The core of Instagram Stories is the ability to share photos or videos that can only be viewed for 24 hours, after which they disappear forever. This eases the burden of having to create permanent content of the highest quality and incentivizes people to share more.
Furthermore, instead of forcing users to choose the best photo for their Story or regular feed post, Instagram has also allowed them to share a post with multiple photos, so they can tell their story in the best way possible.
Let’s review how you can share multiple photos in one Instagram post or Story as well as how to add images or video to an existing Instagram Story and a few other tips and tricks.
When you upload multiple images to Instagram, you not only tell a better story but also save time, increase engagement, and maintain clear theme separation in your overall narrative.
There are a few ways to add multiple photos or upload multiple videos to Instagram. You can do so from your phone or Mac, both using the official Instagram app or leveraging the extra functionality of third-party alternatives.
When you want to add multiple photos in one Instagram Story, your instructions might differ based on what version of Instagram you’re using and whether you’re trying to do that on iPhone or Mac.
Historically, the way to upload multiple images to Instagram Stories has been the following:
Instagram has recently removed the Select Multiple option on the iPhone (still there on Android). However, the functionality still exists — you just need to tap and hold any of your images for it to appear.
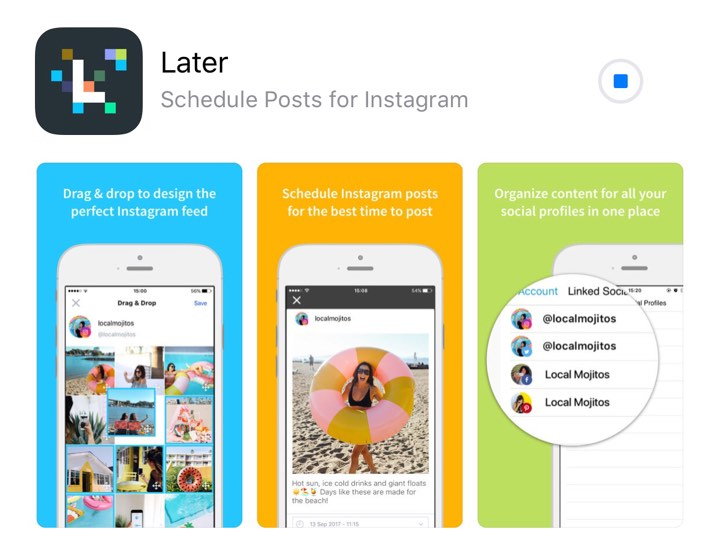
There also are a variety of situations where posting Stories from your Mac would be much more preferable, especially if you tend to edit your photos with macOS software. As you might know, there’s no official Instagram client for Mac. But there’s Grids, and it’s just as good.
Grids is a fully-functional Instagram experience for Mac that lets you like, comment, follow, search, explore and, most importantly, post just like you would do with your phone. You can post single or multiple photos or videos to your regular feed and even post Stories. Besides, Grids features a beautiful customizable design, which lets you send direct messages and use separate accounts at once.
Using a carousel in your Instagram feed opens a ton of possibilities for a new kind of storytelling. But posting multiple photos to your Stories can bring your creativity to a whole new level.
Luckily, it’s very easy to learn how to add images or video to an existing Instagram Story:
Instagram is changing the functionality of its app so frequently that it’s sometimes difficult to catch up. One of the newer Instagram features that you might not have tried yet is called Instagram Layout.
Basically, you can use the Instagram Layout tool to create custom collages of your favorite photos and post them as Stories.
Here’s how to use it:
Alternatively, you can use the sticker functionality instead:
 g. text or music)
Sometimes, instead of adding multiple photographs to Stories, you want to create a carousel in your feed instead. How do you do that? It turns out, it’s even easier to do:
This process works in the official Instagram iPhone app, but what if you want to share on Mac instead? Here, once again, the Instagram Mac client, Grids, will help you.
Grids integrates the whole posting process, from choosing high-quality photos and videos to editing how they look and adding captions. You can post multiple photos and videos too, as well as add emojis and hashtags. What’s more, Grids is the only app that allows you to post Stories from Mac.
Long time ago, when Instagram used to be all squares, every photo was automatically cropped to fit the default ratio. Today, there are no longer ratio restrictions. However, if you try to upload multiple images to Instagram, all the photos in the batch will be cropped to the ratio of the first one, which might not necessarily be what you want.
Luckily, it’s easy to change:
In addition to all the information shared above, there are a few questions that tend to come up over and over again, and which we should clarify.
A: The current limit for an Instagram carousel is 10 photos.
A: Although you can add extra photos to an Instagram Story, you can’t do so with posts, since they are meant to be more permanent. Your only way out here is to delete the post and resubmit it again with the correct number of images.
A: The multiple photo workflow described above might not yet be available everywhere in the world. So, depending on where you live, you might get it at a later date. Try keeping your Instagram app updated to the latest version and watch out for it.
As you can see, there are indeed many ways to post multiple pictures on Instagram, both from your iPhone, in the official Instagram app, and from your Mac using a full-featured app like Grids.
Best of all, Grids is available to you absolutely free for seven days through the trial of Setapp, a platform with more than 220 outstanding Mac and iPhone apps for everything from creating beautiful color palettes (Aquarelo) to turning images into icons (Image2icon). Try every Setapp app at no cost today and expand your collection of favorites!
Instagram’s multiple photos feature is a great way to show off several of your best images in one post.
You can even share a post with multiple videos too – up to ten photos and videos at once.
Here’s a guide on how to do it. We’ll also answer some of the most common questions about how to post on Instagram too.
Let’s dive in!
Table of Contents
When you open Instagram, by default, it will show you the home page.
On the top bar, you’ll see a plus icon – that’s the one that allows you to upload your content. By default, it opens as a New Post.
Another way to do it is by going to your profile page and tap on the plus sign there. In this case, it will open Create menu. Here, choose Post.
On the New Post page, you can see a preview of your image on the top half of the screen and your gallery on the lower half. These two parts are divided by a menu bar.
On the left side of the menu bar, you can open different folders to look for your photos.
There are also two icons on the right side of the bar. Tap on the icon on the left that looks like a rounded-corner square on top of another.
This is the Select Multiple button – tap on it.
3. Tap the images you want to includeOnce you tap on the Select Multiple button, you’ll notice a few changes.
First of all, the crop button disappears – so it’s important that you have your images in square format if you don’t want Instagram to crop them.
The other change is on the gallery. All images now have circles on them, and the first one has a number 1 inside that circle. If you tap on another picture, it will get the number 2 and so on, up to 10.
Keep in mind that the numbers also assign the order in which they will appear on the post. If you tap on a photo by mistake, just tap on it again to remove the number and take it off the selection.
Once you’re done, tap on the arrow on the top right corner of the screen – that’s the Next button.
4. Apply a filterOn the next screen, you’ll find the Filters – just like you would on a regular post. However, there’s no Edit option.
If you decide to apply a filter, keep in mind that it uses the chosen filter for all the photos by default. If you don’t want that, tap on each image and change the filters individually.
Tap on the arrow on the top right to go to the next screen when you’re done.
5. Add captions, tags, and other settingsThis is the last screen before posting. Here you can write captions and hashtags that will apply to all the photos in the post. The same goes for the Location and advanced settings – they will be the same for all the images.
The only thing you can do individually is to add Tags. When you’re ready, just tap on the check icon on the top right, and this will publish your post.
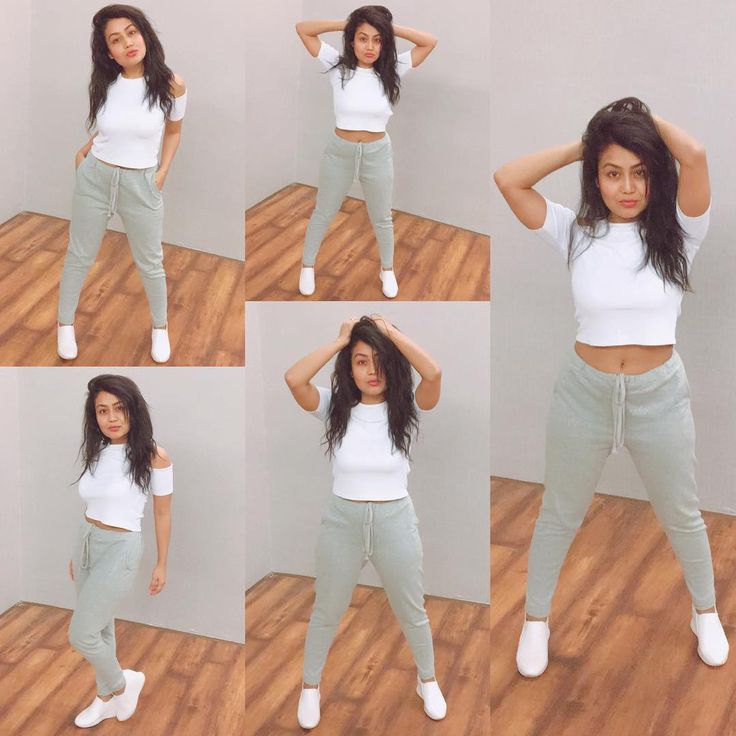
Now, if you go to your feed, you’ll see the first image and a few dots underneath that represent the number of pictures in the post – that’s also how other people will see it.
When someone taps on that photo, they need to scroll left to see the other images. As they scroll, a number will appear on top to indicate how many images are there and which one are you seeing – for example, 1/10, 2/10,3/10 and so on.
Multiple Photos Instagram FAQsWhy is Instagram not letting me post multiple photos?
Many possibilities can cause this, but they all have a fix as the feature is available for all users and devices. Try updating your app or search for advice on forums about troubleshooting with your specific phone.
Is it better to post one picture or multiple pictures on Instagram?
It all depends on what you want to show and how you want to tell that story – there isn’t a better way.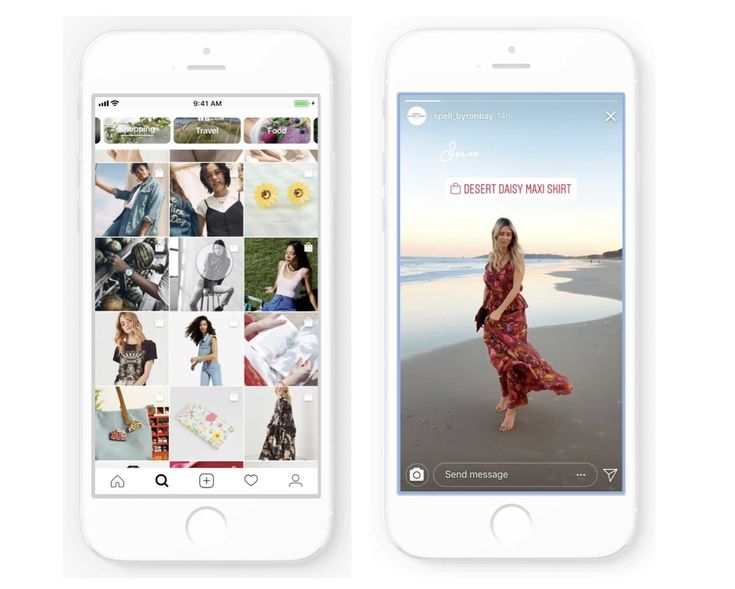 It’s a style choice in the case of a personal account or a marketing strategy in the case of a business account.
How do you post multiple images of different sizes to Instagram?
If your images have different sizes, Instagram will crop them when you upload your post. If you don’t want this to happen, you should use a photo editor to resize your images before uploading them to Instagram.
How do you not crop photos on Instagram multiple?
If you don’t want Instagram to crop your photos when you’re uploading them on Instagram multiple, you need to format them as a square image (1080 x 1080) beforehand. You’ll be able to do that with any photo editing app or software.
Posting multiple images on a single Instagram post is a simple and original way to present your content – it also makes people interact with your feed.
Give it a try, and let us know how it goes in the comments section.
Highly Recommended
8 Tools for Photographers
Check out the 8 essential tools to help you succeed as a professional photographer.
Includes limited time discounts.
Learn more here
Don't Miss These Articles:
.
Post-gallery can be posted on Instagram: several photos and/or videos at once in one post. In such a gallery, there can be up to 10 photos and videos in total. First, we will tell you how to make a post from several photos, and then how to use it to promote on Instagram.
.
When the first gallery post appears on your blog, there will be a few dots under the photo. These points mean that there are several photos in this publication. In your mosaic account, gallery posts will have a gallery icon in the upper right corner. To view the gallery, swipe from right to left. nine0003
You can comment and like a post with multiple photos and videos as usual. But these comments and likes will not be for each individual photo, but for the entire gallery.
Edit like a regular post. Photos and videos, their order and tagged people cannot be changed. But you can geolocation and signature.
Beauty bloggers
Travelers
Sale of goods (shops, needlewomen, etc.)
Sale of services
Posts with several photos and videos are a logical continuation of stories. Nobody wants to spam their account with similar photos/videos, but they still want to keep them (stories disappear!). And for business, there is generally a huge field for development. Instagram will increasingly replace the online store, which not everyone can afford. Experts in all fields will be able to better explain to subscribers the value of their services. And right now, when this format is just appearing in Russia and few people use it, you need to quickly figure it out and publish gallery posts in order to attract new subscribers and shake up existing ones. nine0003
photo source blog.instagram.com
Hello friends! 🙋🏻 Today we will talk with you about how to create a new type of post on Instagram, where several photos and / or videos are uploaded at once in one row. Please note that this is not an ordinary collage, where several photos are displayed in one picture, and not an Instagram story, namely new post type . Such posts are still called "carousel" or slider , because the user can "scroll" photos and videos in a circle.
Previously, this feature was available only for promotional publications, but now all users can use the slider for free.
I’ll add right away that you can create such posts manually from your profile or do it through auto-posting programs on Instagram. Instaplus is the only service we have so far that allows you to publish carousel posts from your computer. nine0003
By the way, in Instagram search, slider posts are marked with a small icon with several squares, which means that there will be several photos in this post.
Now let's see what needs to be done in order to upload up to 10 photos and videos in one post to Instagram.
Step 1. To upload several images and videos in one post on Instagram, you need to click on the “ + " at the bottom of the screen, which means " create new post ".
Step 2. If the new option is already activated for you, then you will see on the screen an icon with several squares , which you need to click to create a publication with a photo and video nearby.
Click on the icon with several squares to create an Instagram photo sliderStep 3. After you click on the icon with several photos, you will have select up to 10 photos and/or videos from the gallery of your mobile device that you want to upload to the post.
Please note that Instagram will show you the numbers on the files you select. These numbers indicate the order in which the photos appear in the carousel. At this stage, you can change the numbers as much as you like until you are satisfied with the chosen order.
Select the photos and/or videos you want to post in the slider and the order in which they appear in the post As soon as you decide on the photo and video for your "carousel", click on the "Next" button , which is located in the upper right corner of the screen.
Step 4. In the next step you can edit the photos and add filters . It's a bit inconvenient, but if you select one of the filters on this particular screen, it is automatically applied to all photos.
If you want to set a filter on all selected photos and videos at once, then click on the filter you likeHowever, you also have the option to select different filters for individual photos. To do this, you need to select a specific photo by clicking on it. Notice that on the right you can see a “piece” of the next photo in the slider, so to move between photos, just scroll through them with your finger. Once you have selected a photo, you can edit it and add a filter to it without changing the rest of the images in the carousel.
Step 5. Here, on this screen, you can also change the order in which photos are displayed in the post. Order To change the display order of your photos, long-click on the image . Once you have the trash can icon at the very top of the screen, you can move the desired image left and right to put it in the right place.
When you're done editing your media, click on the "Next" button which is in the top right corner of the screen.
Step 6. Next, on the next screen, you can add a caption to any of the photos. The photo to which the test is being added is visible on the right. To select the next photo, click on the photo. nine0003 Click on the photo to enlarge
Please note that Instagram allows you to tag different users on different photos, add different geotags, which is very convenient! 👌🏻
Tag the users you want in the photo and click on the "Done" button.Step 7. Well, actually, that's it! If you are satisfied with the work done, then just click on the " Share " button and your post will go to the feeds of subscribers ☺️
For those who prefer instructions in video format, I share with you a video from Instagram itself. nine0003
Instagram does nothing for nothing, so the emergence of a new posting format is not an accident either.
Instagram has already managed to “offload” the news feed a bit with the help of stories, where users upload temporary photos that are not saved in their profile gallery. But sometimes you really want to add several images united by one topic, but so that they remain in the profile, right? nine0003
So that you don't bombard your subscribers with, say, ten photos from a cool concert in a row, now there is an opportunity to make photo sliders. Agree that it is very convenient!
Let's look at some examples of how Instagram users are already using the new format.
As I mentioned above, in order not to bore subscribers with a series of photos and videos from some event where you are present or organize, why not combine the best photos in one post? nine0003
This way you show everything you want, without the risk of being branded as a "spammer" and getting a reply.
Whatever position you are in, seller, buyer, insta-blogger, sometimes you want to show some product, so to speak, with your face, or just show off a new phone or a new thing in front of your audience . Again, in order not to take five photos of one dress from all angles, it’s better to “stuff” the whole thing into a convenient slider, and there the subscriber will decide for himself how many photos to view. And you feel good, and the subscriber is not a burden 🙂
And one more living example.
Publication from ✂Flowers Minsk/ FLOWERSJULI🌿 (@flowers_juli)
Want to share with readers a step-by-step photo instruction on how to make an apple pie, make a wreath of fresh flowers or use a mobile application? Then why not do it in the form of a "carousel"? The slider, in my opinion, is a very convenient format for conveying visual information about how something is being done. Don't forget also that you can upload both photos and videos to the carousel. nine0003
Here's another step by step tutorial from Photoshop showing how you can creatively combine two photos into one. Here, it is interesting and useful for the user to look, and the product is presented for the way 🙂
Posted by Adobe Photoshop (@photoshop)
As for any news, the post-carousel will come in handy again. You can add both a separate story about an event and a group of news to the news slider. What's more, many Instagram profiles that post interviews to their accounts can now "split" those interviews into multiple parts. Such content will be even more readable and interesting, thanks to several photos or even video inclusions. nine0003
The Instagram carousel post is also very handy for posting testimonials.