Magdalena Poprawa
0 0
scroll down
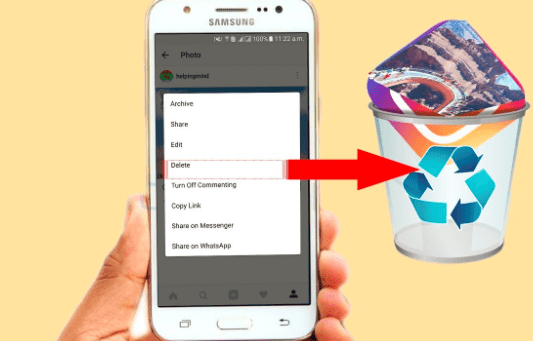
Sometimes you post a picture on Instagram and after several minutes (days, or even years!) you change your mind and want to delete it. Thankfully, Instagram makes this easy to do.
You can do this with as many pictures as you want but it’s still not possible to delete more than one post at the same time.
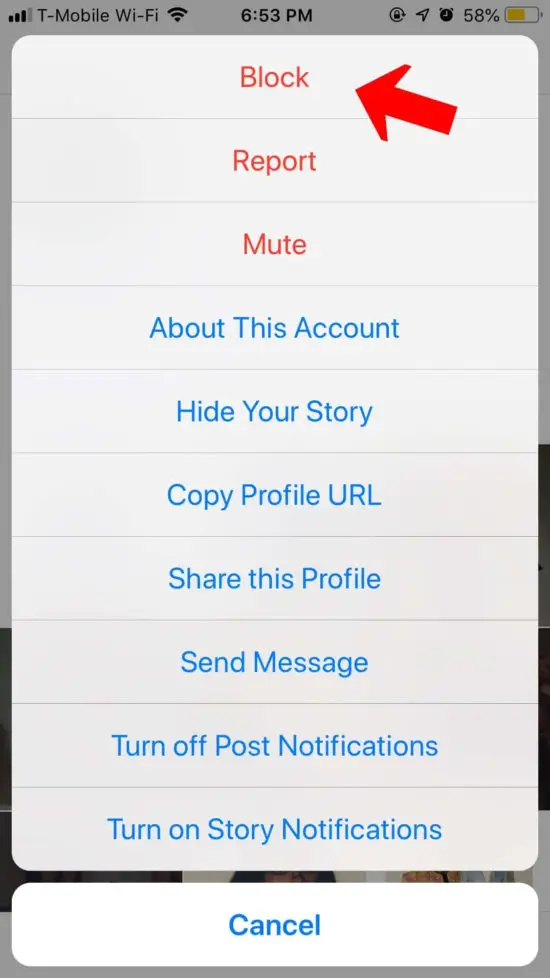
It is also possible to delete a tag of yours on someone’s photo. You can do it like this:
And that’s it. To mass untag photos, tap the three dots in the top right corner of the ‘Tags’ menu, then tap ‘Hide Photos’.
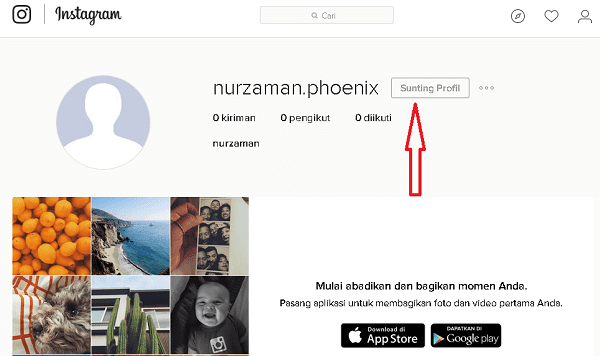
Remember that there is no way to delete Instagram photos from your profile on a laptop or other PC. If you want to delete a post, you have to do so from the app on your mobile device.
Apart from your personal feelings, consider if deleting a post is actually beneficial. Maybe you had significant engagement under it? Maybe users liked it and it was something valuable?
Before deleting content, always try to analyze it before. Check how this specific post performed. Compare its performance to other posts. Monitor if users are often coming back to it… and so on, and so on…
Top posts in Sotrender
You can analyze your posts’ performance in a complex way in Sotrender.
It may obviously happen that for some reason you will no longer want to see some posts on your profile. Maybe your post is eventually not performing well? Or an offer presented in a post is no longer valid? Or you just changed your mind and don’t want it to be there?
It’s all understandable. But what we want to pay your attention to is the possibility to archive posts instead of deleting them.
The first reason is that you may simply change your mind again 😉 And there will be no coming back if you delete a post. If you archive it, however, you will find all such posts in the archive section and you can easily show them on your profile again anytime.
The second reason is, however, more important.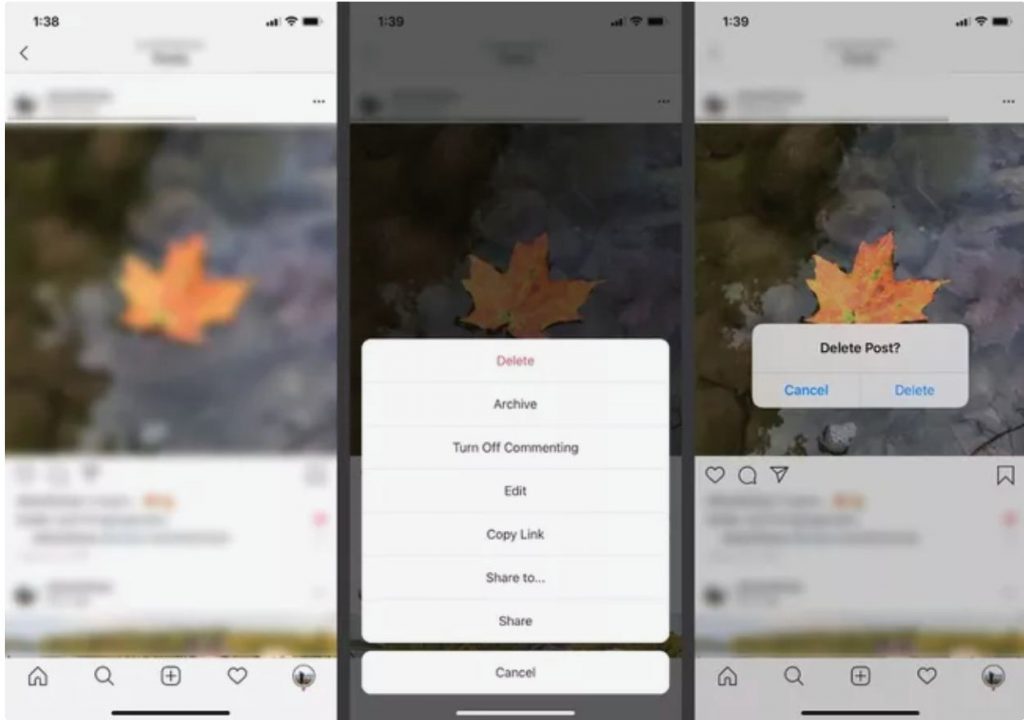 Instagram’s algorithm doesn’t like deleting content, especially if it happens often. Such activity is something unusual for it and once you delete your content it has to learn your behaviors again.
For other users it simply doesn’t matter if you archive a post or delete it – they simply no longer see it. But for your profile’s performance, it does matter a lot.
Read also:Did you like the article? Share it with friends.
Share Tweet ShareMagdalena Poprawa
Content Marketer
Law and communication design student, in love with social media law, coffee and Disney movies.
go up
No-bullshit marketing analytics.
Dear Marketer, be sure your current social media deliver spends your money right.
Get no-bullshit analytics for free to find out.
You can always reach us [email protected]
This website uses cookies to improve your experience. We'll assume you're ok with this, but you can opt-out if you wish.Accept Read More
The ability to stuff multiple pictures into a single Instagram post is incredibly useful, especially because most of us don’t have the time, energy, or money to commit to daily curated posting like the most successful influencers. What can be complicated is figuring out how to delete one of those images when it no longer belongs in an existing photo dump.
So if you’ve fallen out of love with a picture (or a person) in one of your posts, but haven’t trashed it because you like the other photos, it’s time you learned how to excise that malignant memory like a skilled social media surgeon.
For those unfamiliar with the term, a carousel is a single Instagram Post that features two to 10 images or videos. (Given the amount of people who search “how to delete one picture out of multiple on Instagram” and other overly complicated phrases, we understand if you call these posts something different.) Carousels have been around since 2017, but the ability to delete one photo without killing all of them took Instagram four more years to release.
One catch: you can’t delete one image from a two-photo carousel, potentially because that would make it a single-item post and mess with something inside Instagram, though we can’t say for sure. These steps will only work with a post stocked with at least three pieces of media.
Instagram’s post editing feature also lets you add and edit tags, the alt text, location, and caption. Unfortunately, you currently can’t use the Edit button to change the order of photos in a carousel post after it goes live, or add images or video at a later date.
Any deleted items will hang out in a folder deep within your settings for 30 days. If you change your mind, you can recover them before that time runs out. Or you can go in and delete them permanently so you’re not tempted to restore them in the future.
To find these discarded pics in their purgatorial location, go to your main Instagram profile page and follow the steps below.
 Chelsey Coombs
We say “kind of” because if you delete an image from a carousel and then restore it, the photo won’t go back to its original spot in the lineup. It’ll show up at the very end. This may not matter, but if you’ve carefully curated a group of pictures to tell a specific story or exude a certain aesthetic, this could ruin that. And if that’s a problem for you, just reupload the whole batch—maybe you’ll get more likes this time around.
This story has been updated. It was originally published on November 20, 2021.
Shared Albums allows you to share photos and videos only with selected users, who can also add their own photos, videos, and comments.
Preparation
Using Shared Albums on an iPhone or iPad
Using Shared Albums on a Mac
File types that can be used in Shared Albums
Shared Albums Storage Limits
If you are using earlier versions of iOS, iCloud for Windows, iPhoto, or Aperture, you can still create and view Shared Albums. In previous versions of iOS, macOS, tvOS, and iCloud for Windows, Shared Albums was called iCloud Photo Sharing.

When viewing a list of shared albums, you can also click Edit, then click the Delete button to remove the shared album.
A deleted shared album is automatically deleted from all of your devices and those of your followers. If the Public Website setting is enabled, the shared album will be removed from the web as well. Deleting a shared album permanently deletes all the photos it contains. Before proceeding, make sure you have saved all the photos you need to keep.
To share an album with friends or family who don't use iCloud, open the shared album you created, go to the People tab, and turn on Public Website. Your photos will be published on a website that can be viewed by all users in any web browser of the latest version.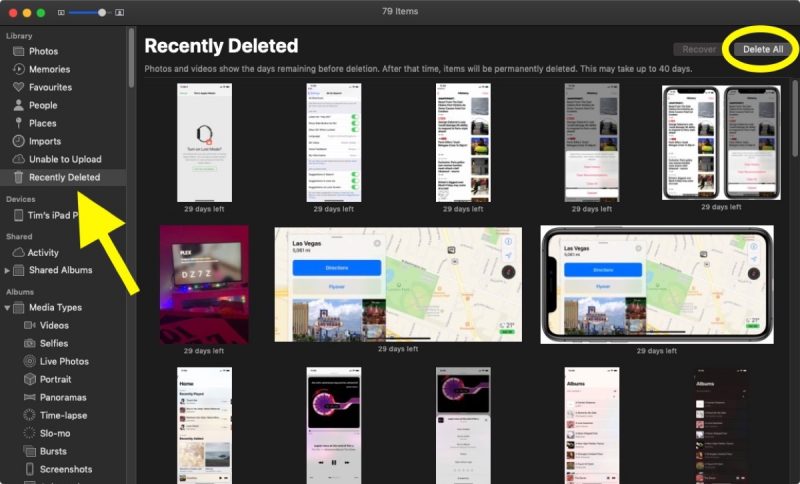
User access to a shared album is controlled by its creator. You can remove subscribers at any time.
If you have a shared album open, you can also click the Add button to select photos and videos to add.
When new photos are added, users who have access to the shared album are automatically notified. To allow followers to add photos and videos too, turn on Allow followers to post. Click the More button and select Shared Album Details.
The owner of a shared album can delete any photos, videos, or comments from any user. Subscribers can delete anything that they have personally added. Anything you delete is automatically removed from the album on all of your and your followers' devices.
Any photos you have saved or uploaded to your library from a shared album remain in your library even after the shared album is deleted or accessed.
When you share photos and videos with someone, they can save the shared items to their own library.

A deleted shared album is automatically deleted from all of your devices and those of your followers. If the Public Website setting is enabled, the shared album is removed from the web as well. Deleting a shared album permanently deletes all the photos it contains. Before you continue, make sure you've backed up any photos you want to keep on your Mac.
 Click the Add button to select people to invite from your contacts.
 You can also share albums with friends and family who don't use iCloud. Simply open the shared album you created, click the People button in the toolbar, and turn on the Public Website option. Your photos will be published on a website that can be viewed by all users in any web browser of the latest version.
User access to a shared album is controlled by its creator. You can remove subscribers at any time.

If you have a shared album open, you can also click Add Photos & Videos to select photos and videos to add. You can also simply drag and drop photos from your library directly into the shared album in the sidebar.
When new photos are added, users who have access to the shared album are automatically notified. Open a shared album, click the People button in the toolbar, and make sure "Allow followers to post" is enabled so that followers can add photos and videos too.
If you have a shared album open, you can also select a photo and press the Delete key to remove it from the shared album.
The owner of a shared album can delete any photos, videos, or comments from any user. Subscribers can delete anything that they have personally added. Anything you delete is automatically removed from the album on all of your and your followers' devices.
Any photos you have saved or uploaded to your library from a shared album remain there even after the shared album is deleted or accessed.
When you share photos and videos with someone, they can save the shared items to their own library.
Shared Albums support the following image formats:
Shared Albums also support specific formats available on iPhone devices, such as slow motion, time lapse, Live Photos, and Memories videos. Photos are reduced to 2048 pixels on the long edge when shared, except for panoramic photos, which can be up to 5400 pixels wide. You can share GIF files up to 100MB in size.
Shared albums support the following video types and formats:
Videos can be up to 15 minutes long and 720p resolution.
* Unable to send RAW photos to shared albums on a Windows computer.
Shared Albums sends a copy of your data. Downloaded content cannot contain the same information as the original content.
A Shared Album can contain up to 5,000 photos and videos. Once Shared Albums has reached its limit, you must delete some photos or videos before adding new ones. Shared photos and videos (and comments and likes on photos) remain in iCloud until you manually delete them or the person who added them, or until you delete the entire shared album.
Photos and videos in your shared albums are stored in iCloud but don't count towards iCloud storage usage.
Information about non-Apple products or independent websites not controlled or tested by Apple is not endorsed or endorsed by Apple. Apple is not responsible for the selection, functionality, or use of third party websites or products. Apple is also not responsible for the accuracy or reliability of information posted on third party websites. Contact the supplier for more information.
Publication date:
Content
The mobile version allows the user to delete, edit and hide publications.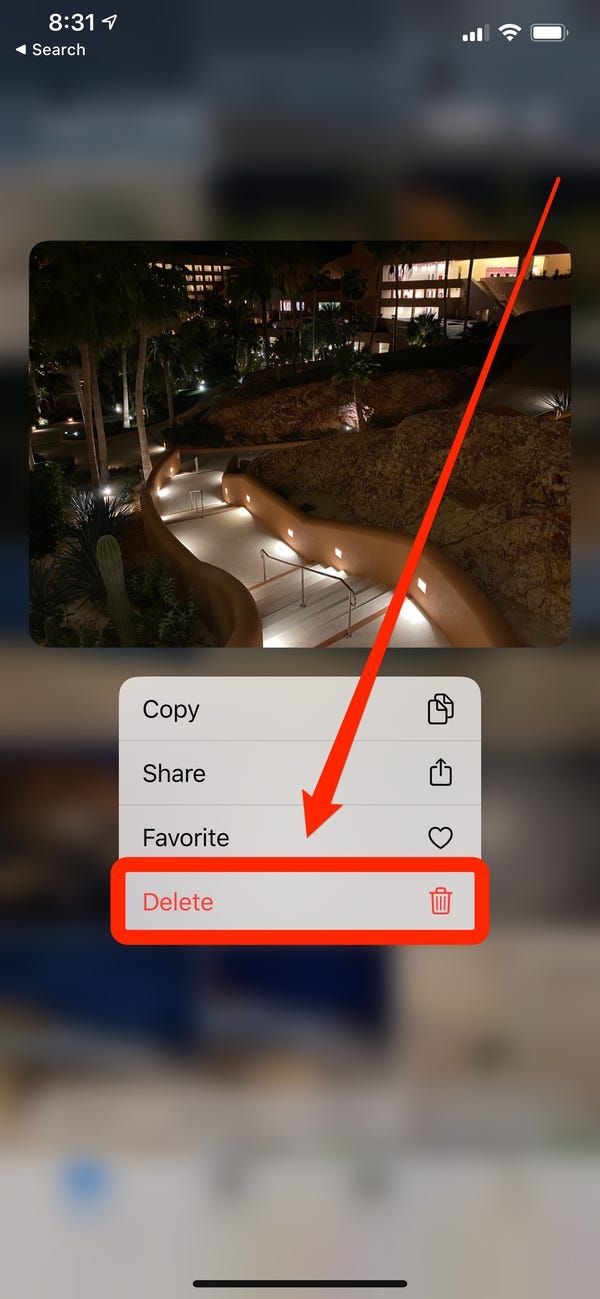 In recent updates, if you remove a snap from the feed, it will be redirected to the section: " Recently deleted ". If the author wants to restore the content, he can do it using this section.
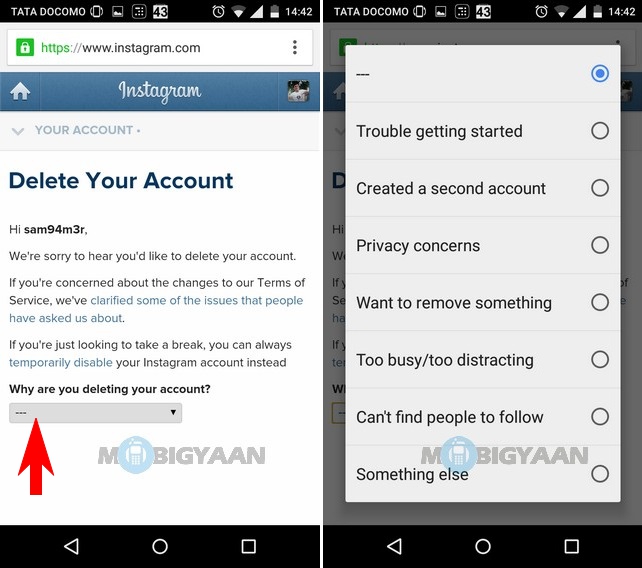
How to remove a post from your profile:
Expert opinion
Alina
SMM specialist, I design, promote and maintain pages on Instagram
Ask a question
Further, if the user deletes it for the first time in the new version, a notification will appear: "The entry has been moved to temporary storage." You can opt out of it and then posts deleted more than 30 days ago will not be saved.
Deleting an Instagram post from a computer is as easy as performing the same steps from a mobile phone. The only difference is that the record cannot be edited from the PC format.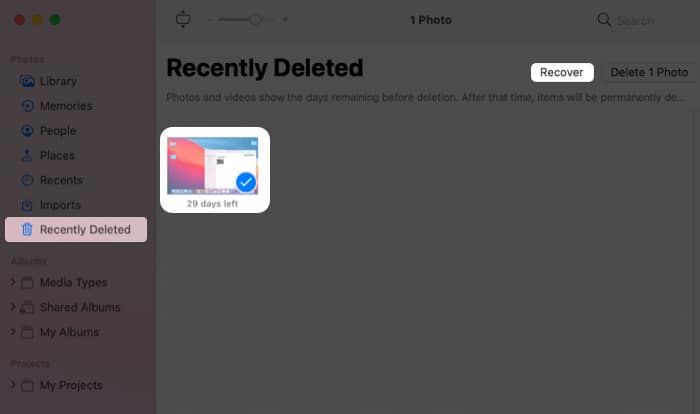
Delete post:
But in this case, the author may not find the publication in the recently saved. Also, transferring to the Archive will not work, since this option is only suitable for mobile versions.
Therefore, there is a second option, how to work with a social network on a computer - use the emulator: Bluestacks, Nox. The emulator repeats the Android operating system and allows the profile owner to install the same applications as on a smartphone.
Deleting a photo from the Instagram carousel in a single order will not work: the user needs to remove the entire publication. Therefore, there is only one option left: save the pictures, delete the entire “gallery” and place it again.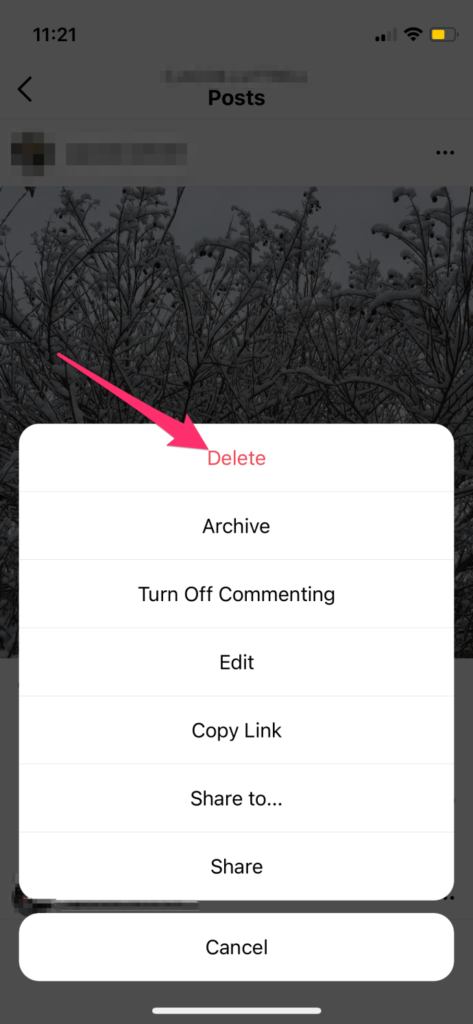 The placement date will change accordingly to the current day.
How to change the order of photos:
To get their photos if the original has not been saved, the user can either create a screenshot or use instagrabber.ru . This is a service that will help you save your posts to your smartphone or computer.
The social network itself does not support deleting multiple posts, but there is a way to remove up to five posts at a time. To do this, the account owner needs to connect a Facebook account and allow access to Creator Studio.
How to delete several posts at once:

Now these posts will be removed in an official way and the user will not have to install third-party applications.
But if the account status is "Private" or "Closed", Facebook will not connect. It remains only to delete publications one by one and observe the limits of the social network.
It is possible to delete sent photos from Direct only if the user immediately selects the function: "Cancel sending". Otherwise, the interlocutor will be able to open and save them.
There are rules regarding media content in private messages:
 More precisely, the sender will receive a notification that his photo has been saved.
 To cancel sending a picture that was added from the Gallery:
The same applies to other messages if the interlocutor decided to send a link to someone else's publication or shared a Story.
Using the "Archive" section, you can hide publications, swap them. If you remove it to the Archive, then the posts in the profile will shift by one. When re-posting, the same entry will be added on the original date.
How to hide a publication in Archive:
To view the same entry again, the profile owner needs to go to: Settings - Archive .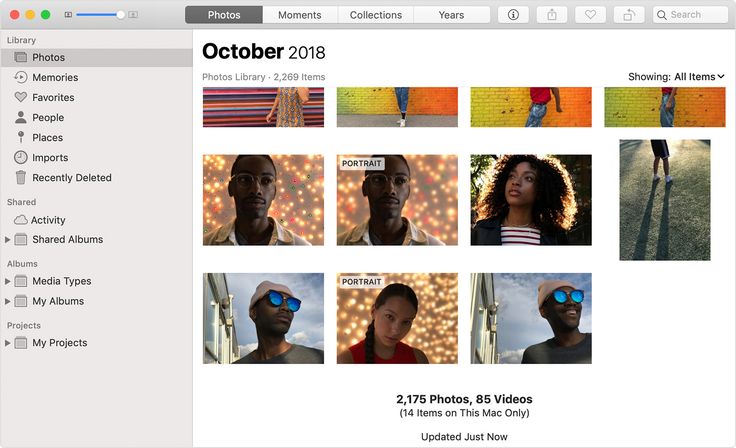
This tab stores not only hidden publications, but also records from History. Each post is on a timeline where you can select numbers and find photos/videos.
One way to get your Instagram post back is to use the "Recently Deleted" section. It contains posts that the profile author deleted less than 30 days ago. And if you set up storage, then all removed files will be automatically moved to this section.
How to find and return a deleted entry:
The entry will be returned the same date it was posted. In this way, you can delete not only photos, but also videos, Reels. The section with "Recently Deleted" does not store Stories, as they are automatically moved to the Archive after 24 hours.

The second option to get back deleted posts on Instagram is to use the connected cloud storage. If Google Drive or iCloud was connected on the smartphone, the created media files are copied. This option is suitable if the profile owner accidentally deleted the post and did not save a copy.
Return recording from cloud storage:
Cloud storage does not store all data, so older photos may not be available. In order not to search for your photos among the materials, the user needs to specify in the “Settings” of Instagram: “Create a copy of pictures”.
How to save copies:
The next time you post photos, a copy of the photo will be sent to your mobile device's Gallery.
The last section where photos can be stored is Drafts. It is possible to delete photos on Instagram from your phone using drafts only if the author has previously created copies of such files.
How to view and remove:
You can select up to ten saved posts that the user has planned to post in the future. By deleting, the text added to the description will also be removed.
The situation when the record was deleted from Instagram by moderation occurs when the rules of use are violated. For example, the blog owner used obscene language, insults or hostile symbols.