How to Create a New Facebook Account Step by Step (2022)
By Berta Ventura, on 21 January 2022
Have you thought about creating a Facebook account? Maybe you haven't decided to join this social network yet, but you're curious. Or maybe you're looking to create a Facebook Business page? Or perhaps you already use it regularly but want to know how you can further customize your account and better configure your privacy settings.
Facebook, now known as Meta, is a network that offers a lot of options to its users. In this guide, we’ll show you how to create your Facebook account step by step, and set up all your options to get the most out of it.
Creating a Facebook account is the first step to being able to create Facebook Ads and promote your brand, so let’s get started!
How to Create a New Facebook Account Step by Step
From the Computer
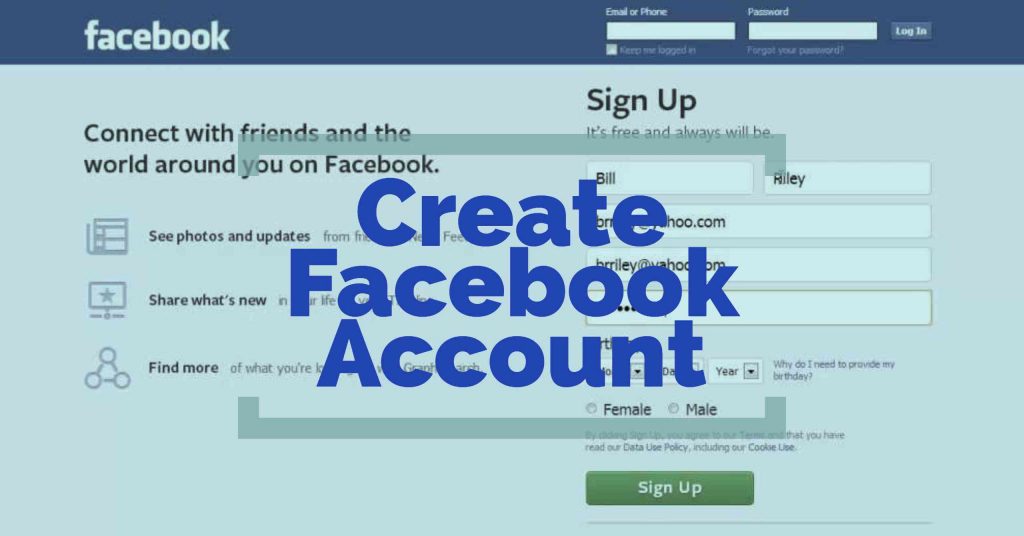
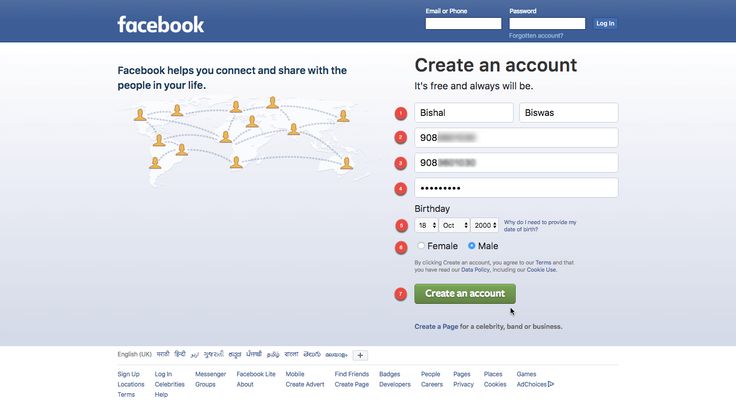
Go to www.facebook.com
Enter your name, email or cell phone number, password, date of birth, and gender. If the system indicates that your password is not secure enough, try adding more characters or combining upper and lower case letters.
Click Create an account (remember you must be at least 14 years old to do this).
Finally, you'll need to confirm the email address or cell phone number you entered earlier. To confirm the email, click or tap on the link in the confirmation email you receive. To confirm the cell phone number, you must enter the code you received by SMS in the Confirm box, which will appear when you log in.
From Your Cell Phone
The first thing you'll need to do to create a Facebook account is to install the Facebook application on your cell phone. To do this, go to the corresponding app store (App Store for iPhones and Google Play for Android phones), find the Facebook application and download it.
If you have space problems on your cell phone, you can download Facebook Lite, which is a reduced version of the Facebook application. It takes much less time to install, but retains the same basic functions as the normal application.
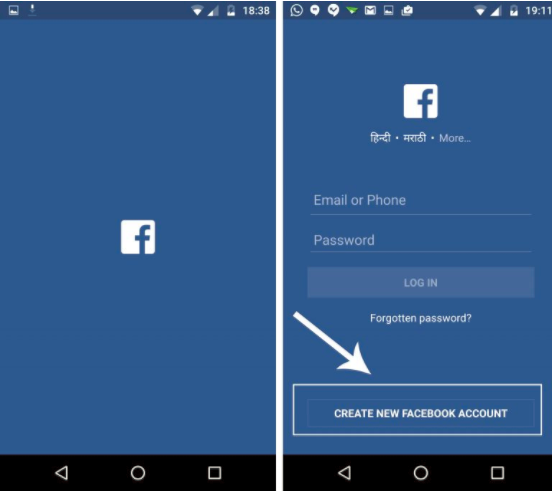
Once you have downloaded and installed the application, open it. On the home screen, and click Create Facebook Account.
Then click Next.
Enter your first and last name.
Enter your date of birth.
Enter your gender.
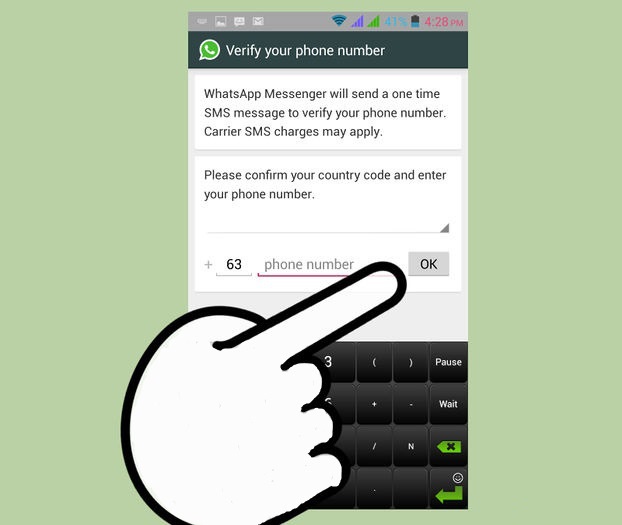
Enter your mobile number for verification.
Choose a password.
Finally, click on Register. If there is a problem with your password, the system will ask you to go back and change it.
And that's it! The application will automatically log in. You can tell it to remember your password so that you can log in by touching the application, without having to write down your details each time.
How To Get More Out Of Your Facebook Account
If you have followed the steps above, you have already managed to create your own Facebook account. Welcome! Let's see how to use this social network and take advantage of the different options it offers.
Personalize Your Facebook Account
Your Facebook account is like an online letter of introduction, which serves as a way for other users to find you. That's why, after creating your account, the next thing you need to do is to personalize it.
To begin with, change your profile and cover photos since they are the most visible elements.
Your profile photo, as the name suggests, is a round image that serves to represent yourself. Keep in mind that it will appear whenever you post or comment on Facebook. Most users use some kind of portrait, but it's not mandatory. You can choose any image you like and want to be associated with. To be seen in good quality, the image has to be at least 180 pixels long.
The cover photo, on the other hand, is rectangular and can only be seen when other users enter directly into your wall or hover over your profile name on desktop only. Its large size makes it ideal for images such as your favorite landscape, some illustration, or a photo of you practicing a hobby. It must be at least 720 pixels wide.
Once you have your profile and cover photos, update your biographical information. You can click on Update Information and fill in the fields that interest you most. For example, the places where you have worked and studied, places where you have lived, important events, etc.
Finally, you have the Introduction section, in the left corner (below the pictures). Here you can enter a very short text (maximum 101 characters) that defines you.
Find Content Published By Other People
The crux of a social network is to see what other people publish and to share your own content. To do this, you have different options.
Adding friends is a fundamental step. Unlike other networks where you follow strangers, on Facebook, it is typical to add only people you know to your contacts. To do this, follow these steps:
Click on the search bar at the top of Facebook.
Enter your friend's name and click on the magnifying glass icon. If you don't see them, try clicking on People.
To send someone a friend request, click Add to Friends next to their profile picture. If they accept, you will be able to see their posts.
You can also find friends by uploading your contacts from your cell phone or by using the People You Might Know feature, where they will show you suggestions of people you might know.
Another option to view and share posts is to join a group. On Facebook there are groups related to many different topics with three different levels of privacy:
Open groups: you can join at any time and invite other people. Just click on Join the Group. Anyone can see the information and content in the group.
Closed groups: to join, you have to use the button to request your entry and wait for an administrator to give you approval. Anyone can see the description of the group, but posts are private.
Secret groups: you can only join if you are invited as it is not possible to search for them. Only group members can see the information and content.
Finally, you can also view public content through fan pages. You can see the publications on a page by entering it directly or by clicking on Like or Follow to have them appear in your news section.
Publish Your Own Content
Are you ready to share your thoughts with the world? Just follow these steps:
At the top of the news or biography section, click on Publish.
In the box that appears, you can either post a text update (and customize it with colors) or click on the type of post you want to share. If you want to see all the options, click on the three-point icon to the right. For example, you can choose between photos and videos, locations, stickers, etc. You can also tag other friends in the post.
Then choose who you want to share this post with. The default option is with your Facebook friends but you can also make it public, choose not to show it to some friends, show it only to the contacts you choose or leave it private, meaning only you will see it.
Click Publish.
To publish to a group, you will have to select the group in and, once inside, click Write Something. As with the information you publish on your wall, you have different options such as text, photos or videos, surveys, add files, etc.
Another option to share content in public is on Facebook fan pages. In the last section of this guide, we explain how to create yours.
Edit Your Privacy Options
Privacy is one of the issues that most concern Facebook users, so it's critical to set it up right from the start. To view and change your privacy options on Facebook, click the arrow in the upper right corner, and from there, click Settings. Then, select Privacy from the left sidebar menu.
Once there, spend some time exploring your options and choosing the ones that suit you best. In particular, take a look at the following:
Who can see your posts: By default, only your friends can see what you post. But you can also make your posts public, so that only a specific list of friends can see them, filtering by location, by the institute they have gone to, etc. In short, you have a whole world to explore.
Who can find the profile: Here you can decide if other people on Facebook can contact you, see your email address or phone number, or even if your profile is accessible to search engines like Google.
Which ads will be shown to you: This option is also under Settings, but instead of Privacy, you should click on Ads Settings. Here you can decide that advertisers cannot use information about you to show you personalized ads. You can also edit the Interest categories (topics that Facebook thinks you are interested in and that are used to show you personalized ads).
What profile information is shown to others: To edit these options, you need to go to your profile home page, click on Information, and then go to Basic and Contact Information. Once here, you can see all the options (mobile, email, zip code, relationship) and decide who can see them.
How To Create A Facebook Business Page
Facebook Pages are used to promote companies and brands, but you can also use them to get in touch with other fans of an artist, promote your website or blog, or create a community around a topic that interests you. To create your own Facebook business page, follow these steps.
Go to the page creation page: www.facebook.com/pages/create/
Choose the type of page you want to create. There are six categories in total: local place or business, company, organization or institution, brand or product, artist, music group or public figure, entertainment, and cause or community. Yours may not fit perfectly into these types, but don't worry: choose the one that works best.
Choose the name of your page. This is a very important step since the name of the page is what makes it possible for other people to find it. To help you choose a good name, you can think about how you would look for a page on that topic.
Choose the profile and cover image. To make them look good, make sure they have the recommended dimensions: 180 x 180 pixels for the profile photo and 851 x 315 pixels for the cover image. Later on, you can return to this option and choose a slideshow or a video for your cover image.
Choose whether you want to automatically reply to messages sent to you by other users.
Complete the information on your page. Here you have four different categories to fill in: general, contact (phone, web, email, and related links), location (only for businesses with physical locations), and schedule.
Customize the tabs that are displayed on the page and add a call to action button, for example, so that users can contact you or download your application.
With this, you can learn how to create a business page after you create a Facebook account for yourself.
You've got it! Your page is ready to be shown to the world. To get more followers and create a community, remember that it is important to publish content frequently: links, photos, videos, etc. It is also very important to respond to comments and messages from your followers.
How to Create a Facebook Business Page in 7 Simple Steps
If you have a business, you need a Facebook Business Page. With 1.82 billion daily active users, Facebook is simply not a social network you can ignore.
Perhaps that’s why more than 200 million businesses use Facebook’s free services. That includes business Pages—yes, creating a Facebook Page is a free way to market your business.
The good news is, creating a Facebook account for a business is pretty simple, and you likely already have all the components you need to get started. Let’s dive in.
If you’d rather watch than read, watch this video to learn how to create an effective Facebook Business Page:
What is a Facebook Business Page?
How to create a Facebook Page for business
How to optimize your Facebook Business Page
Bonus: Download a free guide that teaches you how to turn Facebook traffic into sales in four simple steps using Hootsuite.
What is a Facebook Business Page?
A Facebook Page is a public Facebook account that can be used by brands, organizations, artists and public figures. Businesses use Pages to share contact information, post updates, share content, promote events and releases, and — perhaps most importantly — connect with their Facebook audiences.
Pages can be connected to Facebook ad accounts and Facebook Shops.
How to create a Facebook Page for business
Before you can sign up for your Facebook Business Page, you need to log into your personal Facebook account. Don’t worry—the information from your personal account will not be publicly visible on your business Page.
This is simply because every business Page is managed by one or more page administrators. The administrators are people with personal Facebook accounts. Your personal account works like the key to let you into your new business Page. If you have team members helping you with your Page, their personal accounts will also unlock their specific roles and capabilities.
So, if you’re not already logged into your personal account, log in now, then dive into the Page creation steps.
Step 1: Sign up
Go to facebook.com/pages/create.
Enter your business information in the panel on the left. As you do so, the page preview will update in real time on the right.
Source: Facebook
For your page name, use your business name or the name people are likely to search for when trying to find your business.
For category, type a word or two that describes your business and Facebook will suggest some options. You can choose up to three of the suggestions.
Source: Facebook
Next, fill in the Description field. This is a short description that appears in search results. It should be just a couple of sentences (maximum 255 characters).
When you’re happy with your description, click Create Page.
Source: Facebook
Step 2. Add pictures
Next, you’ll upload a profile and cover images for your Facebook Page. It’s important to create a good visual first impression, so choose wisely here. Make sure the photos you choose align with your brand and are easily identifiable with your business.
You’ll upload your profile photo first. This image accompanies your business name in search results and when you interact with users. It also appears on the top left of your Facebook Page.
If you have a recognizable brand, using your logo is probably the safest way to go. If you’re a celebrity or public figure, a picture of your face will work like a charm. And if you’re a local business, try a well-shot image of your signature offering. The important thing is to help a potential follower or customer to recognize your page immediately.
As we explain in our post on the best image sizes for all social networks, your profile image should be 170 x 170 pixels. It will be cropped to a circle, so don’t put any critical details in the corners.
Once you’ve chosen a great photo, click Add Profile Picture.
Now it’s time to choose your Facebook cover image, the most prominent image on your Page.
This image should capture the essence of your business and convey your business or brand personality. Facebook recommends you choose an image that’s 1640 x 856 pixels.
Once you’ve selected an appropriate image, click Add Cover Photo.
Source: Facebook
After you upload the photos, you can use the buttons in the top right of the preview to toggle between desktop and mobile views. Use these to make sure you’re happy with how your images look in both displays. You can drag the images in the left column to adjust their positioning.
Source: Facebook
When you’re happy with your selections, click Save.
Ta-da! You have a Facebook Business Page, although it is extremely sparse.
Of course, while the skeleton of the Facebook Page for your business is now in place, you’ve still got a lot of work to do before you share it with your audience.
Step 3. Connect your business to WhatsApp (optional)
After you click Save, you’ll see a pop-up box asking if you want to connect your business to WhatsApp. This is optional, but it does allow you to add a WhatsApp button to your page, or send people to WhatsApp from Facebook ads.
Source: Facebook
If you want to connect your business to WhatsApp, click Send Code. Otherwise, close the window to continue without connecting WhatsApp. You’ll get one more pop-up box asking if you’re sure. Since we’re skipping this, for now, we’ll click Leave.
Step 4: Create your username
Your username, also called your vanity URL, is how you tell people where to find you on Facebook.
Your username can be up to 50 characters long, but don’t use extra characters just because you can. You want it to be easy to type and easy to remember. Your business name or some obvious variation of it is a safe bet.
To create your username, click Create Username on the Page preview.
Enter the name you want to use. Facebook will let you know if it’s available. If you get a green checkmark, you’re good to go. Click Create Username.
Source: Facebook
You’ll get a confirmation pop-up. Just click Done.
Step 5: Add your business details
While you might be tempted to leave the details for later, it’s important to fill out all of the fields in your Facebook Page’s About section right from the start.
As Facebook is often the very first place a customer goes to get information about you, having it all there is important. For example, if someone is looking for a business that’s open till 9, they want to confirm this information on your Page. If they can’t find it, they’ll surely keep looking until they find another place that’s more forthcoming.
Fortunately, Facebook makes this very easy to complete. Simply scroll down on your Page view to the section called Set Your Page Up for Success and expand the item called Provide Info and Preferences.
Source: Facebook
Fill in the appropriate details here, starting with your website.
If your business is open to the public during specific hours, make sure to enter those here. This information appears in search results.
Don’t forget to complete the Add an action button section.
Facebook’s built-in call-to-action button makes it very easy to give the consumer what they’re looking for and it allows them to engage with your business in real time.
The right CTA button will encourage visitors to learn more about your business, shop, download your app, or book an appointment.
To add your CTA, click the blue box that says Add Button, then choose which kind of button you want.
Source: Facebook
If you don’t want to complete all of these steps now, you can always access them later. In the Manage Page menu on the left, just scroll down to Edit PageInfo.
Bonus: Download a free guide that teaches you how to turn Facebook traffic into sales in four simple steps using Hootsuite.
Get the free guide right now!
If at any time you want to take your Facebook Business Page offline while you work on the details, you can choose to unpublish your page. From the Manage Page menu, click Settings, then General. Click Page Visibility and change the status to Page unpublished.
Source: Facebook
Follow the same steps to republish your page when you’re ready.
Step 6. Create your first post
Before you start inviting people to like the Facebook Page for your business, you should post some valuable content. You can create your own posts, or share relevant content from thought leaders in your industry.
For inspiration, check out our blog post on Facebook marketing.
You could also create a specific type of post, like an event or offer—just click one of the options in the Create box at the top of your page.
Source: Facebook
Make sure that whatever you post offers value for your visitors when they arrive at your Facebook Business Page, so they’ll be inclined to stick around.
Step 7. Invite an audience
Your Facebook Business Page now represents a robust online presence that will make potential customers and fans feel comfortable interacting with you.
Now you need to get some followers!
Start by inviting your existing Facebook friends to like your Page. To do so, just scroll down to the bottom of the Set Your Page up for Success box and expand the section called Introduce Your Page.
Source: Facebook
Click the blue Invite Friends button to bring up a list of your personal Facebook friends. Select which friends you want to invite, then click Send Invites.
Use your other channels, like your website and Twitter, to promote your new page. Add “follow us” logos on your promotional materials and email signature. If you’re comfortable doing so, you can ask your customers to review you on Facebook, too.
To grow your audience quickly, check out our post on how to get more Facebook likes.
How to optimize your Facebook Business Page
Now that you know how to create a Facebook Page for business, it’s time to think about ways to optimize your Page. These strategies will help maximize engagement so you meet your Facebook (and social media) marketing goals.
Here’s a quick video overview of the steps you can take to optimize your Facebook Business Page. We’ll dig into these components in more detail below.
Add a pinned post
Is there important information you want all visitors to your Page to see? A promotion you don’t want them to miss? A top-performing piece of content you want to show off? Put it in a pinned post.
A pinned post sits at the top of your Facebook Business Page, just under your cover image. It’s a great place to put an attention-grabbing item that will draw your visitors in and make them want to stick around.
Start by publishing a new post, or scrolling down your feed to find an existing post you want to pin to the top of your Page. Click the three dots on the top right of the post, then click Pin to Top of Page.
Source: Facebook
Once you’ve pinned the post, it will appear under the heading PINNED POST at the top of your page. This is only for your internal view. To visitors, it will just show as the first item under Posts, with a blue thumbtack icon to indicate it’s pinned.
Source: Facebook
Make the most of templates and tabs
Tabs are the different sections of your Facebook Page, like the About section and Photos. You can customize which tabs you want to include and the order in which they appear in the left Manage Page menu.
If you’re not sure which tabs to include, check out Facebook’s various templates.
Source: Facebook
Each template has a set of buttons and tabs designed for particular types of business. For example, the Restaurants & Cafes template includes tabs for a menu, offers and reviews.
To access templates and tabs, click Settings in the Manage Page menu, then Templates and Tabs.
Like other Pages
Since Facebook is, after all, a social network, it’s a good idea to use your Page to build a community for your business.
One way to build community is to connect with other Pages that are relevant to your business (but not competitors).
For example, if you run a shop in a popular shopping area or mall, you could connect with other shops in the same area. Think of this as an online version of your local business improvement association or chamber of commerce.
If you have a virtual business, you could connect with other businesses in your industry that could provide additional value for your followers without competing directly with your products.
To follow other businesses, navigate to their Facebook page, then click the more icon (three dots) under the page’s cover photo. Click Like as Your Page. If you have more than one Facebook Business Page, choose which one you want to use to like the other business, then click Submit.
Source: Facebook
Pages will receive a notification when you like them and may check out your Page or even give you a like in return.
Your business page gets a news feed separate from your personal profile, so you can interact with all the businesses you follow from your business profile. To see all the content from the Pages you’ve liked as your Page, just select your Page and click News Feed in the left menu. If you haven’t liked any Pages yet, Facebook will provide a list of suggestions to get you started.
Source: Facebook
Join Groups as your Page
Facebook Groups represent an organic opportunity to reach many people who are interested in a specific topic, but without paying for ads. Joining and posting to a relevant Group as your Facebook Page helps anyone who is curious about your post click through to your business page, rather than your personal profile. Here’s a quick tutorial that explains how to join as a Page (it can be tricky!)
Review your settings
Your Facebook Page settings allow you to get into some pretty fine detail about who can administer the Page, where your posts are visible, words banned from the Page, and so on. You can also see people and Pages who have liked your page, control your notifications, and so much more.
Think of the Settings tab as your behind-the-scenes console for every adjustable parameter available to you. Take a few minutes to go through each setting and make sure that it’s optimized for how you want to manage the Page and how you want your audience to interact with you.
To access your settings, just click Settings at the bottom of the Manage Page menu.
Source: Facebook
Check your settings regularly, as your preferences and requirements may change as your business—and social following—grows.
For even more control over who can administer your Page, and to control the roles filled by team members, contractors and agencies, consider setting up Facebook Business Manager.
Learn from Page Insights
The more information you have about your audience, the more content you can create to satisfy their needs.
Facebook Page Insights makes it easy to gather data about how your fans are interacting with your Page and the content you share. To access Page Insights, click Insights in the Manage Page menu.
Source: Facebook
Insights gives you information about your Page’s overall performance, including some data on audience demographics and engagement. You can see metrics on your posts so you can understand how many people you’re reaching.
You’ll also see how many comments and reactions are gained from specific posts—data that helps you plan future content.
A key feature of Insights is the ability to see how many people have clicked on your call-to-action button, website, phone number, and address. This data is divided by demographics such as age, gender, country, city and device, making it easier for you to tailor future content to your audience. To access this information click Actions on Page in the Manage Page menu.
For more details, check out our post on how to use Facebook Page Insights.
Link to your Facebook Page from other web pages
Backlinks help boost the credibility of your Facebook Business Page and may help improve your search engine ranking. They also help direct new potential followers to your page.
Include a link to your Facebook Page at the bottom of your blog posts and where appropriate on your website. Encourage other companies and bloggers to do the same when you collaborate.
Once your Facebook Page is set up and optimized, check out our full guide to Facebook marketing to take your Facebook strategy to the next level.
Manage your Facebook Business Page alongside all your other social media profiles using Hootsuite. From a single dashboard, you can create and schedule posts, engage followers, monitor relevant conversations, measure (and improve!) performance, and much more.
Get Started
Grow your Facebook presence faster with Hootsuite. Schedule all your social posts and track their performance in one dashboard.
Free 30-Day Trial
Facebook registration* without phone number in 2022
#Press releases
On for a long time Facebook ( Facebook ) remains the most popular social network in the world and is not going to leave this place. According to statistics, each the fourth person on the planet is active user. Do you want to become participant? In that case, you will need go through a simple process of creating personal profile.
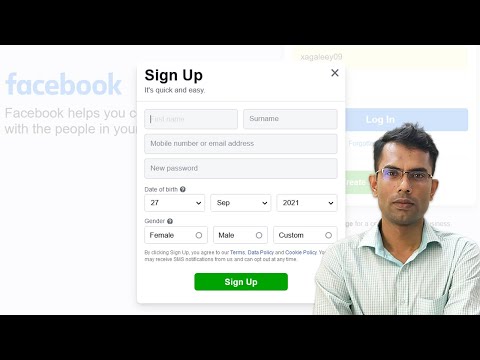
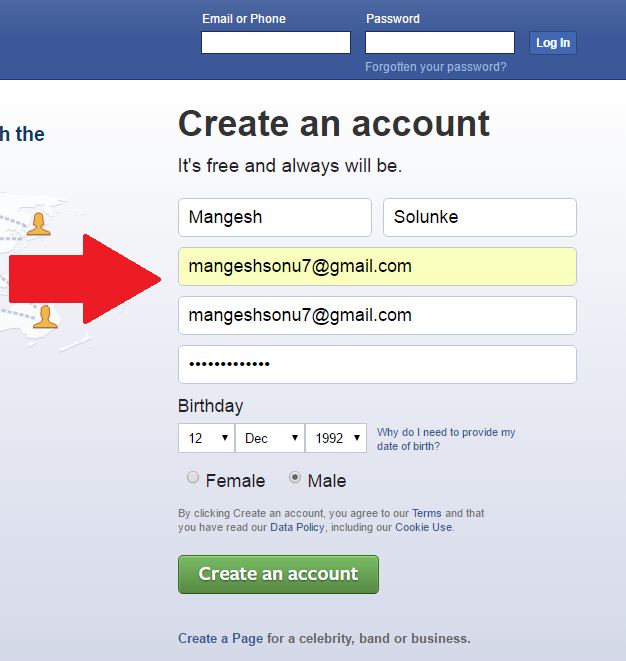
Look for as register on facebook phone number ? Such an opportunity is provided social network administration. Window creating an account looks like this way.
How can be seen, registration no phone number on facebook takes place using an email address. mail. This method has certain peculiarities. First of all, not always. it is convenient to start a separate mail for social network. Additionally, site will periodically offer a binding phone. This verification option is more preferable for administration.
Registration Facebook without phone to virtual number
Exists the best solution for for various situations. Can use a virtual number. Its difference lies in the fact that there is a physical carrier in the form SIM cards. The number is purchased in the Internet. Nothing connects him to a specific person.
What no less important, you can buy virtual number for registration in Facebook specific country. social network is not prohibits the creation of profiles for residents specific countries. Despite this, not it would be superfluous to prepare for such scenario of events. Price highly dependent on the internet shop. We suggest using services of the service "Grizzly Sms" ("Grizzly SMS"). Provides a combination of low prices, large selection and ease of making purchases.
How create facebook account without number phone
Consider detailed registration instructions profile using the Grizzly Sms service as an example. The task is carried out in multiple stages:
Let's move on to the registration window on the service. Can enter email or use the create button profile in one click. It should be noted, that any option is the maximum confidential. Third parties cannot get no information about the client and purchased virtual numbers.
For shopping needs to top up balance. The corresponding button is in the top menu.
Let's go to the form of payment. Choose the right one option from several options ways. Visa systems available (Visa), MasterCard (MasterCard), Apple Pay (Apple Pay) and Payeer Wallet (Payer). After clicking, a window appears where the amount in rubles is entered. Replenishment accounts are instantaneous.
Let's go to the store where we make the purchase. AT lists, the country is selected first, then service. Not required to view all options. You can enter what you are interested in name in the search column and the system will display coincidence.
How registration occurs on Facebook without phone number (real)? Not provided here serious differences. Virtual number entered on a social networking site. SMS the message comes to your personal account. No less important is that it instantly.
*Activity American transnational holding company Meta Platforms Inc. on sales of social networking products Facebook and Instagram banned on the territory Russian Federation on the grounds carrying out extremist activities.
As an advertisement
Found a mistake in the text? Select it and press Ctrl + Enter
print version
How to create a second account on Facebook - bypass social bans.
networks
Home » Social networks » Facebook
Author Admin Reading 3 min Views 36 Updated
Everything is not so simple here. According to Facebook rules, each user can have only one account. The rest will be blocked. But there are several ways to get around the limitation. And now we will tell about them.
Contents
Creating an account with a fictitious name
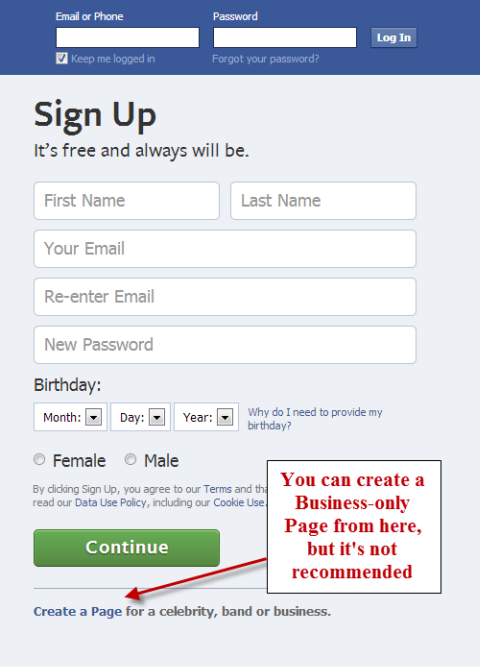
Creating a page
Conclusion
Creating an account with a fictitious name
This is the easiest and most affordable way for everyone. After all, if there is at least some difference in the name and surname, then Facebook will consider it a completely different account. But you will need an alternative mailbox or a different phone number.
After all, registration takes place via telephone or e-mail. However, now we will consider this process in more detail. Here is an instruction that tells how and what to do in this case.
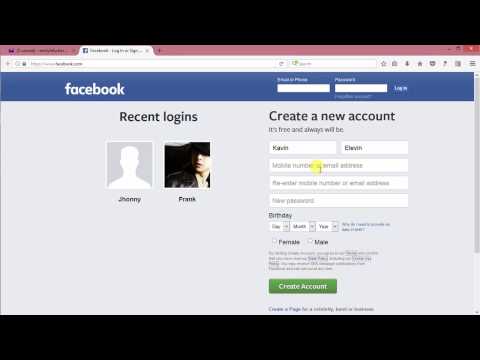
Go to https://www.facebook.com/ .
The main page appears. A data entry form will be provided immediately.
Enter the first and last name (fictitious), email address (used as a login), invent and enter a password, and also set the date of birth (here you can also lie a little) and select the gender.
After that, click on the button "Registration" .
So, after pressing the button "Registration" you will be redirected to the verification page. At the same time, a letter will be sent to your mailbox specified when creating your account.
You need to create a new tab in your browser and load your e-mail box there.
Find the email from the Facebook team and open it. If it is not there, then look in the Spam folder . Sometimes these messages end up there.
The letter will contain a link and a special code. You can simply follow the link and your account will be activated instantly. Or you can copy the code, return to the verification page, enter it in the appropriate box and press "Continue" .
This is how you create an account on the social network Facebook. Just make sure that the data you enter does not really match the information from the old account. Otherwise, the system will block the newly created account.
If you used your phone number to register, a message with a verification code will be sent to your number. You will need to enter it in the appropriate field on the verification page. So the phone number must be working and used. Otherwise, such registration will not be possible.
Creating a page
This is not really an account. Rather, it is a public or a group. But in some cases it can be used for personal purposes. It will be a little weird. But if you do not have a backup mail or phone, then this is the only option.
The process itself is not particularly complicated. But Facebook's confusing interface can cause some problems.
 It takes much less time to install, but retains the same basic functions as the normal application.
 Welcome! Let's see how to use this social network and take advantage of the different options it offers.
 Its large size makes it ideal for images such as your favorite landscape, some illustration, or a photo of you practicing a hobby. It must be at least 720 pixels wide.
 To do this, follow these steps:
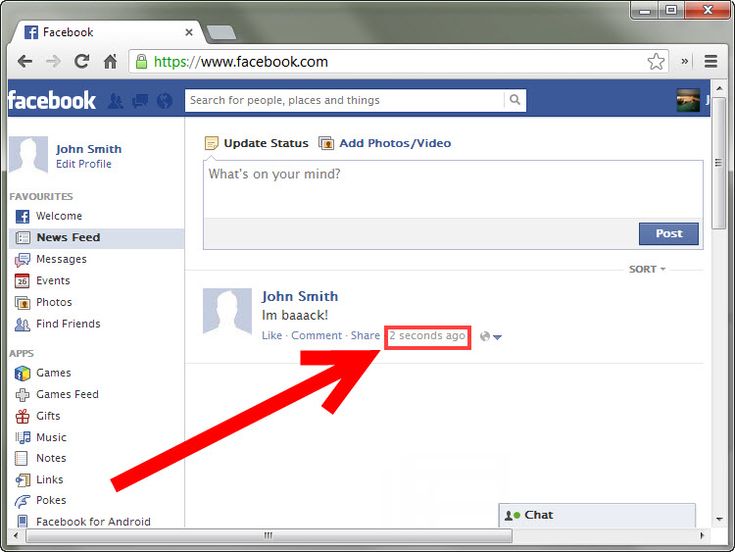 Anyone can see the description of the group, but posts are private.
 If you want to see all the options, click on the three-point icon to the right. For example, you can choose between photos and videos, locations, stickers, etc. You can also tag other friends in the post.
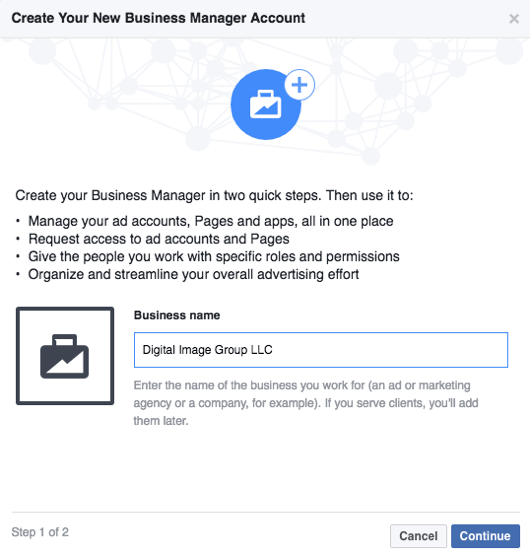 To view and change your privacy options on Facebook, click the arrow in the upper right corner, and from there, click Settings. Then, select Privacy from the left sidebar menu.
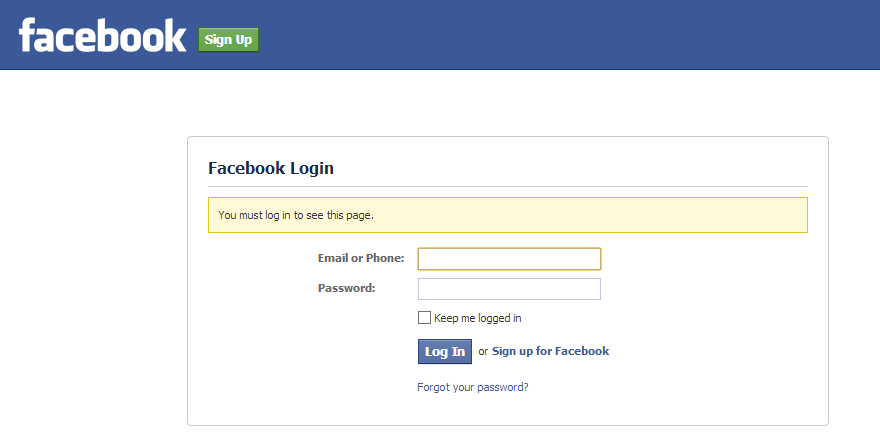 Here you can decide that advertisers cannot use information about you to show you personalized ads. You can also edit the Interest categories (topics that Facebook thinks you are interested in and that are used to show you personalized ads).
 There are six categories in total: local place or business, company, organization or institution, brand or product, artist, music group or public figure, entertainment, and cause or community. Yours may not fit perfectly into these types, but don't worry: choose the one that works best.
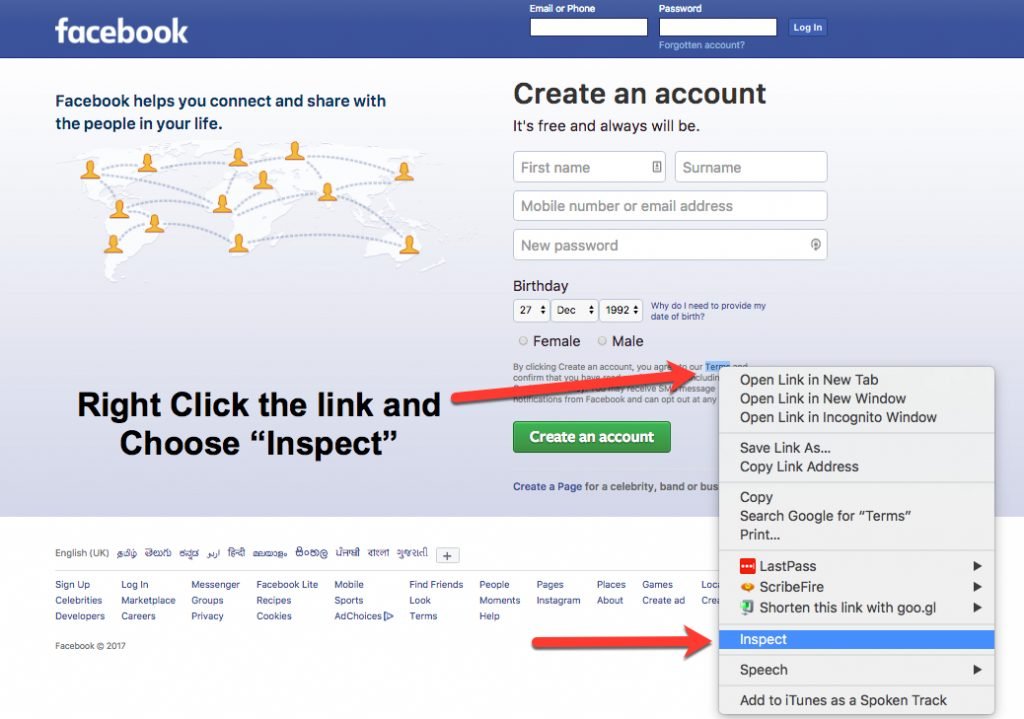
 Let’s dive in.
 This image accompanies your business name in search results and when you interact with users. It also appears on the top left of your Facebook Page.
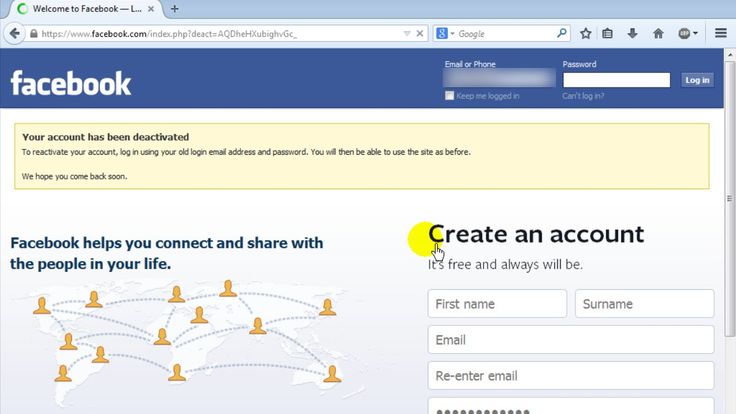 Facebook recommends you choose an image that’s 1640 x 856 pixels.
 This is optional, but it does allow you to add a WhatsApp button to your page, or send people to WhatsApp from Facebook ads.
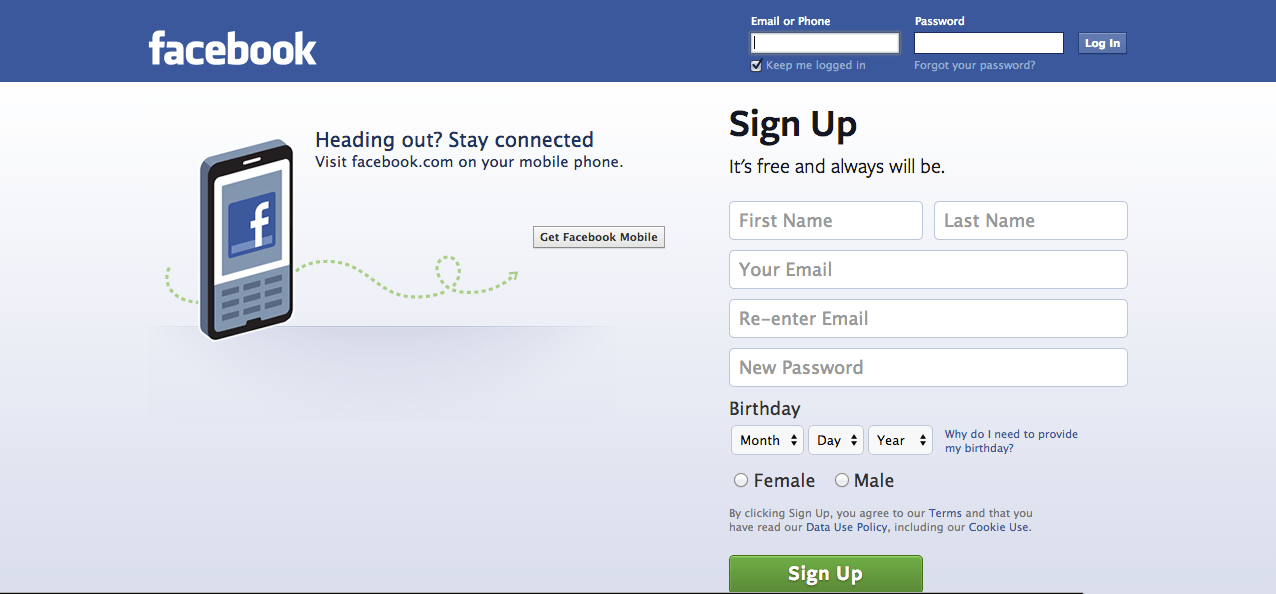 If you get a green checkmark, you’re good to go. Click Create Username.
 Select which friends you want to invite, then click Send Invites.
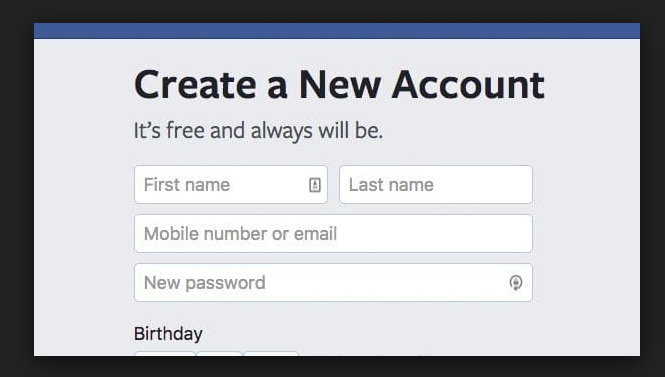 This is only for your internal view. To visitors, it will just show as the first item under Posts, with a blue thumbtack icon to indicate it’s pinned.
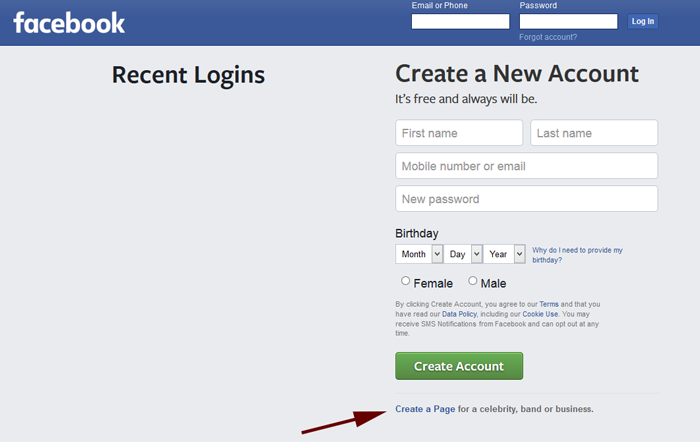

 This data is divided by demographics such as age, gender, country, city and device, making it easier for you to tailor future content to your audience. To access this information click Actions on Page in the Manage Page menu.
 From a single dashboard, you can create and schedule posts, engage followers, monitor relevant conversations, measure (and improve!) performance, and much more.
 Window creating an account looks like this way.
 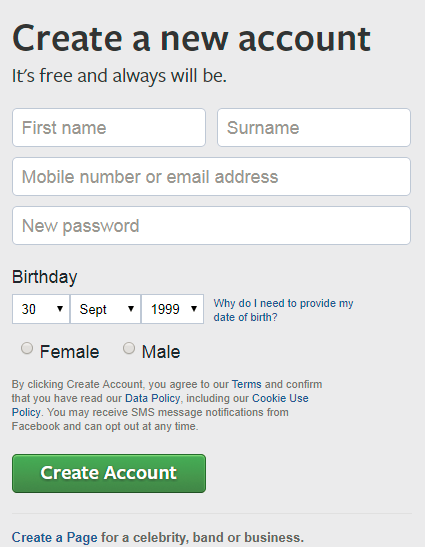 Price highly dependent on the internet shop. We suggest using services of the service "Grizzly Sms" ("Grizzly SMS"). Provides a combination of low prices, large selection and ease of making purchases.
  After clicking, a window appears where the amount in rubles is entered. Replenishment accounts are instantaneous.
 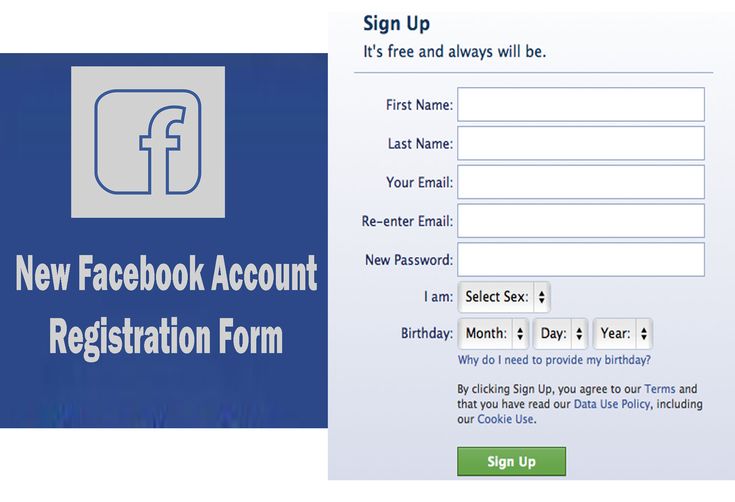 networks
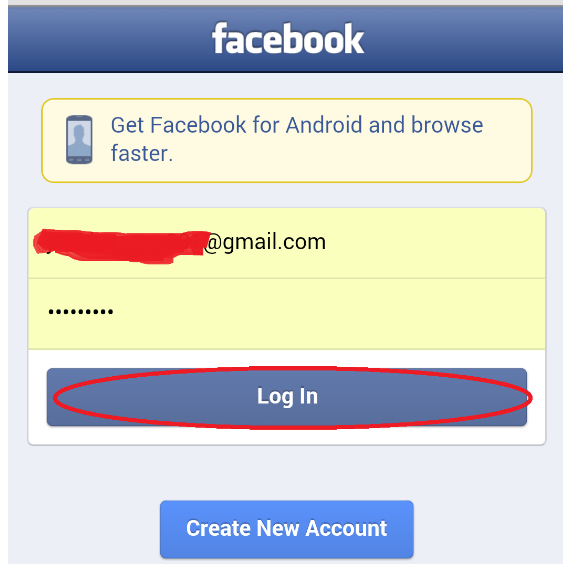
 Or you can copy the code, return to the verification page, enter it in the appropriate box and press "Continue" .