If you’re looking for ways to make your communications simpler, you might want to find a fastest way to enter your Facebook account. Sure, you could bookmark Facebook on your browser, but that’s not the best solution.
In this article, we’ll show you how to add a Facebook icon to your Desktop so you can open it with only one click.
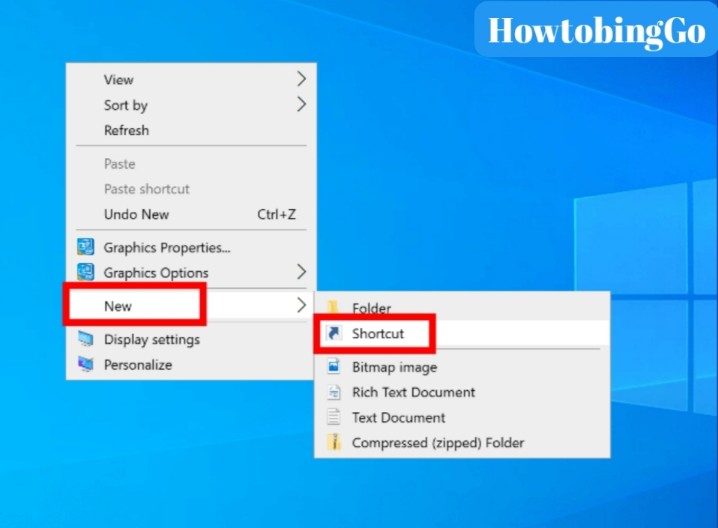
Before we start, we have to explain that adding the Facebook icon means creating a shortcut on your Desktop. In fact, there are two parts: adding the shortcut and adding the Facebook logo. The process is similar for all Windows desktop devices. However, if you have one of the older models, it may not be compatible with your device.
Here’s what you have to do:
You’ve now added a shortcut to your Desktop, and can open Facebook with only one click. However, as you can see, the shortcut doesn’t have a Facebook icon. Instead, it has the generic symbol of your browser. Not a problem. We’ve got you covered. We’ll now show you how to change it in a couple of seconds!
Did you know that there are many websites where you can find icons of your favorite apps? What’s more, they offer various Facebook icons. All you have to do is choose the one you like the best. For example, if you don’t like the icon Facebook is currently using, you can select an older version. Moreover, you can opt for more creative, artistic designs.
Don’t worry, these websites are legal, as long as you use the icon for your personal purposes.
We used Icon Finder, and we’ll show you how you can do it as well:
There you have it! This is one of the best ways to customize your Facebook icon.
As you’ve noted, the website offers plenty of high-quality icons for free. However, if you need more than that, you can purchase a membership and unlock even more options. The best thing about membership is that you can download premium icon sets and customize your Desktop.
Moreover, you can also download icons designed by famous digital artists.
When you download the Facebook app to your Mac, its icon should automatically appear on your Desktop. However, this sometimes doesn’t happen, especially if you already have a lot of apps on your Desktop.
Don’t worry as there’s an easy way to add a Facebook icon. All you have to do is create a shortcut, and it’ll bring the Facebook icon to your Desktop. Here’s how:
That’s it! You can now enter the Facebook with only one click. Of course, you can do this with any other app, as well. If you haven’t already, we suggest you drag the Facebook Messenger, WhatsApp, or some other app you may be using for chatting with your friends.
We love shortcuts because they make our life easier. When we’re busy, even saving a couple of seconds can mean a lot. Especially when it comes to things we do daily, such as checking our social media. We hope we inspired you not only to add a Facebook icon but to organize your Desktop as well.
What shortcuts do you have on your Desktop? Which one do you find the most useful? Let us know in the comments section below.
By Nolen Jonker
Updated
Share Tweet Share Share Share Email
If you don't want shortcut icons clogging up your app, here's how to add or remove them on Facebook.
As the Facebook app keeps getting updated, all of the new features can start to get overwhelming. If you're reading this, chances are that you're looking to manage your shortcuts on your home screen a bit better.
Luckily, there are a few methods you can use to simplify your navigation by customizing the shortcuts tab. Here's what to know about these icons and how to add and remove shortcuts on the Facebook app.
Shortcuts on the Facebook app provide access points to different pages and features in one place—you'll see these icons on the shortcut bar. For Android users, this bar will be at the top, and for iPhone users, it's at the bottom. It also appears at the top of the page of the Facebook website on desktop browsers.
The Facebook shortcuts bar makes navigation quick and easy since there's no need to scroll through a menu to get to where you want. Most of the shortcuts can be removed and re-added, and their notification dots can also be disabled and enabled, we'll show you how later on.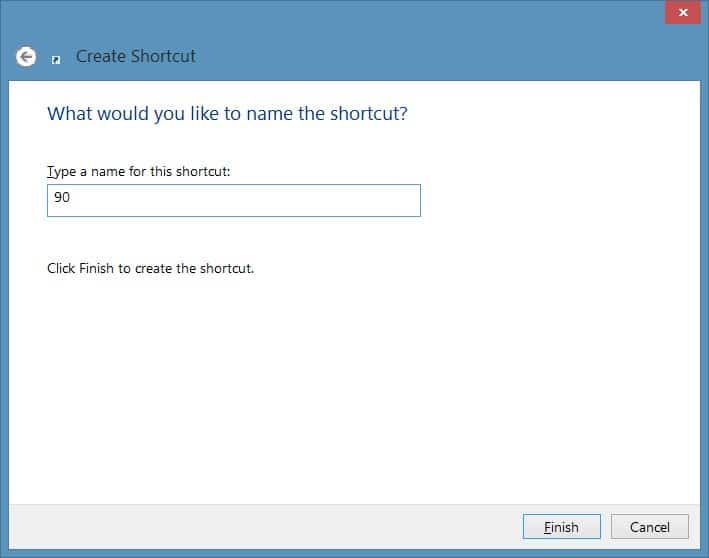 First, let's have a look at the shortcuts you can expect to find in the shortcut bar.
The first shortcut to the left is the Homepage, represented by a house icon. This is where you'll access your Newsfeed. This shortcut can't be removed.
Settings are on the far right (the hamburger icon) and will open a page where you can have quick access to things like saved posts, events, as well as some of the Facebook shortcuts that are also accessed through the shortcuts bar. There are several menu tabs in this Settings page, from where you can customize the app's settings. This is an essential tab and can therefore not be removed.
The bell icon is the Notifications tab. Here, you'll find all your notifications (that you have turned on) such as comments, likes, shares, invitations to like pages, and birthday reminders. This tab can't be removed either.
The Profile shortcut is a circular avatar icon and it's where you can access your profile and all your posts. You can remove it, and if you do, your profile is still accessible from the Settings page via the hamburger icon.
The Friends shortcut is an icon with two people. This is where you can view all your friend requests and suggested friends to add. If you remove the tab, you'll get friend request notifications in the Notifications tab instead.
Read more: What's the Difference Between Facebook Friends and Followers?
The Facebook Marketplace shortcut is represented with a tent icon, and here you can discover, buy, and sell items. It comes with its own list of settings where you can filter through specific items. Listings will be based on your location by default, but you can change it.
Facebook Groups combines posts from all the groups you're a part of into its own feed. Similar to suggestions that pop up on your regular feed, you'll see some suggested groups here. It's a circular icon with three people and can be removed.
Watch suggests videos from creators that you might be interested in. It's a rectangular play button icon and can be removed.
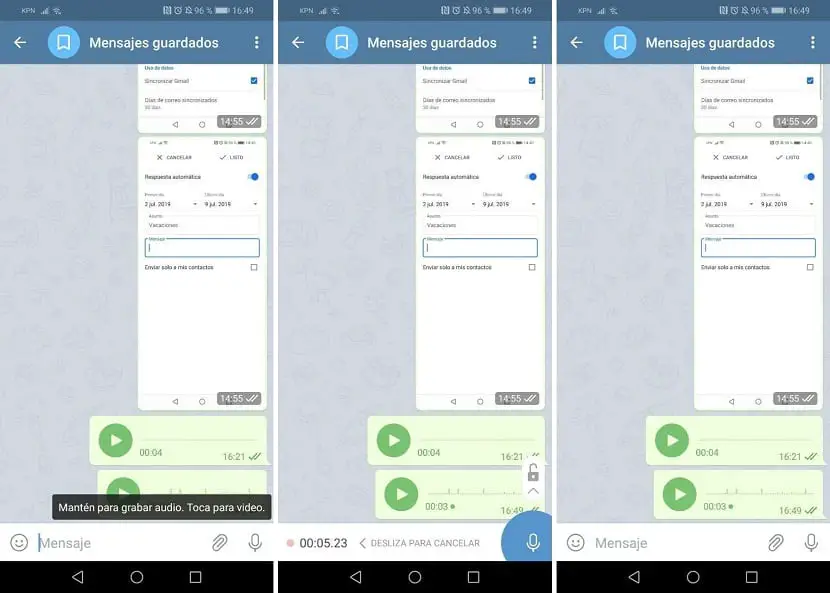
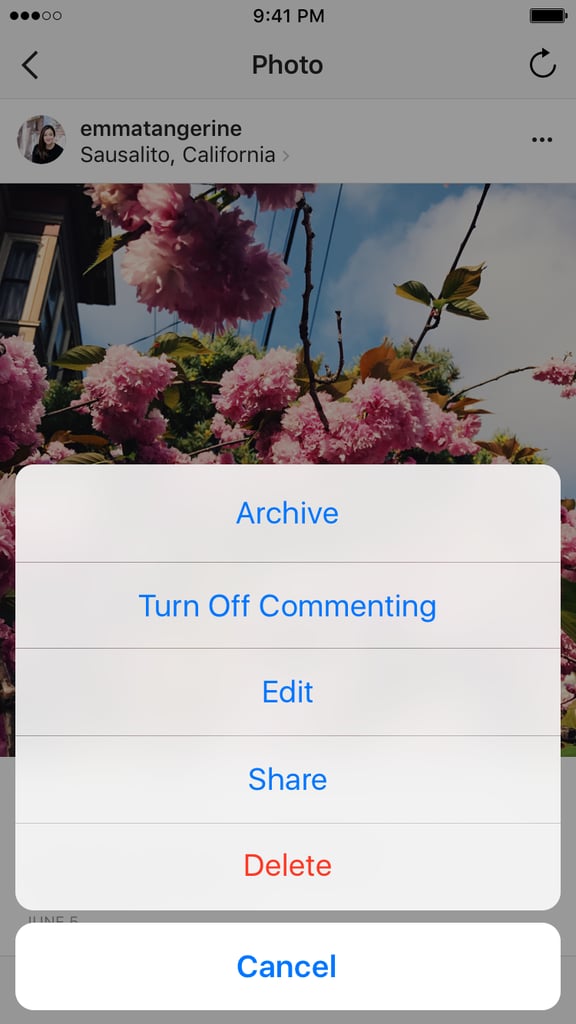
Long-pressing on an icon from the shortcuts bar is the simplest way to remove a shortcut in the Facebook app. But you can only remove shortcuts with this method, not add them.
3 Images
To remove shortcuts by long-pressing, follow these steps:
Not only can you remove shortcuts using your settings on Facebook, but you also can add new ones.
4 Images
To add or remove shortcuts via the settings, follow these steps:
If you'd prefer not to see notification dots on the shortcut icons, you can disable them by long-pressing.
2 Images
To disable and enable notification dots by long-pressing, follow these steps:
You can also customize the notification dots from your Facebook settings.
4 Images
To disable and enable notification dots from the settings, follow these steps:
 Again, if you haven't updated the app in a while, then you might have to scroll down to Notifications and select Notification dots from there.
 Shortcuts are there to make navigation quick and convenient. But let's be real, they can also clog up your screen. Follow the above guide to choose which shortcuts you want to display and whether or not you want to see their notification dots.
Help Center
Using Facebook
Pages
We are updating the mobile version of Facebook.com. More
Pages you manage may use the new version. More.
To create and manage shortcuts, sign in to Facebook from a computer.
You can create labels and apply them to your Page's posts to organize them by category, topic, or importance. You can apply multiple labels to a single post and filter your Page's Inbox to see all posts with the label you want.
You can manage Page posts and tags if you have Page admin, editor, or moderator rights in the classic version, or access to the Page at the Facebook or task level in the new version. To create and manage shortcuts, sign in to Facebook from your computer.
Classic Pages
To create a shortcut:
On the menu to the left of the Ribbon, click Pages.
Go to your Page.
Click Inbox in the menu on the left side of the screen.
Select a conversation on the left side of the screen.
Click Manage Shortcuts on the right side of the screen next to Shortcuts.
Enter a name for the new label and click Add Label.
To apply a label to a conversation:
On the menu to the left of the Ribbon, click Pages.
Go to your Page.
Click Inbox in the menu on the left side of the screen.
Select a conversation on the left side of the screen.
In the Shortcuts section on the right side of the screen, click Add Shortcut…, start typing the name of the desired shortcut and select it from the list that appears.
To filter your Page's incoming messages by label, click the icon on the left side of the screen above the conversations. Then enter the name of the desired shortcut and select it from the list that appears.
To manage all of your Page's labels, click Manage Labels on the right side of the screen next to Labels. Here you can click on the label color to change it, or click to remove the label. Deleting a label will not delete messages with that label.
New version Pages
If you have task-level access to the new version of Pages, sign in to Meta Business Suite to create and manage shortcuts.
To create a shortcut to access the new version of the Page at the Facebook level:
Log in to Facebook and click on your profile photo in the upper right corner of the screen.
Click All Profiles and select the Page you want to switch to.
In the upper right corner of the Ribbon, click the icon.
Select a conversation on the left side of the screen.
Click Manage Shortcuts on the right side of the screen next to Shortcuts.
Enter a name for the new label and click Add Label.
To apply a label to a conversation:
Sign in to Facebook and click on your profile photo in the upper right corner of the screen.
Click All Profiles and select the Page you want to switch to.
In the upper right corner of the Ribbon, click the icon.
Select a conversation on the left side of the screen.
In the Shortcuts section on the right side of the screen, click Add Shortcut…, start typing the name of the desired shortcut and select it from the list that appears.
To filter your Page's incoming messages by label, click the icon on the left side of the screen above the conversations. Then enter the name of the desired shortcut and select it from the list that appears.
To manage all of your Page's labels, click Manage Labels on the right side of the screen next to Labels. Here you can click on the label color to change it, or click to remove the label. Deleting a label will not delete messages with that label.
Was the article helpful?
Information
Confidentiality
Conditions and Rules
Advertising preferences
Vacancies
COOKIE
Creation
Create page
How do you usually access Facebook? You probably launch the site in your favorite web browser or tap on the icon of the official application on your smartphone. Both options are clear, simple and already familiar. But the developers of the social network offer an alternative way - install Facebook on your computer as a standalone application.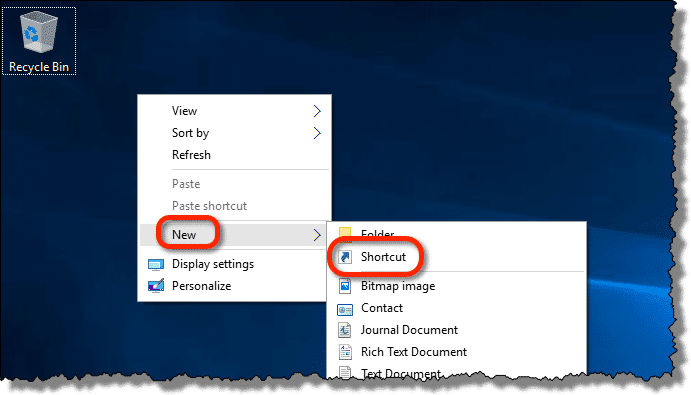 Not all users know about its existence, and only a few people most likely see the need for it. What is the essence and advantages of Windows FB? And is it worth it to even bother using it?
It's no secret that developers of most Internet services focus on developing products for tablets and smartphones. Facebook management, in turn, is in no hurry to part with developments for PCs and periodically pleases computer users with amenities. In addition to improving the main site of the social network, the developers are busy updating a special application for laptops and computers running on the Windows operating system.
If Windows 10 is installed on your laptop or computer, then the question of how to install Facebook on your desktop will be relevant for you. Actually, the installation process itself is no different: the steps are exactly the same as when downloading any other application:0003
go to the "Start" menu and click on the "Store" icon;
enter "Facebook" in the search bar and go to the installation window;
The Facebook app for PC weighs about 105 MB, so there's probably room for it.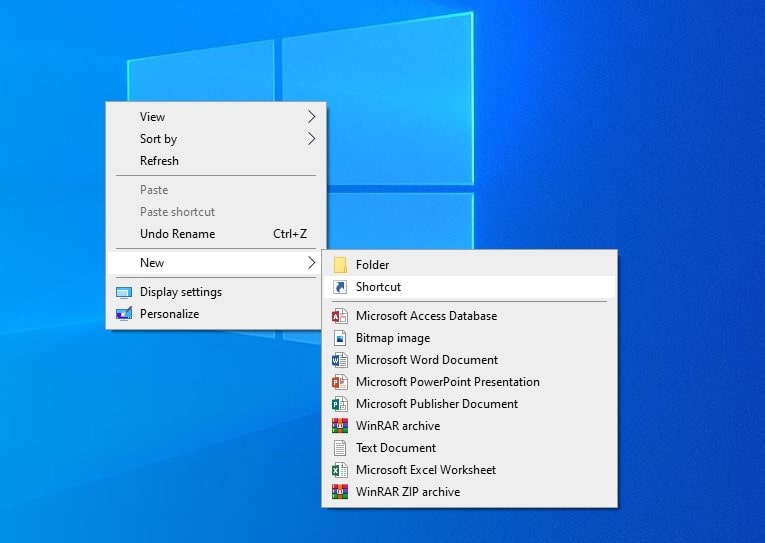
So, the program is installed - you can run it. You can do this right from the installation window by clicking "Open".
You will be greeted by a new window - the authorization window. Everything is standard here - you need to enter your login and password if you are already registered in FB, or register.
The application interface in general can be described as pleasing to the eye and even familiar. You immediately get to the News Feed, which you can, as always, scroll through, leaving comments and putting "likes".
The task of the developers, apparently, was to create an intuitive and uncluttered design, as close as possible to the favorite applications for mobile devices. The professional “Zuckerberg team” coped with this task with dignity - everything is really clear and does not require explanation.
On the left, as is customary on FB, there is a column with available functions - Groups, Events, Pages, Applications.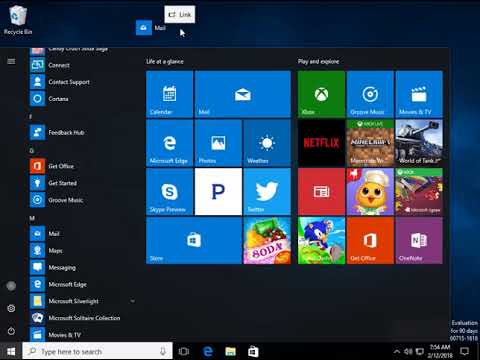 At the top are the "Home" section (i.e. News Feed), notifications, a link to your Page and settings. The chat is located on the right side, most likely initially collapsed.
In the middle sector, the actual action takes place - this is the working space. For example, if you go to Settings, then the left, right and top parts of the window remain the same, and the settings are changed in the same middle sector. It looks like this:
In terms of functionality, everything is the same as in the main version of the social network. You can publish text posts, photos and videos, chat with friends and subscribe to all kinds of publics.
And, finally, the most important, probably, question - is it necessary to download FB to a computer at all? Everything here, no matter how trite, is individual. The application is much more compact and convenient in terms of use - nothing more, everything is close to mobile applications. And notifications can even be customized to stay up to date.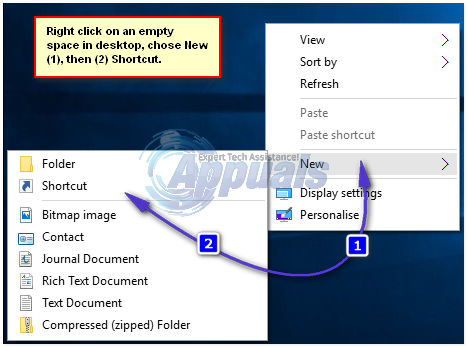
One minus - Windows Facebook slows down sometimes. And you won’t be able to download Facebook for Windows 8 or a version below - only “ten” is supported.
Whether or not to use this product is up to you. But you still need to download and try it. You may not even want to go to the web version of the social network after that... Google Chrome provides an easy option for creating desktop shortcuts. It is not the same in creating a web page shortcut in other browsers. These links will help you open a website/app in a chrome browser window instantly.
You can create shortcuts to frequently visited websites such as Facebook, Gmail or Google Reader.
Open the web page in the browser for which you want to create a shortcut. Click on the menu page which is given in the upper right corner. From the drop-down menu, click Tools > Create Application Shortcuts.
You can pin your favorite page to the desktop, taskbar or start menu.
You will find a newly created shortcut on the desktop.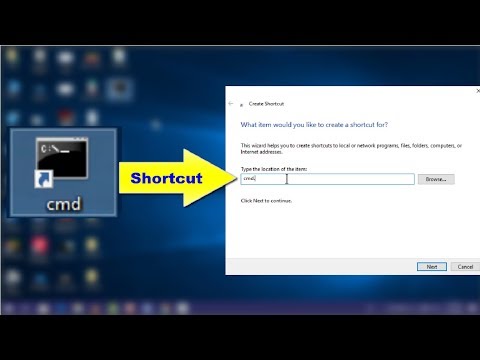 Click on it and chrome will open the selected page in a new window.
It's very simple. You can save all your favorite sites on your desktop and visit them at any time without delay.
Sometimes, for various purposes, you need to get quick access to a particular site. It's easiest to pin it to your main browser's welcome screen, but what if you don't have the option to pin this site in your browser or need to access it even faster?
You can create a site shortcut right on your desktop. To do this, you do not need to download special software or have any special knowledge.
So, the instruction will look like this:
The shortcut settings window will open. In the field where you are asked to specify the location, insert a direct link to the desired resource and / or page.