According to Facebook, 1 out of every 5 minutes spent on a mobile device in the U.S. is spent on Facebook or Instagram.
With 1.8 billion Facebook users globally, the platform dominates our attention spans so when it launched its advertising platform, it was only natural that it would become an instant game changer in the space.
Unlike traditional advertising that involves high budget production and a creative team, advertising on Facebook allows anyone with a Facebook account to “pay to play.”
For example, even a business with a budget of $100 can create an effective campaign to drive traffic to their website.
In addition, Facebook’s user-friendly platform grants marketers of all skill levels the ability to take control of the look and feel of their advertising presence.
Join the IMPACT coaches for a deep dive on a new topic every month in our free virtual event series.
Advertising on Facebook gives businesses the unique opportunity to reach and engage with their target audience for several reasons:
It’s cut above the noise: Last year, Facebook announced it adjusted its newsfeed algorithm in order to show people content that was most relevant to them, such as posts from family and friends. This implies that if you are not sponsoring content, your ads will most likely not be seen. By advertising on Facebook, you increase your chances of your target audience viewing your promotional material.
Unprecedented reach: With over 1 billion Facebook users worldwide, Facebook has world-leading targeting capabilities. Advertisers can now pay to reach a specific persona based on location, demographics, interests, online behavior, and more.
Monitor and learn from results: Facebook’s Ads Manager provides complete transparency into critical metrics, allowing you to monitor ads and adjust your advertising strategy in real time.
Due to the sheer volume and diversity of people on Facebook, companies across industries can find value in advertising on Facebook. Whether you are a mom-and-pop shop or an established Fortune 500, Facebook advertising can be effective in:
While increased budget (how much you spend on each ad) often boosts results, you can also set a modest budget of $5/ day for ads. The accessibility of the platform is just one reason why there are 65 million businesses using Facebook to advertise today.
There are, however, slight differences in how B2B or B2C companies can leverage this platform.
Traditionally, B2C companies have used Facebook to inform and entertain consumers in a personal, friendly way in order to promote brand awareness and inspire action (i.e. buy a product, sign up for a course, navigate to a landing page).
With its diverse functionalities (details below), Facebook Advertising is an efficient way for B2C companies to connect with potential customers naturally where they are already “hanging out.”
Similarly, B2B companies can also utilize Facebook to inform (or retarget) audiences about new thought leadership pieces, webinar registration, or upcoming events. B2B businesses can especially take advantage of Facebook’s targeting capabilities to reach specific job titles, interests, age groups, and more.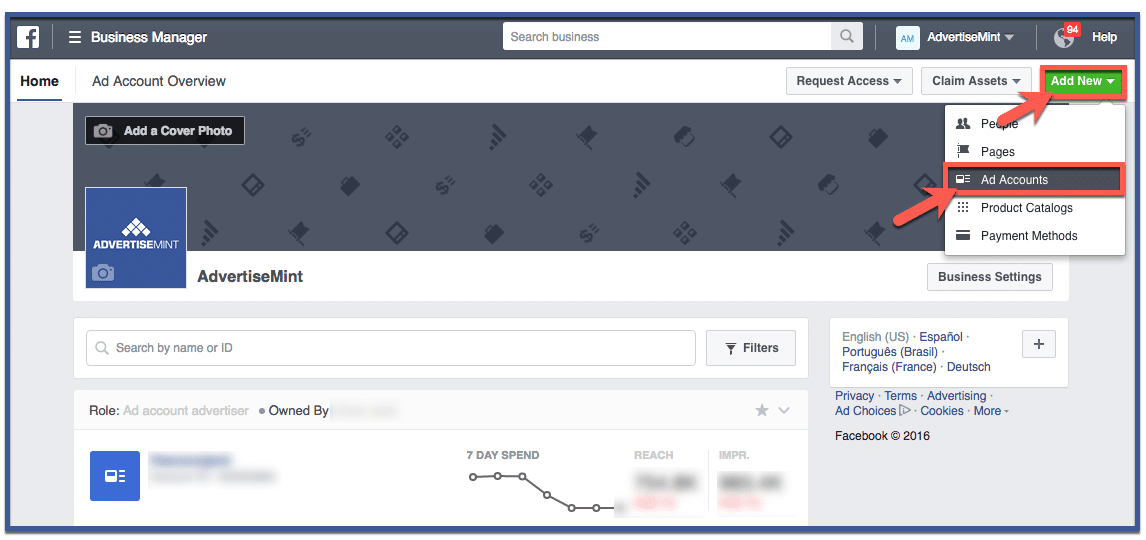 For example, if someone who “likes” your competitor’s business page, you can target them with your ad positioning yourself against them.
Check out 7 of IMPACT's favorite B2B Facebook Ads here!
Facebook continuously rolls out new functions that make their advertising platform more intuitive, but my goal is to give you the basics you need to get started.
While the guide below outlines how to setup a Single Image ad, we encourage you to explore and test different things in order to take advantage of all that Facebook has to offer.
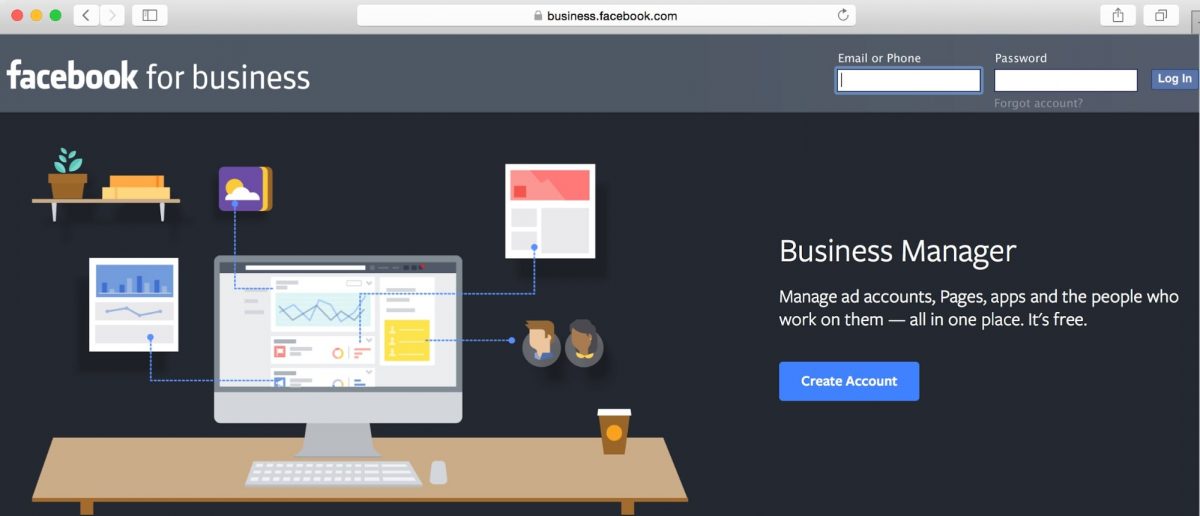
In order to begin advertising on Facebook, you need to set up a Business Manager account. Through Business Manager, you can access your Pages, ads, and grant access for people to manage your accounts. Setting up a Business Manager account is easy:
Next, set up advertising access through Business Manager:
Once you have set up your payment method and billing information, you’re ready to navigate to Ads Manager.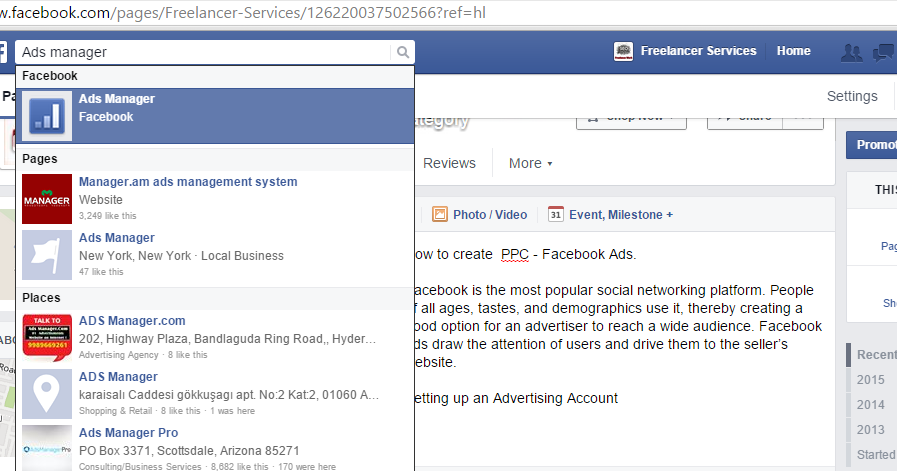
Facebook Ads Manager is your advertising “headquarters.” This home base includes functionalities that allow you to:
After creating your Business Manager account, you can access Ads Manager by clicking the drop-down arrow in the upper-right corner of your Facebook page and select “Ads Manager.”
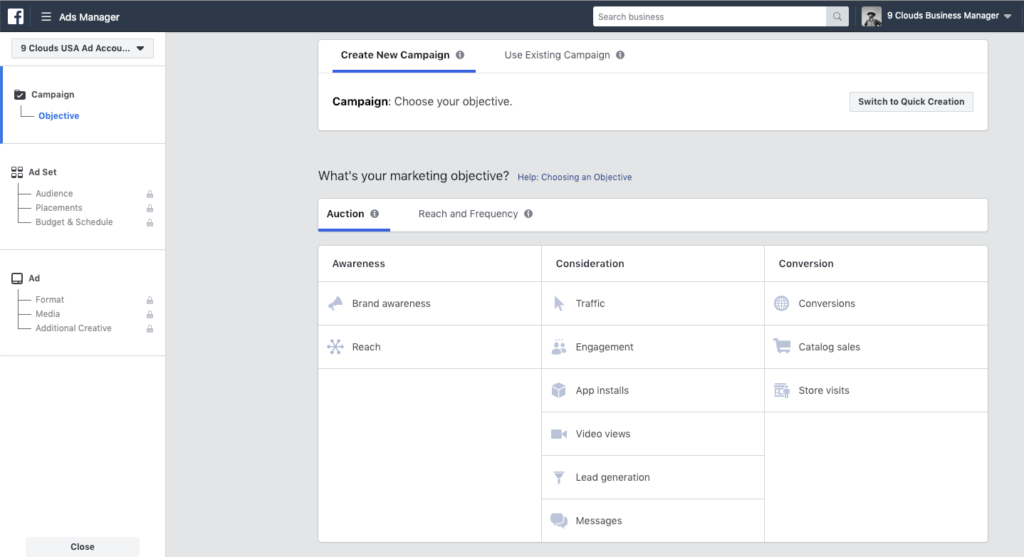
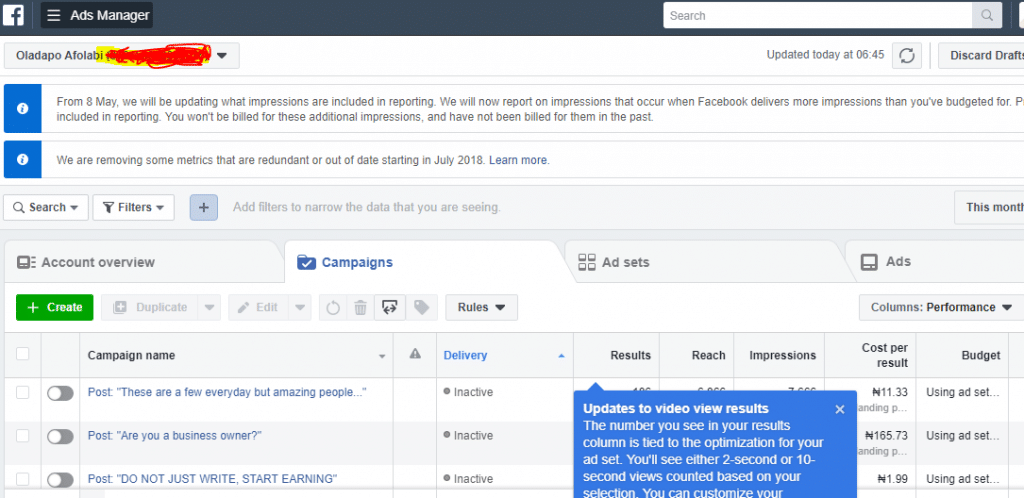
The Ads Manager dashboard looks like this:
[IMAGE 1: Facebook Ads Manager Dashboard]
Once you are in Ads Manager, select the green “Create Ad” button in the top-right corner of the page. You’ll be prompted to select a campaign objective, in other words, what you ultimately want to achieve with this ad: awareness, consideration, or conversion.
The full list of campaign objectives is shown below:
[IMAGE 2: Campaign Objectives]
Once you’ve made your selection, create a campaign name–congratulations, your campaign is officially created!
Facebook’s audience targeting capabilities are its bread and butter. With so much demographic information captured by users across the globe, it’s possible to get extremely granular in who you push your ad to. Here are just a few ways you can filter people:
 e. Entertainment, Fitness and Wellness, Food and Drink)
Perhaps one of the best features offered in the Facebook Ad Manager is the ability to create Lookalike Audiences. Lookalike audiences are Facebook users who share similar qualities to other known groups (i.e. your customers, your Facebook fans, or known brand loyalists.)
When you create a Lookalike Audience, you can identify the initial criteria on your own or you can upload a custom audience list and Facebook will identify common qualities of the people (i.e. demographic information, location, or interests) and finds people who are similar (or lookalike) to them.
Essentially, this feature allows you to take your marketing team’s list of existing customers and expand your advertising reach.
To ensure the quality of your Lookalike Audience, Facebook recommends that you upload an audience list that is between 1,000-50,000 people for better targeting results.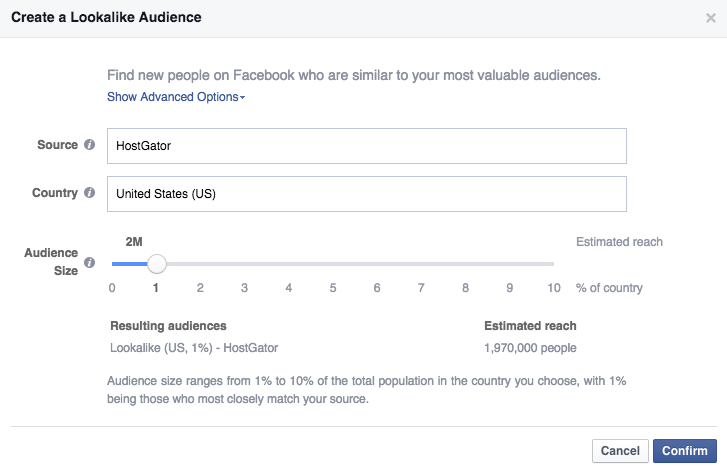
Facebook then allows users to take control of how much they want to spend on each ad.
There are currently two main ways to allocate media spend:
While Facebook suggests a $20.00 daily budget by default, you can always adjust your budget while the campaign is live with either option.
As a rule of thumb, I recommend you spend at least $5 per day on an ad. In addition, keep your ads running for at least seven days so that you can monitor behavior across the week as research suggests people tend to react differently to ads depending on the day of the week. You might want to start with $100 to test a 2-week campaign.
When setting your media spend, it’s also important to note the difference between CPM and CPC.
CPM is the cost per every 1,000 impressions (or every 1000 times your ad is displayed) while CPC means each time someone clicks on part of your ad that takes them to your website or app, you pay up.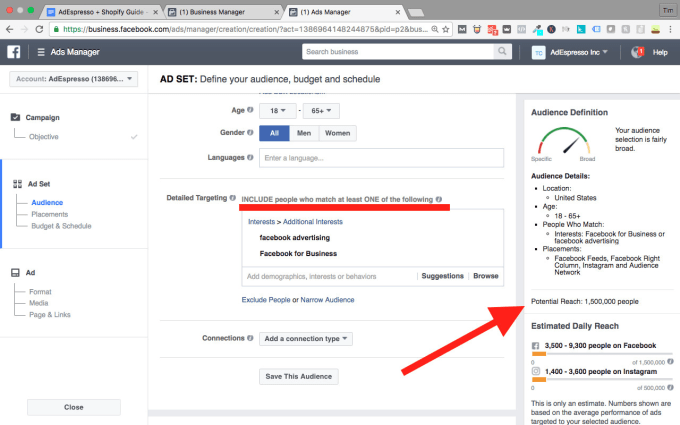
(Note: You can set a manual bid, which is the maximum amount you're willing to pay per link click.)
According to Facebook, “Paying for impressions (“CPM”) might be a good choice if you want to build awareness around your brand while paying for link clicks (“CPC”) encourages people to visit your business's website or app.” So, the latter may be best if you’re trying to drive traffic or leads.
Remember, Facebook wants to maximize its earnings, so it will deliver your content to people most likely to convert. It’s a win-win situation. Optimizing for conversions is an effective way to reach campaign goals and maximize your budget.
Lastly, keep in mind that you have complete autonomy over all aspects of Facebook Ads Manager, so play around with how your media spend impacts campaign performance–the more experimental you are, the more learnings you will gain for future campaigns.
If you use Facebook, you will have seen ads pop up on your mobile news feed, desktop news feed, and on the right side of your screen (right column).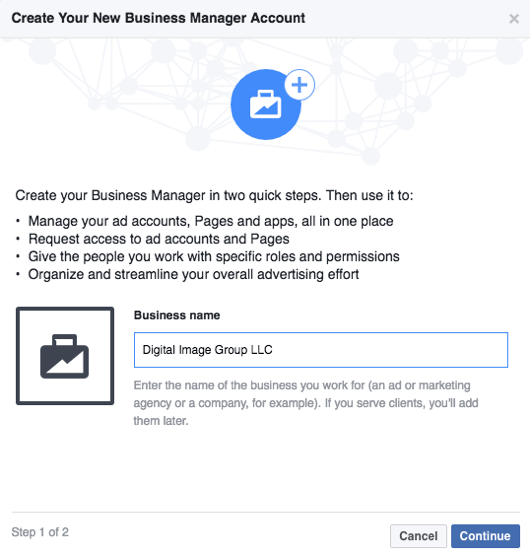 In addition, with Facebook’s acquisition of Instagram, you can create ads on Facebook Ads Manager for Instagram.
Below is a visual of where these ads are placed:
[IMAGE 3: BUFFER APP]
Desktop/ Mobile News Feed: Ads will appear embedded in the news feed of a user (alongside posts from friends and family). This is a good option for anyone who wants to build brand awareness and post engagement. Note: if you are driving users to a landing page from a news feed ad, make sure the website has a mobile responsive design so that mobile users have a seamless experience moving to the new landing page.
Right-hand Column: As its name suggests, this option places ads on the right column of Facebook and is the most traditional, “banner” style ad offered. This is only available for desktop users and is appropriate for ads encouraging users to purchase items or learn more about your product.
Facebook Audience Network: A network of mobile apps and websites that Facebook has partnered with to show ads. This is a good option if you want to maximize exposure and show your ads in front of people who are on different apps or websites. This placement is also effective in optimizing video views.
Instagram: Best for maximizing reach and building brand awareness to a target audience that is present on Instagram.
For more information on ad placement and how to get the biggest bang for your buck, refer to this Facebook guide.
You’re almost there! Now that you have set up your campaign, audience, and placement, it’s time to input the creative and copy.
First, select how you’d like your ad creative to display:
[IMAGE 4: AD CREATIVE FORMATS]
There are 5 different formats:
 The Single Image ad is one of the most versatile ads and is a great place to start for those starting out with Facebook Ad Manager.
 Next, it’s time to select your image and build out the copy.
When it comes to selecting a compelling image, take it from Facebook: “Remember your photos will be competing with pictures of babies and someone’s fancy dinner. Focus on the things about your business that make it stand out. The people. The environment. The products. Try to pick an image that will grab your audience’s attention as they scroll through Facebook.”
Go for the thumb-stoppers!
Facebook allows you to upload and test up to 6 different images, so if you’re not sure what to choose, experiment! The right image can result in 100% or higher difference in CPC (cost-per-click) or CPA (cost-per-acquisition) results.
Once you have uploaded your image, populate each field to insert copy for your ad (preview below):
[IMAGE 5: FB AD CREATION]
A couple of specs to keep in mind:
As a best practice, front-load your copy with what is most important. When people are on Facebook, they scroll through quickly, so you need to ensure you grab your audience’s attention from the get-go.
Also be explicit about the call-to-action, whether it be urging them to click to learn more or signing up for an upcoming event. As a general rule of thumb, keep it short and sweet.
Once you have created your Facebook ad, click the green “Place Order” button. Your ad will be screened to ensure it does not violate Facebook’s Advertising Policies before it is approved and goes live.
As mentioned previously, you have full transparency in Ads Manager on the ROI (return on investment) of your ads. Some noteworthy metrics to monitor are:
Set a reminder at the same time every day to check in on your ads. If you’re not getting any traction try tweaking the creative, copy, targeting, or media spend.
With so many users on Facebook today, there are very few other platforms where you can reach and engage with your target audience in the same way. Perhaps more importantly, advertising on Facebook empowers users to take a once complicated process into their own hands.
Yes, you are competing against posts from family and friends, but that doesn’t mean you can’t get noticed. If you’re advertising on Facebook, you’re already one step closer to capturing the attention of your target audience. Good luck!
The Beginner's Guide to Facebook Advertising
Chapter 1
Writing by Massimo Chieruzzi
In our first chapter on Facebook advertising, we’ll talk about setting up your Facebook Business Manager account and Facebook Ads Manager account.
In this chapter, we will also be covering
By the end of this chapter, you should have everything set up and ready to start making Facebook ads to market your products or services.
Business Manager is a tool designed to be your primary hub on Facebook to manage all of your Facebook Pages and ad accounts.
With Business Manager, you can:
To open a Facebook Business Manager account, you first need to sign up for a personal Facebook account.
Source
After that, fill in the details in the pop-up window and press Submit.
Source
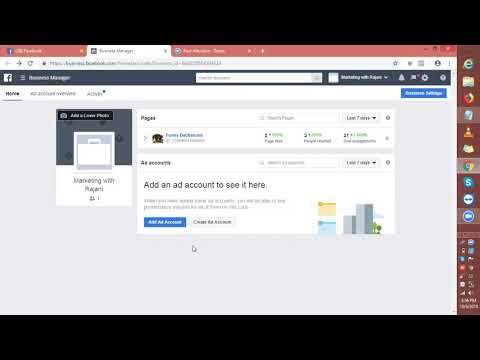
Before you can create a campaign, your Business Manager must manage at least one Facebook Page.
To add a Facebook Page to your Business Manager, go to the Business Manager homepage, click More Tools on the sidebar and select Business Settings.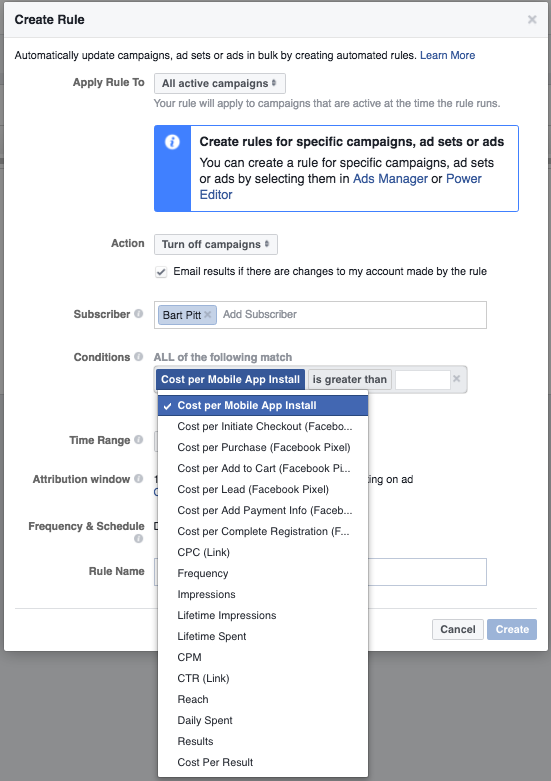
Source
Click Pages under Accounts, then select Add.
You can pick one of three options:
Pick whichever applies to you and follow the prompts, and your Facebook Page should be added to your Business Manager.
Lastly, you’ll want to create or add a Facebook Ad account that will be associated with your Business Account.
Start at the Business Settings screen of your Business Manager. Click Ad Accounts under the Accounts section of the sidebar.
Click the blue Add button.
From the drop-down menu, you can choose Add an Ad Account (an existing account you’ve already opened), Request Access to an Ad Account or Create a New Ad Account.
Choose the best option for your situation and follow the prompts.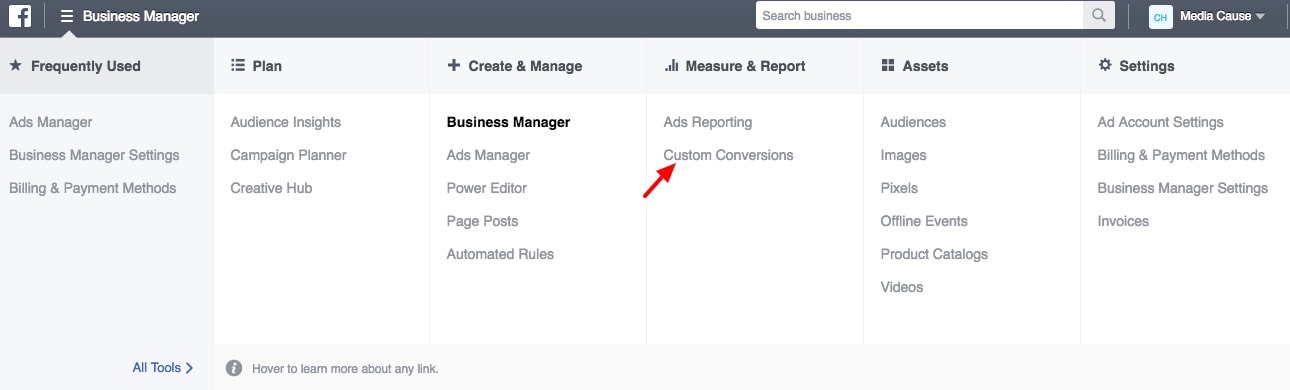
Before we move on from setting up your Business Manager, it’s important to assign roles in your Business Manager account. Users can take on one of two main roles: Admin and Employee.
Here’s a quick overview of these two roles and the permissions they have:
There are also different roles for Facebook ad accounts you can manage and edit in the Business Manager.
With your roles all set up, you’re nearly ready to start advertising.
It’s time to add your payment method so you can move forward with creating a Facebook ad campaign.
Head to the Payment Settings page by clicking Ad Account Settings and selecting Payment Settings from the sidebar.
Source
On this page, you can:
To add a new payment method to your ad account:
Source
As you start advertising more and more, we suggest that you add a secondary payment method. This prevents Facebook from stopping all of your campaigns should your primary card expire, reach the monthly limit or be blocked for whatever other reason.
If you need additional help, here’s a Facebook guide that explains what payment options are available in which countries.
Editing your payment optionsIf you want to make changes to your Facebook advertising payments, you can do it on the same page by clicking the three dots beside your payment option and selecting Edit.
Source
If you have entered multiple payment options, you can choose your primary from this screen as well.
You cannot delete your primary source, so you’ll need to make another option for your primary source before removing your current primary payment method.
Understanding billingBilling on Facebook is determined by how you choose to pay for your ads. The many payment options are divided into two camps:
Manual payments are essentially pay-as-you-go and are relatively easy to understand, as you are billed every day for whatever you spend that day on ads.
Automatic payments are slightly more complicated.
With automatic payments, you can expect a bill from Facebook on two occasions:
The billing threshold amount varies based on your billing history. When you start, this threshold will be pretty low (usually $25), and you’ll be billed every time you spend $25 in Facebook Ads. As you keep spending and your payments are correctly processed, your threshold will be automatically increased.
If you still have a balance at the end of the month, but your billing threshold has not been met, you will be billed for that amount to clear your balance for the start of the month.
Setting up the account spending limitYou can control your total ad costs by setting an ad account spending limit. Your ads will pause when you reach the limit you’ve set and won’t run again until you increase or remove that limit.
You can add an account spending limit by clicking the 3-dot icon beside Account Spending Limit.
Fill in how much you want your spending limited to and click Save.
Ad account spending limits are especially useful when working with agencies when you want to be sure your consultant or agency won’t be able to spend more than you’ve planned across all of your campaigns.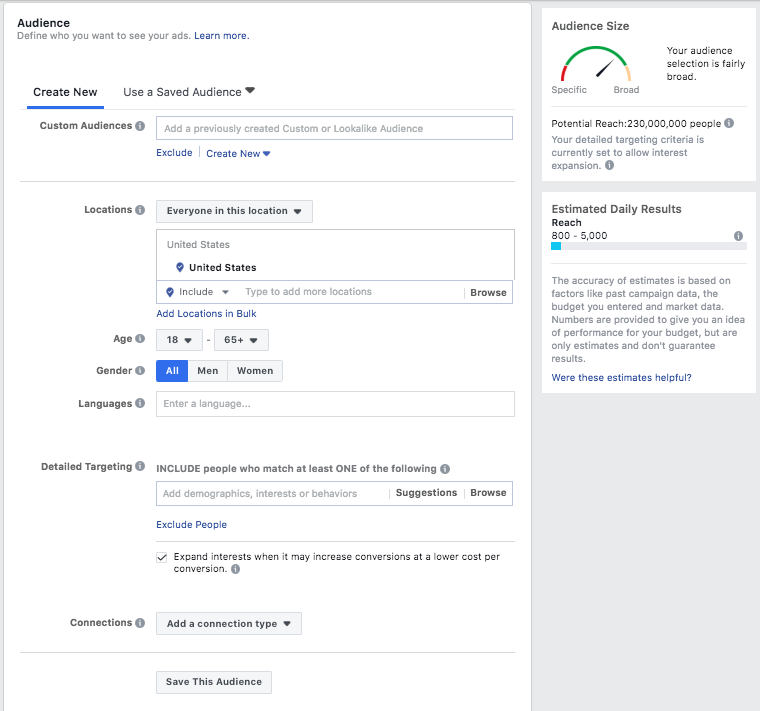 Don’t set it too low, or you’ll have to update it often. Remember that each time the limit is reached, all of your accounts will be paused for at least 15 minutes.
Whether you like it or not, your Facebook Advertising account will have some limits. It’s better to get to know them from the beginning.
Here are the limits of Facebook Ads Manager:
Once you reach any of these limits, all you’ll have to do is delete old campaigns and their ads to make room for new ones.
Facebook notifications are an excellent way to stay in touch with your campaigns. However, they can also flood your inbox quickly, so you may want to change the frequency of email notifications you receive from Facebook to fit your needs.
Source
Set up your notifications so that you’ll get the most important notifications via email, while the others can just be Facebook notifications that will appear when you log in to your Business Manager. That way, you’ll never miss anything when it comes to your Facebook ads.
Once you have been creating ads for a while, you may wish to collaborate with another person, such as a freelancer, an ad agency or an employee. This is where roles come into play. If you want to add new users and admins to your Facebook advertising account, navigate to the Ad Accounts tab in the Ad Account Settings page.
Source
Click Add People, and then fill in the name of the person you want to add and the role they will be assigned.
Source
With your team members all here, you’re set to get started with Facebook ads.
Your Facebook ad account is finally ready and waiting for you to set up those first campaigns!
Proceed to Chapter 2 to learn how to set up your first Facebook advertising campaign in the Facebook Ads Manager.
Start Index Chapter 2 Facebook Business Manager is the most useful tool for both clients and agencies or professionals who are engaged in targeted advertising in social networks.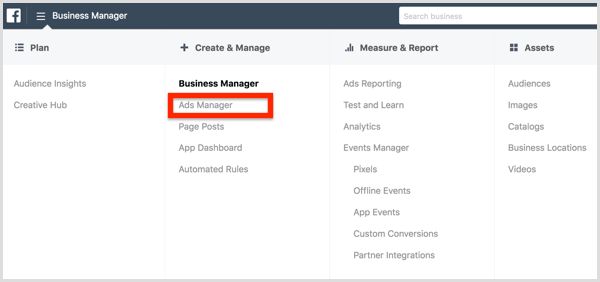
Why a Facebook Business Manager is needed for a client/customer
Why an agency or professional needs a Facebook Business Manager
This is a very useful and convenient tool for both business owners and those who set up ads for them.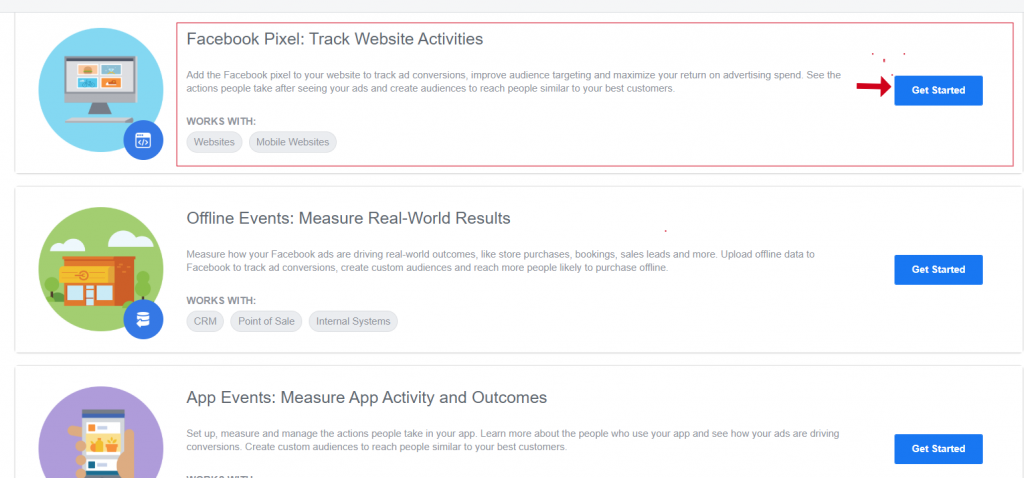 It not only simplifies the management of advertising and the transfer of projects between specialists or agencies, but also provides more opportunities for advertisers.
Next, let's take a step-by-step look at creating and configuring a Facebook business manager.
Create a Facebook Business Manager
Add your company page on Facebook.
Add your company's business account on Instagram
Create a Facebook ad account
Create a Pixel
Create a product catalog
Add employees or contractors
Assign a role and management objects to each employee in Business Manager
An important clarification before you start: A business manager is created from a personal Facebook profile. If you need to create a Facebook Business Manager, first register a personal Facebook profile.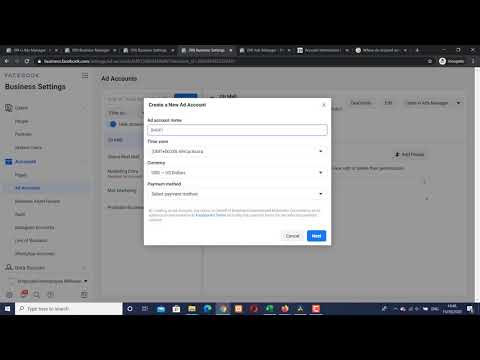 If you already have it, feel free to proceed to the instructions.
3. Fill in all the fields in the opened popup and click the Send button.
It is important to provide real data in case you need to confirm your identity or company.
4. Confirm email address. To do this, find the email from Facebook in the mail and click the Confirm button.
5. After that, you will be redirected to Facebook Business Manager.
Important! To add a Facebook business page to Business Manager, you must be an administrator of the page.
3. In the drop-down menu, select the Add page item.
4. Enter the copied URL and click the Add page button.
5. If everything is done correctly, the page will appear in the list.
1. Go to the Instagram Accounts tab and click the Add button.
2. In the pop-up window, click the Connect Instagram account button and then enter the login and password for your business account.
If done correctly, the account will appear in the list.
Note: If your Instagram account is linked to a Facebook business page, then when you add it to Business Manager, it will automatically be pulled up.
1. Switch to the Advertising accounts tab and click the Add button.
2. In the drop-down menu, select Create an advertising account.
3. In the next popup, select the appropriate item and click the Create button.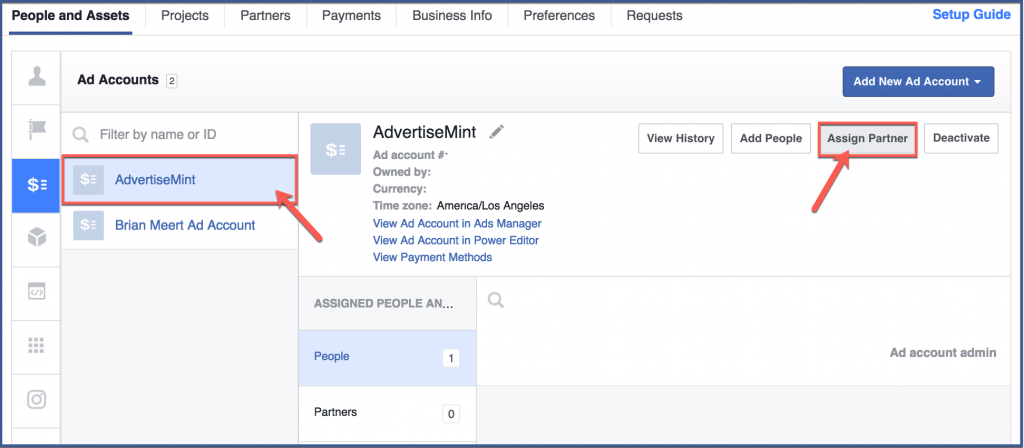
4. In the next popup, select the appropriate item and click the Create button.
5. The next step is to add payment information.
6. Select the type of payment and click Next.
7. Enter the details of the card with which you plan to pay for advertising and click the Save button.
Facebook Pixel
video instructions
3. Name the Pixel and paste the URL of your website.
4. Click the Continue button.
If done correctly, the new Pixel will appear in the list.
1. On the Data Sources tab, switch to the Catalogs section and click the Add button.
2. In the drop-down menu, select Create catalog.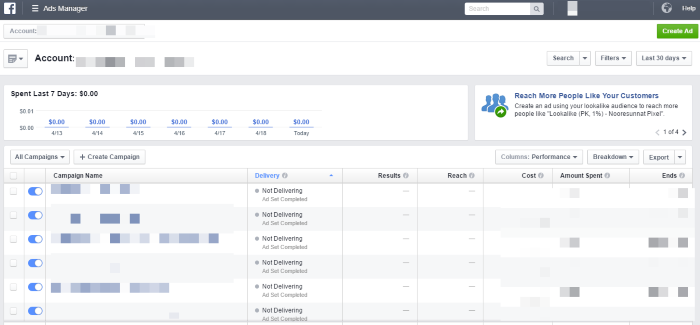
3. Give a name to your catalog and click the Create catalog button.
4. Select the Pixel that will be associated with the directory and click the Save button.
1. Switch to the People tab and click the Add button.
2. Enter the email of the employee / contractor you want to add to Business Manager
3. Select the access level and click the Next button.
Important! In the email field, you need to enter the address from which the employee is registered on Facebook. If an employee has an account, but only a phone number is added to it, you need to add an email as well.
4. Assign which resources the new employee will have access to and click the Invite button.
If everything is done correctly, you will see the employee's email in the list with the status "pending".
After the employee accepts the access, the "pending" status will disappear.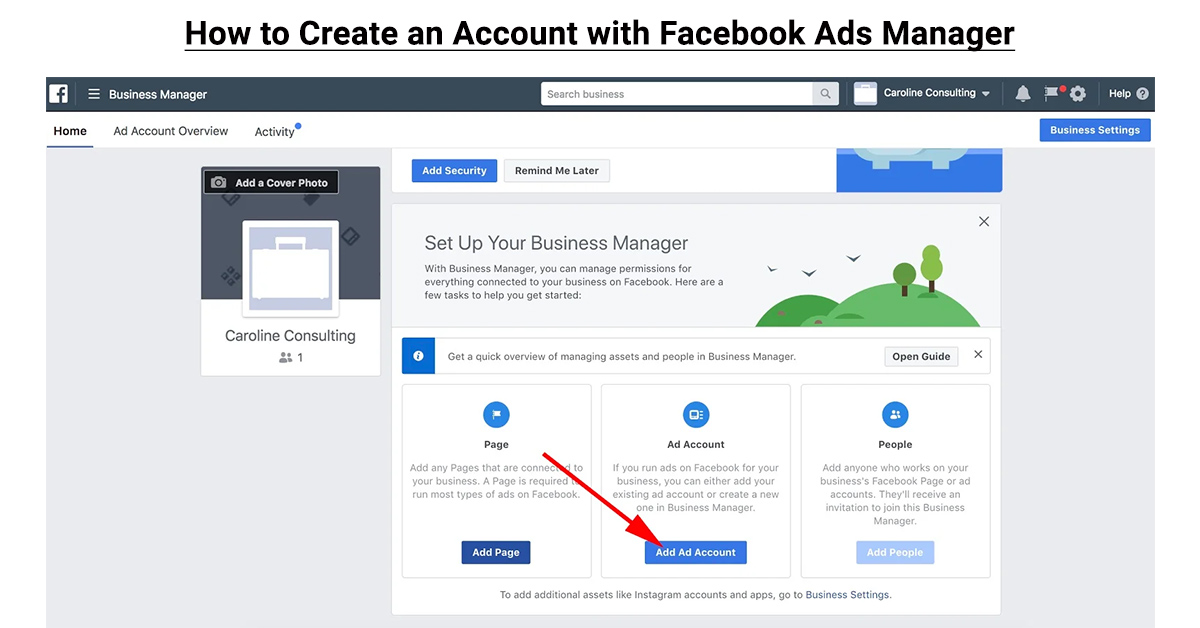
Administrator has the ability to edit, assign / remove access to other employees, edit accounts and tools. Has access to all resources in Business Manager.
Employee can only work with the resources and tools that are assigned to him.
3. In the pop-up menu, select objects (according to the list) and assign roles.
4. Click the Save changes button.
After that, in the general list you will be able to see the assigned objects for each of your Business Manager's employees.
Income from the Facebook channel for 3 months
How to get 1140% ROAS, 772 orders from social networks for products / audience 35+
429 sales at $2. 28 | case of catalog advertising on Facebook and Instagram
Product catalog advertising on Facebook and Instagram for a children's clothing manufacturer
Facebook and Instagram audience statistics Ukraine
research for January 2021
Facebook (that is, already Meta) has created a professional tool - Business Manager - for experienced marketers, large companies and marketing agencies. It helps to automate processes, organize data for different projects, manage business pages, set up advertising campaigns, and control team work.
But how do you use all the features of Business Manager to grow your business? In this article, we will answer your question.
What is Facebook Business Manager?
Who is Business Manager for?
Why get a Facebook Business Manager?
How do I create an account in Business Manager?
How to work in Business Manager?
1. Setting up the interface
2. Creating a page
3. Creating an advertising account
4. Assign roles
5. Set up payments
6. Set up the pixel
Blocking Business Manager: advice from the contrary
Conclusion
Business Manager is a free advertising tool from Facebook for setting up promotion tools in one window. With the help of a specialist:
The service is designed for organizations and professionals who manage several customers at the same time - this is convenient and reduces the risk of getting banned on a personal account.
Business Manager is used by marketing agencies when launching targeted ads for clients or businesses that manage two or more pages.
Specialists create an account in the service when:
Also Read: Top 12 Benefits of Using Facebook for Business
There are several implicit reasons - Facebook does not single out and does not describe them in its documentation. The reasons below are put into practice by experienced marketers who use Business Manager:
Read also: How to prevent data leakage: case from Timehop
Any Facebook user who has created a personal page 3 weeks before registering in Business Manager can use the service. If you register before this time, Facebook may suspect the account of fraud and block it.
If you don't have a personal Facebook account yet, register first.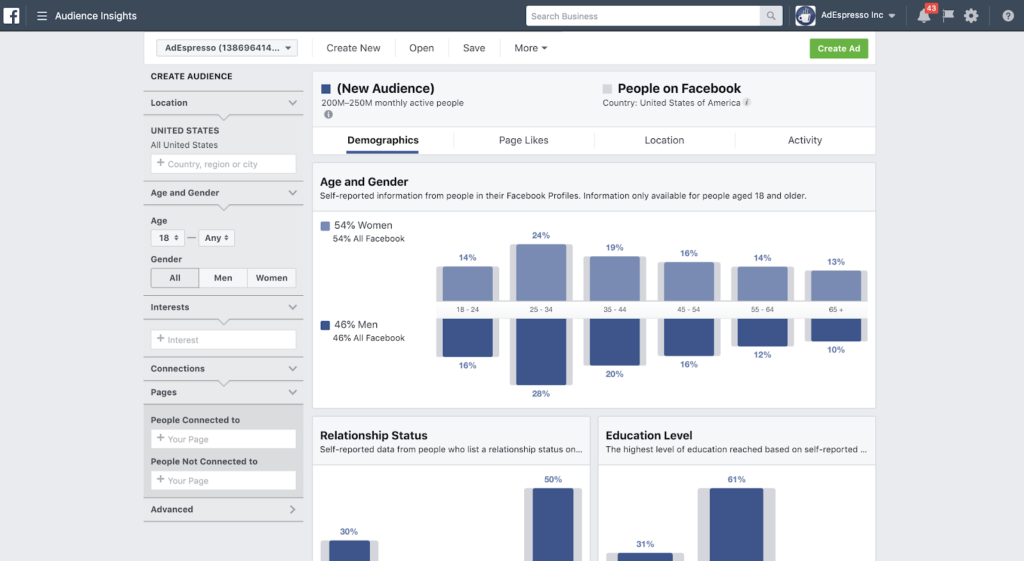 In the form, indicate your real name and add a full-face photo.
Create an account for a business owner or close associate who will definitely not quit. This way you will keep your data confidential and will be able to restore your account if you lose access.
Now register for the service at business.facebook.com:
When Facebook confirms the information, you will be able to log into your personal account. Here they edit and advertise Facebook and Instagram pages, set up payments, install a pixel, launch ads for a similar audience.
Read also: Metaverse: what is it, or a lifeline for Facebook
The account in Business Manager is called a “company” by the social network.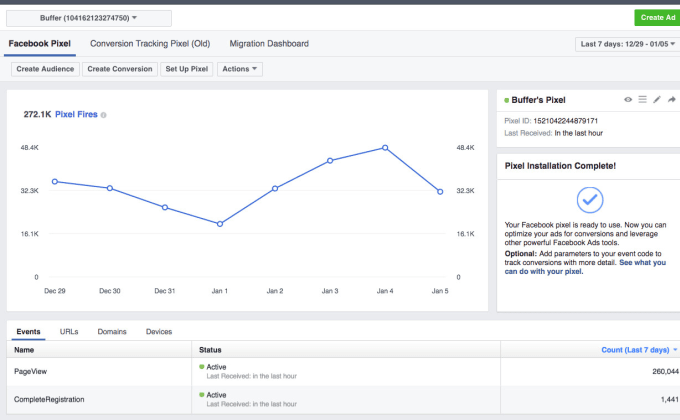 For full-fledged work in the service, this account must be configured. First, connect a business page, an advertising account and assign responsible persons:
How to get access to an individual employee, we will analyze later, first:

General information about the account, limits and data specified during registration is published here. Fill out the page, set up security and notifications.
Also Read: The 9 Most Effective Types of Facebook Ads
The service interface is divided into blocks:
Objects are units that can be modified: roles, accounts, and data sources.
In Business Manager, you can create objects, claim rights to them, or request access to these objects.
This step is needed so that the Business Manager owner can find customers, communicate with them and promote the business.
To create or add a page, select Company Settings → Accounts → Pages → +Add:
To promote an Instagram account through the service, add it to the Instagram Accounts tab. Click "Accounts" → "+ Add" → "Connect Instagram account" → log in to your account.
Read also: Launching a lead form ad for Facebook and Instagram: step by step instructions
An ad account is a tool through which a user sets up and runs ads on Facebook and Instagram.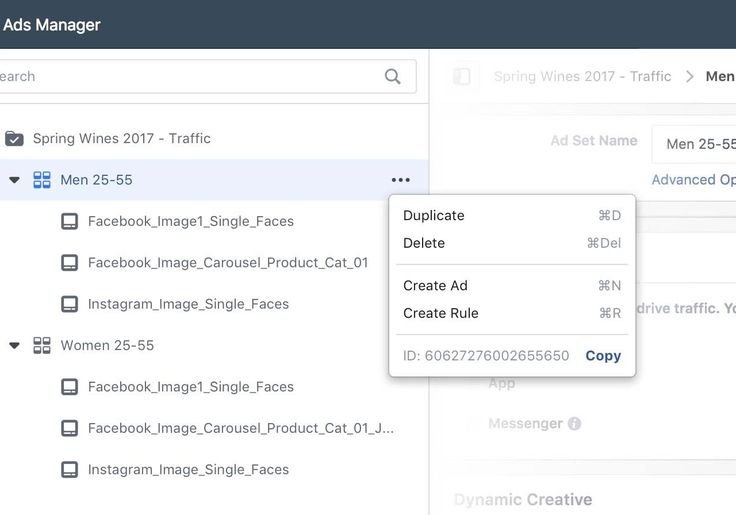 In Business Manager, you can manage multiple ad accounts and create new ones.
To connect an account, enter your personal account → "Accounts" → "Ad accounts" → "+Add" → perform the action:
To make sure that an account has been added, go to the Business Manager personal account settings → "Ad Accounts". Choose an account and create an ad.
To go to the advertising account, select Ads Manager in the settings. To do this, click on the three horizontal bars in the top menu bar → "Ad Manager".
Now select advertising channels from the dropdown list. The list shows all types of advertising campaigns that the company uses. To change the advertising channel, click on the channel name in the list.
Keep in mind that Facebook periodically changes the interface, button layout, and description. Do not be alarmed if the interface of the social network differs from the screenshots from the article.
The next step in configuring Business Manager is the distribution of roles. The account owner can add users and adjust access rights.
In Facebook, user roles are configured in the "Users" → "People" section. The owner can assign roles:
 When setting up ads by a contractor, the owner gives access to Ads Manager, but does not allow changing the payment system.
 You can add an employee in the "People" tab:
You need to edit the access of existing employees in the "People" or "Partners" section.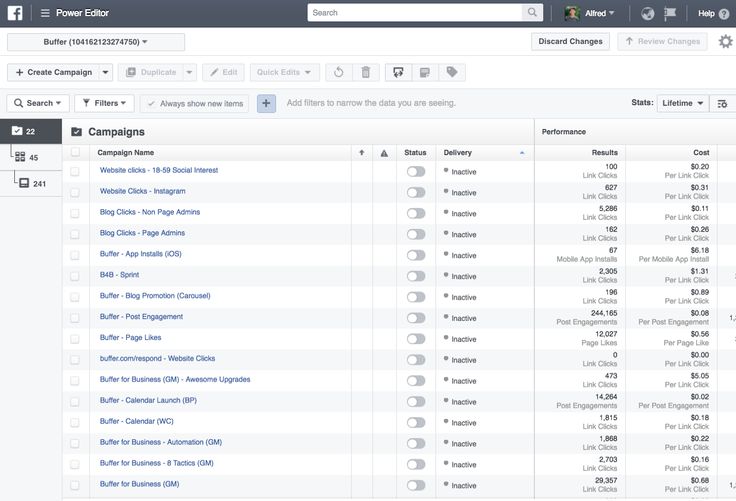
If you've added an ad account rather than re-creating it, you don't need to set up payments. Facebook automatically pulls data from an existing account and does not allow you to change it.
If you've just created an ad account in Business Manager, set up your payment system. By default, the social network will offer to set up post-payment with a bank card or PayPal.
The system writes off money from the linked card on the reporting day or when the limit is exceeded. If there are not enough funds on the card, advertising will not be broadcast. When calculating postpaid, the social network works with individuals and does not provide closing documents.
If the company needs to document expenses, choose the prepaid method. The organization deposits money into the account of the advertising account and launches promotion for this amount. Closing documents are automatically generated for Ads Manager.
To set up a payment, go to the tab in "Ad Accounts" → "Accounts" → "Payment Settings" → "Add Payment Method".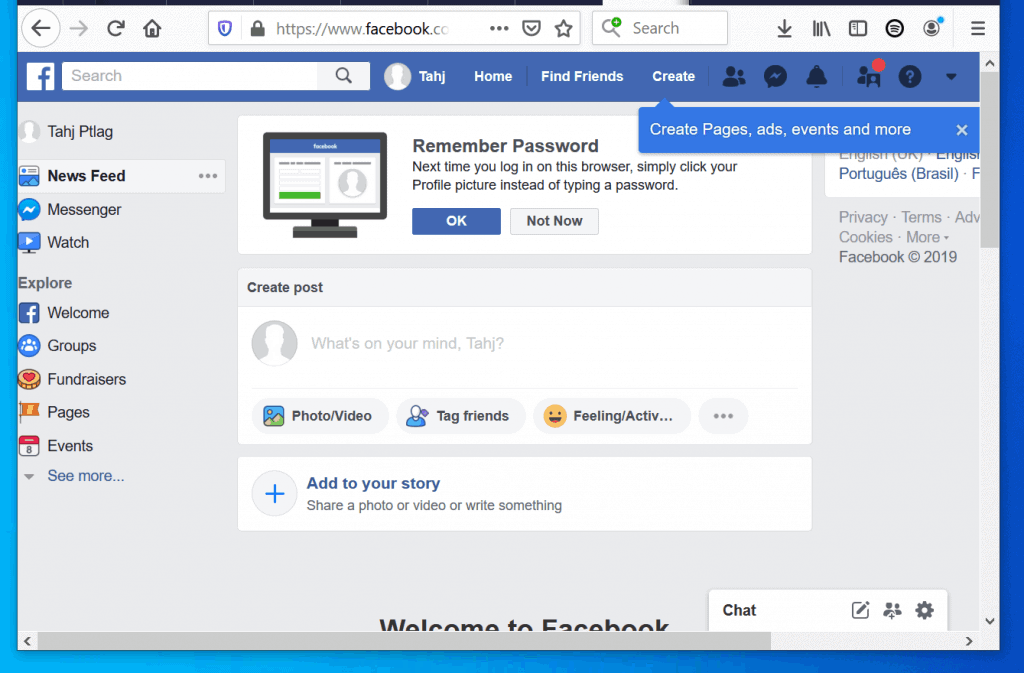 Click on the desired option and enter the details.
Read also: SEO promotion of an online store: business tips and recommendations on topics
A pixel is a tracking code that digital professionals install on a website. This is how they track targeted actions: page views, button clicks, orders, etc. The pixel captures every visitor action.
Based on this information, the social network algorithm helps to find an interested audience among millions of users. With the help of a pixel, specialists collect an audience for remarketing, set up conversions, optimize ads, and create a lookalike audience. It helps to create more relevant content, increase sales and increase audience loyalty.
Facebook Ads can be created with no more than 5 pixels, in Business Manager there are more - up to 10 pixels. A specialist can give access to other participants, connect other pixels, change existing ones.
To create a pixel:

To use the received data, link the pixel to the advertising account:
If you do everything right, the system will display a notification on the screen.
Now let's look at how to embed the Facebook code on the site:

Read also: Landings VS product pages: less details, more conversions
The main thing Facebook bans for is fraudulent activity. To lose Business Manager and all account history, just do the following:
However, the social network is also blocked for suspicious activity. For this:
 If you want to get banned, do not follow the rules of the social network.
 And if you don't want to get banned, follow the Facebook rules and act like a regular user. Then robots won't ban you.
Still, do not forget that the social network between you and your customers is a manhole in your gas pipeline: on the one hand, you need it, on the other hand, it gives access to third parties. And creating quality leads is based on trust.
To do this, customers must be confident that your company is able to guarantee the integrity and safety of personal data. Therefore, for high-quality lead generation, we advise you not to abandon landings and multi-page sites. It is they who create the brand image and win customer loyalty.